


Unboxing and key data
The homepage gives out enough detailed information so that I don’t have to regurgitate everything here, but had simply put an overview on the first page. The dimensions are owed to the FE board and so there are around 220 mm including the terminal in length, 124 mm in height and a thickness of around 32.8 mm including the backplate in the spec sheet, whereby the thickness is also owed to the dual-slot bezel. The usual electrolytic copper base material is set as usual and covers all necessary recesses, but analogous to Corsair, it relies on a second layer and an O-ring for the separately inserted heatsink.
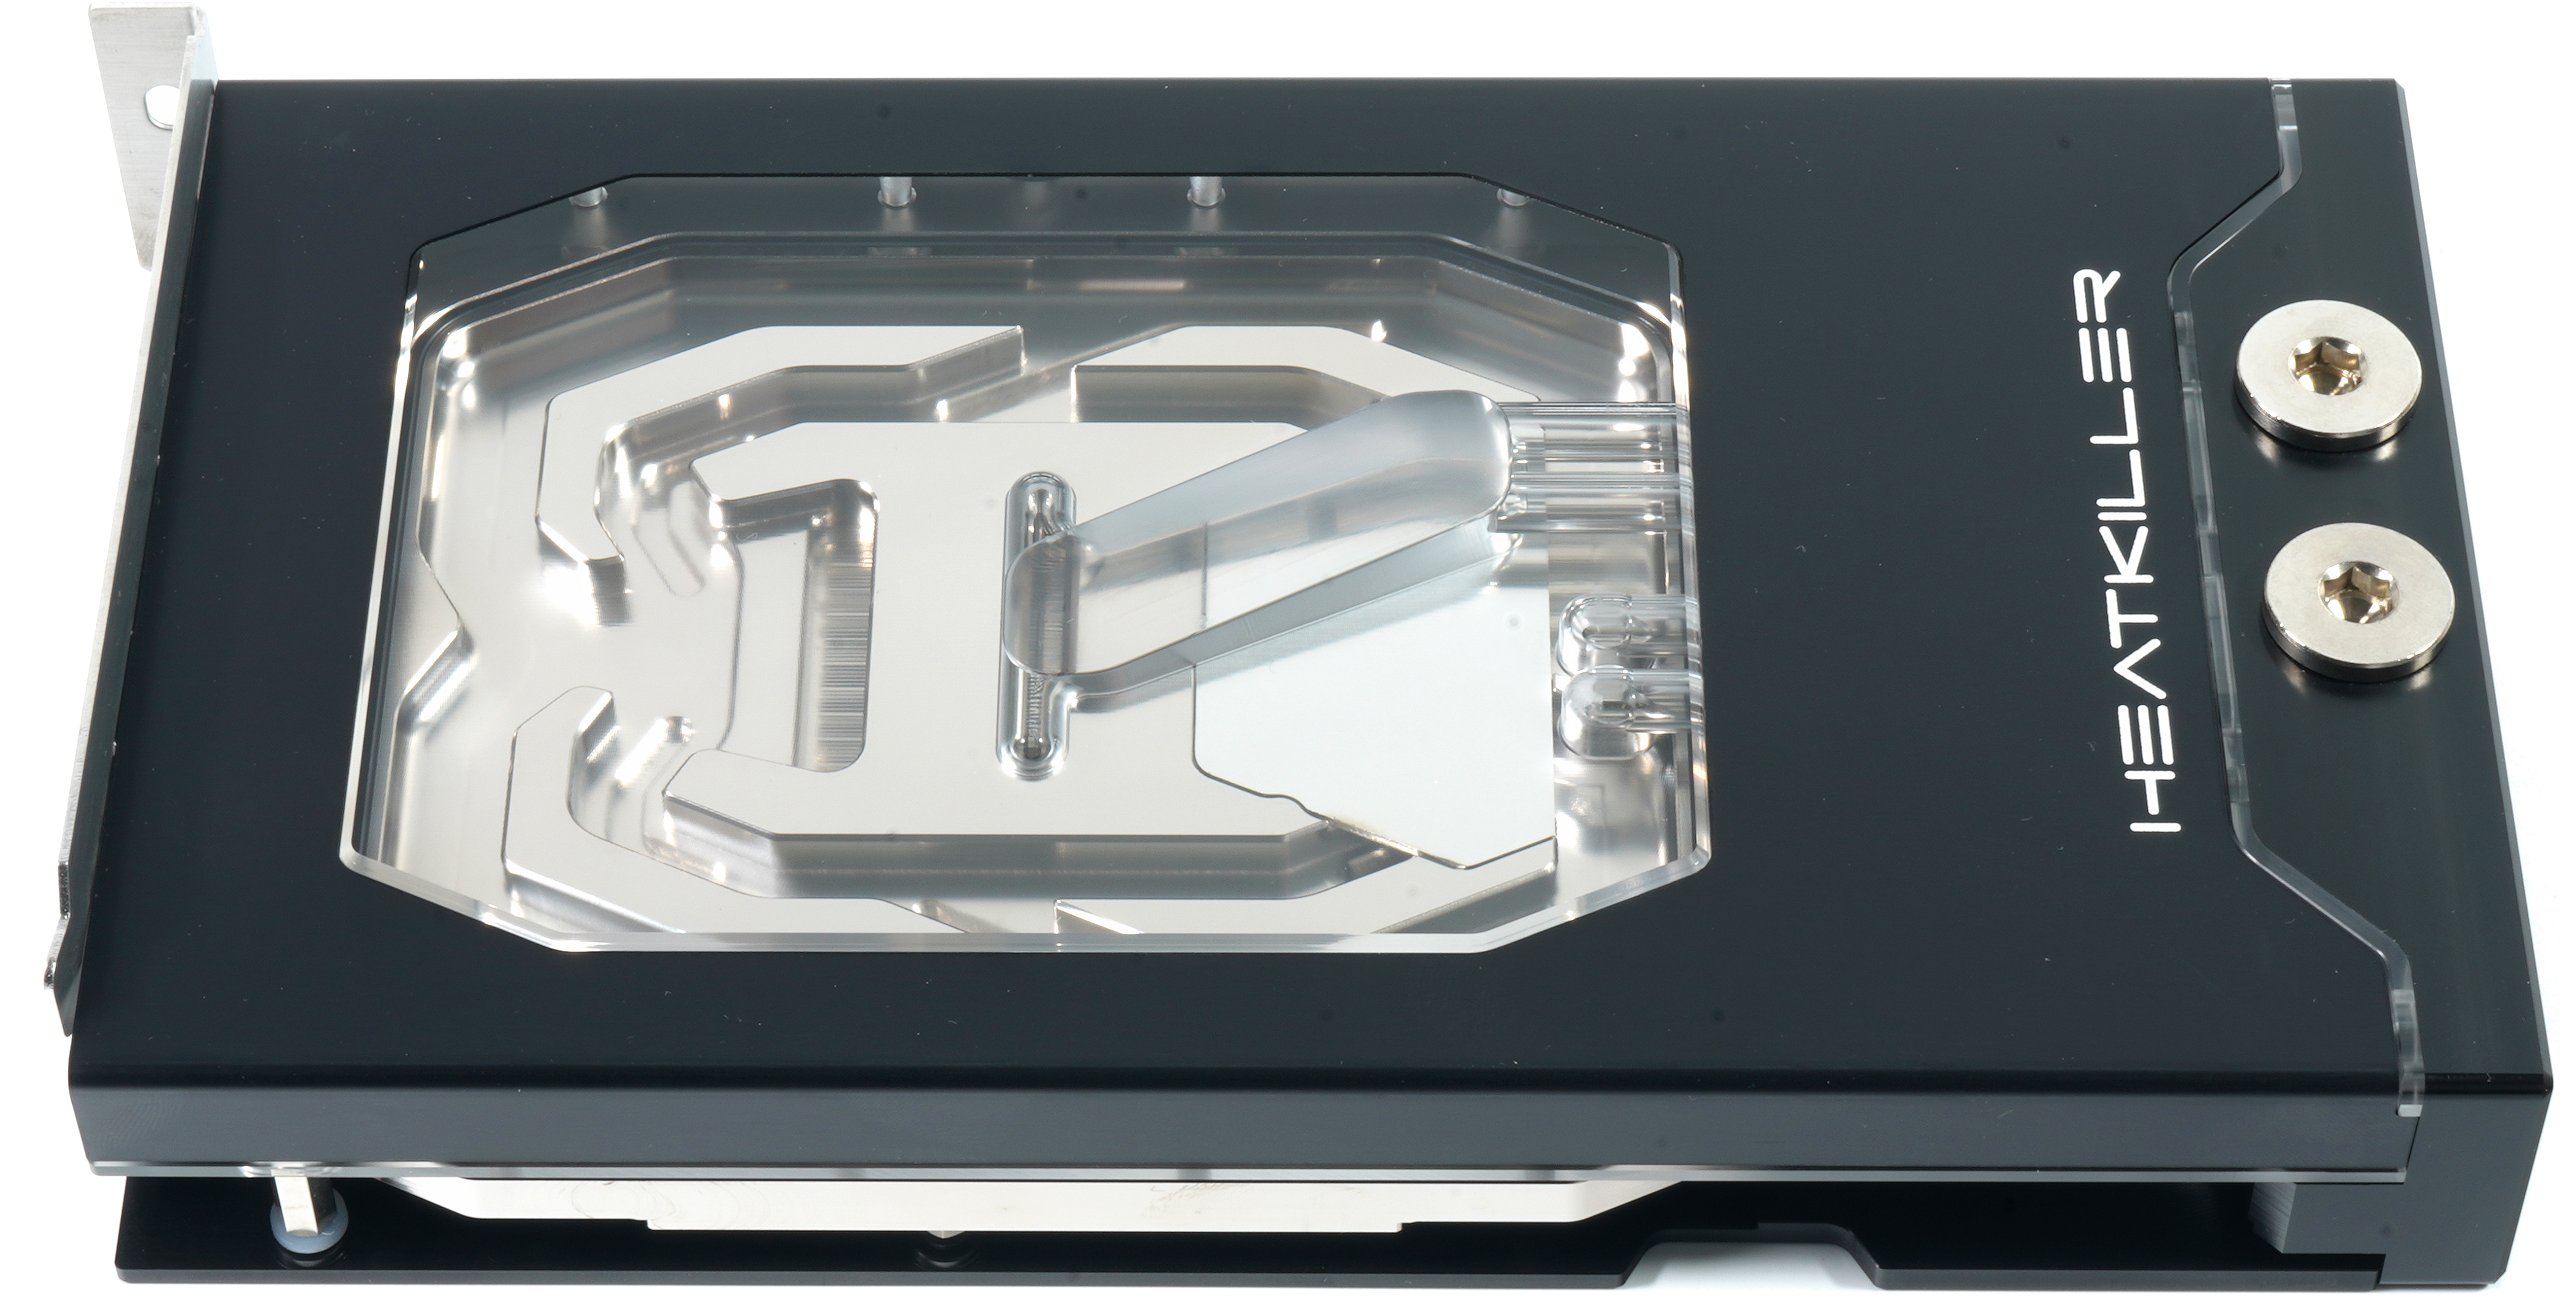
The coldplate is a true classic in jetplate style, with the injection asymmetrical and not centered, since the water inflow comes from the end of the card. The circulation then splits only after flowing through the GPU cooling fins, which already allows two predictions here: the GPU temperature could be lower than in the competitors, while the areas of the more distant voltage converters could be a bit higher. But let’s be surprised, because I still have the heat flow analysis later.
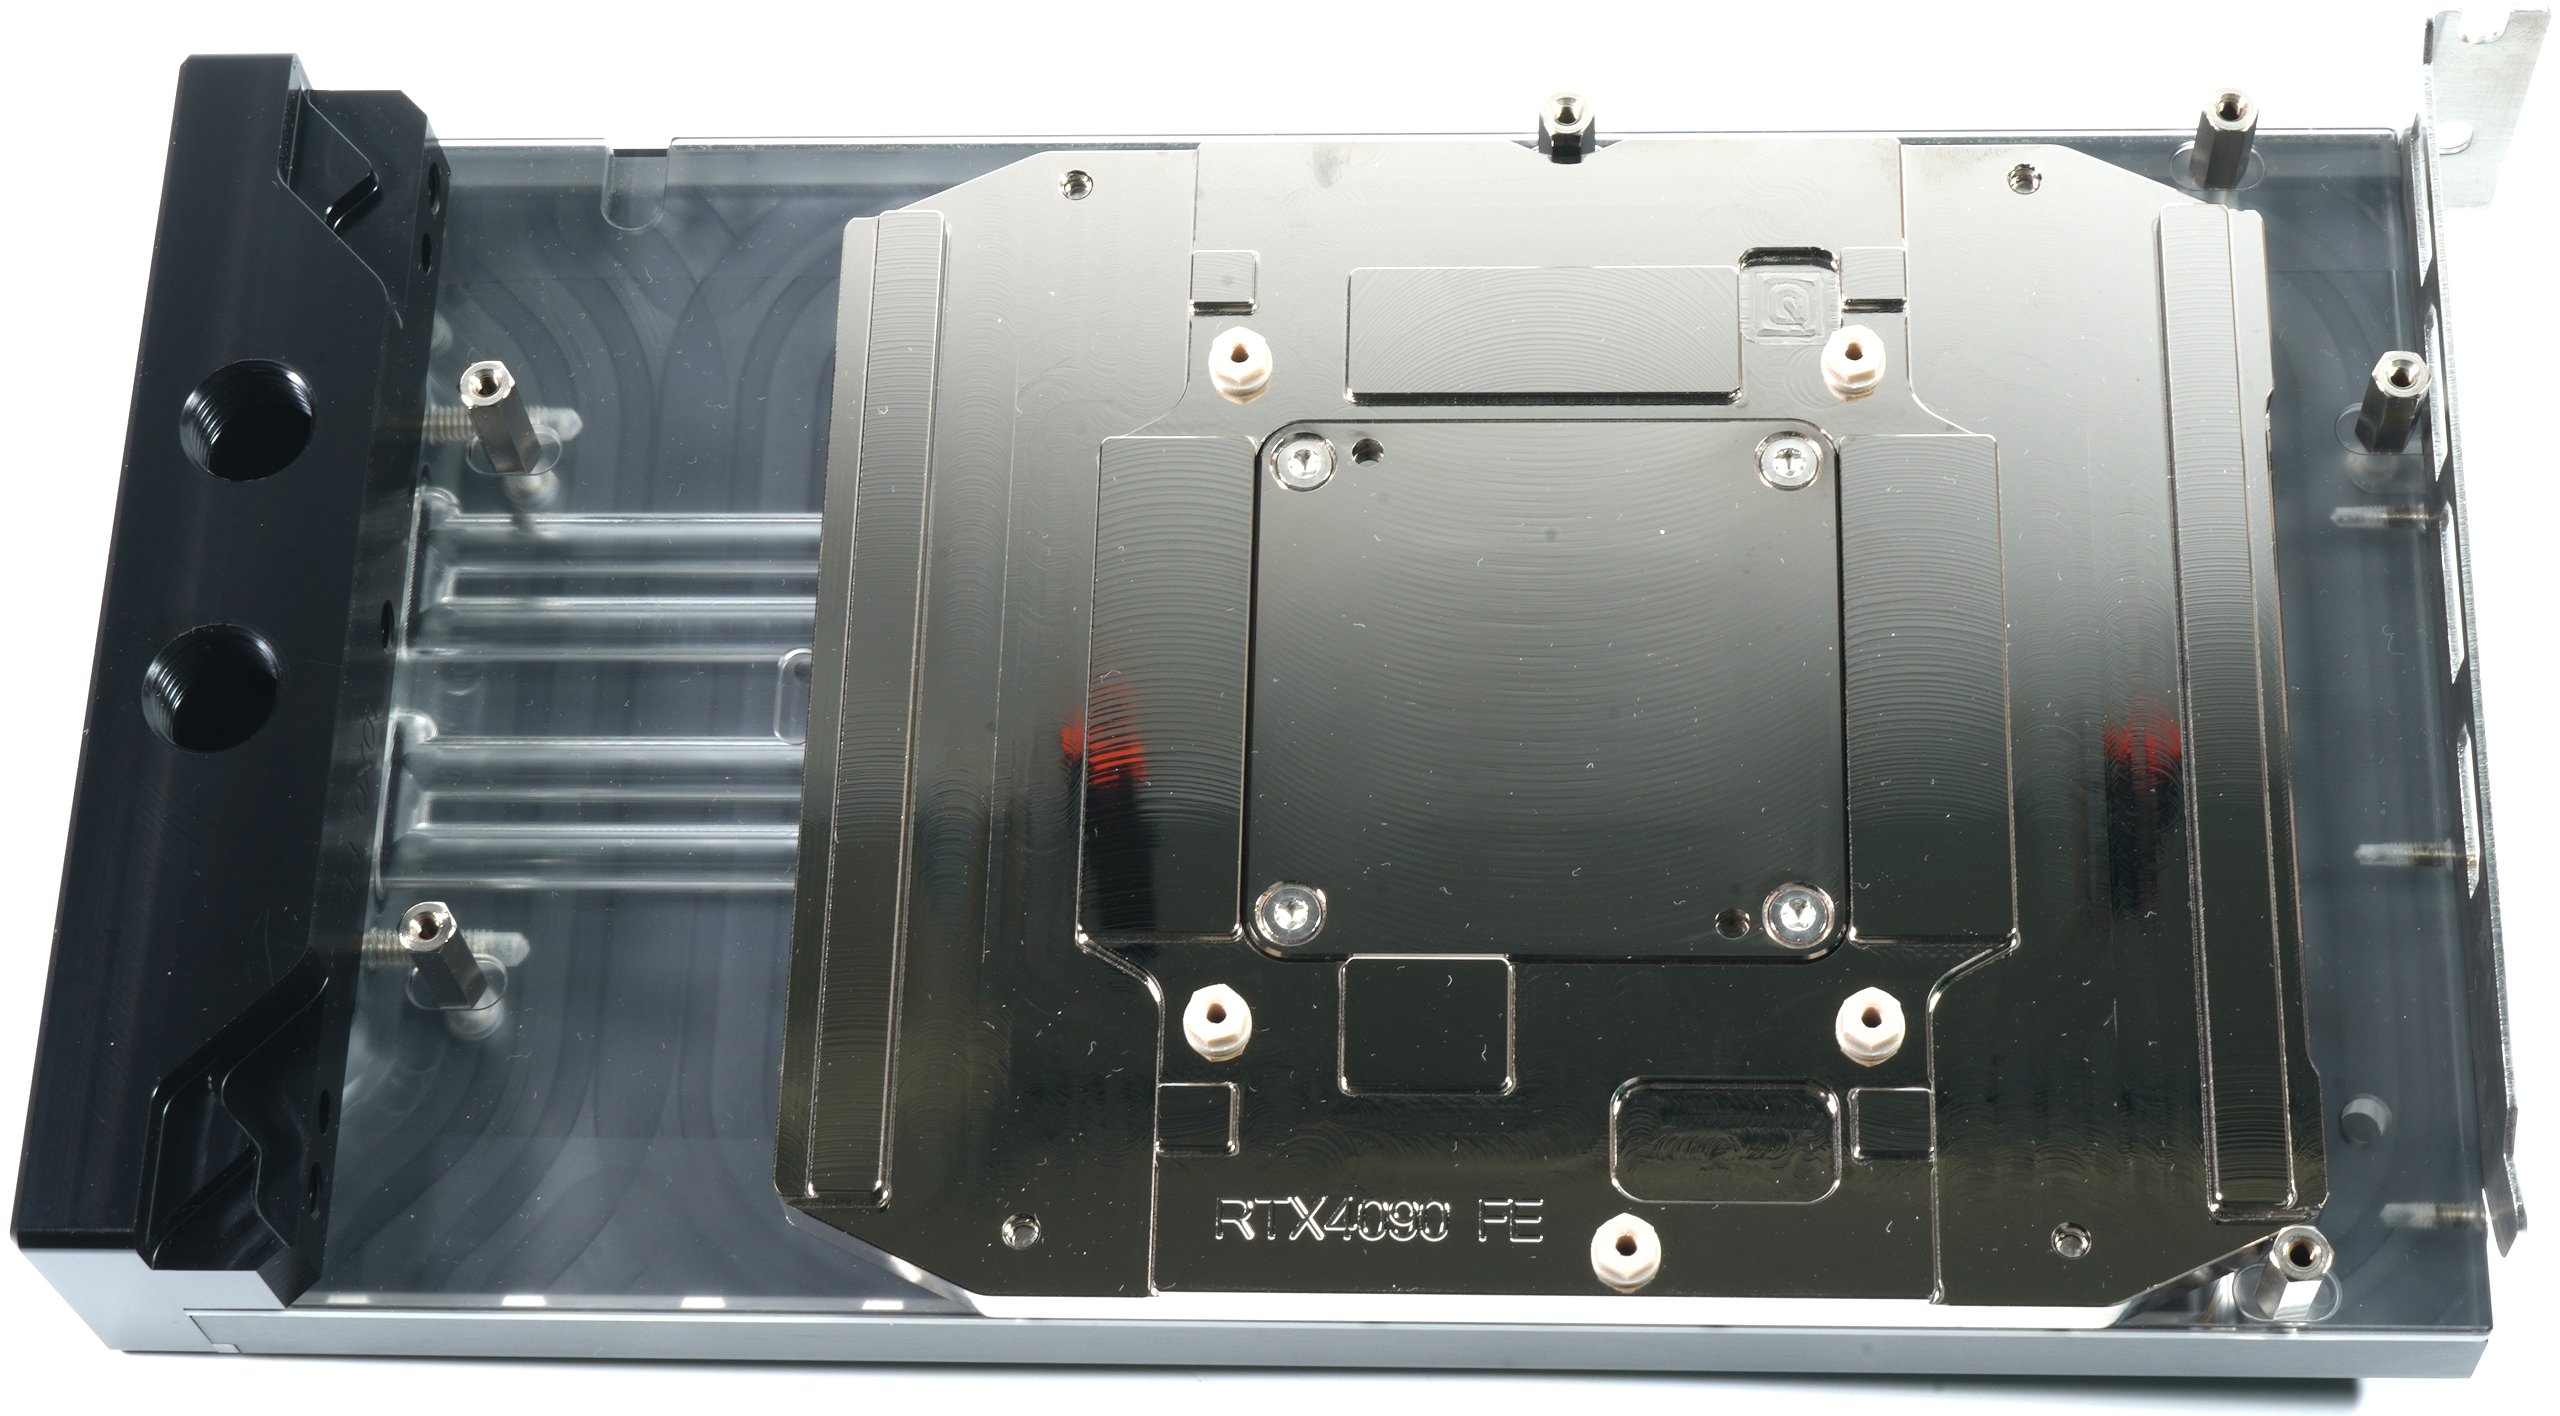
However, the area after the GPU heatsink has the risk of air bubbles collecting there in the corners (pinball effect) with the channel layout design used here. I can only advise to flush the cooler well once before installation and also not to let it dry again. Then the air also no longer “sticks” so well. The workmanship is okay, but the tool marks could have been a bit smaller in the GPU area. The nickel plating does not cover everything here. It can be assumed that the heatsink used is based on an extremely low residual bottom thickness and high fins, which also explains the physical division of the cooler parts.
The acrylic cover is solid, neatly framed in the case and looks pleasantly timeless. The lead to the RGB stripe is long enough to be connected directly to the motherboard’s digital RGB header using the included cable. However, what doesn’t work at all, and here I ask for caution when mounting, are the extremely sharp edges of the obviously punched slot bezel. Even though the surface was still finalized with a light brush, all the edges were as sharp as a plane, especially in the inner area (side facing the map). On the loss side, there is now a cut photo foil and a bloody index finger. However, I have already pointed this out to the manufacturer and it should probably have been an outlier. Why I touched the slot bracket at all, you can read on the page with the assembly (or somewhere at kilometer 4.8 in the PDF).

The backplate is neatly inserted and can also be thermally bonded with pads to help with cooling. However, after 2 hours of operation and complete saturation with waste heat, I could no longer read out a difference to operation without a backplate during a plausibility test. But especially due to the all-round cover on the top, it simply looks a few Euros more expensive. So you can (and should) do it that way.
How the whole thing can be assembled now, you will see after the next page. Before that, I have listed the other three previous articles for you:
|
|
|
|


67 Antworten
Kommentar
Lade neue Kommentare
Veteran
Mitglied
Neuling
Neuling
Urgestein
Urgestein
1
Urgestein
Urgestein
Urgestein
Urgestein
Veteran
Urgestein
Urgestein
Urgestein
1
Neuling
Veteran
Urgestein
Alle Kommentare lesen unter igor´sLAB Community →