


Disassembling and cleaning the board
You can find out more about the correct order of disassembly in the article linked below. I’m assuming you’ve also read my videos and articles on the RTX 3080 and RTX 3090, so you already know the procedure. For all others: The two ribbon cables for the fans can be released by tilting the black levers at the end of the lock upwards. Please remove or lift off the thermal paste dry first and only later use some isopropanol sparingly for fine cleaning.
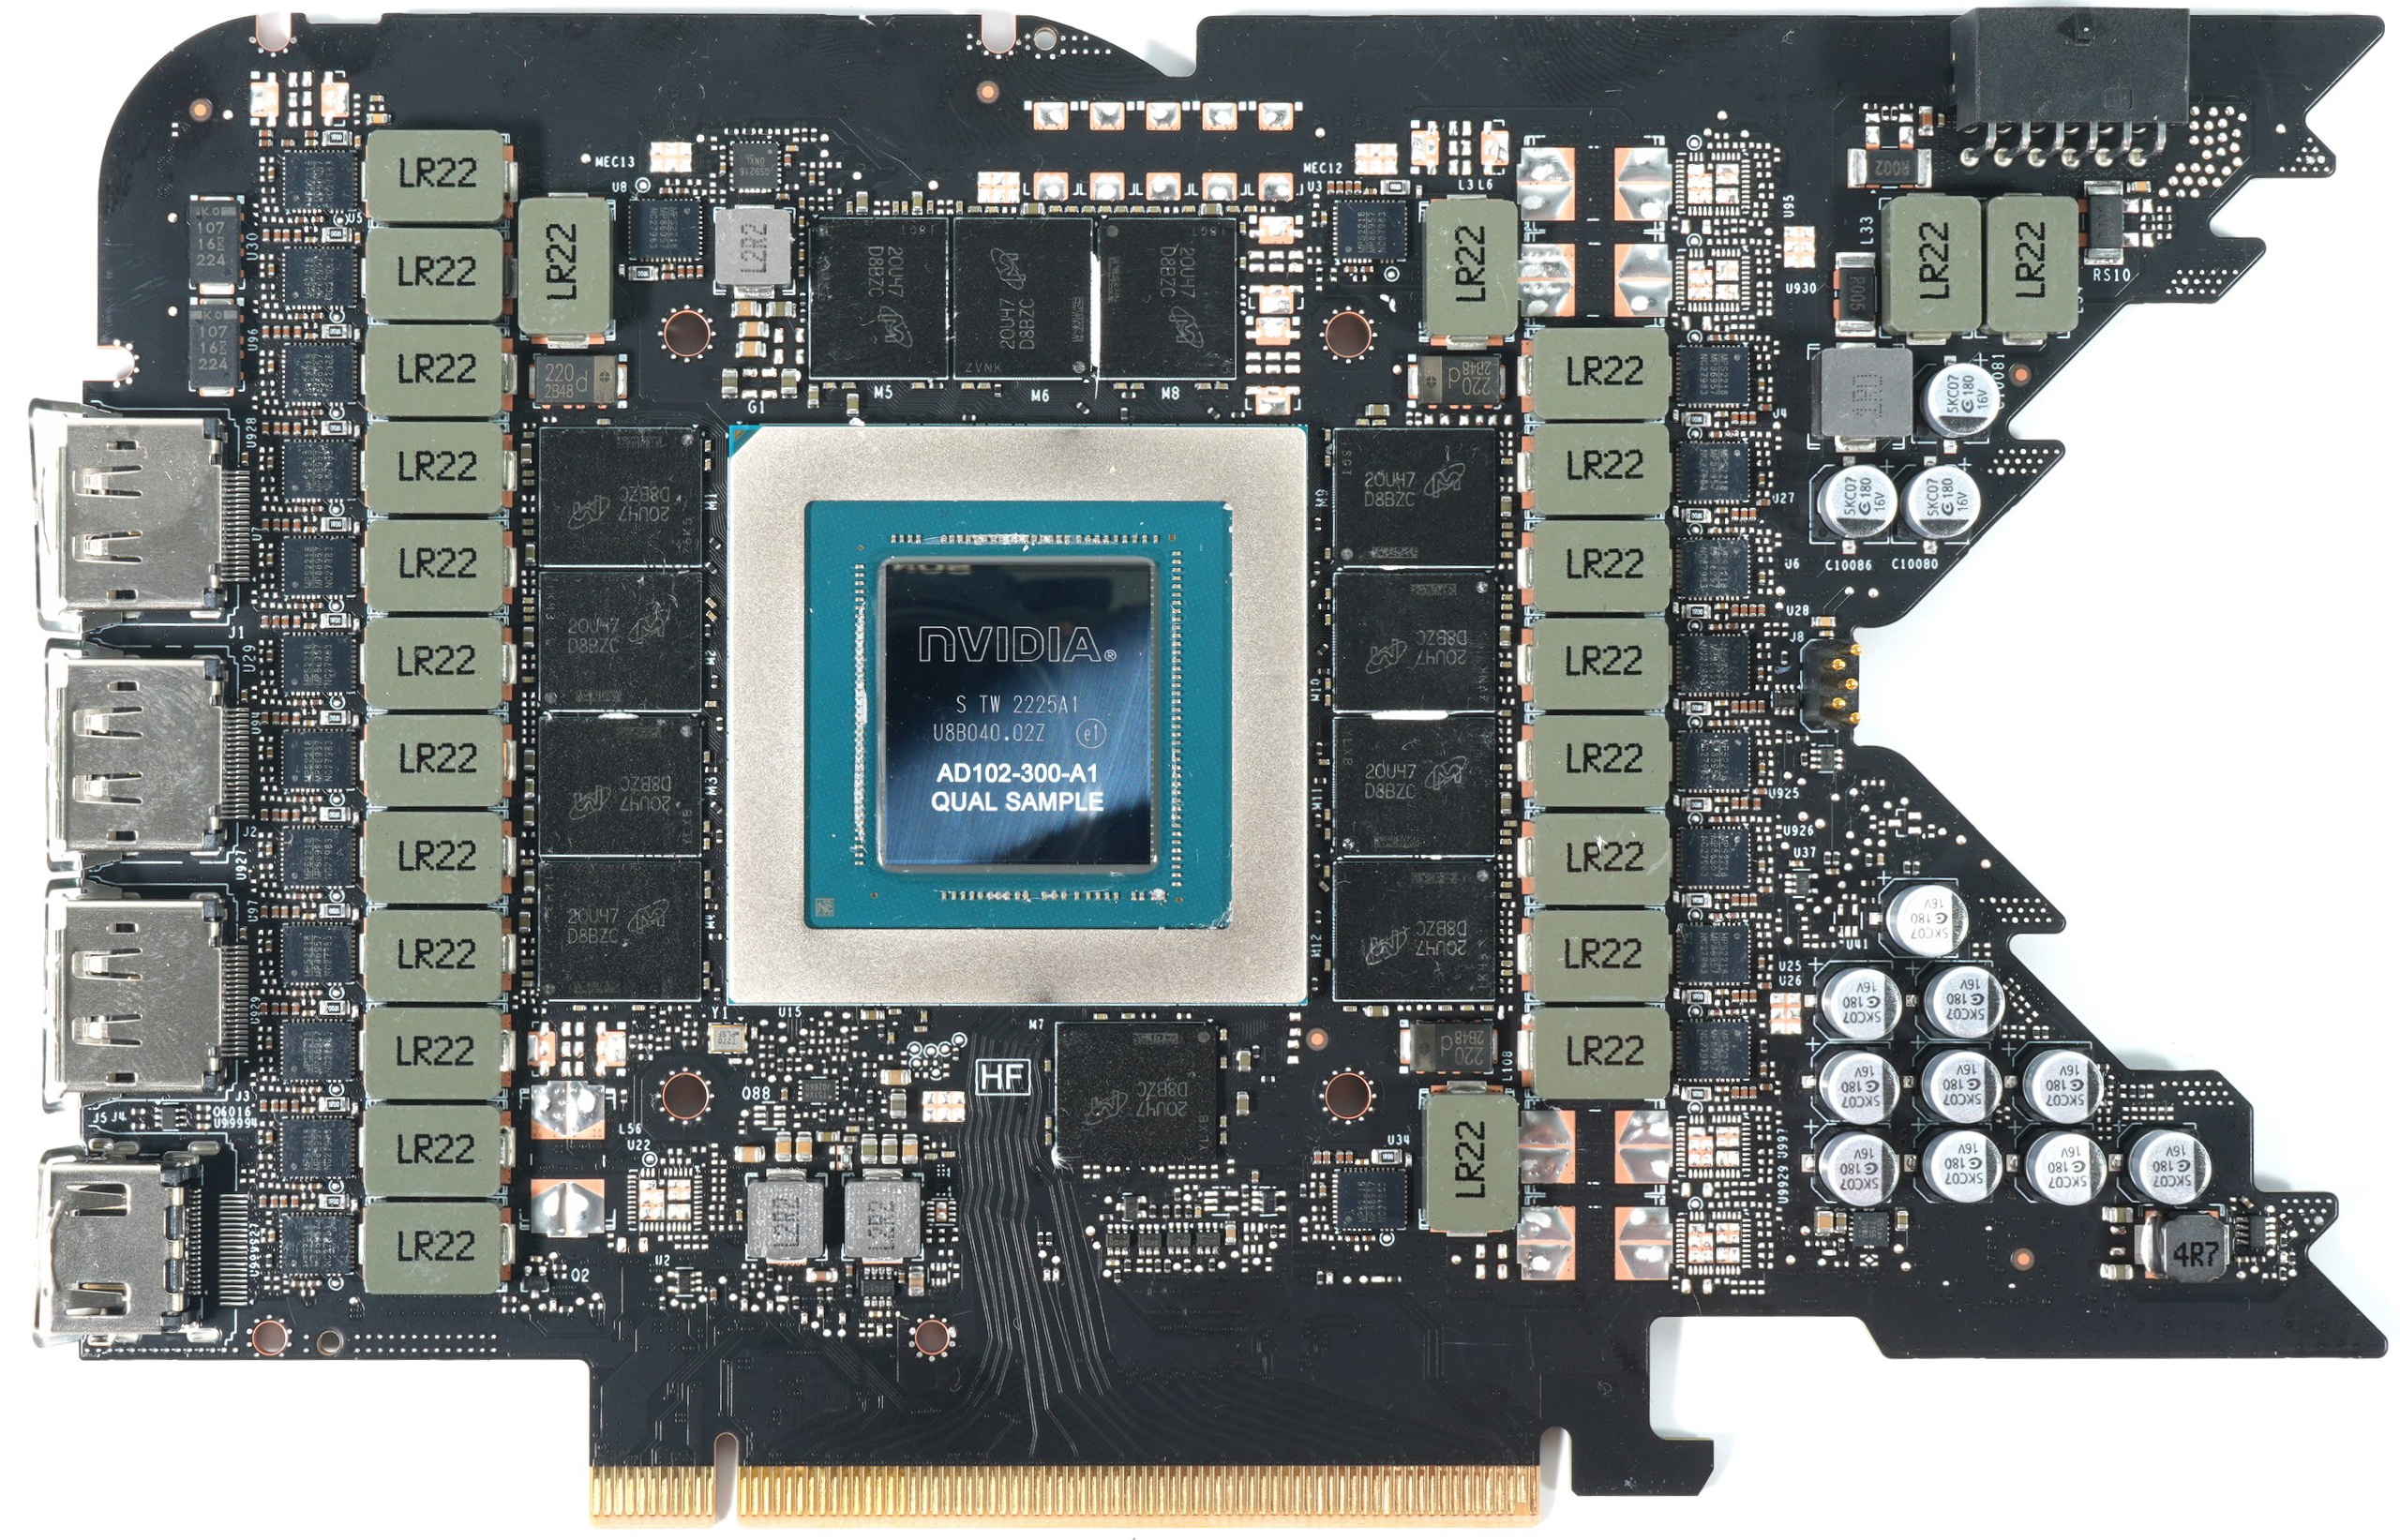
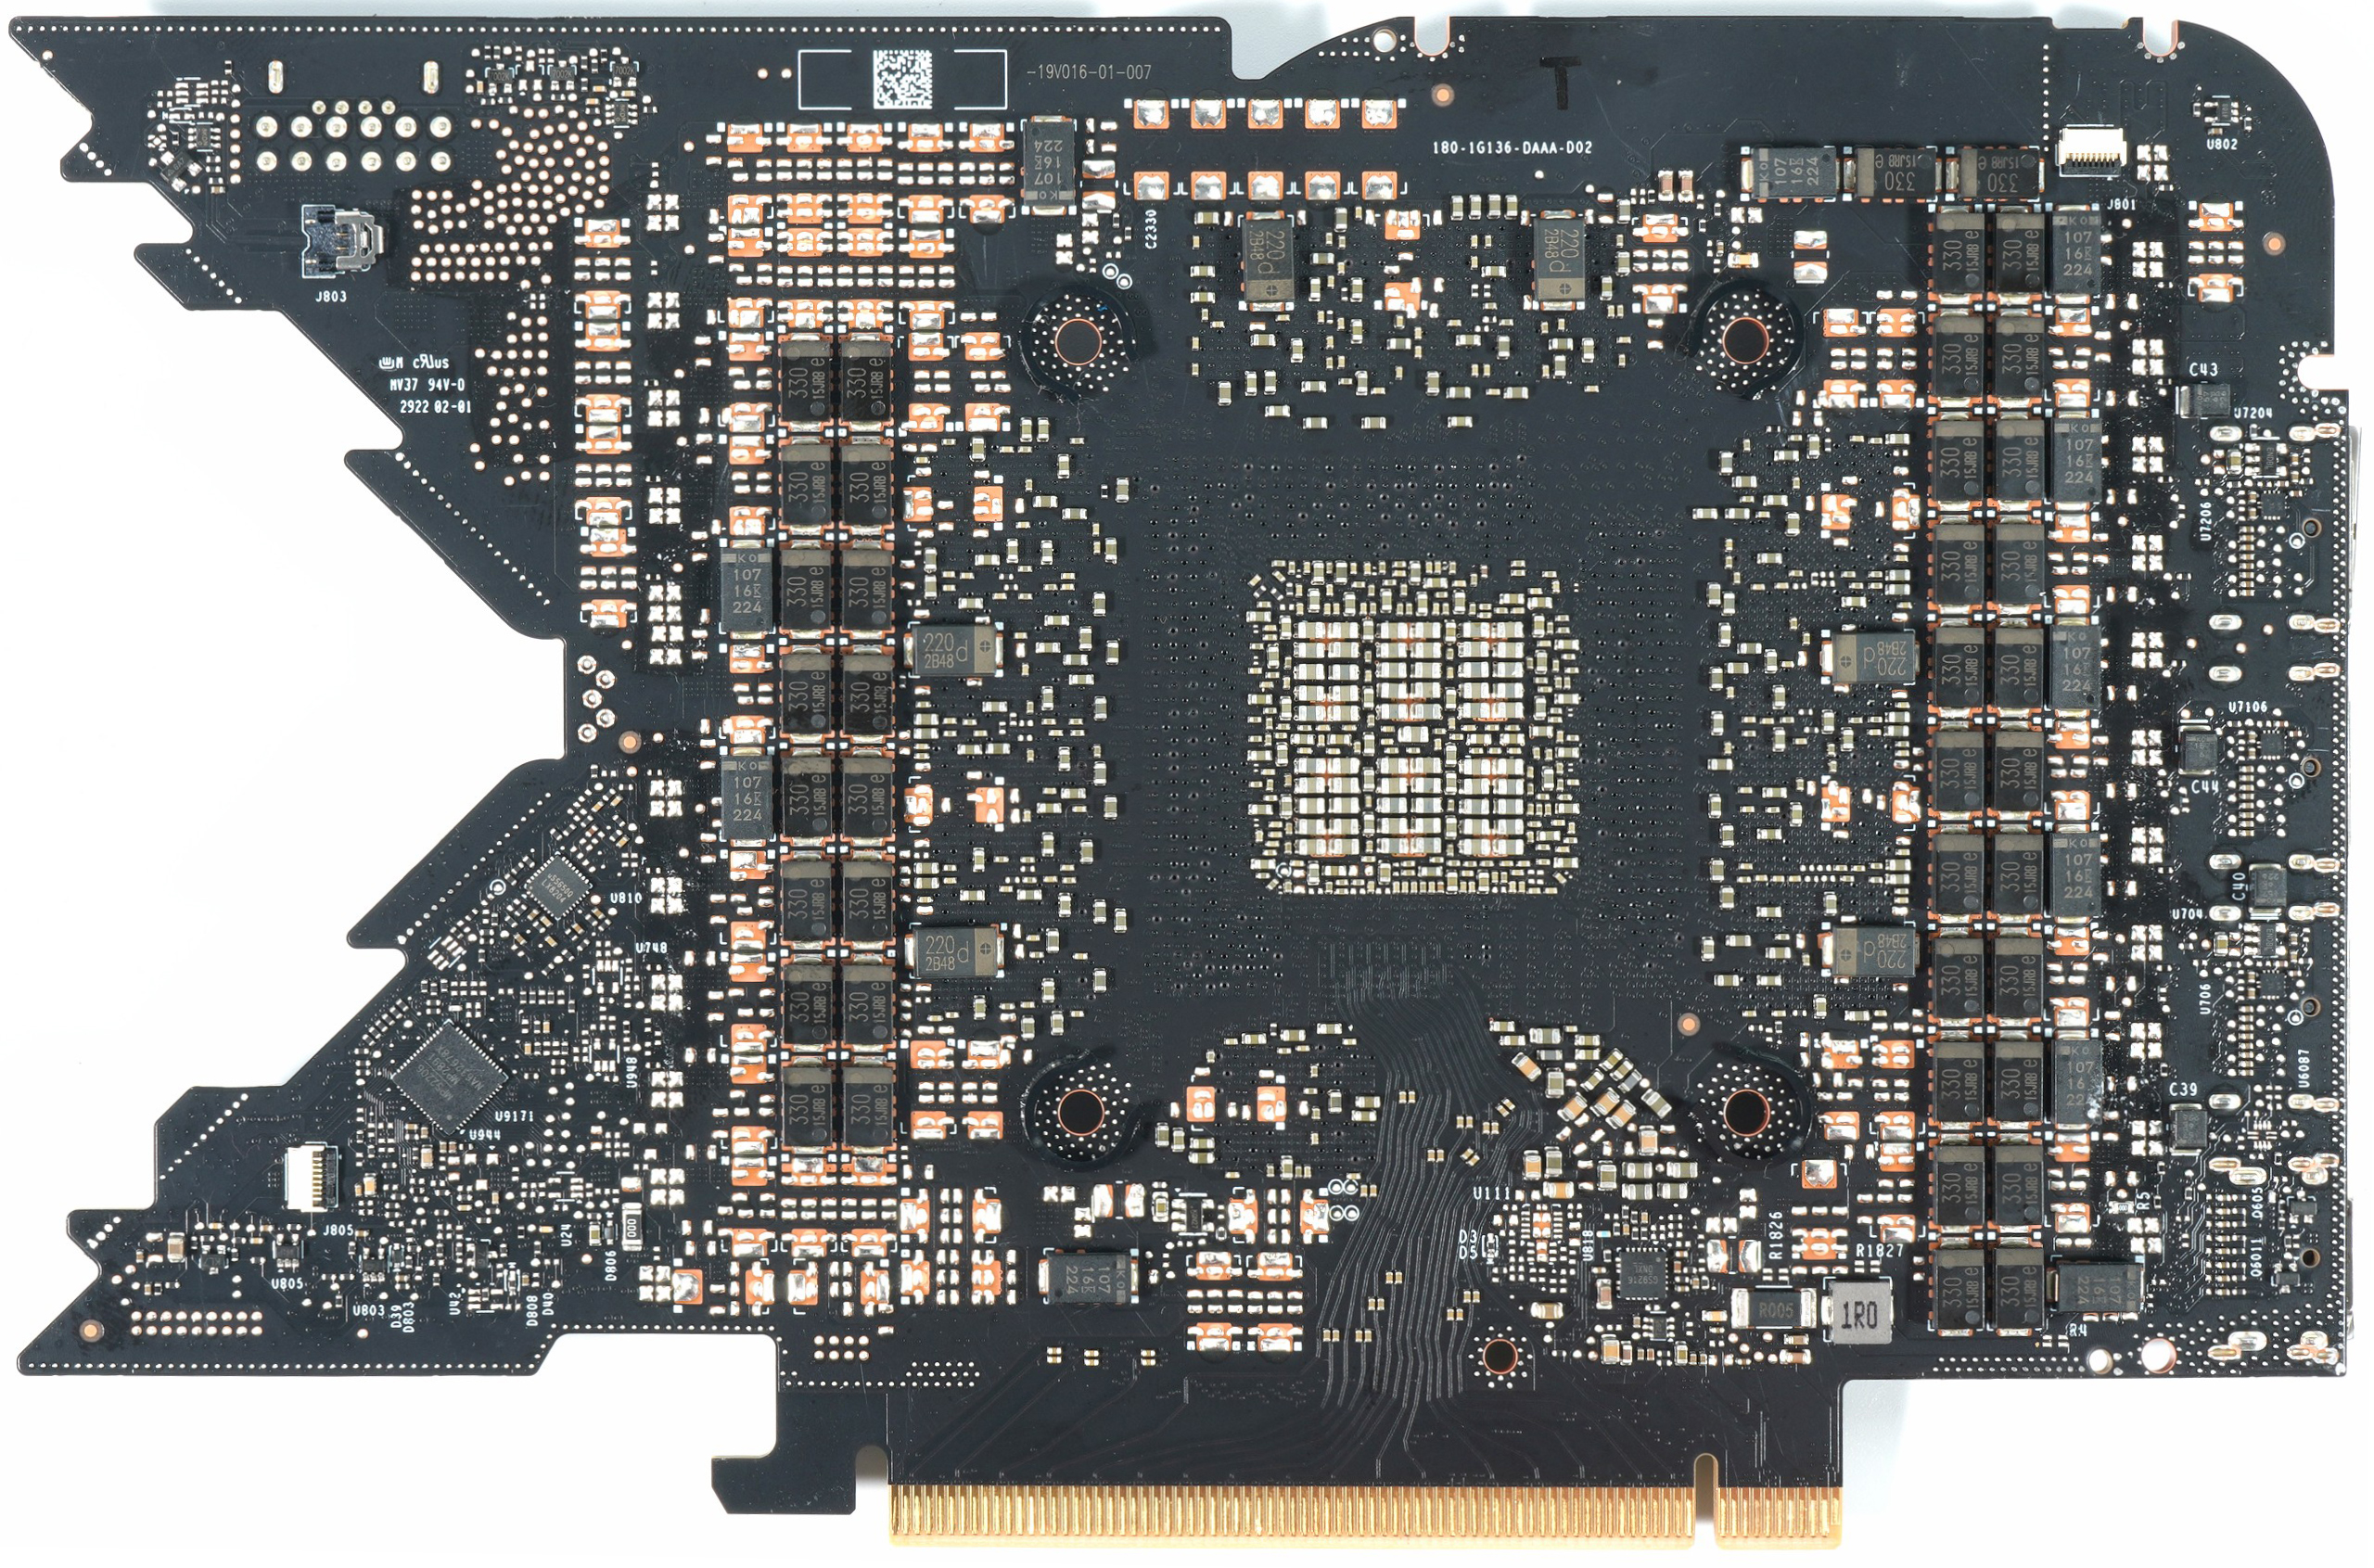
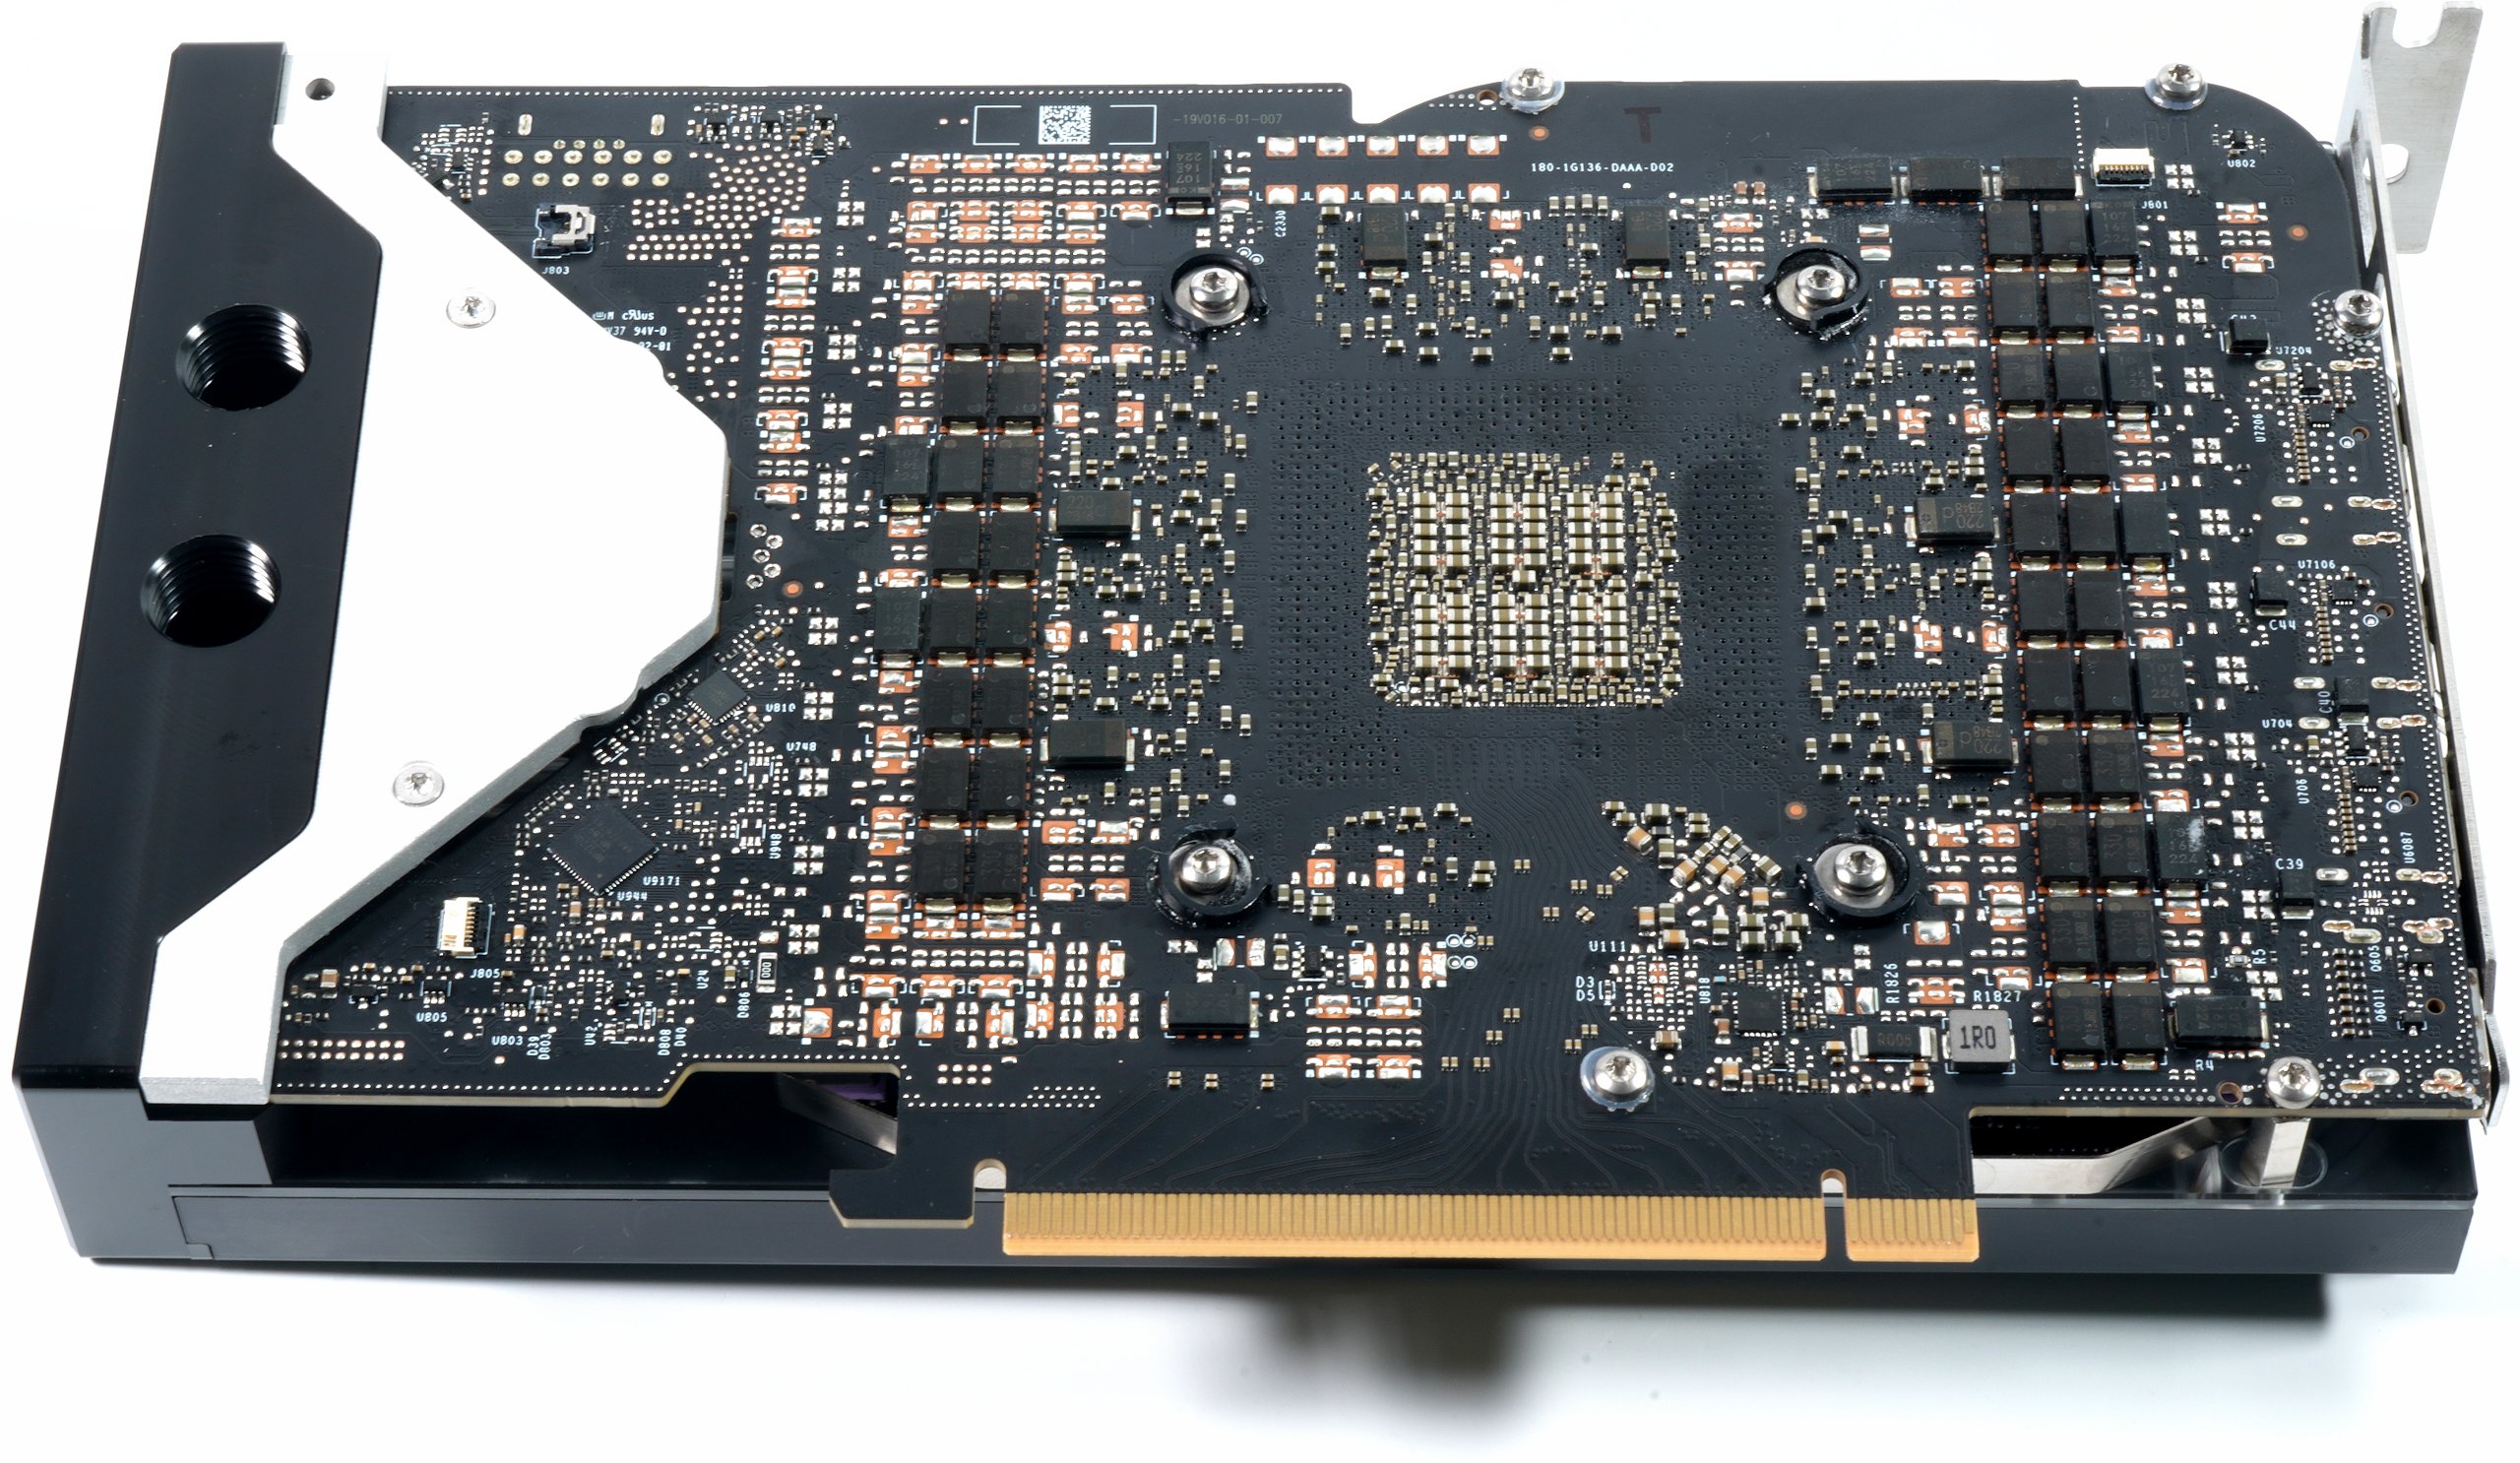
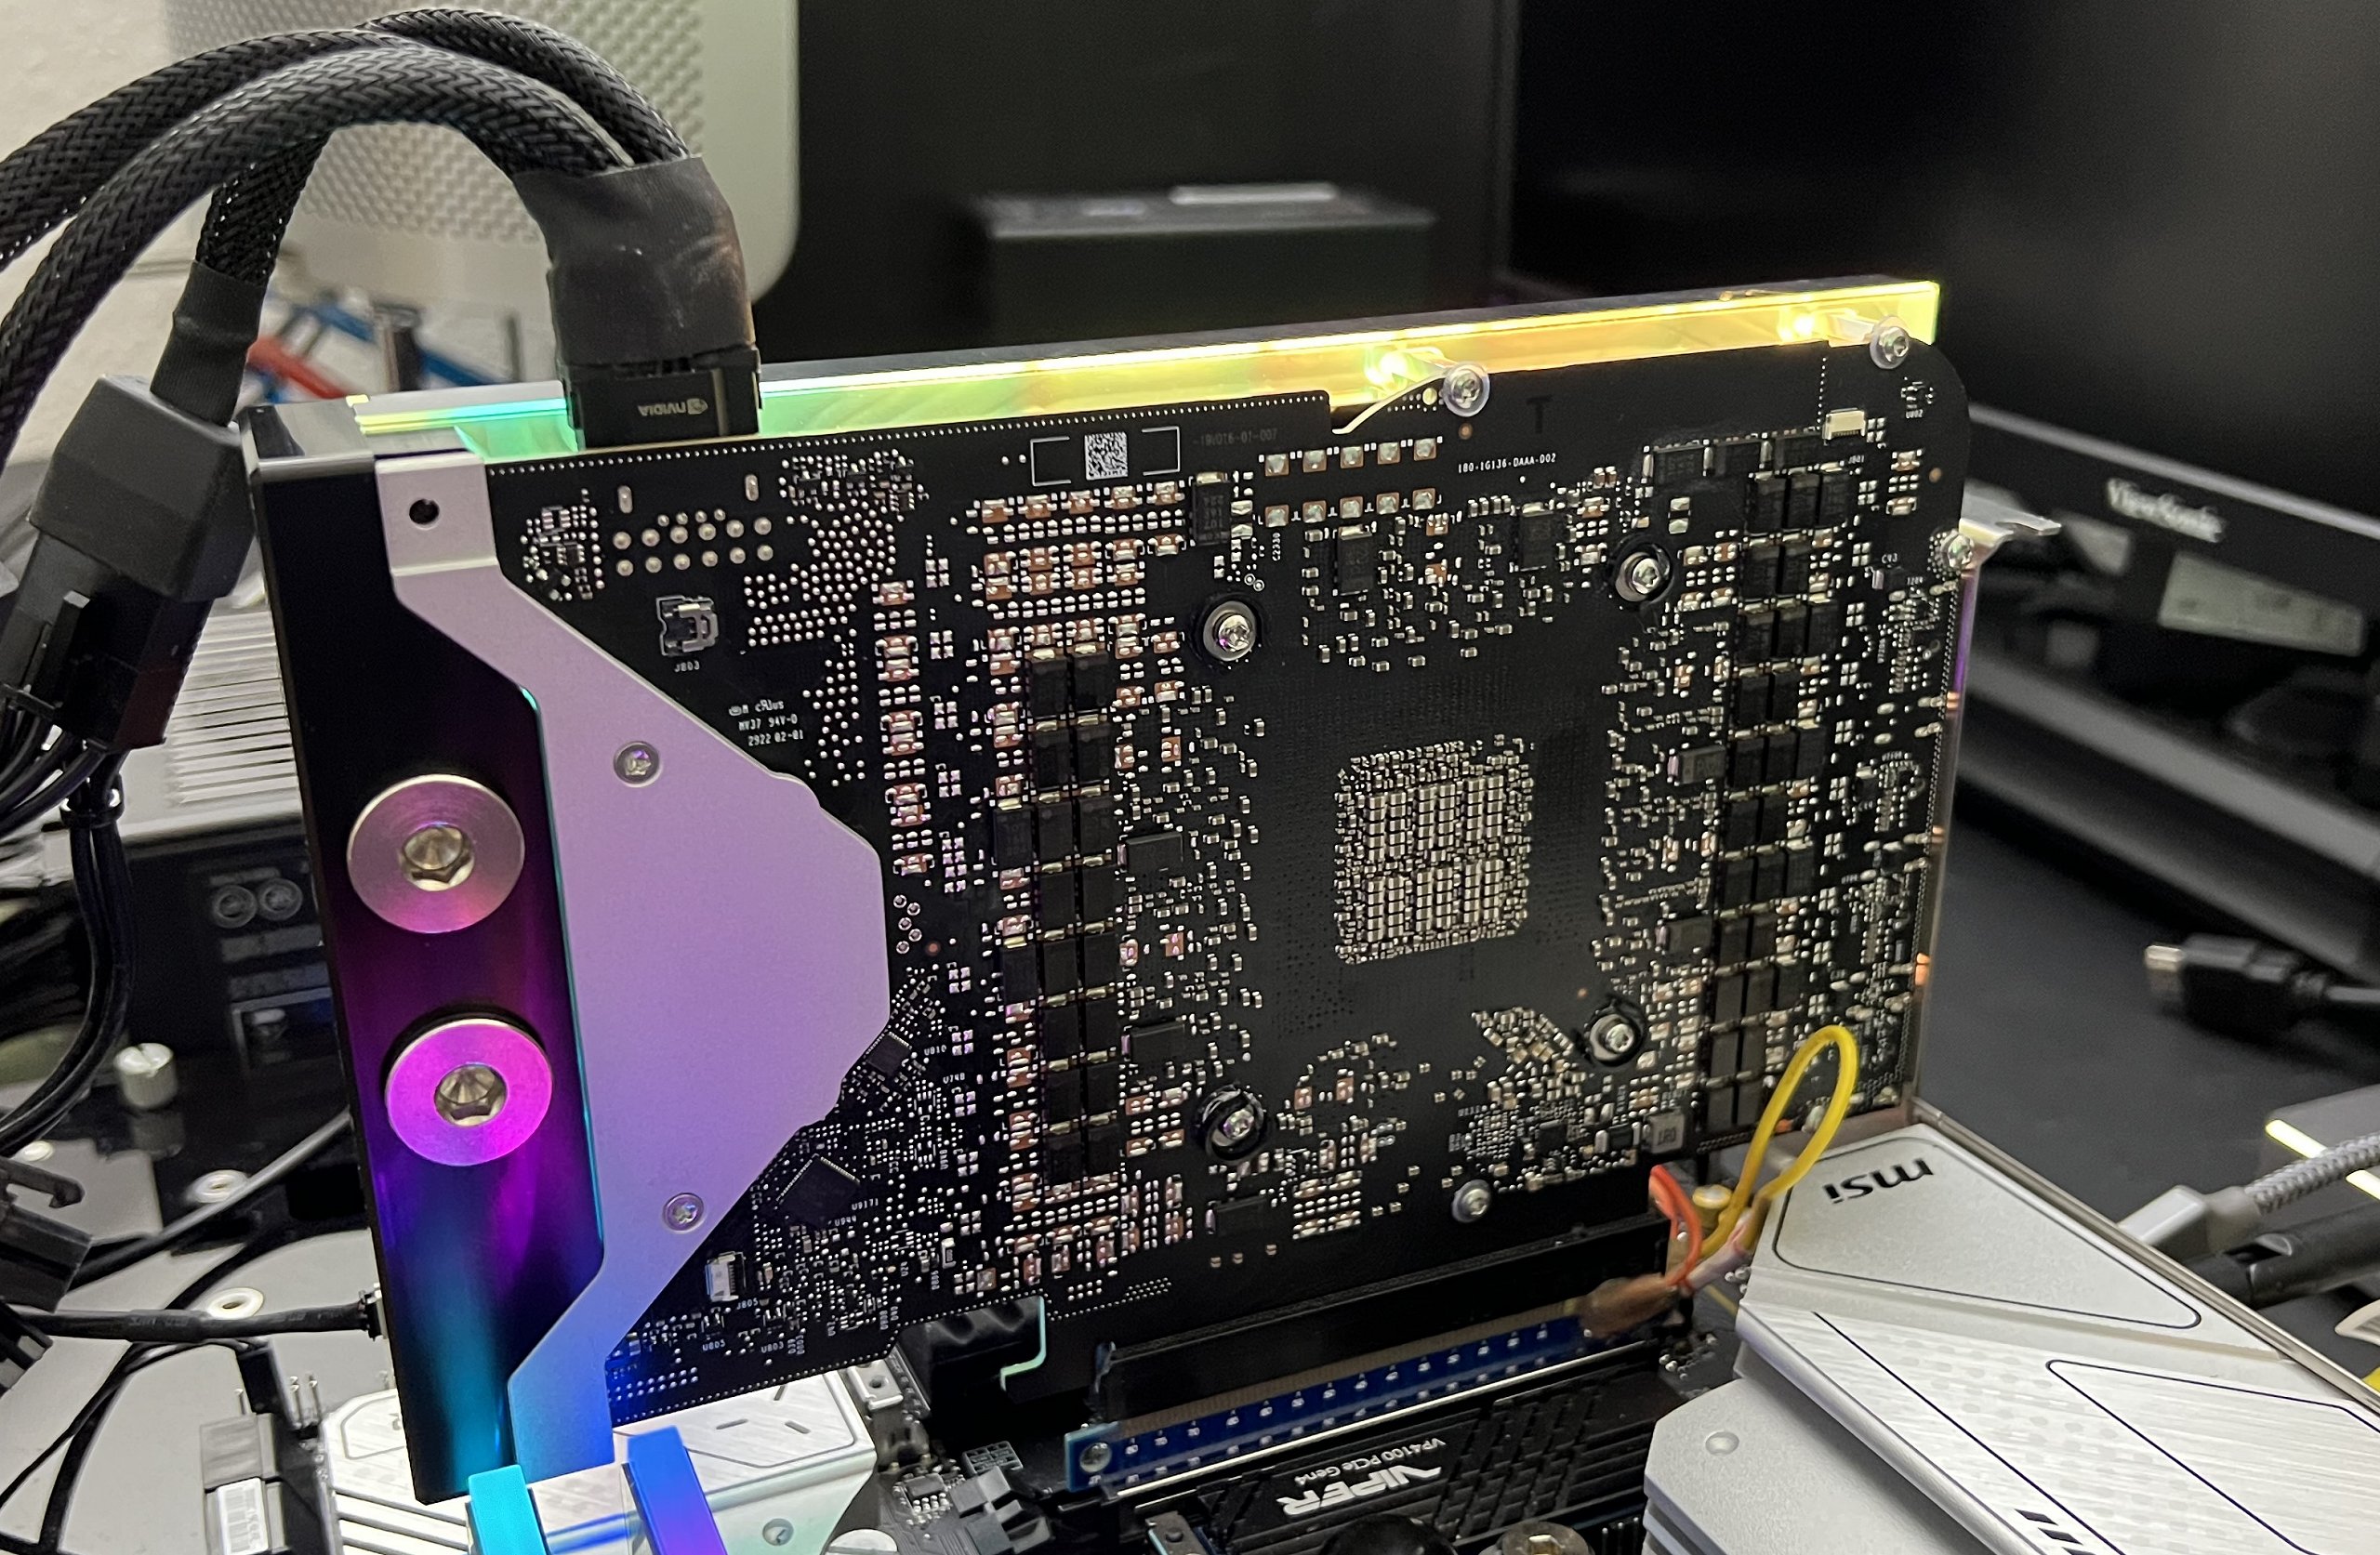
We can neglect the back, it does not need to be cleaned either.
Here again the procedure with description:
NVIDIA GeForce RTX 4090 Founders Edition richtig zerlegen – Anleitung für Wasserkühlungs-Umbauer
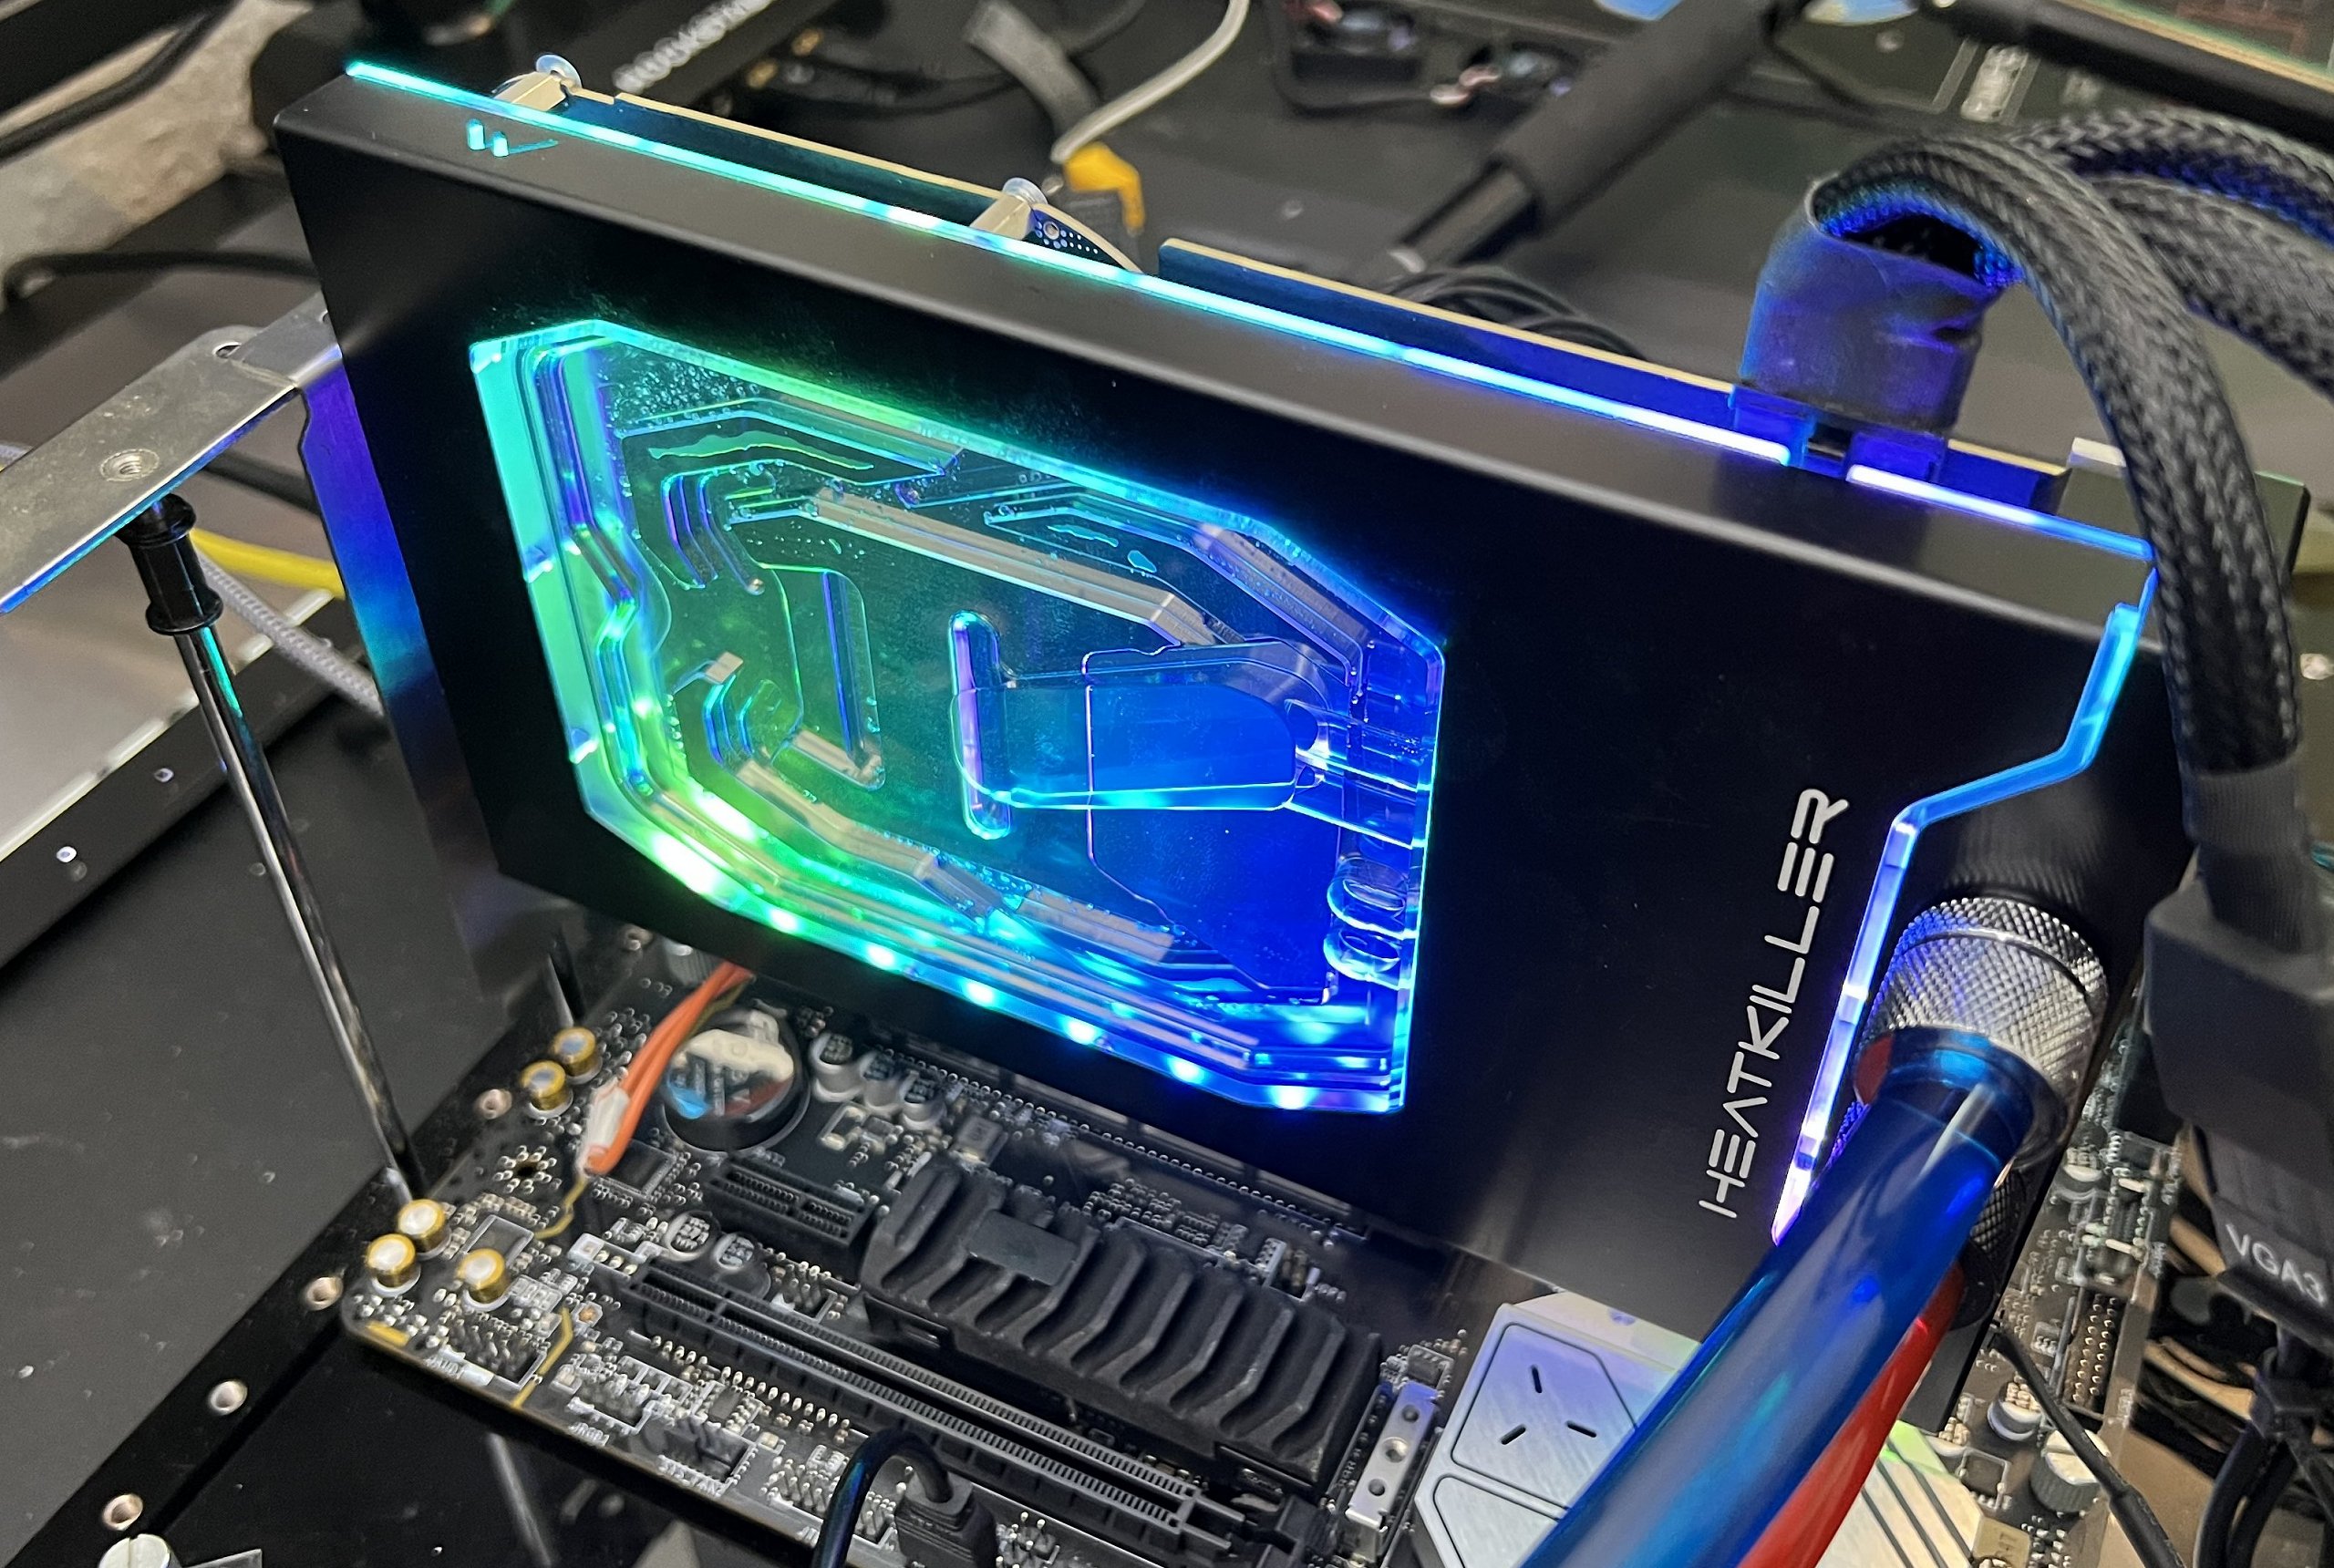
Mounting
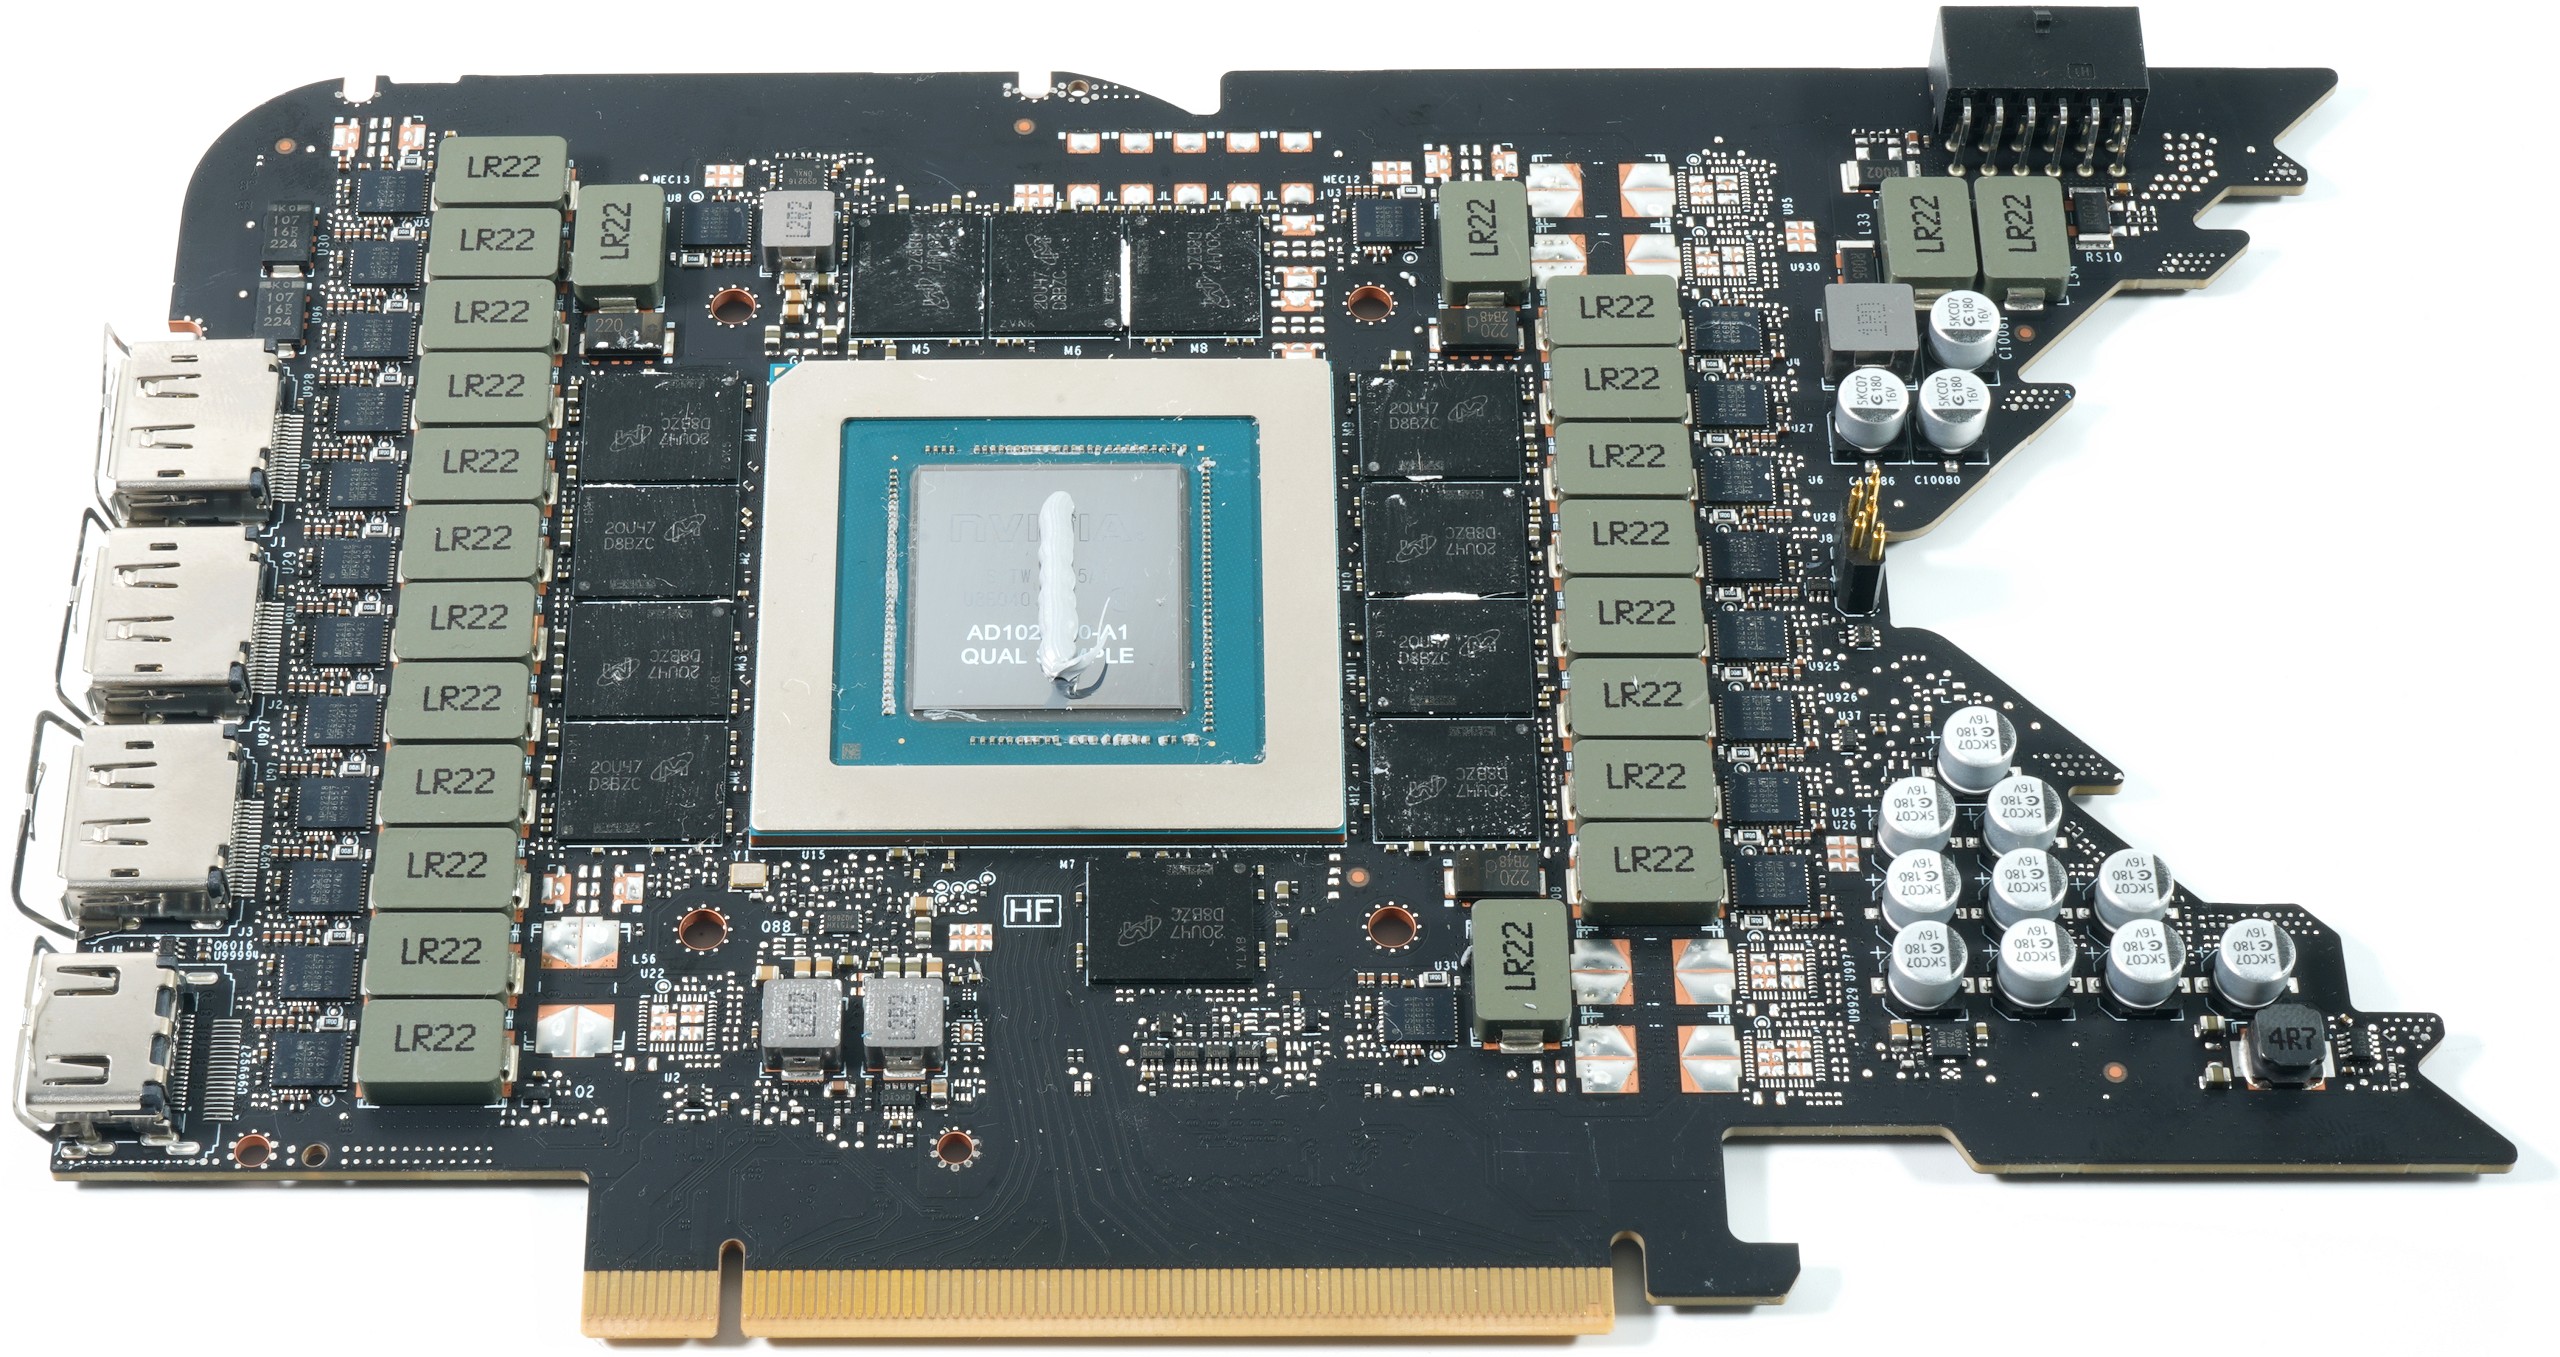
As you can see, I deliberately omit the strips for the bobbins this time as well. From a temperature point of view, this is not a loss, but many coils (especially those of the FE) would like it to be a bit warmer. So you’ll have to experiment to see if it tends to promote or minimize coil whine (I didn’t have any). Depending on the coil variant. The used and already pre-assembled 1 mm pads are ok, but removing the protective or transfer foil from the smaller pad pieces is fiddly to borderline. Almost nothing works without tweezers.
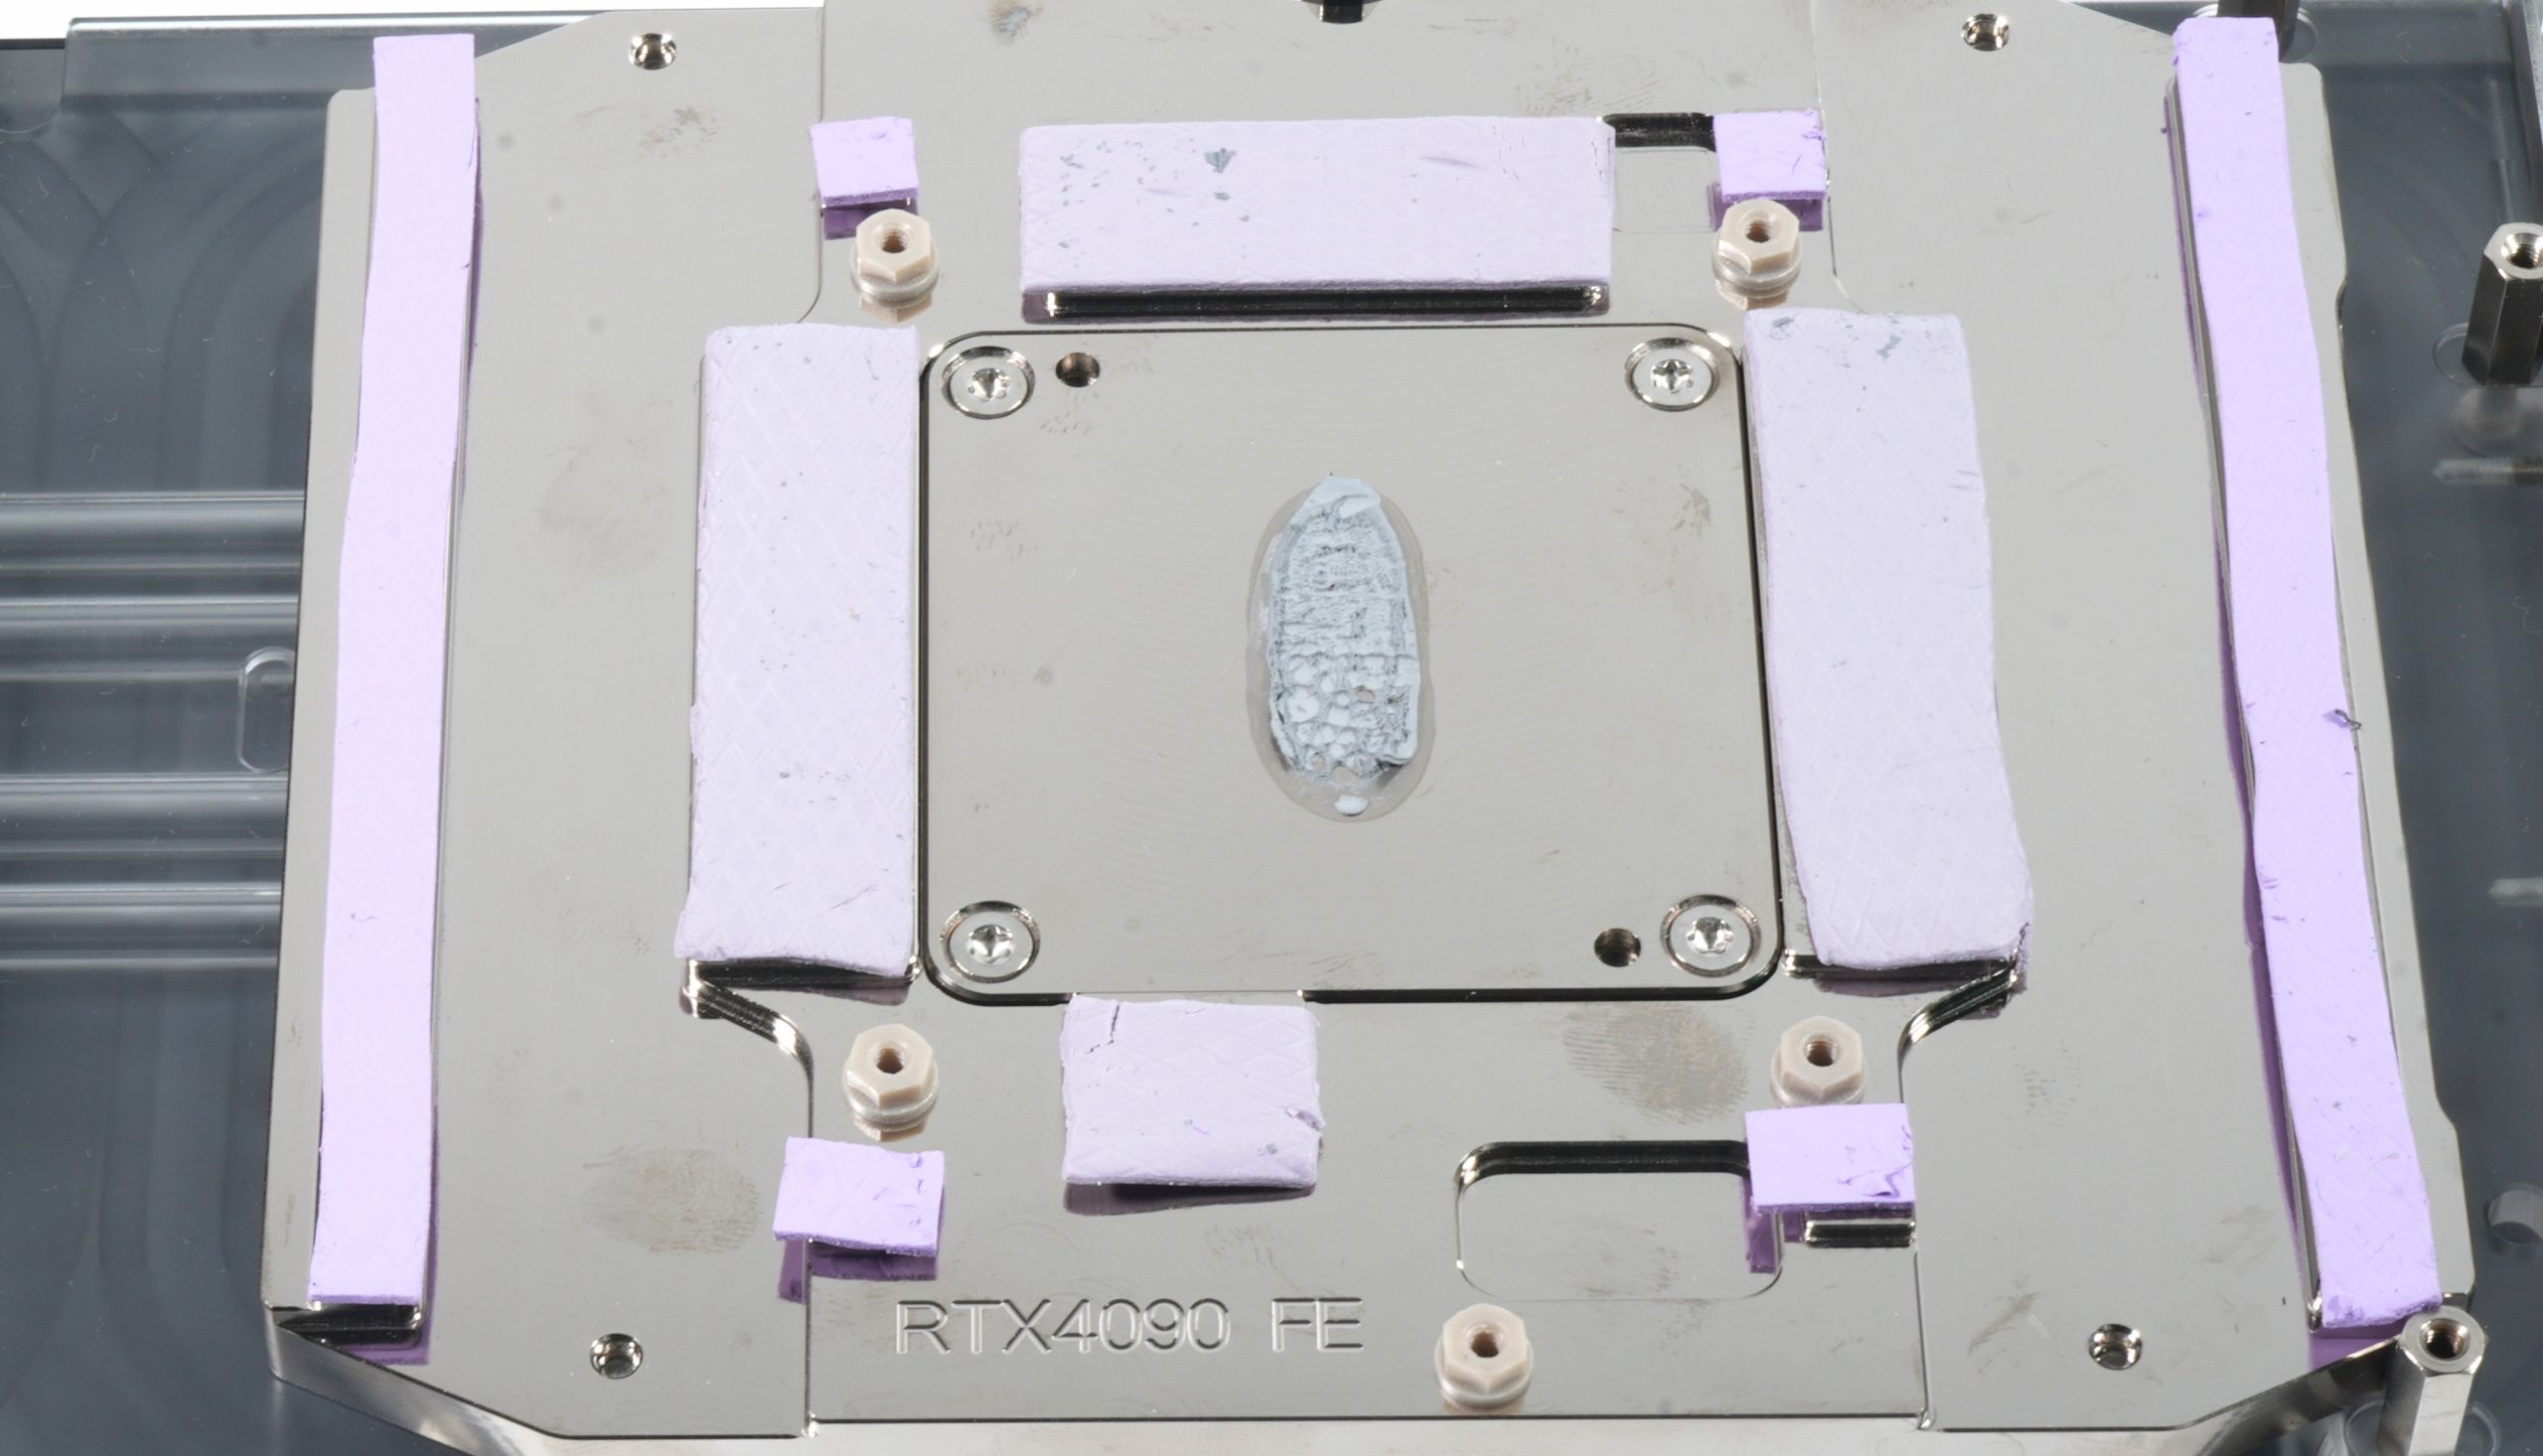
As a paste, Watercool supplies a small OEM tube with Thermal Grizzly Kryonaut. This is more than enough for one-time application. I use here again as always the proven sausage method, this has already proven itself with the Ampere cards and works also with the large Ada chip excellently. You can also see in the picture above the contact area to the paste when the pads are just lightly resting without pressure. The rest must solve the screw connection.
For the measurements I do without the backplate, because by means of control measurement it has been confirmed that it does not bring at my temperatures and does not change anything in the result. The stabilizer at the end of the board at the V-shape of the FE board is solely for stabilization when operating without backplate and it is also NOT included. The still incorrectly seated slot aperture does not interfere with the assembly, so I had saved the part of screwing it on for the next day, because I still wanted to deburr the aperture in the workshop. A light chamfering is now really no act and it also cost me no 2 minutes. Then you can also mount orifice correctly without danger (see manual).
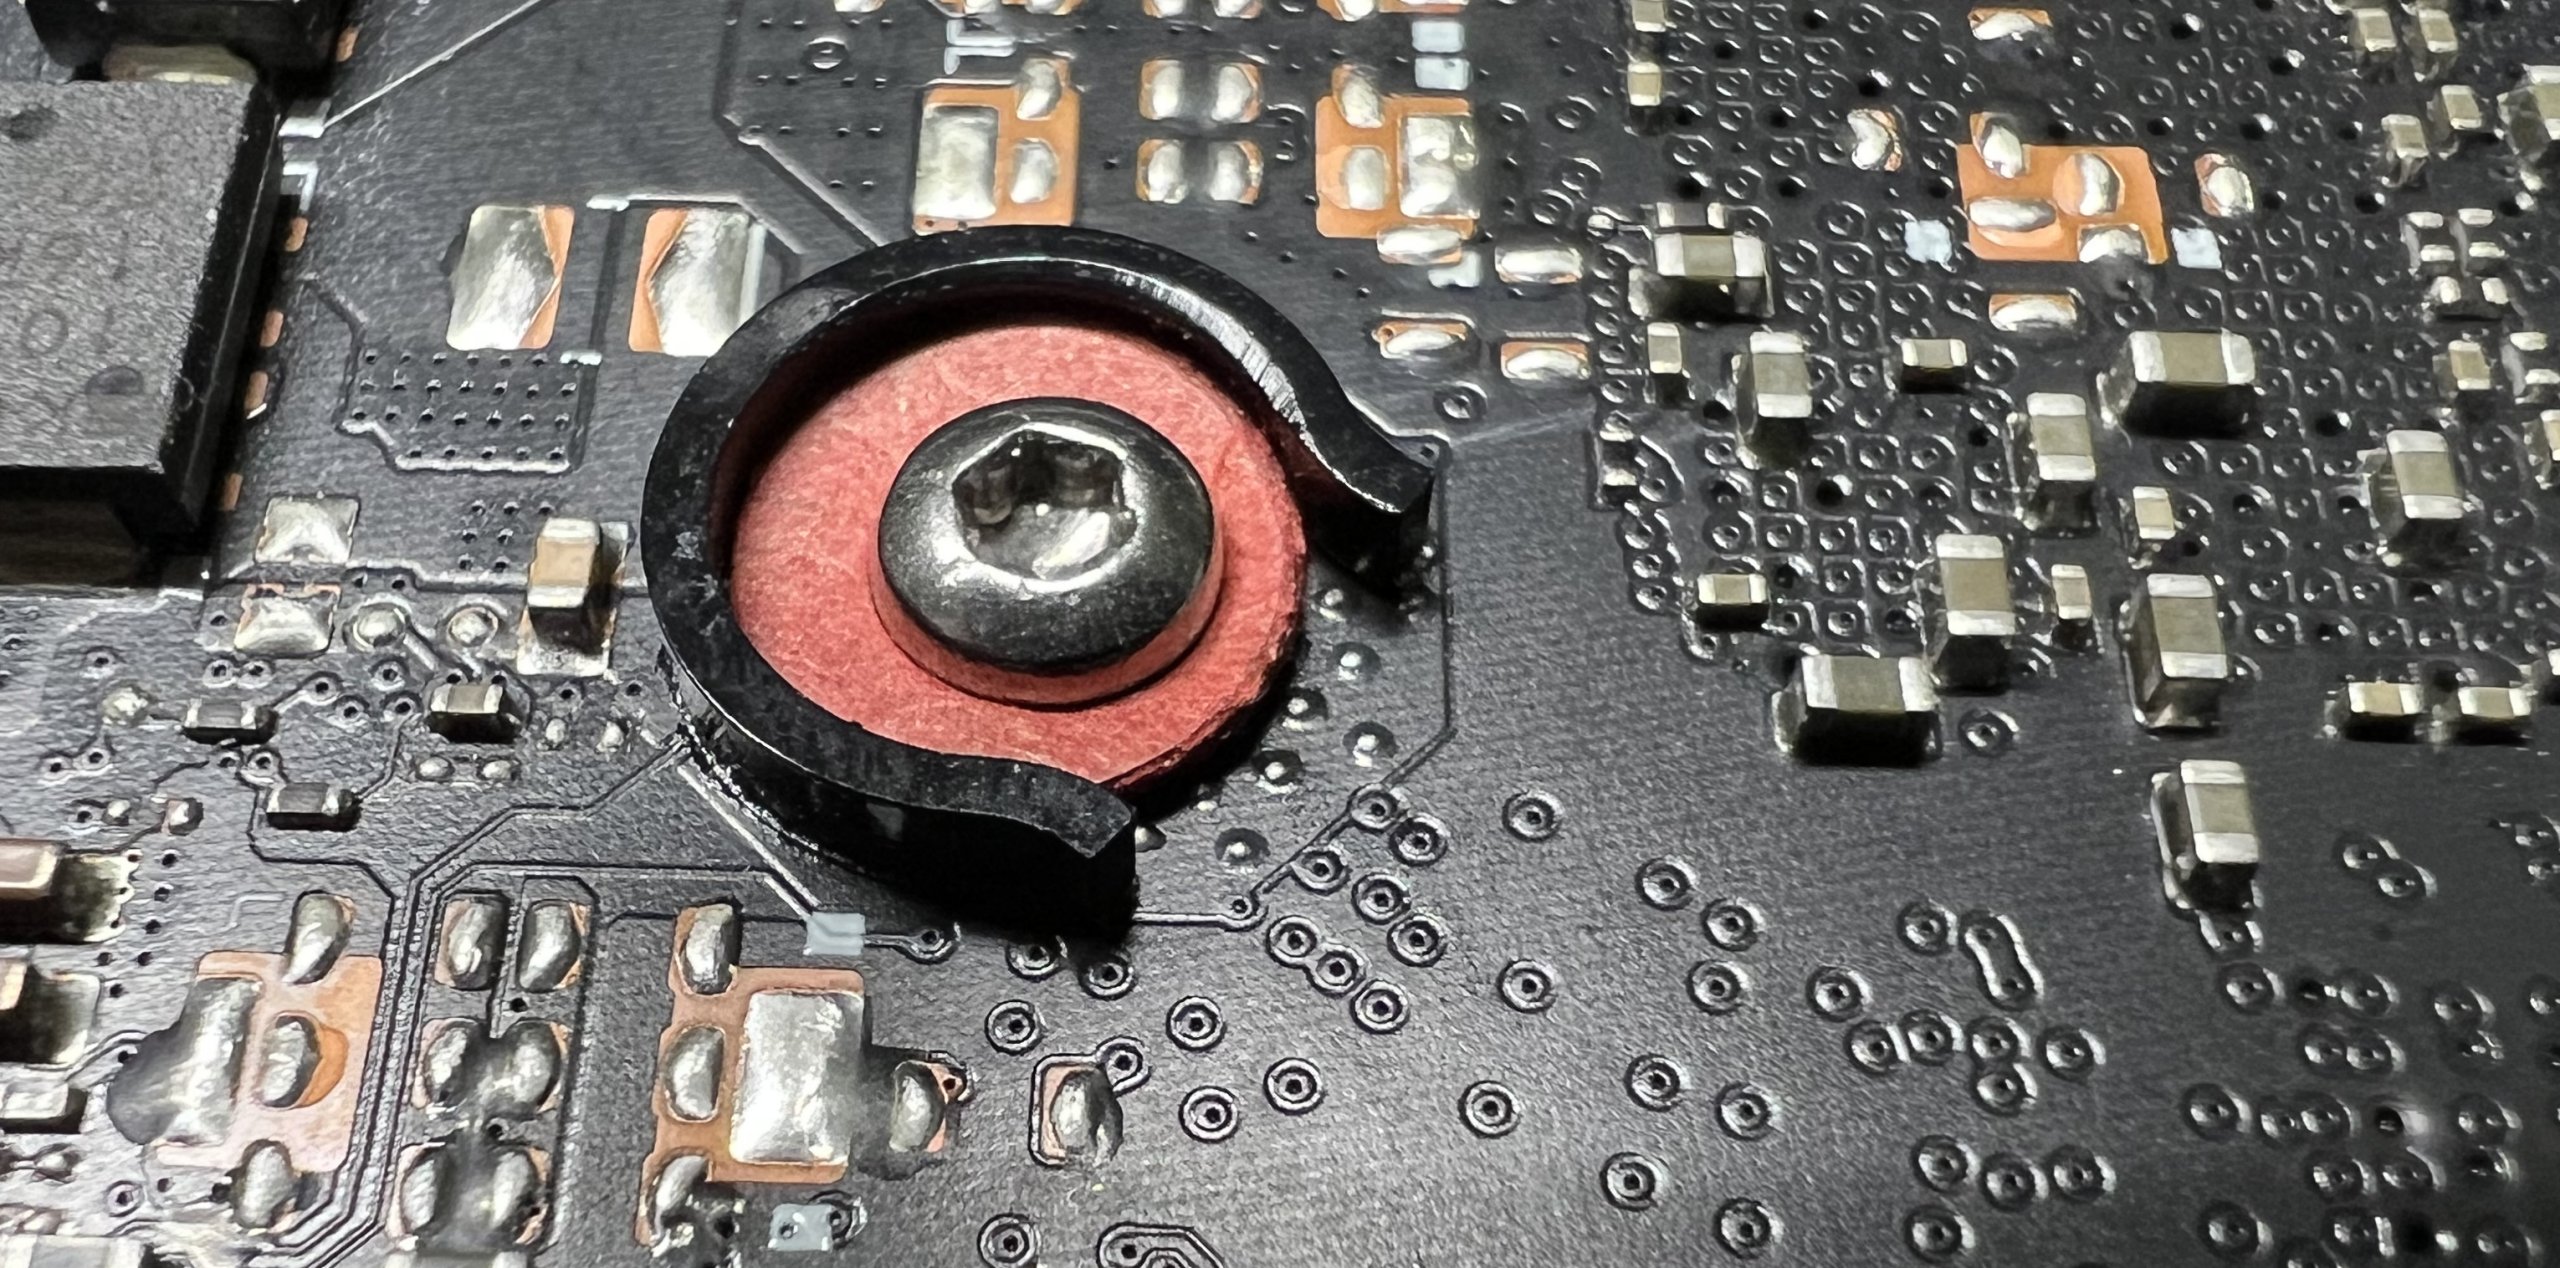
Compared to Alphacool, however, Watercool does not use spring screws and thick, soft rubber washers for the GPU area (clever solution and thought-out), but also sharp-edged metal washers and massive screws. You can like that or not, but according to the board partners, NVIDIA only allows clamping crosses with a fixed support or spring screws, spring screws with nylon washers or other screws with soft, non-conductive washers to protect the PCB. If you use the metal washers from the accessories, then you should (thanks to the thought refresher from the forum), at least align the sharp side upwards and not towards the circuit board.
 I have corrected the text again at this point and also ask for forgiveness for overlooking the glue residue. The problem with such solid washers, however, is a general one, because if the holes in the washer are significantly larger than the bolt diameter or have not been positioned completely in the center, then exactly what you can see in the picture below will happen when the bolt is tightened. Unfortunately, the black guide for the VU’s clamping cross is only glued on and tears off quite quickly when pressure is applied, especially when the board gets hot. But then, according to NVIDIA, any warranty or guarantee claims expire.
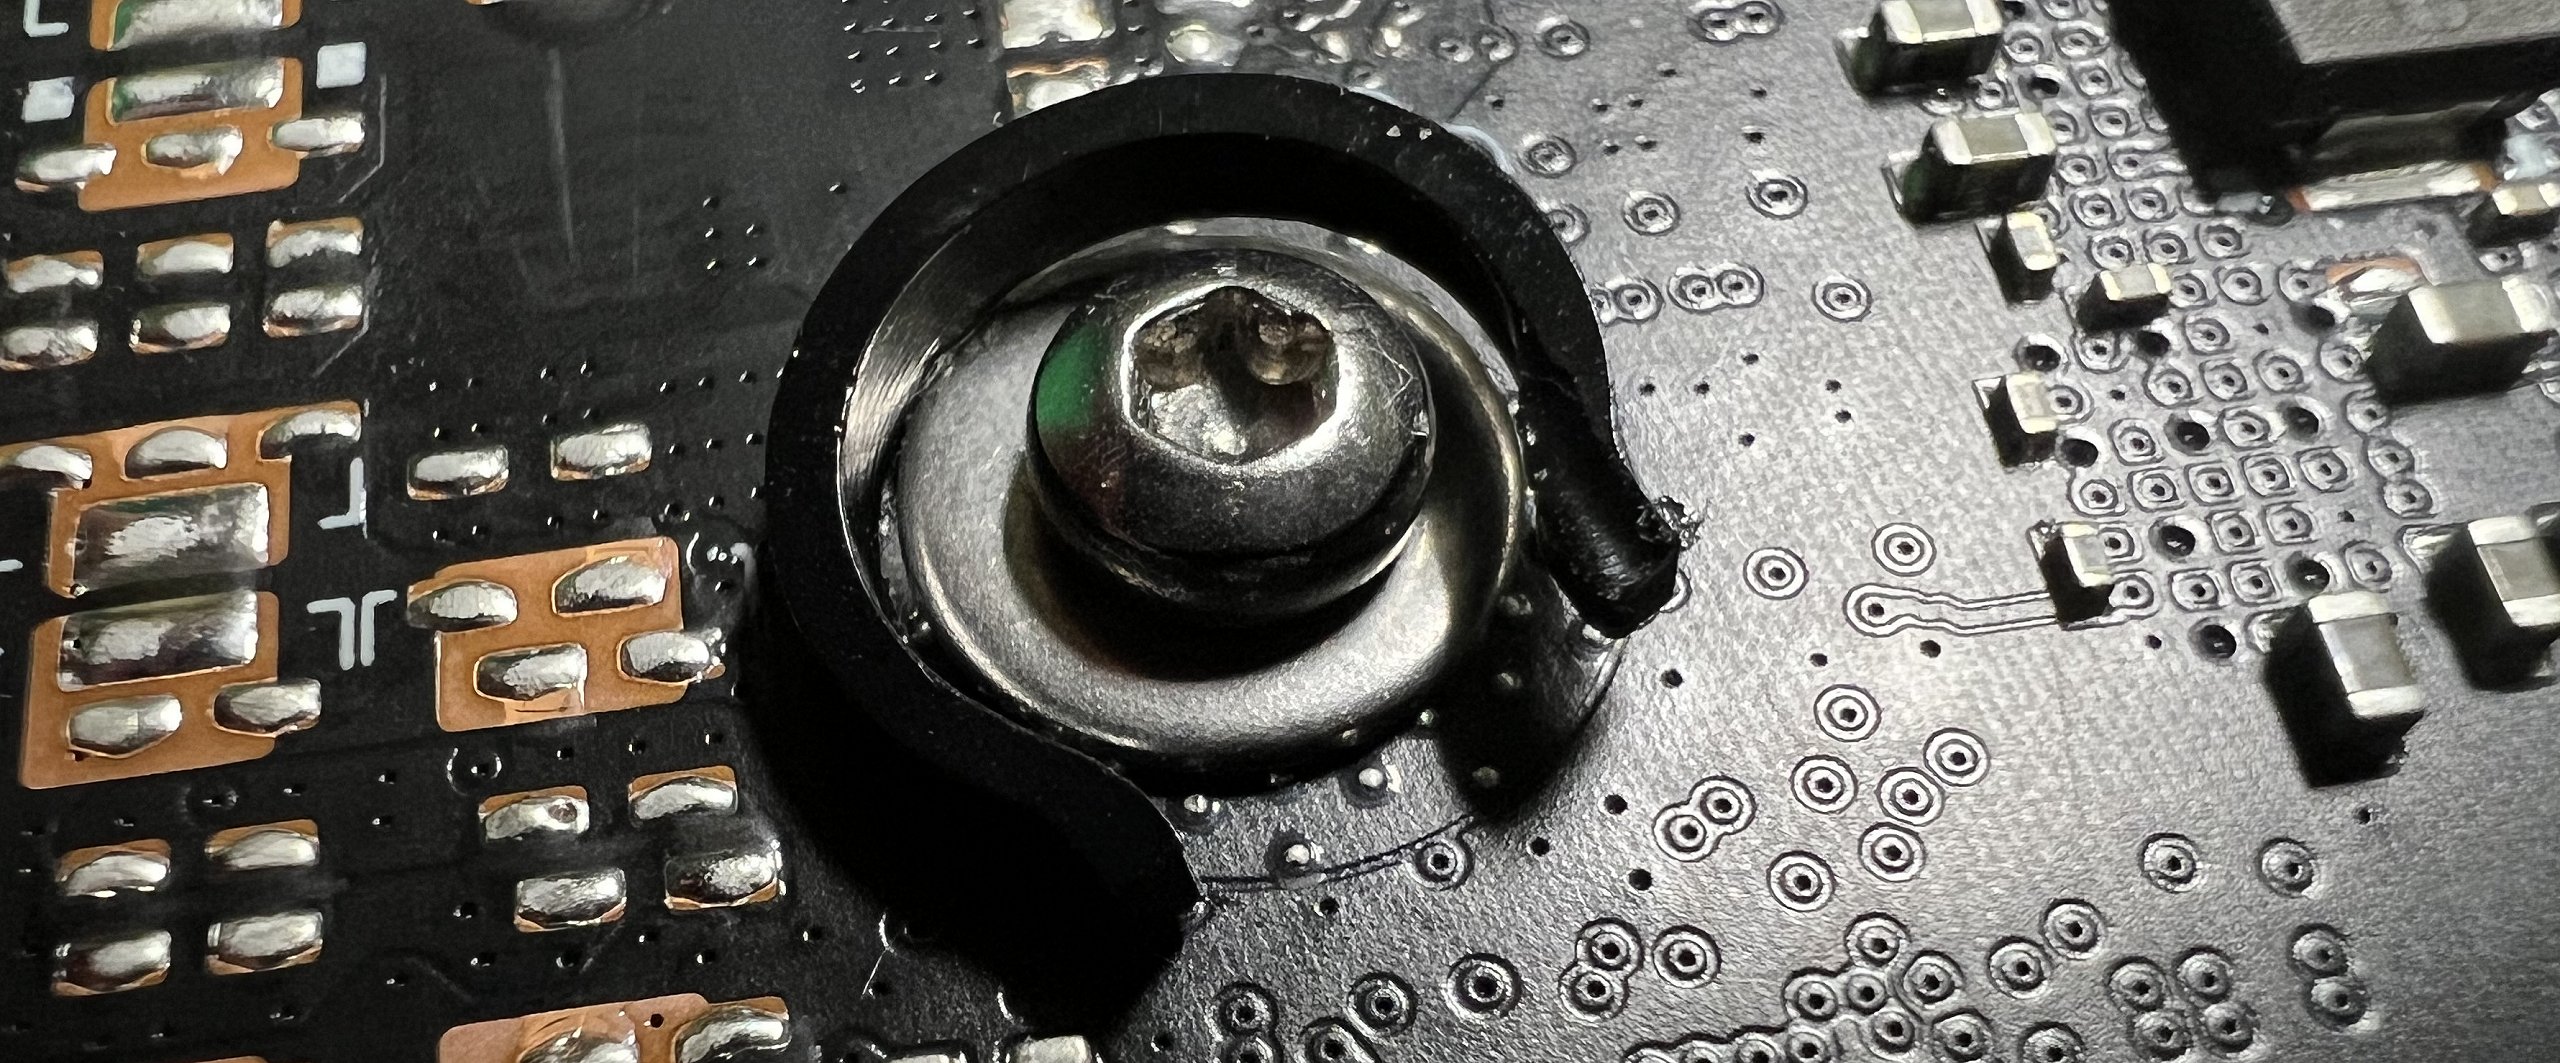
So if you want to rebuild your card later and sell it if necessary, you should pay attention at this point. You have to know that the Founders Edition deliberately doesn’t use any seals, so that you don’t create any detectable traces that could affect the manufacturer’s support with a clever modification. But mechanical damage is really noticeable. So you have to calculate exactly what you’re getting into here and pay close attention during the conversion.
You can alternatively use Pertinax washers. This is a (usually) brown fiber composite made of paper and a phenol-formaldehyde resin (phenoplast) – it works just as well, but without any potential damage. For proper gluing of torn guides, a suitable superglue can be used (but no all-purpose or plastic glue!). Wet, allow to dry and only then stick. Original or non-metallic replacement – however, the temperatures do not change.
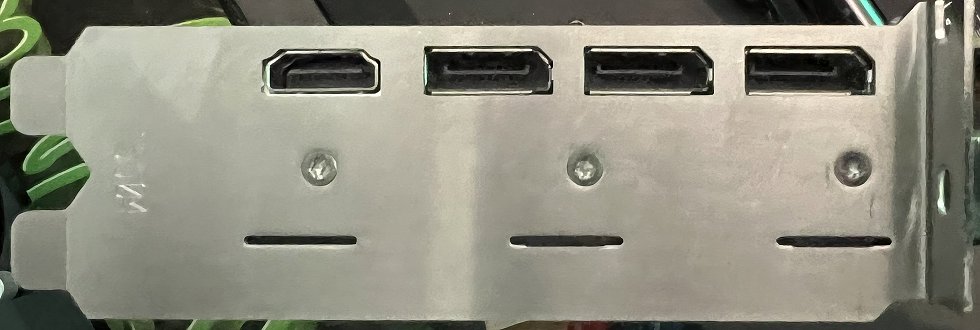
Bolt and be happy. That’s all you really need to do. Unless you want to use the opposite sides at the terminal, like I do. Then you need a hexagon socket, which is not included as an accessory, to move the plugs.
It took me less than 15 minutes for the complete assembly (excluding the slot bracket) and even a layman can do it if he has read the manual with relish.


67 Antworten
Kommentar
Lade neue Kommentare
Veteran
Mitglied
Neuling
Neuling
Urgestein
Urgestein
1
Urgestein
Urgestein
Urgestein
Urgestein
Veteran
Urgestein
Urgestein
Urgestein
1
Neuling
Veteran
Urgestein
Alle Kommentare lesen unter igor´sLAB Community →