


Preparatory measures
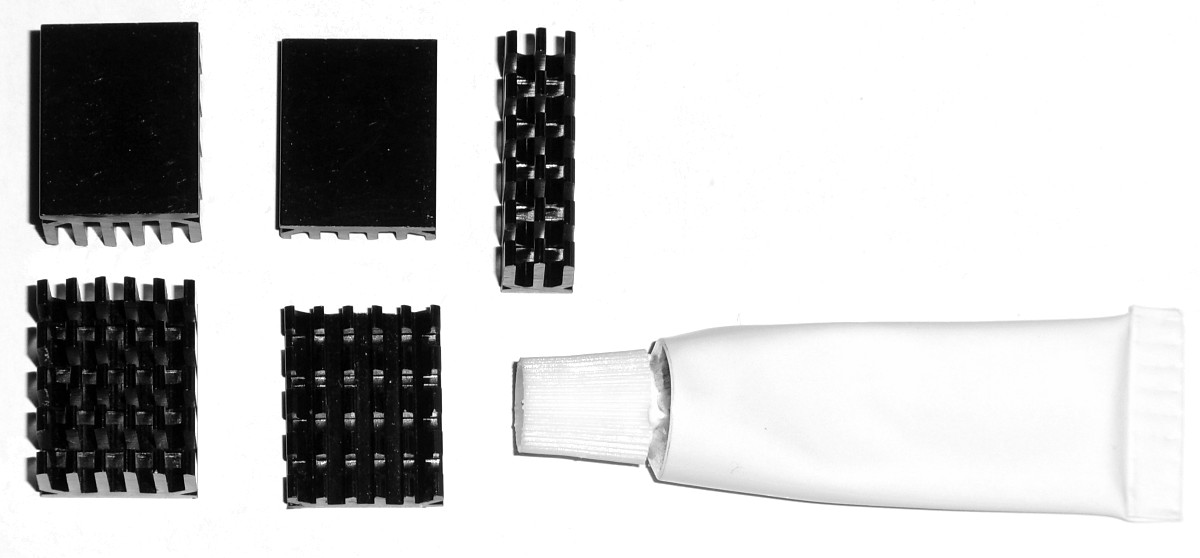
No, it is not really solved foolproof, but on the other hand it is not completely impossible to mount the EKL Peter successfully even in the first attempt. The very straightforward assembly instructions are unfortunately from the distant past, the special features of the HD 7970 have to be guessed at, and there are also some small schematic errors hidden. Nothing, however, to fail grandly at if you follow the advice below. Let’s unpack the parts first:

We quickly forget about the two pre-mounted brackets on the radiator plate, which we can’t use in our case. We replace these with the two brackets with 54mm bore, here the manual still helps us. We screw the 4 shorter set screws into them and tighten them carefully (!) with the enclosed wrench. Unfortunately, the strength of these pins is not optimal, overtightening must be avoided at all costs. More timid minds better rely only on finger strength, because that’s enough too. After that, we put aside the flat and tall heatsinks for the RAMs, the large long VRM heatsink and a small VRM heatsink for later use and first devote ourselves to exposing the PCB.
Expose circuit board and glue on cooler
Loosening the reference cooler is like taking off a pair of wet jeans – in the end, you are glad to finally be rid of the unpleasant part. First, loosen the two screws on the slot bracket and then all the screws on the back of the board that hold the frame of the cooler construction in place. The 6 screws of the plastic cover, on the other hand, do not need to be loosened. Only then do we carefully loosen the 4 remaining screws of the stiffening cross for the lock below the GPU. Since there are springs at work here, you should unscrew the last coils very carefully so that nothing jumps off and disappears into the depths of space.

After that, the old cooling block can be carefully twisted off and removed. Also be careful with the power supply from the old fan, here the plug must still be disconnected. After that, we remove the thermal pad residues from the RAM components with a soft eraser and carefully clean the GPU with kitchen paper.
However, the RAM absolutely has to be cooled, it cannot remain so naked. Therefore, we take the appropriate small heatsinks and select the right height for the RAM devices. The picture below serves as a template, since the manual unfortunately does not give any hints. The two heatsinks on the left and the one below the GPU namely have to be equipped with the flatter heatsinks because of the protruding heatpipes. First, we coat the required RAM coolers sparingly (!) with the thermal glue, so that the black cooler base can only be seen in a very thin hint, but so thick that paste is still visible under the heat sink when pressed on. It’s best to simply test this out with a heat sink. The whole thing then looks like this:

The cooling of the voltage transformers is also important. However, the large heatsink is only glued on, and the manual is unfortunately silent in inappropriate restraint here as well. Since the height of the voltage converter row is not quite the same and the heat sink is also relatively heavy, a bit more thermal adhesive should be used than for the RAM. The included adhesive pads are absolutely superfluous here and do not hold, the holes are unfortunately only suitable for other cards, so you have to glue.

Once you have completed this procedure, the cooler should be well centered as shown in the picture:

It is also important to provide another voltage converter with a cooler, which was simply omitted in the manual:

Here, too, you have to intervene in a cooling way. Otherwise we’ll have roast pork. After that, we use the included thermal paste, press a blob of about 2 mm in diameter onto the GPU and put the pre-assembled heatsink with the right brackets on. On the back side, we screw (here the manual starts again) the holder cross diagonally and alternately with the nuts up to the respective stop (this is not written in such detail in the manual, but makes perfect sense).
Intermediate note: The thermal glue only really holds after the first BurnIn, until then you must not move the RAM cooler and the heavy VRM cooler and handle the card carefully so that nothing falls off!


31 Antworten
Kommentar
Lade neue Kommentare
Urgestein
Urgestein
Urgestein
Urgestein
Urgestein
Urgestein
1
Urgestein
Urgestein
Veteran
1
Mitglied
Urgestein
Urgestein
Veteran
Urgestein
Mitglied
Urgestein
Mitglied
Alle Kommentare lesen unter igor´sLAB Community →