Teardown: The cooler
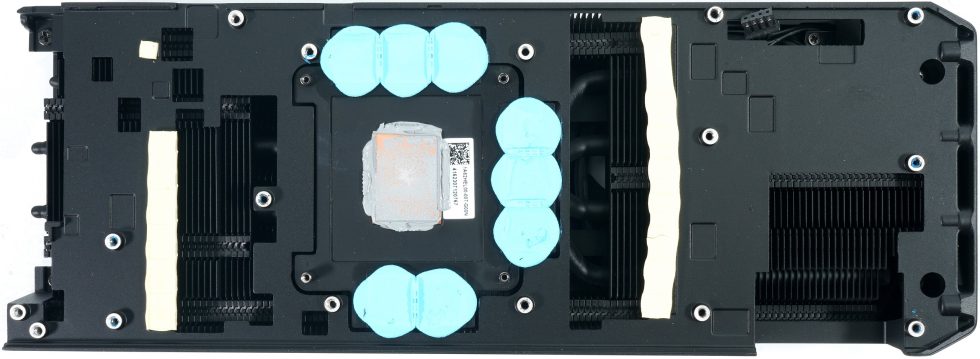
Since the effort for a total of four cards would have been too much, I analyze the MBA cooler all the more closely. In contrast to the RX 7900XT(X), we no longer use a massive vapor chamber, but a massive copper heatsink. This pays off, because the filling is omitted and mechanically you can hardly do anything wrong. However, this is also completely sufficient, as we will see later with the temperatures. The memory is directly connected to the heatsink, which in turn lies on a cast aluminum body that acts as a housing and carries the fans.
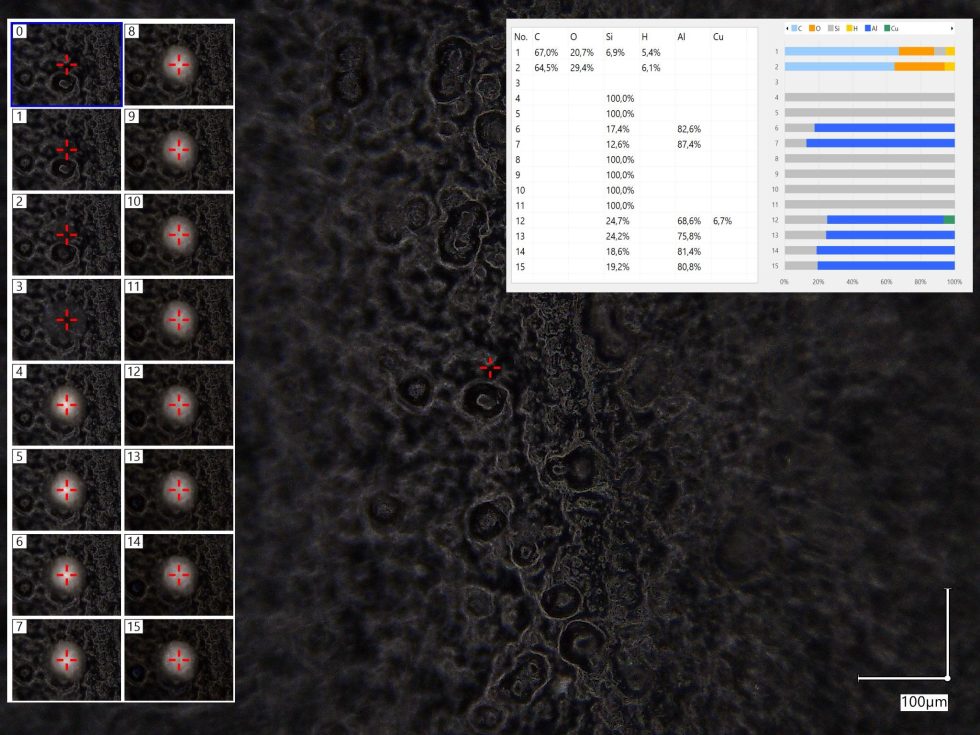
The cast aluminum body with the inner shell carries a really homogeneous and relatively thick black layer, below which is a transition layer and then comes the actual material.
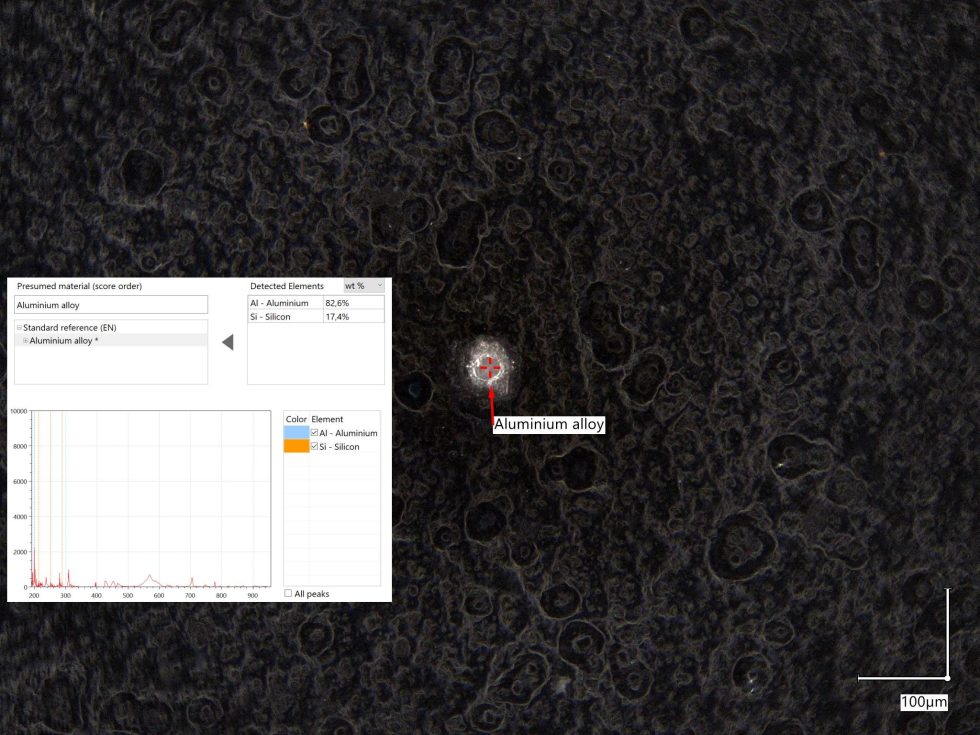
This is a special aluminum-silicon alloy with a fairly high silicon content. On the one hand, this ensures a stress-free and cleaner casting, and on the other hand, it provides more impact strength and toughness, since pure aluminum is rather soft and brittle.
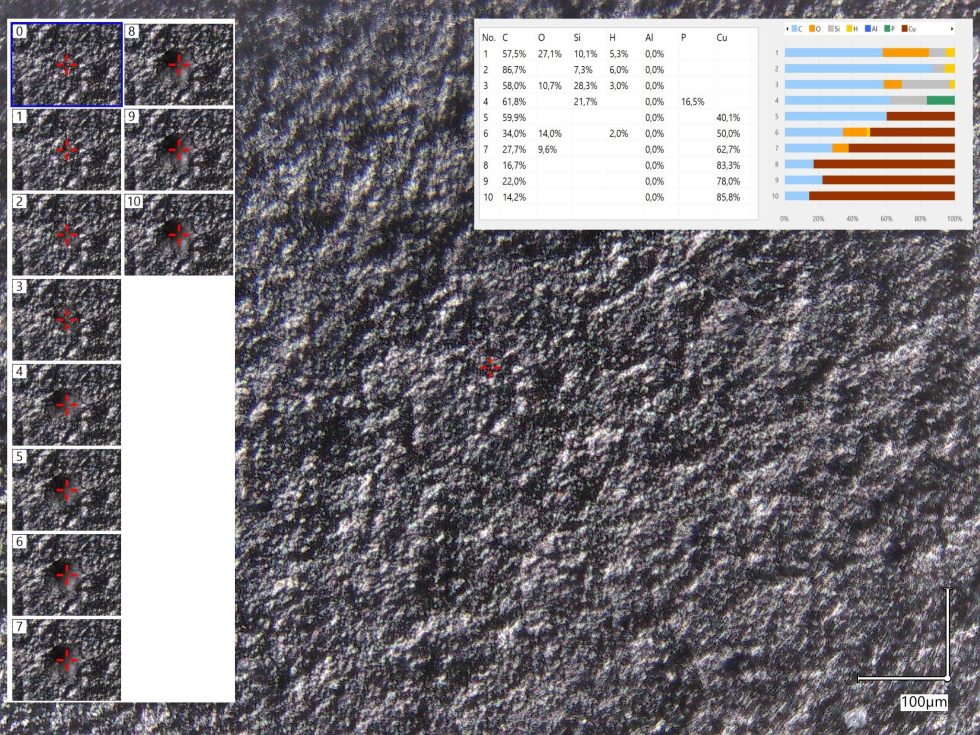
And now we come to the heatsink and the memory overlay. The actual material is hidden under the same black layer (coating) and at the latest after the 10th laser shot on the same spot, relatively pure copper shows up. We are dealing with a very large copper heatsink, on the back of which a total of four mostly continuous and blackened 8 mm heatpipes have been soldered, which in turn use the blackened and pressed-on aluminum fins for heat dissipation.
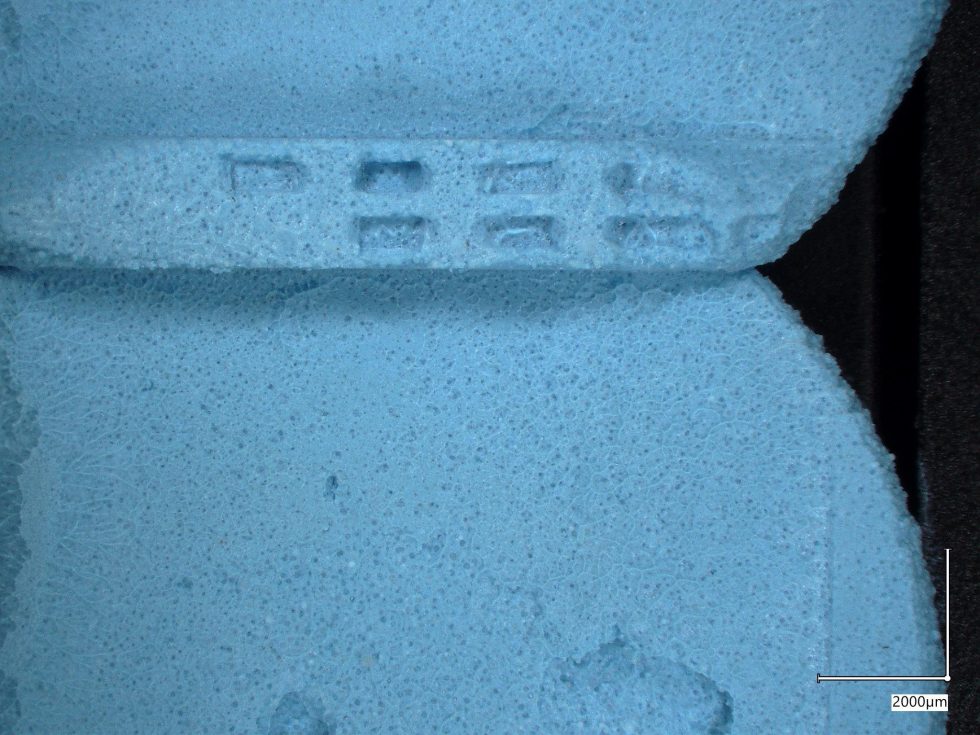
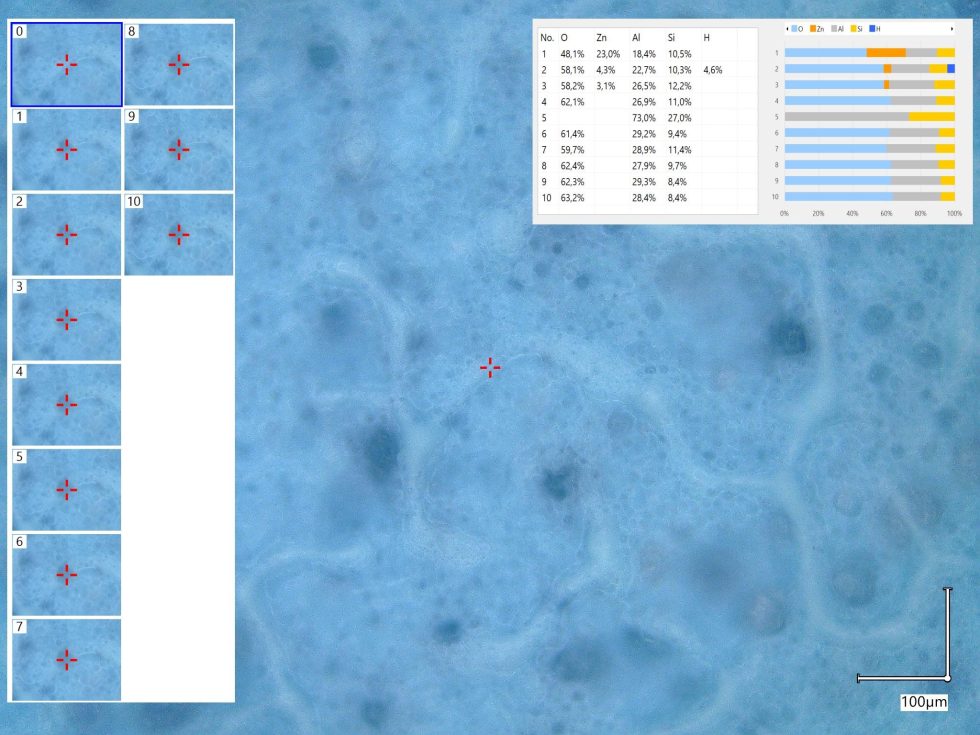
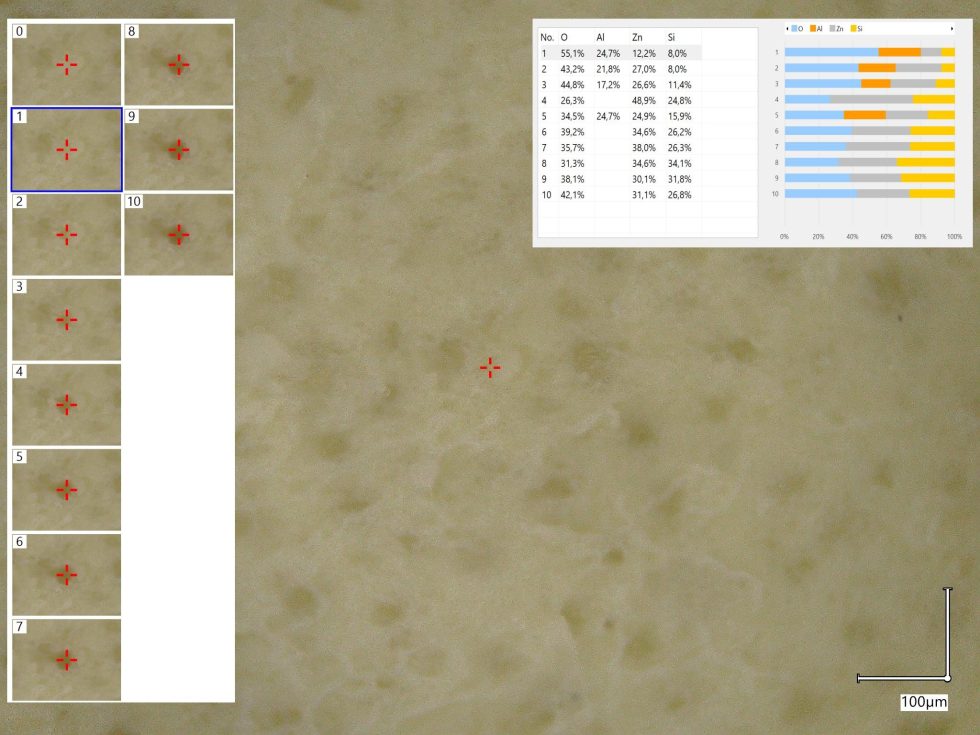
The softer but very good Thermal Putty Pad for the memory from Honeywell is top drawer, again I took a look at what primary everything is in it.
The depth analysis is quite interesting. One finds only small amounts of zinc oxide, but under the surface almost 30% relatively finely ground aluminum oxide (AL2O3, corundum). The binder is silicone thickened with zinc oxide platelets. Apart from the organic blue dye, there are hardly any visual conspicuities. Great cinema and adapted by NVIDIA. Their “crumb” pads from Ziitek could be seen as a forerunner, especially since they switched to Thermal Putty later and long before AMD.
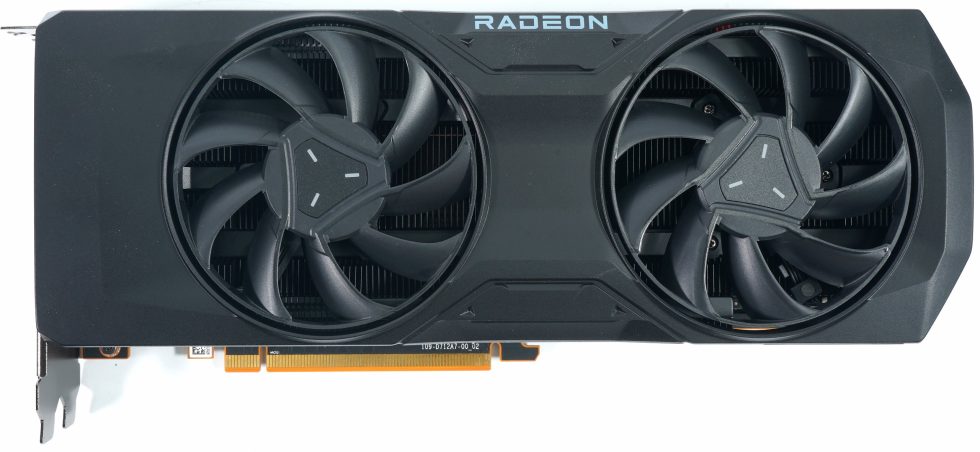
The two 8.5 cm fans each have nine very steeply pitched, very large rotor blades with a circumferential inner ring and are still relatively bearable up to about 1500 rpm, up to about 1000 rpm even extremely quiet. The card occupies 2.5 slots and most of the weight is at the expense of the actual cooling construction.
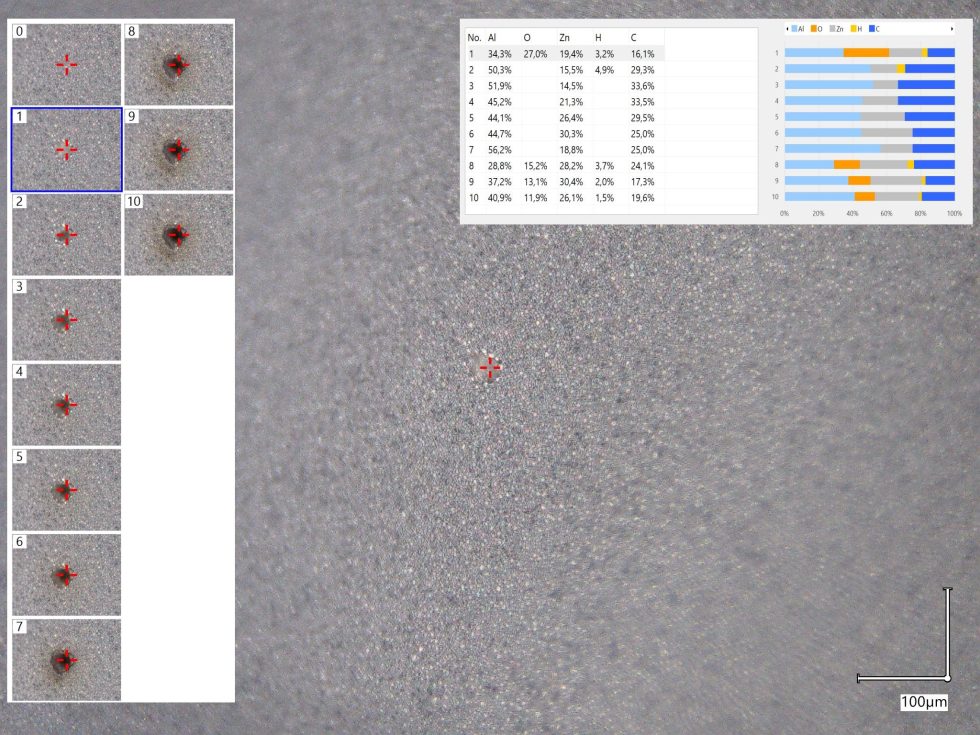
The very soft, foamed pad of the voltage converters is richly oily and from the rather cheap category. I was a bit disappointed here, because this would of course also work with Thermal Putty. If you use expensive copper excessively, like with the heatsink, you shouldn’t suddenly save senselessly here.
And what else is there besides a lot of air? The superficial aluminum traces have not been confirmed in depth, here the main component should be cheap zinc oxide, bound with lots of silicone.
The heatsink of the vapor chamber and the phase change pad
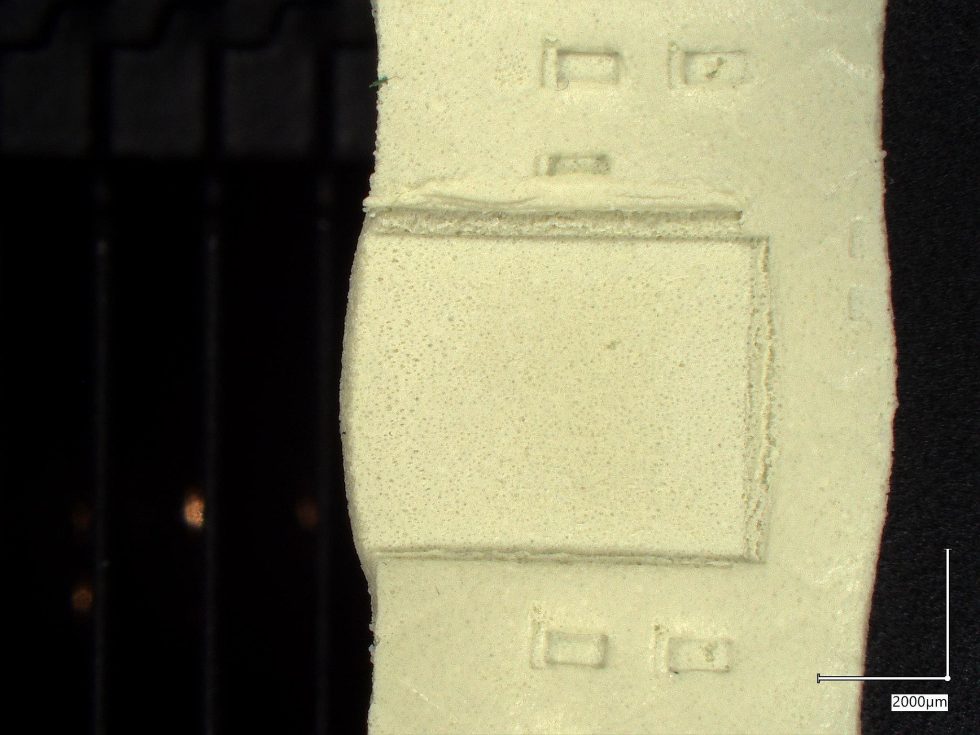
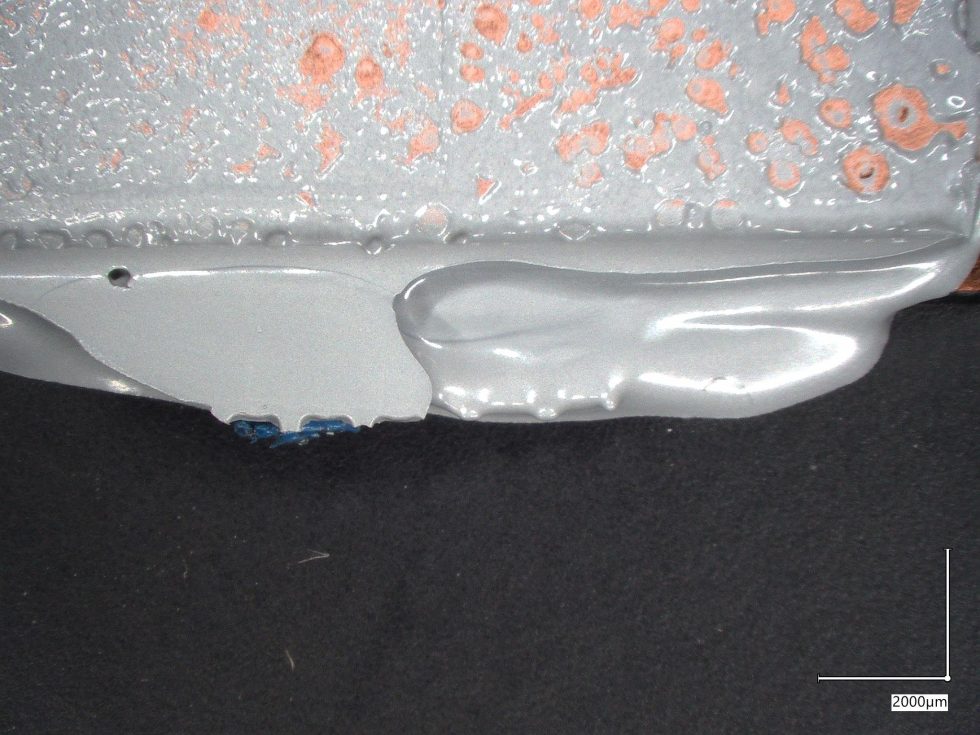
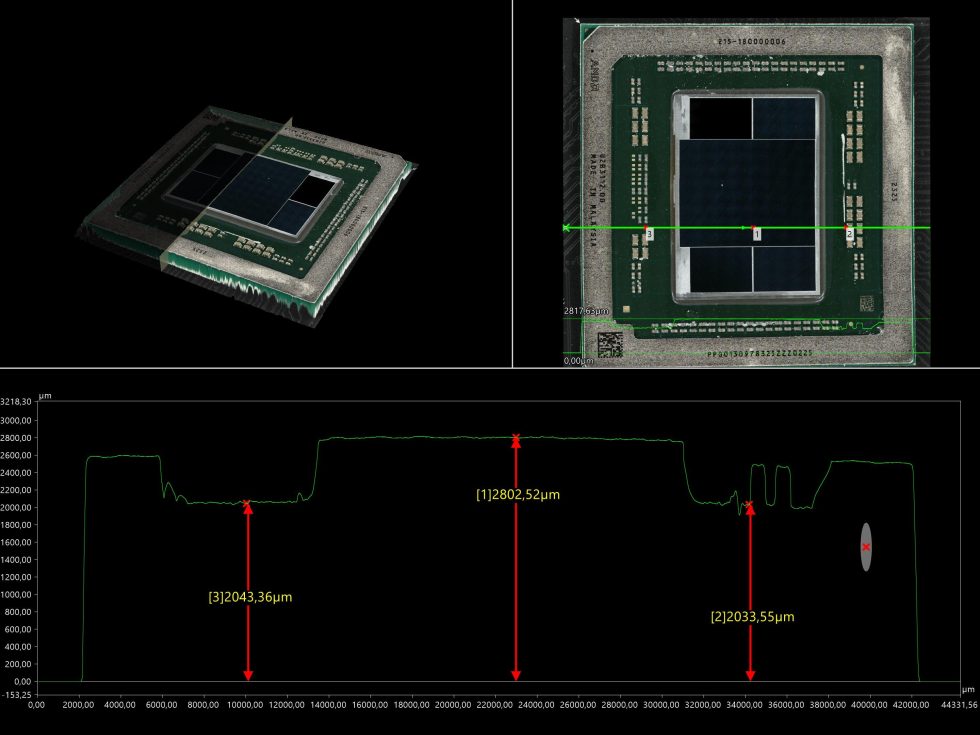
The biggest issue is the flatness of the heatsink. While the RX 7900XTX still had a rather curved heatsink, the RX 7800XT has a rather extremely flat heatsink, which eliminates the large production tolerances of the Vapor-Chamber. You can see it well in the larger amount of phase change material in the center that was squeezed out of there because those amounts aren’t needed. In the picture, the bubbles and the shape of the run from the burn-in show the hardening of the once soft material. With a good paste, one could even have achieved an advantage here.
The package with the chip, on the other hand, is almost flawless and much smoother than that of NVIDIA’s big Ada card. That has to be praised, so chapeau!
If you don’t have such materials (I have very similar and extremely thin pads from Boyd here), you should definitely use a quite viscous thermal paste after a conversion to water cooling or a reassembly after a teardown, and by no means a liquid one! Cleaning is similarly problematic as with the RX-Vega, because the gaps between the graphics die and the four chiplets are quite narrow and the interposer underneath is very sensitive to pressure and tensions. Then, with a bit of bad luck, it cracks faster than you can say pug.
The pad itself is made of a special, originally soft phase change material that becomes liquid shortly above 52 °C when first heated, and then completely hardens after spreading and height compensation finally. What is left is pressed out at the edges (see picture above). Only a proper, long-term stable paste would probably have been more purposeful.
I recommend dry cleaning by turning cotton swabs and applying as little pressure as possible. Only at the end you can do the fine cleaning with a soft cloth and isopropanol. No matter what you reapply later, no residue should remain in the relevant areas.
- 1 - Introduction and overview of Navi32
- 2 - The cards from AMD, Sapphire and XFX at a glance
- 3 - Test system and the igor'sLAB MIFCOM-PC
- 4 - Teardown: PCB and components
- 5 - Teardown: Cooler and surprising material analysis
- 6 - Gaming-Performance in Full-HD (1920 x 1080)
- 7 - Detailed Metrics for Full-HD (1920 x 1080)
- 8 - Gaming-Performance in WQHD (2560 x 1440)
- 9 - Detailed Metrics for WQHD (2560 x 1440)
- 10 - Details: Power consumption and load balancing
- 11 - Load peaks, capping and PSU recommendation
- 12 - Temperatures, clock rates and infrared analysis
- 13 - Fan curves and operating noise
- 14 - Summary and conclusion






167 Antworten
Kommentar
Lade neue Kommentare
Urgestein
1
Urgestein
Urgestein
Urgestein
Mitglied
Urgestein
1
Mitglied
Veteran
Urgestein
Veteran
Veteran
Mitglied
Urgestein
Veteran
Veteran
Urgestein
Alle Kommentare lesen unter igor´sLAB Community →