


In order to test the performance of the heatsinks, the RAM kit is also allowed to sweat in Testmem5 with profile “Extreme1@Anta777” today. For this purpose, external type K temperature sensors are used together with an Elmorlabs KTH for temperature detection. One of the sensors is placed in the center of the outer (warmer) module at the height of the ICs, between the board and the heatspreader. With another one the ambient temperature is measured, the values are logged 2 times per second each and so the delta is formed. This test was of course performed before the teardown, so the results really describe the modules in their original state. In addition, the heat test was performed on the Asus Maximus Z690 Apex, as this board has the smallest spacing between DIMM slots and thus poses the biggest challenge to the heatsinks.
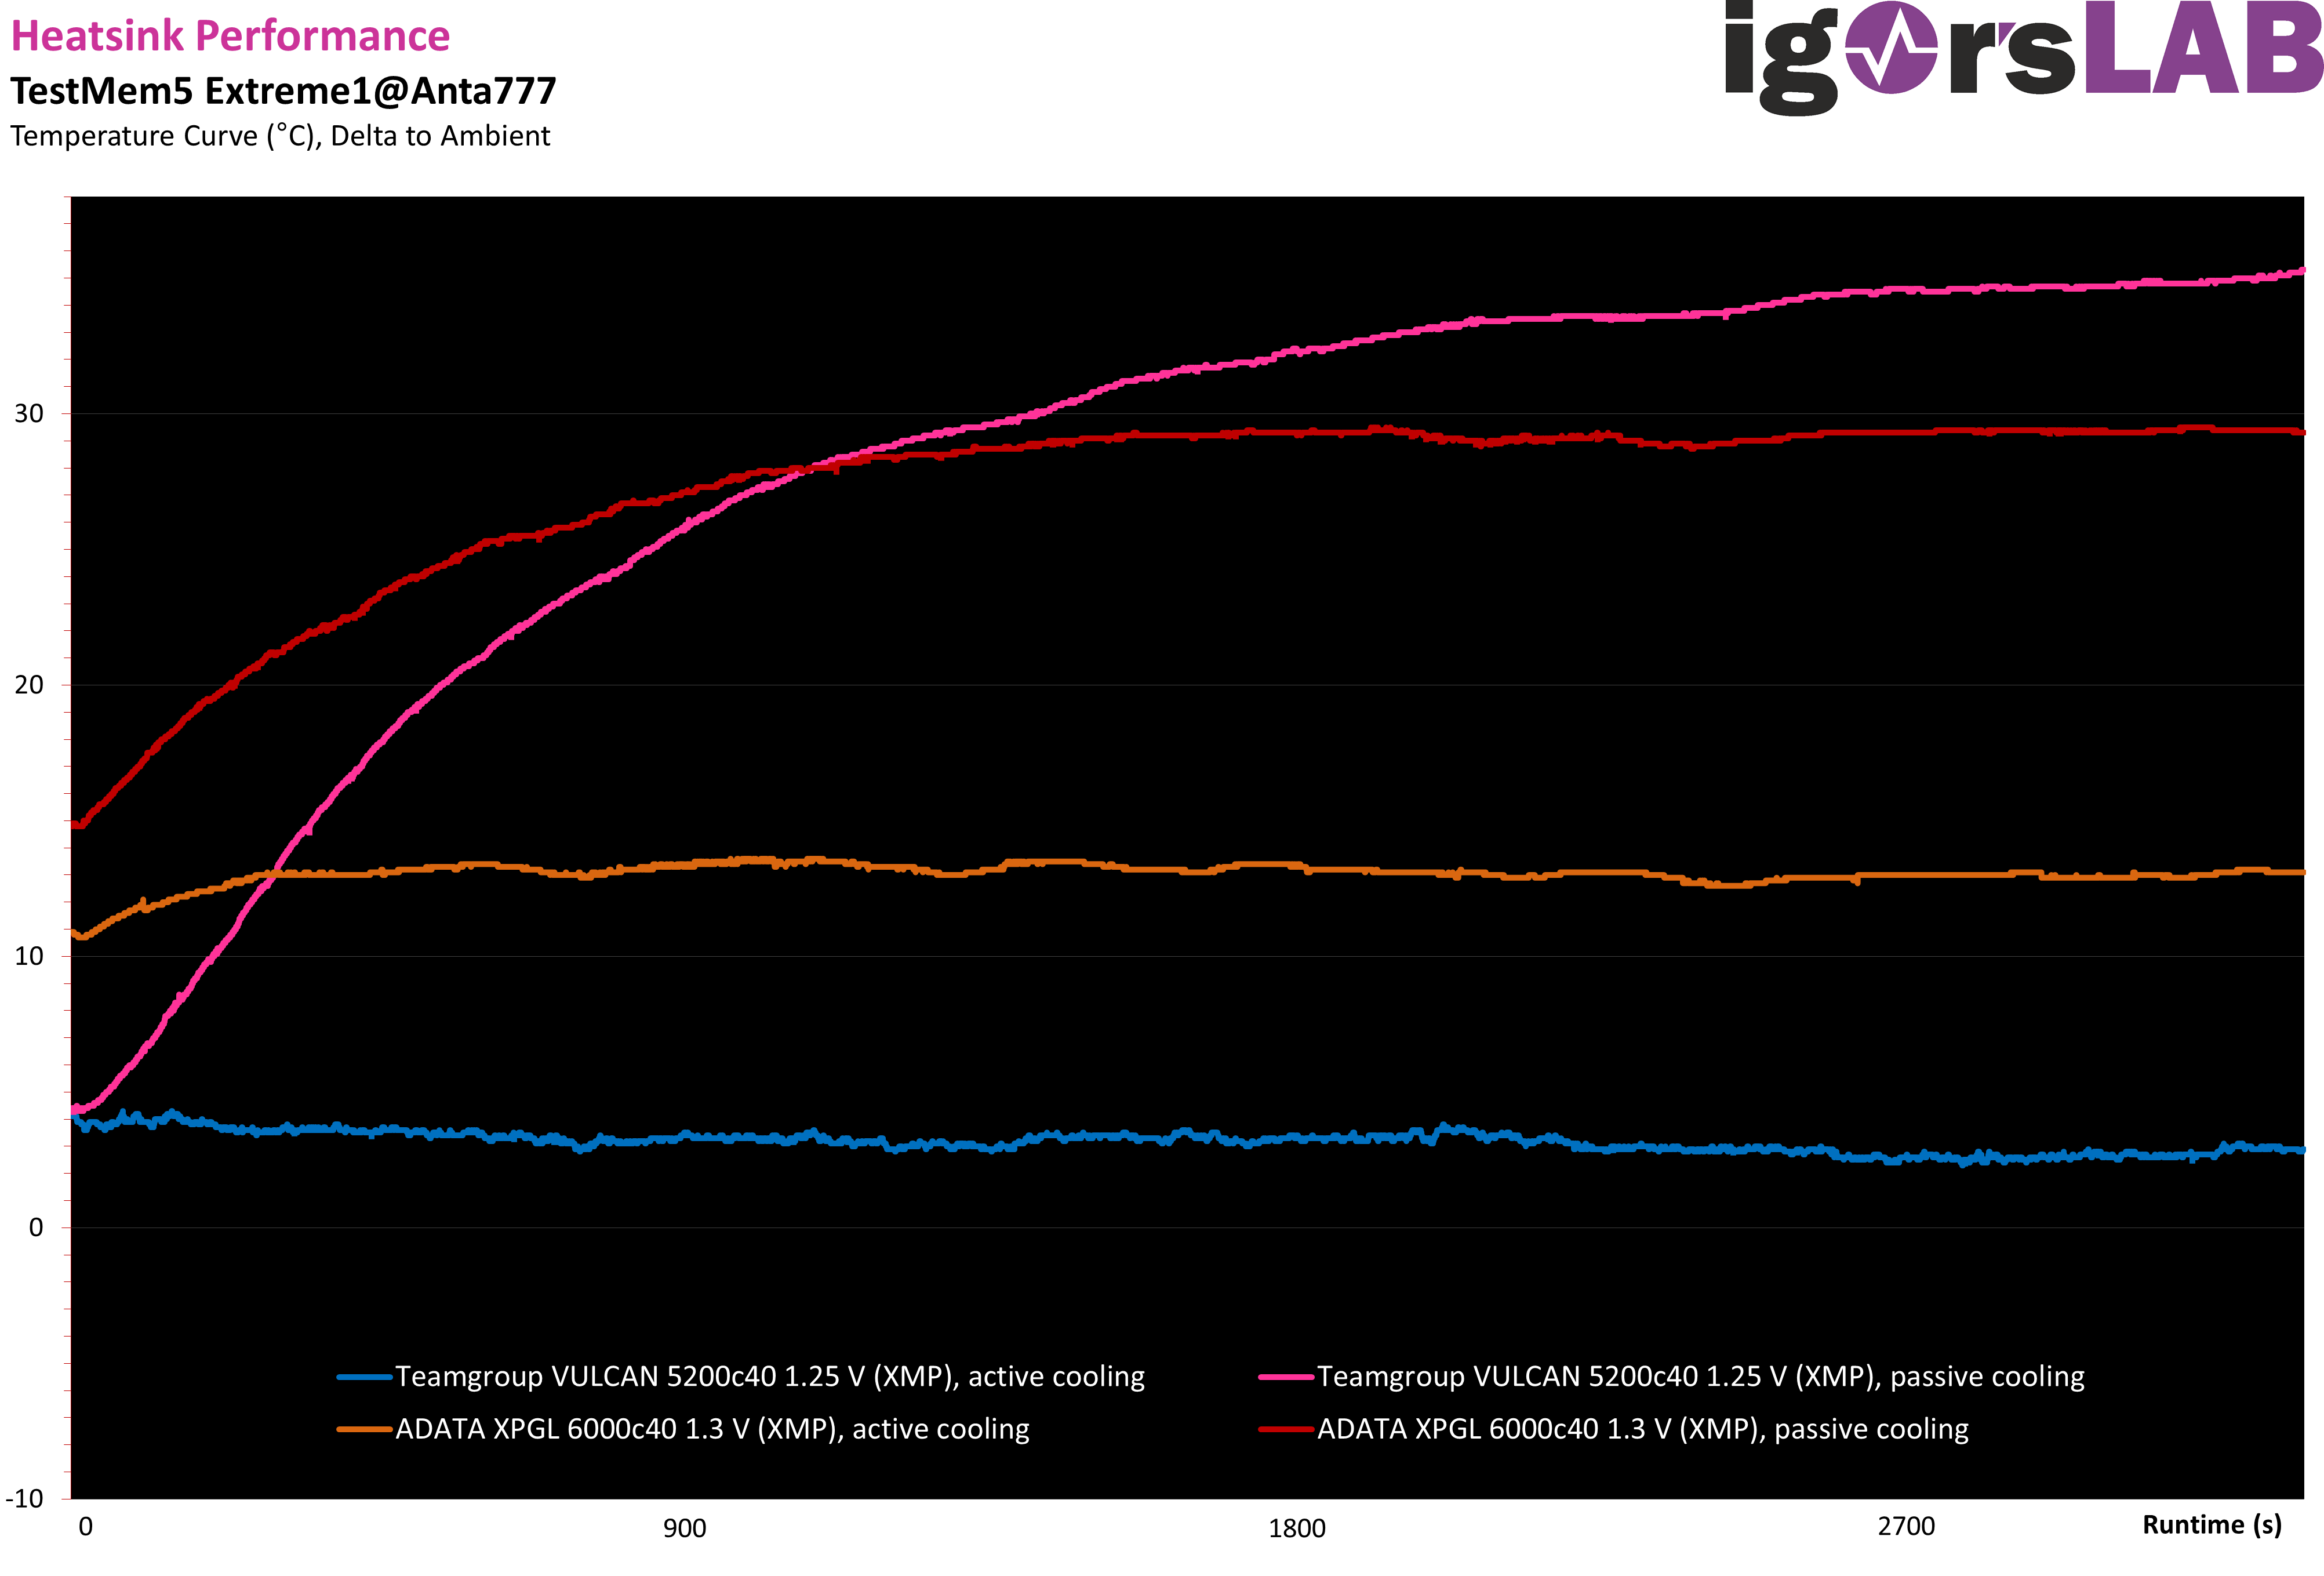
In addition to the Teamgroup VULCAN modules, I also put the ADATA XPG Lancer from the last test into the diagram as a reference. Of course, the kits with their different ICs, heatsinks and price points are only comparable to a limited extent, but this makes it a bit easier to put the numbers into context. It should be mentioned in advance that the VULCAN modules run completely stable in the XMP and reach about 34 °C above room temperature in the worst case. It is now noticeable that the Teamgroup modules live up to their name and get relatively warm without active cooling. Conversely, if you place a 120 mm fan on the modules, they effectively stay constant at about 3 °C above room temperature. The design of the heatsink with its relatively low thermal mass is probably the cause, as we will see in the teardown.
Teardown and PCB analysis
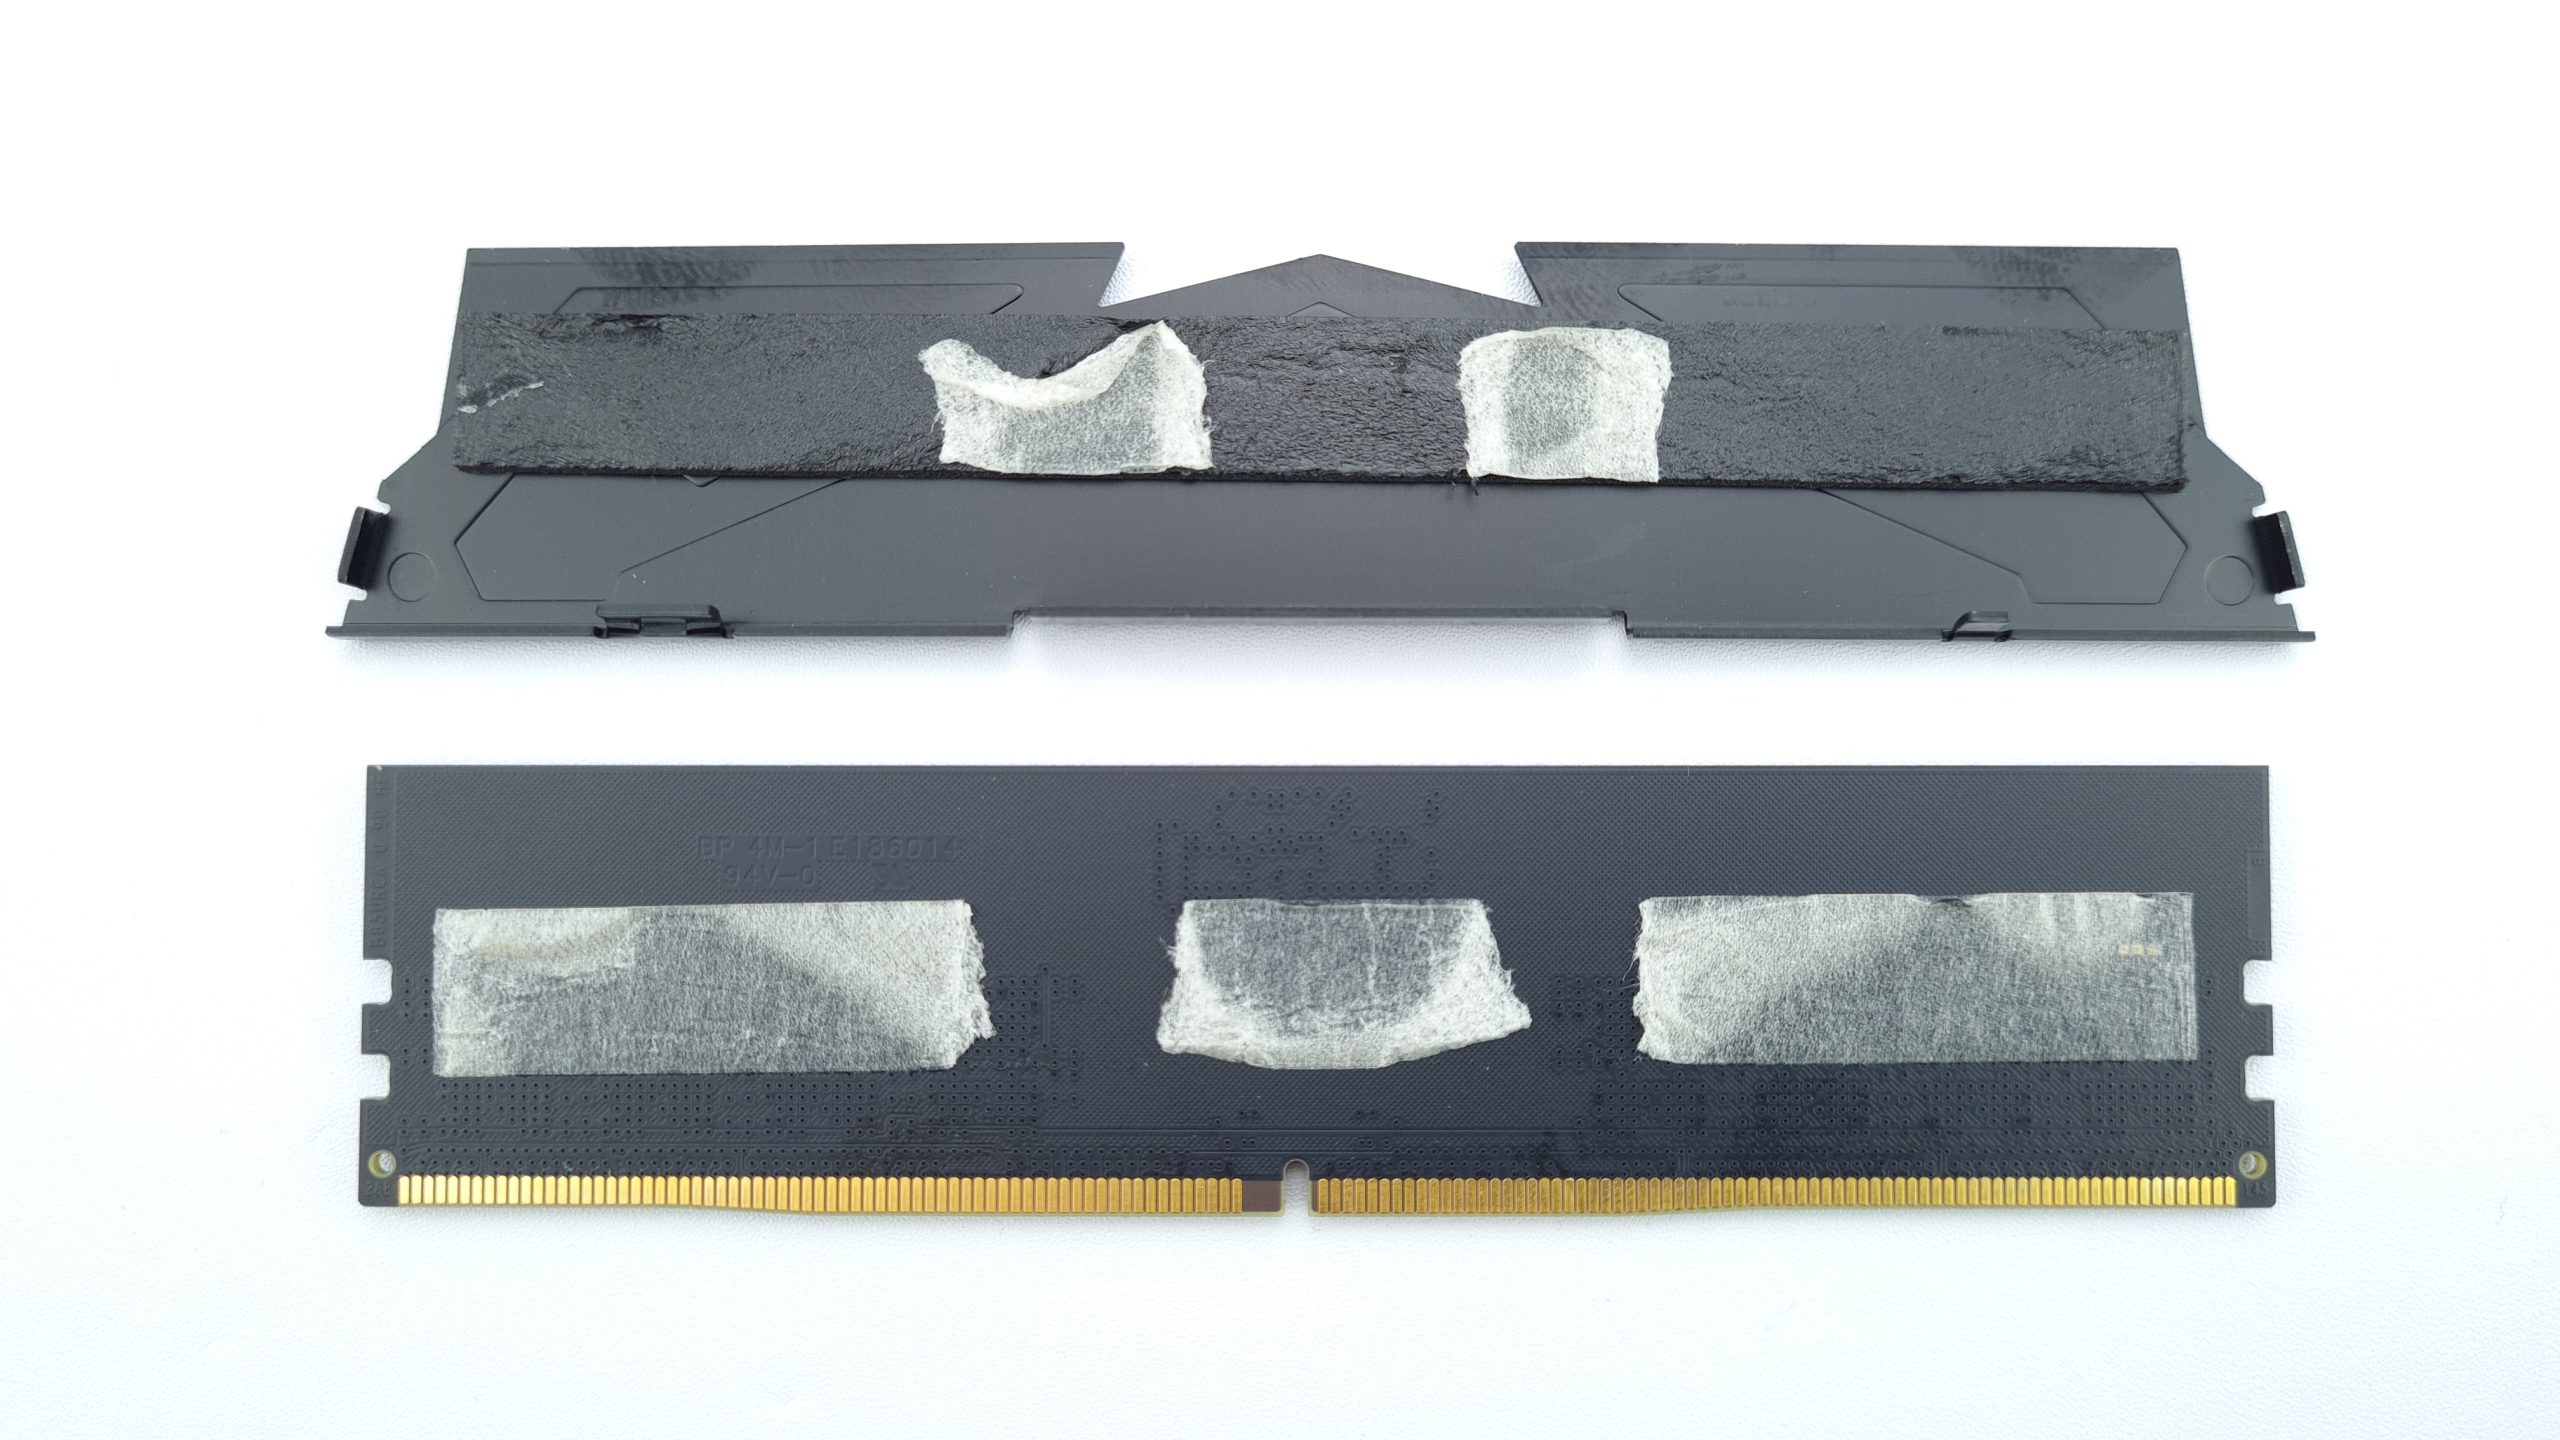
Removing the heatsinks is relatively simple and quickly done. After a short warming up of the modules, the two halves can be carefully levered off, whereby the side without ICs struggles a bit with the long foam spacer.
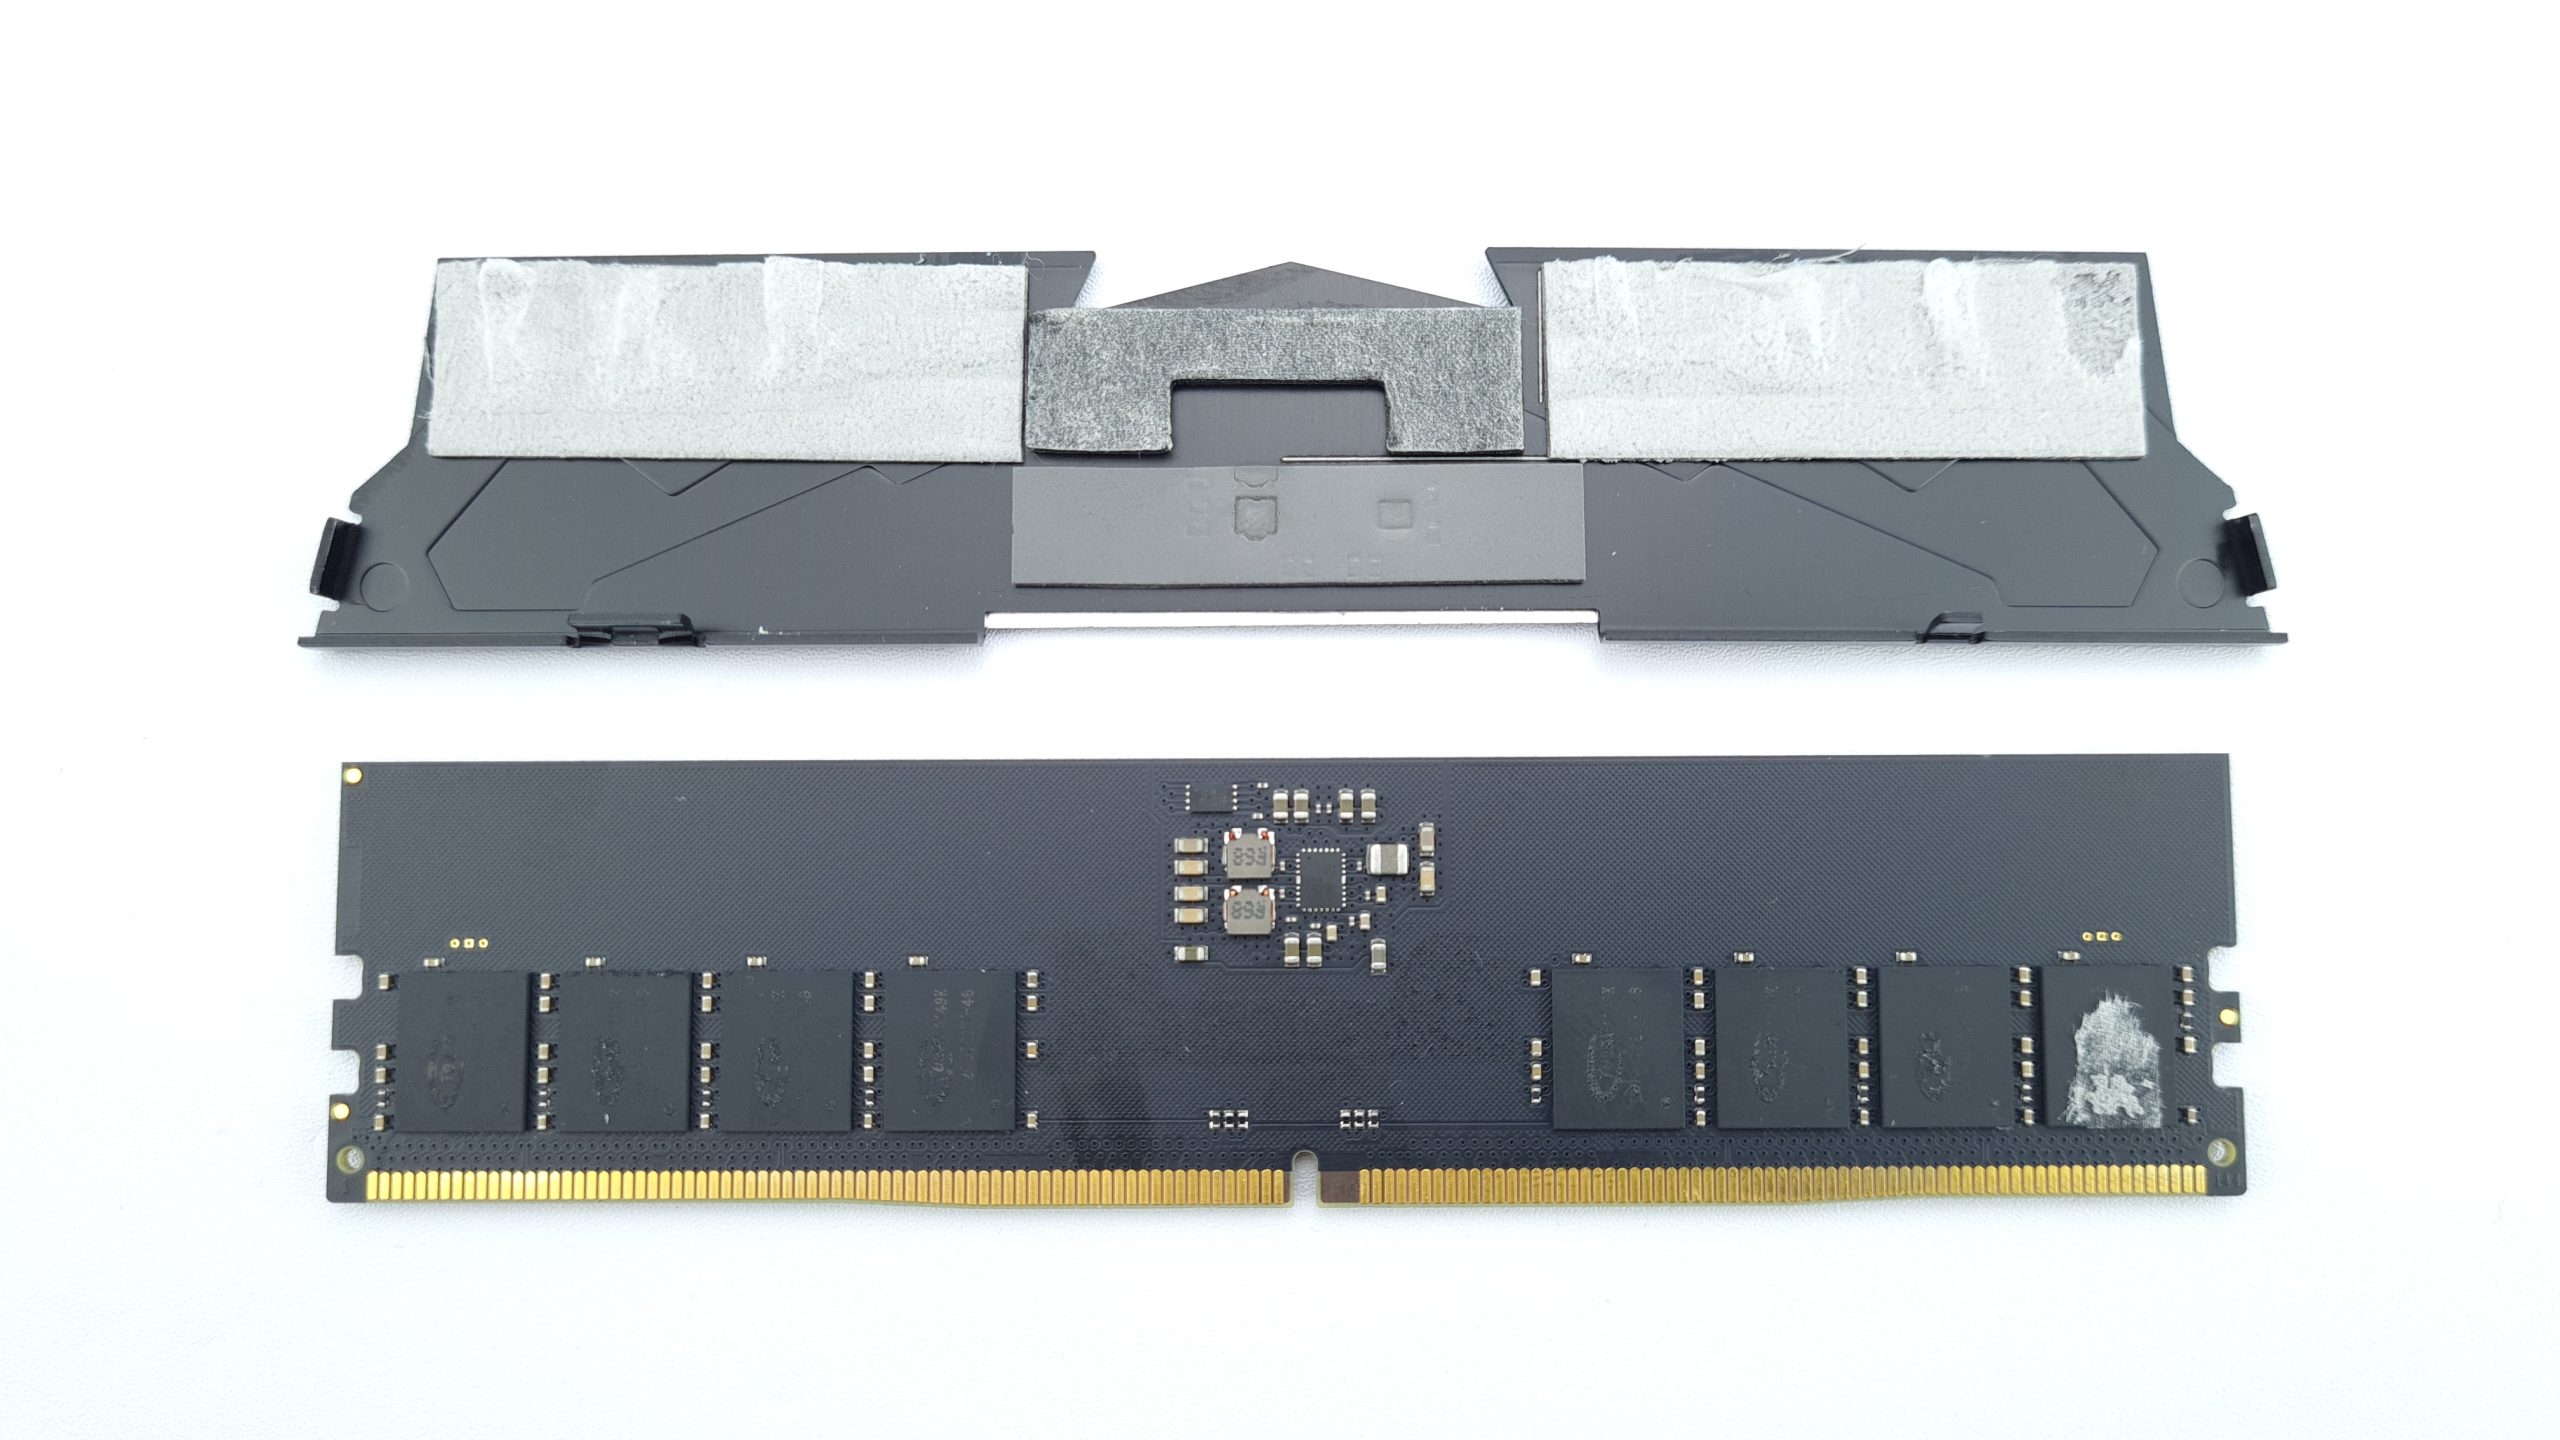
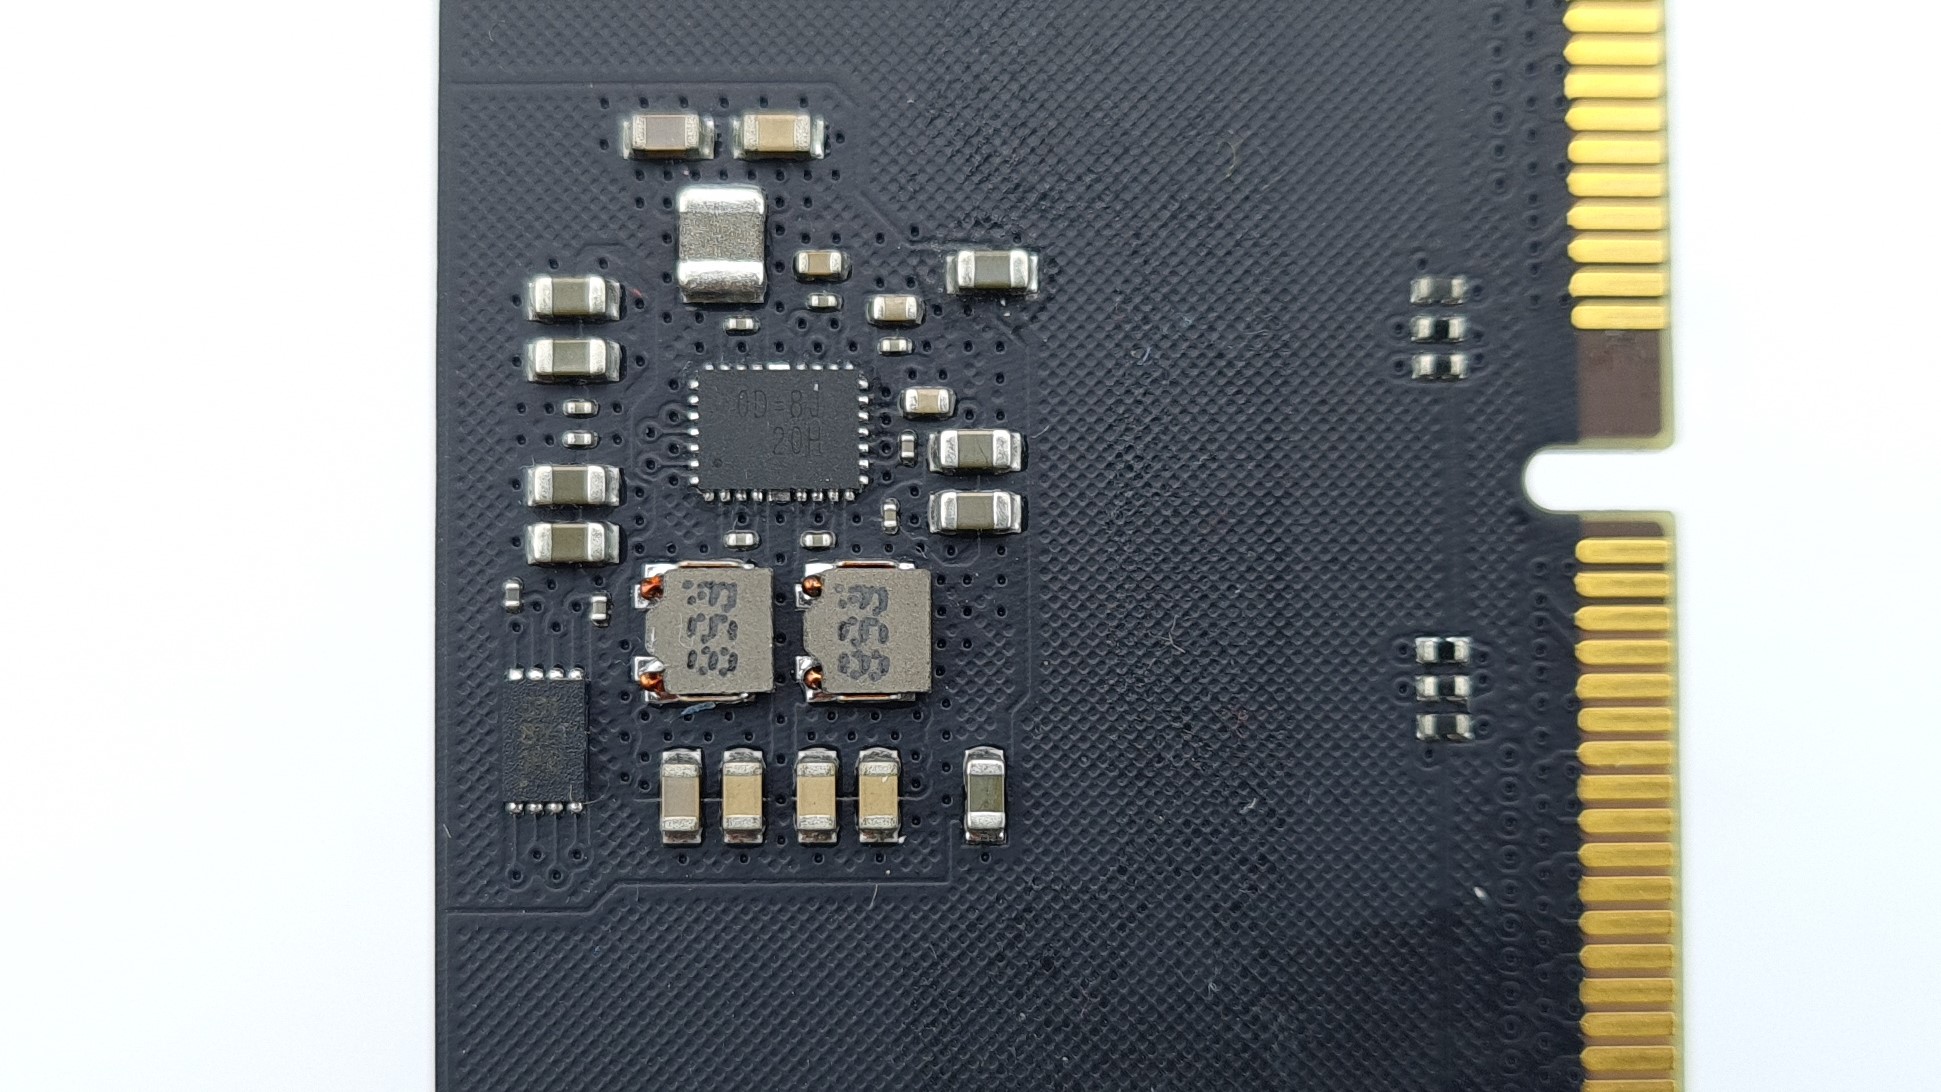
The heatsinks are also relatively simple in design and only consist of a single 0.8 mm thick aluminum sheet. These are correspondingly easy to bend when disassembling – so be careful here. On the side with the ICs, there is another small spacer below the PMIC, probably so that you can’t see through the modules. The PMIC and its surrounding components are connected to the cooler with their own thermal pad, although only the coils and a resistor really make contact. However, this should be completely sufficient for reliable heat dissipation with a short detour via the PCB.
The ICs have their own package branding from Teamgrouop with the inscription 2149K T5D20488NT-48. This is therefore a classic repackaging, where the actual manufacturer of the memory chips, in this case Micron, resells its ICs directly and Teamgroup then takes over the further processing and selection in this case. Thus, Teamgroup also theoretically has better control over the quality and selection of the memory ICs here.
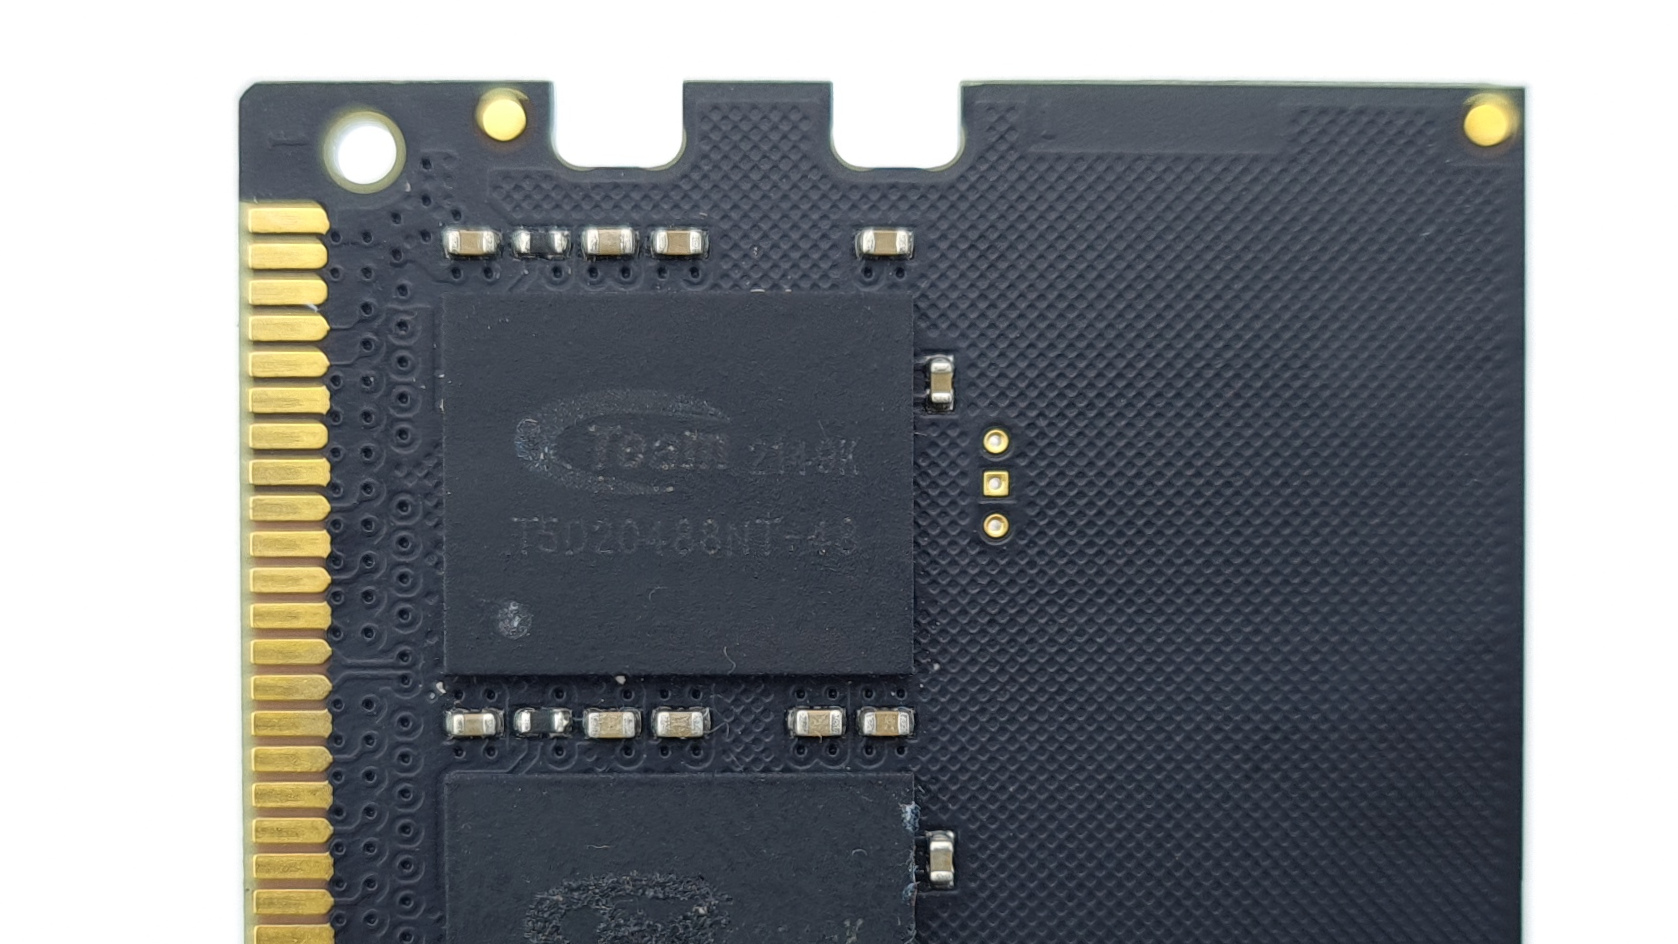
The PMIC has the label “0D-8J 20H” and the SPD EEPROM “511 8Y1 18M”. As we already learned in the SPD, the former is a make from Richtek and the latter from Renesas.
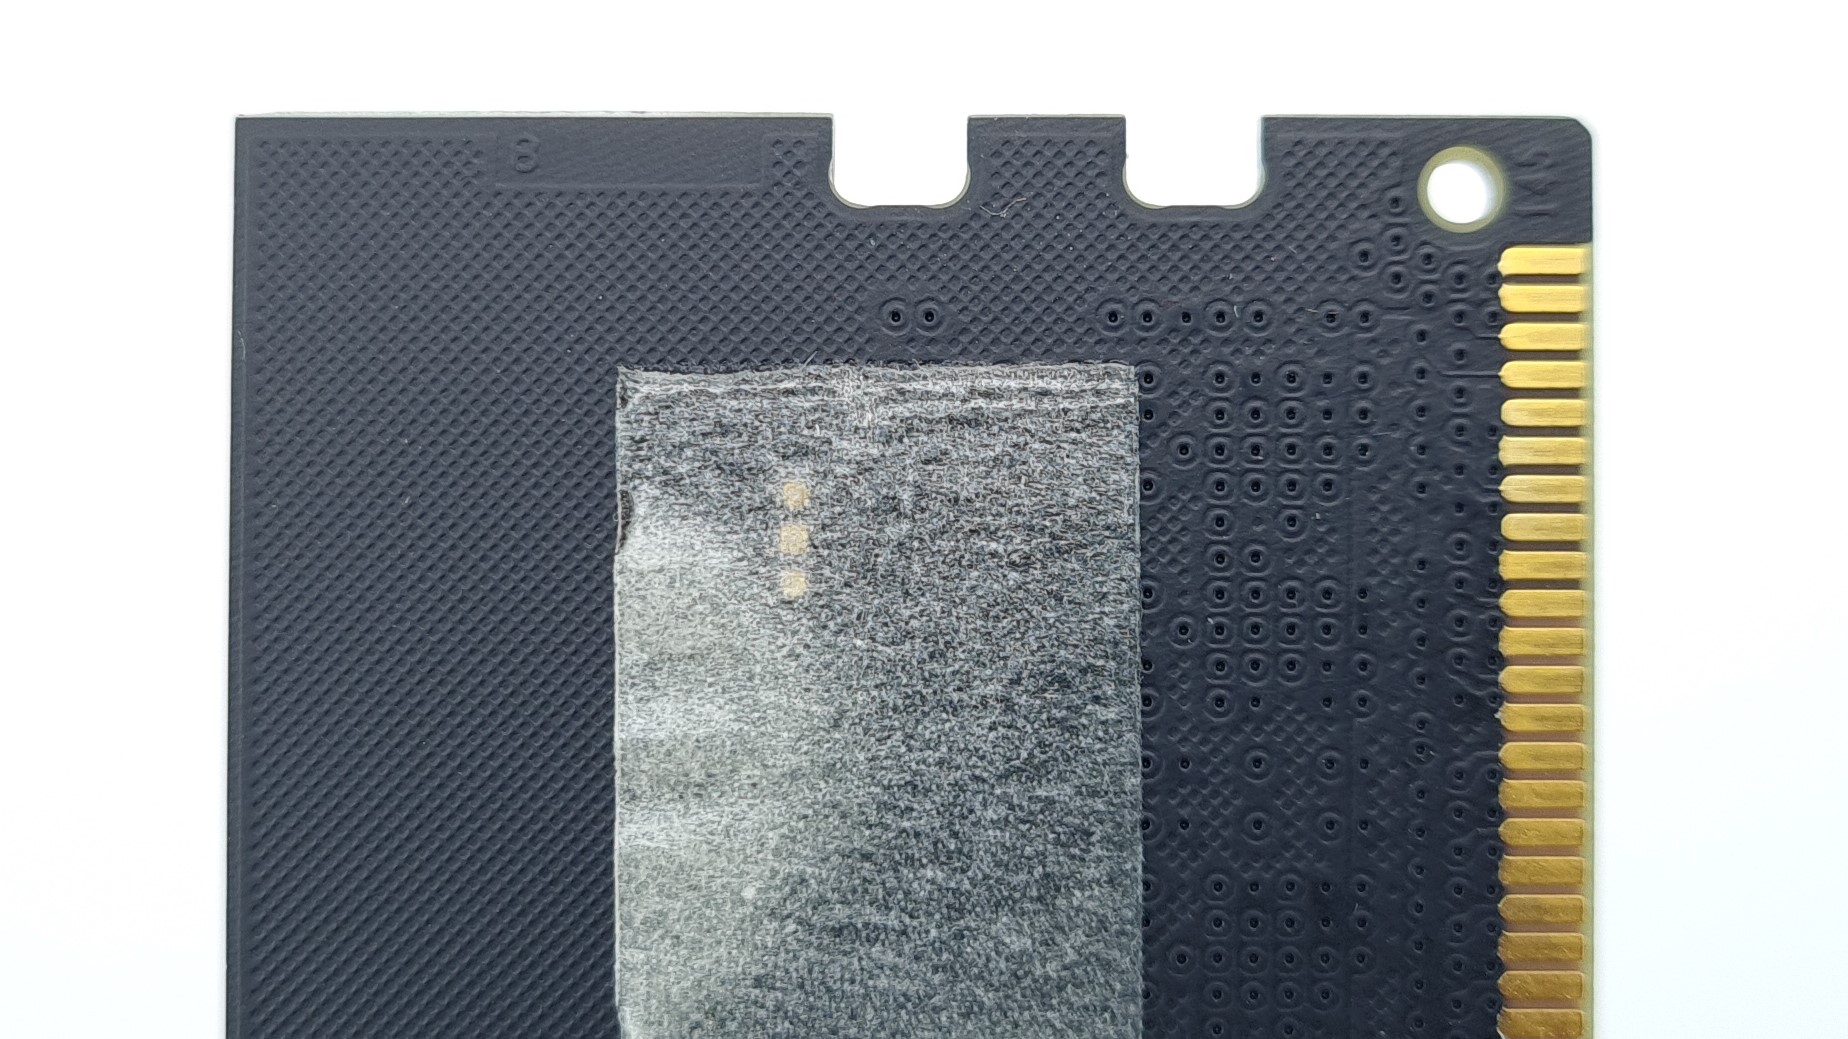
The board has a ground weave for shielding on the top layer and on the edge we also find an indication of the number of layers, here 8. On the back you can find the stamping “BP 4M-1 E186014”, which tells us Brain Power is the manufacturer of the board. In addition, the board has the embossing “B85URCA 0 90 HF” and “94V-0”.


10 Antworten
Kommentar
Lade neue Kommentare
Urgestein
Urgestein
Veteran
Veteran
Veteran
Urgestein
Veteran
Urgestein
Veteran
Neuling
Alle Kommentare lesen unter igor´sLAB Community →