Case Reviews System

Umbrella Corporation meets Cooler Master and mATX: MasterCase TD300 Mesh Review including a case mod

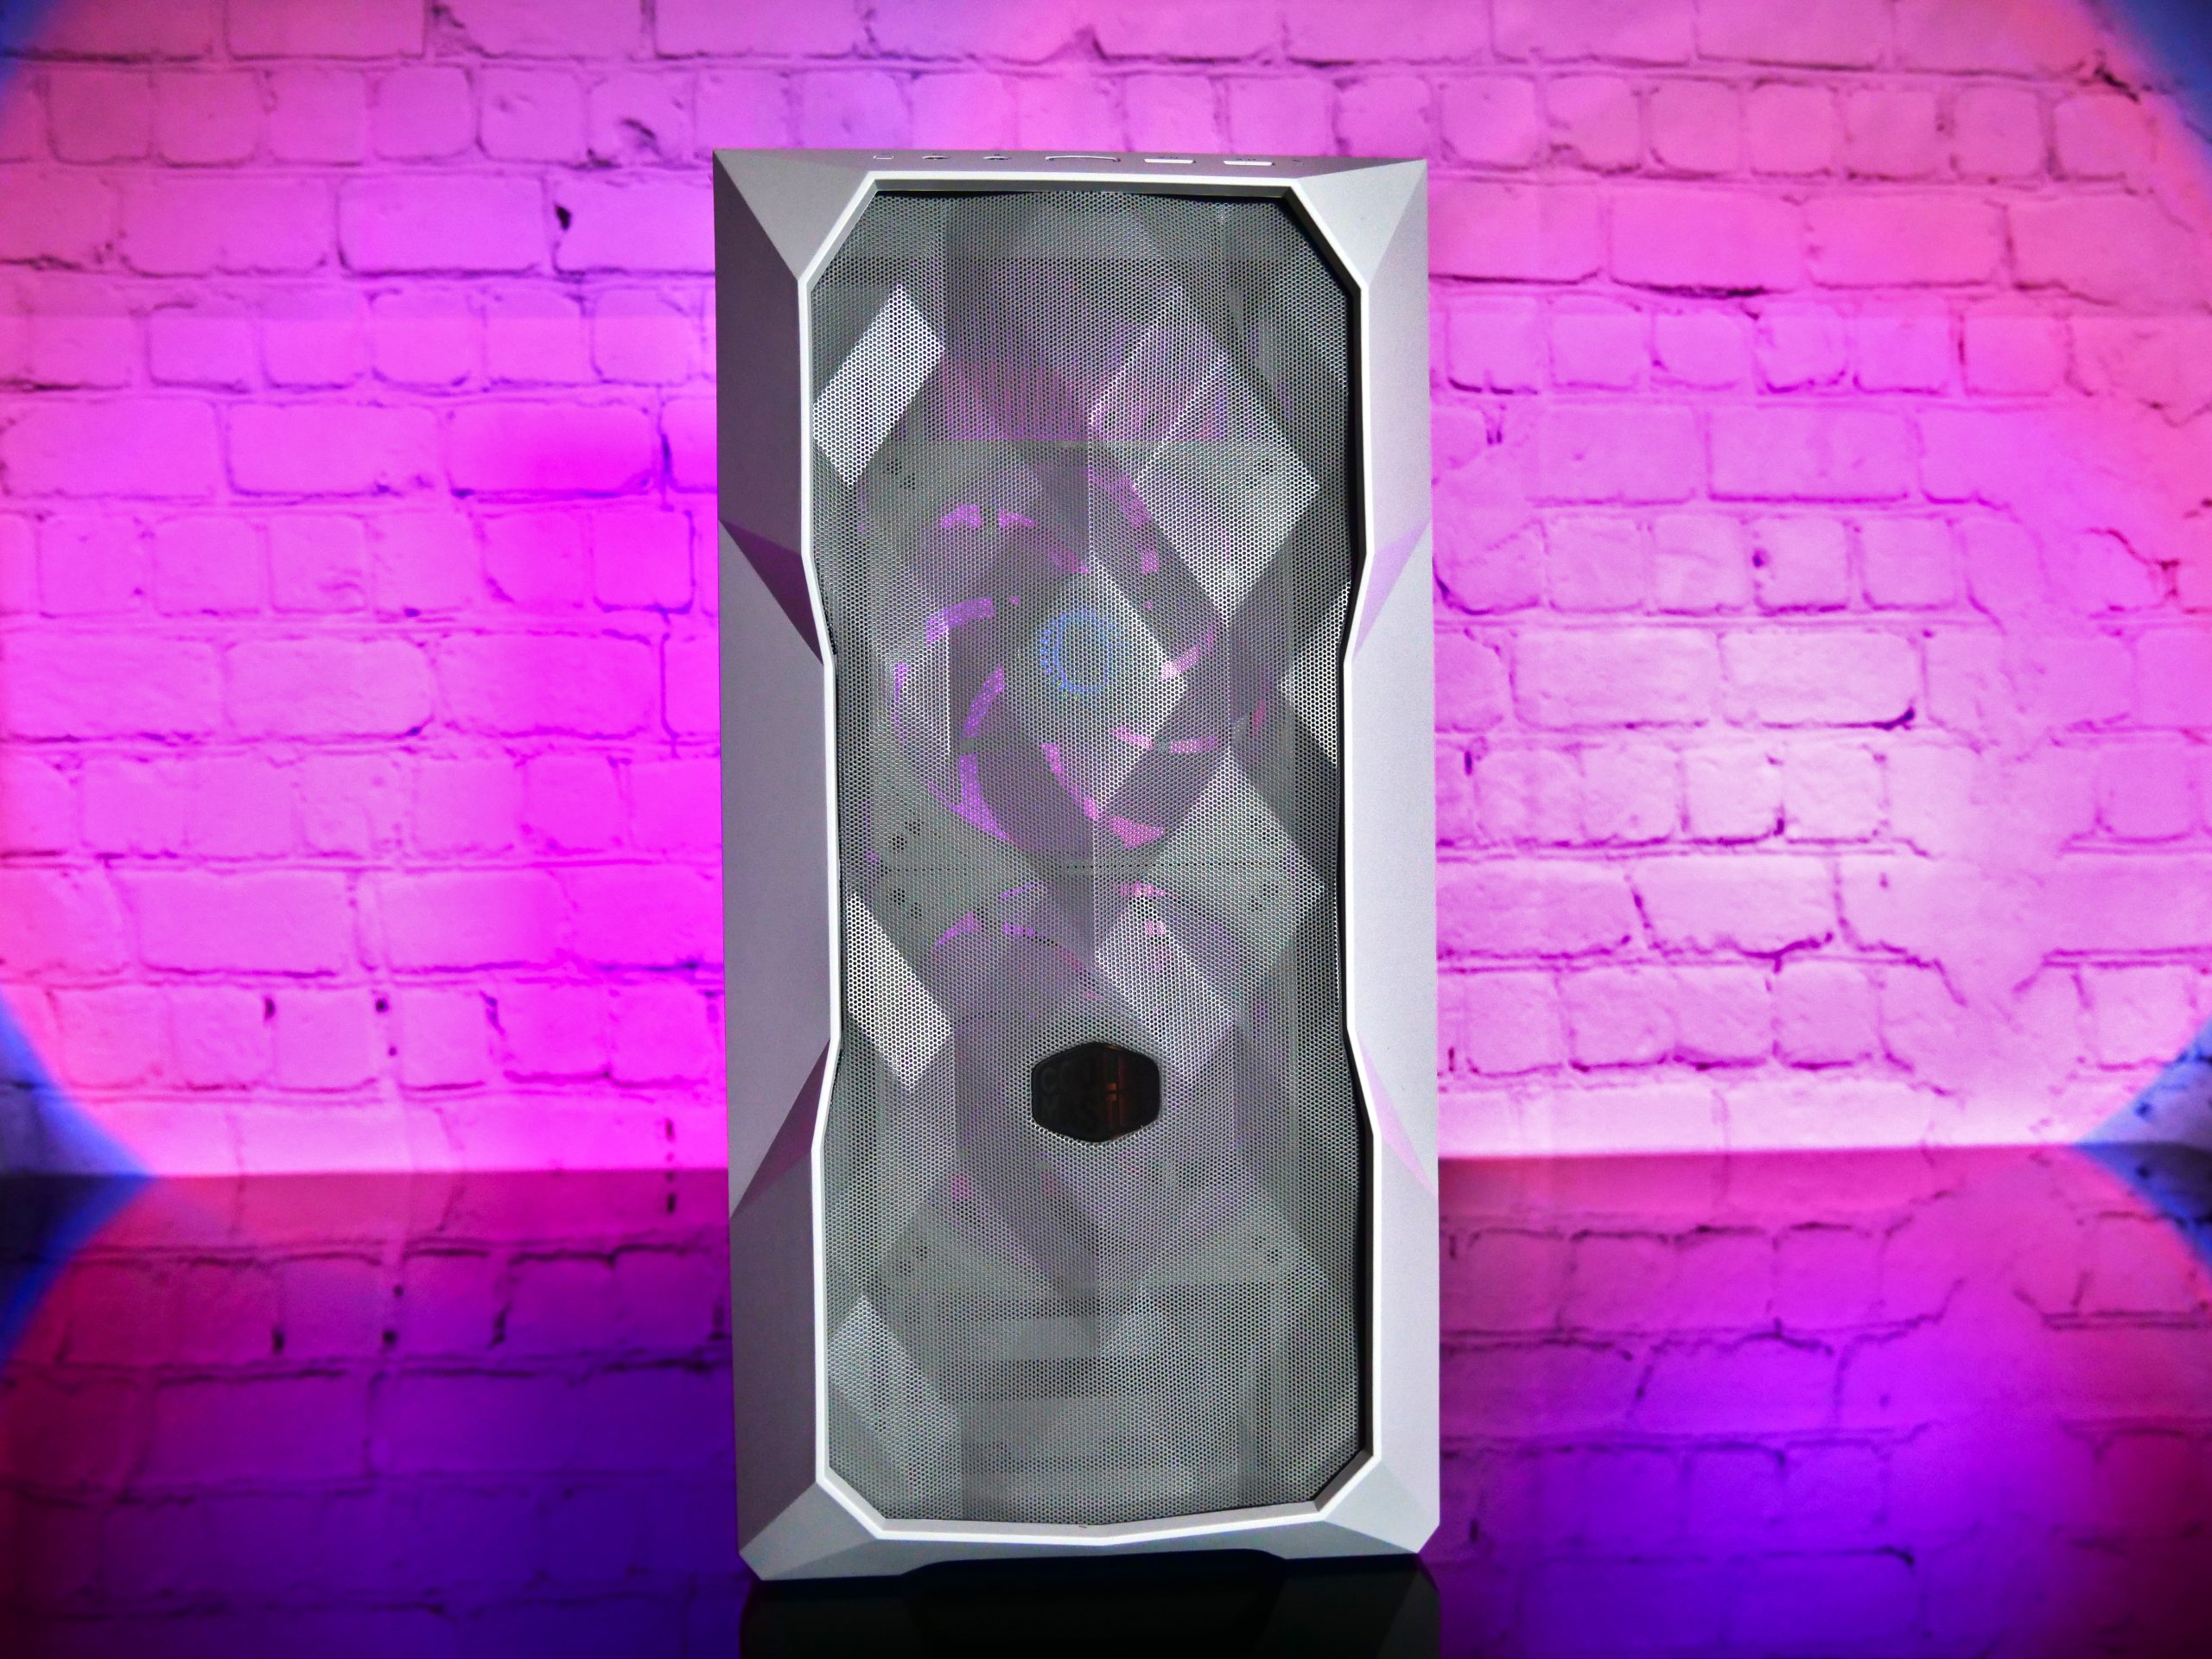
Arriving at the front, we have a light gray polygon mesh front framed in a frame with the typically positioned Cooler Master logo. The overall design of this front is quite appealing for my taste and it also gives the case a certain touch.

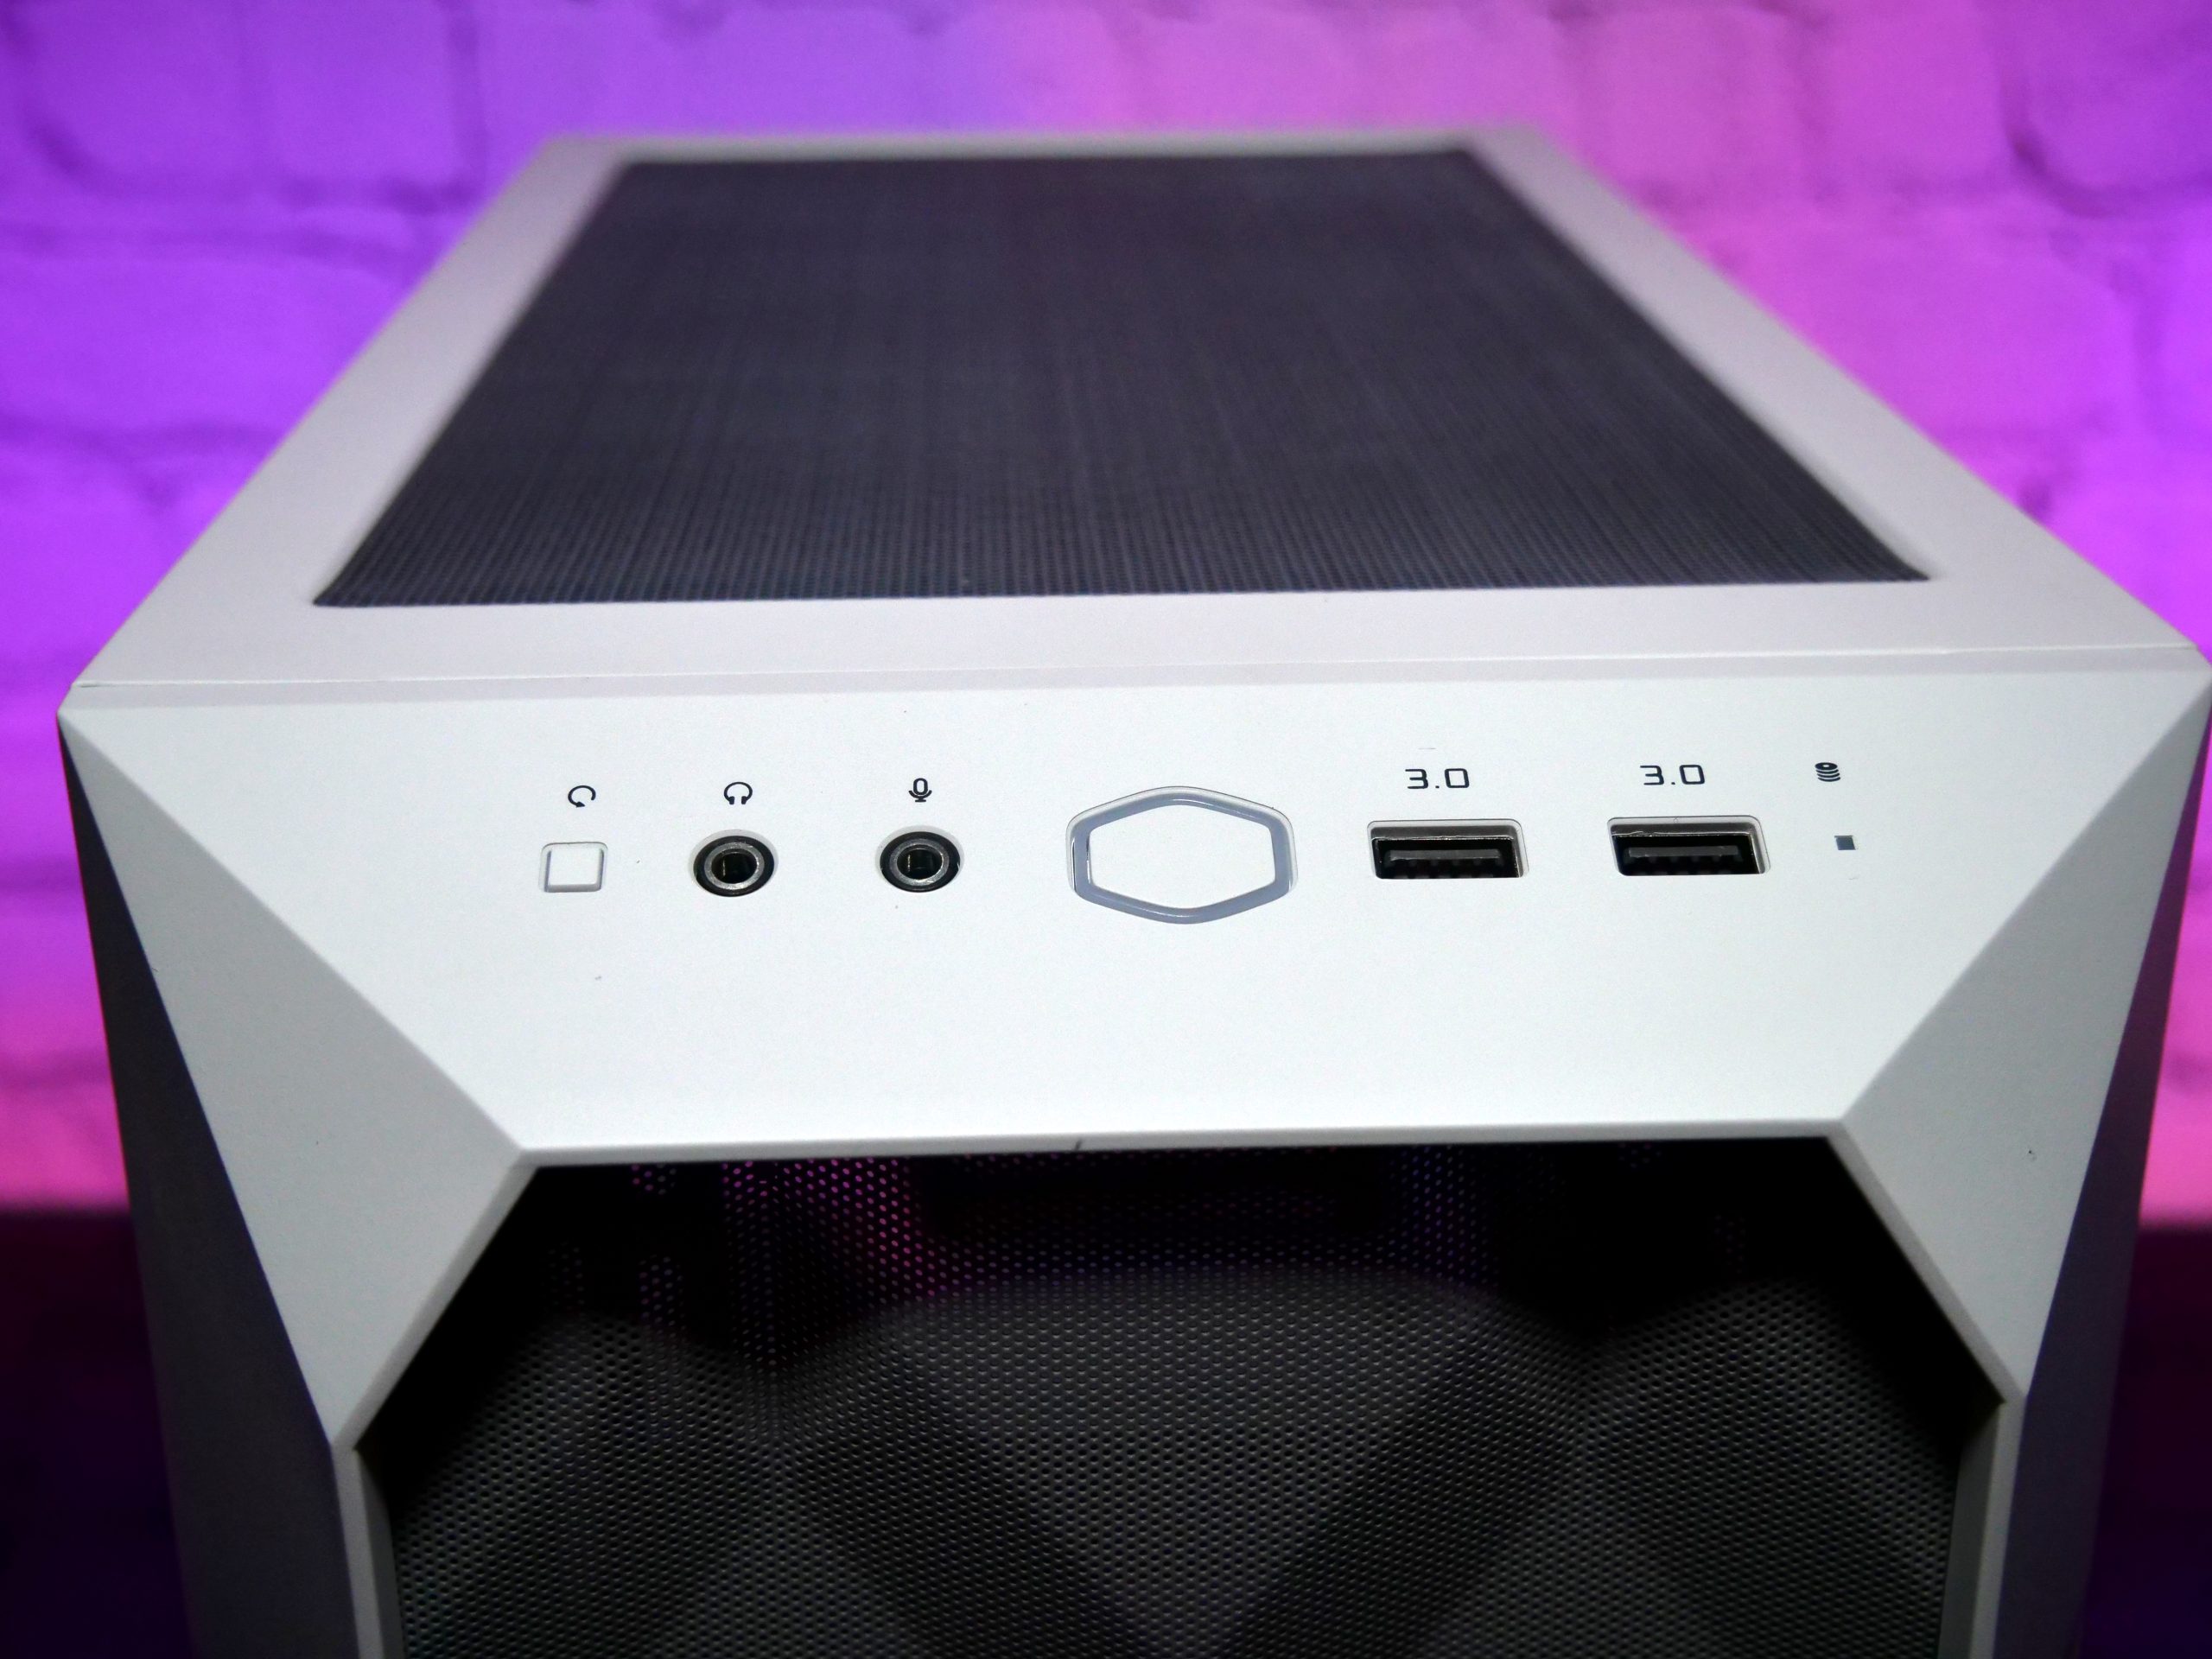
On the top of the front, we find our I/O panel with the power button, where the power LED is integrated, the reset button, the HD audio port with 3.5 mm jacks for the headphones and for a microphone, and two USB 3.0 ports. Unfortunately, Cooler Master did not provide us with a USB C port, which is actually a good thing nowadays. It’s a shame really, but it will probably have been cost considerations for the licenses and another cable. Next to it is another HDD status LED

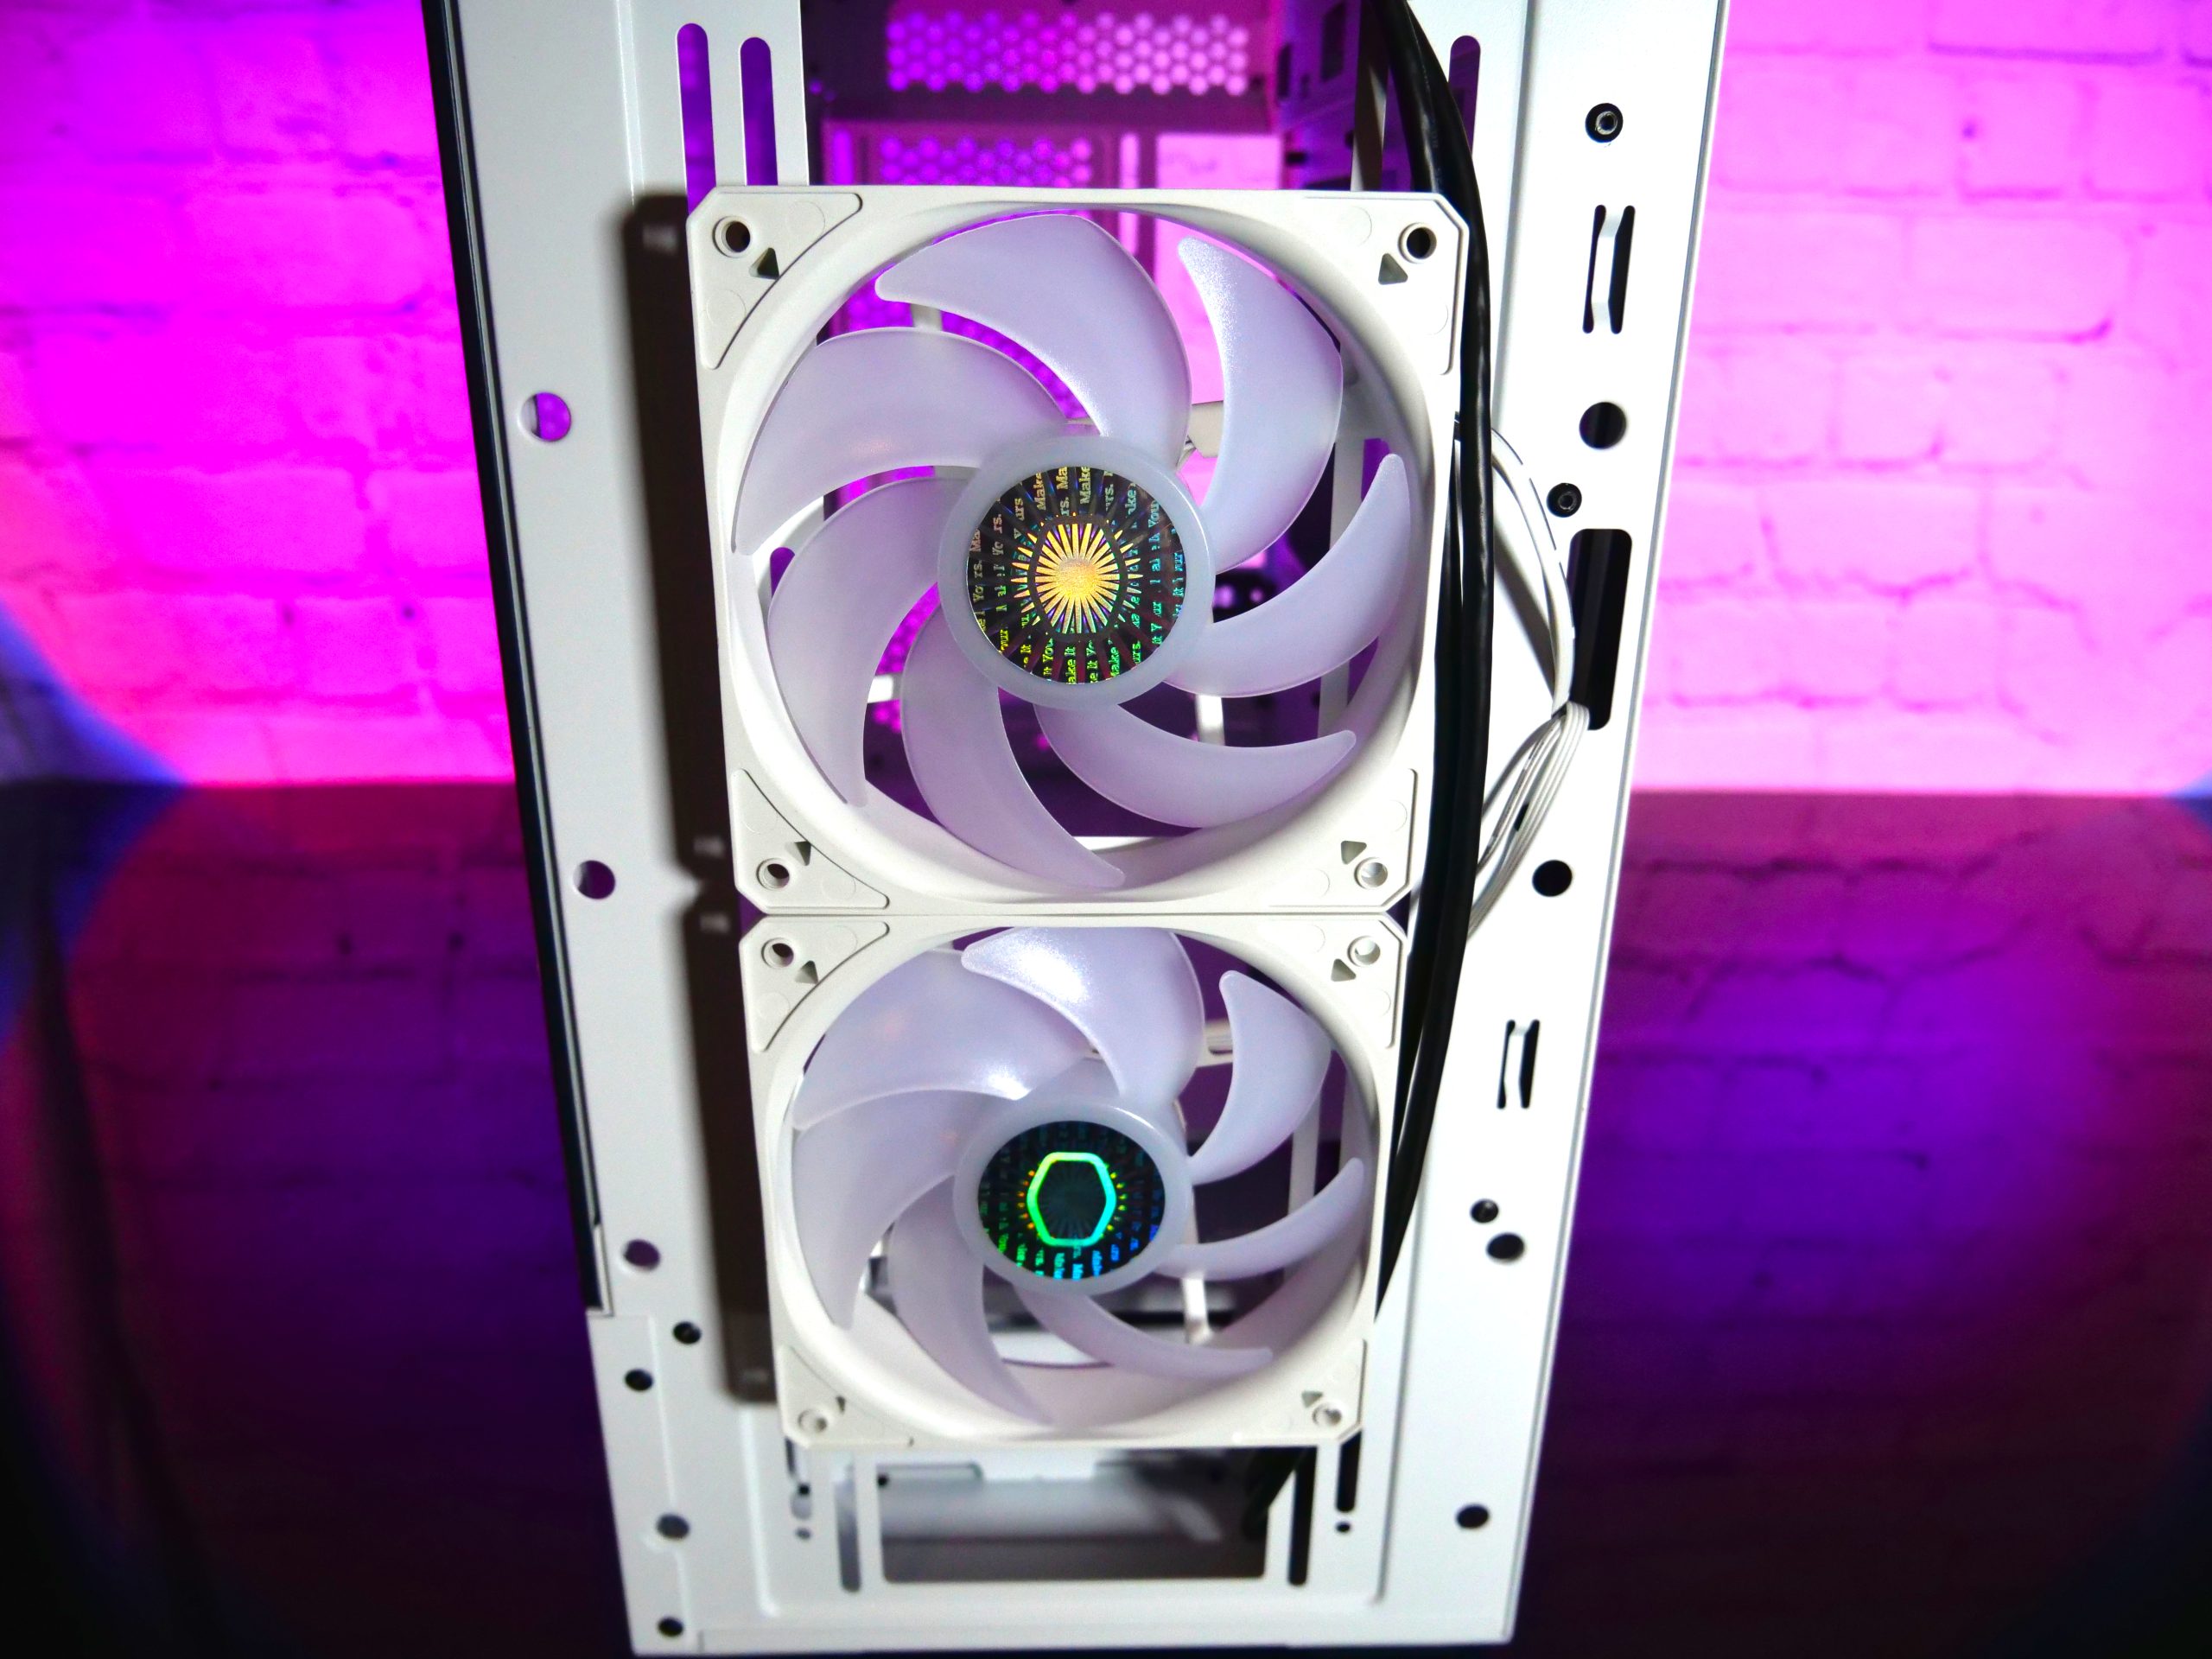
Once the front panel is removed, we now see the two Sickle Flow fans mentioned at the beginning. Either two 140mm fans or three 120mm fans can be installed in the front.

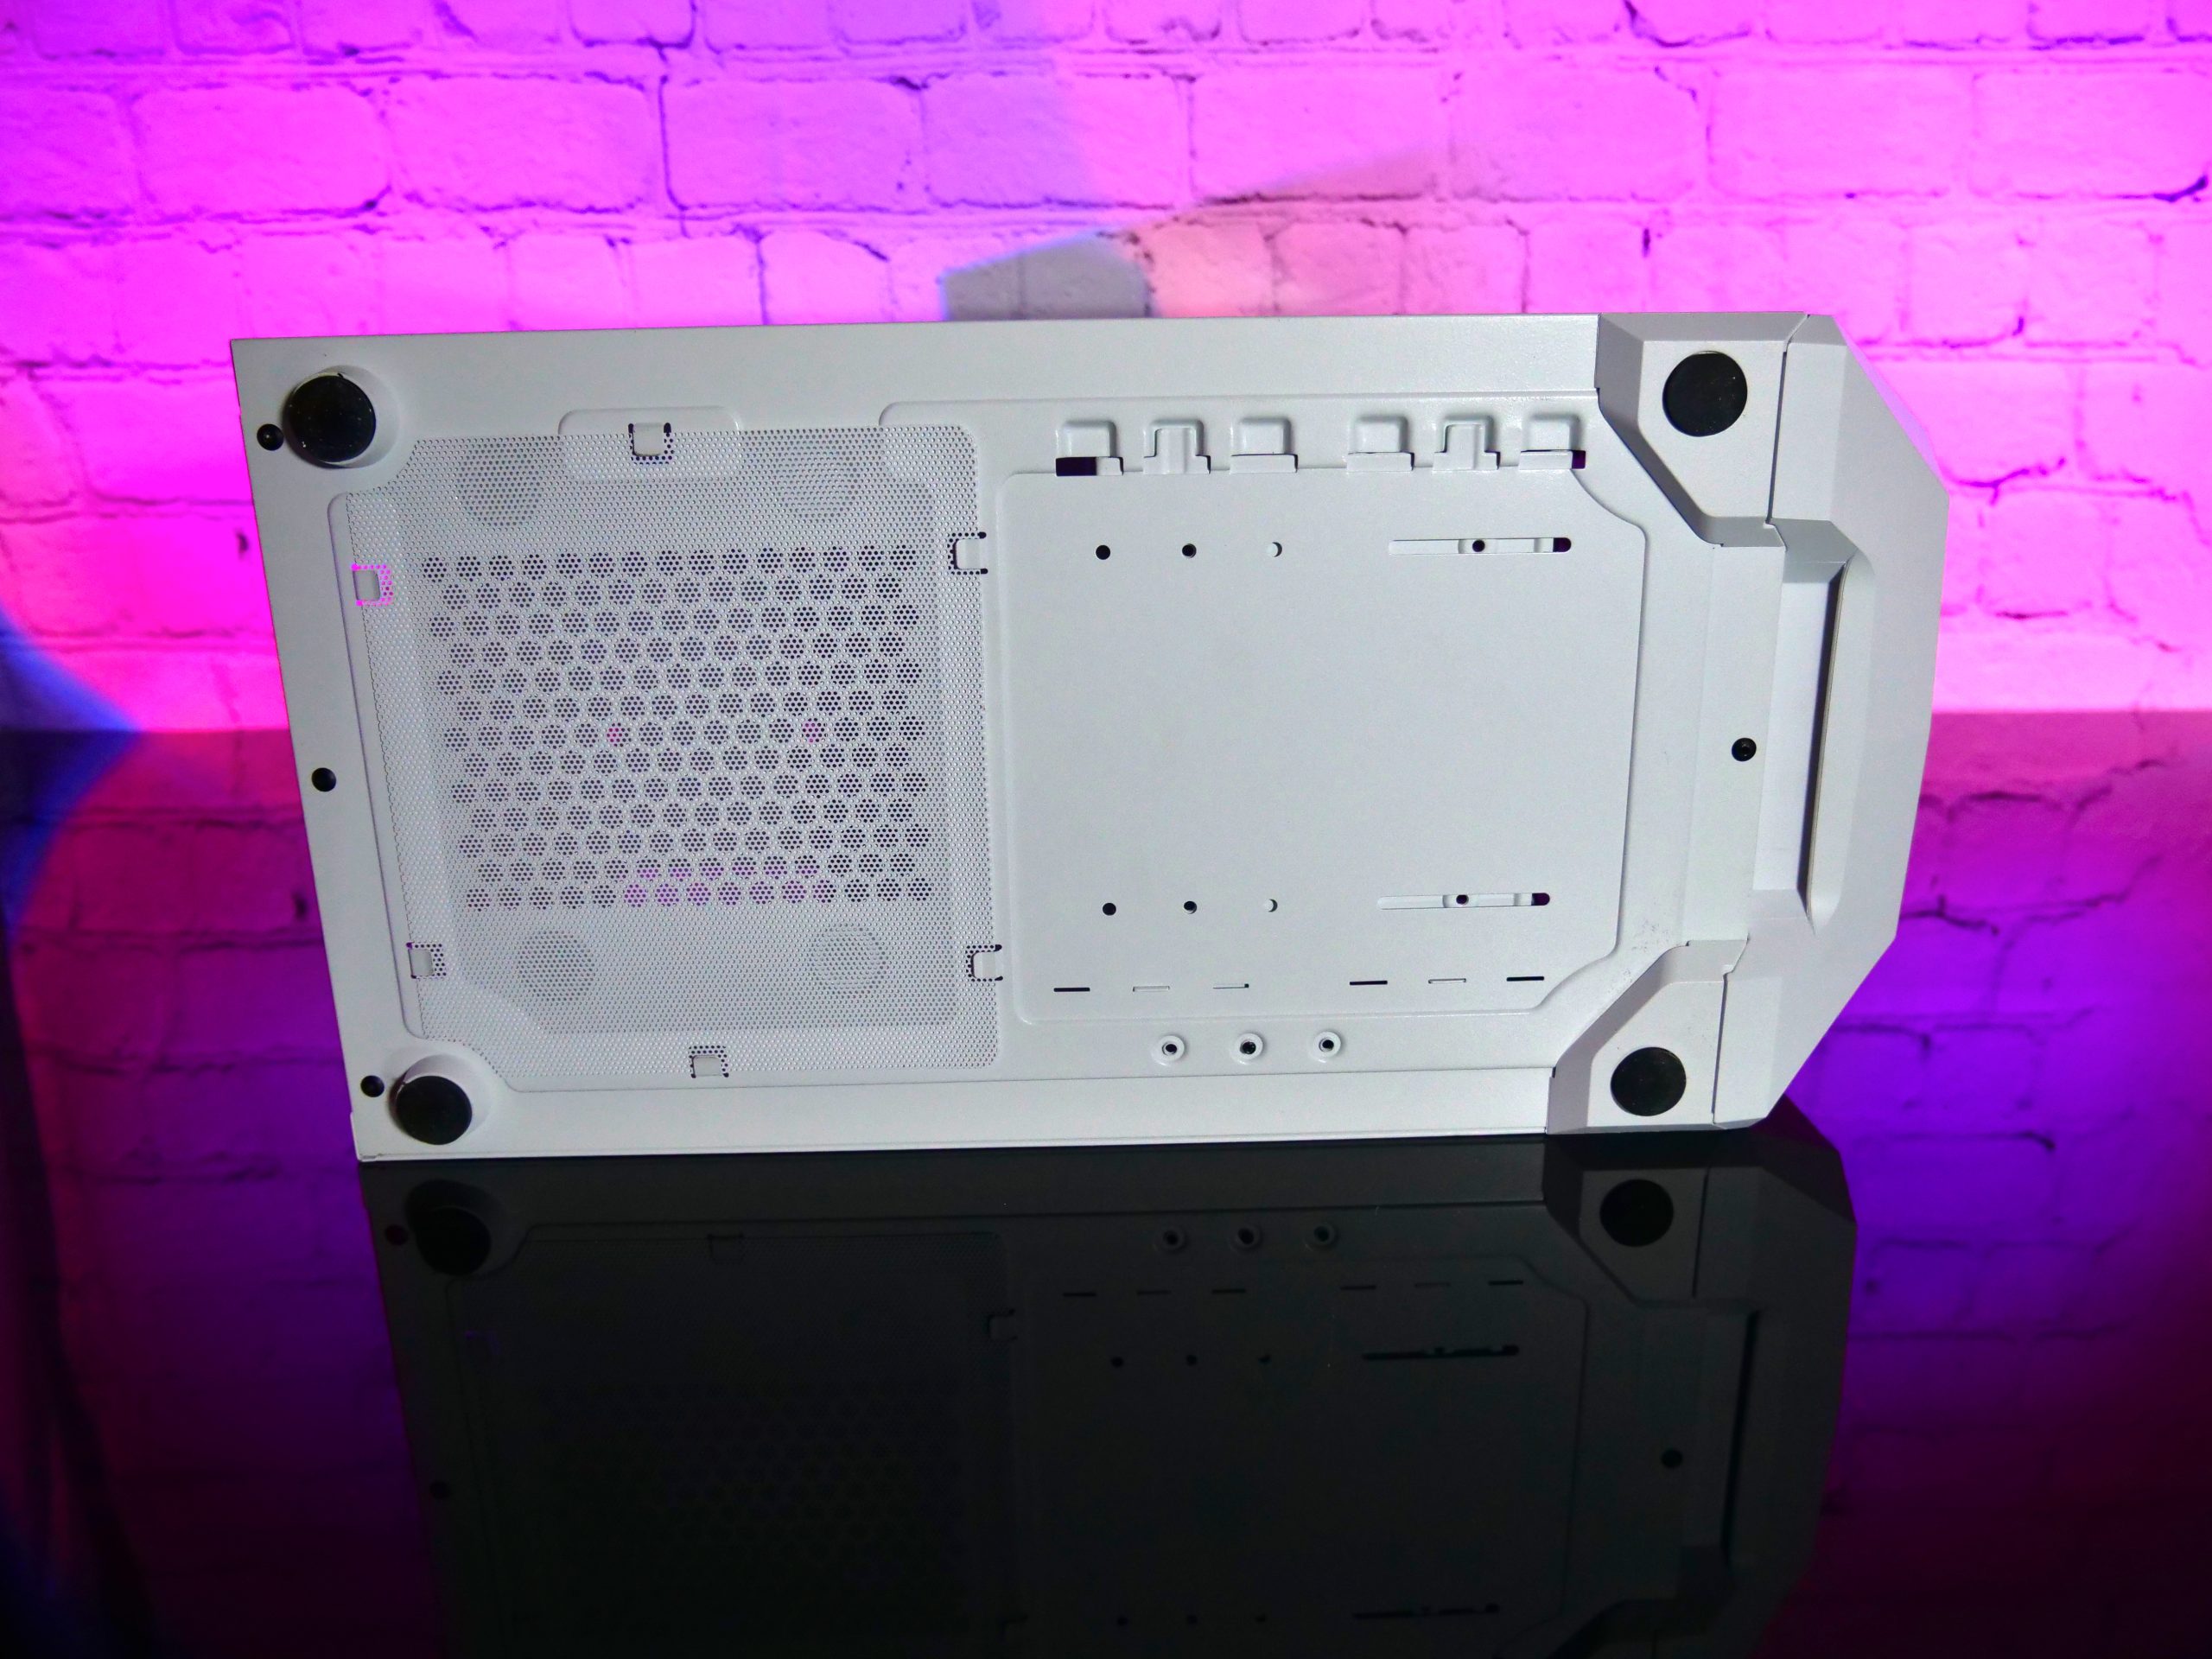
Next, let’s look at the right side. Under the side panel we get access to our PSU bay. There is a pre-assembled HDD cage for 2 HDDs in it. This is fixed with a screw and can be removed effortlessly.

The PSU bay is located in the right part of the bottom and is protected with a dust filter

This is important so that our power supply of choice, which is decoupled by means of rubber, can also breathe unhindered.

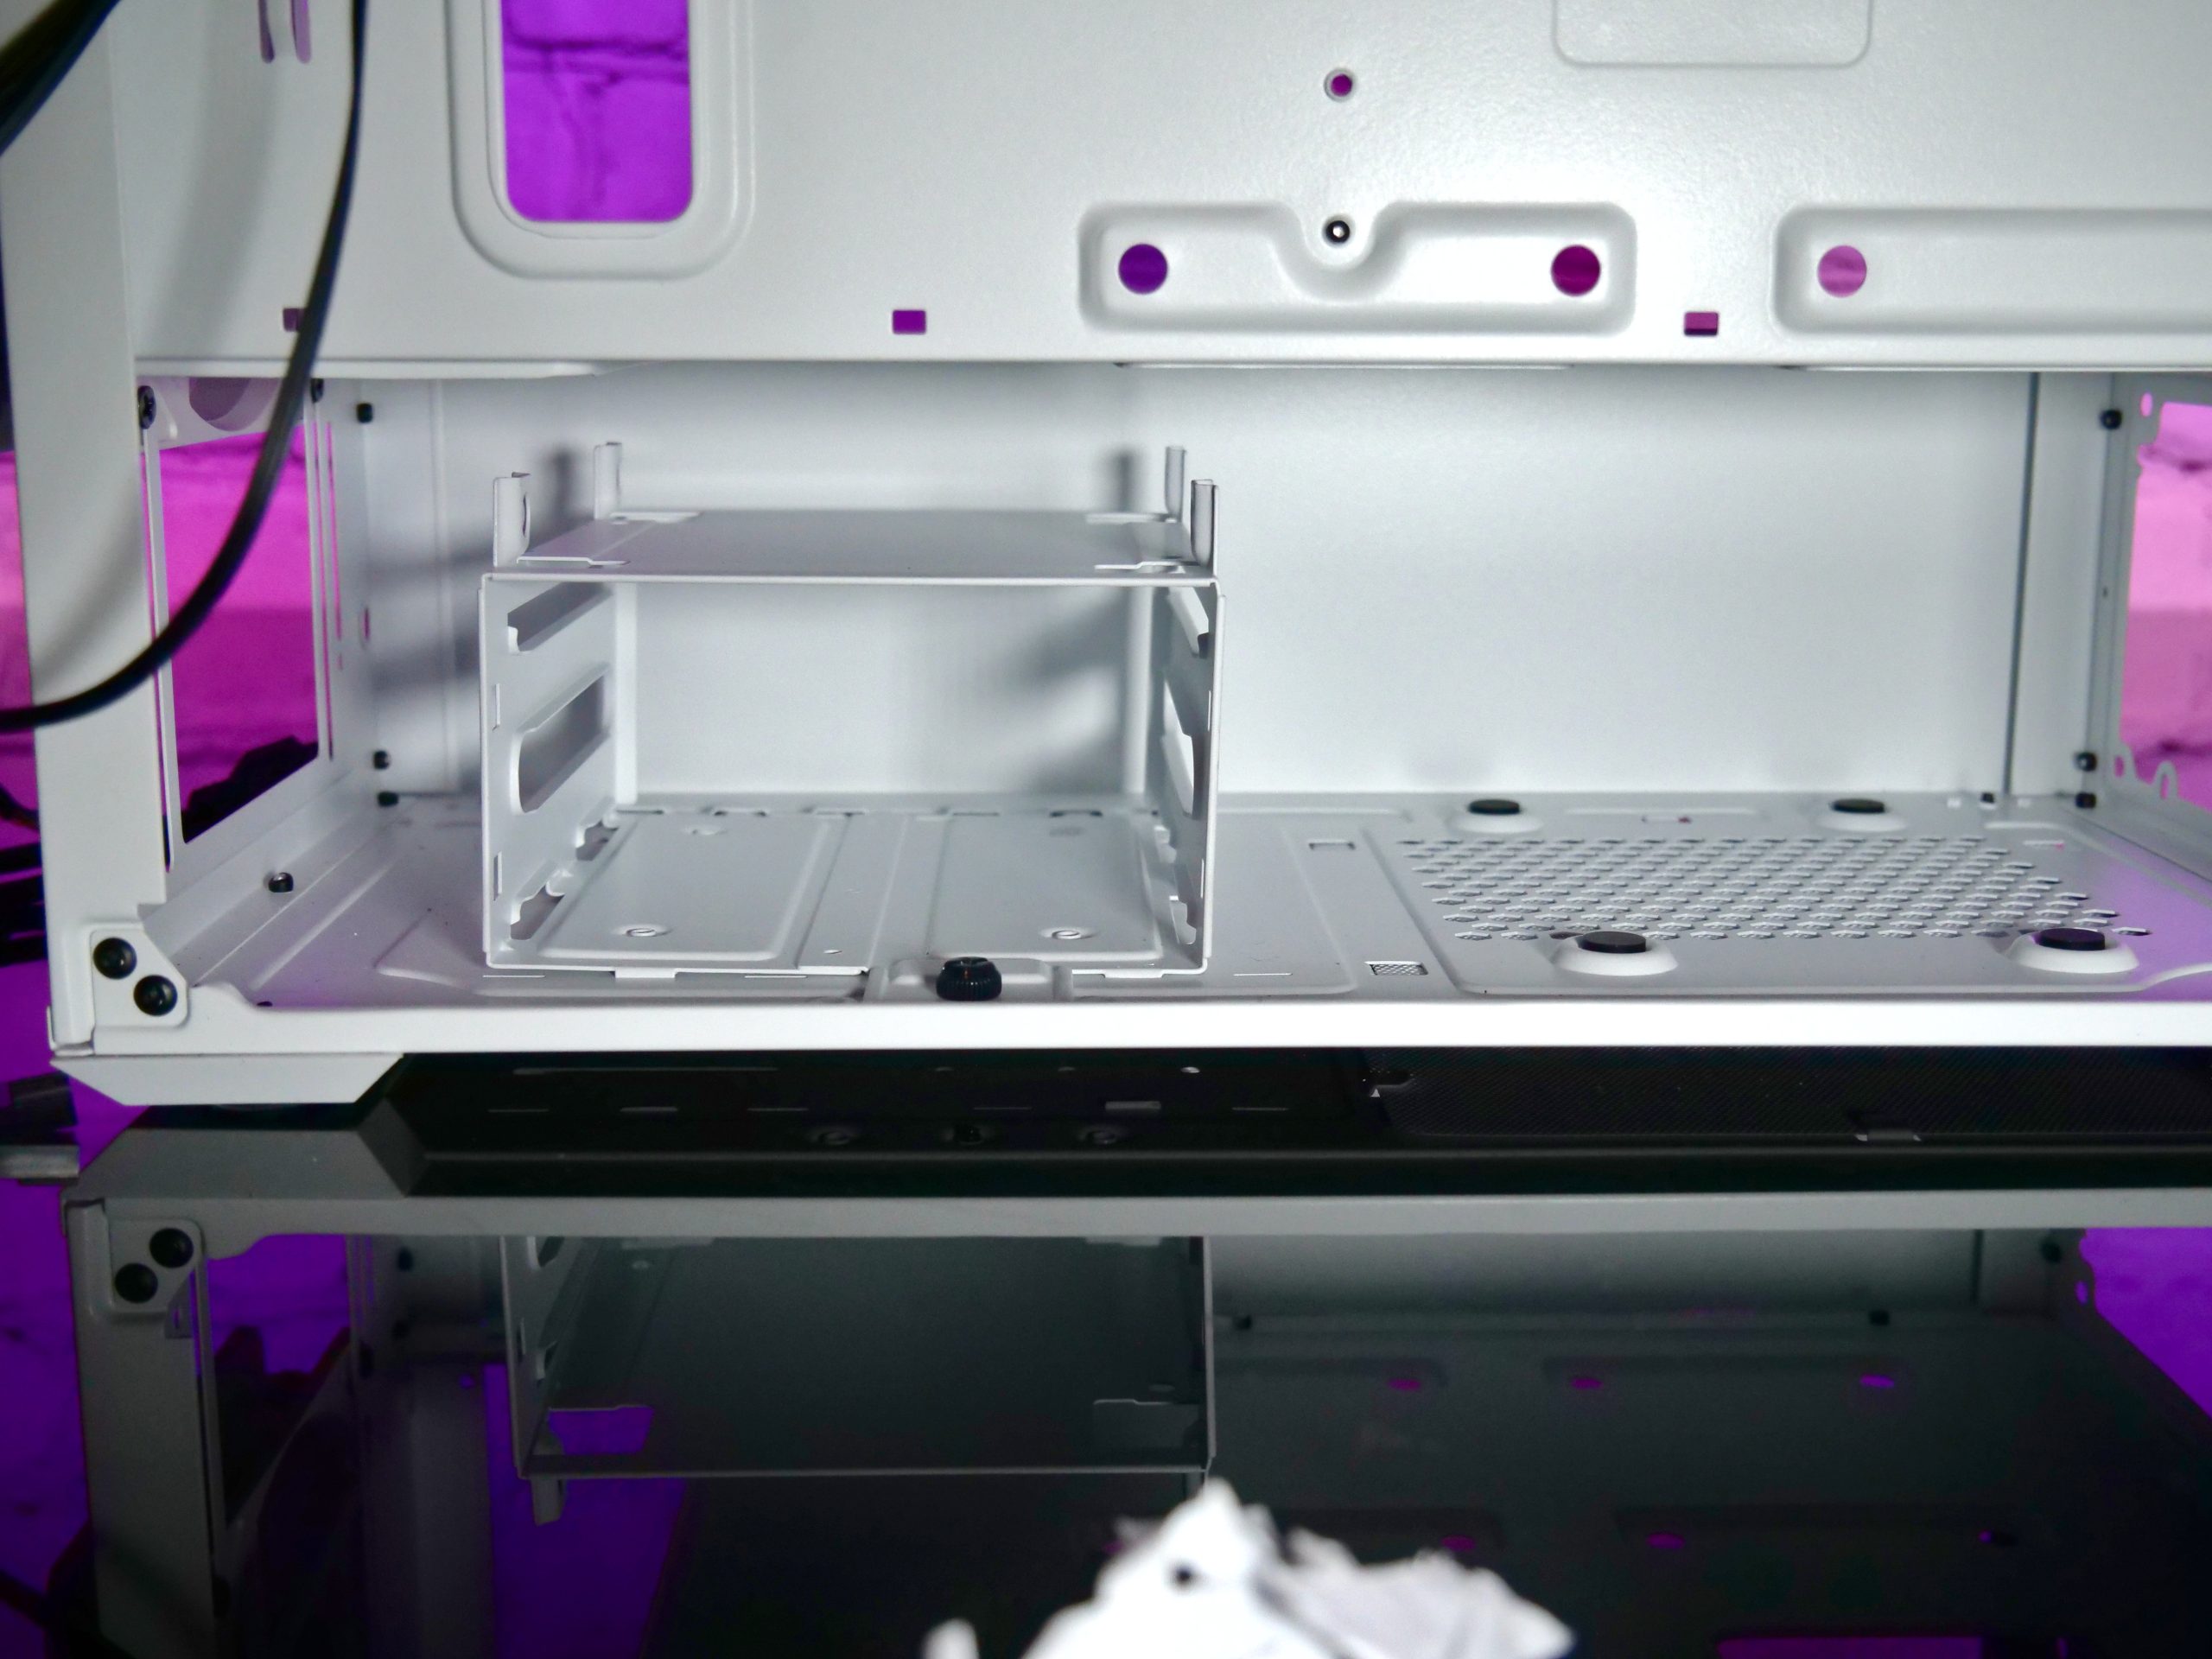
Let’s take a step upwards, where we also have the option to mount two SSDs, just like in the interior.

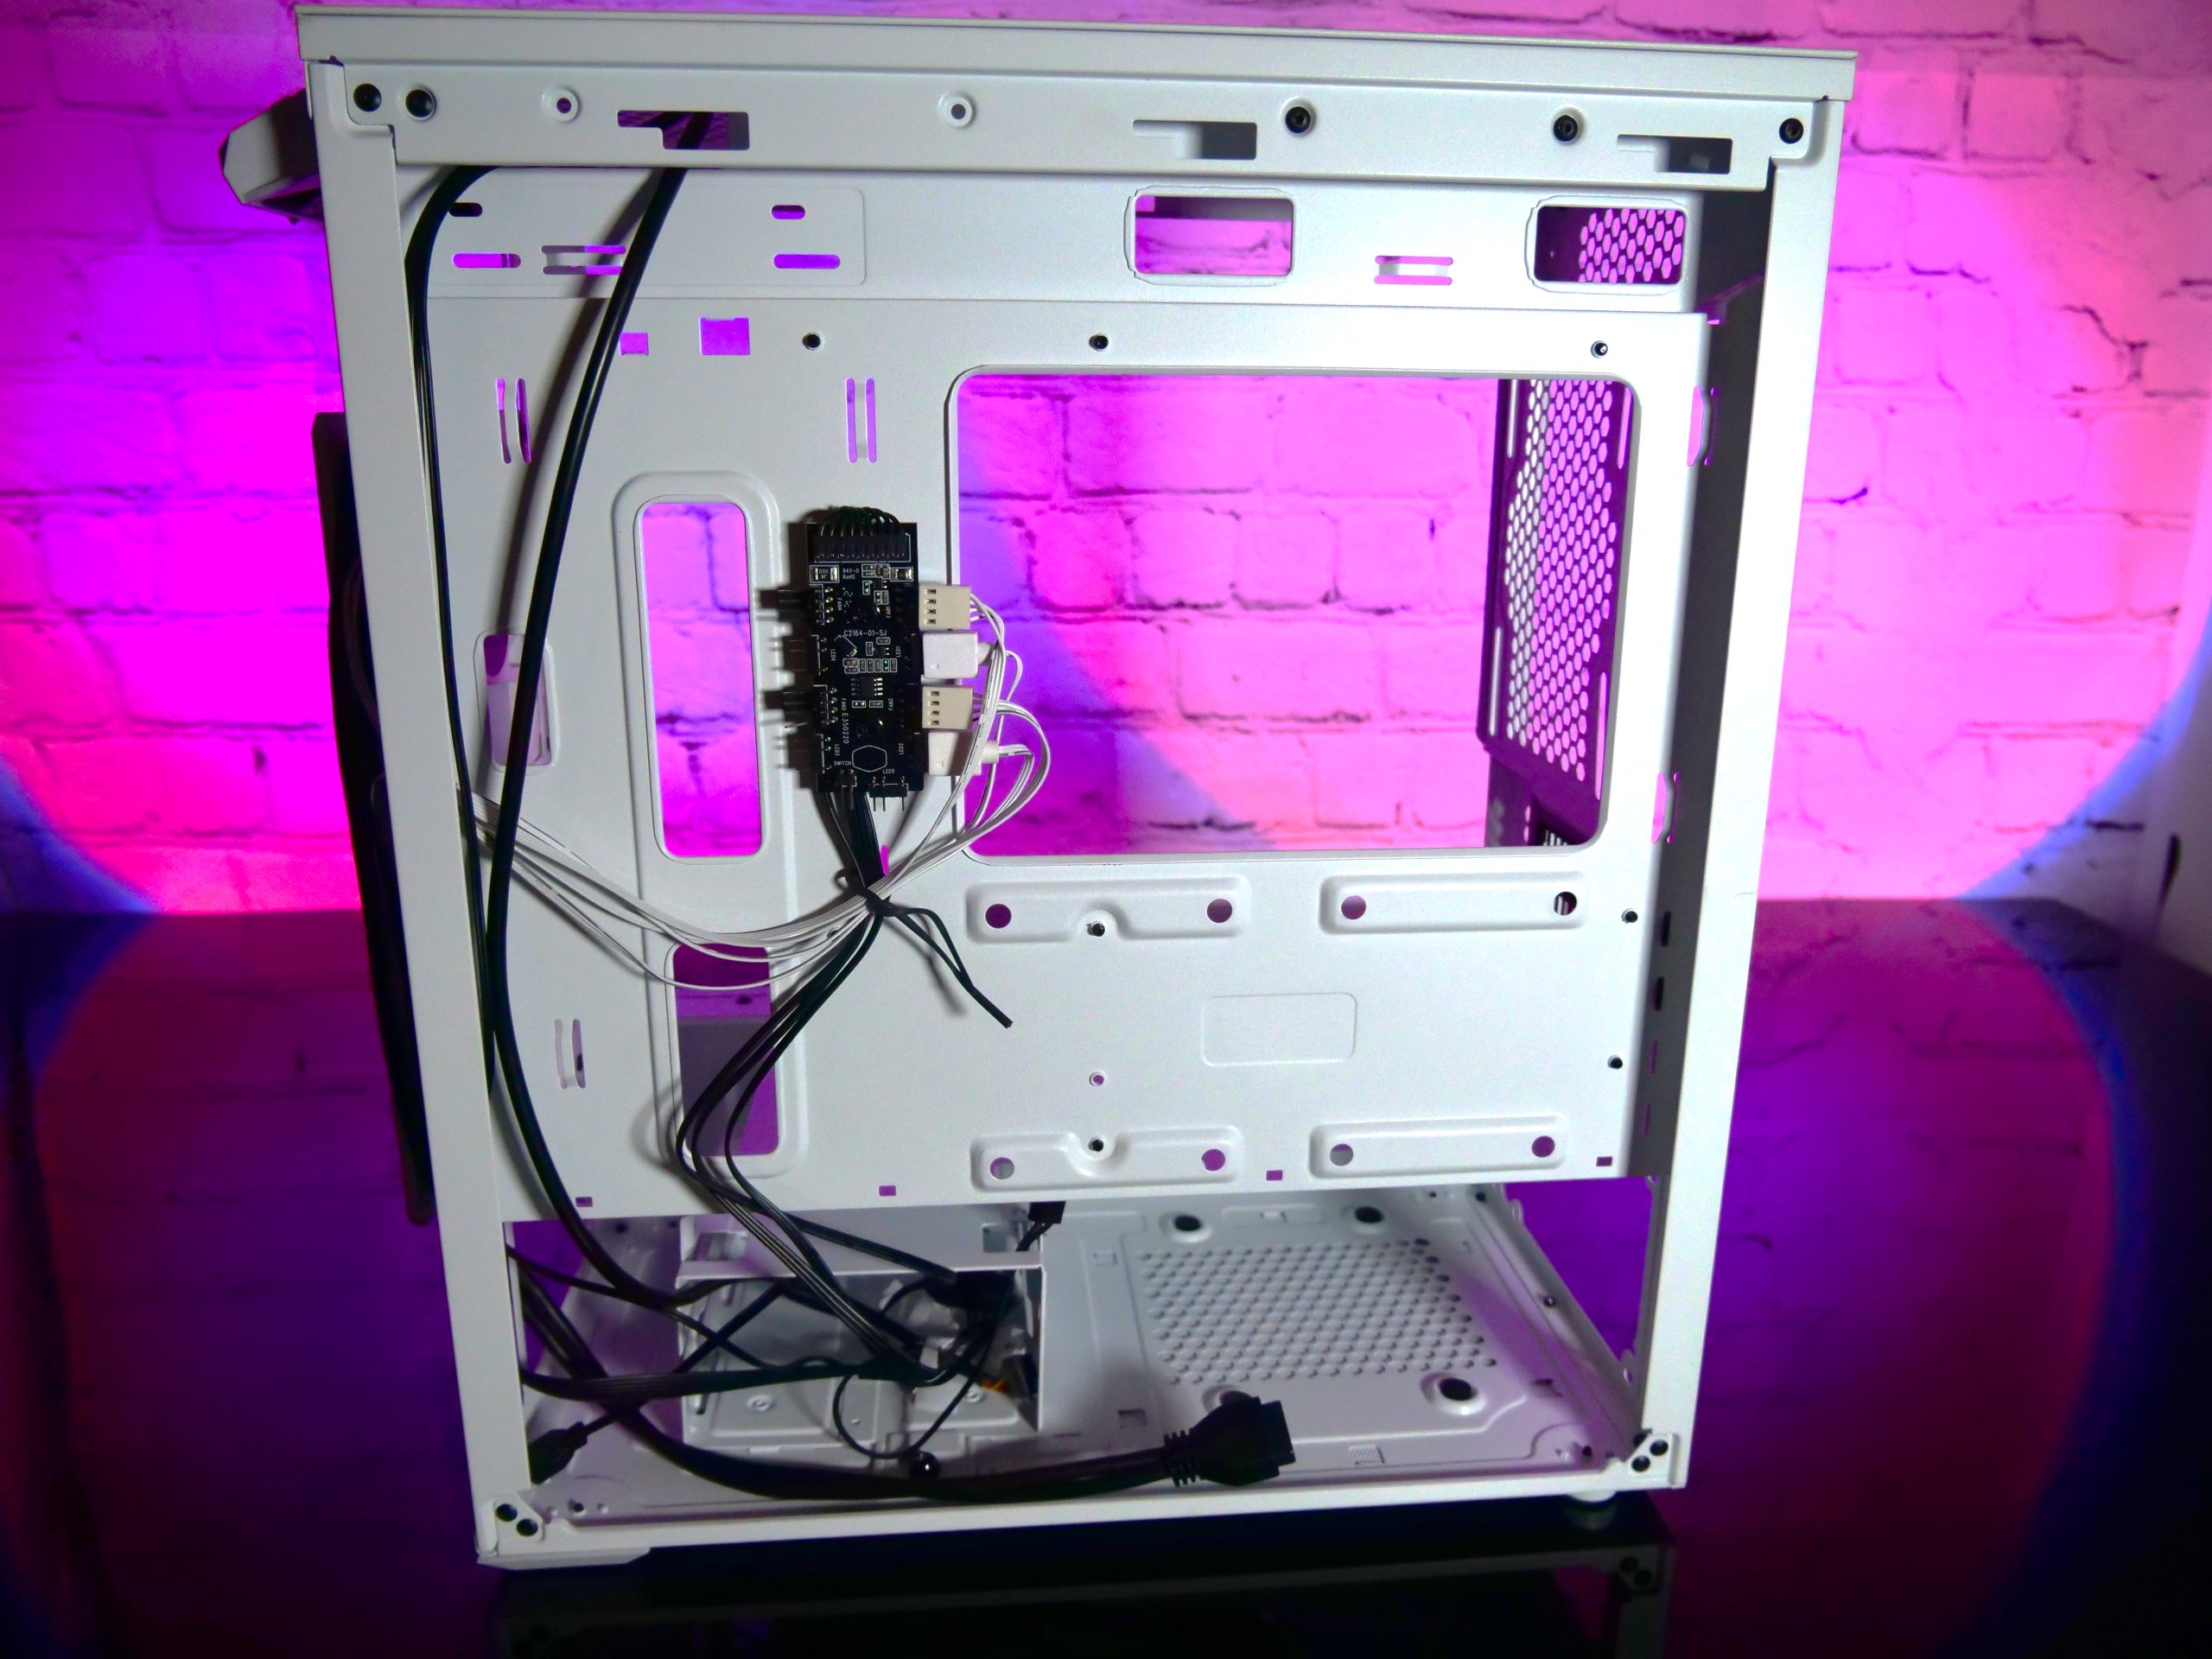
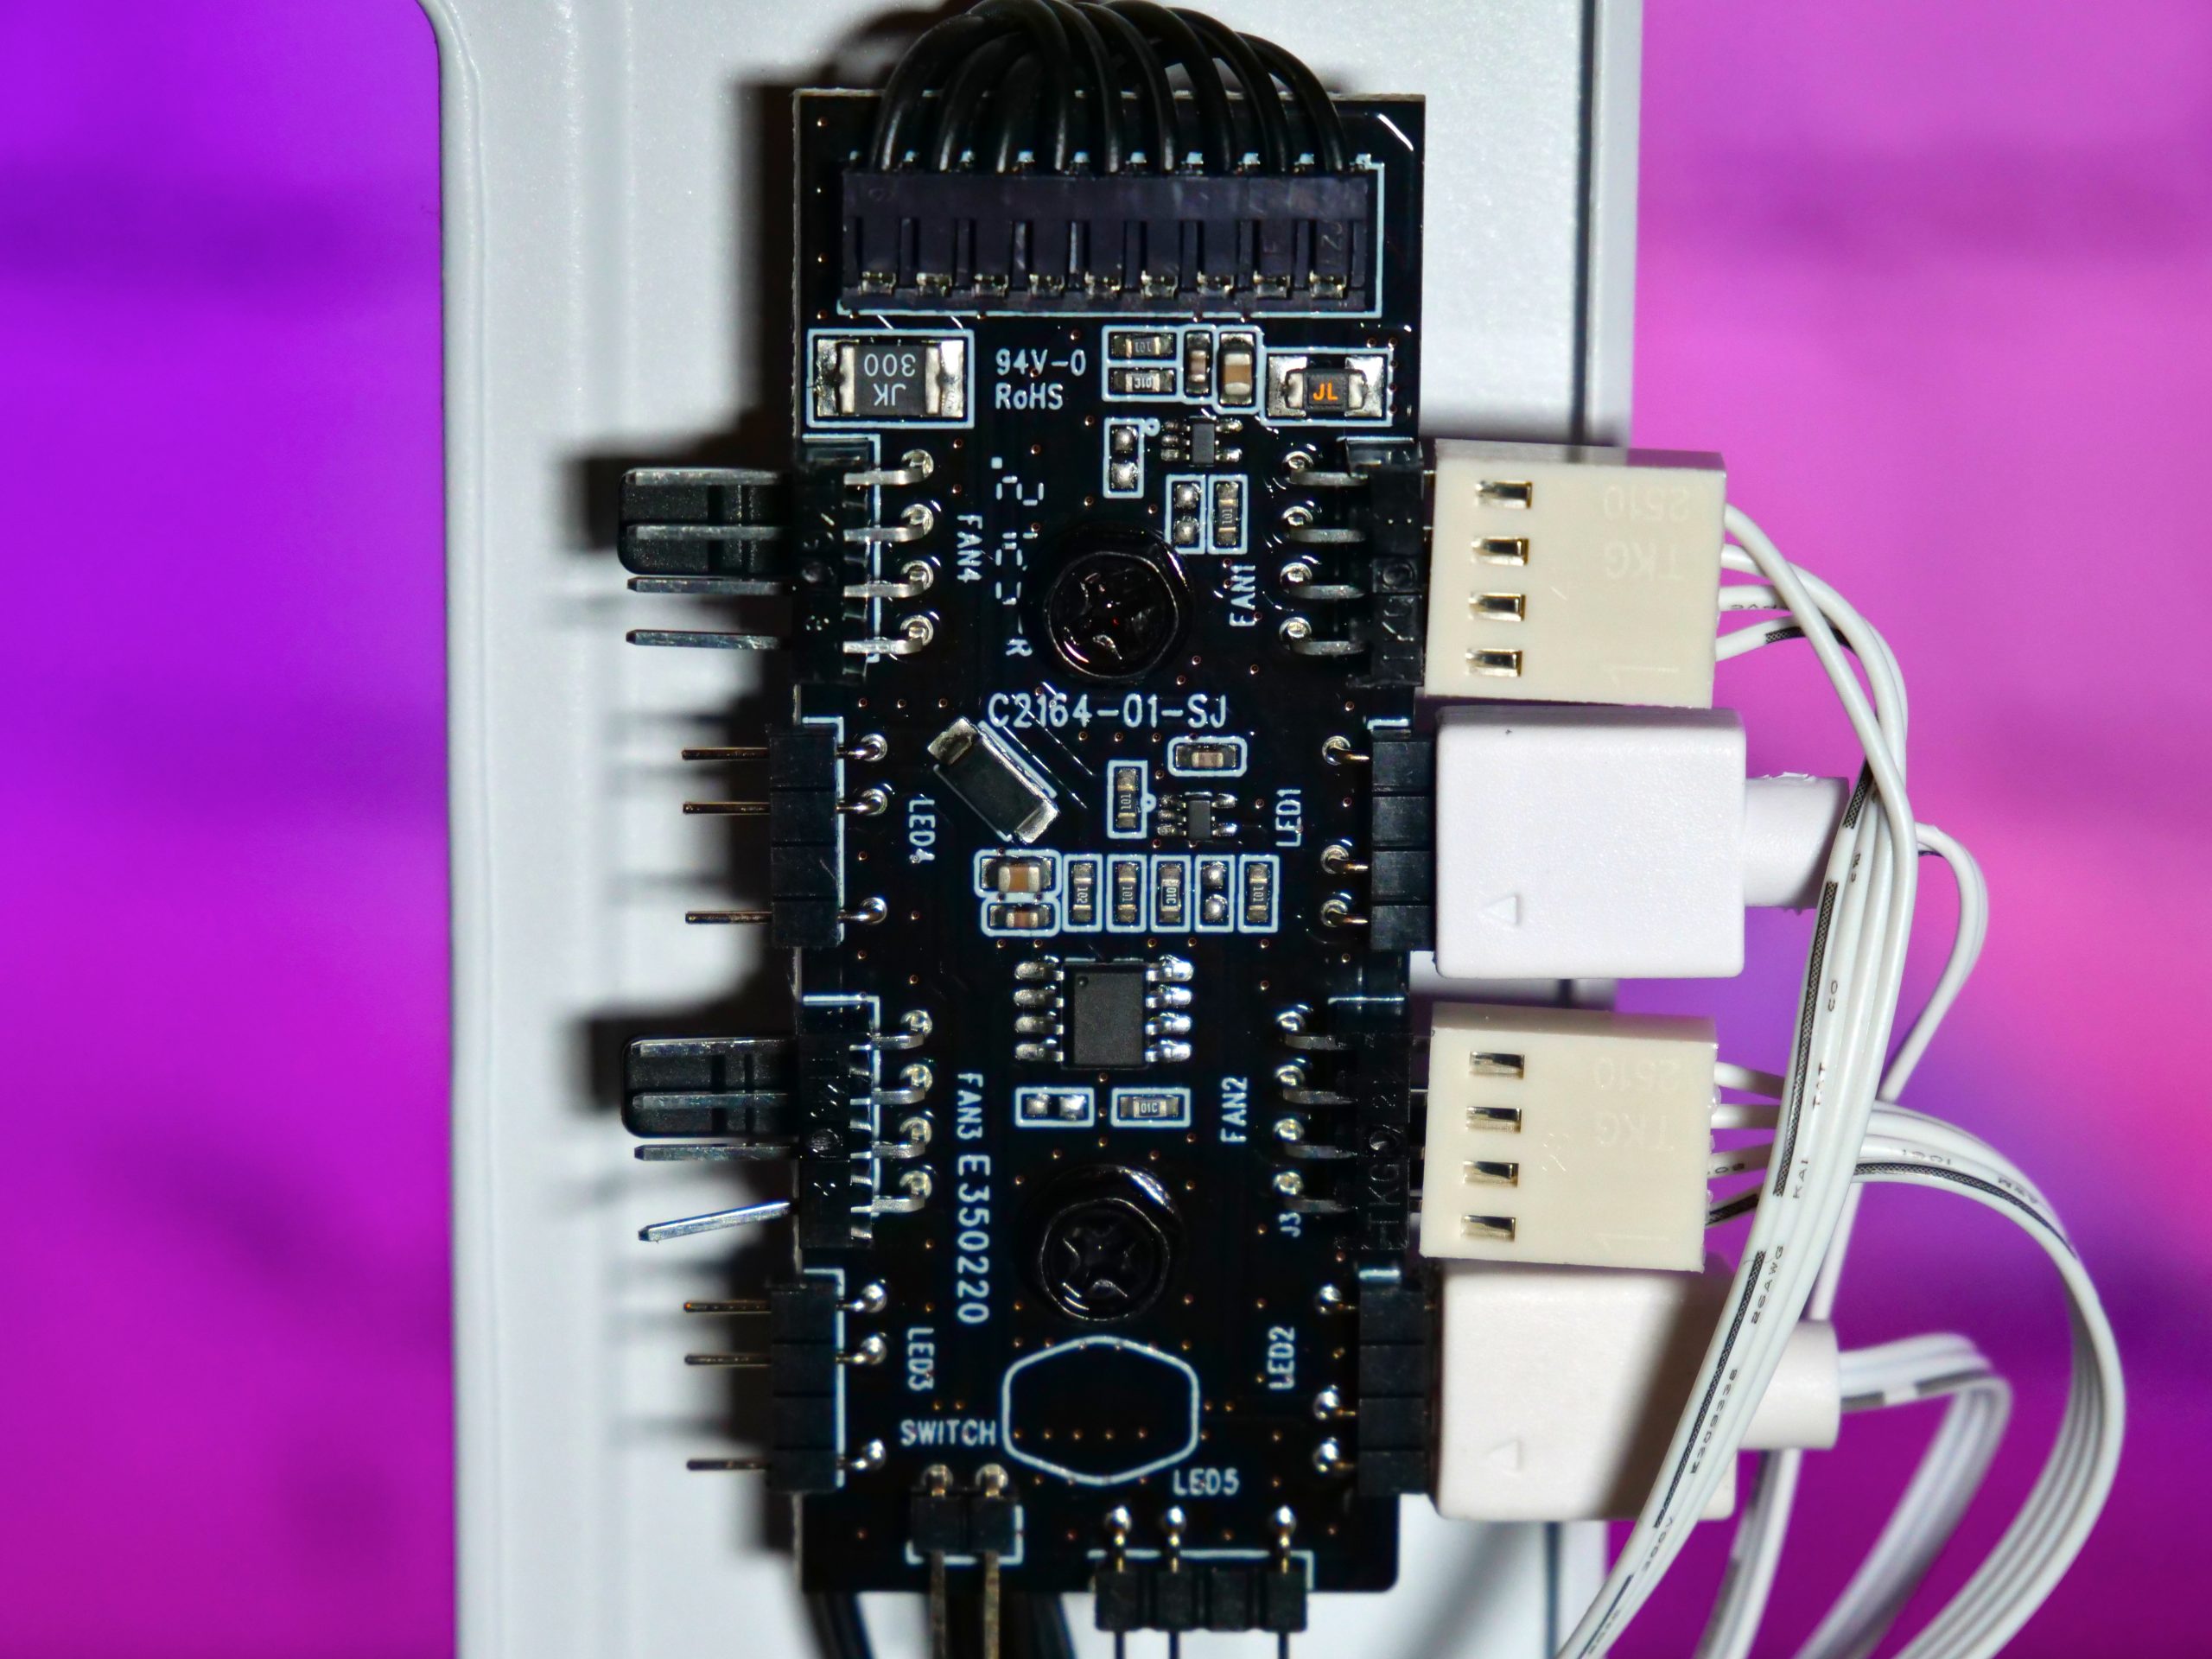
We are also just now seeing another feature. Cooler Master gives us a fan/RGB hub here. On this we have the possibility to run 4 fans and 5 RGB strips. The hub together with the built-in controller has its own lighting modes. To access these, we connect our reset button on the cabinet to the hub and can control the desired effects. This is a bit tricky, but it works. The fan signal is picked up by cable from the mainboard and forwarded to the hub, which now controls our connected fans. Of course, the whole thing needs some power – which we get via the SATA power connector.


Kommentar

Lade neue Kommentare

RX480

Urgestein

1,877 Kommentare 871 Likes

Chickes Display, sogar mit Umbrella-Logo und passender Build mir rotem Fluid in weißem Case=nice!

Der Kritikpunkt mit den Lüftern würde evtl. eh entfallen, wenn vorn ein Radi von der GPU wäre.(oben dann CPU)
(da machen unterschiedliche Drehzahlen kaum Sinn)

Antwort 2 Likes

Pascal TM-Custom

Urgestein

1,122 Kommentare 1,361 Likes

Danke 😊

Ich denke du meinst das mit dem Lüfter Hub? Wie gesagt ich finde einfach und damit meine ich nicht nur Cooler Master das es eine Sinnvolle Aufteilung braucht nach Lüfter Anzahl.

Aber irgendwie machen das viele so.
Versteh nur nicht ganz warum.

Antwort 1 Like

Ghoster52

Urgestein

1,416 Kommentare 1,077 Likes

Dem kann ich mich nur anschließen, schönes Gerät... (y)😍

Antwort 1 Like

Pascal TM-Custom

Urgestein

1,122 Kommentare 1,361 Likes

Gerne dürft ihr das Video dazu anschauen

Viel Spaß dabei 😊

Antwort 2 Likes

grimm

Urgestein

3,084 Kommentare 2,040 Likes

Was hätte man denn für so einen Build zu investieren? Mal abgesehen von den Custom-Bauteilen, die du selbst hergestellt hast...
Mich hätte noch interessiert (im Video), wie du die Hartschaumplatte da reingeschraubt hast.
Sieht aber super aus - Topp-System!

Antwort 1 Like

Pascal TM-Custom

Urgestein

1,122 Kommentare 1,361 Likes

Laut Build.gg bin ich mit allem bei ca.3000€+/-

Das teuerste ist natürlich wieder die GPU.

Die Custom Teile sind eigentlich Cent. Beträge die Platten sind günstig und die 3D Druck Teile genauso.

Befestigt werden die Platten mit Doppelseitigen Klebeband und erhalten zusätzlich halt mit der Schottverschraubung und der Tubes.

Ich kann diese Platten wirklich empfehlen die haben ausreichend Stärke das nichts durchhängt. Dazu gibt es die in Matt und Hochglanz in verschiedenen Stärken.

Kein Sägen nötig, kein splittern und sie lassen sich ganz easy in Form bringen mit einem Heißluft Föhn.

Freut mich das dir mein Build gefällt.

Antwort 3 Likes

s
stillnameless

Mitglied

25 Kommentare 41 Likes

Da ich eher pragmatisch veranlagt bin und ich Technik doch eher zweckgebunden nutze, halte ich per se eigentlich nicht viel von Modding in diese Richtung.
Hier allerdings muss ich zugeben: sieht super aus, tolle Kiste.
Meinen Respekt für diese Kreativität und die Umsetzung!

Antwort 2 Likes

Pascal TM-Custom

Urgestein

1,122 Kommentare 1,361 Likes

Vielen Dank das freut mich natürlich besonders. 😊

Antwort 1 Like

N
Novasun

Veteran

124 Kommentare 75 Likes

Wunderschöner Build. Gefällt mir echt gut.

Antwort 1 Like

ro///M3o

Veteran

348 Kommentare 239 Likes

Geil :cool: bekomme ich direkt wieder Lust zum basteln!
Mein absoluter Favorit in diesem Build ist dein Ausgleichsbehälter samt 3D DNA Strang. Sieht mega aus. Raijintek hat da ein schickes Teil gebracht und die Idee mit dem DNA Teil ist genial.
Ja und natürlich das Display mit dem Raspberry.

Antwort 1 Like

RedF

Urgestein

4,667 Kommentare 2,553 Likes

Die Hardschaumplatten muss ich mir merken : ) .

Antwort 1 Like

Danke für die Spende


Du fandest, der Beitrag war interessant und möchtest uns unterstützen? Klasse!

Hier erfährst Du, wie: Hier spenden.

Hier kannst Du per PayPal spenden.

About the author

Review Team

Werbung

Werbung