


The process in picture and text
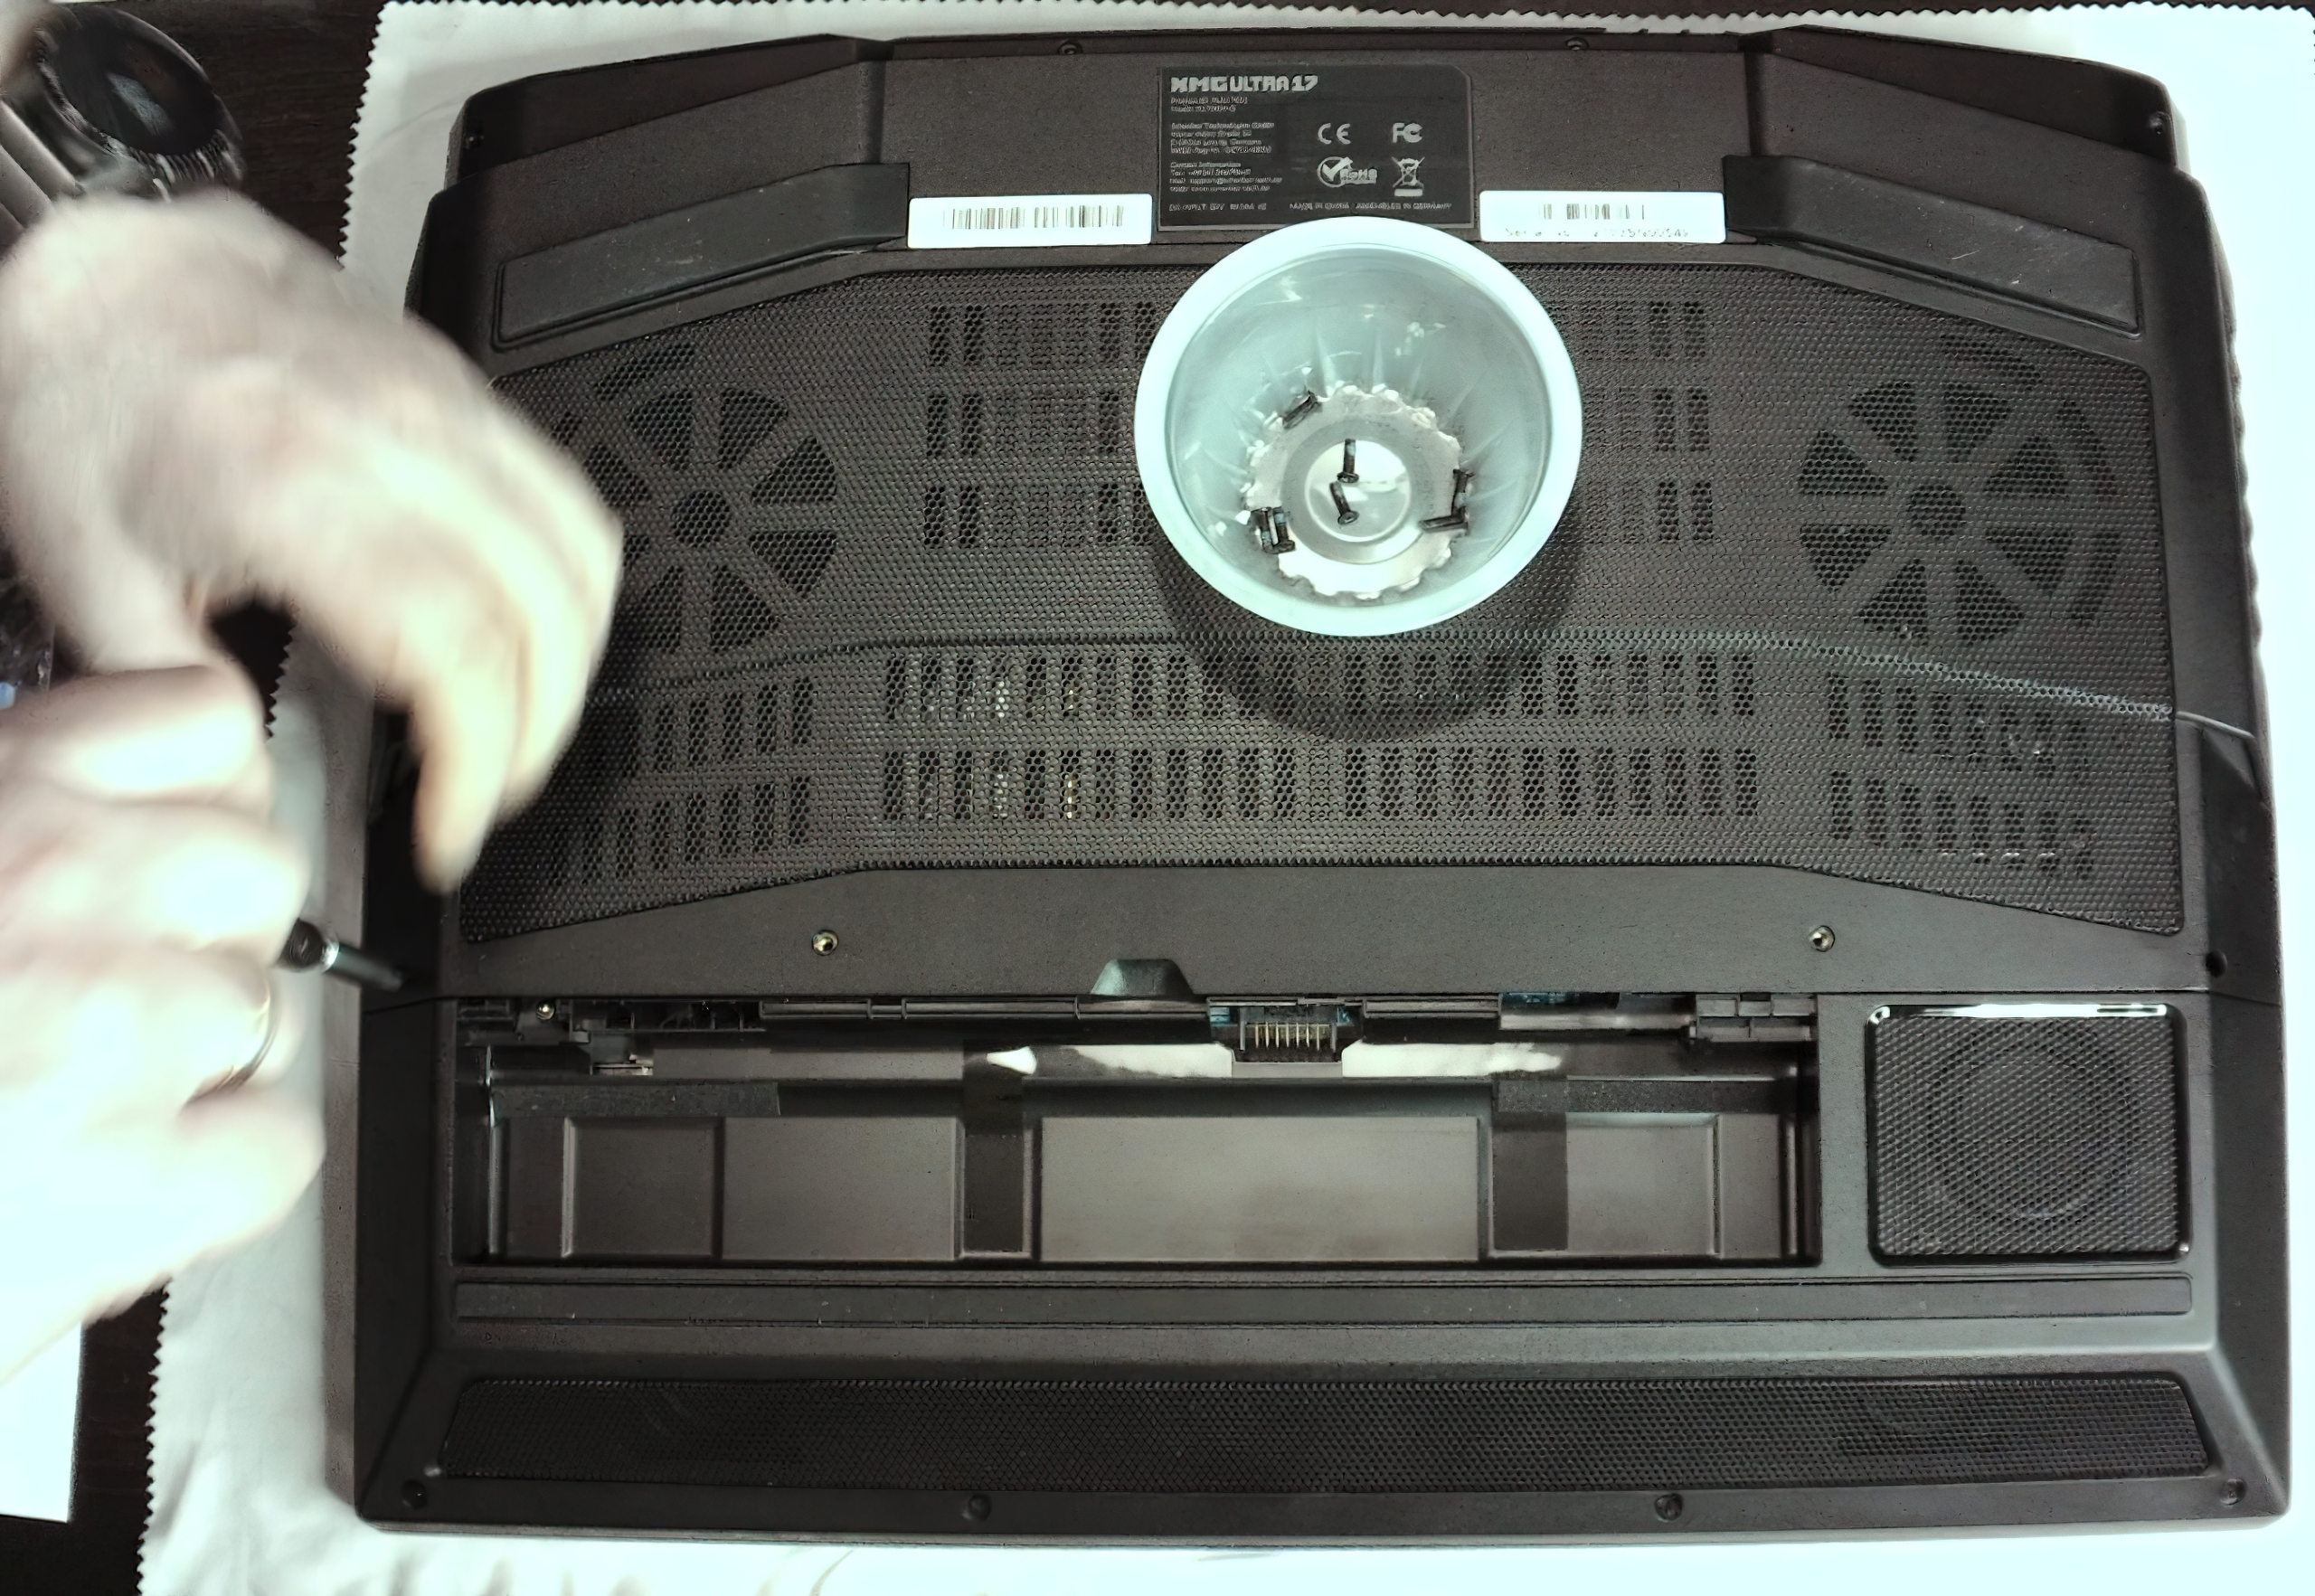
I don’t want to anticipate the following video with my PC house building, but I have cut out the most important steps from the time-lapse video and commented them for you. Let’s start by taking it apart. The battery should be out, then it’s only 8 screws total to remove the bottom cover. Be careful when folding up, the lugs of the Lightbar can easily get caught. We collect the screws in a separate container for the outer screws so as not to get anything mixed up.
Removing the sidebar is easy. However, the flat cable must first be loosened (flip up the lock) before loosening the three screws (separate bowl to collect!).

Then you can carefully pull everything up and set the bar aside. Attention, the black light covers can get caught in the body!
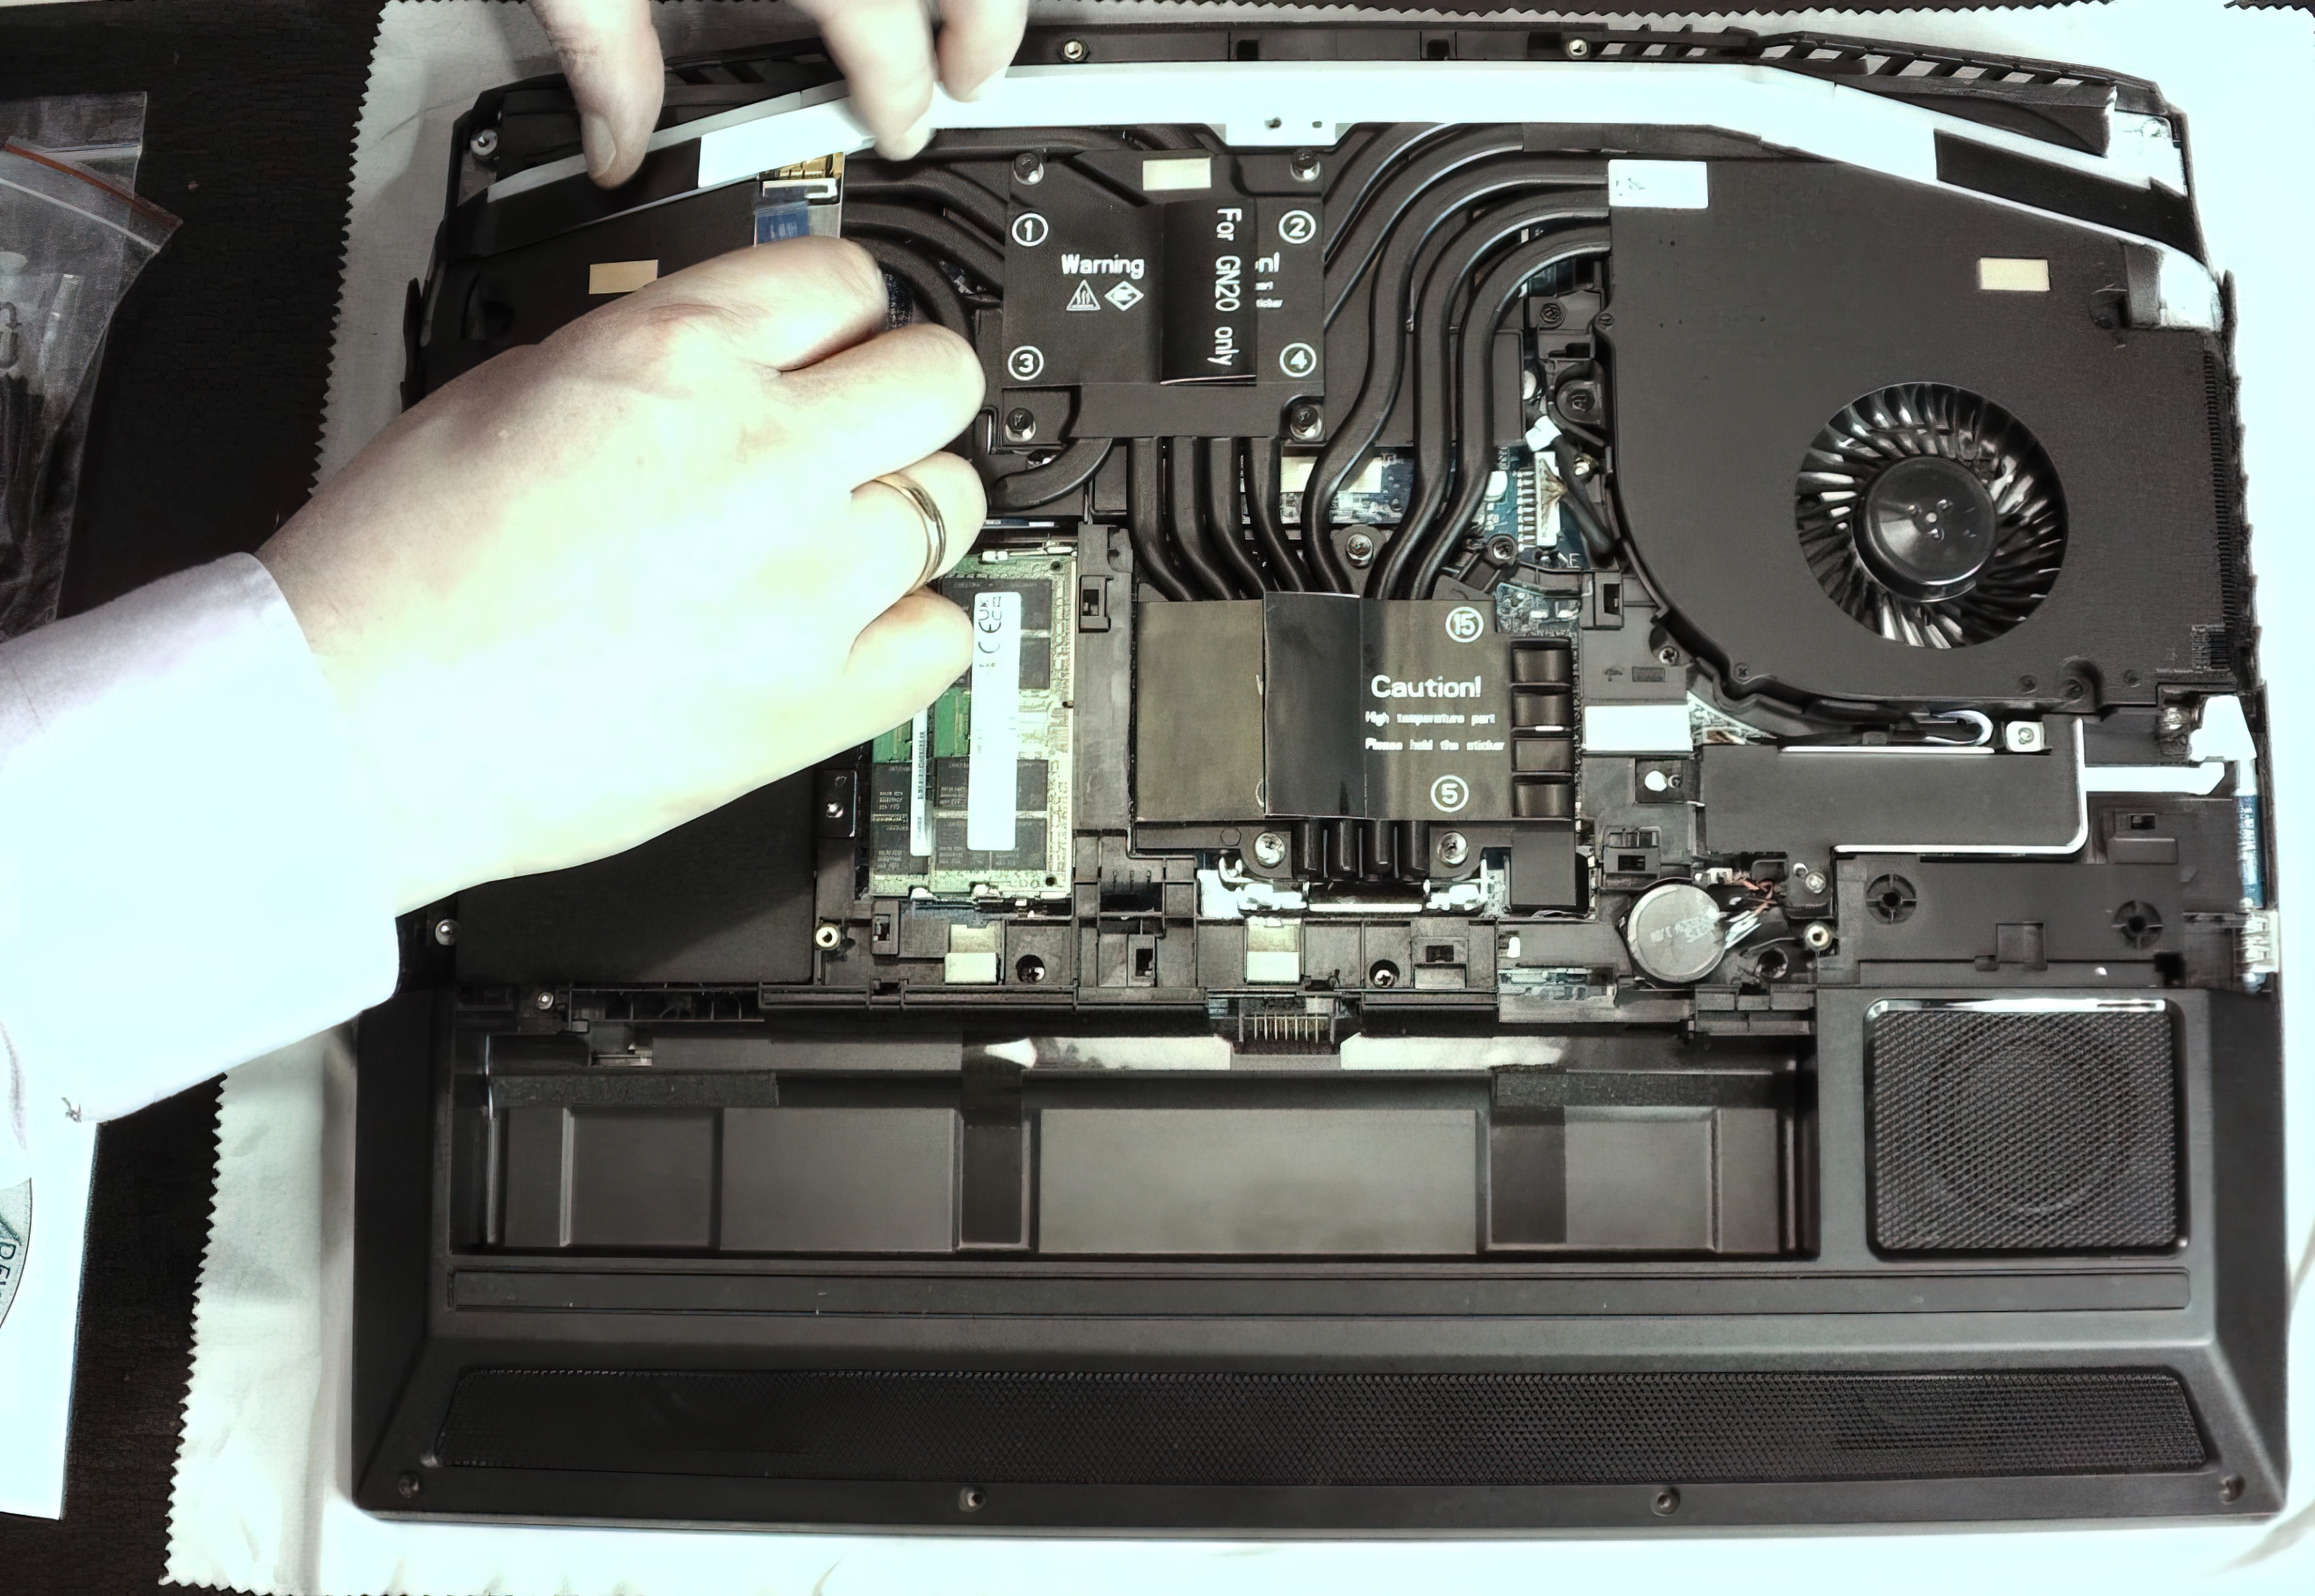
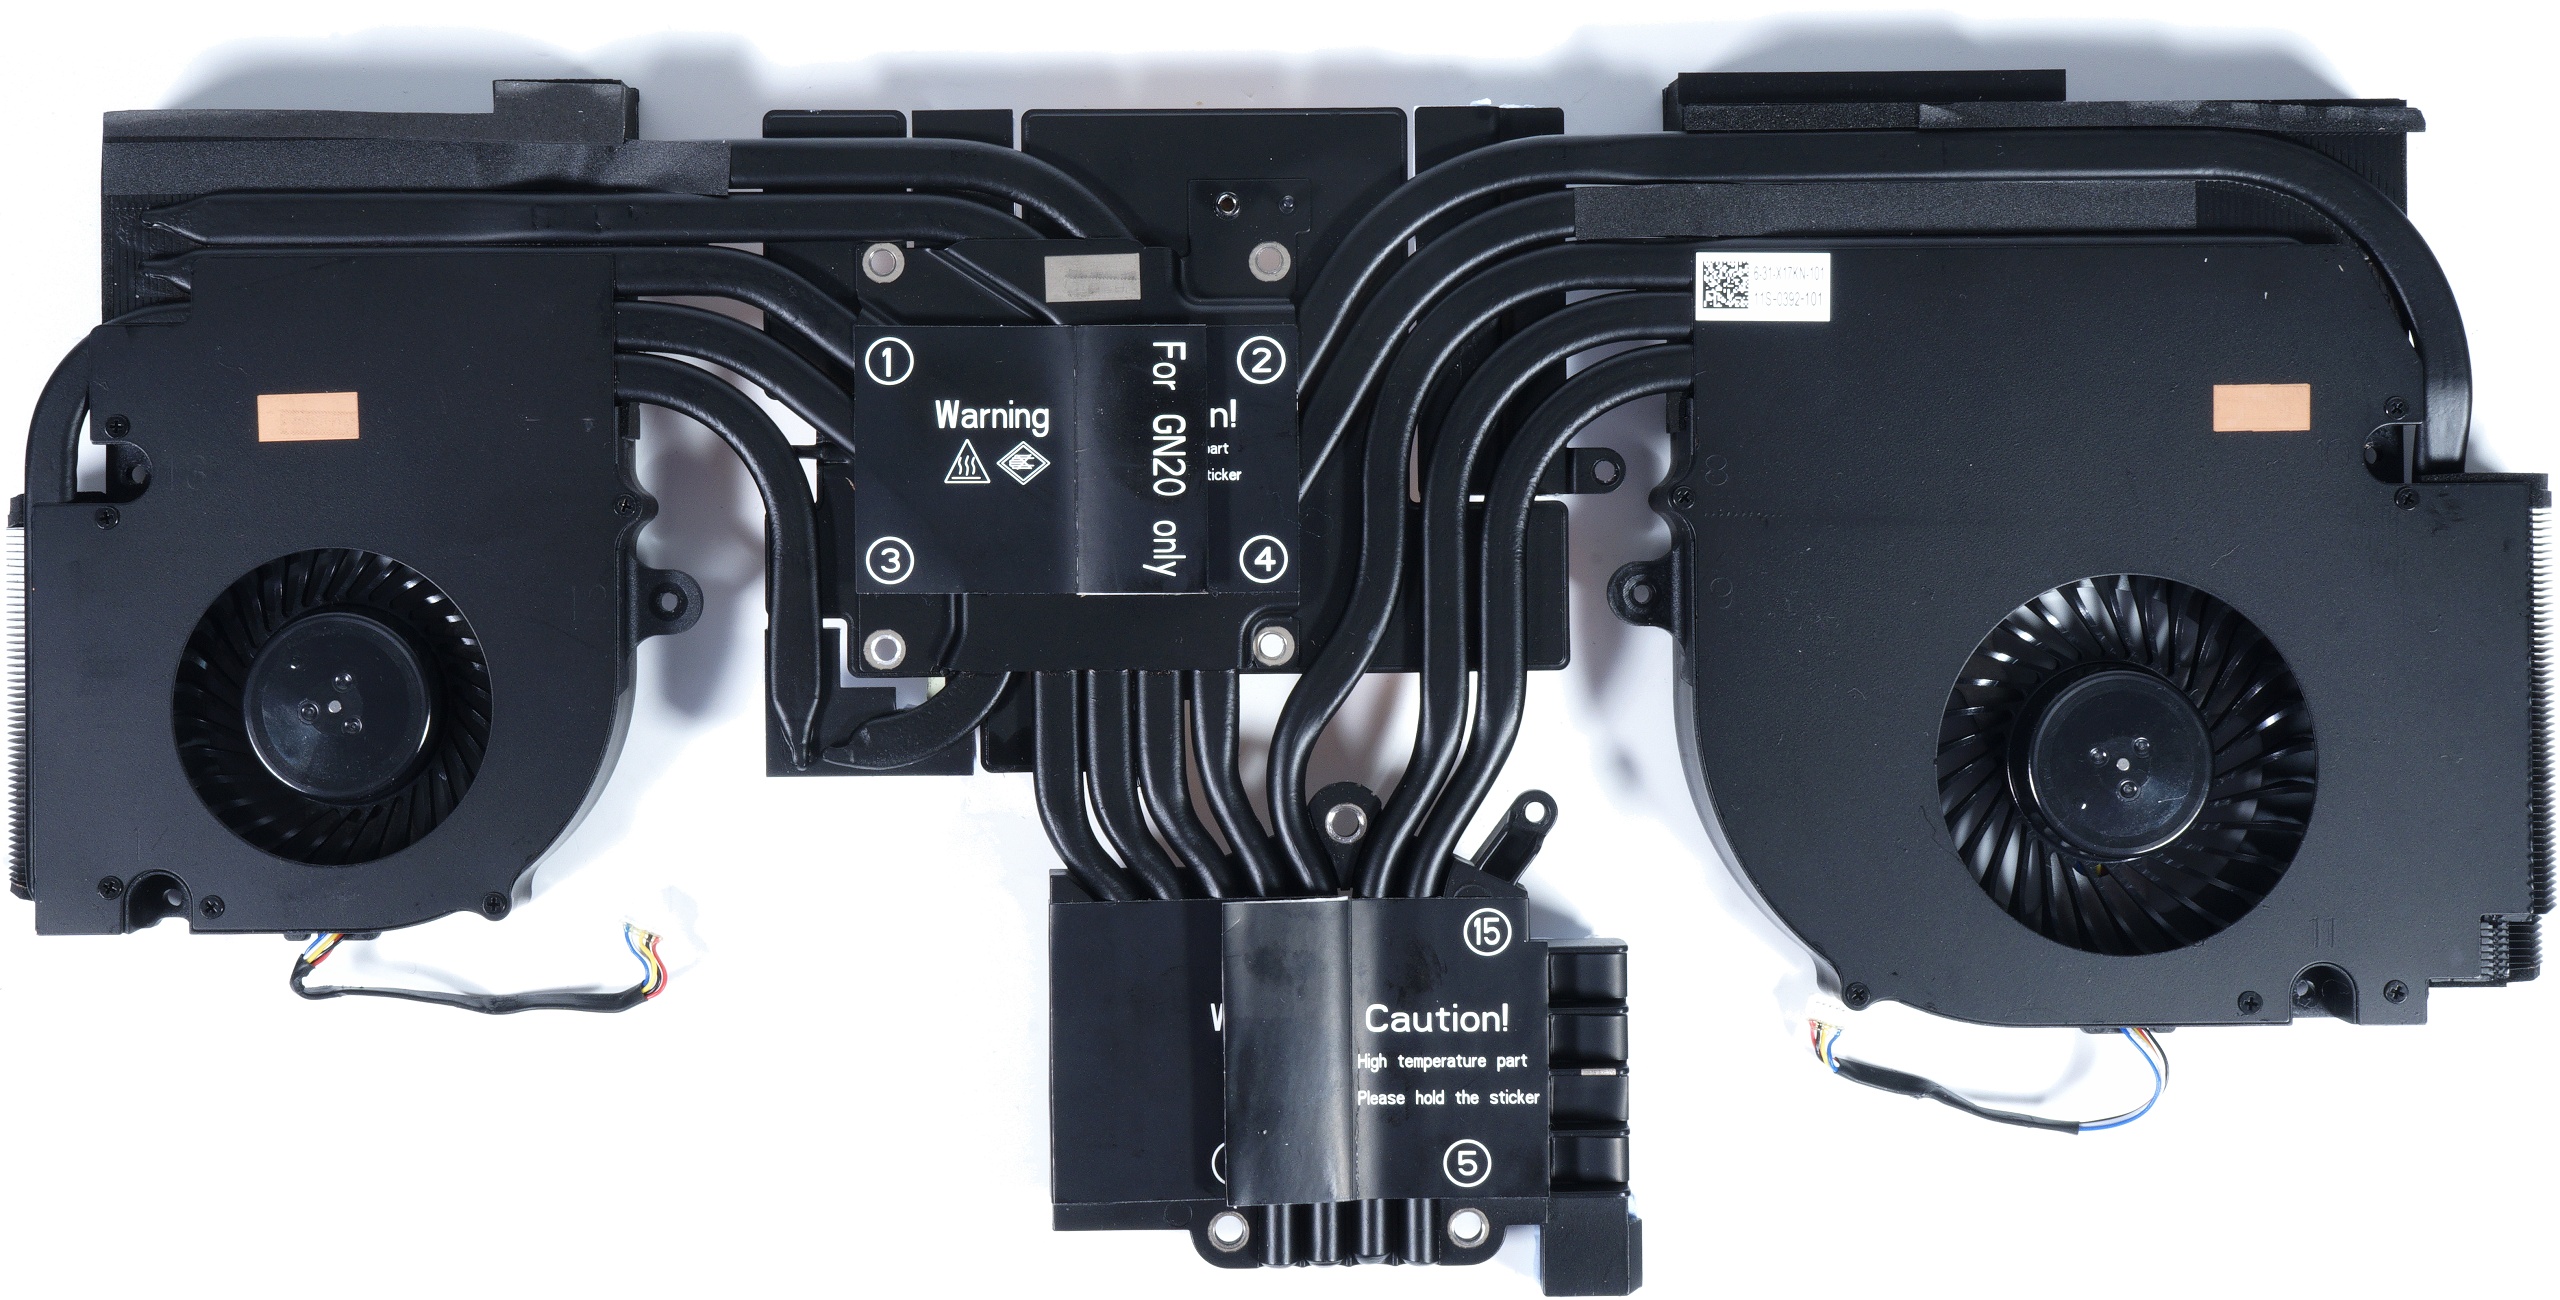
Then we carefully loosen the fan connectors (Mini-Molex), using suitable precision mechanics pliers for this if necessary. Do not pull on the cables, only on the plug! So good tools are first civic duty!
After that we can loosen the remaining screws of the cooling block. But even here you should sort well, because the screws are of different lengths! So those of the GPU area go into their own shell, and those of the CPU go into another shell. The remaining screws of the cooler correspond to those of the Light-Bar, so they come along in this container.
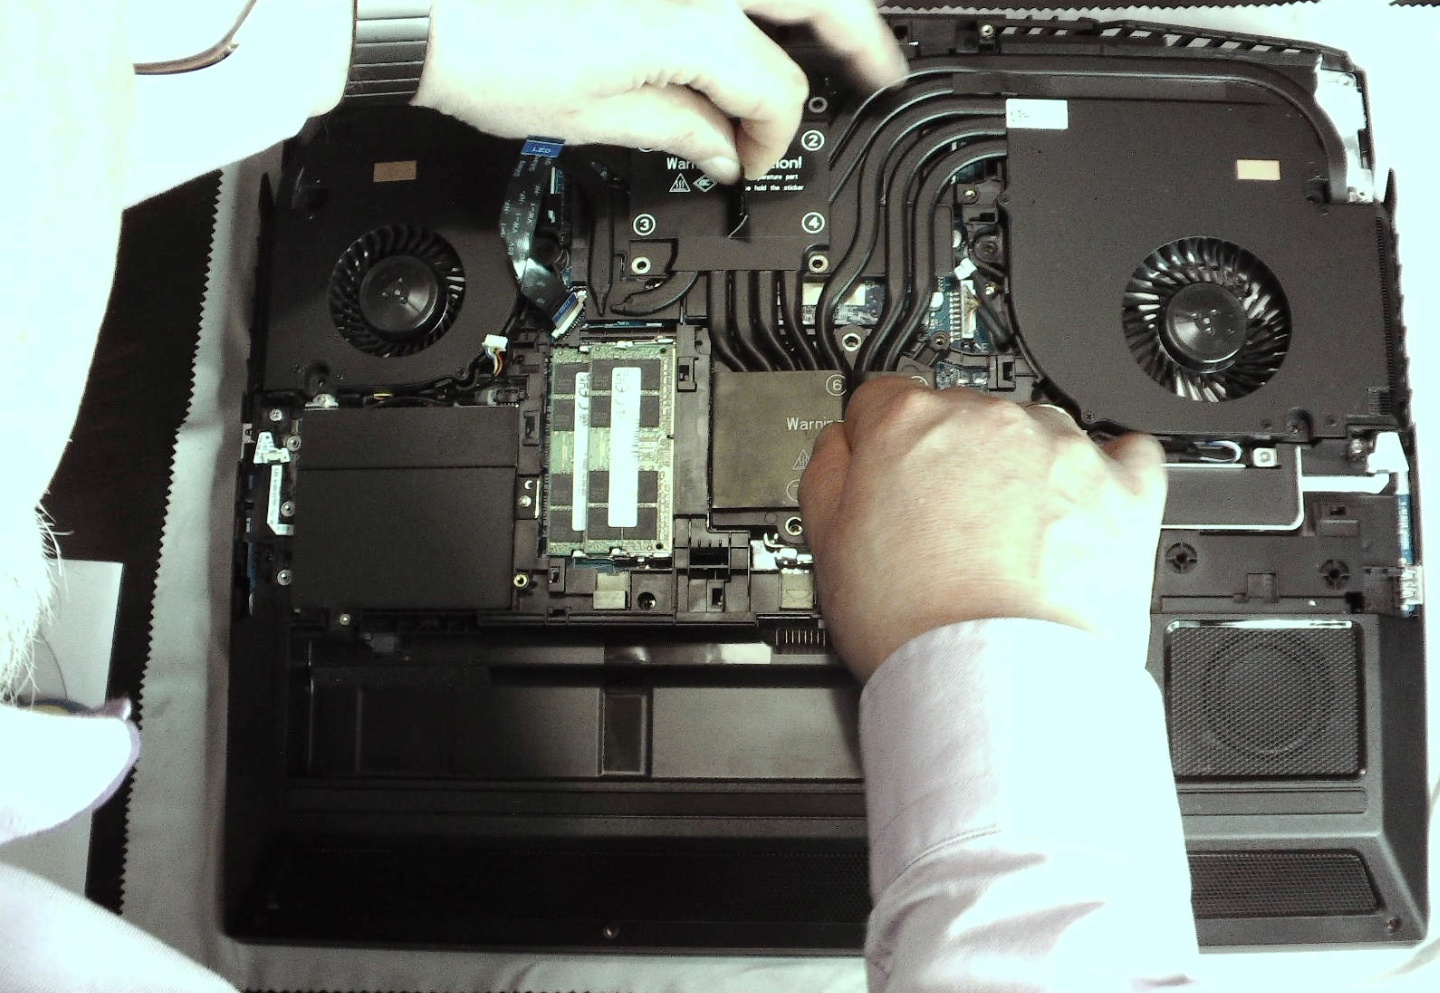
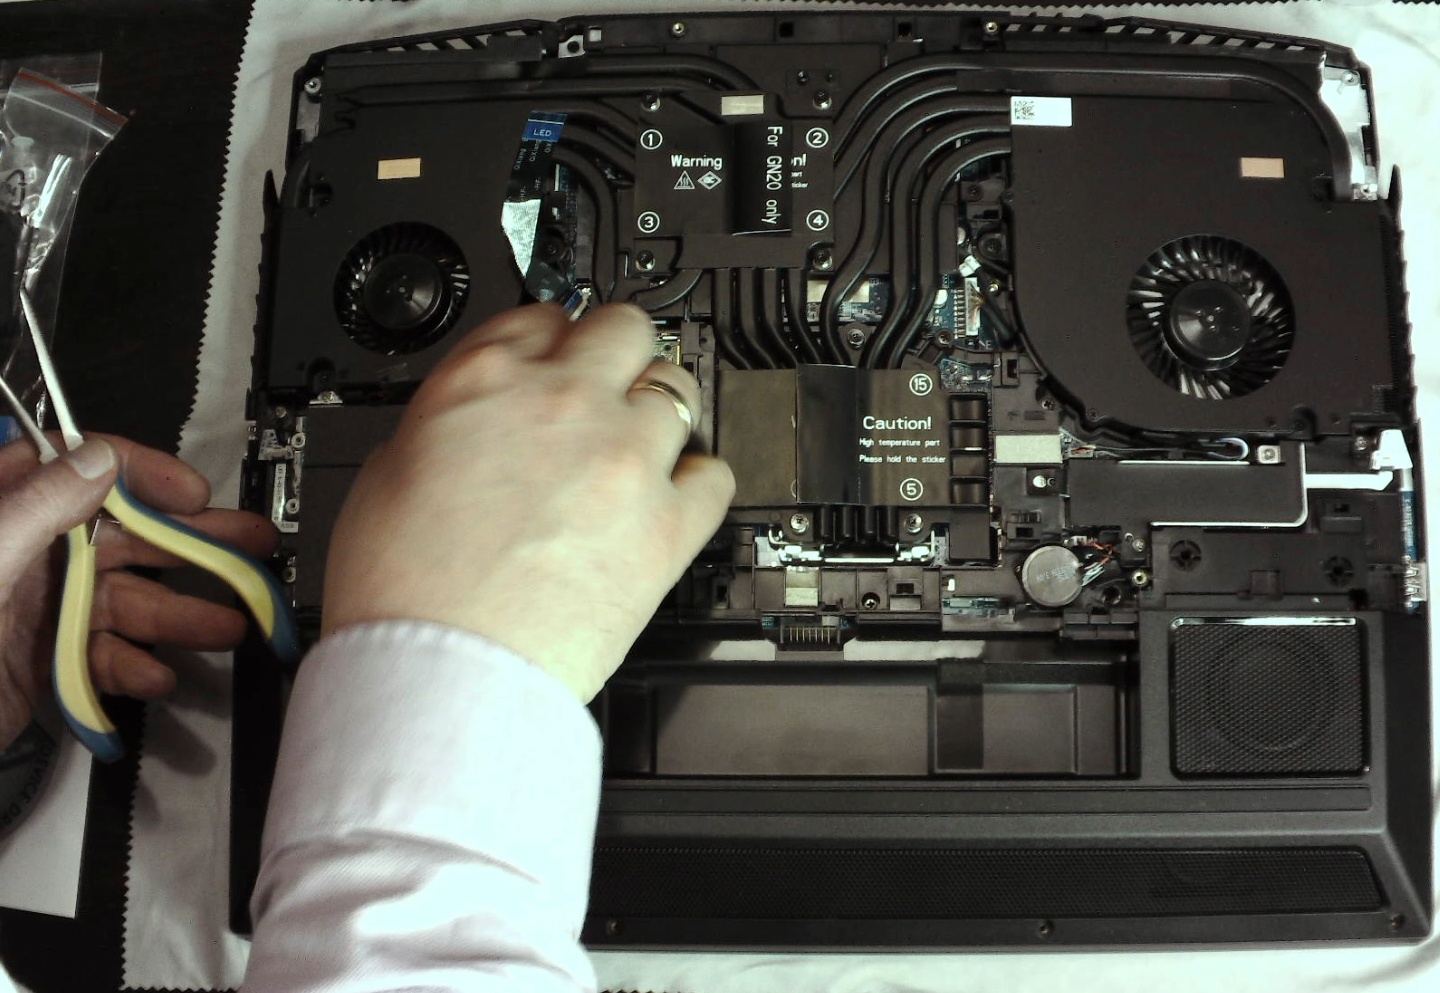
Now you can lift out all the fun at the provided tabs, but you also have to take care that if necessary the graphics card and the thermal pads for memory and VRM still “stick”. Therefore you should always start lifting in the CPU area (in the picture the lower tab). Then the complete block can be uncovered and it should also be cleaned carefully if necessary. Pads can certainly be used more than once, but you have to make sure that the contact is still sufficient.
- 1 - Introduction, Unboxing and Connectivity
- 2 - Datasheet and Manual
- 3 - Maximum Power Draw, Battery and Cooler
- 4 - Disassembling and Removing the Cooler (Diary)
- 5 - CPU, Thermal Grease and Assembling (Diary)
- 6 - Performance Mode: Power Draw, Temperatures, Infrared
- 7 - Entertainment Mode: Power Draw, Temperatures, Infrared
- 8 - Summary and Conclusion for Part One


18 Antworten
Kommentar
Lade neue Kommentare
Urgestein
1
Neuling
1
Urgestein
Neuling
1
Neuling
Mitglied
Urgestein
Mitglied
Urgestein
Veteran
Neuling
1
Alle Kommentare lesen unter igor´sLAB Community →