


Today we build ourselves a notebook! Well, I don’t want to exaggerate, but that’s the beauty of such a barebone: you can actually put in what you would like to have (or think you have to have). Based on the Clevo X170KM-G, that’s no secret, I simply assembled the XMG Ultra 17 myself once, and again, there’s not a dry eye in the house. Especially not the one aimed at the socket. But power comes from fuel, and in the end you can’t get “beautiful living with electrons” for free.
Of course, you can also buy the 4.7 kg heavy part (with more than 1.7 kg for the two power supplies) ready configured and equipped on the Schenker homepage at bestware.com, but first of all that’s no fun for a curious gamer like me and secondly, experiments with own hardware are always worth a try. Schenker has to be given credit for one thing: they have managed to adapt the in-house OEM BIOS in such a way that the installed memory also offers more performance. After all, 64 GB DDR4 3200 on Gear 1 finally does what you should expect for the price.
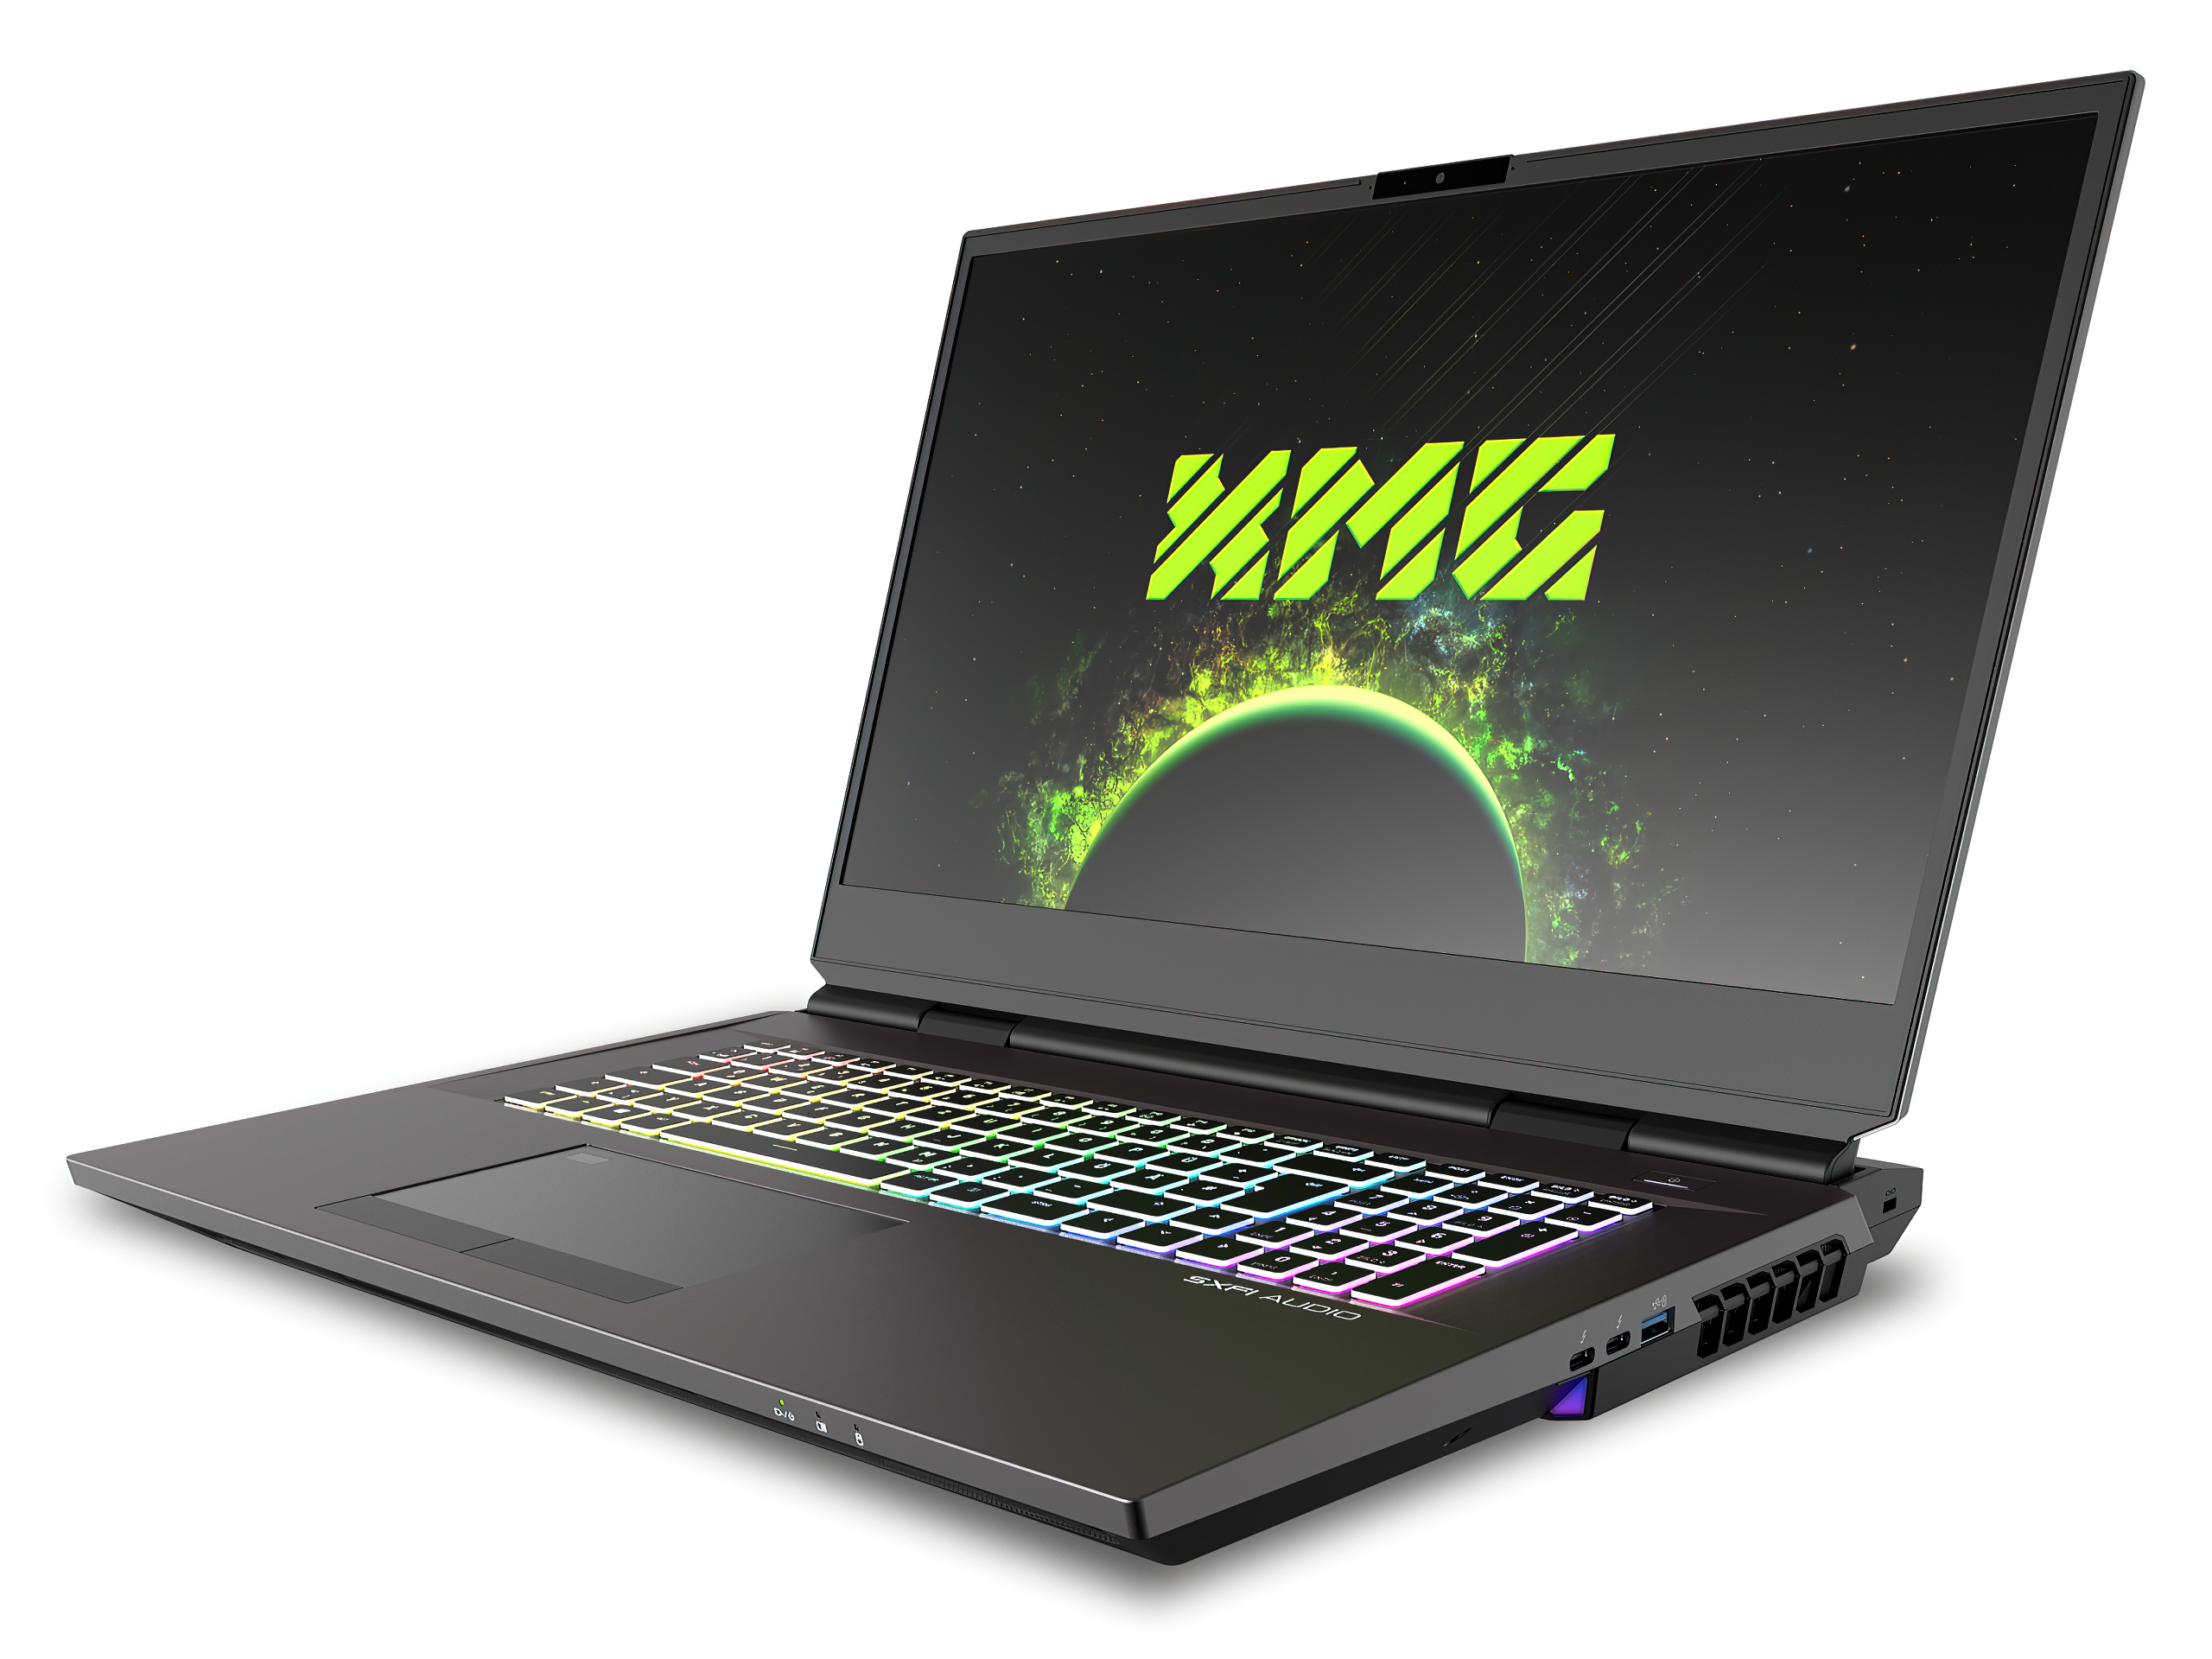
For the display, you can choose between a Full HD panel with a full 300 Hz (I specifically chose IPS from AU Optronics B173HAN05.1) or a UHD panel with 60 Hz (both with G-Sync). For the graphics board, I went for the GeForce RTX 3080, which is the laptop GPU with a power limit of 150 watts (+15 watts Dynamic Boost), which is much faster than the Max-Q design with a much lower TDP (like in the recently reviewed Razer notebook).
The 17.3-inch screen installed here (and thankfully matte), which still delivers a fairly good contrast with its 1,920 x 1,080 pixels, struggles a bit with the maximum brightness. It’s certainly more than enough for a grotto-olm like me, but could happily be more for sun worshippers in a light-flooded home office. The 300 Hz panel offers fast response times, shows no PWM flickering and it supports NVIDIA’s G-Sync technology, so the refresh rates of the display and GPU are dynamically adjusted to each other. In the near future (summer 2021), the FHD/300Hz panel in the ULTRA 17 will then be replaced by a 1440p/165Hz panel, with the price expected to remain identical.

This is joined by the Intel Core i9-11900K from my funny Influencer box, which I shouldn’t even own, but nevertheless use extensively as always. The accessories as such are extensive, especially the two power supplies including a special cage, which serves as an organizer and recliner for the two power brothers, catch the eye immediately. The battery pack, a microfiber cloth, a DVD, as well as various small parts round the whole thing off in terms of content – barebone initial equipment with a focus on the essentials.


Connectivity
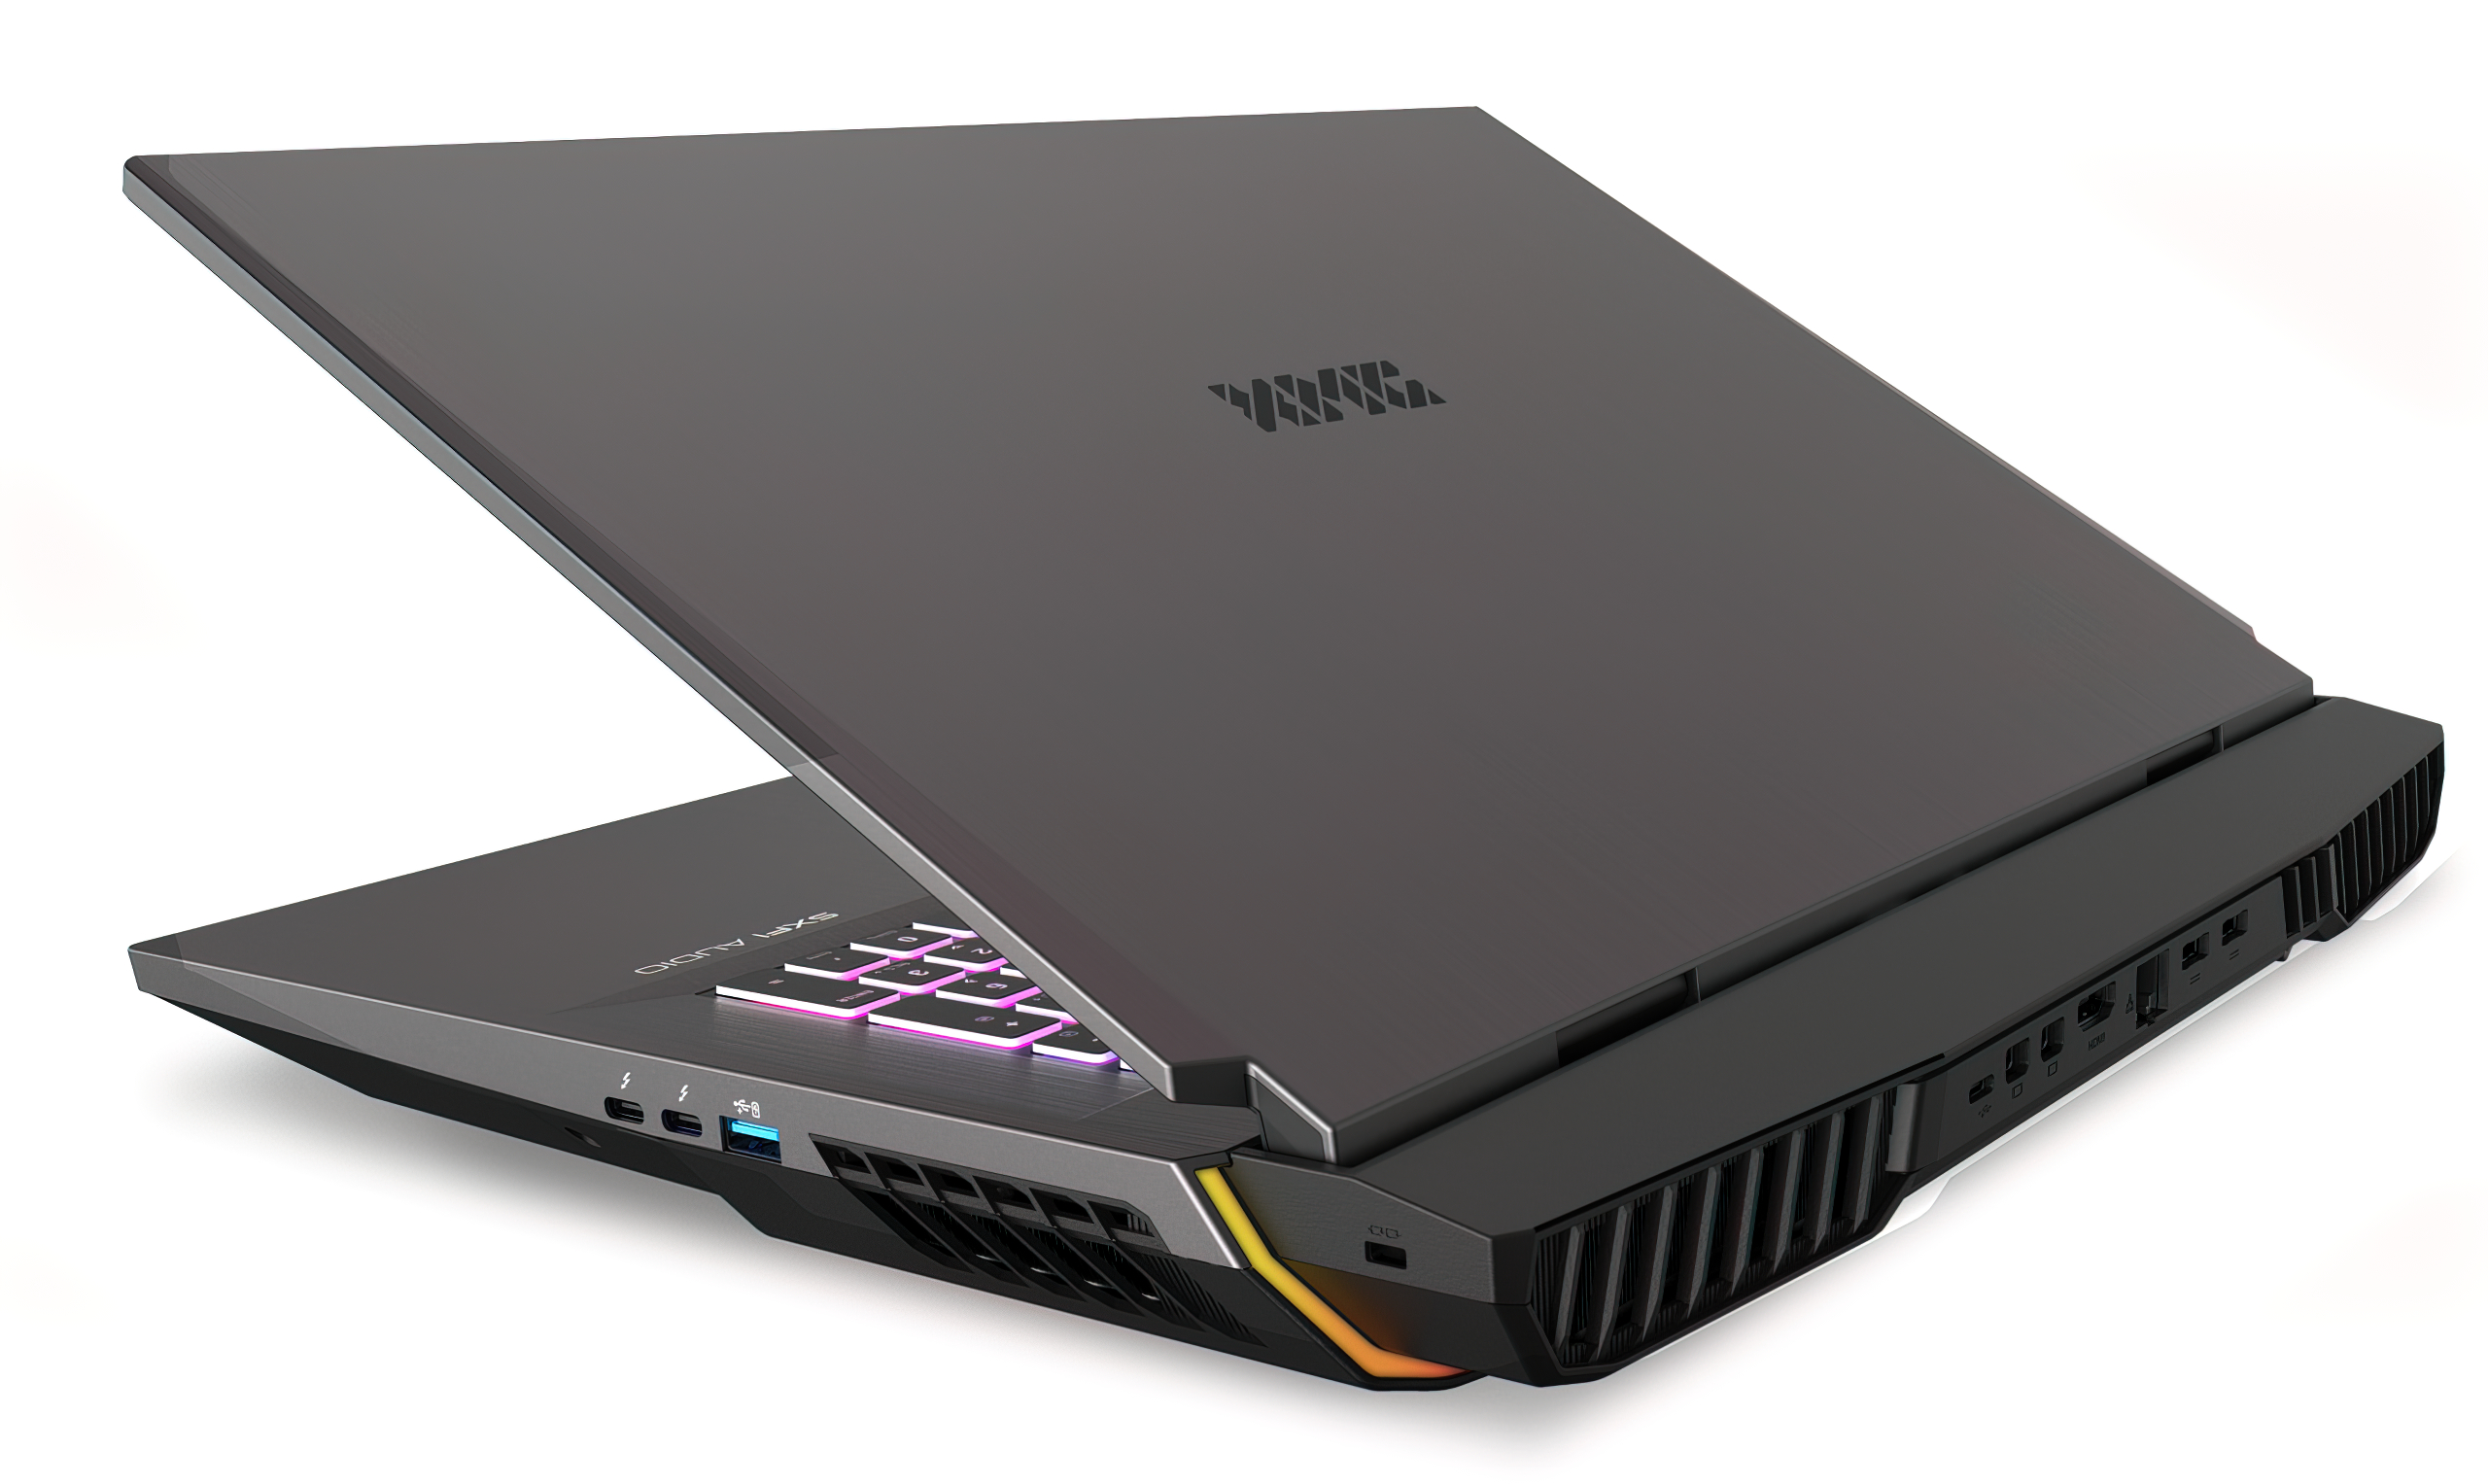
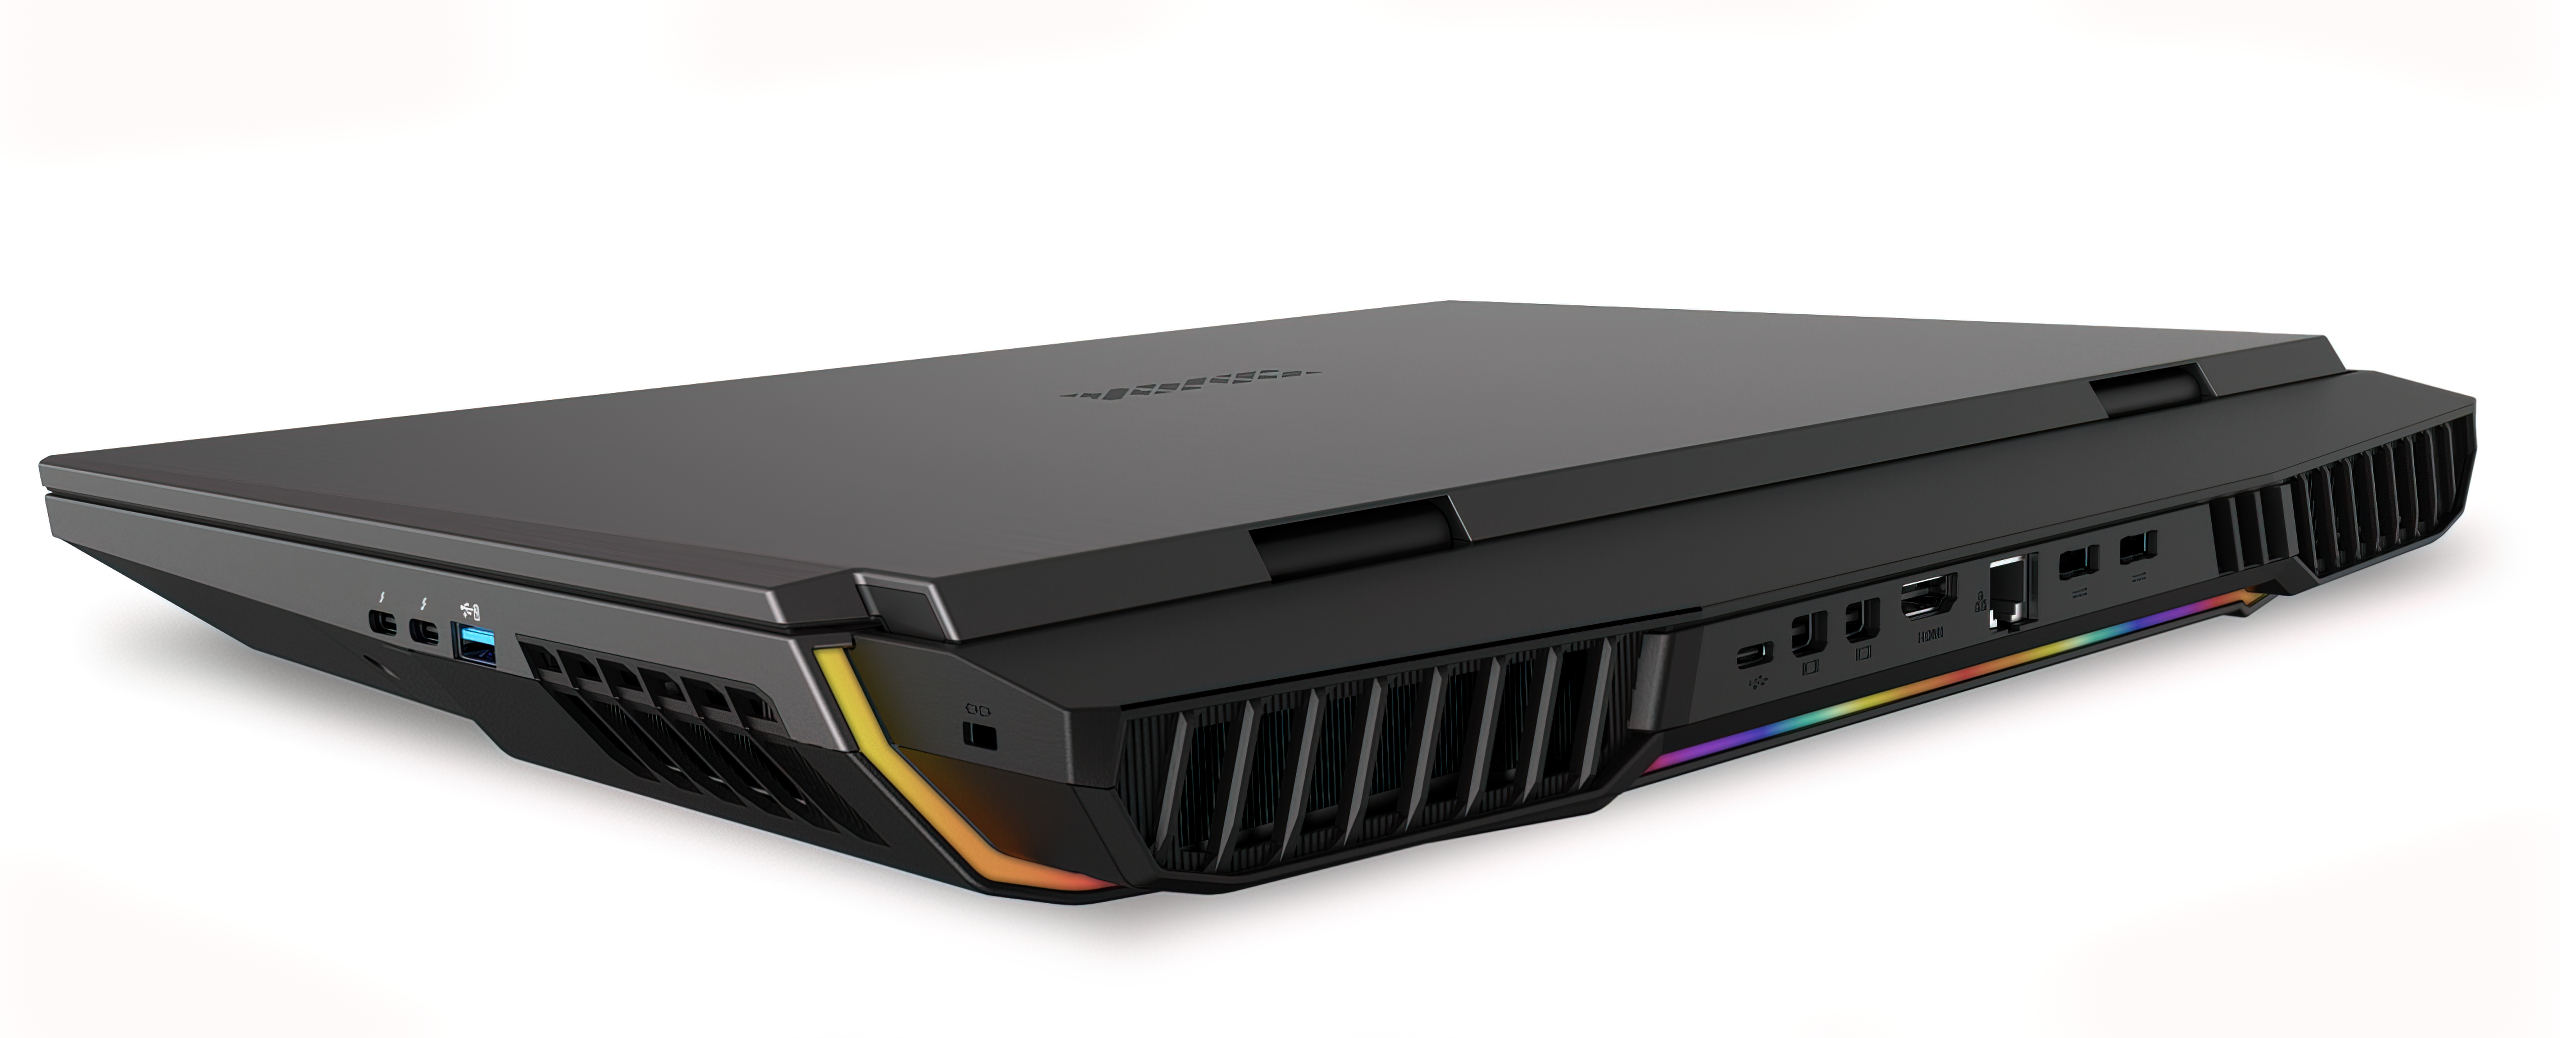
For the rest of the configuration including all possible variants please refer to the data sheet on the next page, this is just too much text at this point. Wi-Fi 6 (Intel Killer Wi-Fi 6 AX1650me, whereby the notebook managed plenty of 1.5 Gbit/s in the mix of sending and receiving on the suitable router. That’s very good. What else? After all, instead of Thunderbolt 3 (TB 3), they have now also placed two sockets with TB 4 at the back.
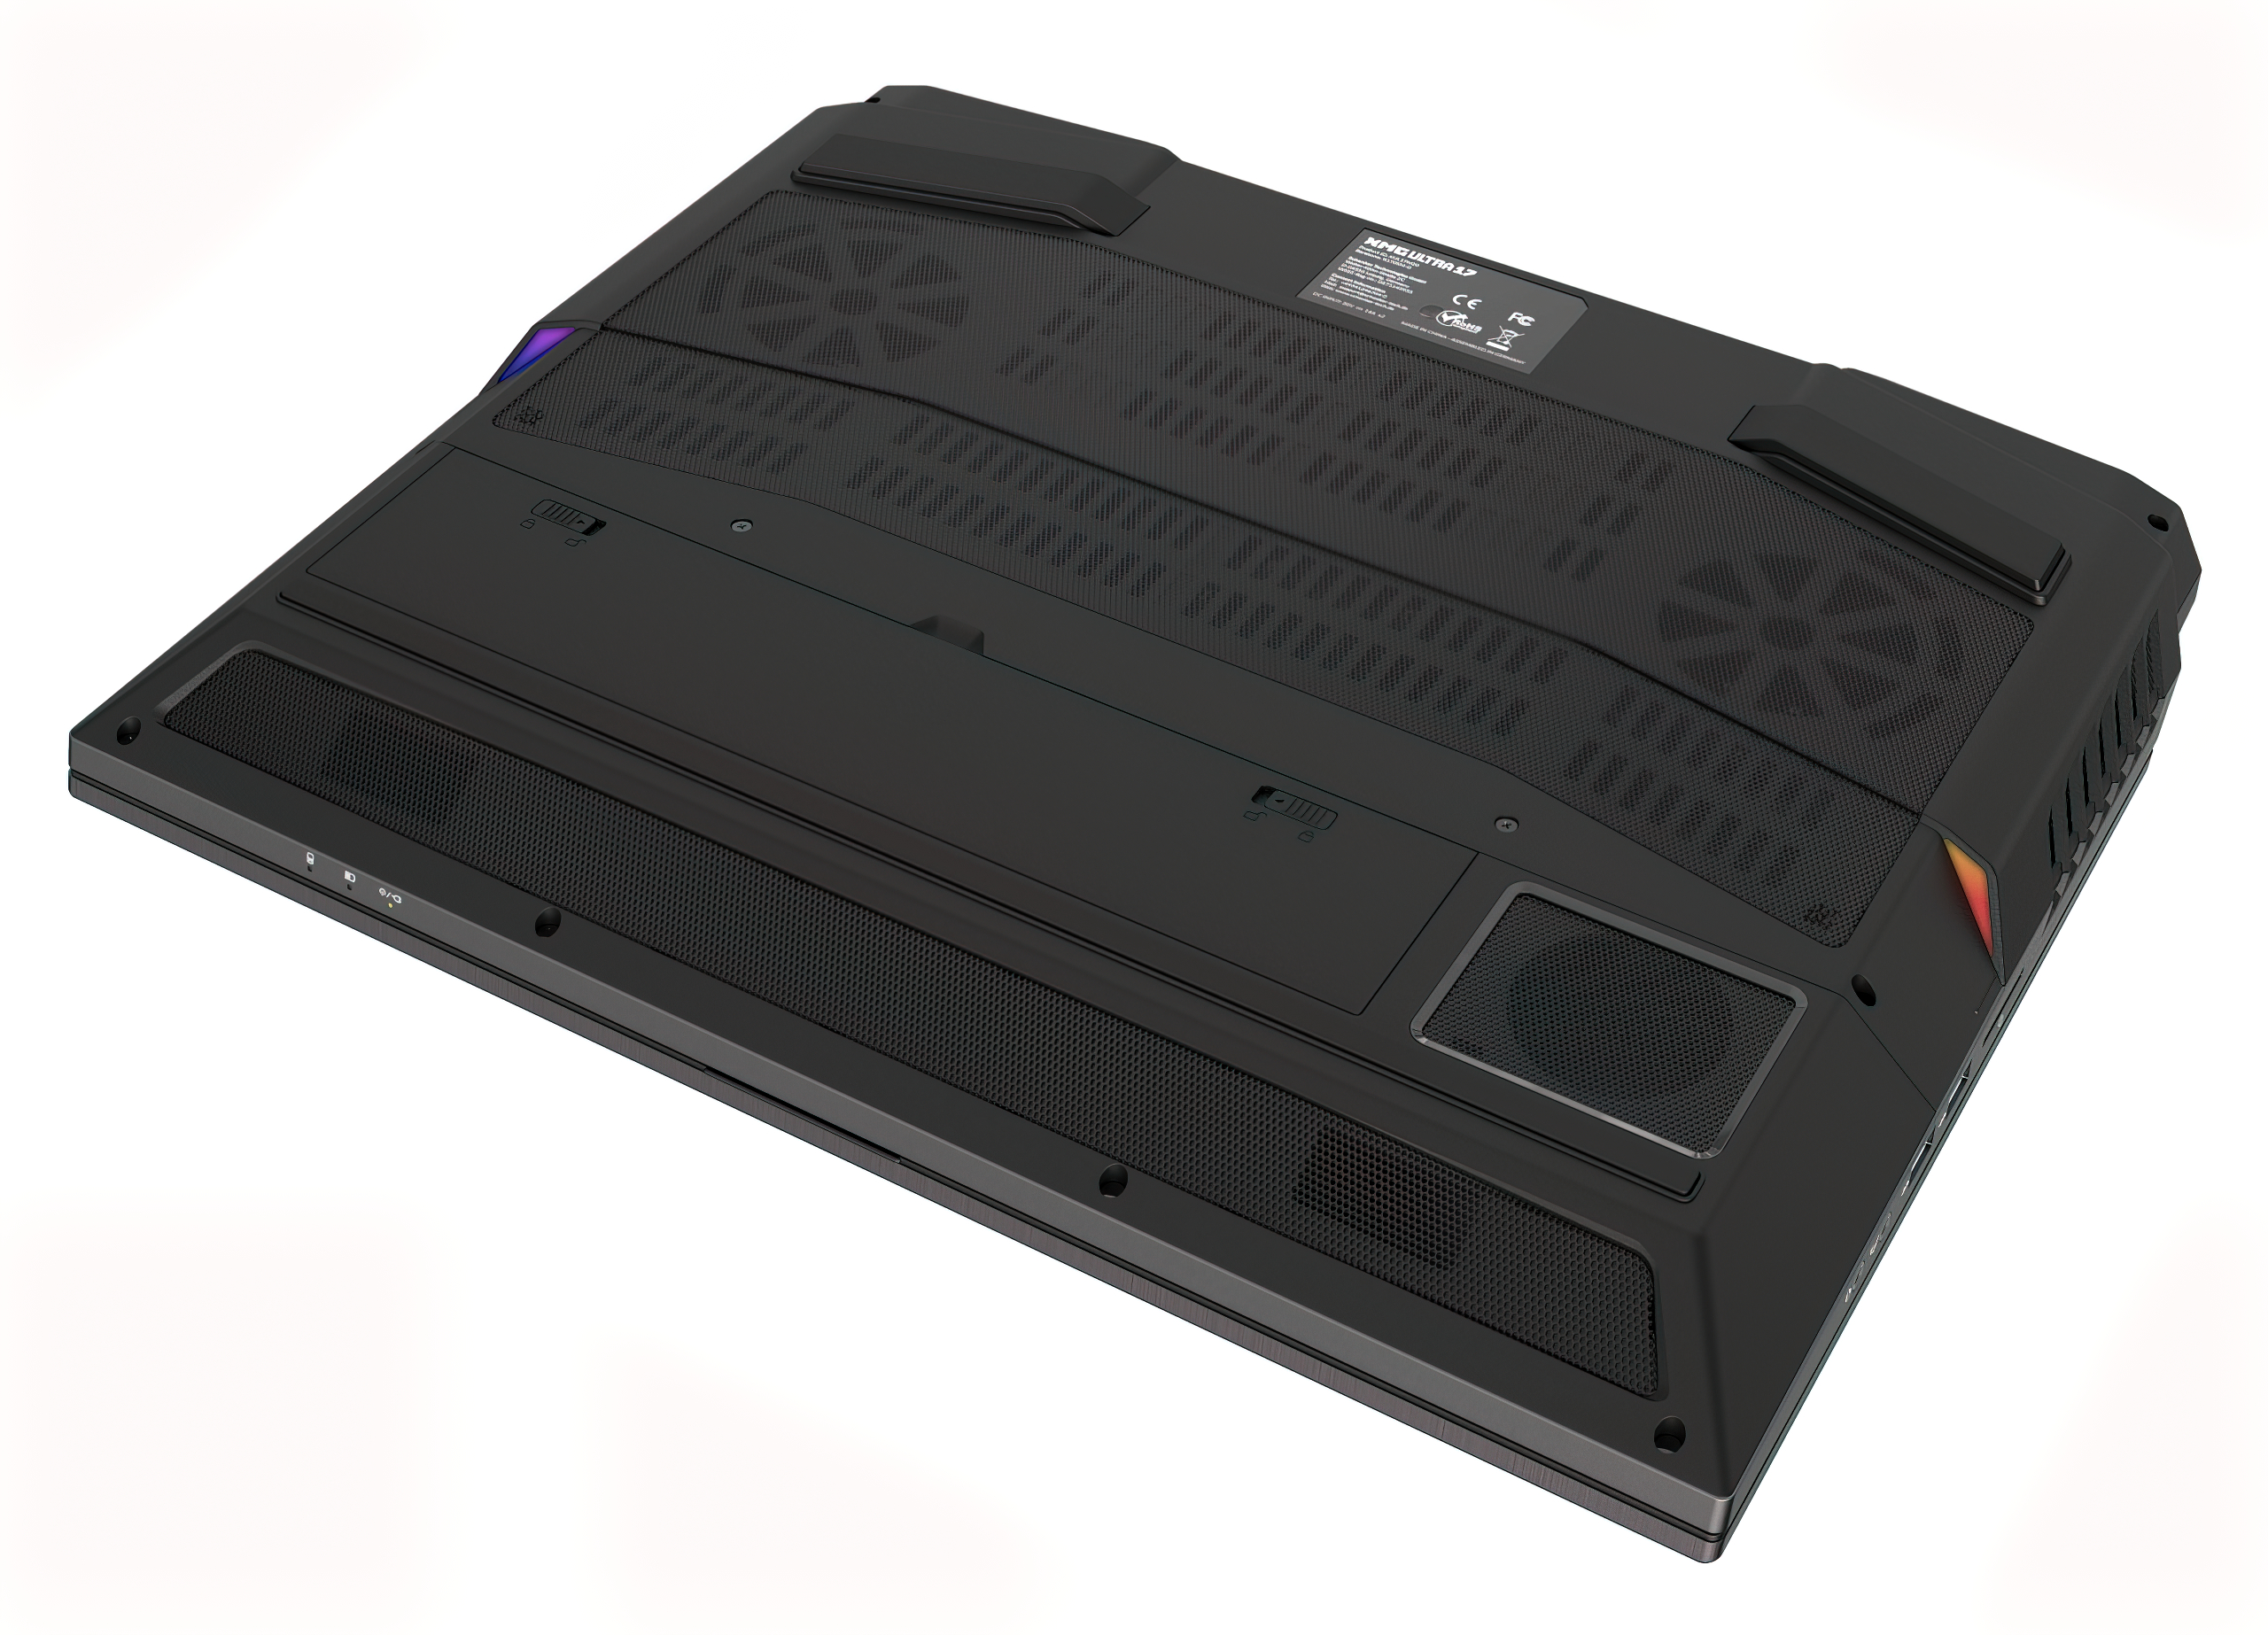
They sit there together with the Gigabit Ethernet (the value is even slightly surpassed) as well as a USB-C port, the HDMI 2.1 output and the two inlet pipes for the lush electrical feed. In addition, there are the two (of four) exhaust pipes of the cooling system on the left and right, where the supplied electrical energy (up to 372 watts!) is immediately spat out again as waste heat. We also find a light bar at the bottom as accompanying stadium lighting and we’re done with the Olympic plug-in games. Something about fuel, you know.

On the left side there is a relatively fast card reader. Both of my high-speed SD cards in the camera averaged 215 to 220 MB/s with a peak of up to 240 MB/s when reading. That’s neat, and I’m sure it goes partly to RKL’s credit. Then there are two USB 3.0 ports as well as two true HD audio ports. TRSS is thankfully dispensed with. And of course there is an air outlet.

And on the right? Two Type-C and one A make the USB party complete, especially since another air outlet provides a real fan stereo feeling. However, to save honor and acoustic first aid, it must also be noted that the rather dominant Performance Mode (“power mode”) can also be tamed in the Control Center. With the entertainment mode (“Entertainment Mode”) hopefully a quite effective wound treatment of the tortured eardrums is in store, which can unfold its effect very effectively after another howl, without the system losing noticeably in performance. The other modes are more for the gallery, as silent and power-saving is something we could also enjoy with a smaller notebook. So it fits.

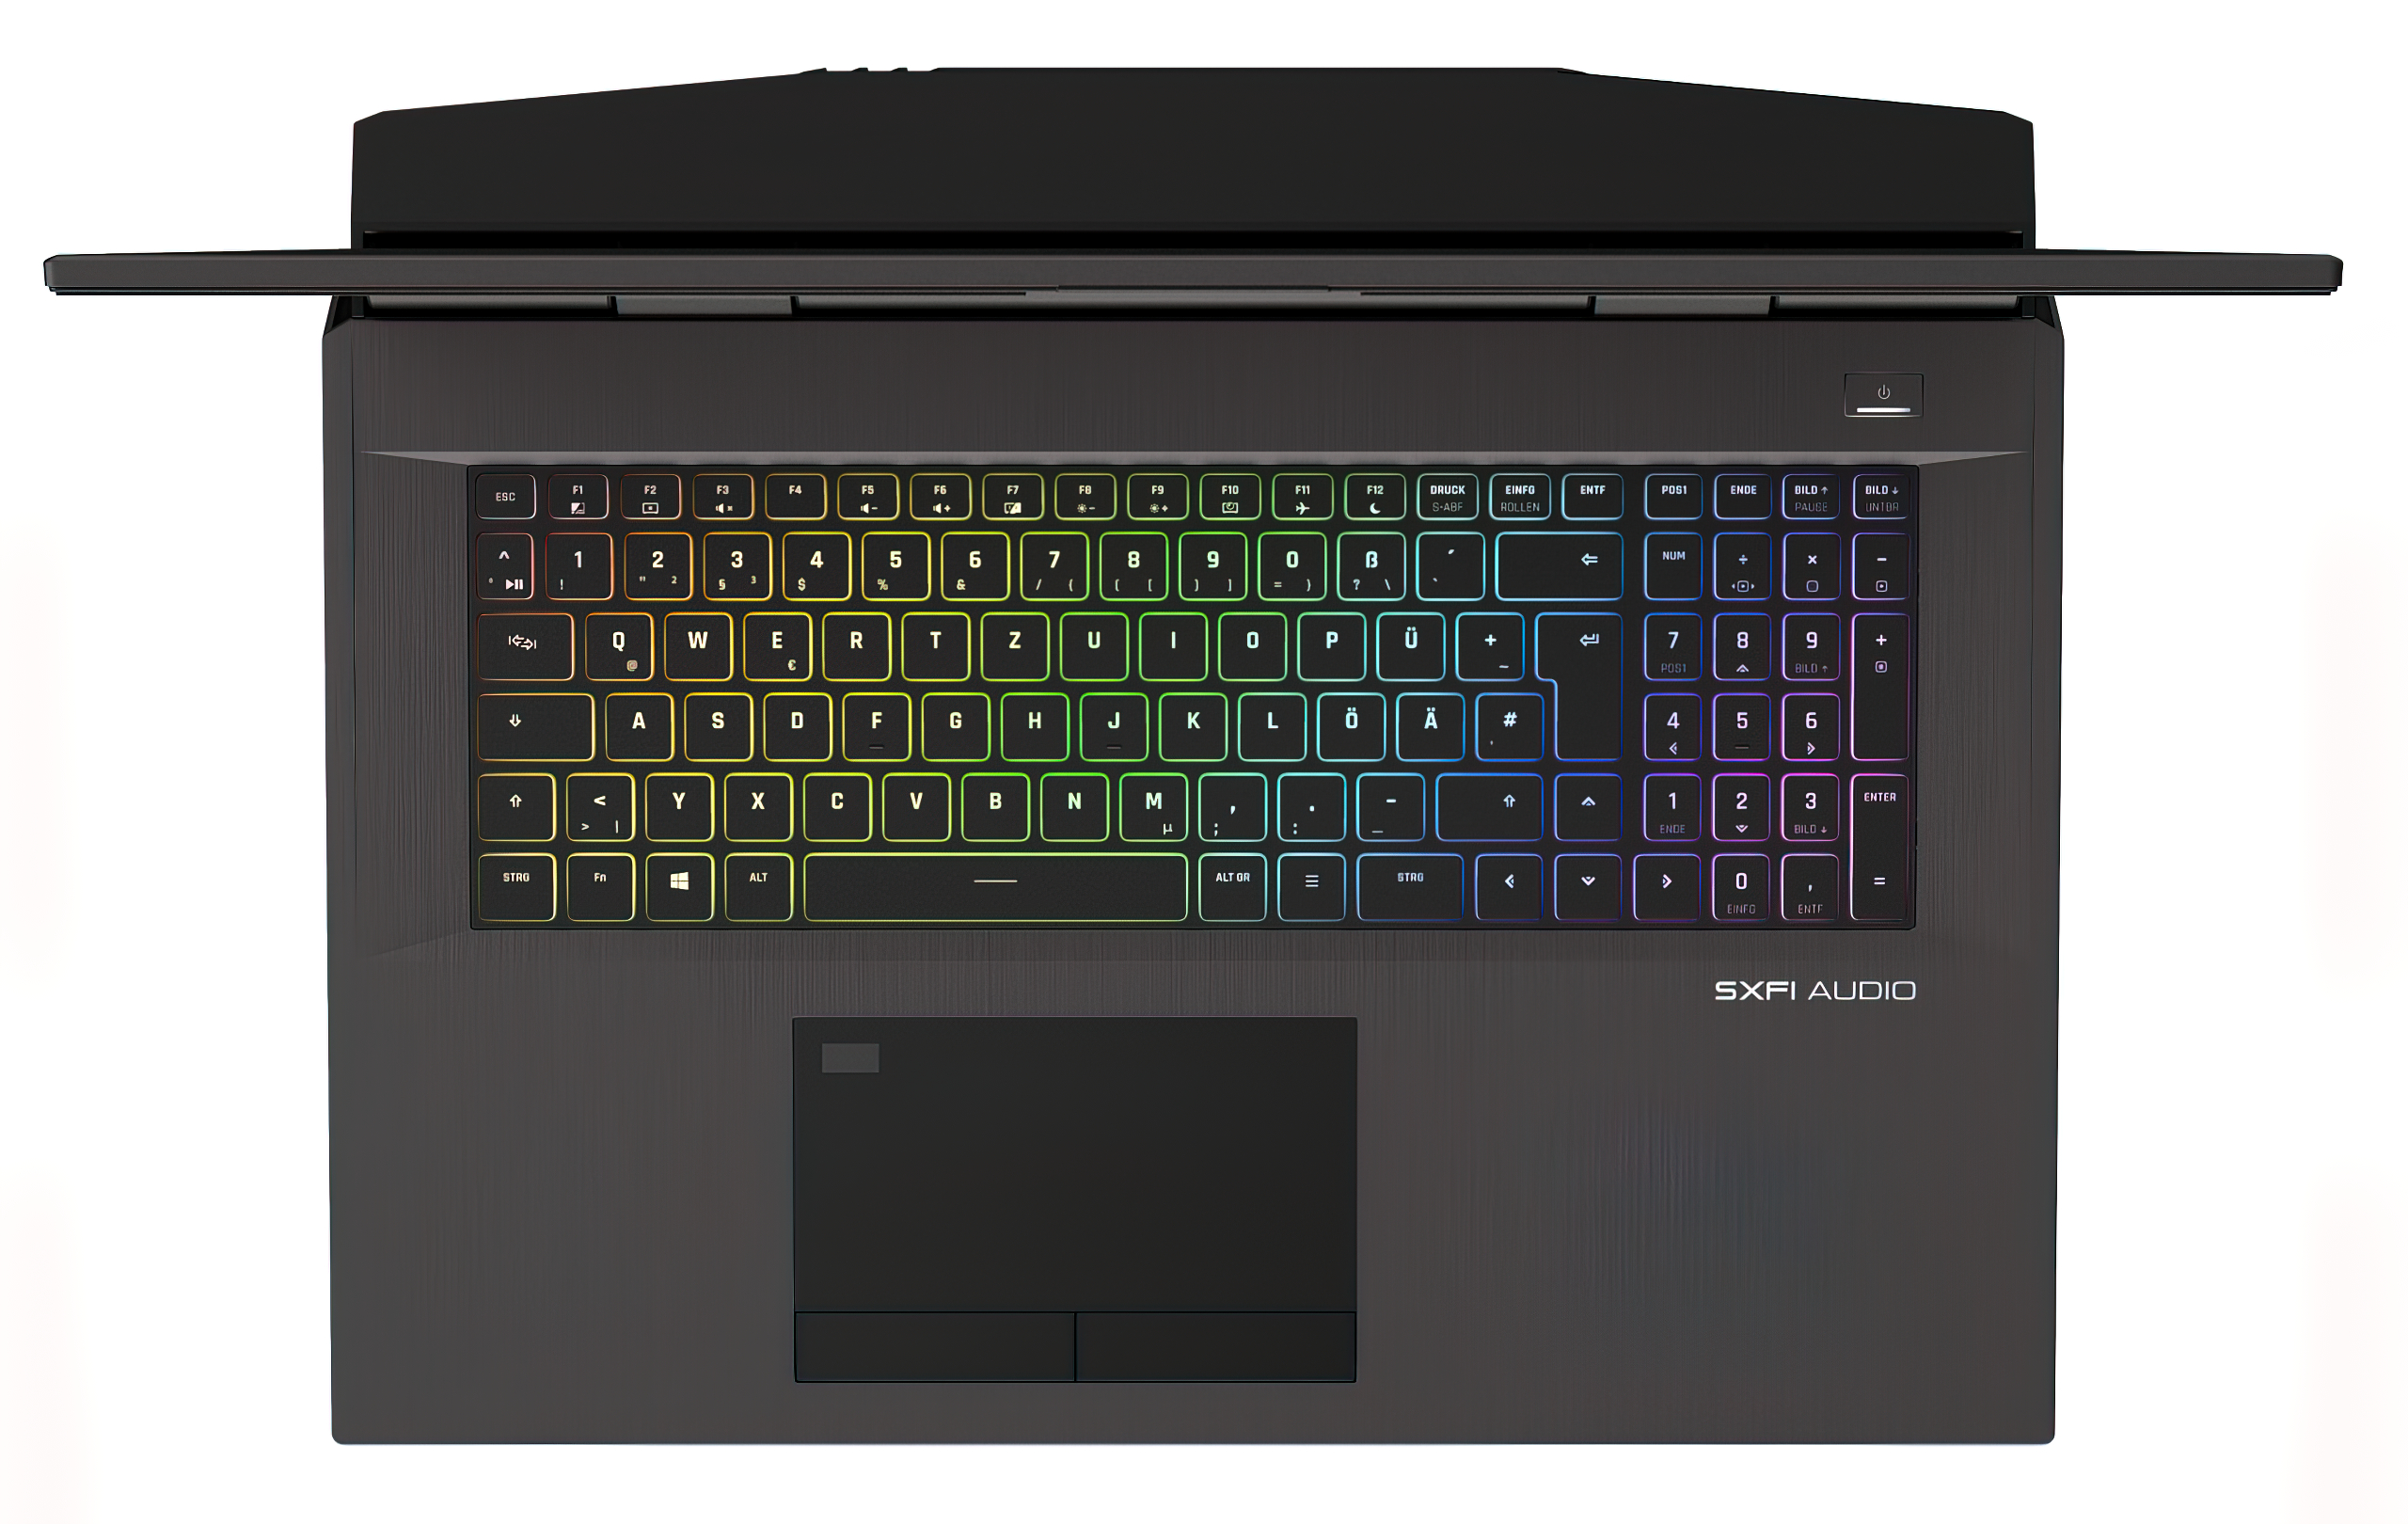
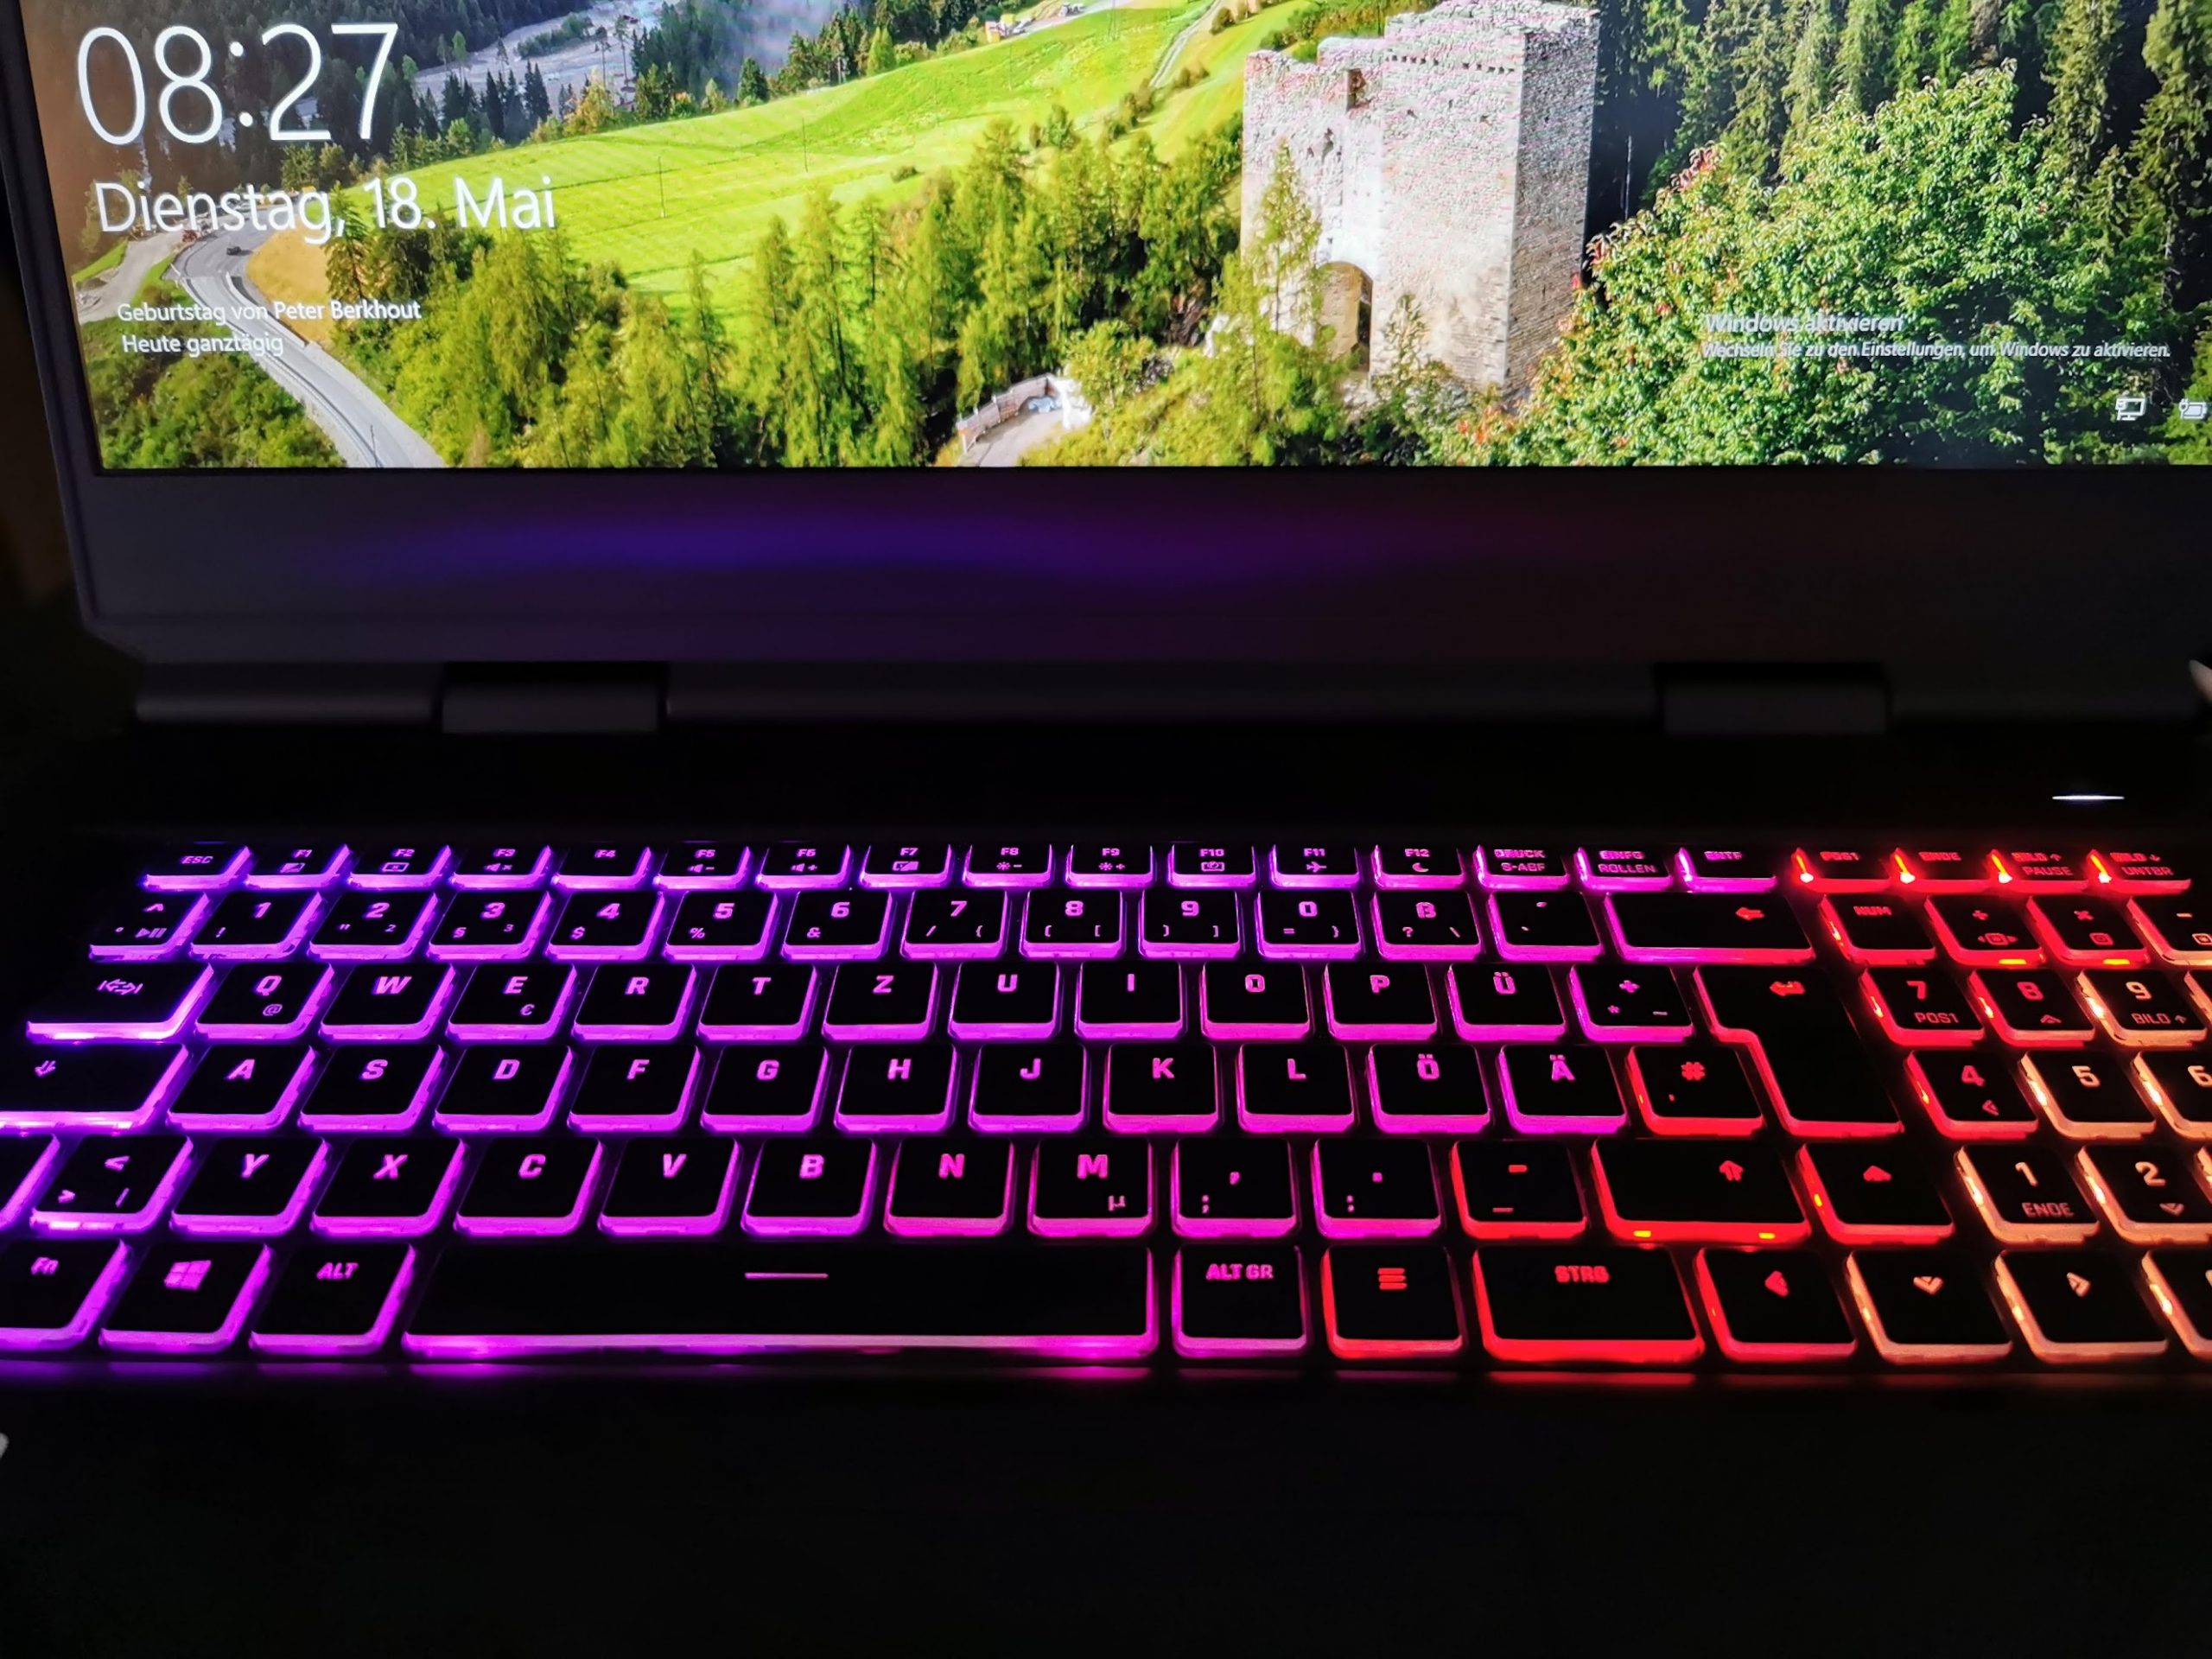
Because one thing must not be forgotten: the waste heat to be dissipated here is brute, but I’ll come to that in a moment when we talk about the cooling system. And since we just had a first encounter with RGB – it generally glows on and in the notebook like there’s no tomorrow. Especially the input field with the nice buttons has a nicely colored nightlife, but it can also be sent into lockdown abruptly via software.
And now we come to the technical data for bureaucrats (and the curious). Just keep scrolling, please.
- 1 - Introduction, Unboxing and Connectivity
- 2 - Datasheet and Manual
- 3 - Maximum Power Draw, Battery and Cooler
- 4 - Disassembling and Removing the Cooler (Diary)
- 5 - CPU, Thermal Grease and Assembling (Diary)
- 6 - Performance Mode: Power Draw, Temperatures, Infrared
- 7 - Entertainment Mode: Power Draw, Temperatures, Infrared
- 8 - Summary and Conclusion for Part One


18 Antworten
Kommentar
Lade neue Kommentare
Urgestein
1
Neuling
1
Urgestein
Neuling
1
Neuling
Mitglied
Urgestein
Mitglied
Urgestein
Veteran
Neuling
1
Alle Kommentare lesen unter igor´sLAB Community →