


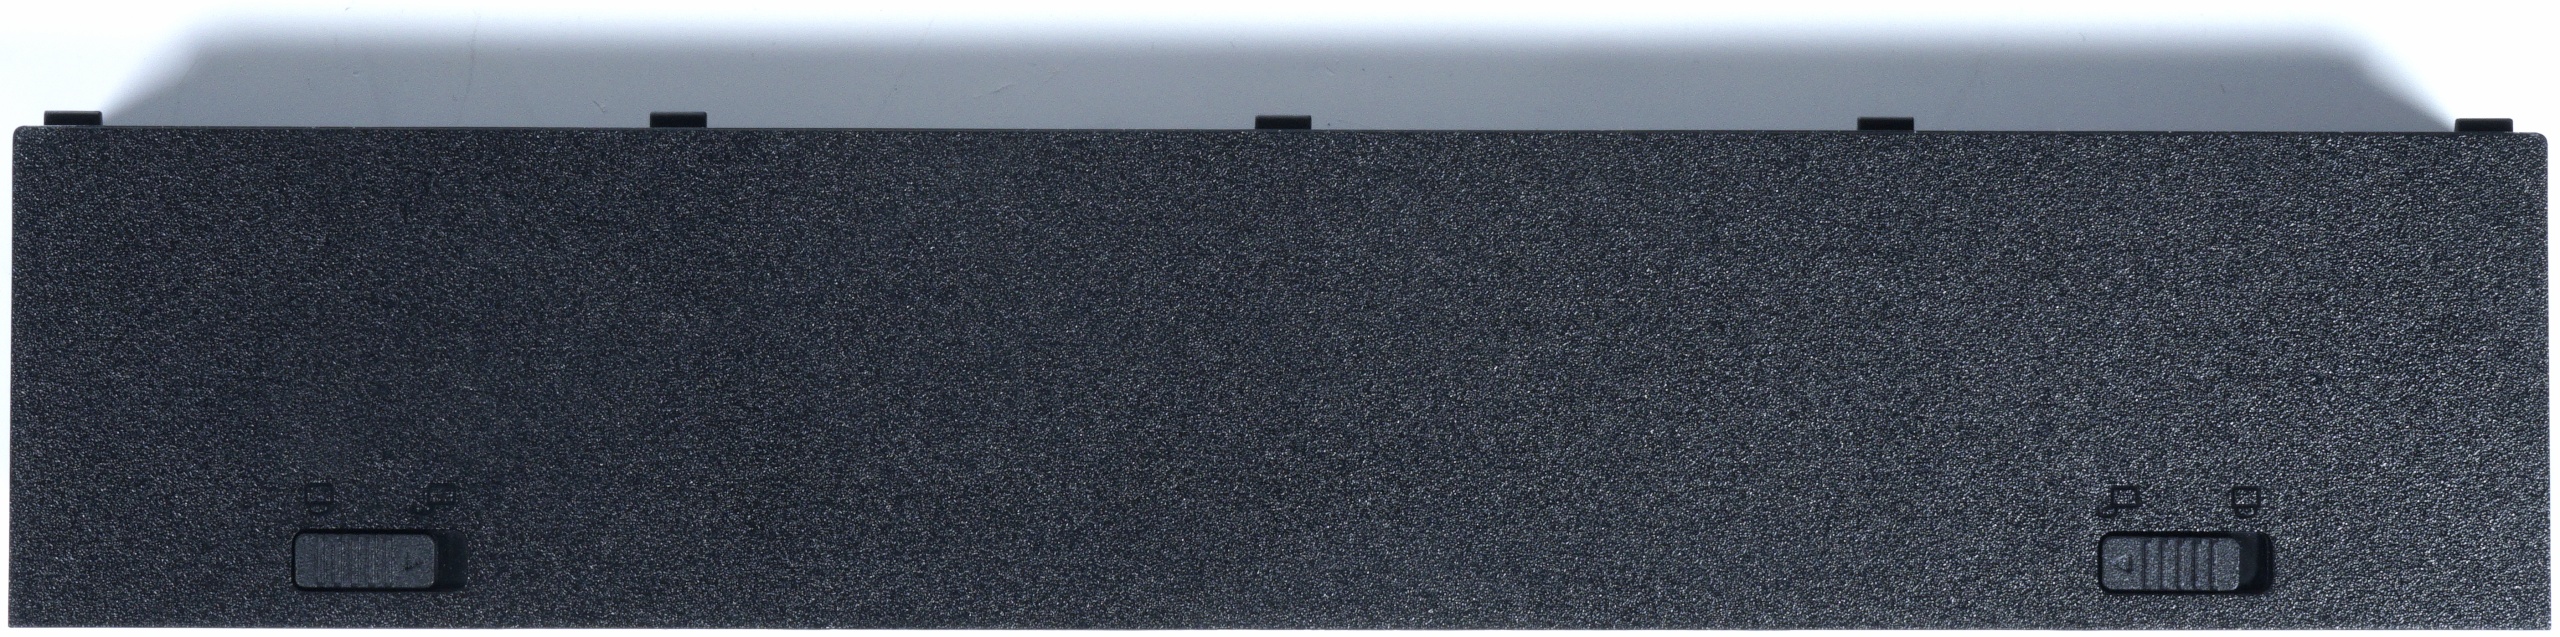
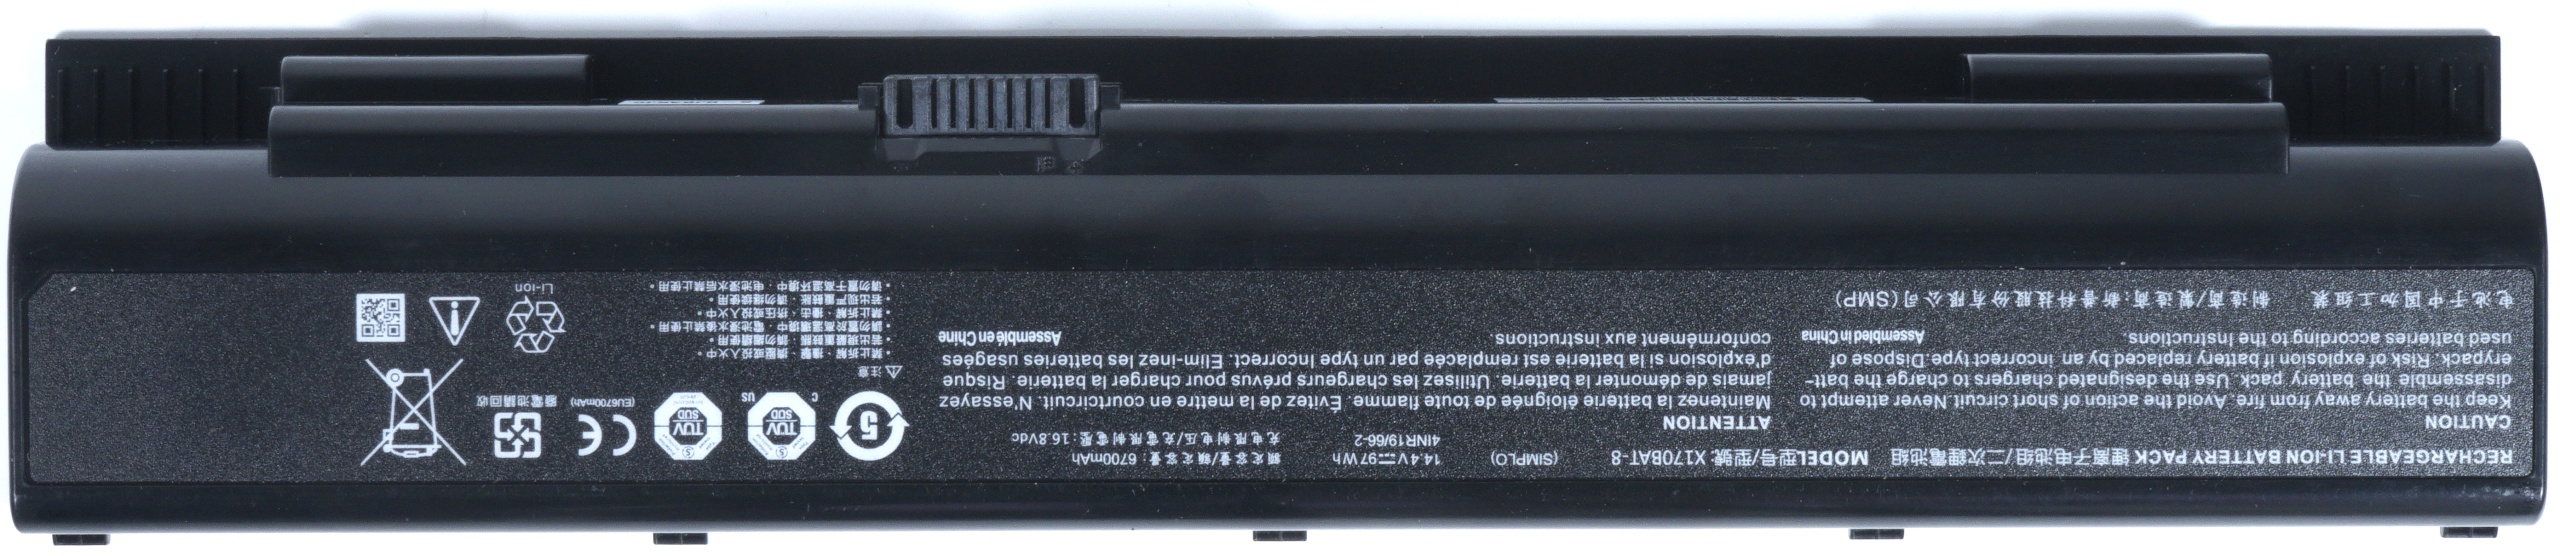
The battery pack
The nice thing about a barebones is its flexibility to be loaded, the bad thing is that you have to disassemble it before you can serve it. Of course I will show you the exact workflow on the next pages, but first of all the battery has to be replaced. The lock is quickly released and you can remove the battery very quickly and easily or insert it again later. That shouldn’t be a real hurdle for anyone.
The size of the battery alone suggests that 97 W/h won’t get you very far. Even though the notebook is a bit more frugal in battery mode, one hour with the battery and increased load is actually not possible. In ambitious gaming, you should save more often when there is no power socket in sight, because after a short time, the machine runs out of breath. But we know that already: E-car, motorway and winter with heating – energetic waste is always there.
Once you have gotten rid of the battery, you can also remove the bottom cover, but you should pay attention to the lateral stripes of the Light-BAR. Then it also works with the lifting. A total of 8 screws stand in the way of the new openness, piece of cake!
Maximum power consumption and cooling block
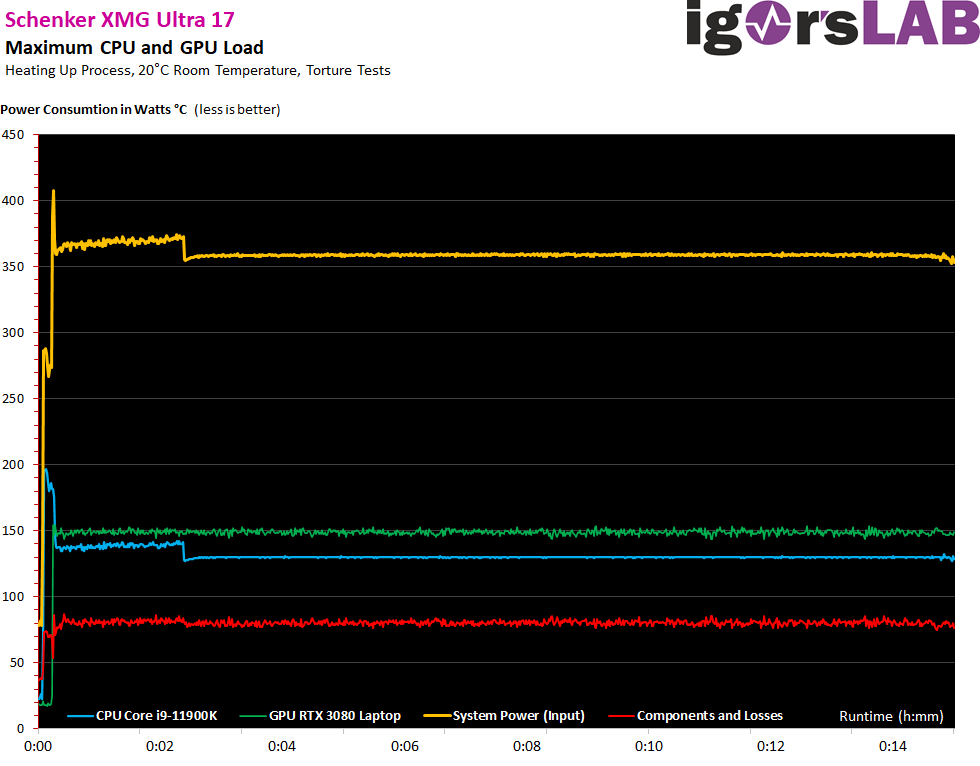
Let’s get to the cream of the crop, as the CPU is allowed to draw up to 251 watts in the PL2 over a limited period of time (which it does, of course) and the GPU isn’t exactly in the economy range either with 150 watts under combined GPU and CPU load, or even up to 165 watts under predominant GPU load (NVIDIA Dynamic Boost with a maximum of 15 watts added). If you now add the other components (motherboard, RAM, SSD, LED) and the losses (voltage converter, board losses, etc.), then the up to 372 watts in the peak (peak up to 410 watts) is quite correct. Then in the long term run it was a pretty consistent 360 watts.
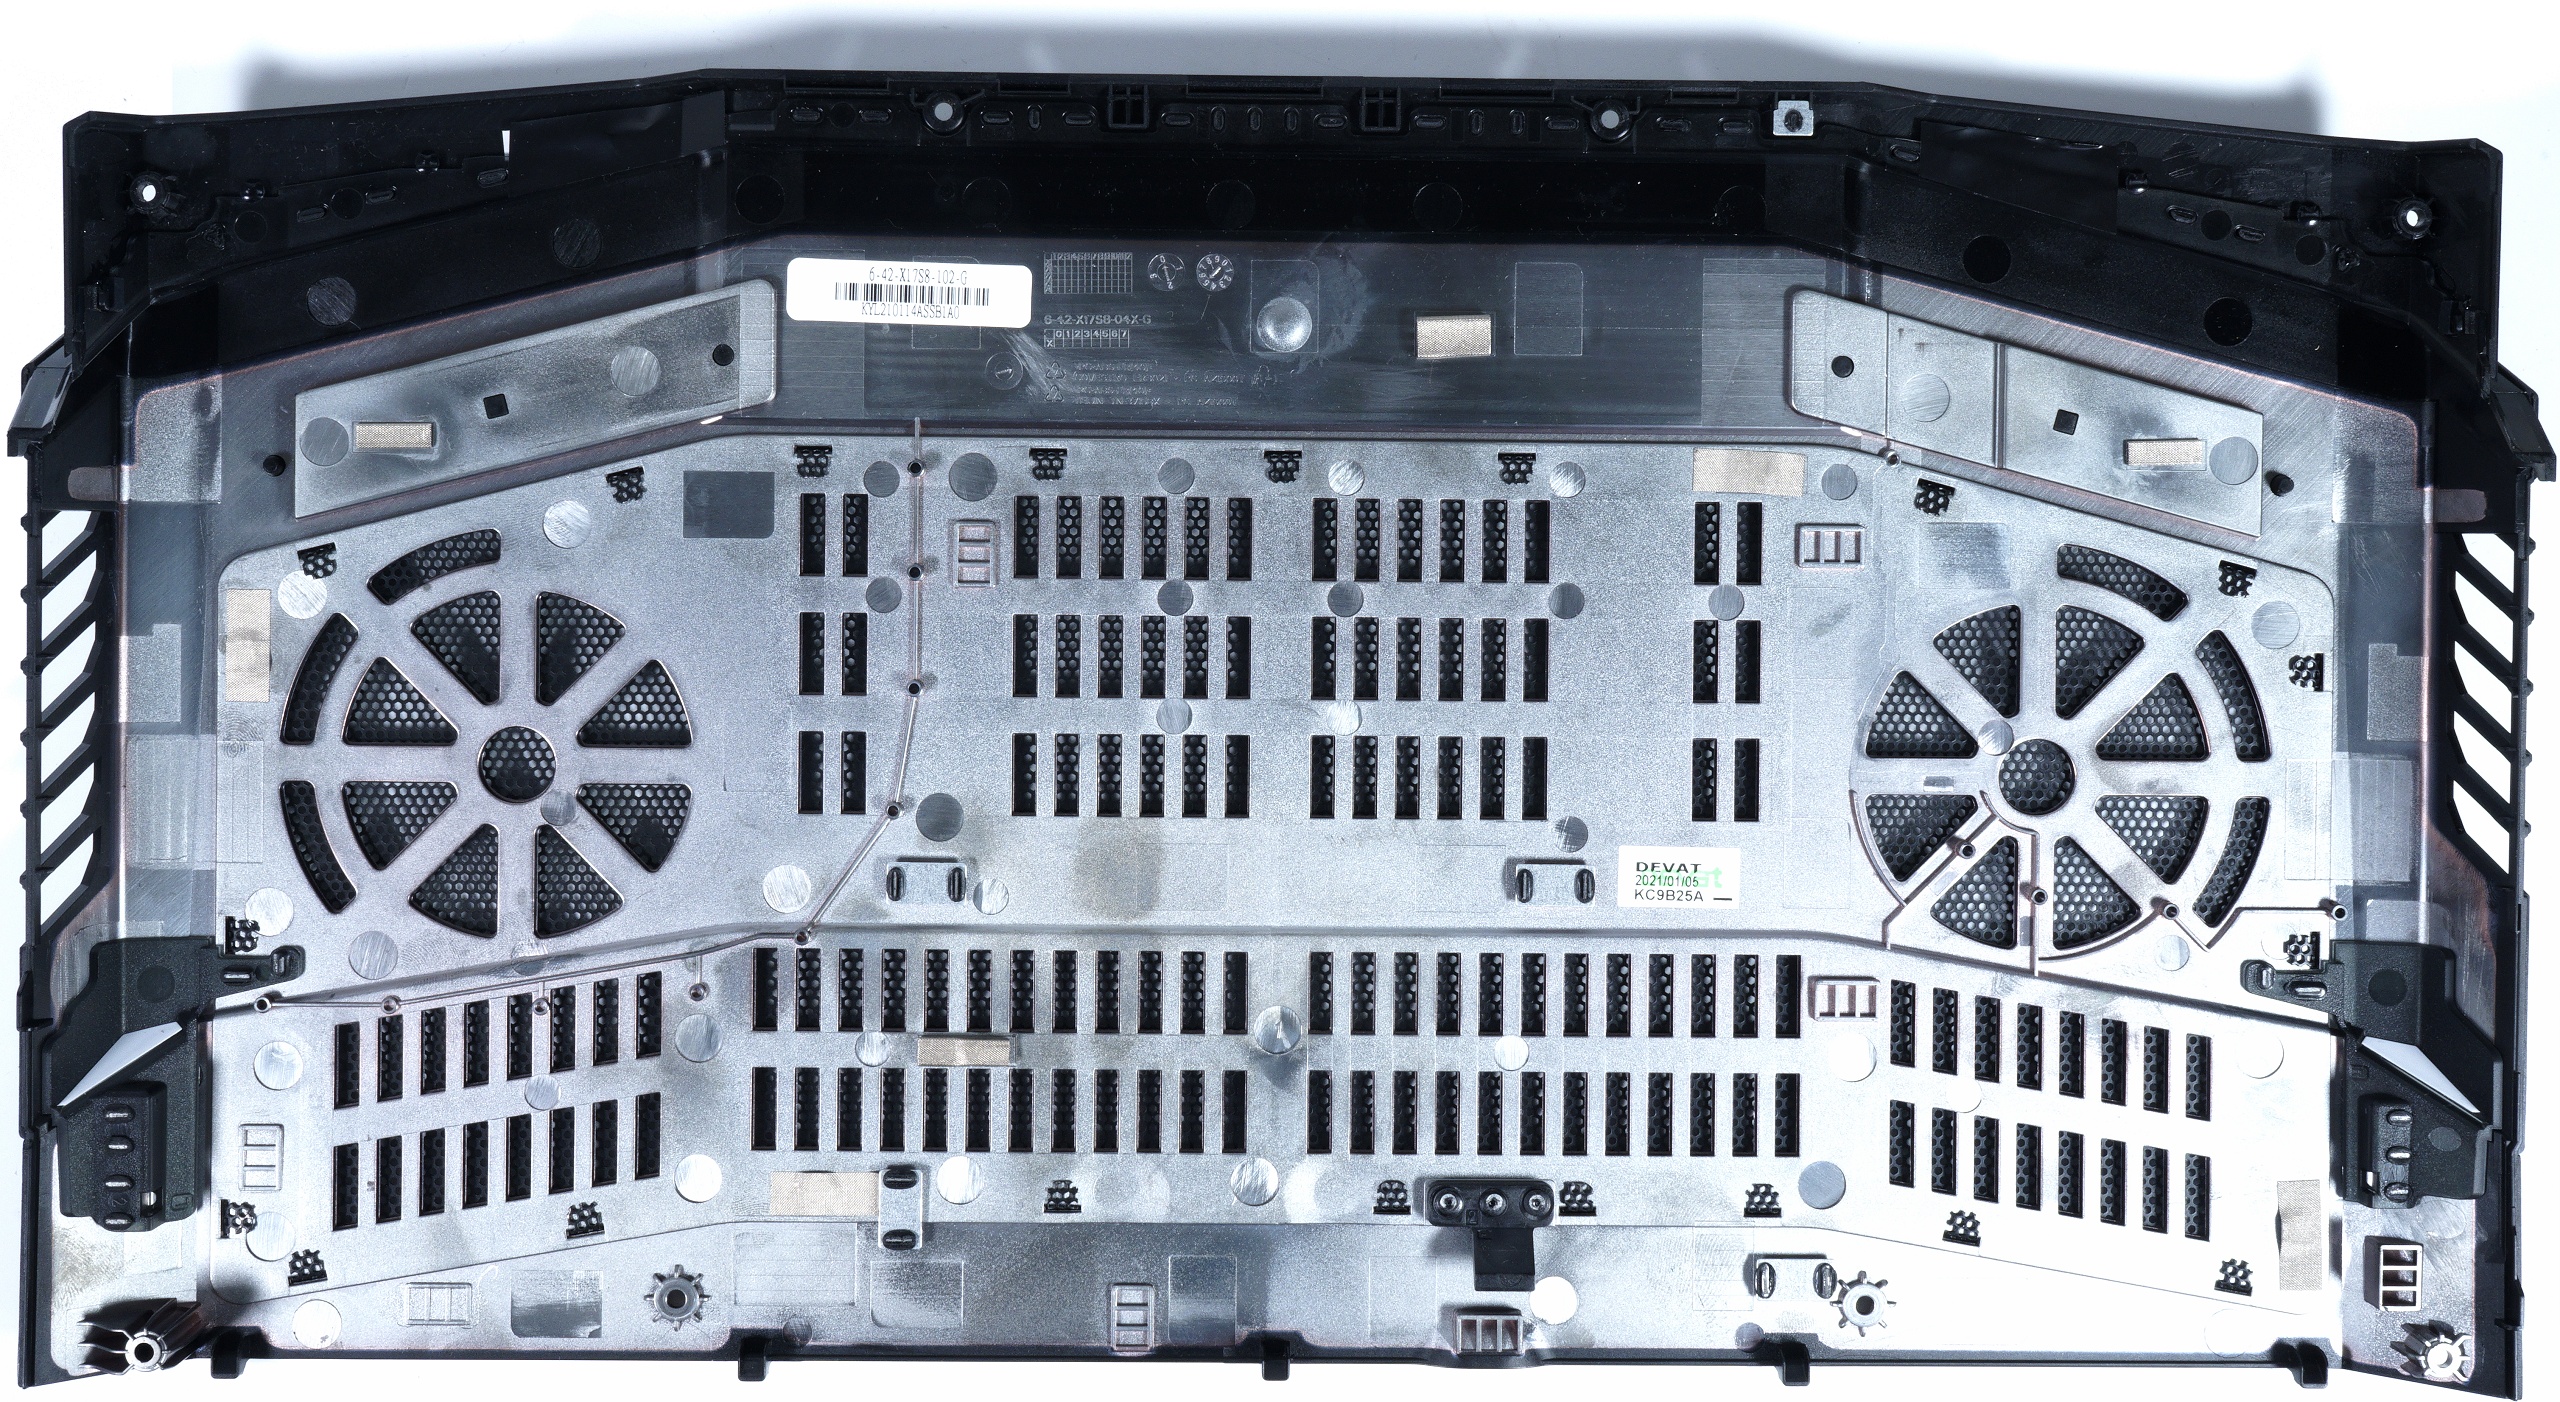
And how do you cool down this electrical energy that has been supplied and later converted into waste heat? Clevo actually did a clean job there, as usual. Let’s first look at the massive block that cools the CPU and GPU together from above. A total of 10(!) flattened heatpipes made of very effective copper composite material are used, which are coated black on the upper side including the heatsink.
I suspect that a cleverly solved galvanic dip coating was used here to coat combined materials in one go, as the traces of the usual spray mist on the underside are completely absent and the transition looks as if it has been cut off. This does not detract from the function, but on the contrary guarantees a beautifully smooth, very homogeneous surface that also remains durable.
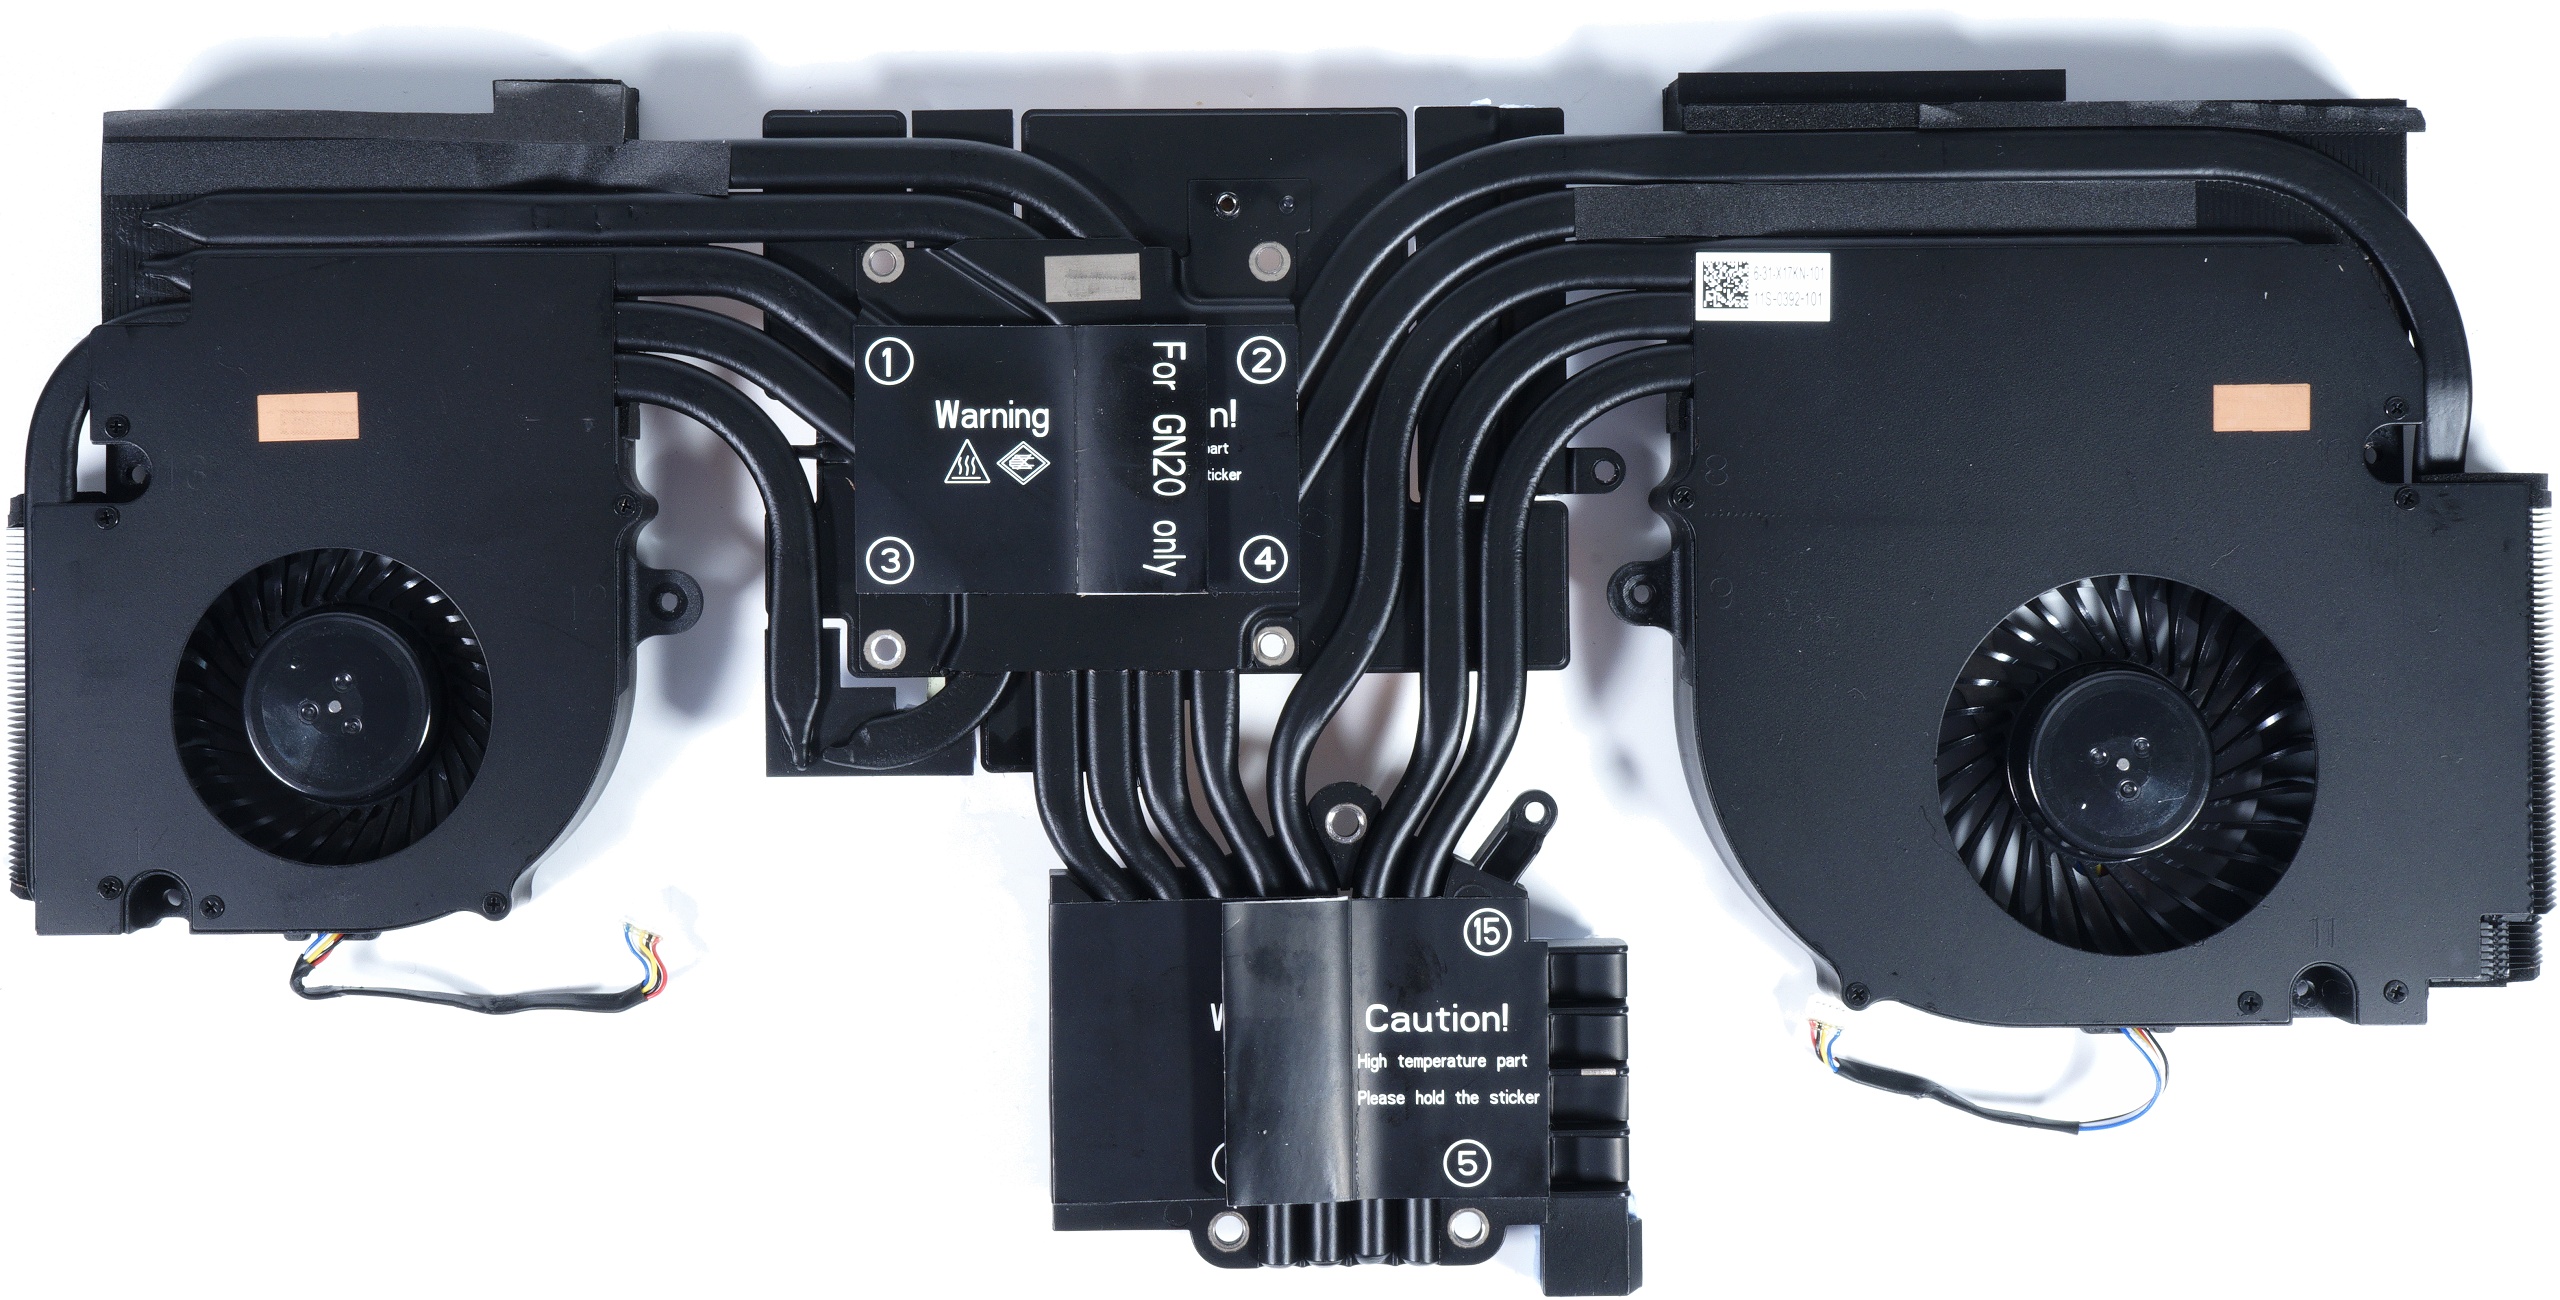
A look from below shows that the OEM really didn’t skimp on copper. The two radial fans sit in front of the chambers of the fin coolers, which in turn hold the ends of all the heatpipes. While the CPU (on the lower picture above) is cooled by a flat copper heat sink, which already has seven heat pipes, the GPU, the memory and the voltage converters are even cooled by a large vapor chamber, which has three more heat pipes in addition to the seven CPU heat pipes.
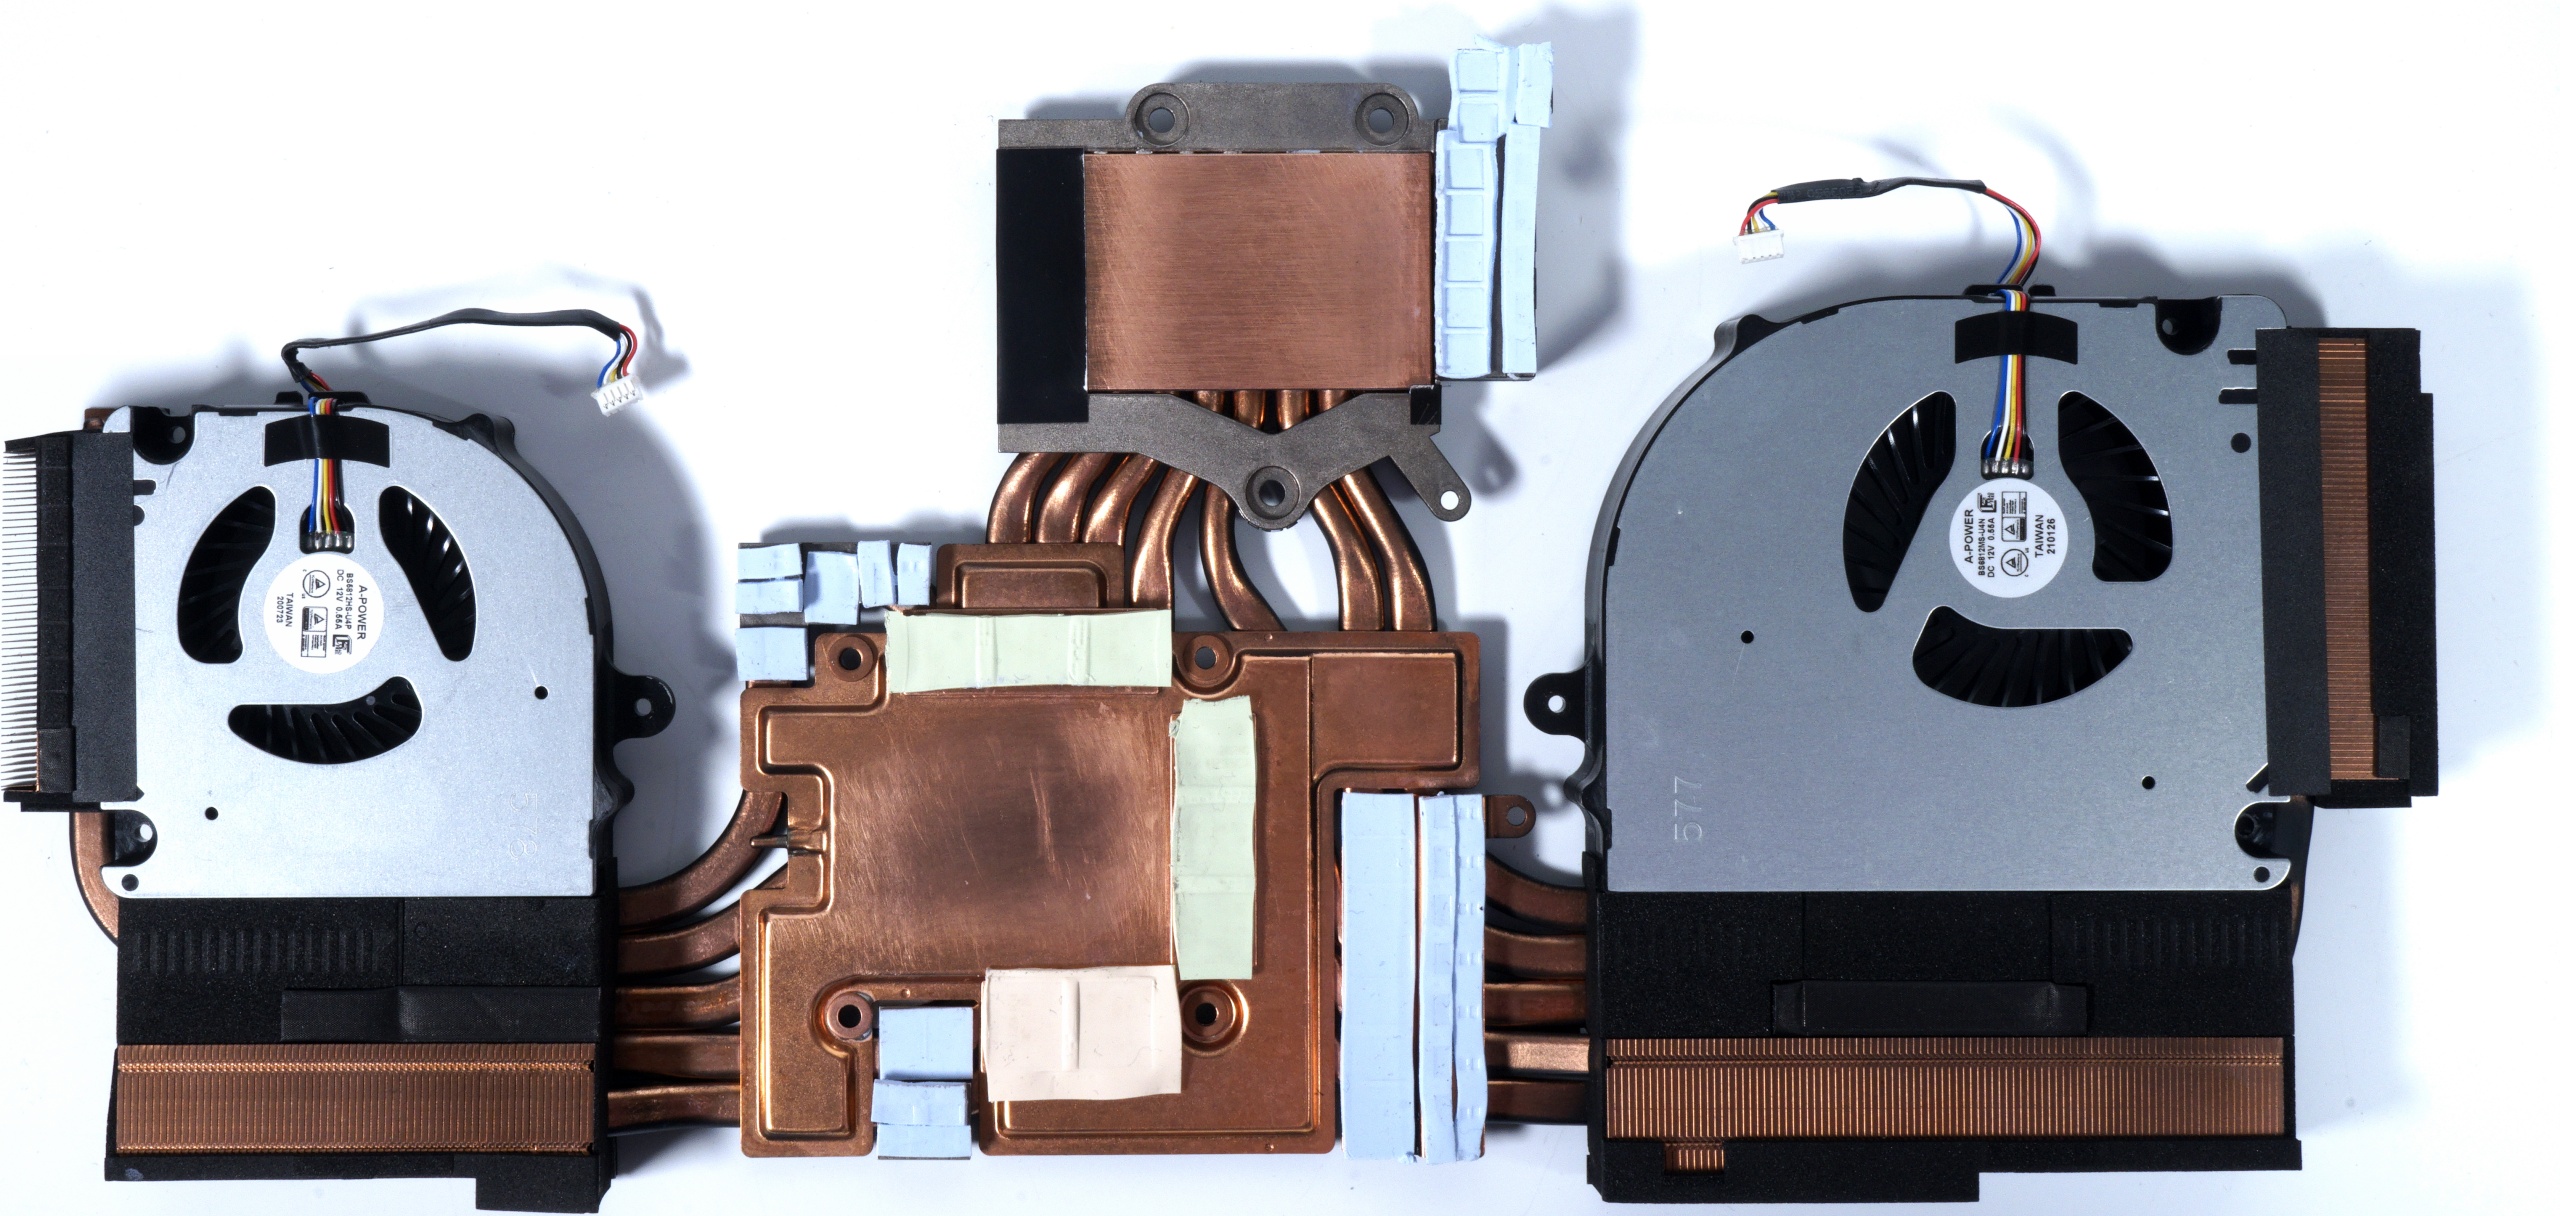
This system is elaborate and complex in design, but still remains very compact. And without wanting to spoil it at this point, it also easily manages to get rid of that waste heat with a gesture of nonchalance and some fan groaning. However, users should be advised not to drape the notebook directly on a pair of pantyhose in the relevant areas for long periods of time. Otherwise, the thighs will end up being foil-wrapped broiler legs. The part definitely belongs on the table with a smooth base, so that there is still enough air for suction. Otherwise, heat exhaustion will happen faster than you can say pug.
- 1 - Introduction, Unboxing and Connectivity
- 2 - Datasheet and Manual
- 3 - Maximum Power Draw, Battery and Cooler
- 4 - Disassembling and Removing the Cooler (Diary)
- 5 - CPU, Thermal Grease and Assembling (Diary)
- 6 - Performance Mode: Power Draw, Temperatures, Infrared
- 7 - Entertainment Mode: Power Draw, Temperatures, Infrared
- 8 - Summary and Conclusion for Part One


18 Antworten
Kommentar
Lade neue Kommentare
Urgestein
1
Neuling
1
Urgestein
Neuling
1
Neuling
Mitglied
Urgestein
Mitglied
Urgestein
Veteran
Neuling
1
Alle Kommentare lesen unter igor´sLAB Community →