


Commissioning and safety precautions
I’ve already mentioned that I don’t really trust the VRM coolers, even if Ziitek thinks they should hold with their pads. With aluminum I would probably have fewer concerns, but copper weighs and pulls, depending on the installation direction, then quite neat. I currently have two solutions in mind, although of course it’s always about the user factor. If you knew what kind of maliciously killed hardware arrives in the RMA departments – you would lose faith in humanity.
Thermal glue is absolutely safe, but exactly such users like to tear the MOSFETs from the board, because they have never heard of isopropanol and soaking. By the way, this also applies to the RAM modules with the older single coolers. No, then rather thermal tape and an additional fixation. I can’t tell you yet what it will look like in the end, but I have already built one of the solutions that works very well. But you know how it is in China. You haven’t even printed out your design yet, and your competitor’s assembly lines are already starting up. Nothing there…
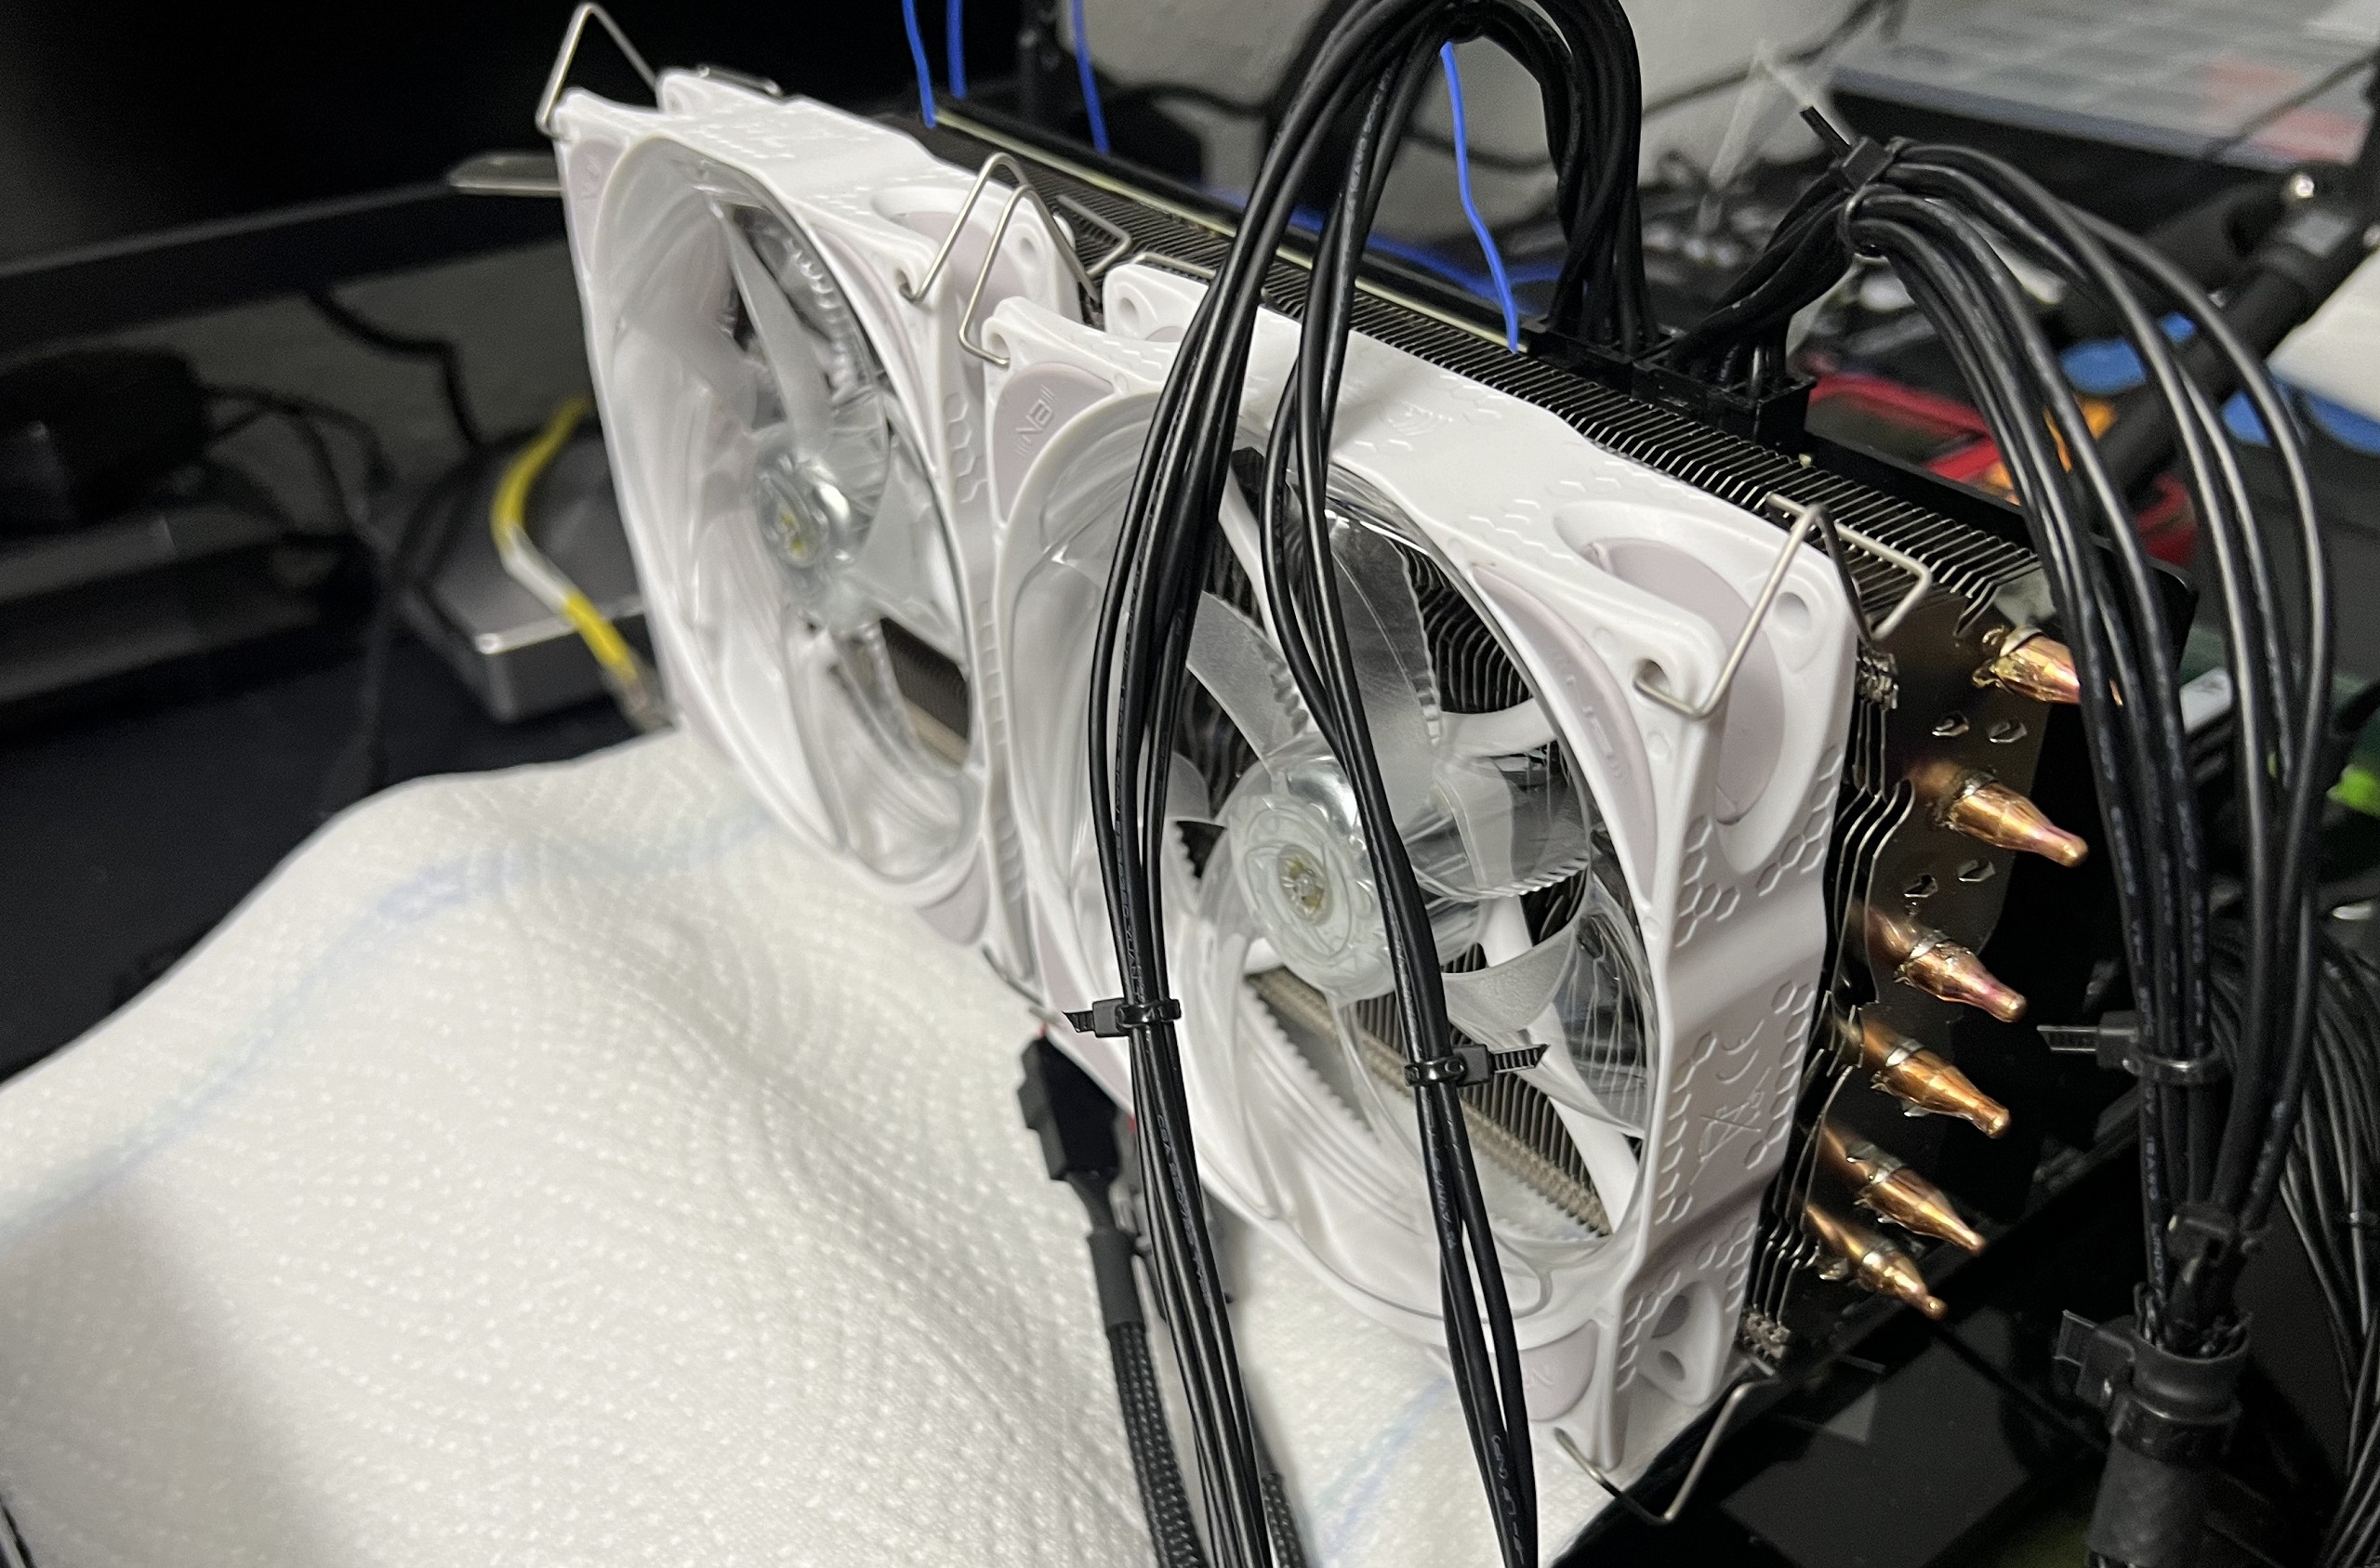
Nevertheless, one has already seen often enough horses vomit in front of the pharmacy. So, out of sheer habit (as with the water coolers), I always put absorbent kitchen paper on the top of the board. This is pure habit and if such a glued-on copper part does fly off, then at least it doesn’t bang on the motherboard. Value preservation and caution. Especially since the wires of the measuring resistors also pull in and on the coolers. It’s easy to get caught by mistake and then bye.
Measurements and an aha effect
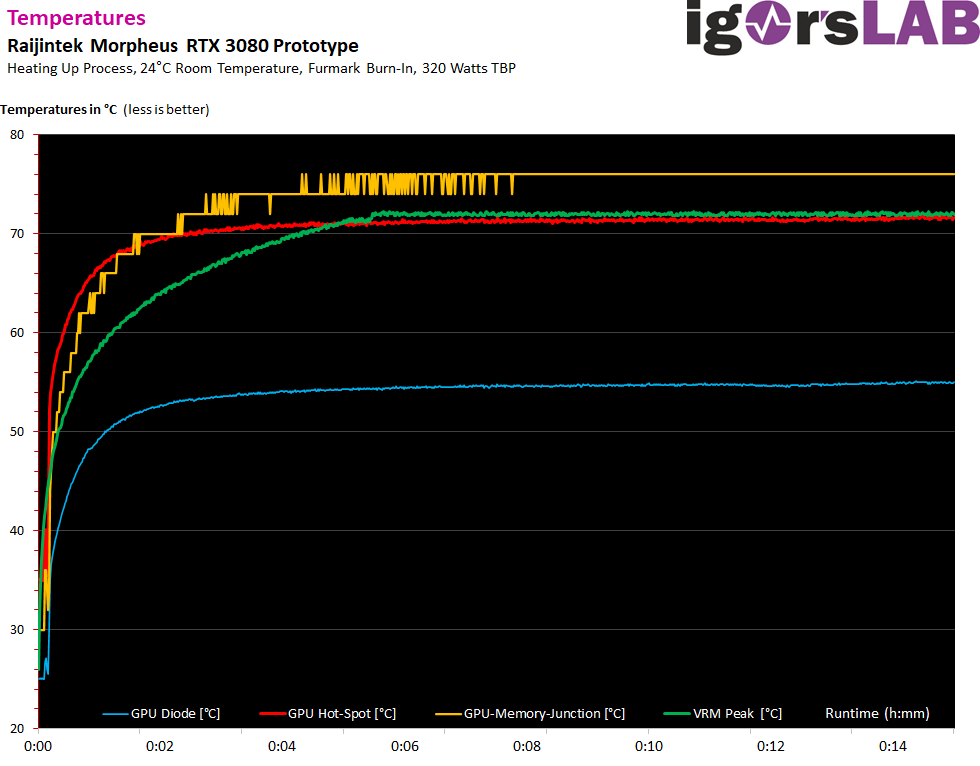
I run the card standing up in an open setup. The room temperature is intentionally higher this time and I set the air conditioning to 24 °C instead of the usual 22 or even 20 °C. This brings me closer to the situation in the well-ventilated case and my electricity bill does not explode. Because I used almost 4 hours and 6 grams of thermal paste just to measure the optimal pad thickness. In addition to electricity, of course, which comes from a combined heat and power plant here and is virtually a by-product. Unfortunately, it is still expensive.
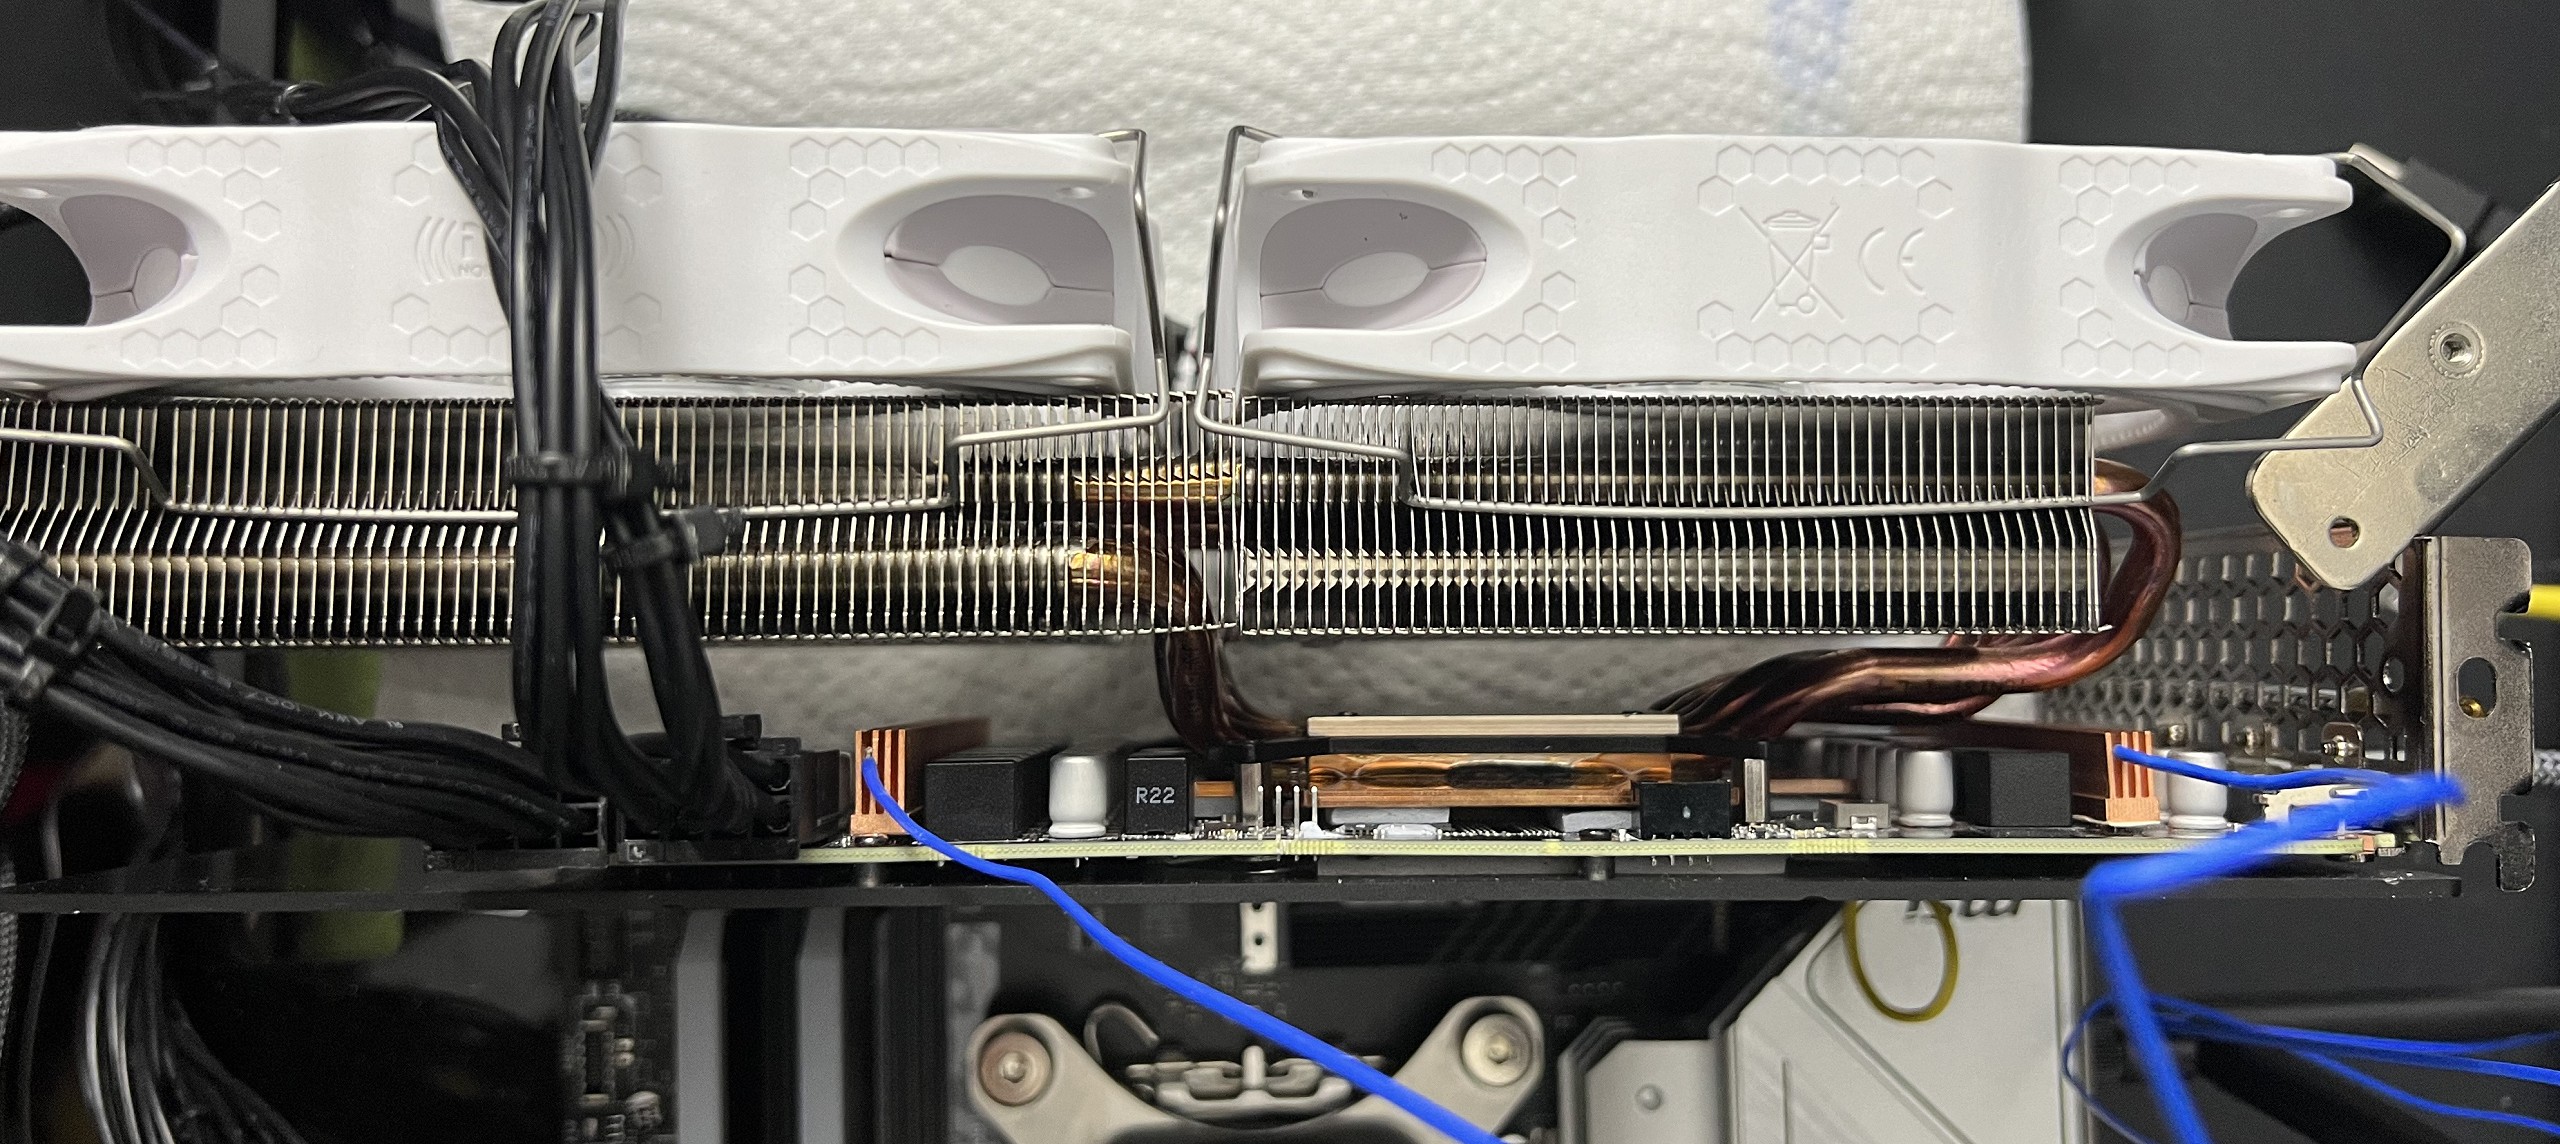
We can also see on the picture above the two measuring resistors, whose supplied values I can also log. I only test the worst case for GPU and RAM with Furmark in burn-in mode and postprocessing on purpose. Gaming is then once again significantly lower and everything goes towards room temperature in idle. The two eLoops from Blacknoise run at 1500 rpm, but 1000 rpm would also have been enough, and even only 800 rpm for gaming, although the RAM then slightly exceeds the 80 degree mark and the MOSFETs then reach over 90 °C. You don’t have to have that, because this is also about efficiency. Cooler VRM also means less power dissipation and more electrical power for the GPU. That’s already a few boost steps difference in the end!
Let us now take a look at the measurements in the worst case. The GPU edge temperature (GPU diode) does not go above 55 °C after 15 minutes, with the whole values remaining stable and constant from 10 minutes. They are still like this after 2 hours. The GPU hot spot is about 15 °C above that, which is an excellent value and benefits from the evenly placed heatsink (screw connection!). sometimes small interventions do bring major improvements. The VRMs are at a maximum of 73 °C despite the quite small copper coolers. I wrote that I added the 20 Kelvin difference very generously to the resistance measurement. In reality, it should even be somewhat cooler inside the MOSFETs.
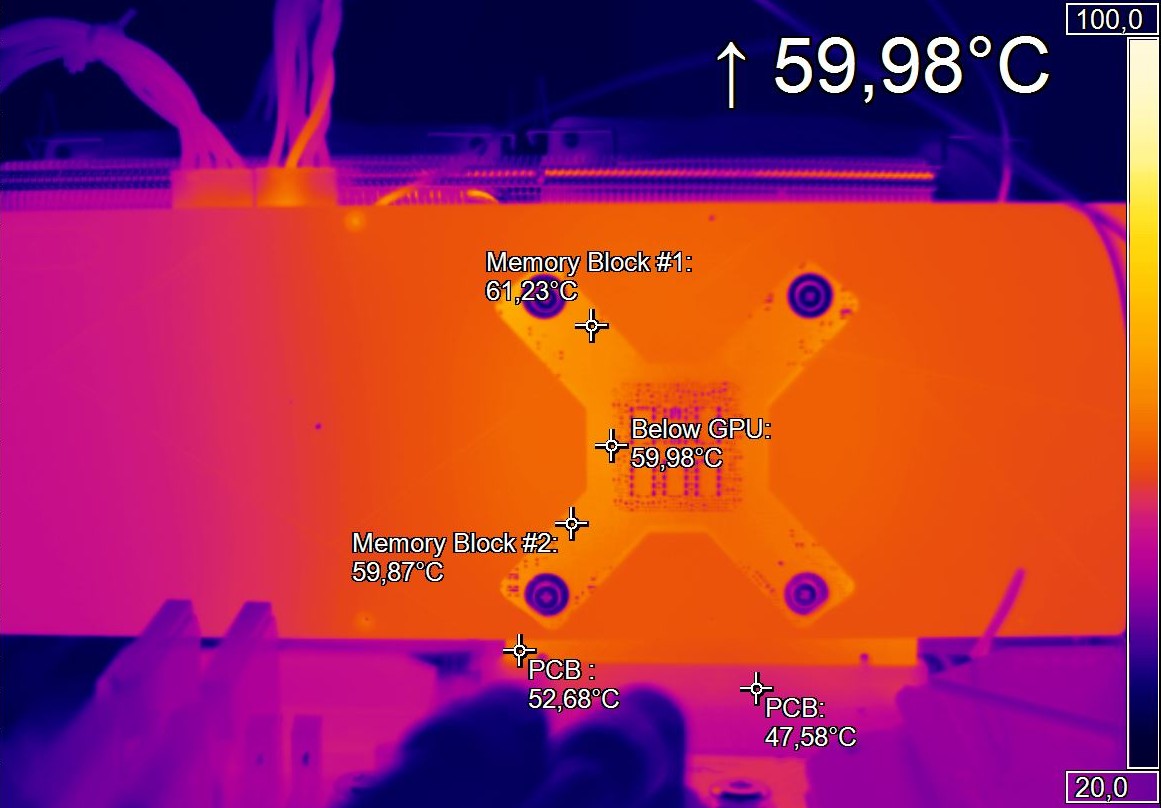
Including the backplate passively in the cooling is also not a bad idea. You can see the effectiveness of my arrangement quite well if you then look at the thermography next
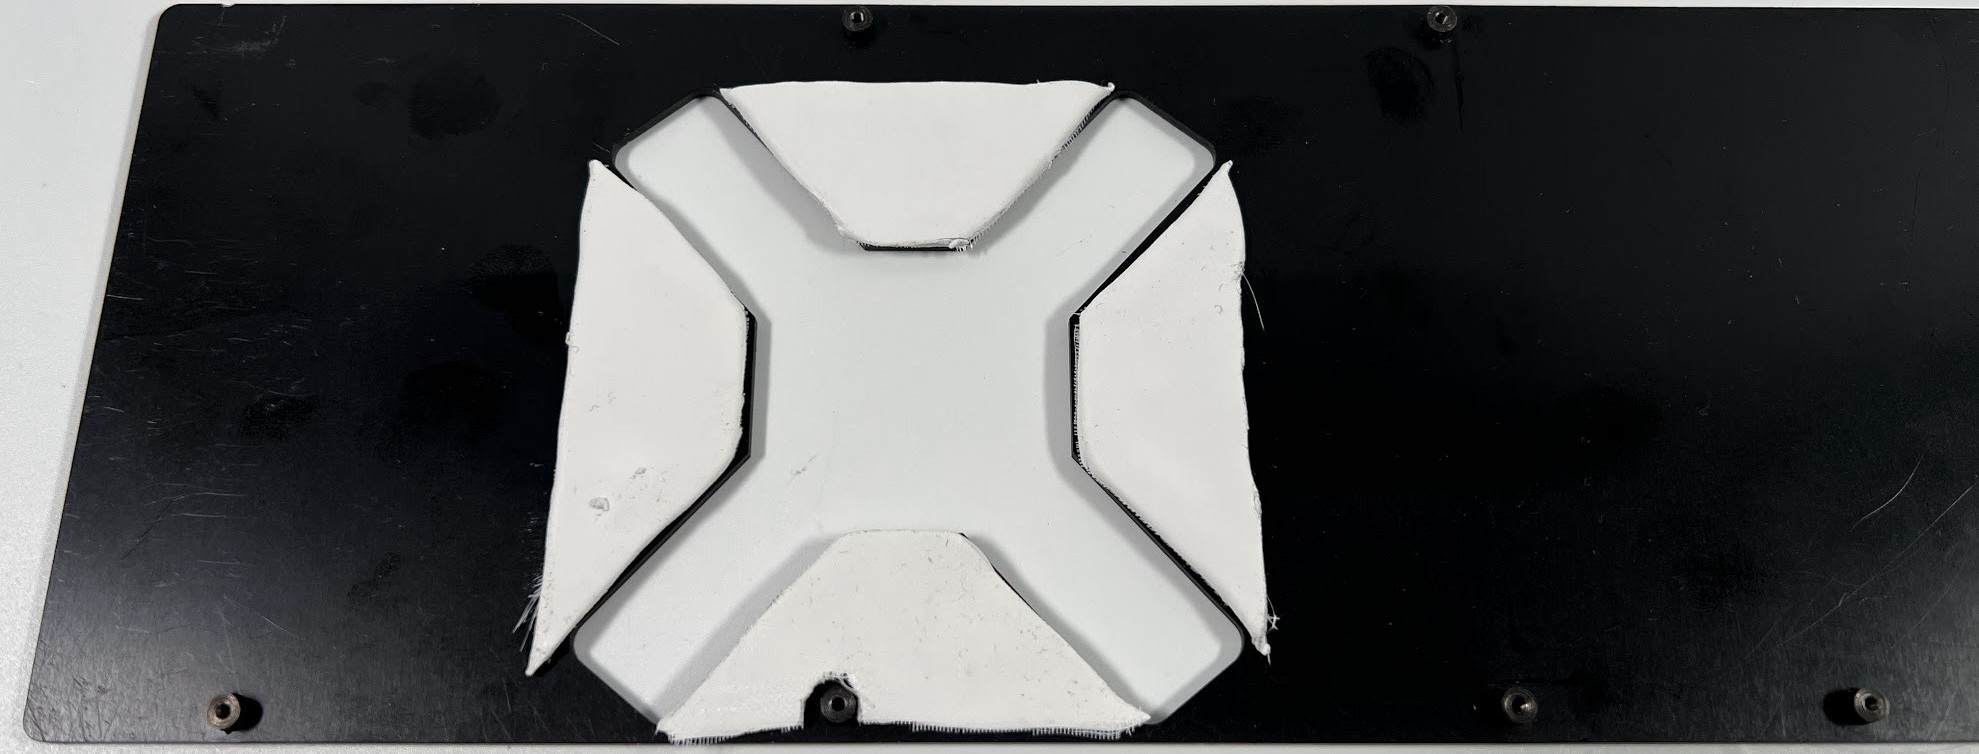
The PCB never gets warmer than 60 to 65 °C even at the hottest spots, which is an excellent value. The backplate is also quite good with 45 to 54 °C. That’s all you can do anyway.
The noise of the two eLoops is completely within tolerable limits at around 33 dB(A). Of course, you can also consult the results of our fan tests and pick a fan that generates less static pressure, but a lot of airflow in the width at low sound pressure levels. There are quite a few candidates. I took the noise blockers because they are always lying around here in the lab and because they are white. This always stands out better in the semi-darkness.

Summary and conclusion
Unfortunately, I can’t give the new Morpheus a buy tip (yet) because it would be kind of dishonest. First of all, this is only the first prototype, secondly, I don’t like to praise myself and thirdly, you can’t do that until the parts are on the shelf anyway. However, I can already spoil that the basic concept also fits Ada and the RTX 4xxx. Since I know the Thermal Design Guide, I can reveal at least this much, that the holes are the same and only the voltage transformers are a bit closer.
In terms of cooling, the really lightweight Morpheus from Raijintek proves once again that it’s not about the pure cooling surface, but primarily about the fastest and most efficient dissipation of waste heat. Here, a smart heat pipe system ensures that you can usually achieve better results despite less mass. The rest is taken care of by small but important details that make quite a difference in total. It will also be one of the few prototypes that I will actively continue to use until the final product hits retail shelves. Not only can you buy it, you should buy it. Especially since Raijintek has always remained humane with the prices so far. Let’s hope for the best for the future!


63 Antworten
Kommentar
Lade neue Kommentare
Urgestein
1
Urgestein
Urgestein
Urgestein
Urgestein
1
Urgestein
Veteran
Veteran
Urgestein
Urgestein
Urgestein
Veteran
Veteran
1
Urgestein
Mitglied
Alle Kommentare lesen unter igor´sLAB Community →