


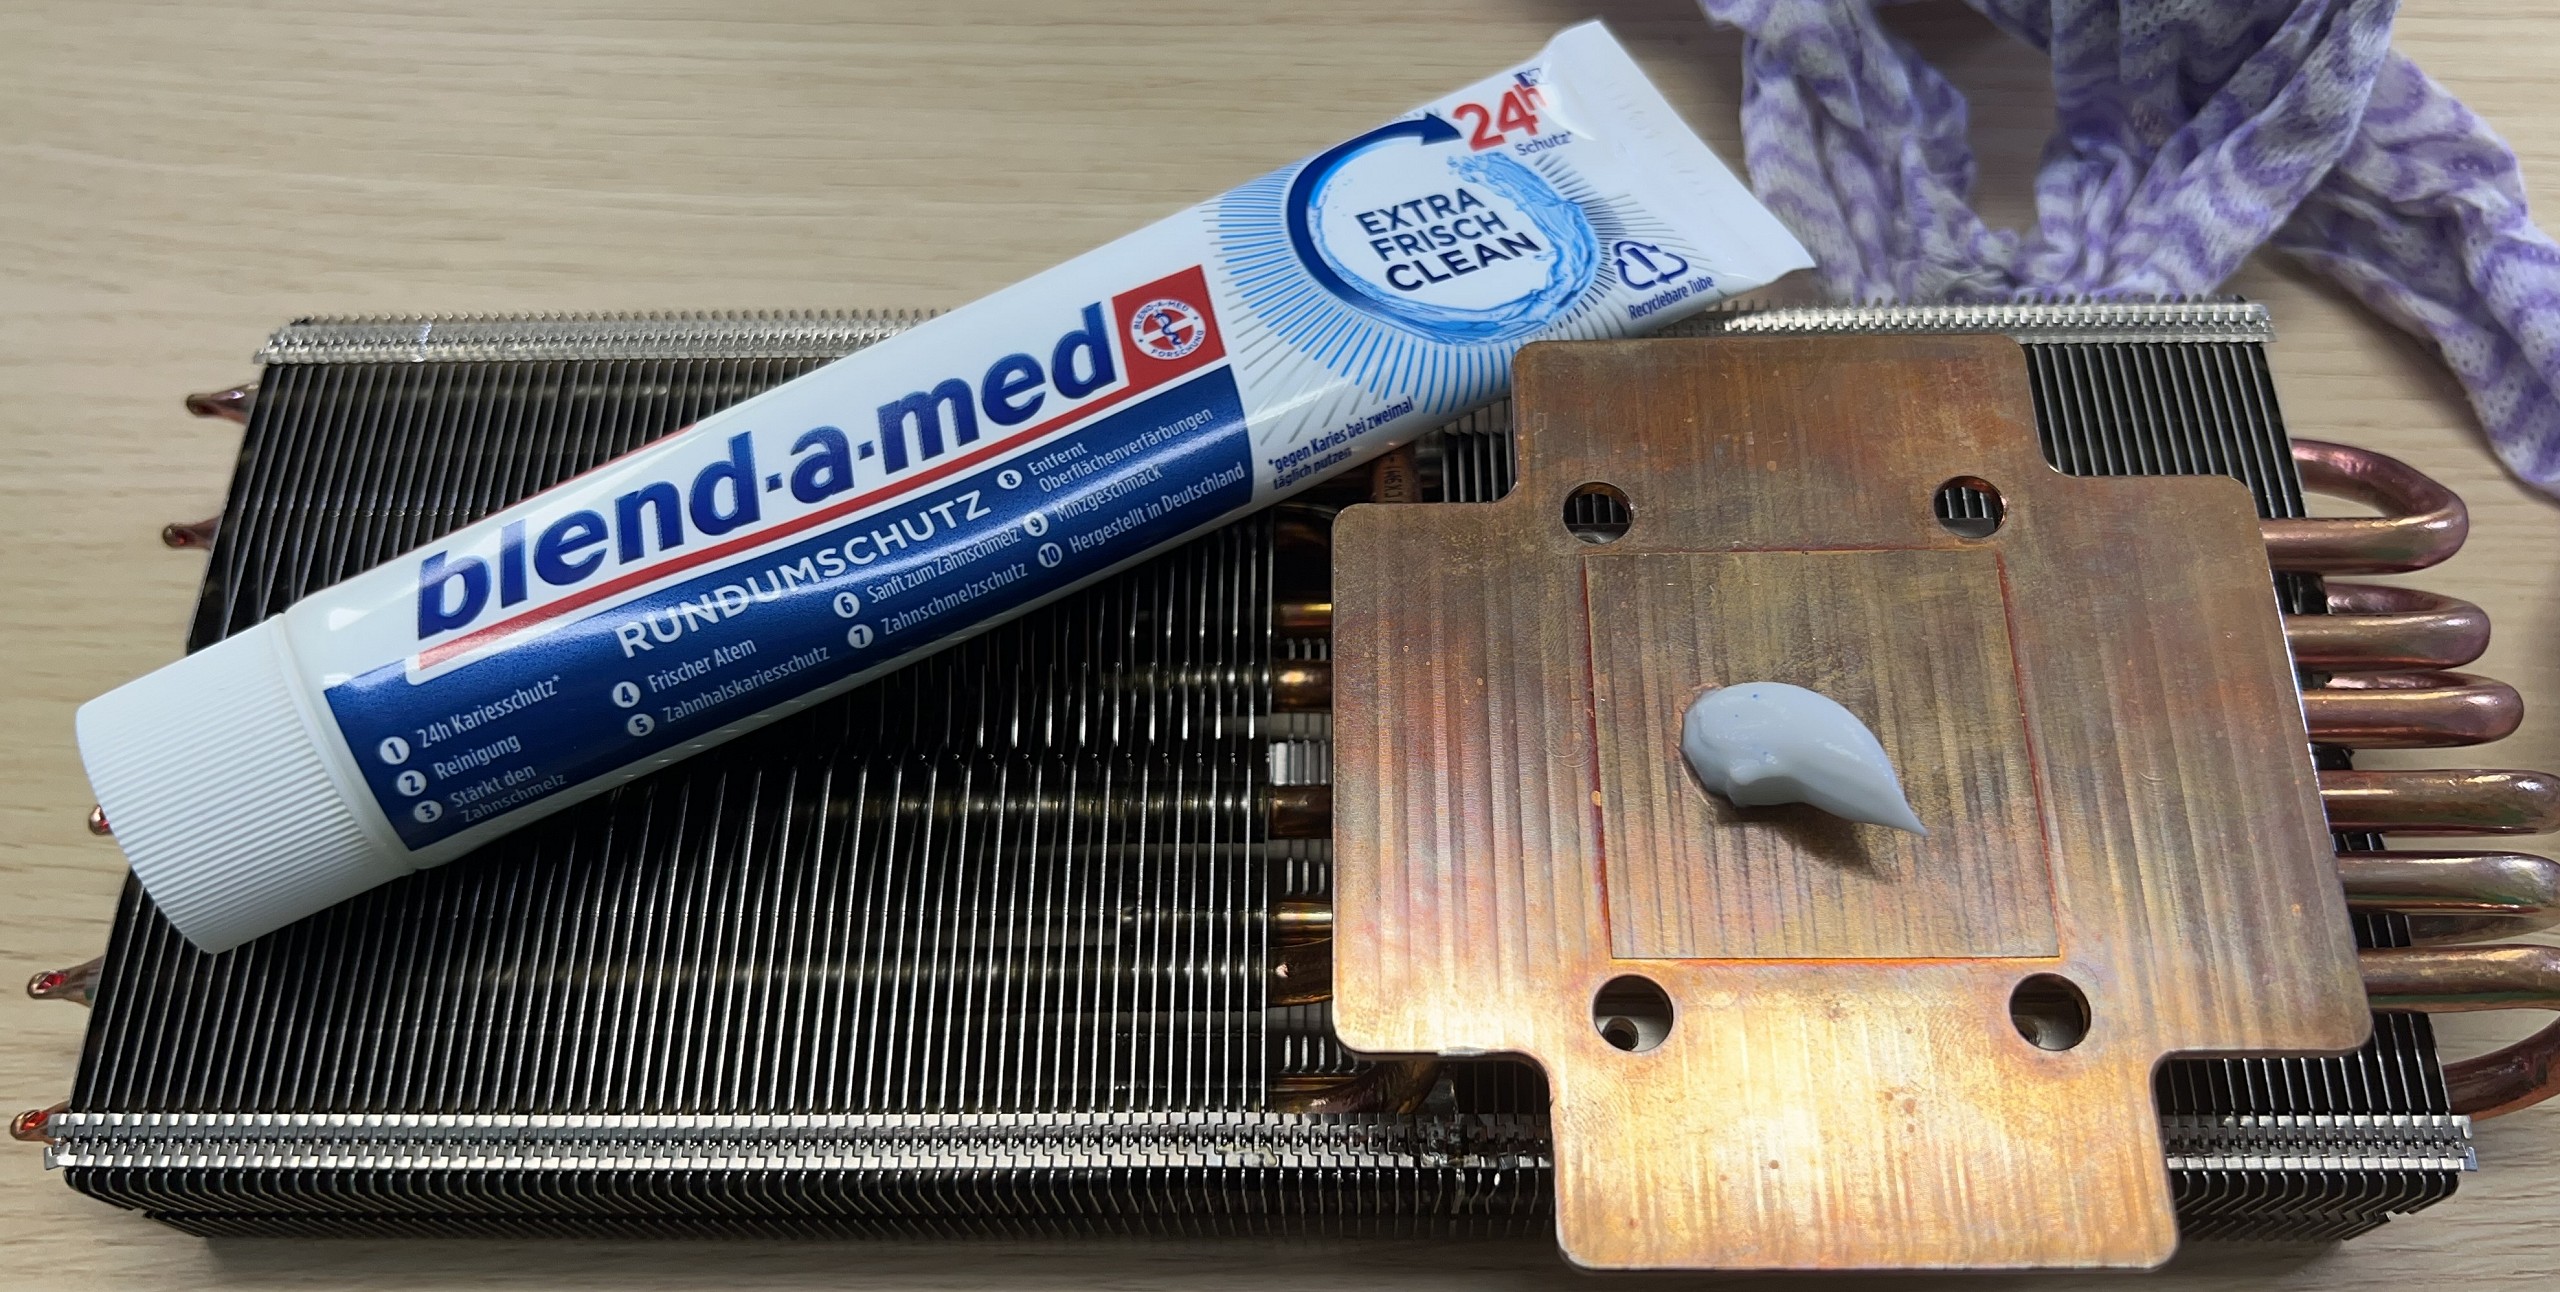
Cleaning de luxe: toothpaste grinds and smells good
I already wrote that the cooler comes fresh from the individual production. I’m not going to polish all the surfaces now (at least the heatsink), but residual flux, a light oxide layer and finger marks have to go first. I always call something like this a manufactory patina, because it is also the best proof of a one-off production.
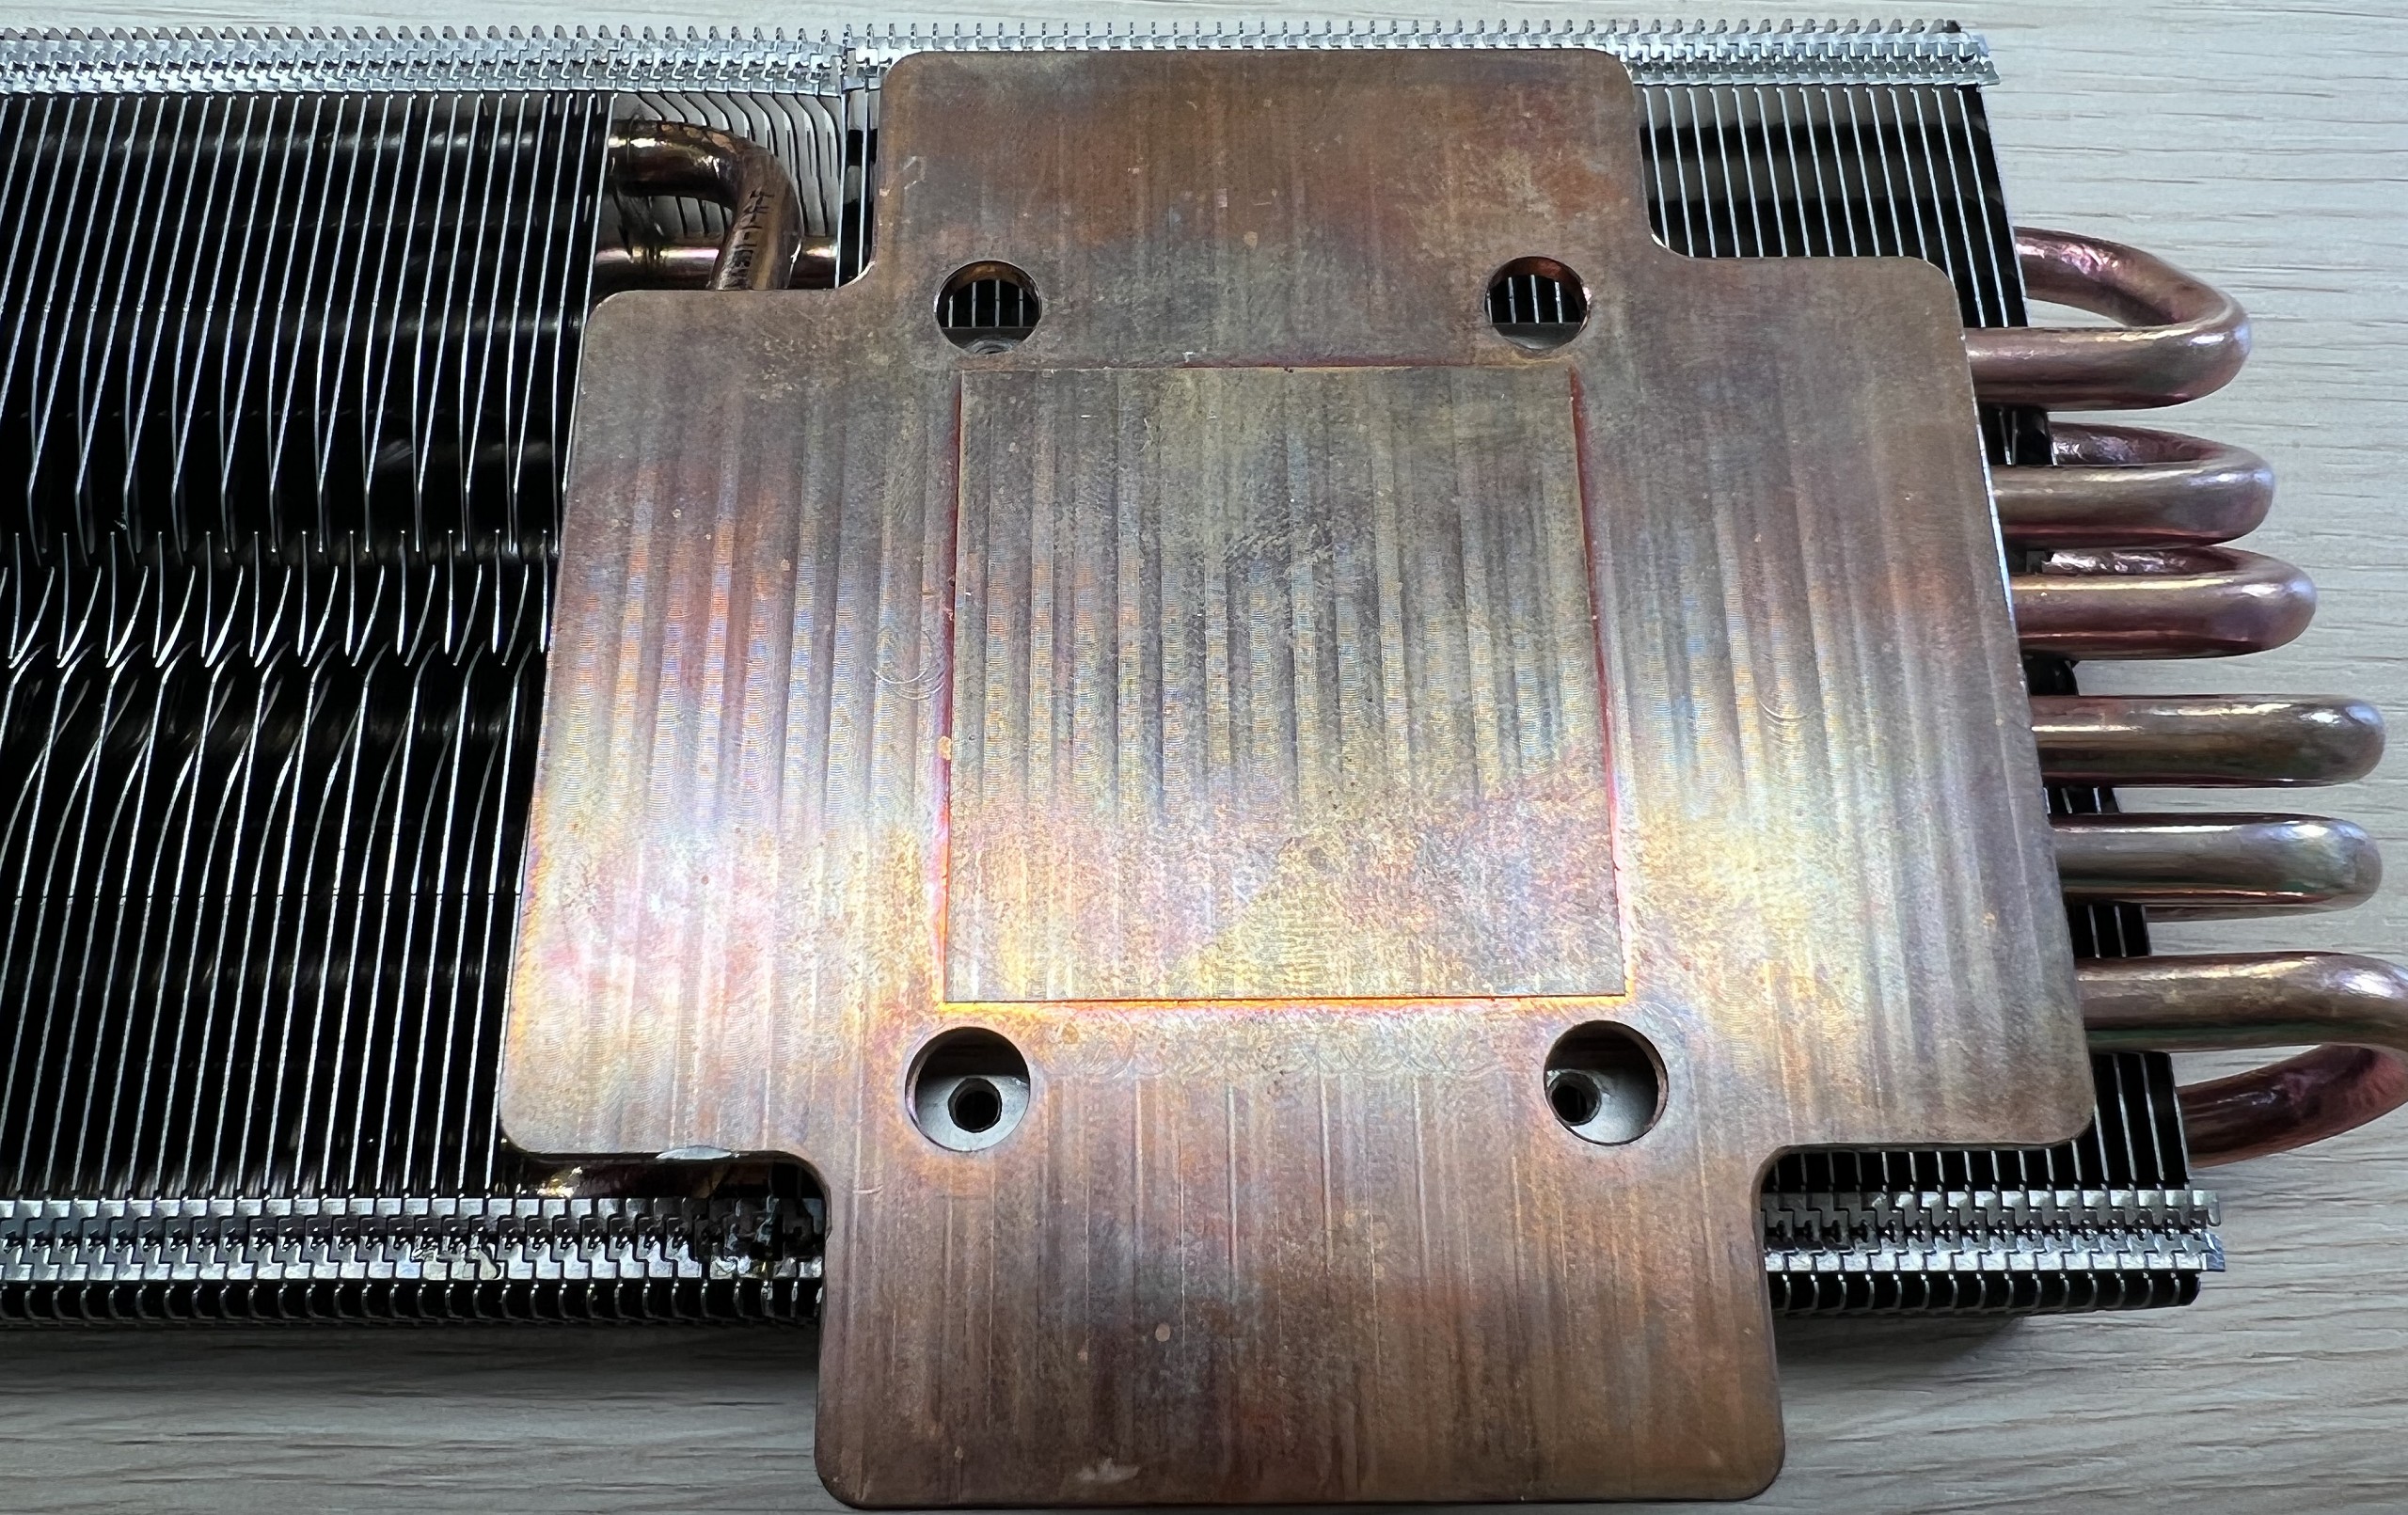
So how do we get this clean now? With good old toothpaste! Sure, such a whitening paste would certainly be even more suitable, but then I prefer to rub three times as much instead of buying such expensive stuff. It also goes Elsterglanz (for the learned GDR citizens), but unfortunately the tube was just out. Toothpaste then. Minty and nice and gentle. I don’t want to sand anything completely flat, just clean the surface.
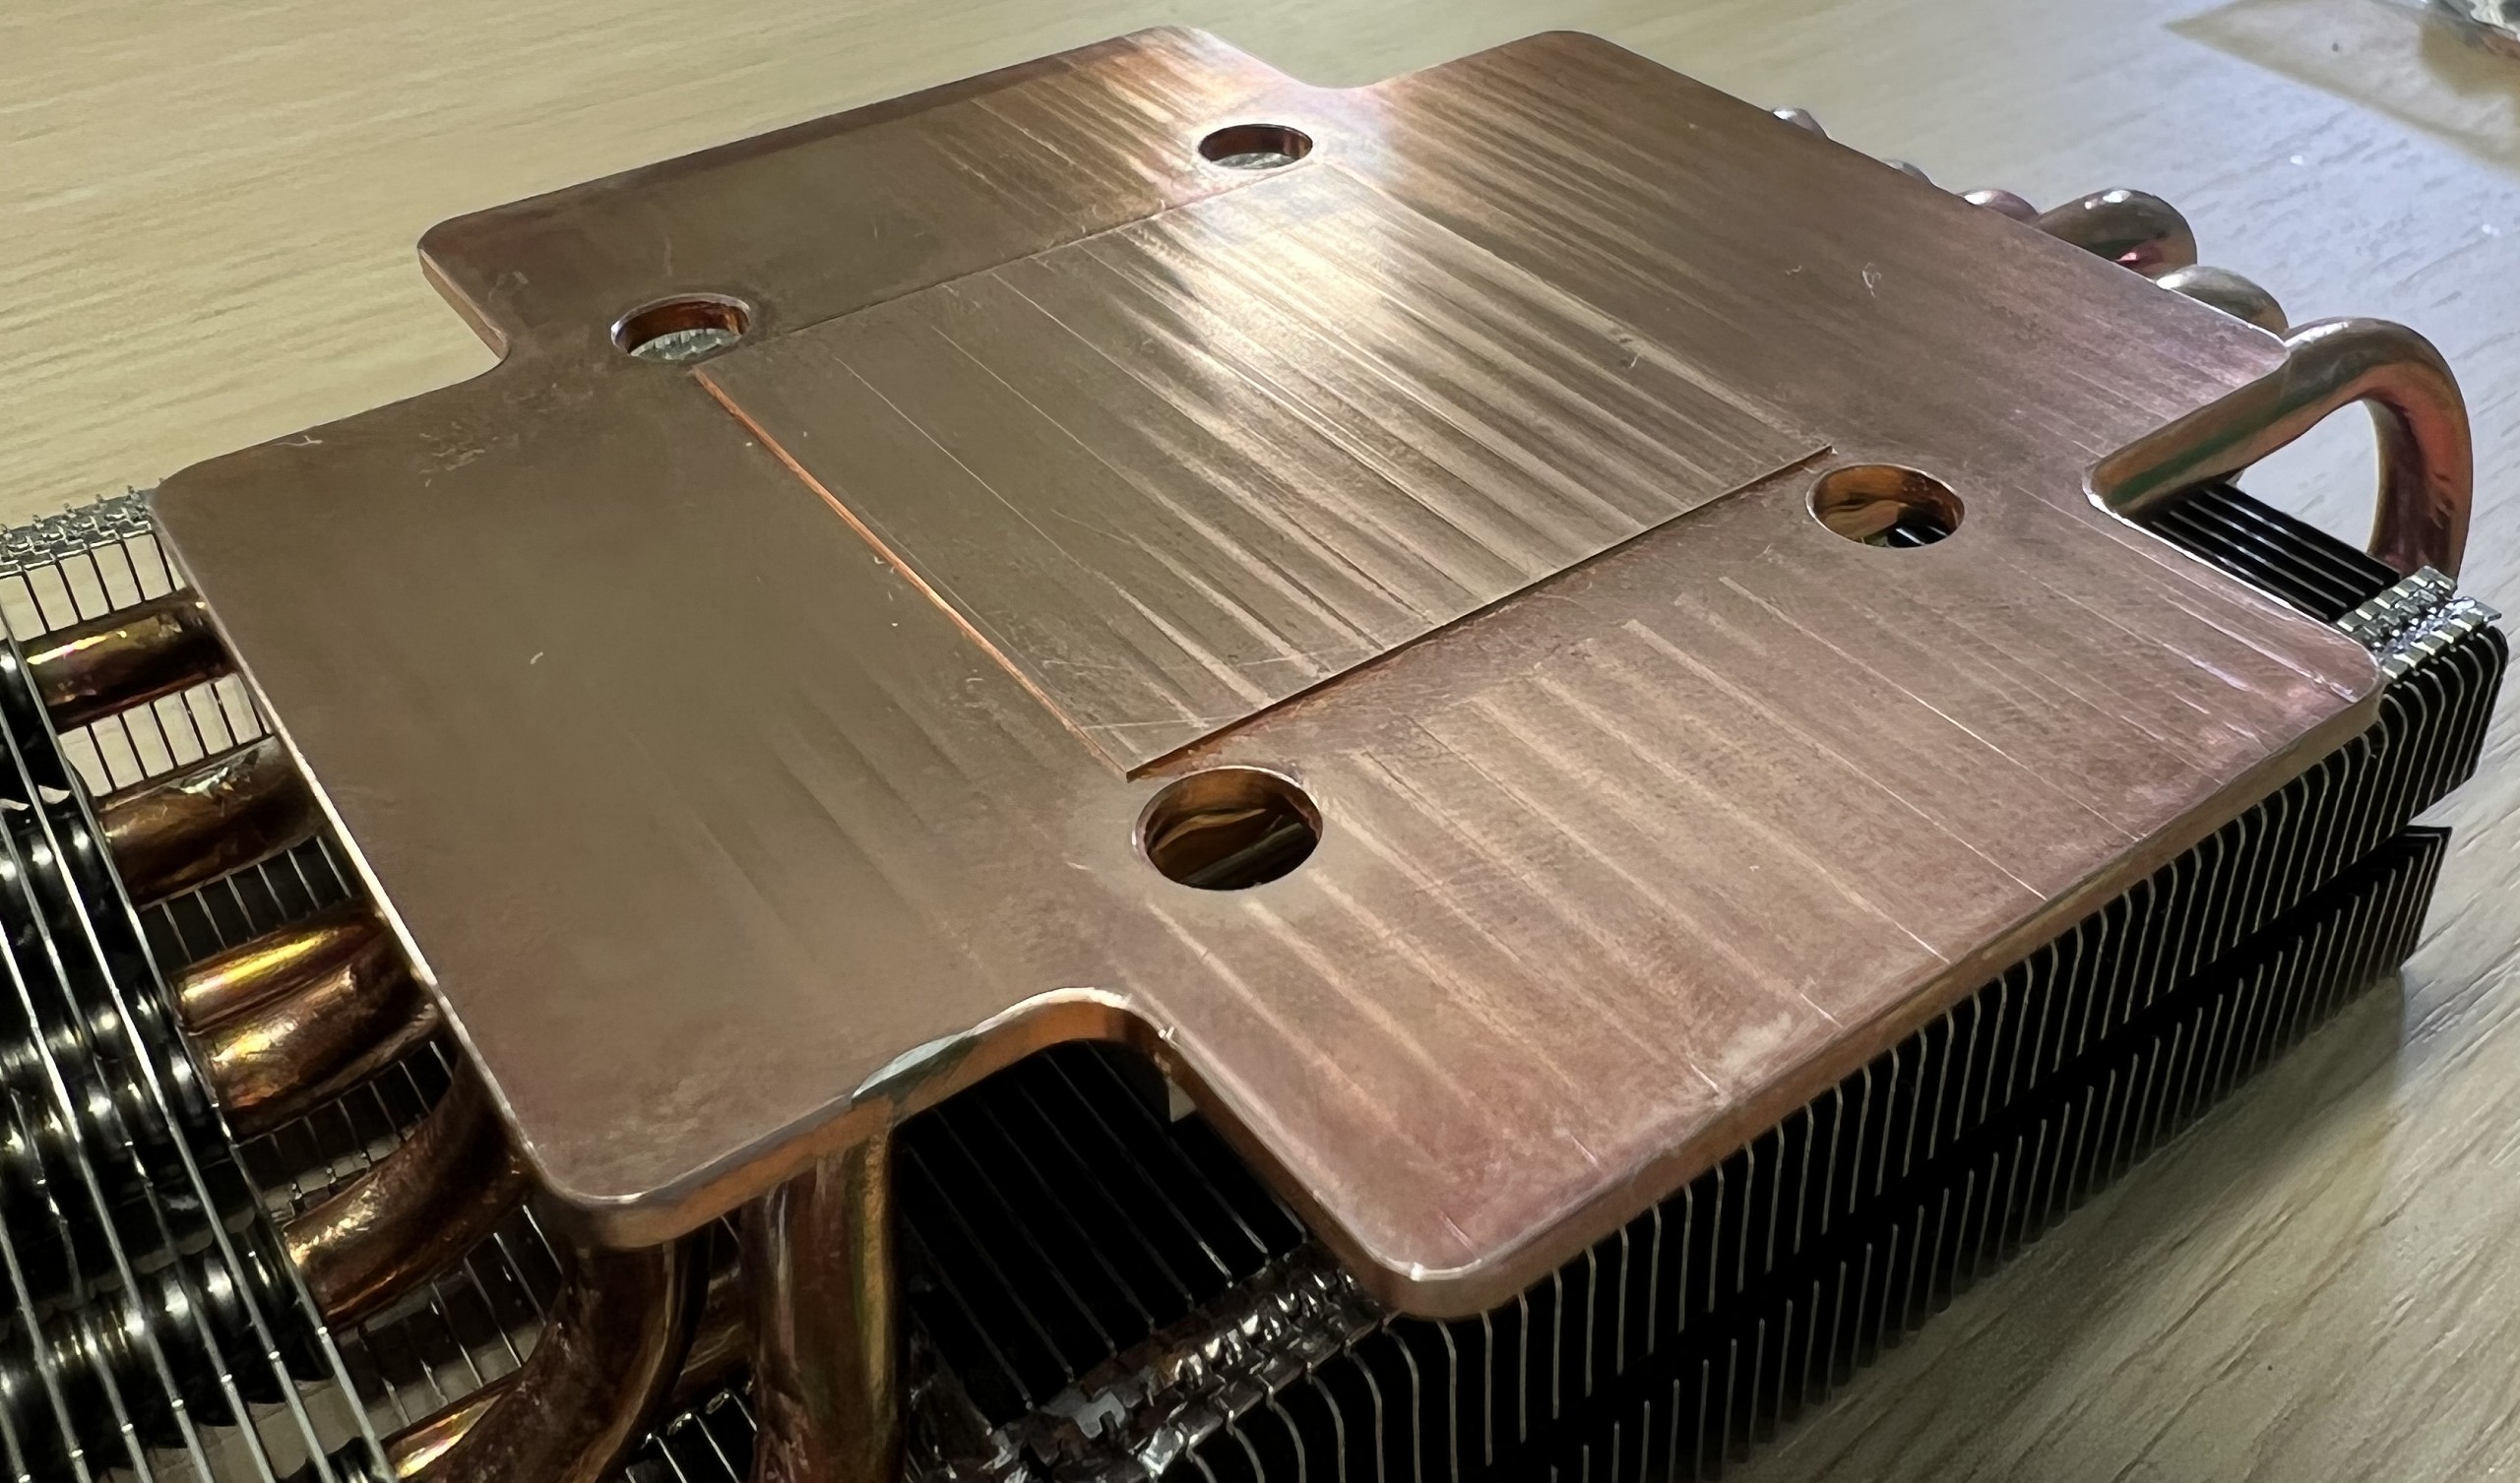
And the result is really something to be proud of. The lab now smells nicely of peppermint, the rag is ripe for the garbage can, my fingertip is burning and the Heatsink is finally reflecting the light again without choking. Now I feel better again. The heatsink, too, by the way.
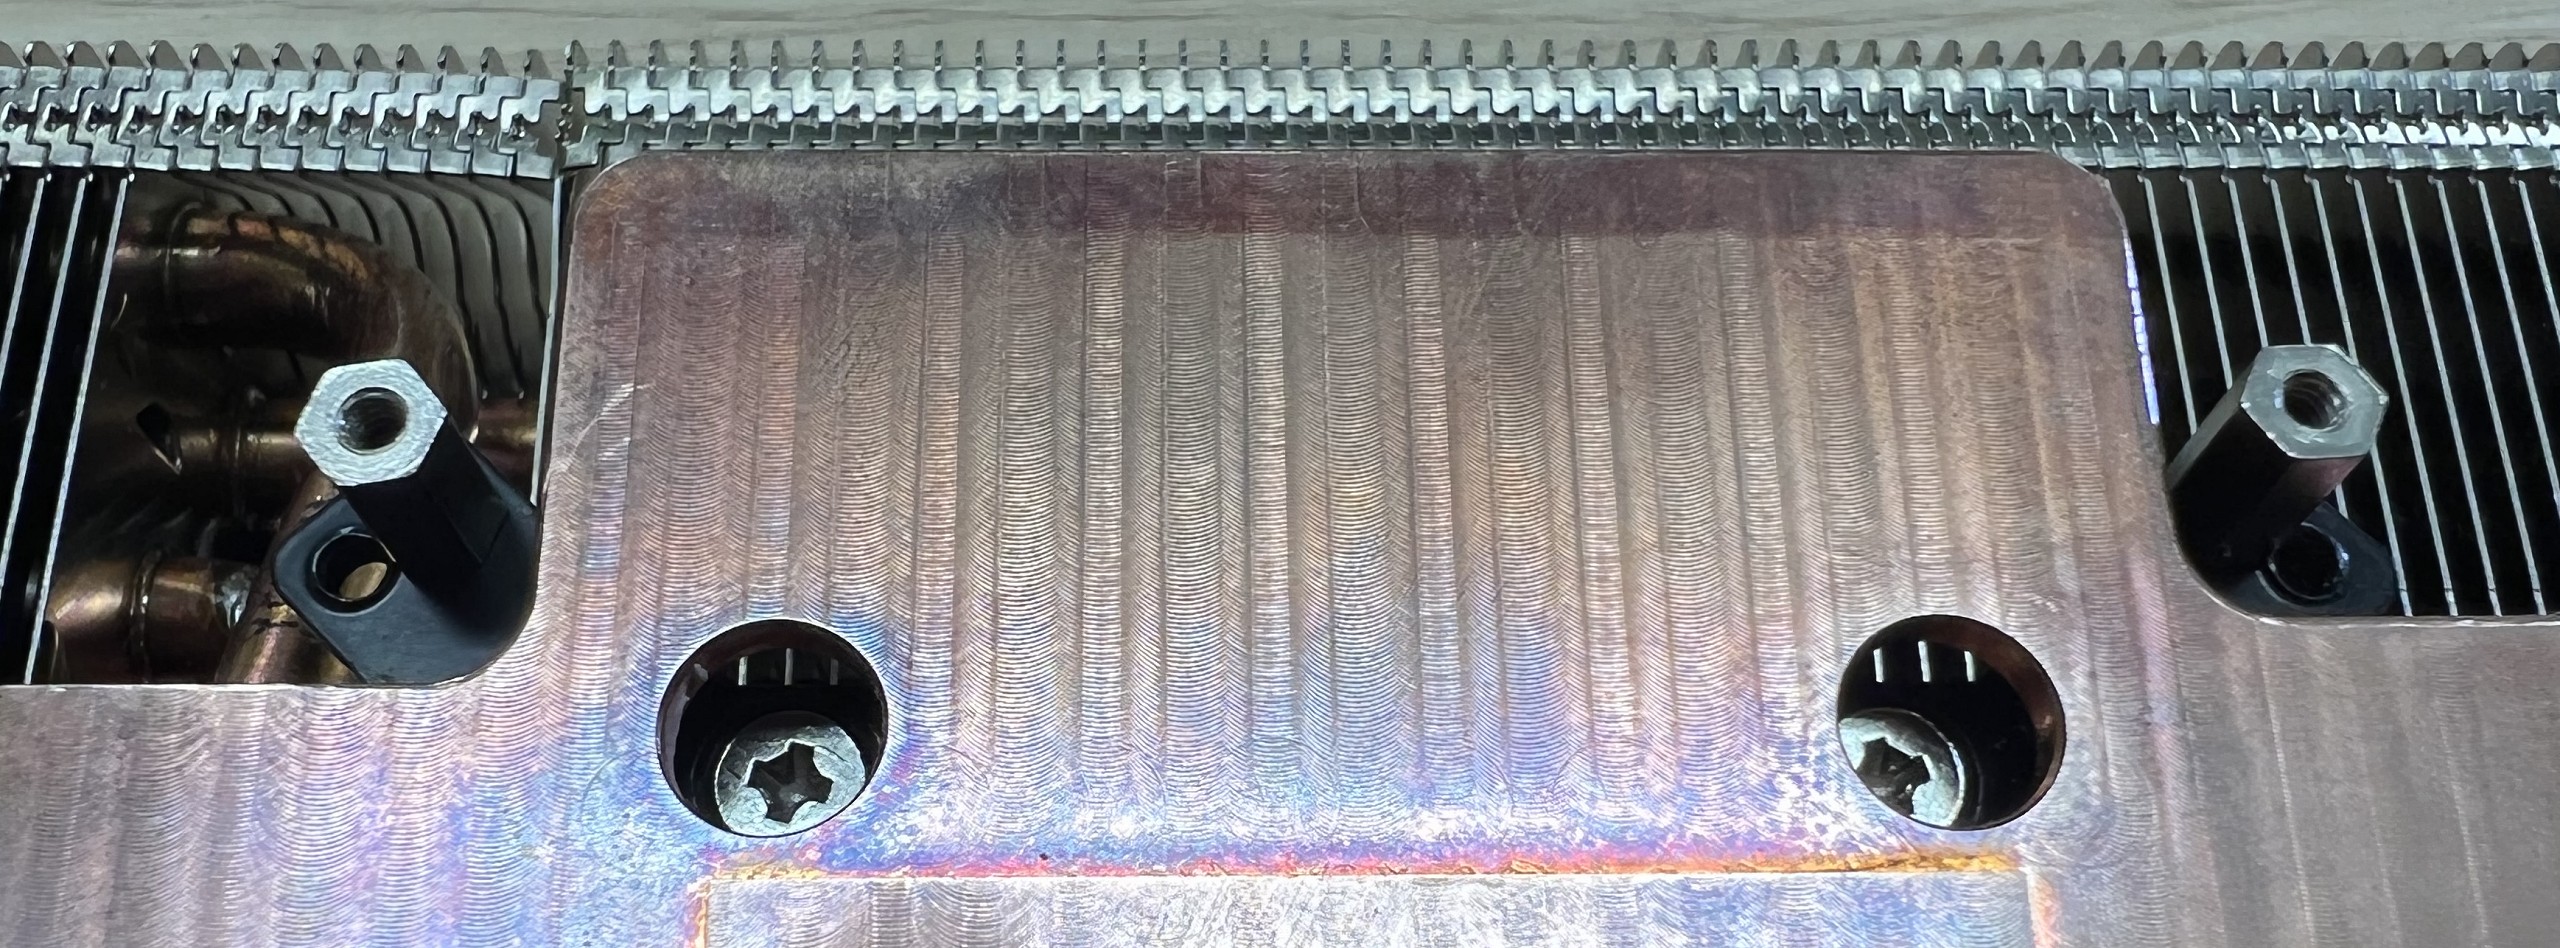
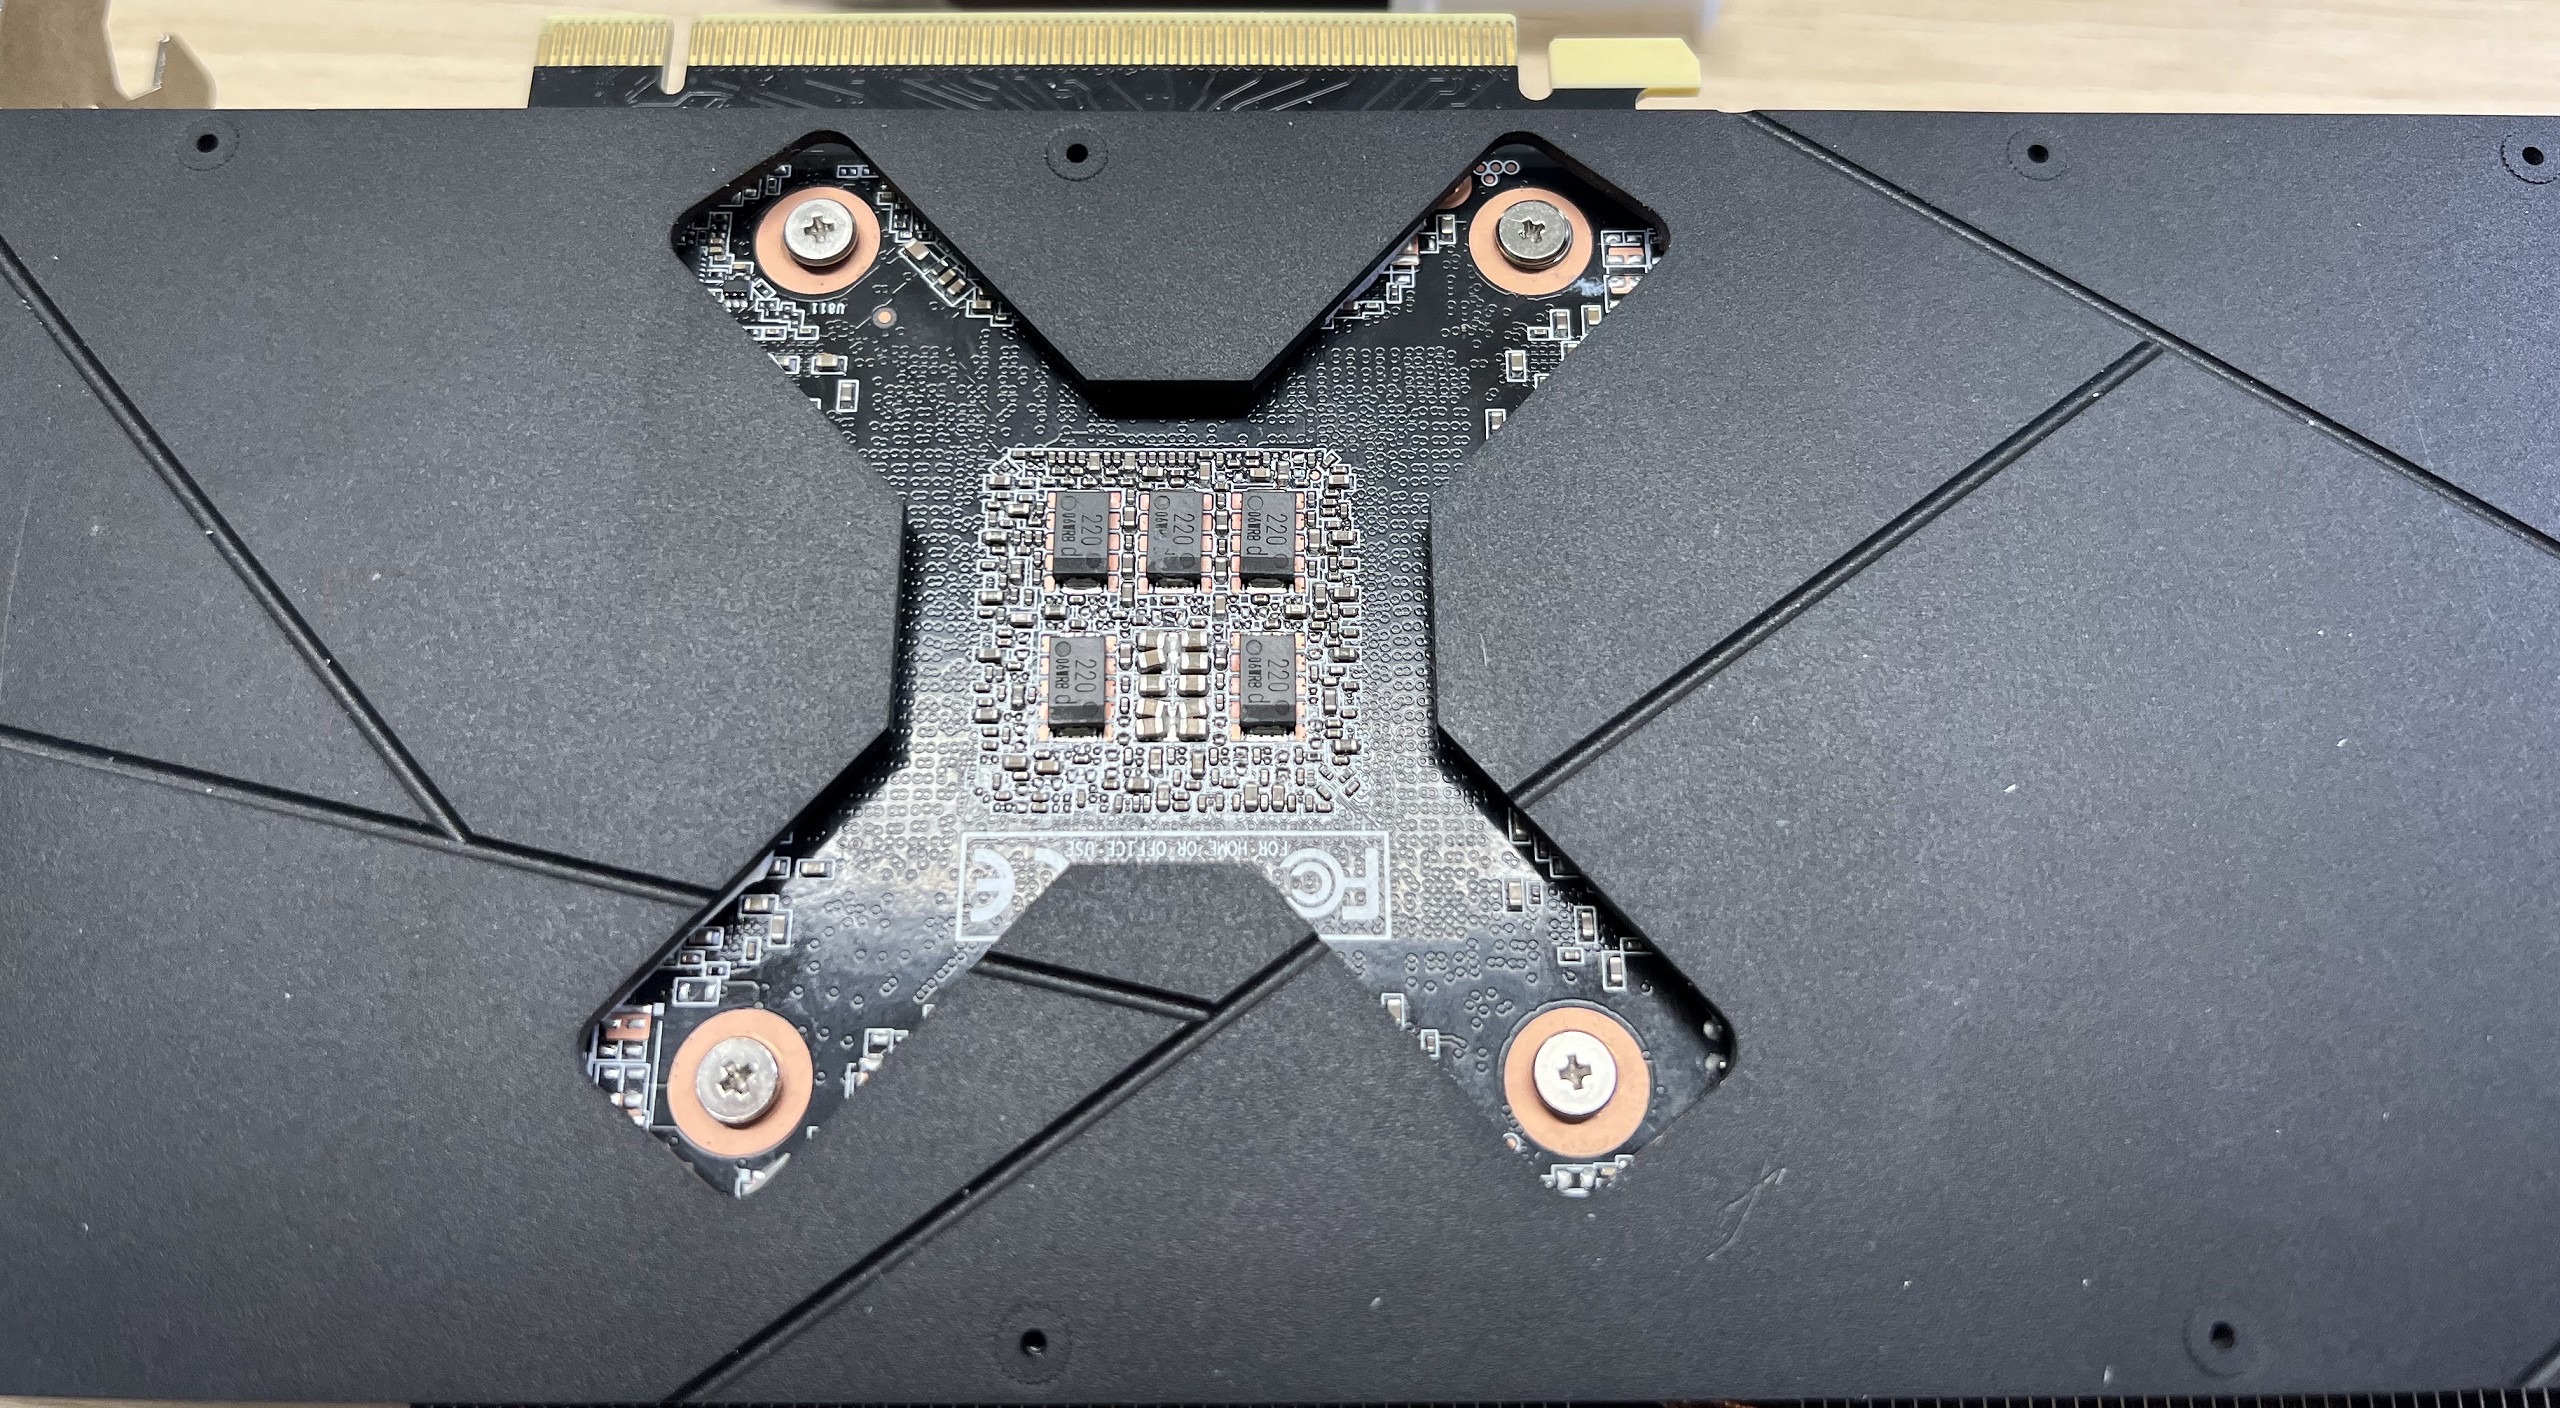
As I already mentioned, I can still use the new brackets and spacers from the first test. However, they must already have the holes for the Ampere cards, which is not the case with the current retail models.

The brackets can be screwed on quite easily from above. The M3 screws intentionally first engage in the base plate of the heatsinks on the back of the heatpipes and not in the upper part where RAM and GPU rest. This takes partial pressure off the heatsink and achieves a more even support. In addition, it also presses the heatpipes up a bit against the copper heatsink after screwing, which is desirable.
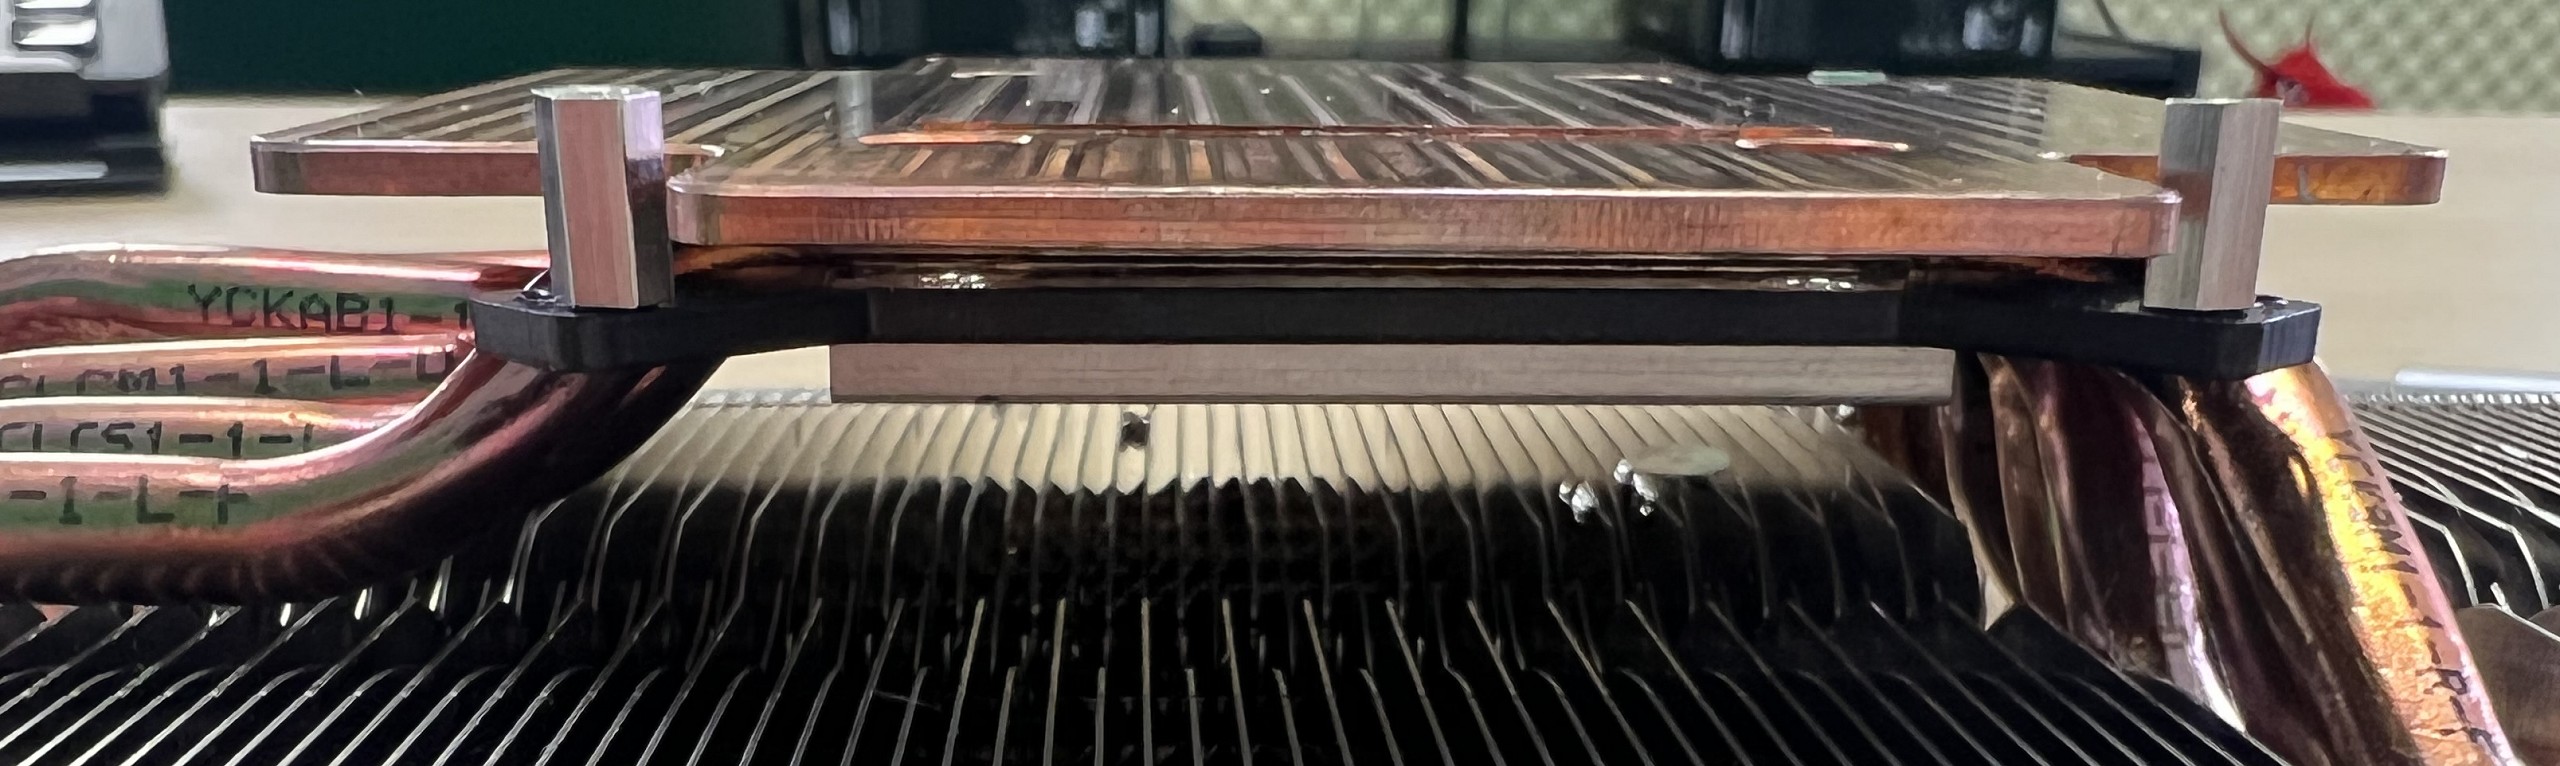
The side view once again shows the bracket and the layer-by-layer structure of the heatsink-heatpipe sandwich. Yes, it’s also the small details that can boost cooling performance a bit more. That’s certainly not much for any innovation, but in the aggregate you do notice it. And that was exactly the goal.
Finally, you simply place the PCB upside down on the cooler and screw the whole construct with four 2.5 mm spring screws. I already discussed the backplate including the 3 mm heat conduction pads for the memory in the first part. If you are interested in the details, you can read them again at the end. The link to the first part comes at the very end.
So ready!. Now I can put it all into operation first, check it and then measure it out. I can already spoil it – it’s going to be really good! Turn the page please…


63 Antworten
Kommentar
Lade neue Kommentare
Urgestein
1
Urgestein
Urgestein
Urgestein
Urgestein
1
Urgestein
Veteran
Veteran
Urgestein
Urgestein
Urgestein
Veteran
Veteran
1
Urgestein
Mitglied
Alle Kommentare lesen unter igor´sLAB Community →