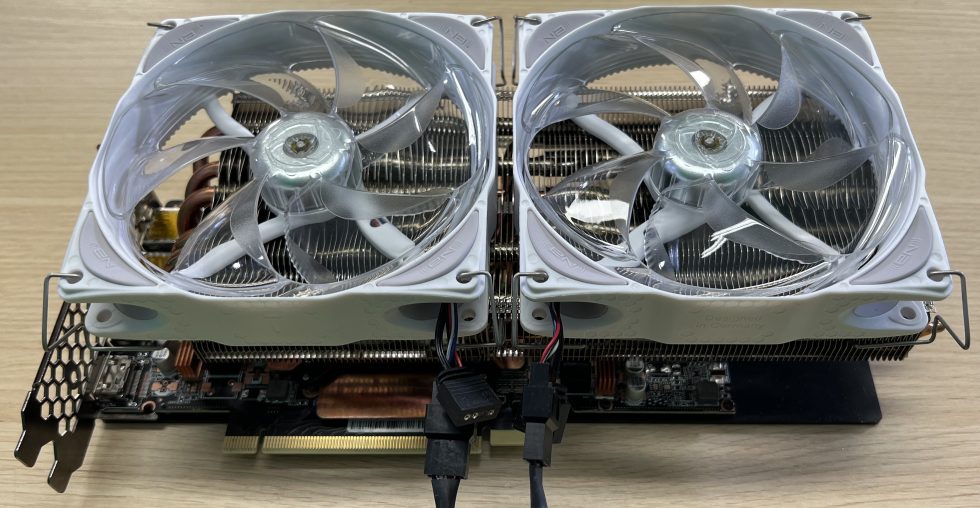
The Raijintek Morpheus is currently the most popular and most potent air cooler for graphics cards, but not for NVIDIA’s RTX 3xxx series. Until now, because I have now exclusively tested the first prototype, which also performs really well. You surely remember the first experiment with the bracket adjustment. But in the meantime, a few things have changed, because Raijintek was so nice (and / or in the self-interest also so clever) to actually implement the improvements and conversions that I had brought in, where I would have liked it. I love it when a plan works and today we get to look at the result together.
Today I will not only present the new cooler to you in detail, but also write a bit from the production, because you can solve something like this smart and elaborate or cheap and loveless. We opted for the first option, especially since it is not that much more expensive if you think through such a project well enough in advance. Raijintek can rely on the biggest heatpipe specialist here and it shows. Of course, the rest is still a prototype and not yet finalized optically and haptically. That’s a preface, because this is about brute functionality and not a Miss Asia contest.
And besides the actual subject of today’s test, you’ll also see a small part of what I do in the lab when I’m not testing finished products and writing articles. However, this time I was allowed to write something about it with Raijintek’s kind permission. Unfortunately, this does not always work for everyone. By the way, for today’s test I use an NVIDIA GeForce RTX 3080 in the pure reference design and with exactly 320 watts TBP. By the way, the new Morpheus would also have managed an RTX 3080 Ti.
First steps with known hardware
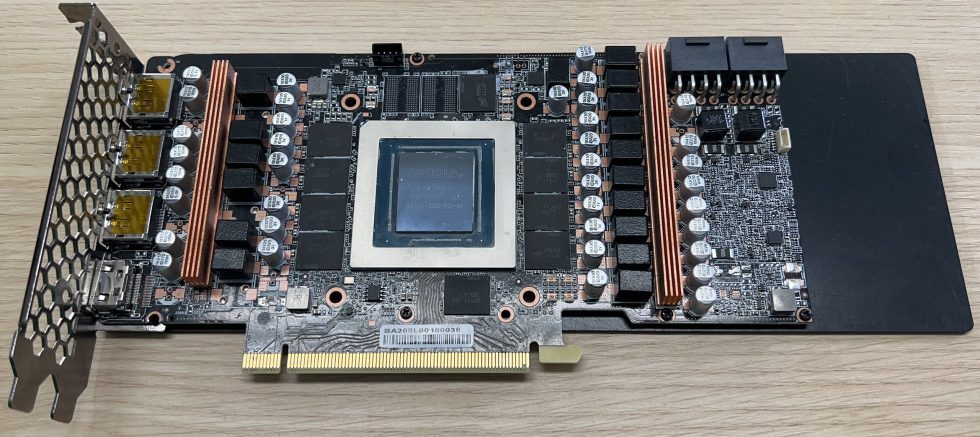
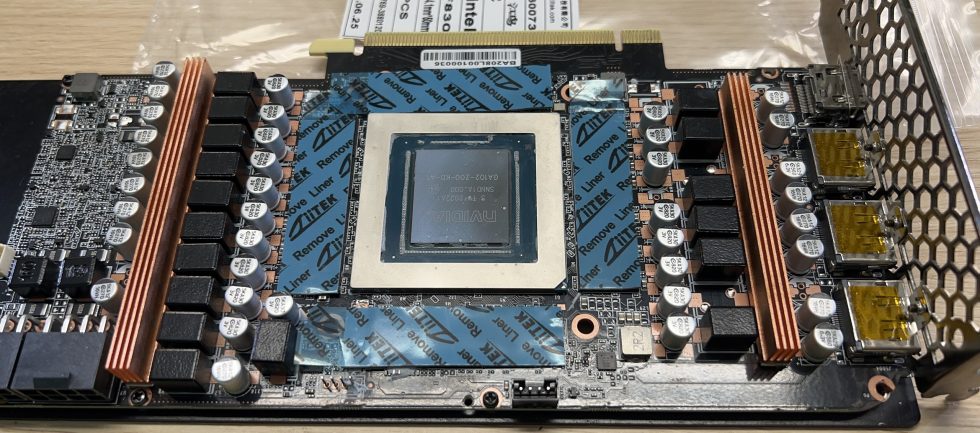
Of course, as always, the circuit board and a stabilizing backplate are at the beginning. The two copper heat sinks for the two VRM series are also included. And I can already spoil that it is completely sufficient in this form in terms of cooling, because the heatpipes are now better positioned (but I’ll get to that in a moment) and the airflow is less disturbed. In addition, there will also be a new attachment that is more secure than the current adhesive pads that are solely responsible for this. I’ll come to the actual cooler on the next page, because it’s a bit too much content for this part.
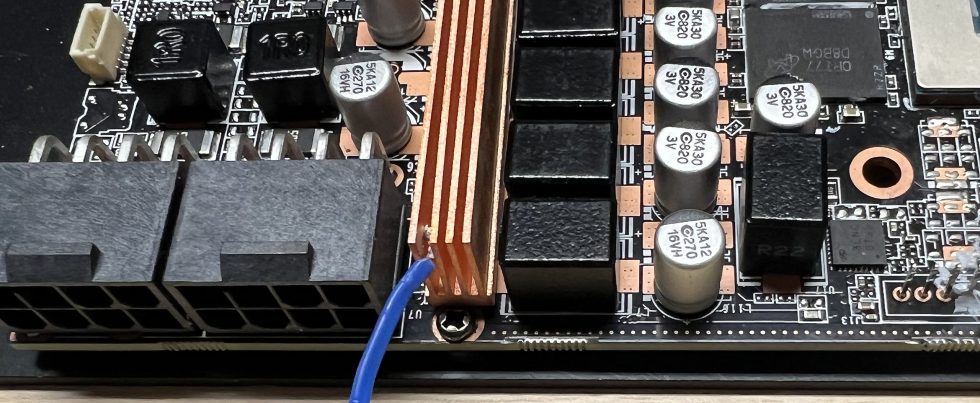
I also will show you the preparations for the measuring. Since it is currently not possible to reliably read the voltage converter temperatures for the RTX cards, I have clamped a calibrated K-sensor into each of the two coolers. The temperature drop across the thermal resistances of the individual layers including the adhesive pad can be easily calculated and still provided with a generous tolerance.
According to the plausibility check on my digital heater, there are about 18 to 20 Kelvin between the measuring point in the cooler and the substrate of the VRM, whereby I simply assume a generous 20 Kelvin. That’s certainly more than in reality, but better safe than sorry.
The story about the thickness of the heat conduction pads for the memory is also always such a thing. For such things I have a gauge with tongues, but pads are more or less soft. The only thing that can help is to approach and thermally read out during operation after an initial rough measurement for the starting value of the thickness. My good fortune is that I have enough pads of various thicknesses in 0.25 mm increments in bulk to really test it out cleanly. The gap is just under 2 mm wide, but the best thermal solution is then at light pressure and 2.25 mm initial thickness of the soft pads.
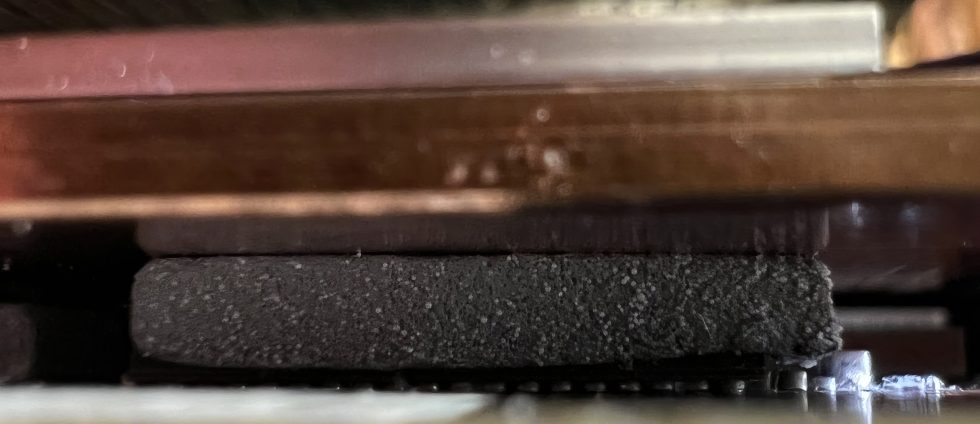
Viewed from the side, the 1.95 mm of the 2.25 mm pad then looks like this and you can also see the small bulge due to the pressure. However, it is still low enough that the solder beads under the RAM modules do not break away. Violence is never a solution, certainly not with RAM. Without underfill, these are all divas of the highest order. And if the pads are too thick, the heatsink won’t get enough contact pressure on the GPU. In the opposite case, the RAM then gets too hot. If you invest a lot of time in testing, you will be rewarded with a good result later on. But I don’t want to get ahead of myself.
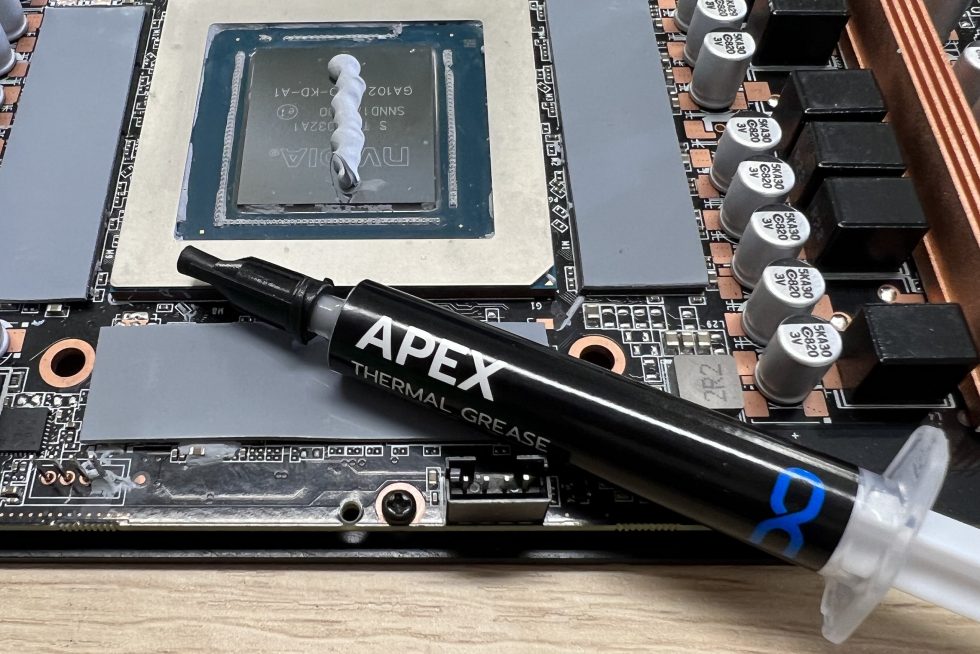
The right thermal paste is at least as important as these pads. I have been using the Alphacool Apex exclusively for some time. Not because I get money for it, but because this paste as “Apex” had to prove itself in internal test series against countless other pure industrial pastes and in the end turned out to be the best paste when it comes to the balancing act of thermal conductivity, user-friendliness (viscosity!) and long-term durability. The stuff comes directly from a large original manufacturer and not from some filler, which is “blended” stuff and “individualized” and then – as a follow – the pastes are from batch to batch differently. In general, the industry does not use pastel-colored pastes, and instead relies on the consistency of the qualities.
The sausage method is the best here, and I’d also like to explain again why large-scale painting is really pointless. If you alternately tighten the longitudinal edges, the paste pushes elegantly from the center to the outside and what is too much is pushed out. In this way, the layer is always equally thin and uniform. If you spread everything instead, it’s hard to squeeze anything out because everything is already full of paste at the edges. The layer will thus always be thicker. And that’s exactly what you don’t want.
And now that the VRM cooler is attached and the board is prepared, I come to the new cooler and the important changes. And yes, I’ve thoroughly enjoyed stringing you along a bit more up to this point. 😀





63 Antworten
Kommentar
Lade neue Kommentare
Urgestein
1
Urgestein
Urgestein
Urgestein
Urgestein
1
Urgestein
Veteran
Veteran
Urgestein
Urgestein
Urgestein
Veteran
Veteran
1
Urgestein
Mitglied
Alle Kommentare lesen unter igor´sLAB Community →