


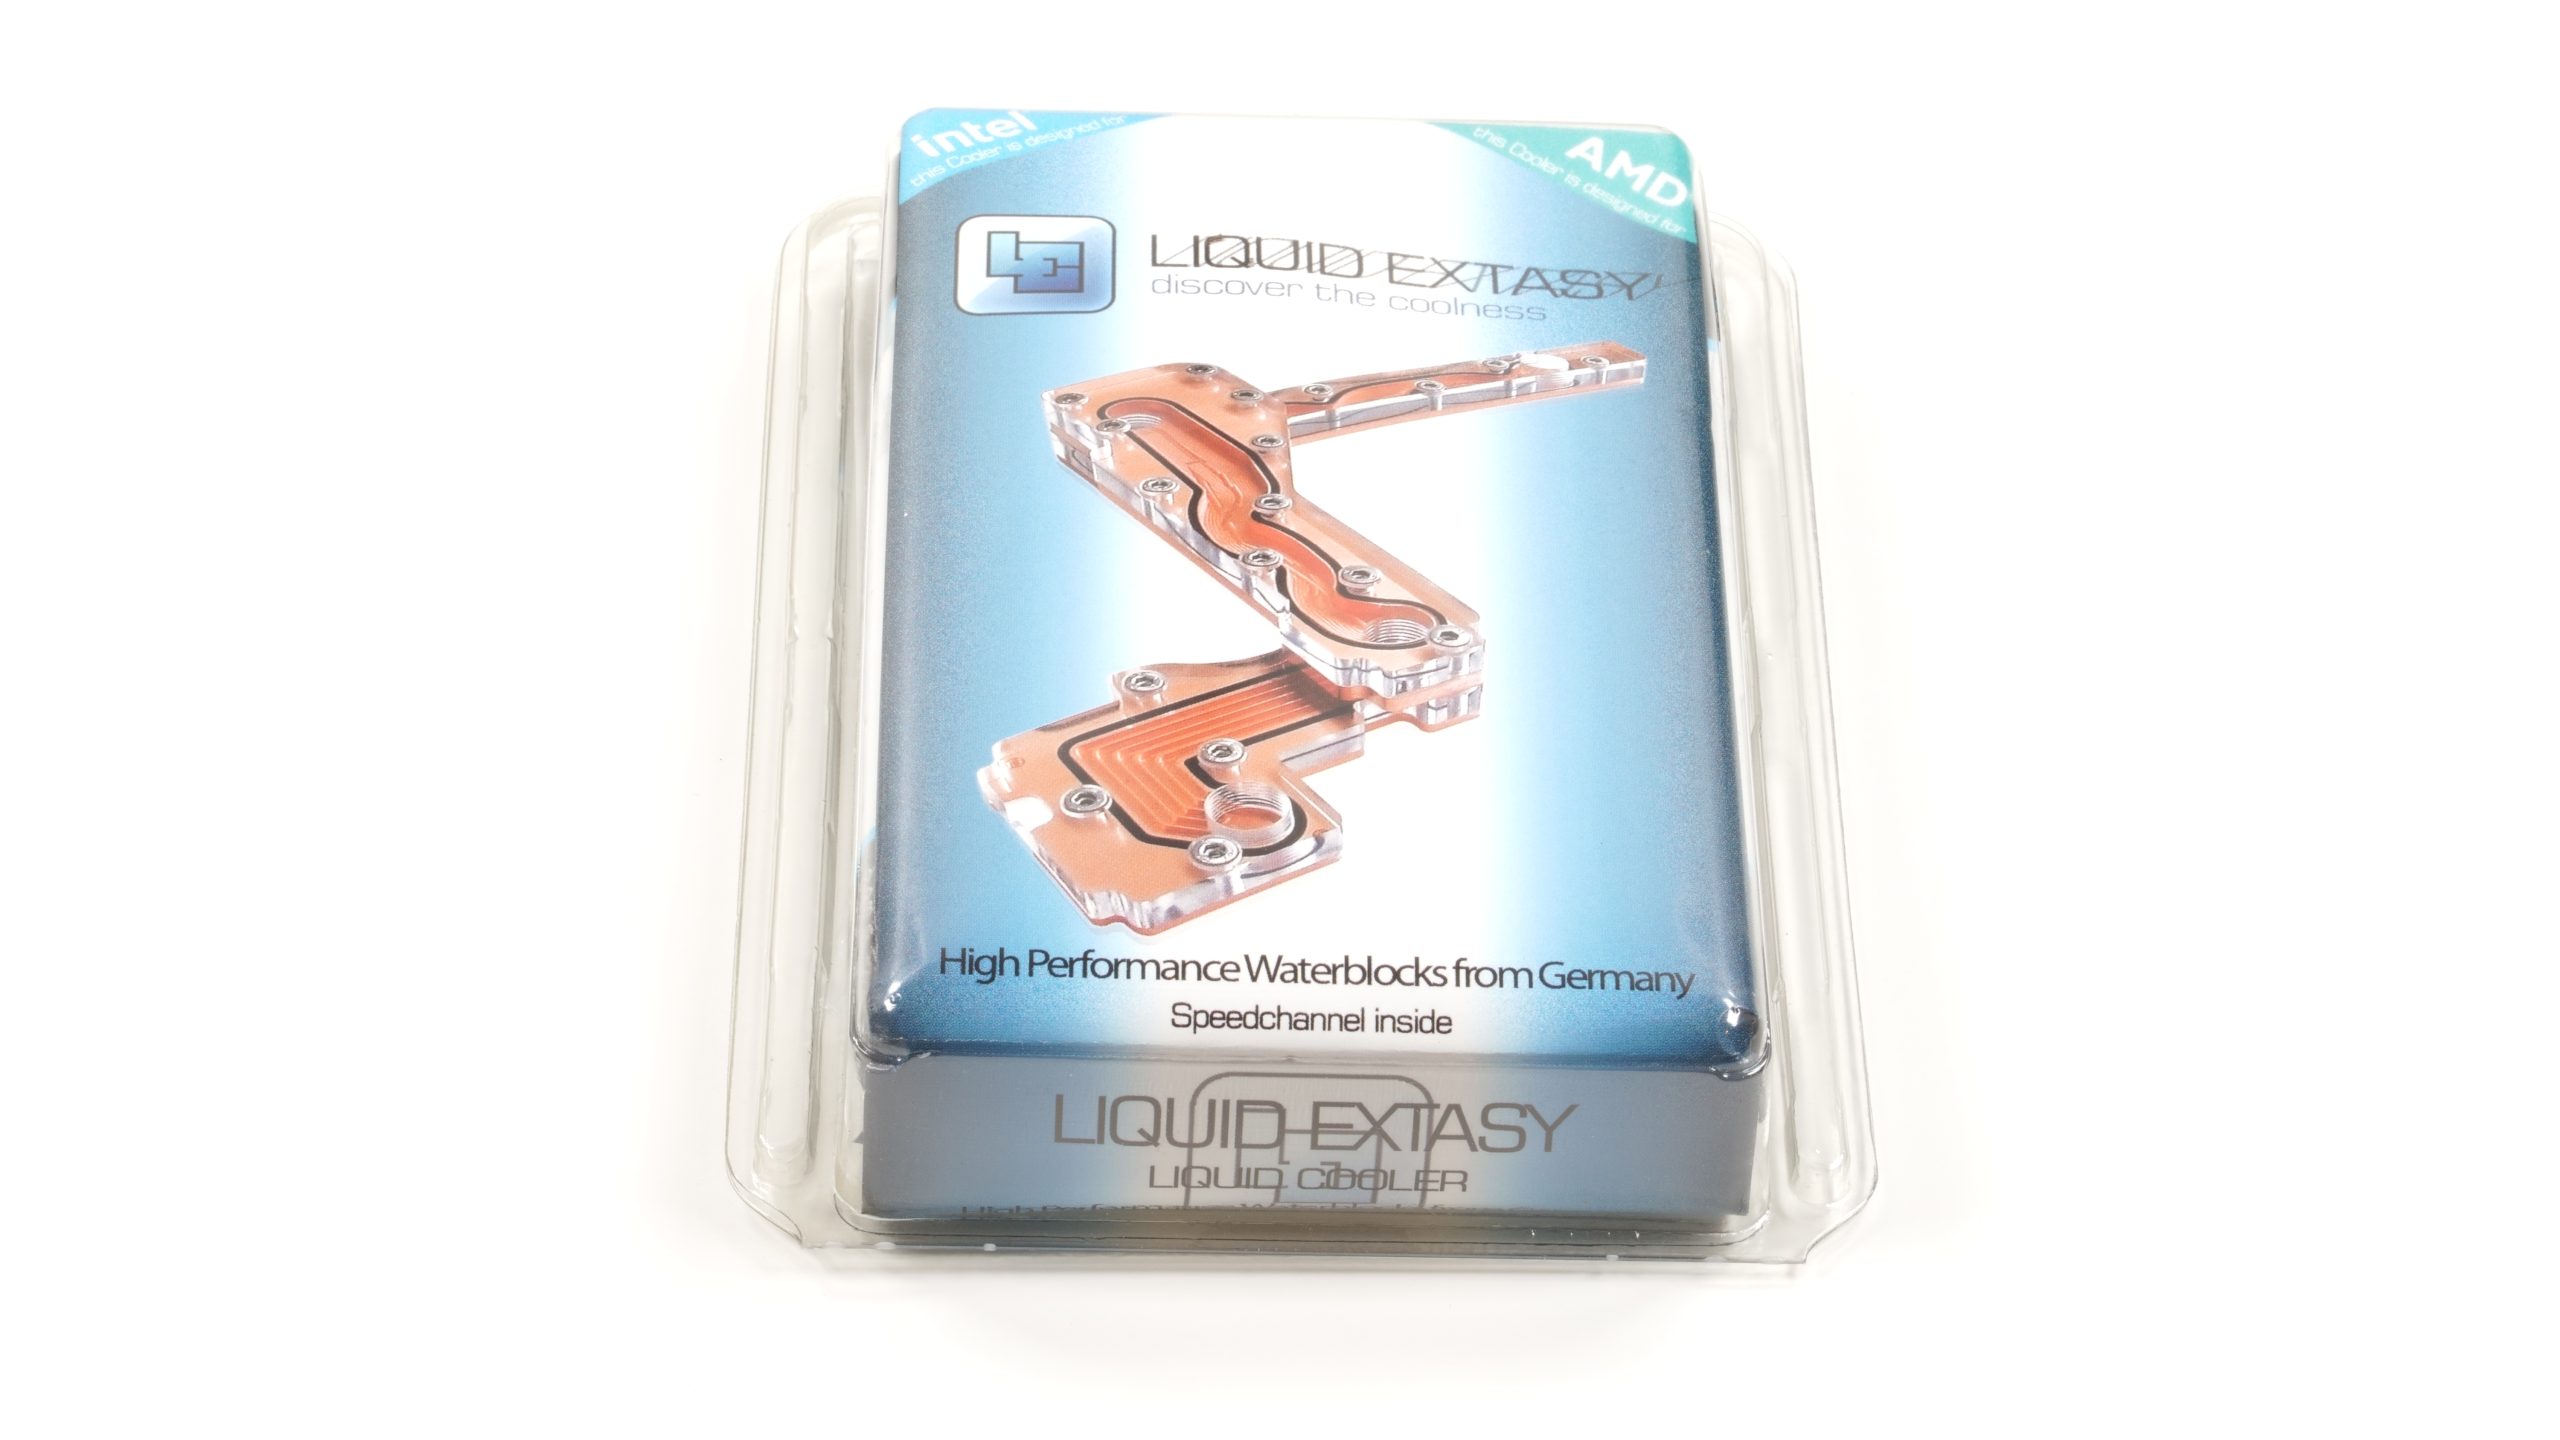
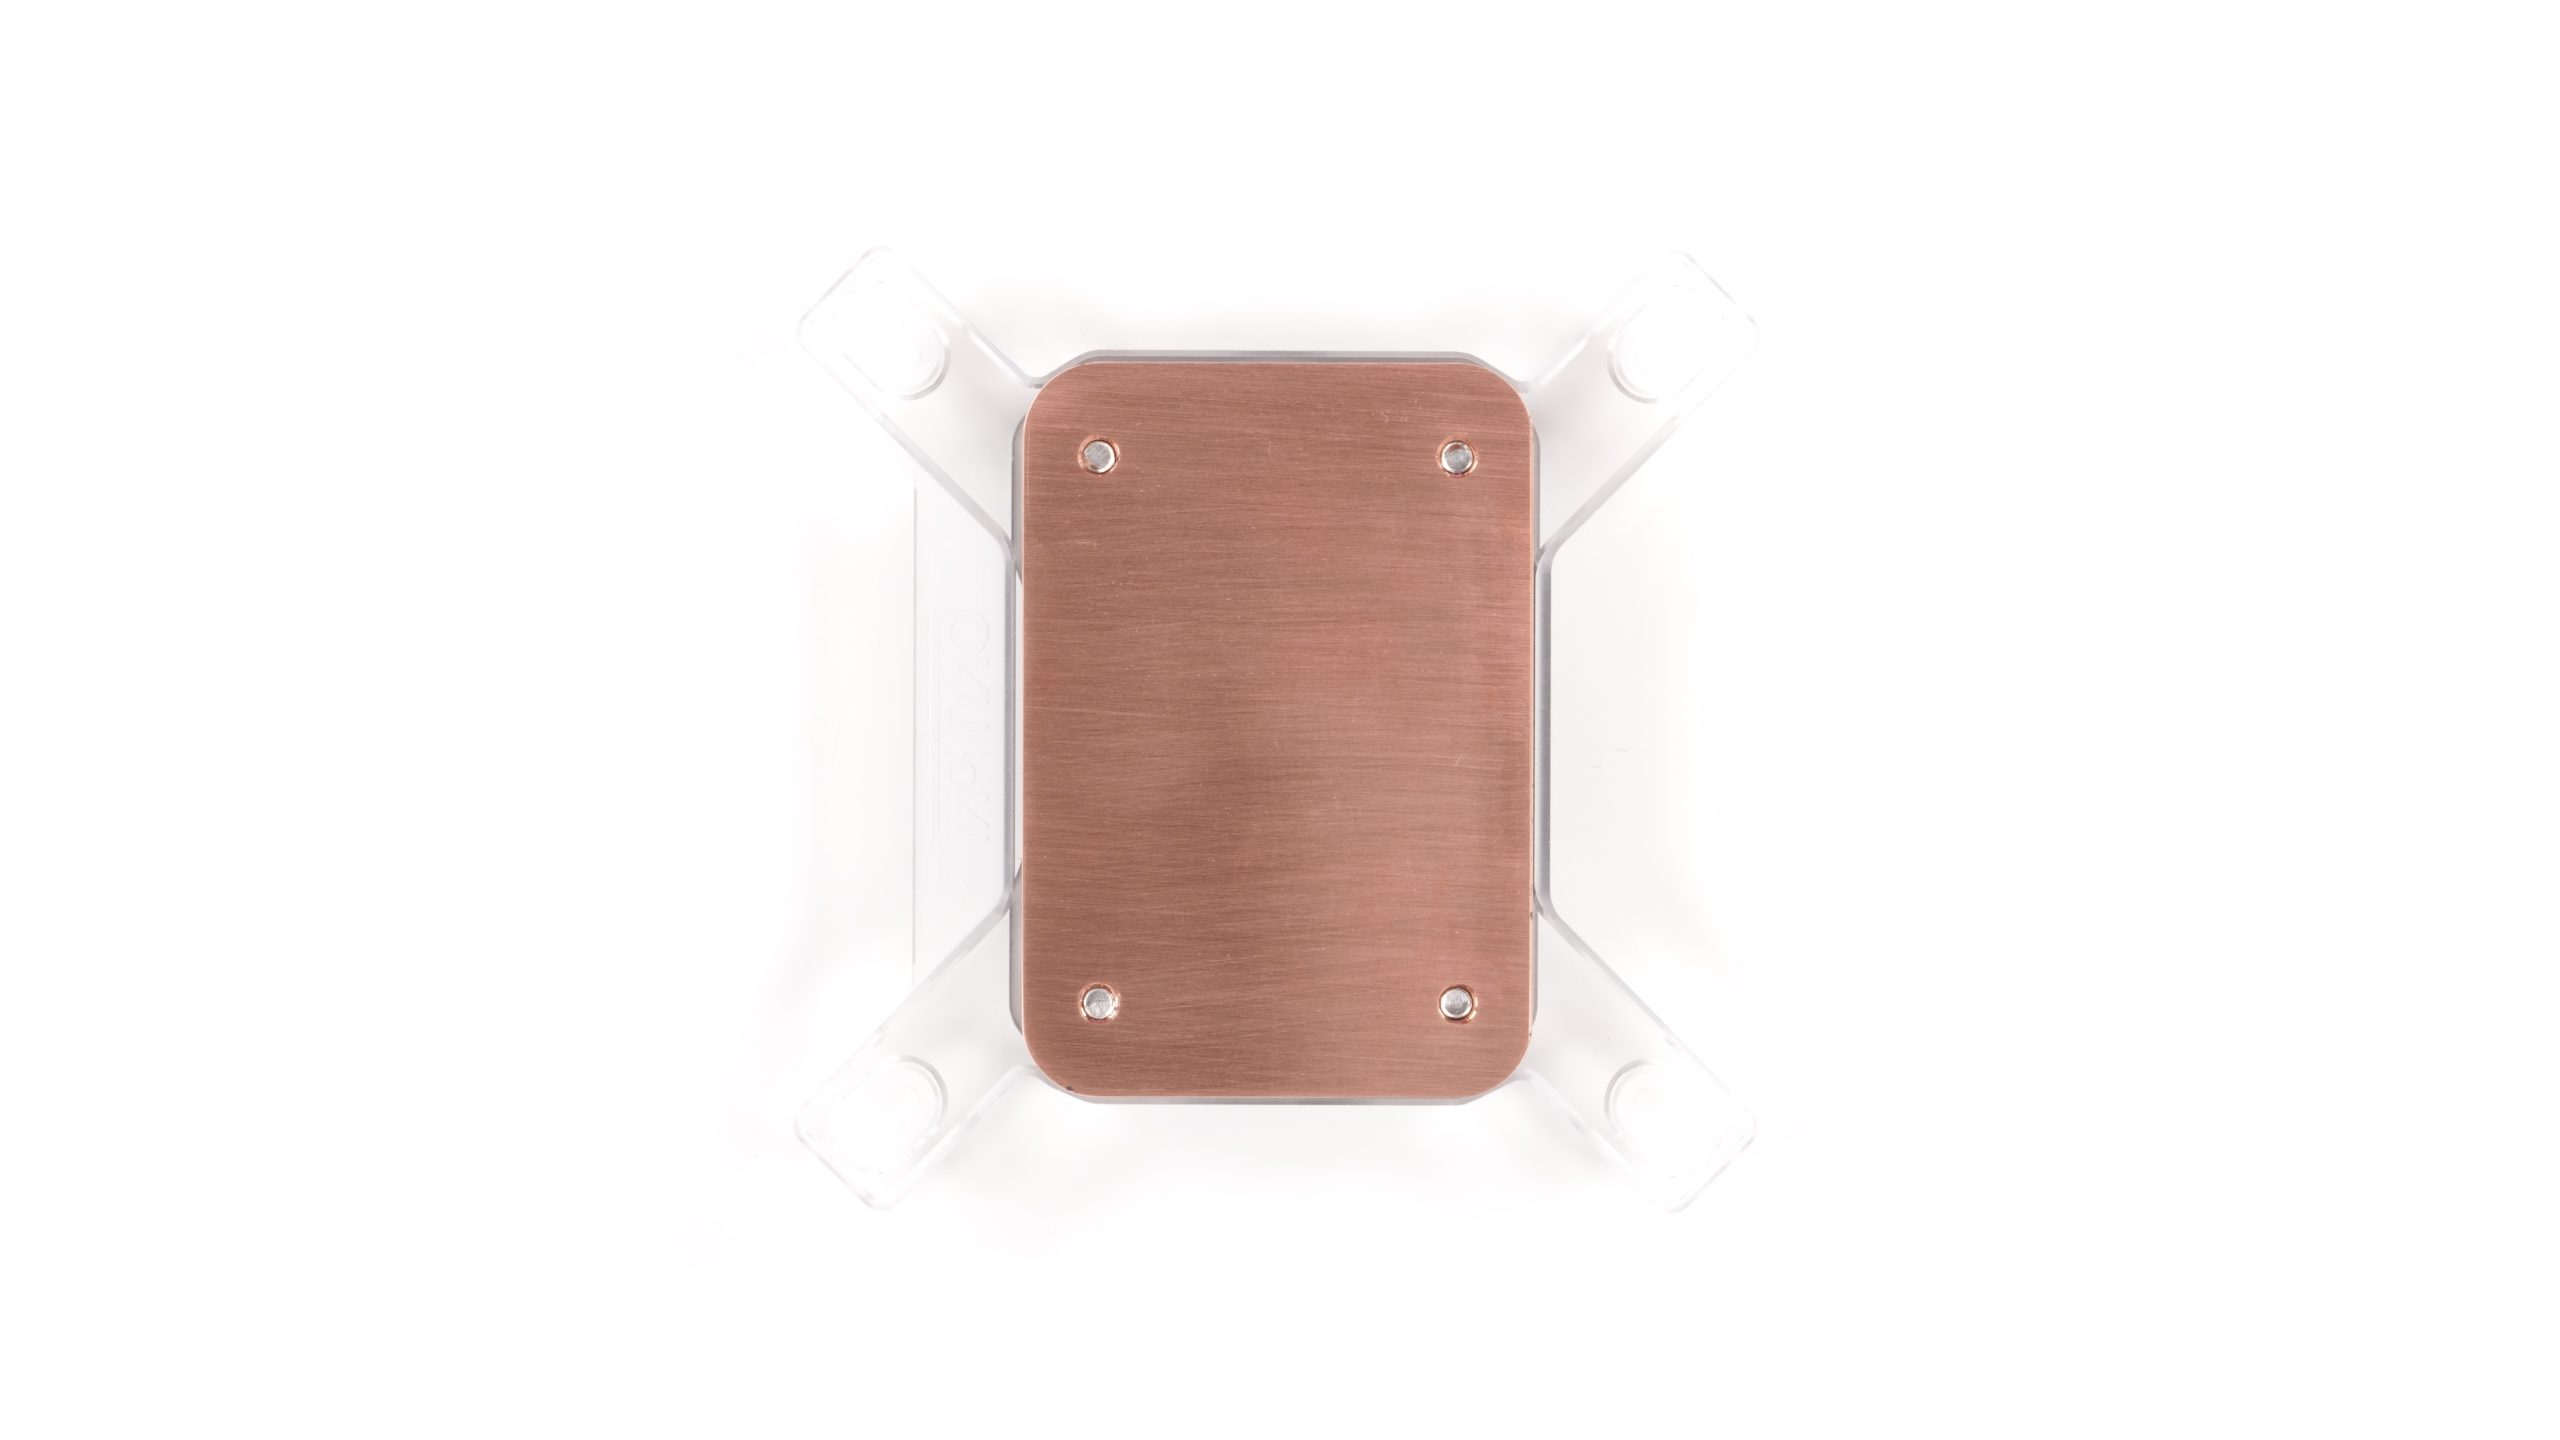
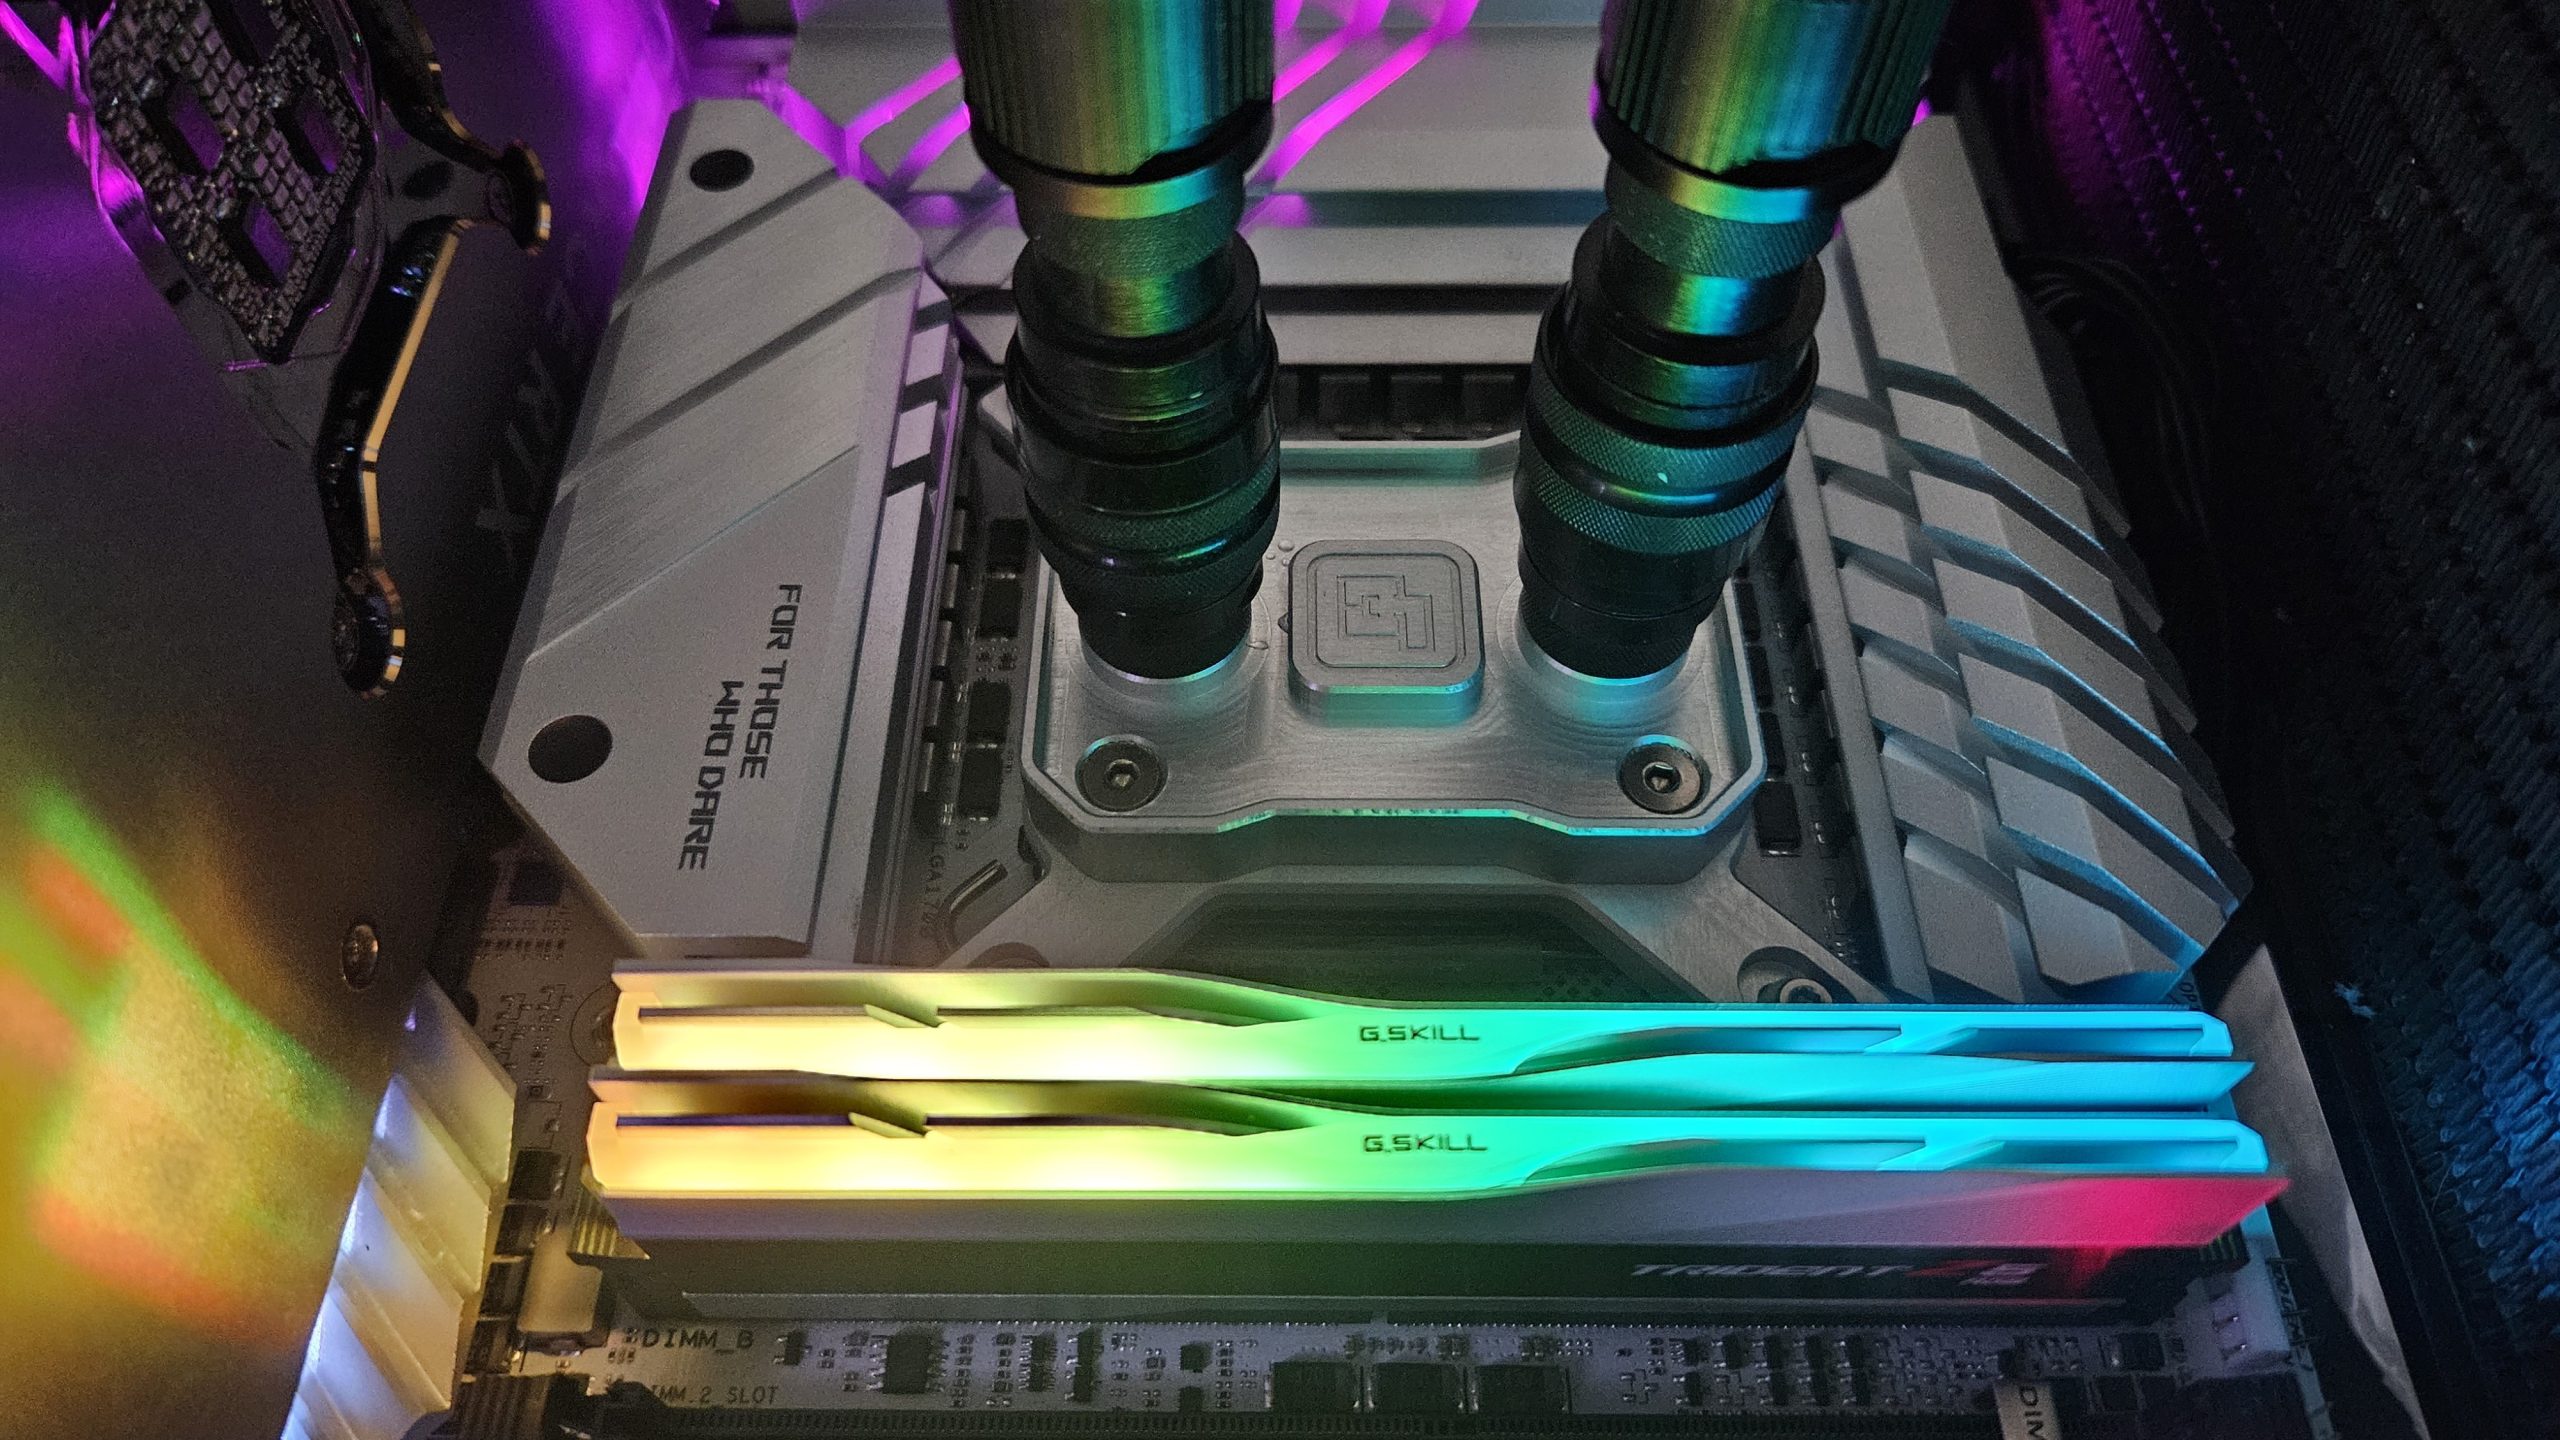
Liquid Extasy No. Uno
As a manufacturer of water blocks, Liquid Extasy is as new as it is difficult to google. They sent us the No. Uno in the acrylic version for LGA1700. We were also sent an aluminum frame for LGA1700 and a frame for AM5 so that we can convert the modular block accordingly. An o-ring is also included, with which the convexity of the base plate can be changed and thus optimized for the respective CPU, similar to EK’s jetplates.
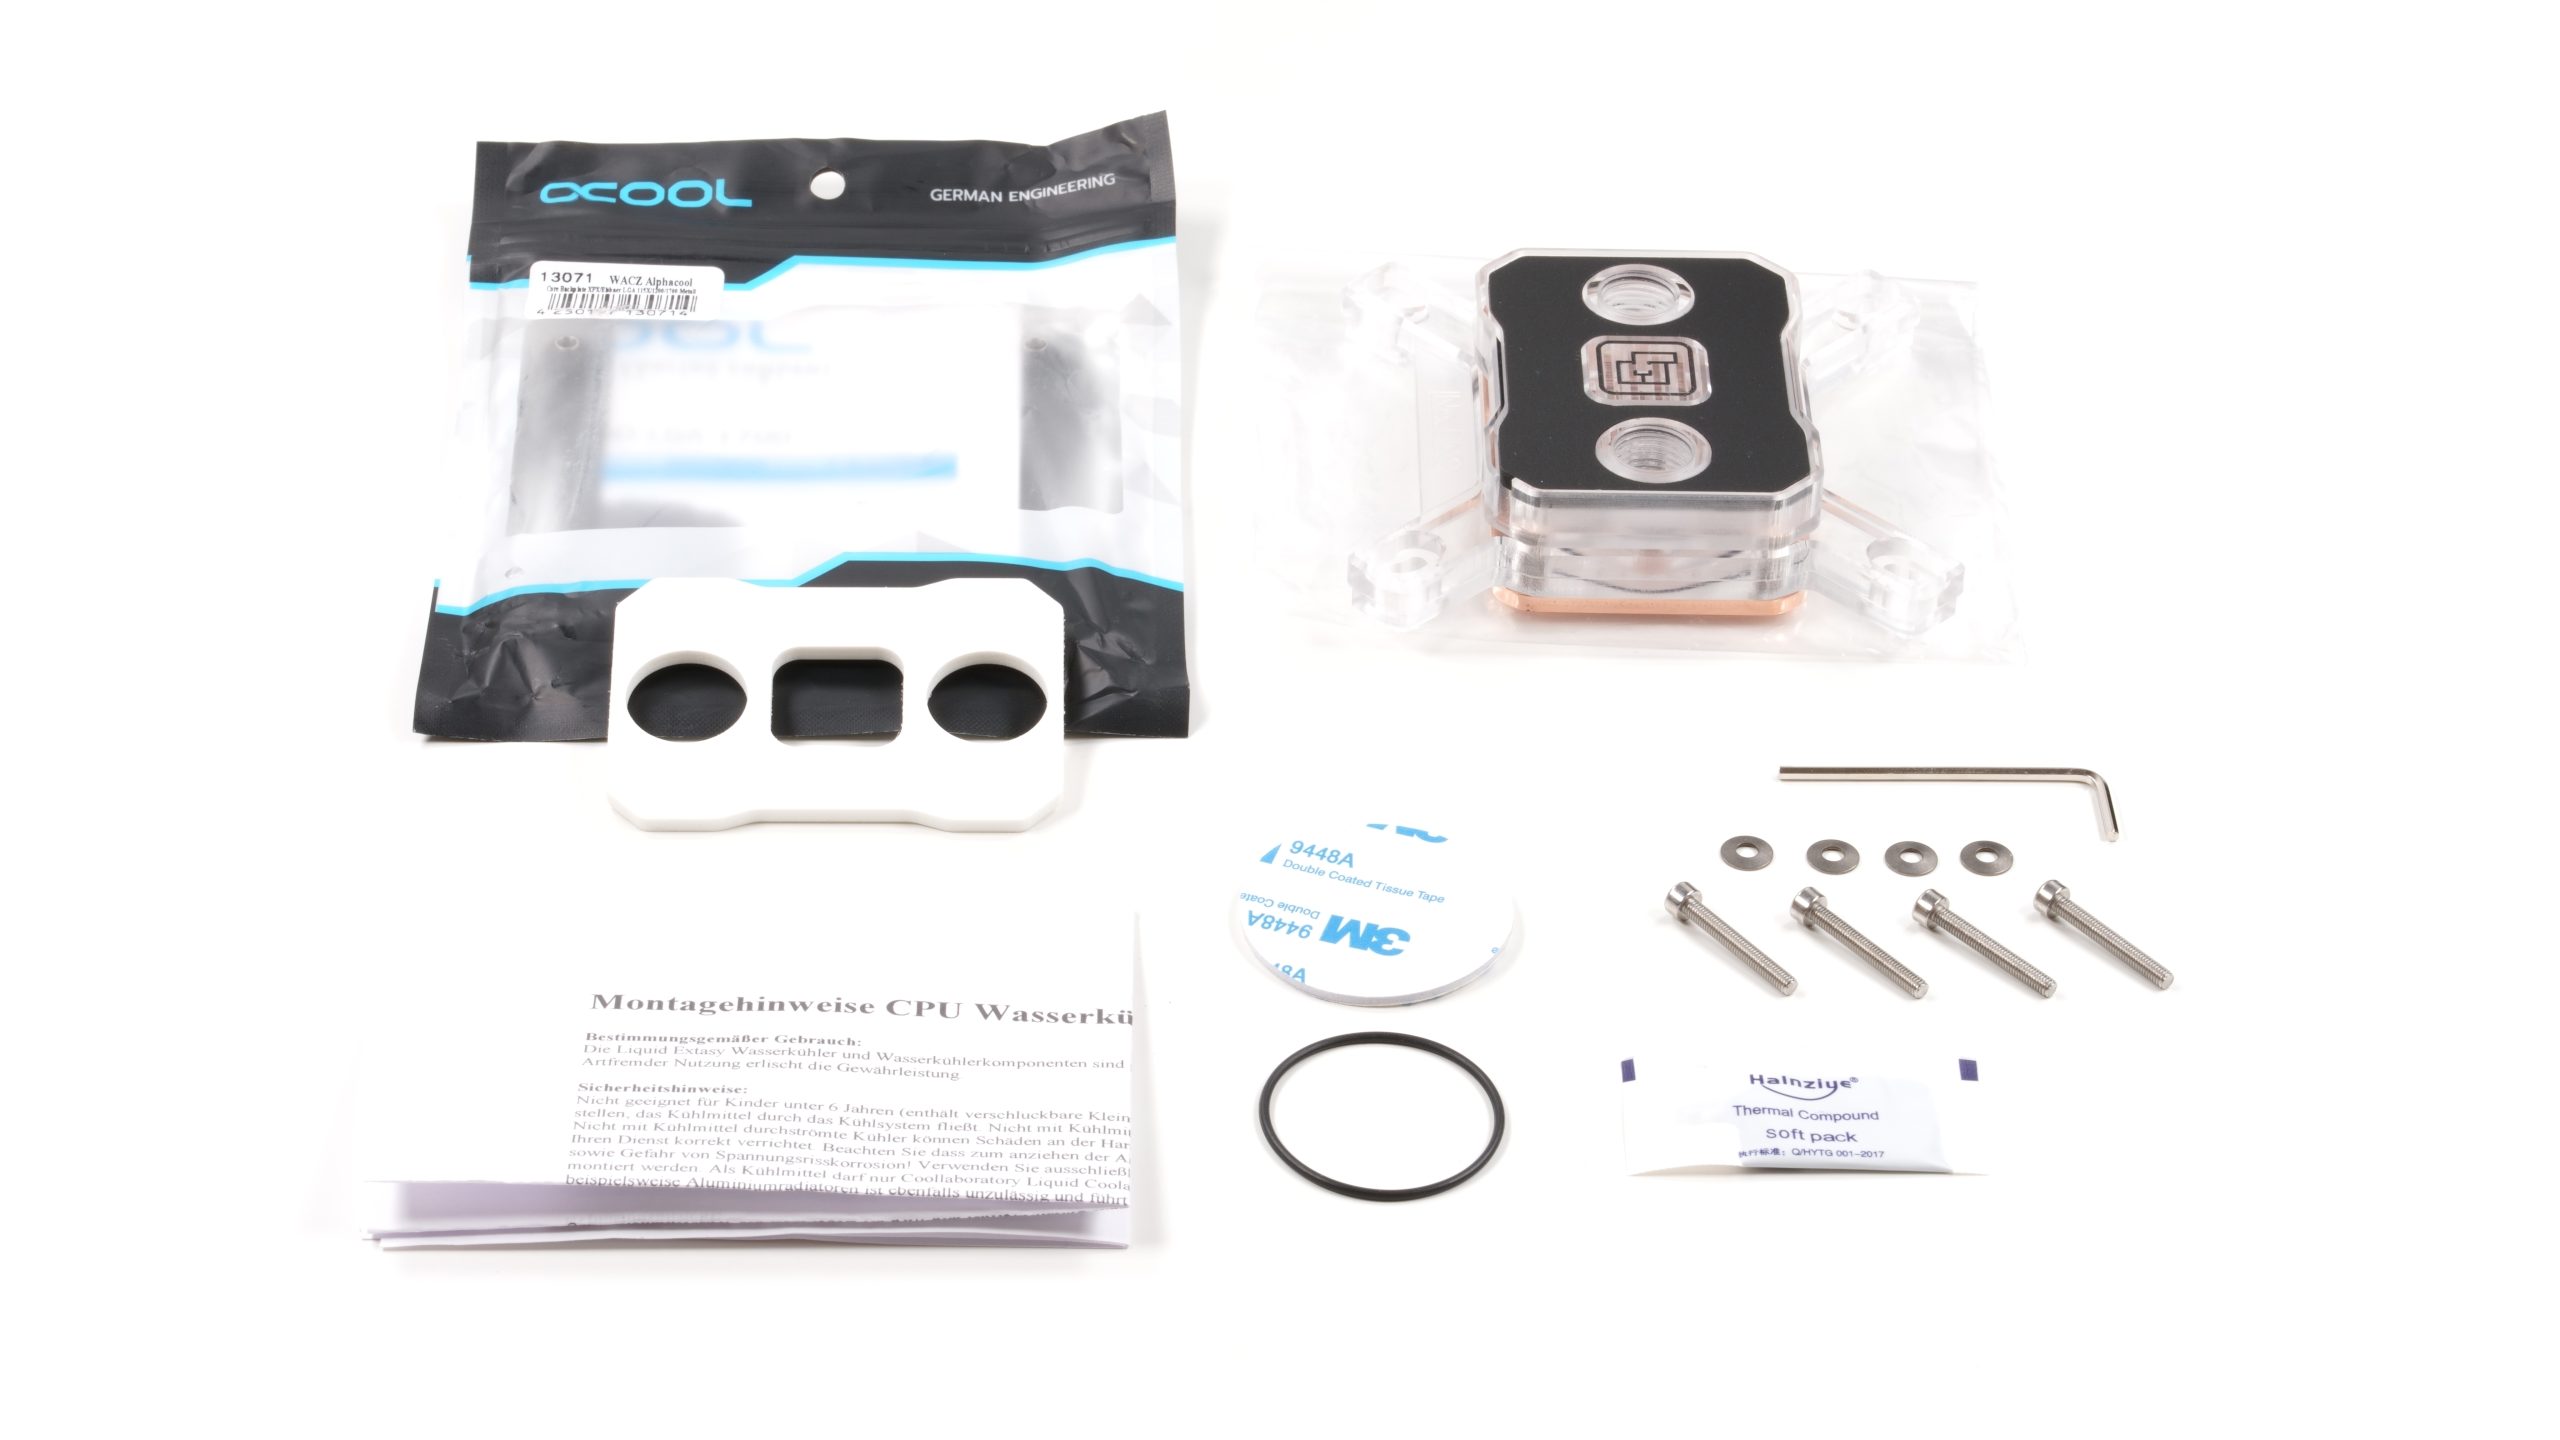
The basic scope of delivery of the acrylic version includes the block itself with two interchangeable accent plates in black and white, an Alphacool Core backplate with an additional adhesive pad. Four sets of screws with M3 thread and H2.5 hexagon socket head as well as a disk spring and a suitable wrench are included. There is also a sachet of heat-conducting paste, the additional O-ring just mentioned and assembly instructions in paper form. This version of the No. Uno costs 140 euros.
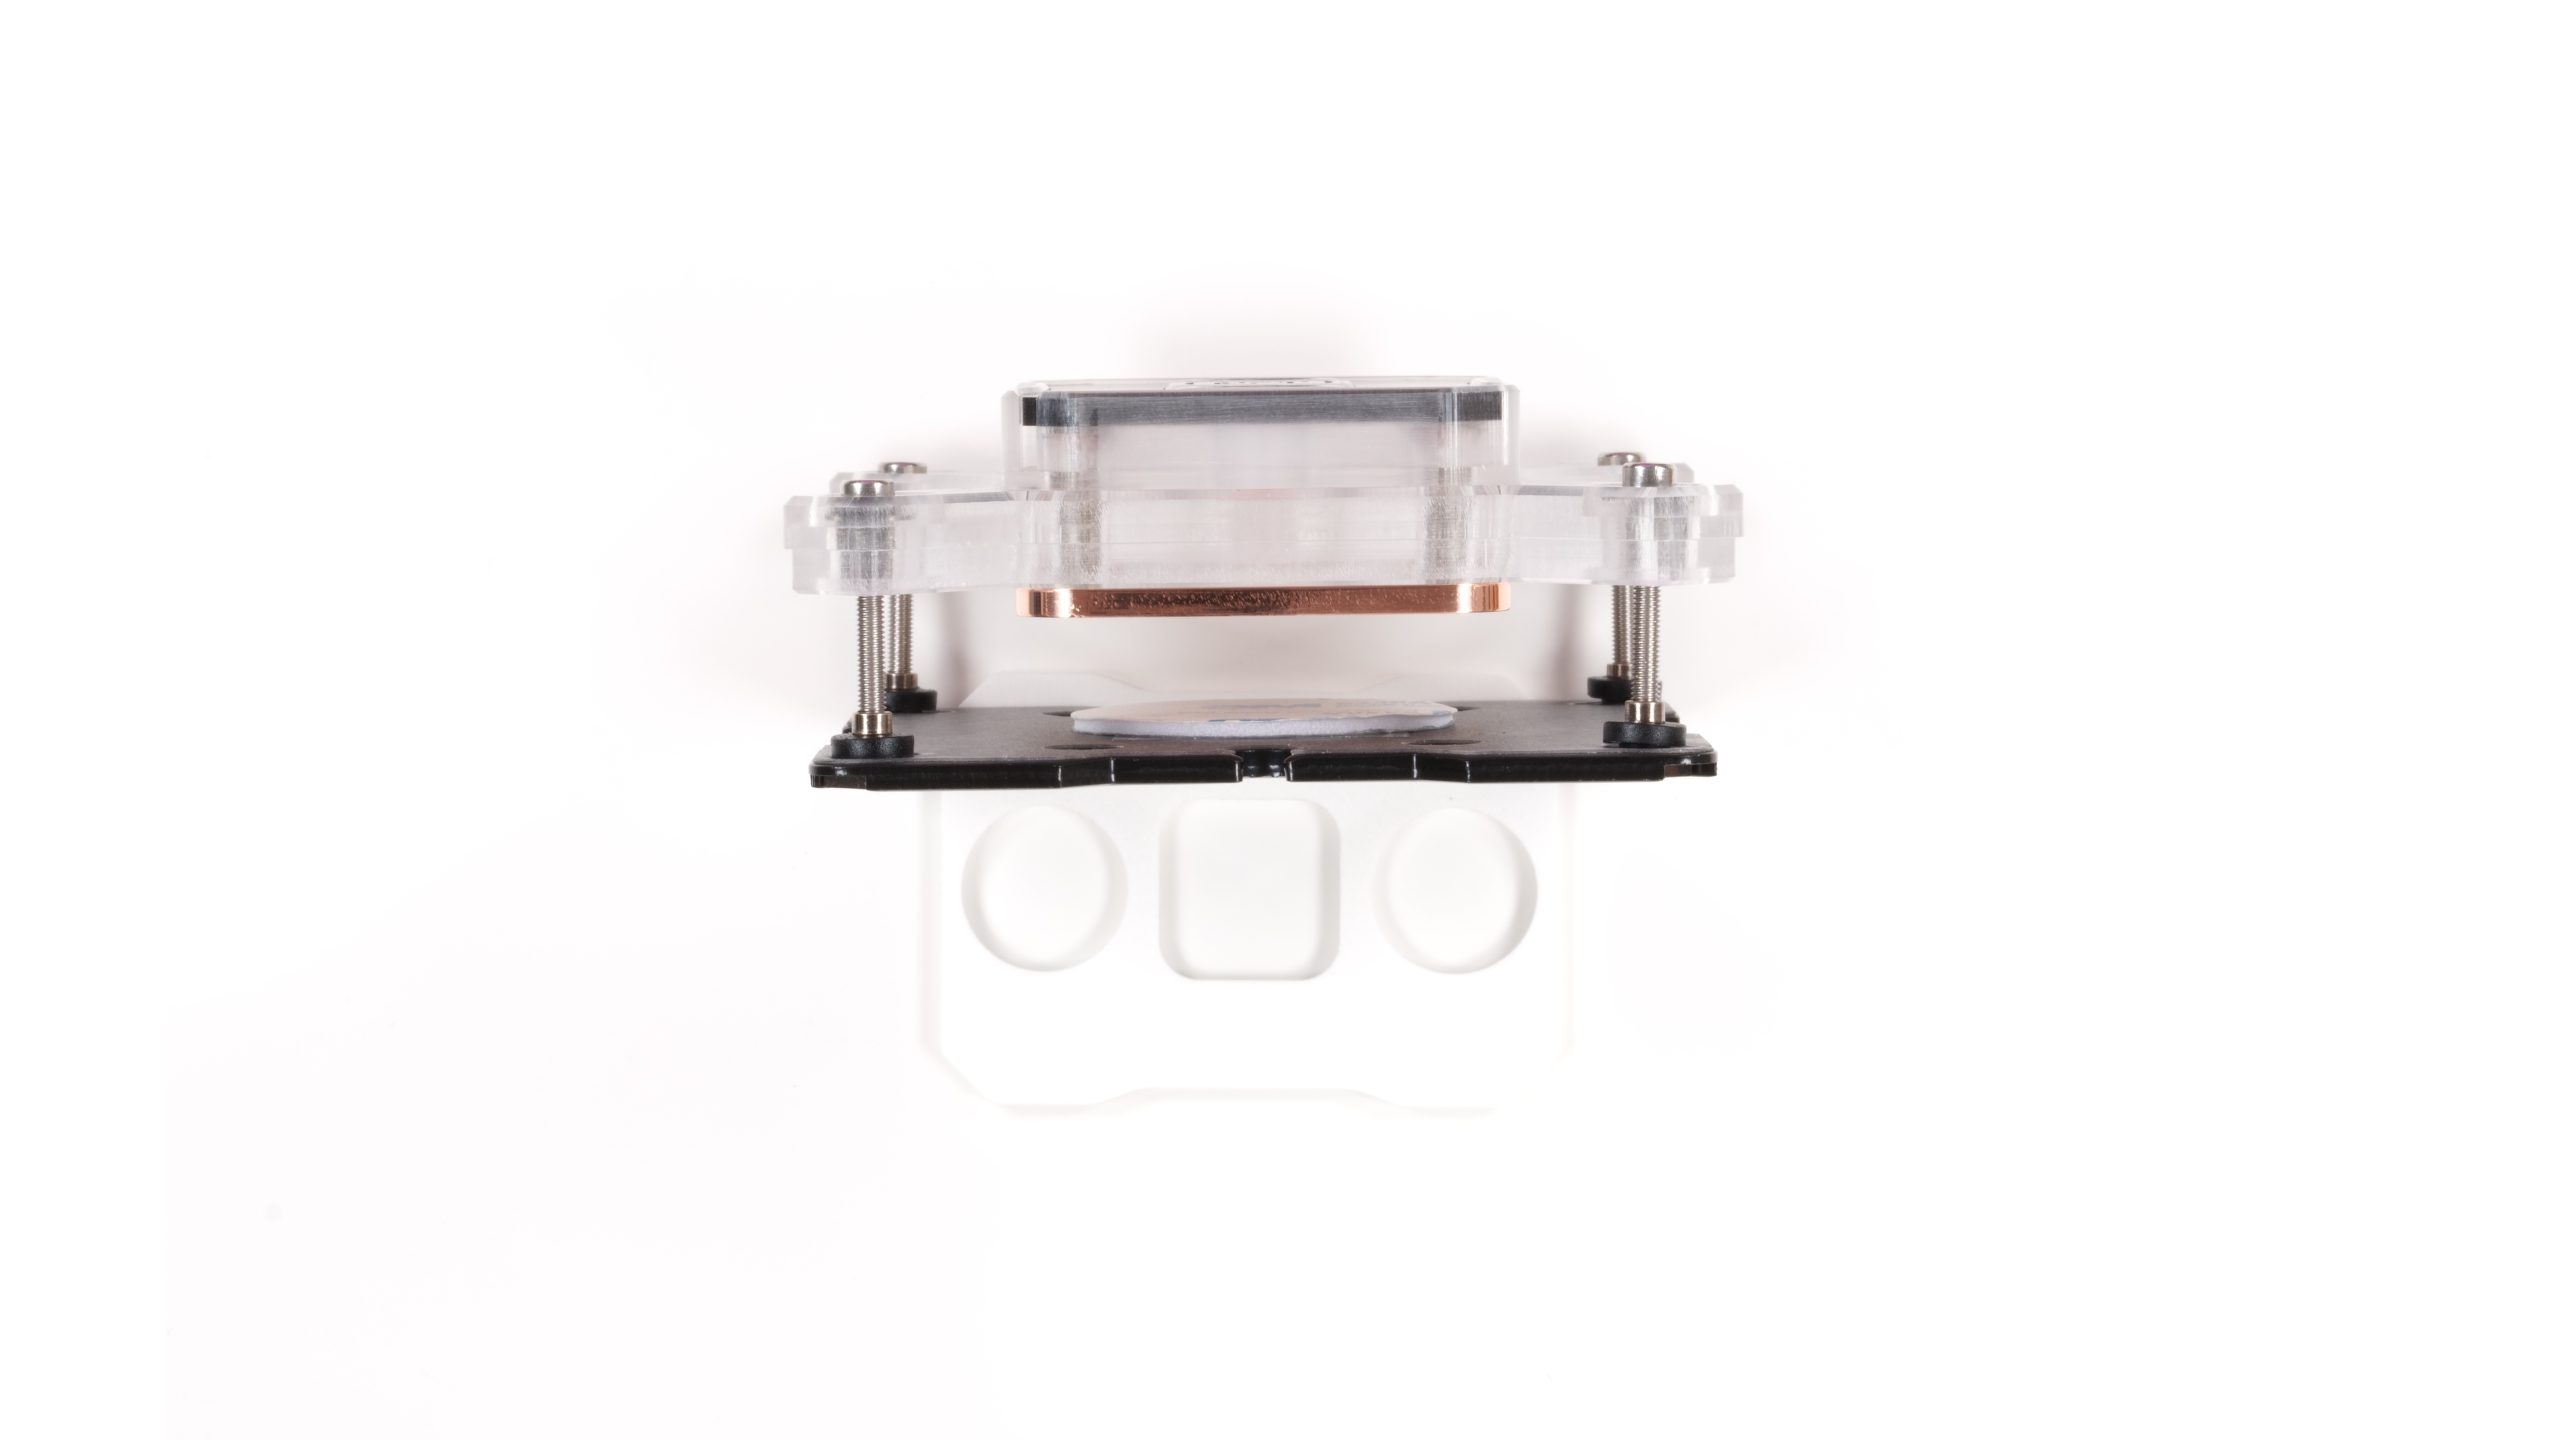
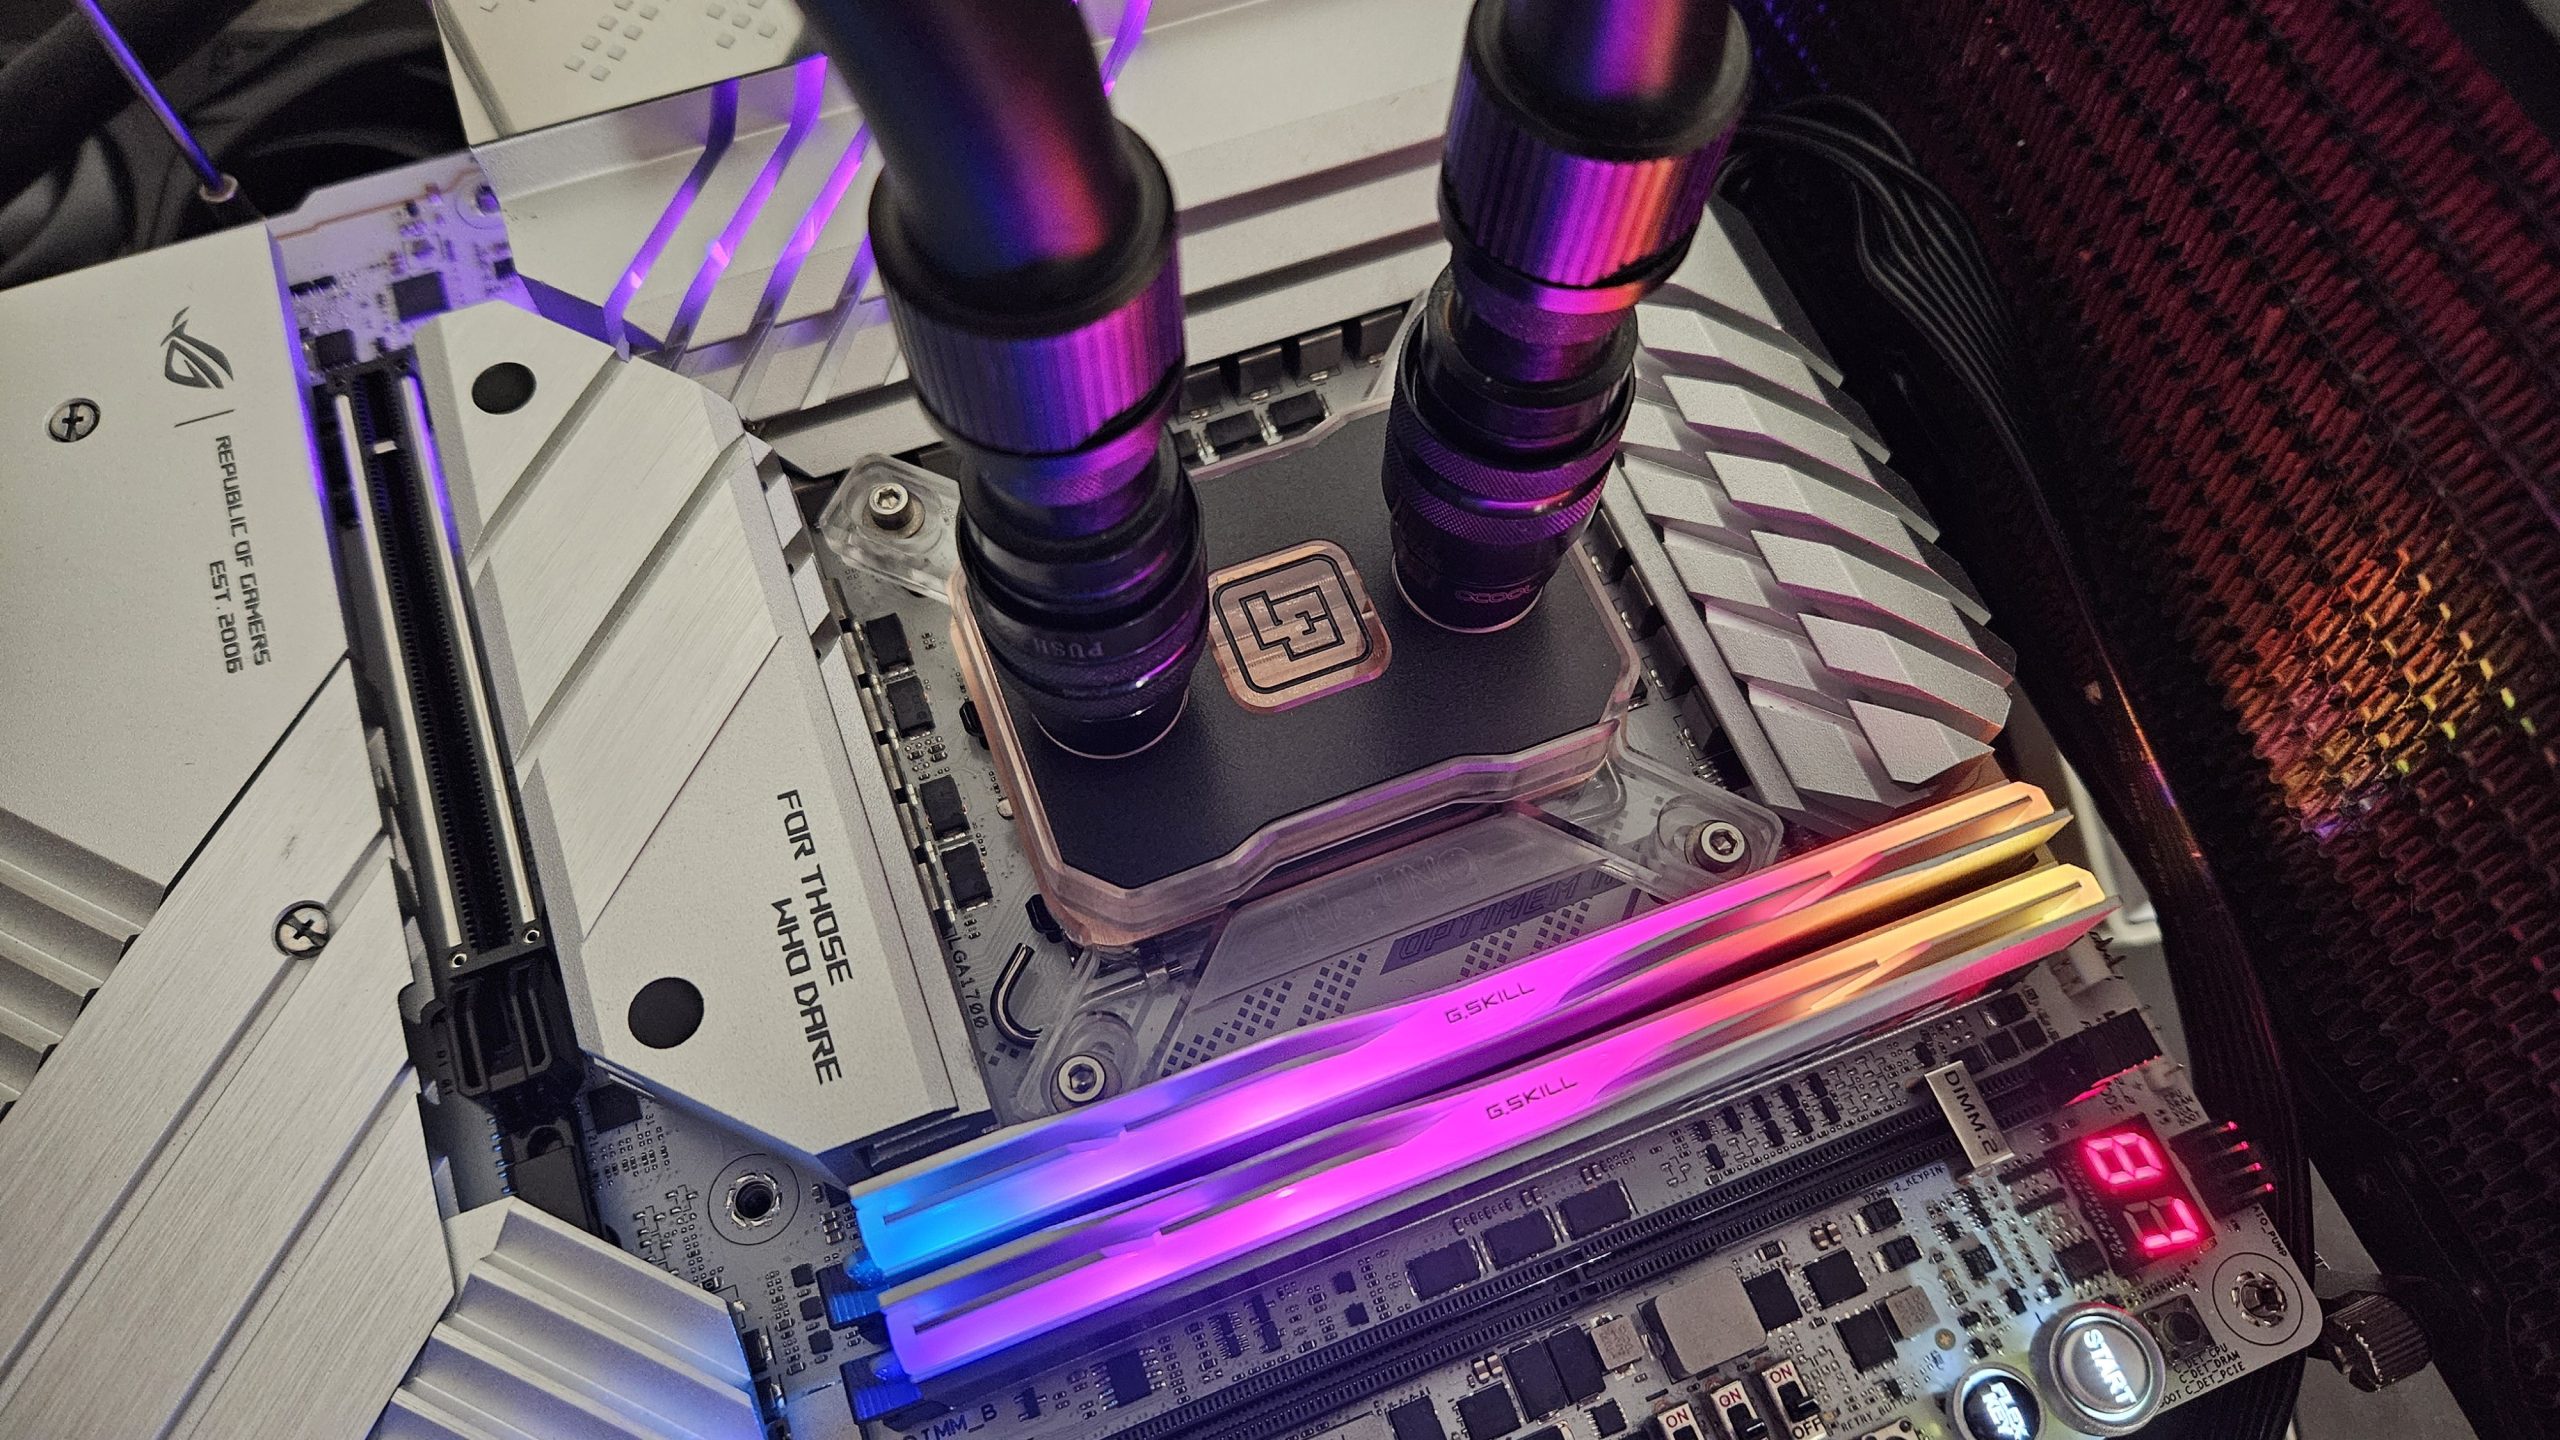
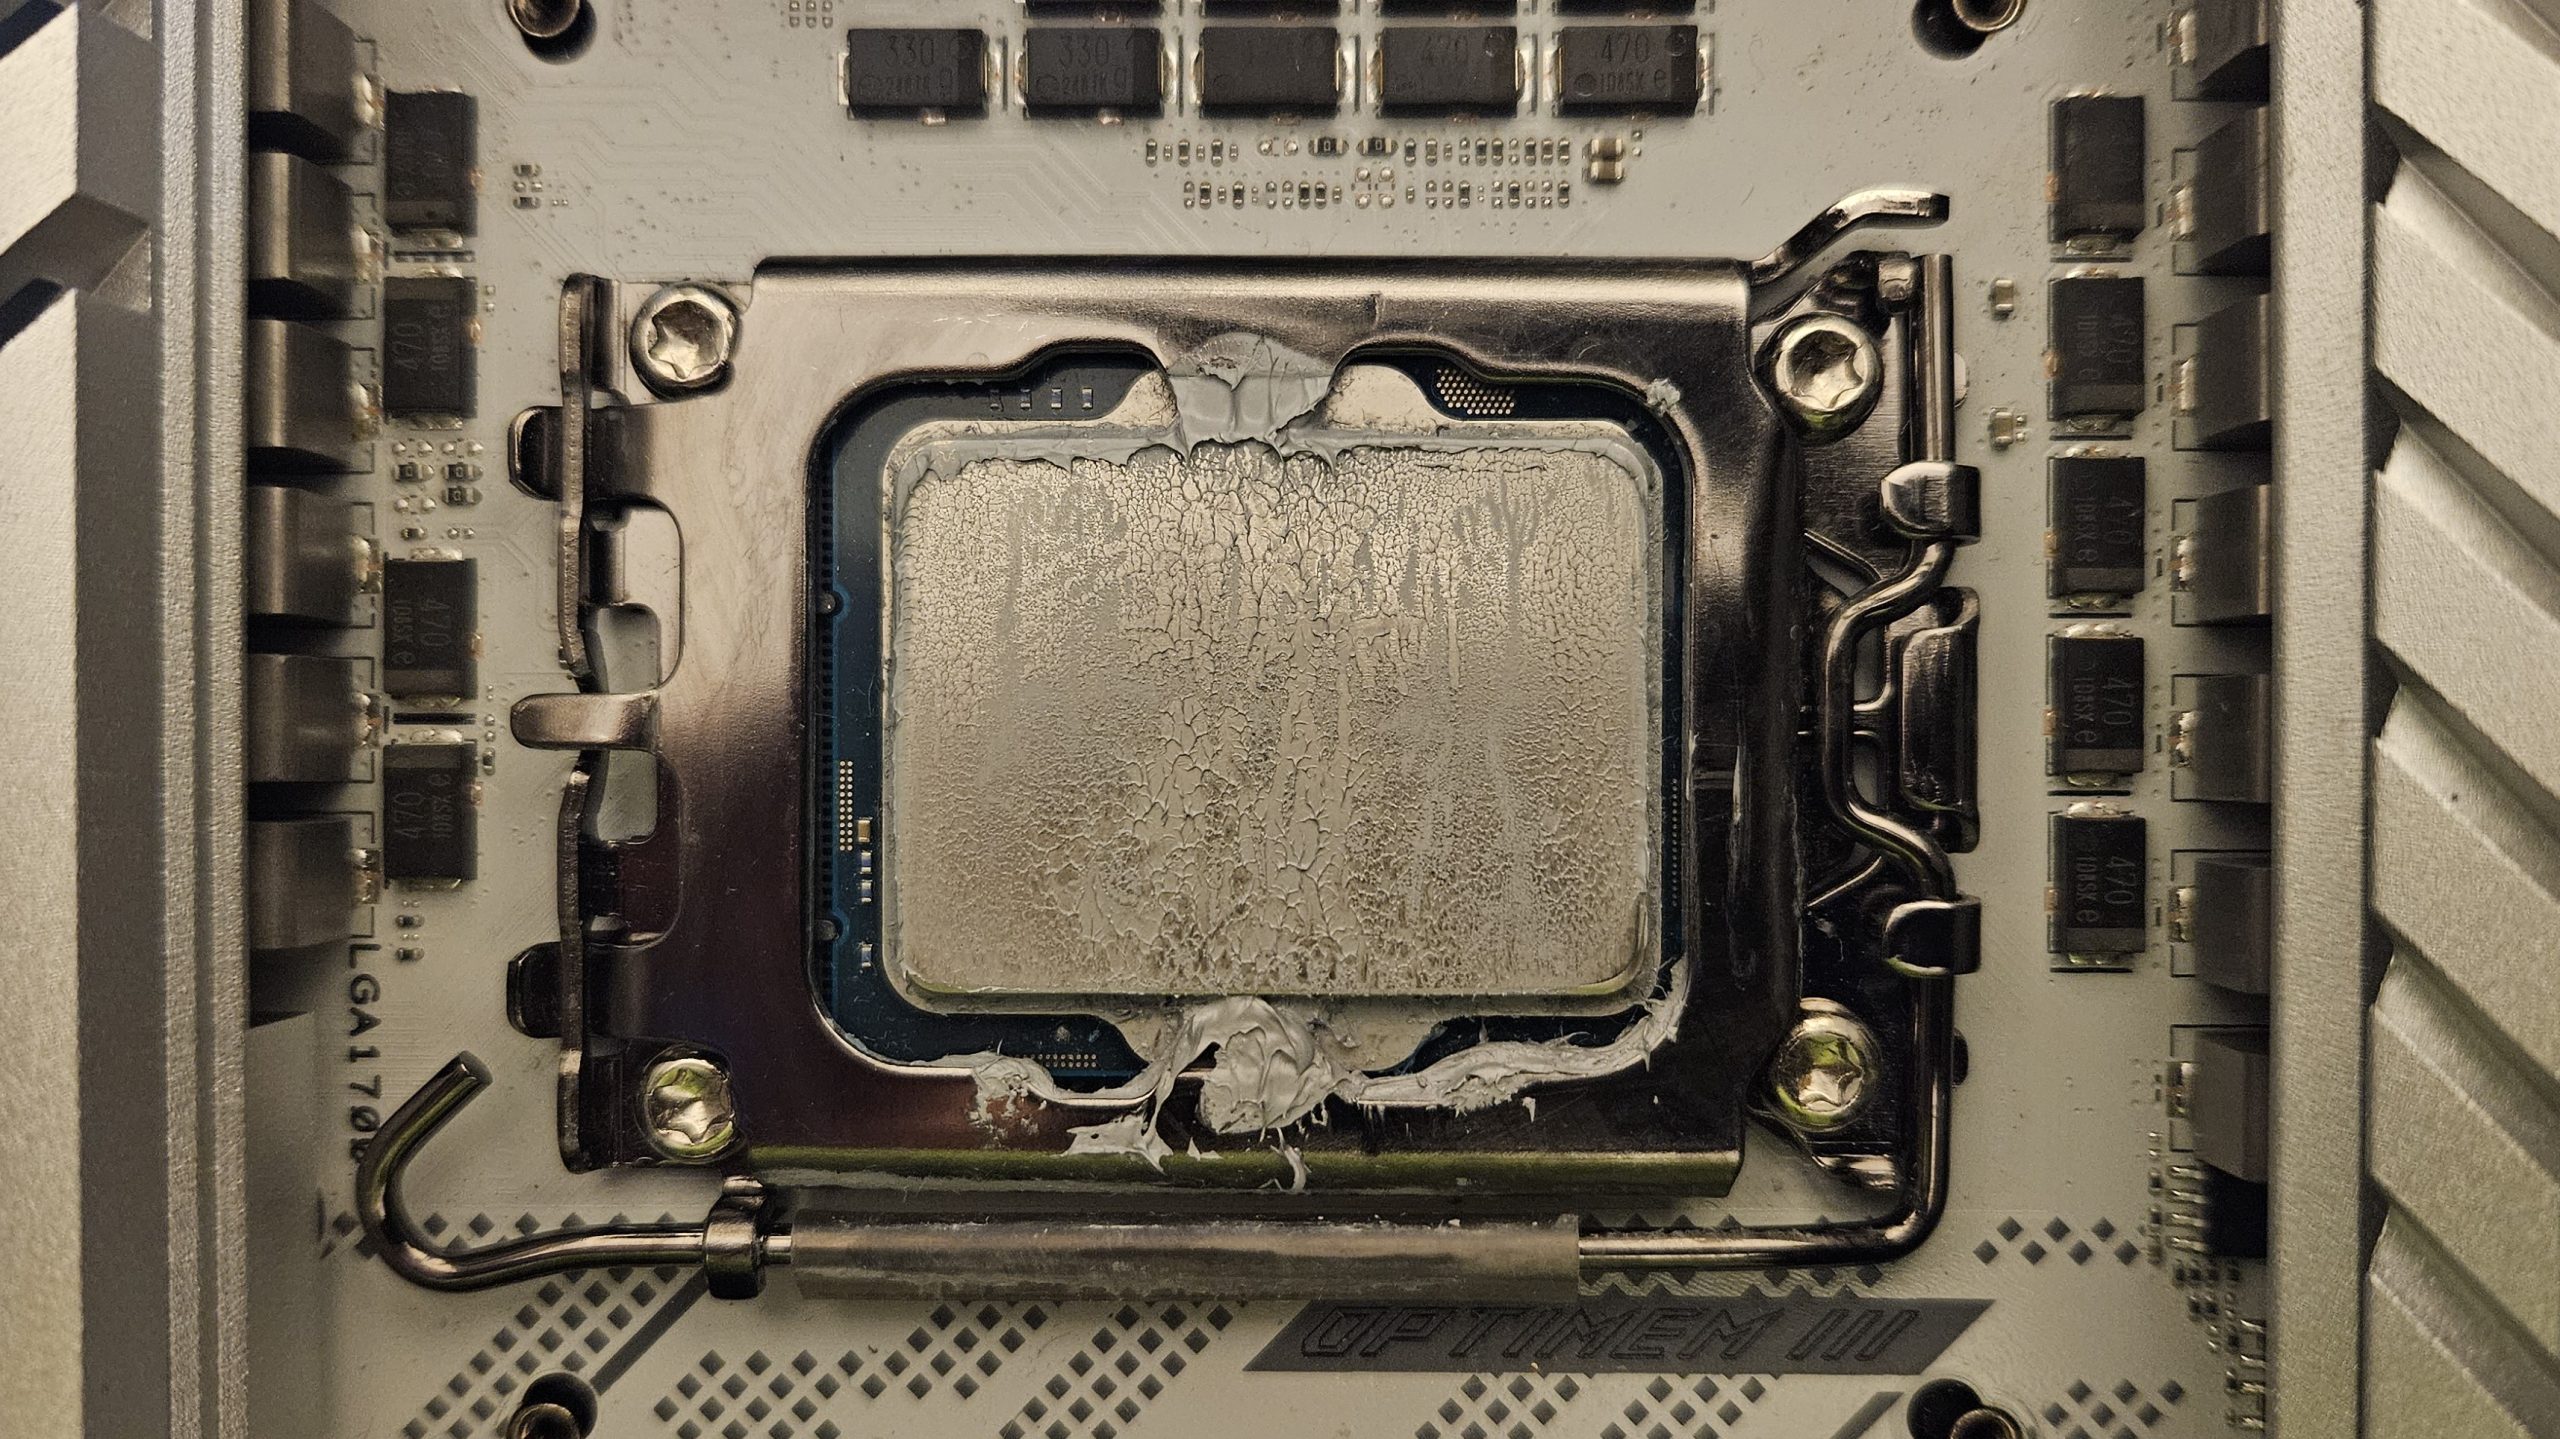
For mounting on LGA1700, the core backplate is fitted with the adhesive pad in the middle and then fixed to the back of the mainboard. The block is then screwed directly to the backplate from the front using the M3 screws, including the spring washer. Other blocks such as the Corsair Hydro X XC7 RGB Pro or the Alphacool XPX blocks also follow this approach of direct screwing into the backplate, but these have a defined stop up to which the screws can be screwed in. Unfortunately, this is not the case here, and instead the instructions describe that you should stop when there is only a small gap of 1-2 tenths of a millimeter between the mainboard and the backplate.
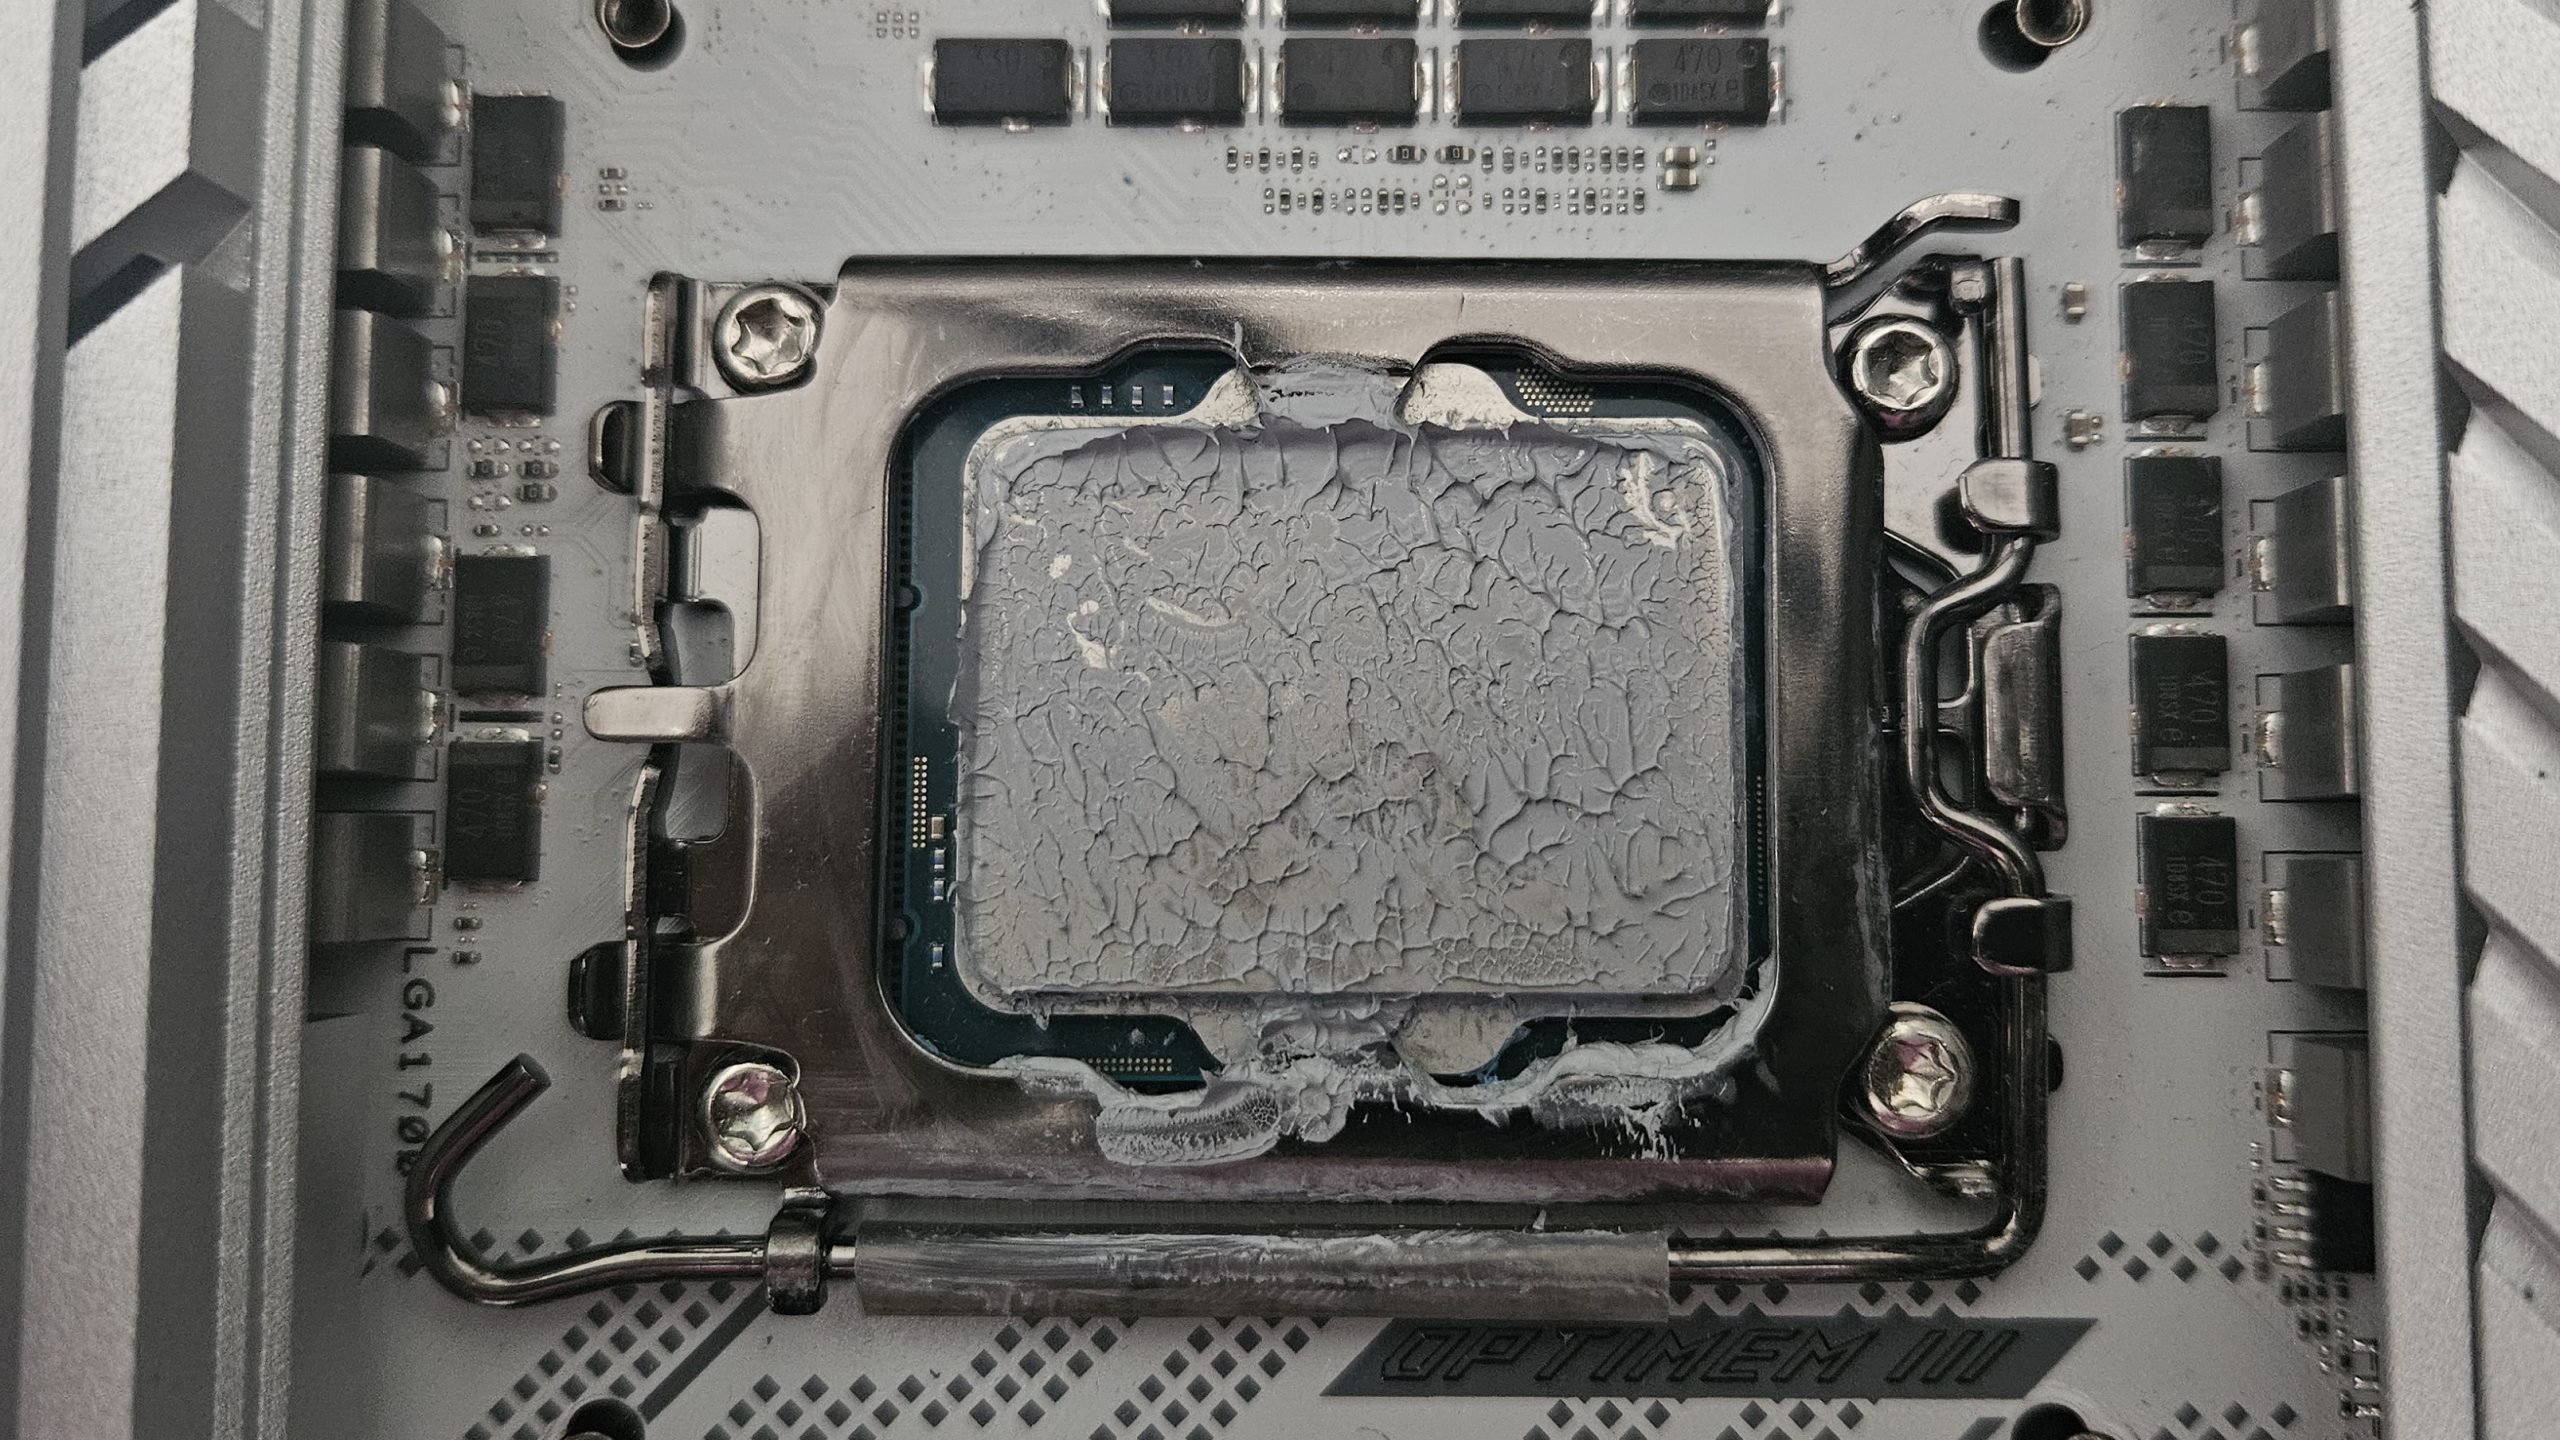
I tried to follow this, but then failed to find out which reference point on the backplate and mainboard was meant. The backplate itself, its threaded inserts or the rubber spacers around it? In the case of the mainboard, the circuit board or the backplate of the socket? I also found that one rubber spacer was almost touching the mainboard, while another still had a gap of around 3 tenths of a millimeter, at least that’s my estimate, because how can you measure that? The positioning of the adhesive pad as the effective tilt point of the backplate on the back of the socket is also decisive here. Consequently, the core backplate with its 3 mm steel construction already bends together with the mainboard. Confidence-inspiring is something else.
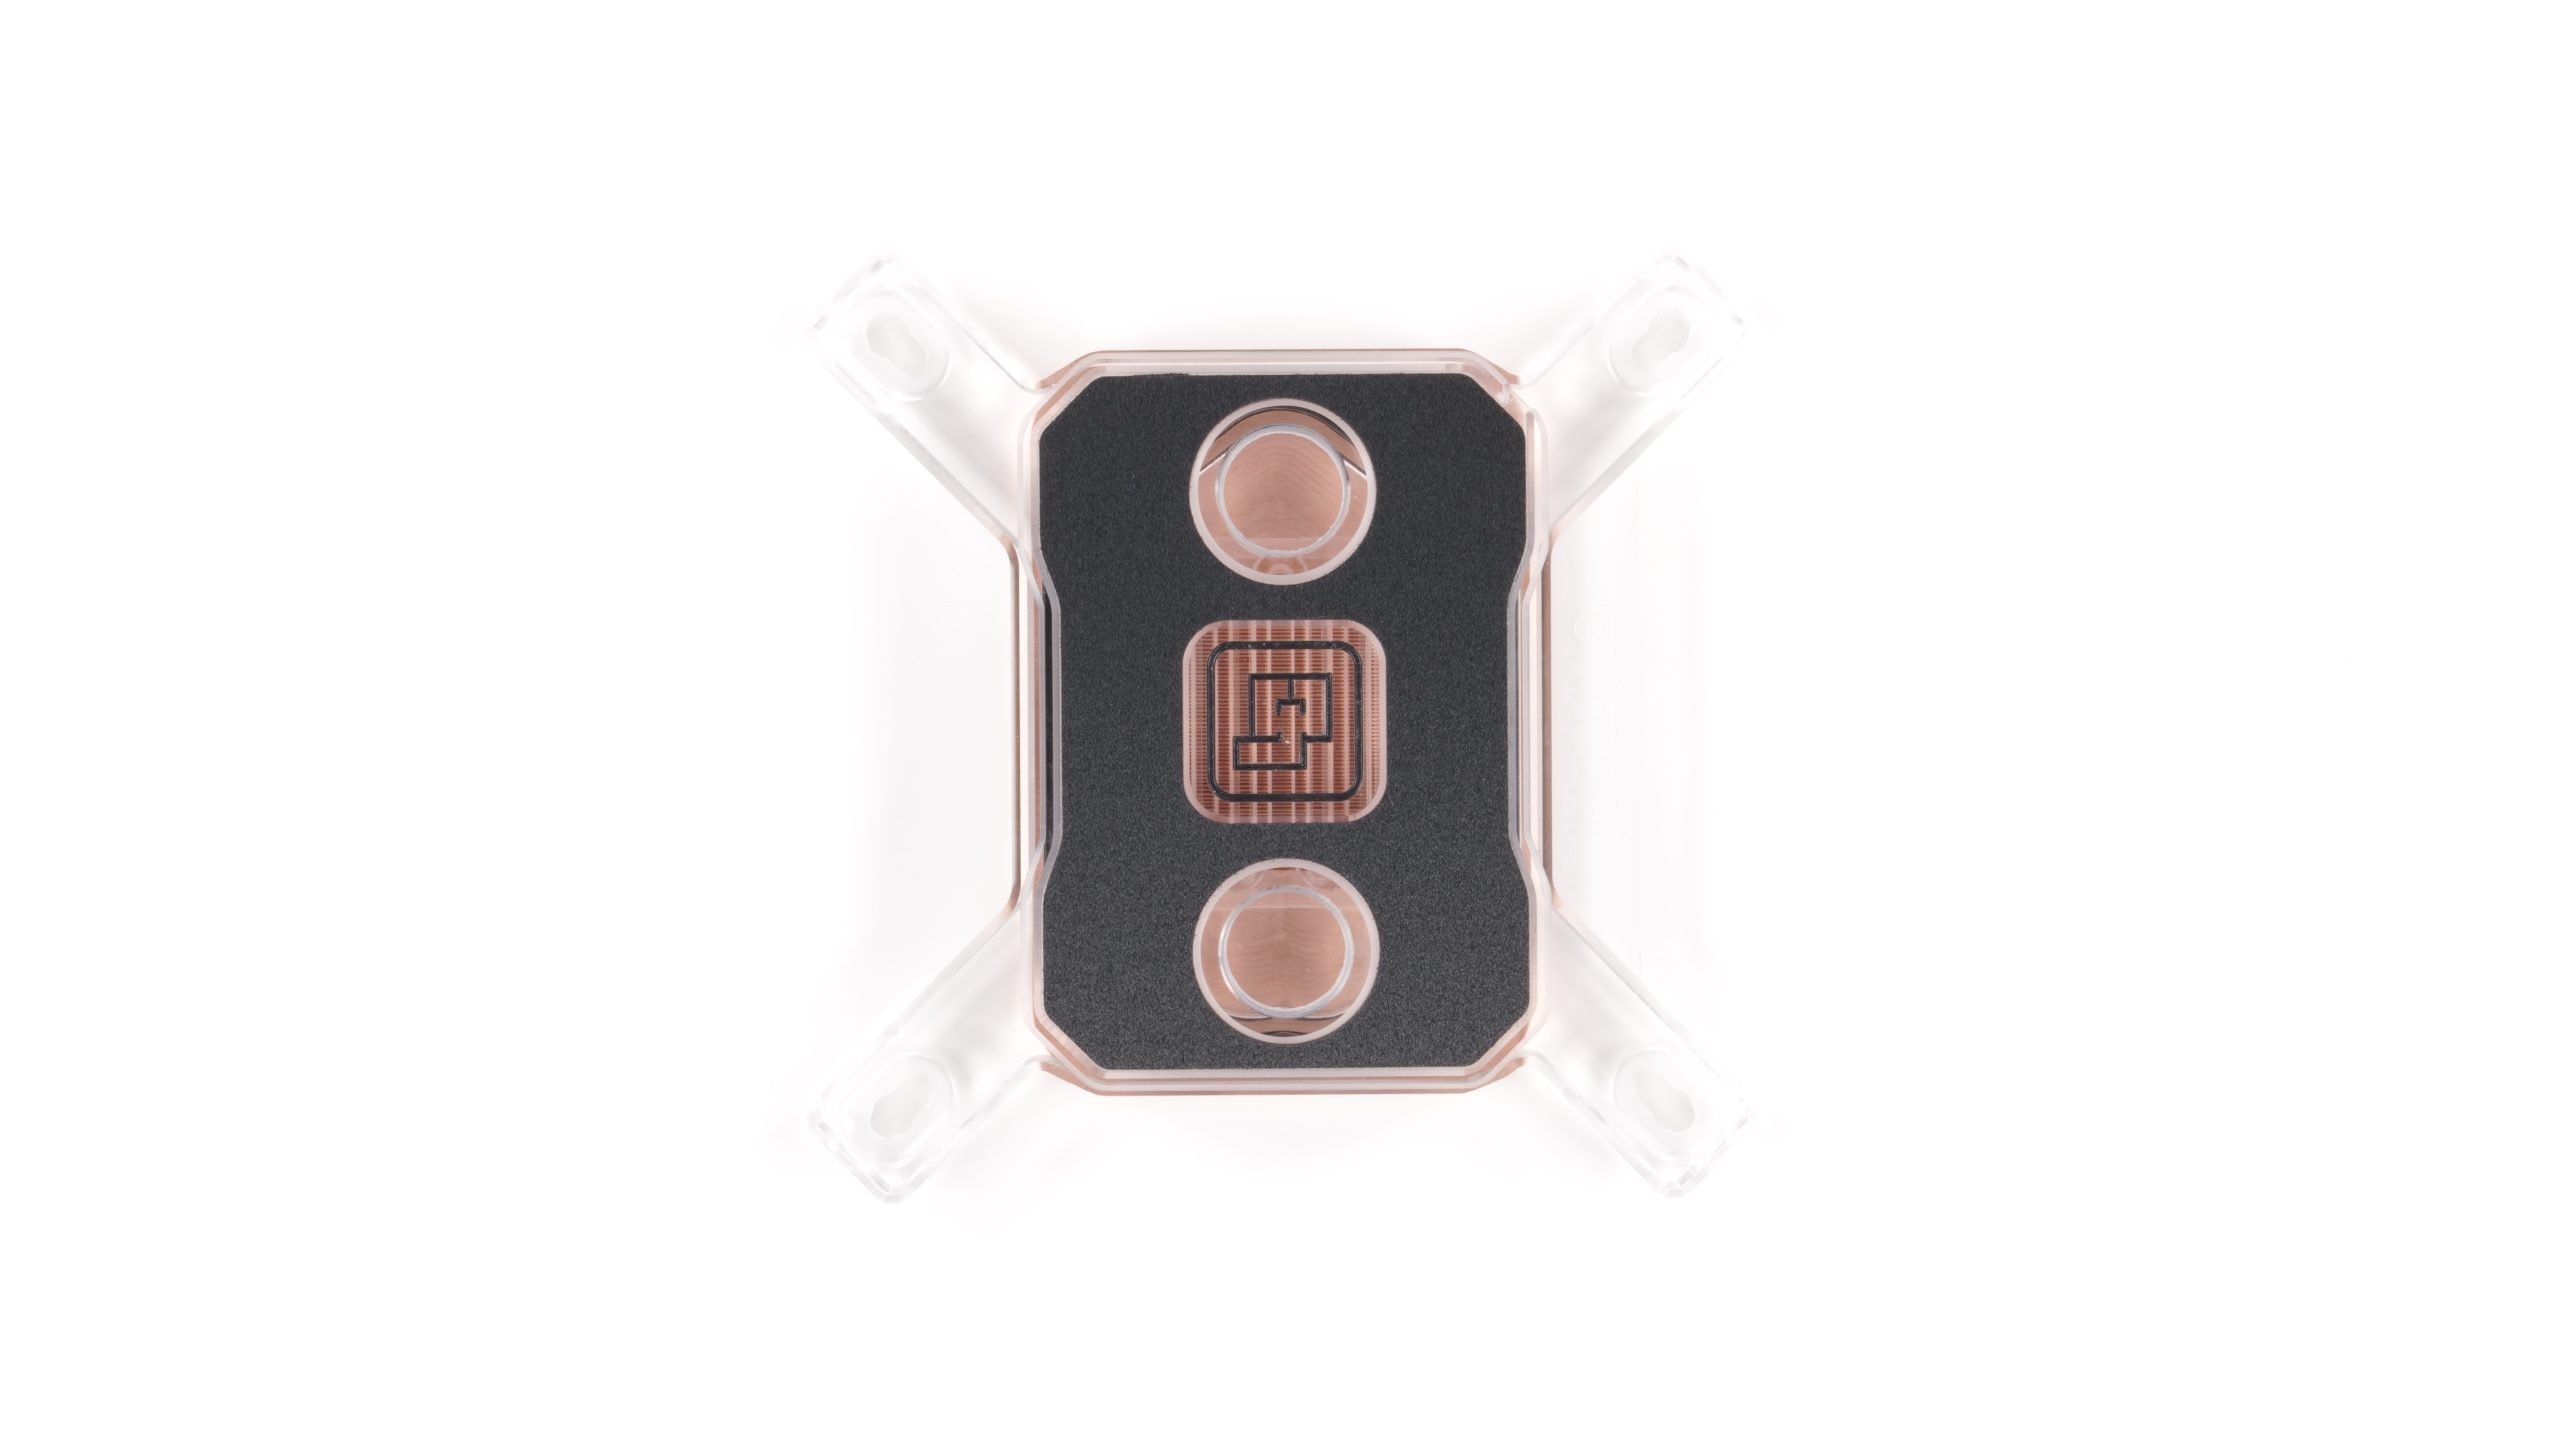
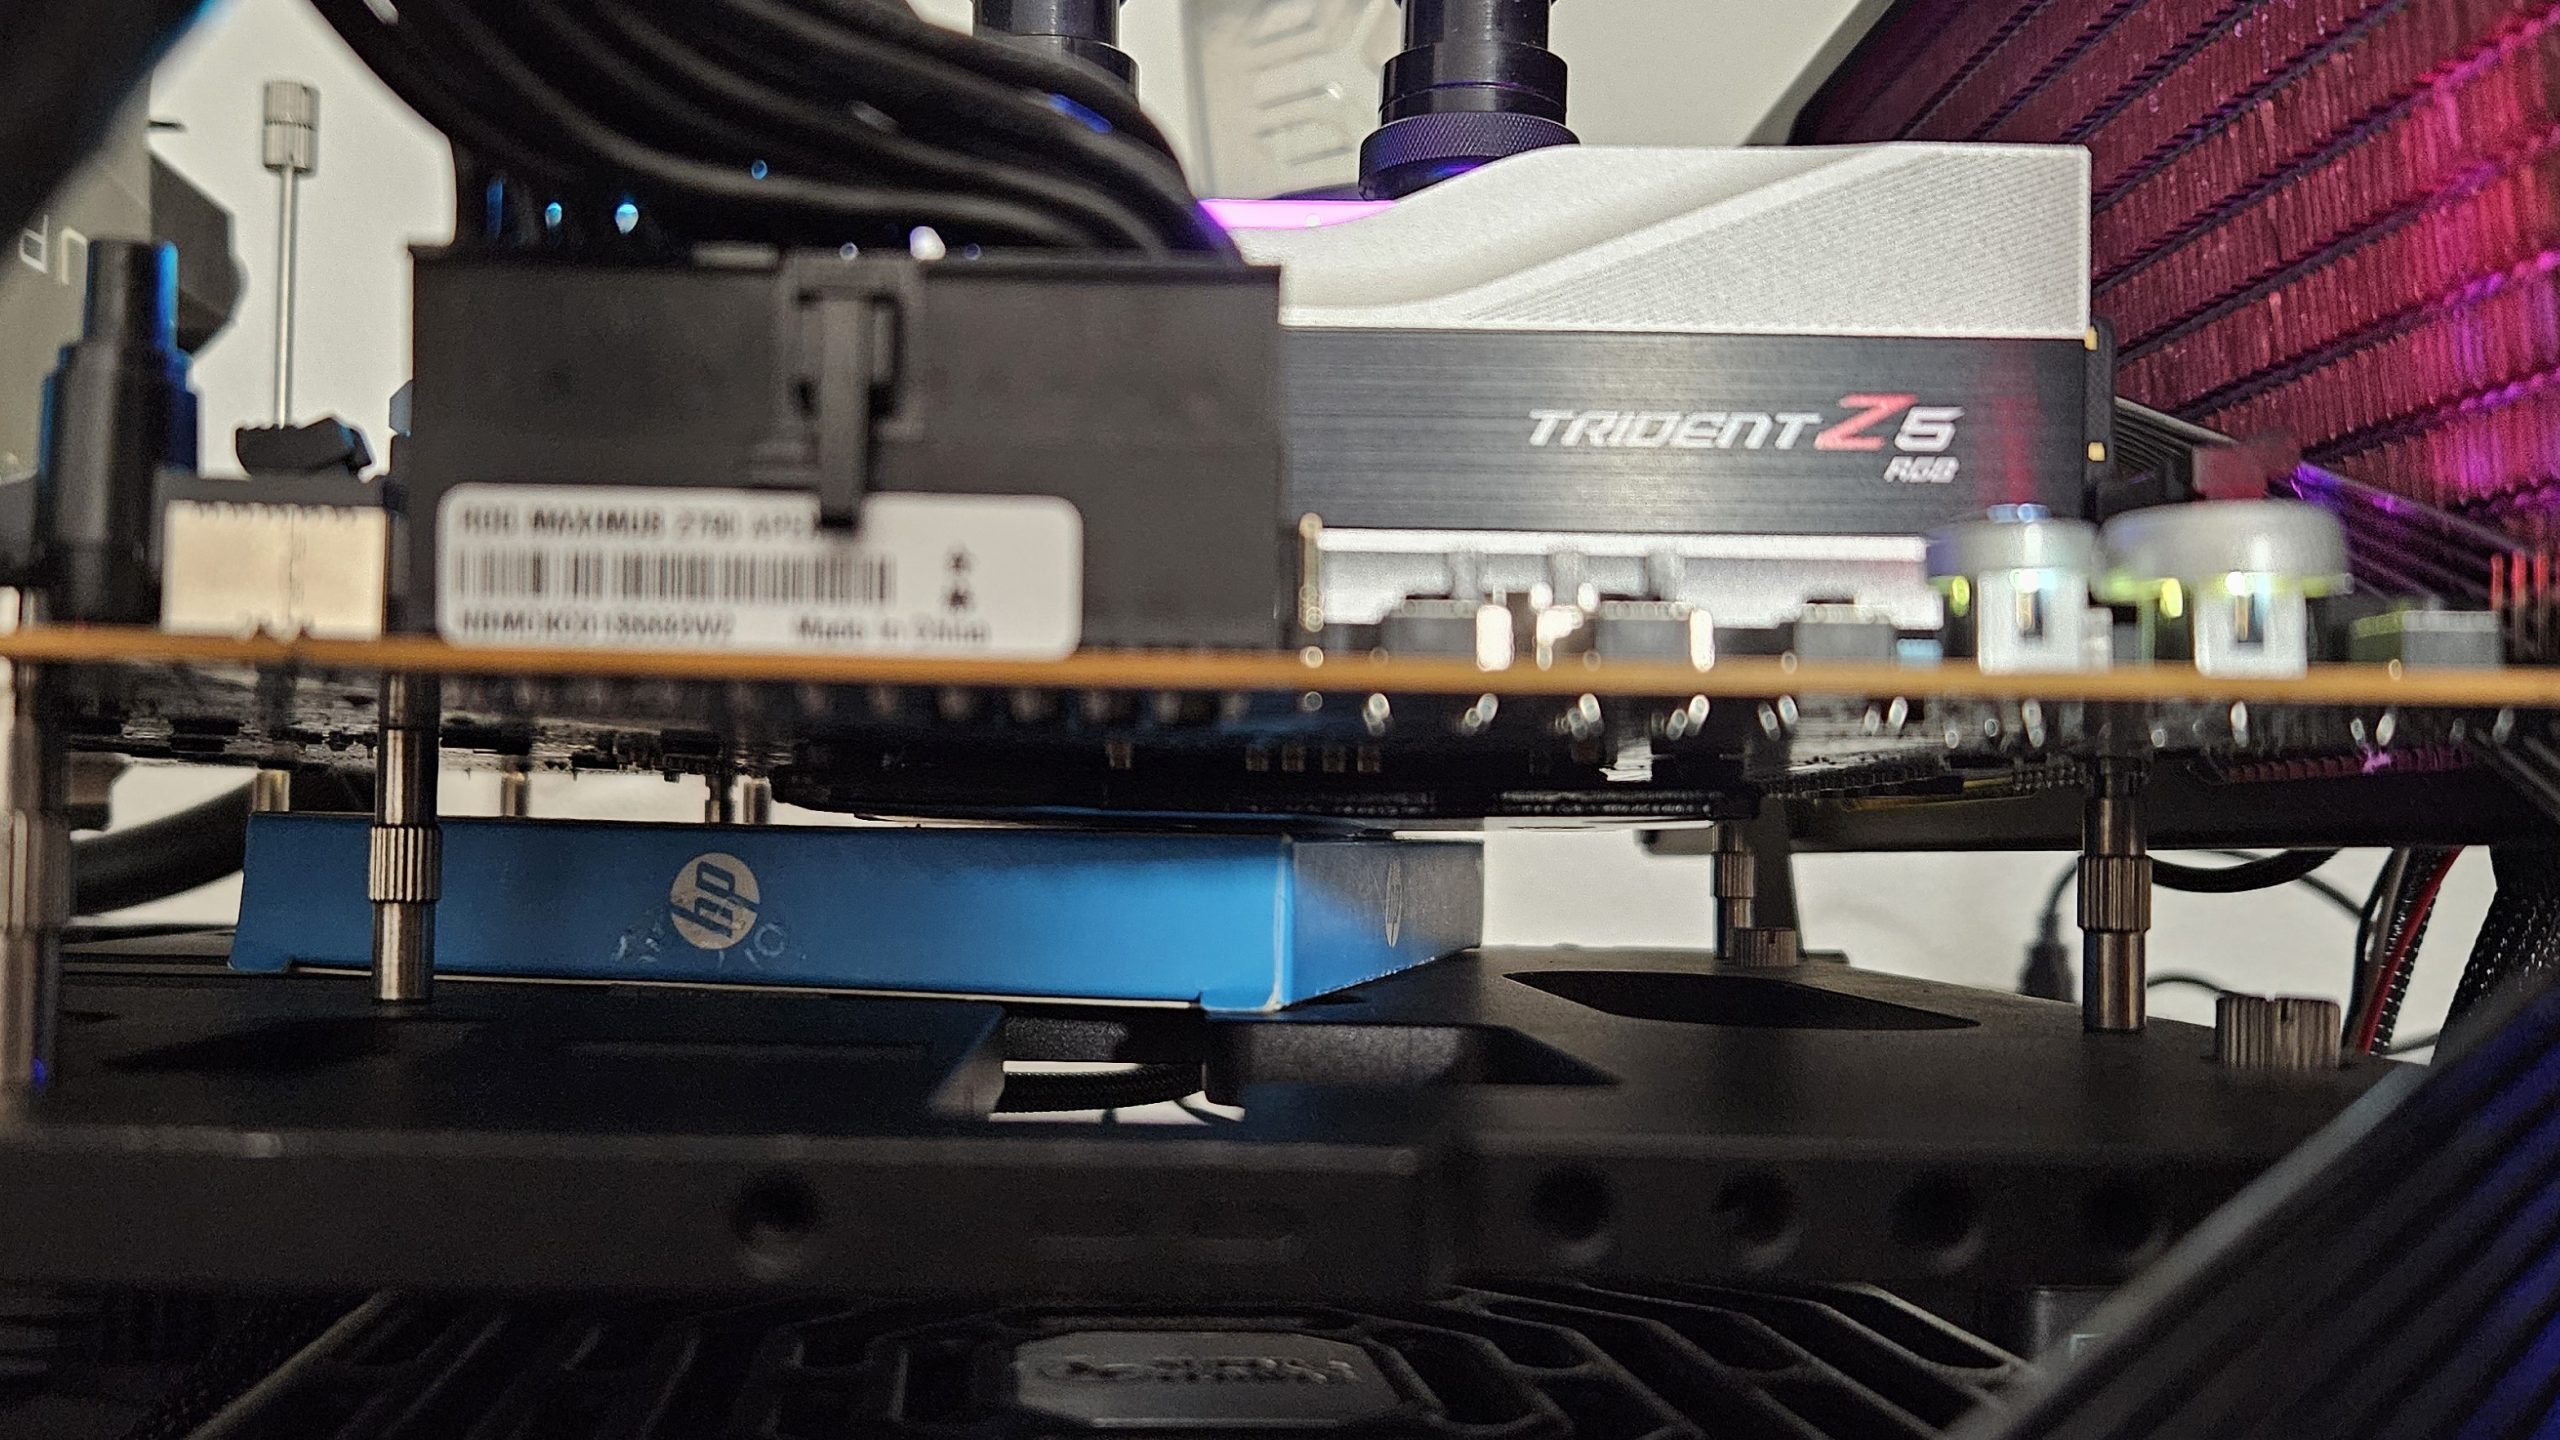
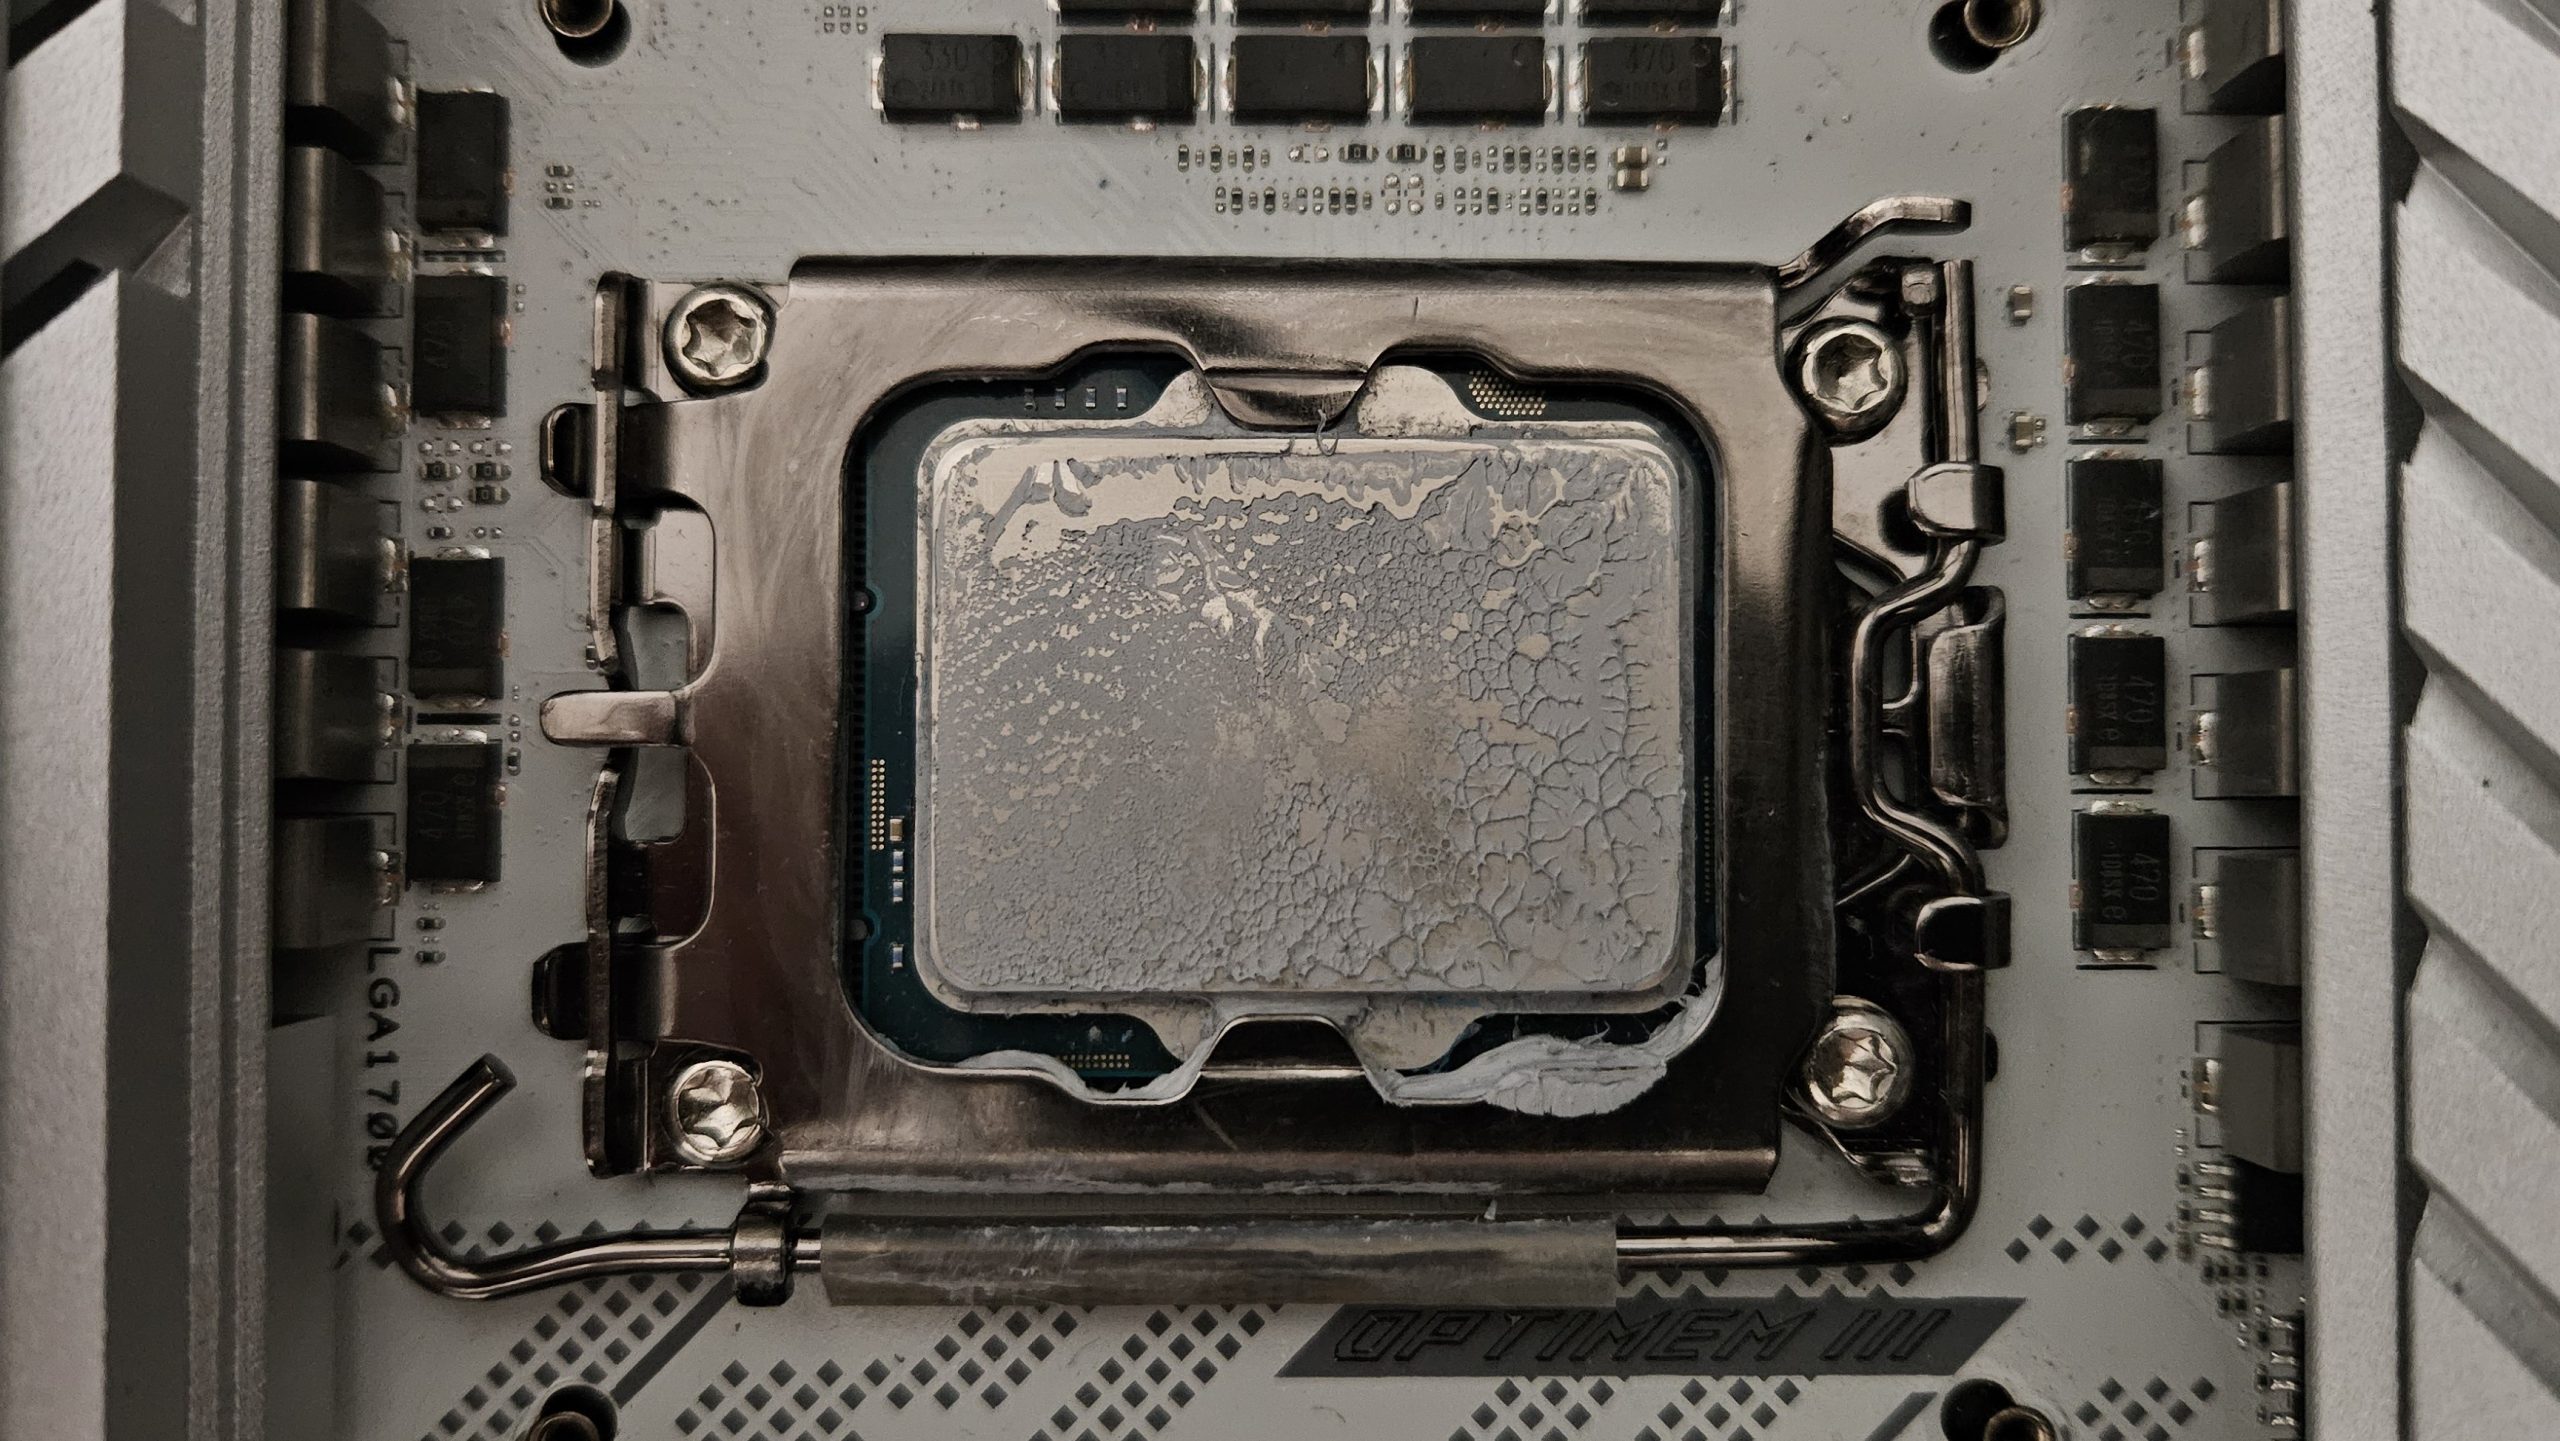
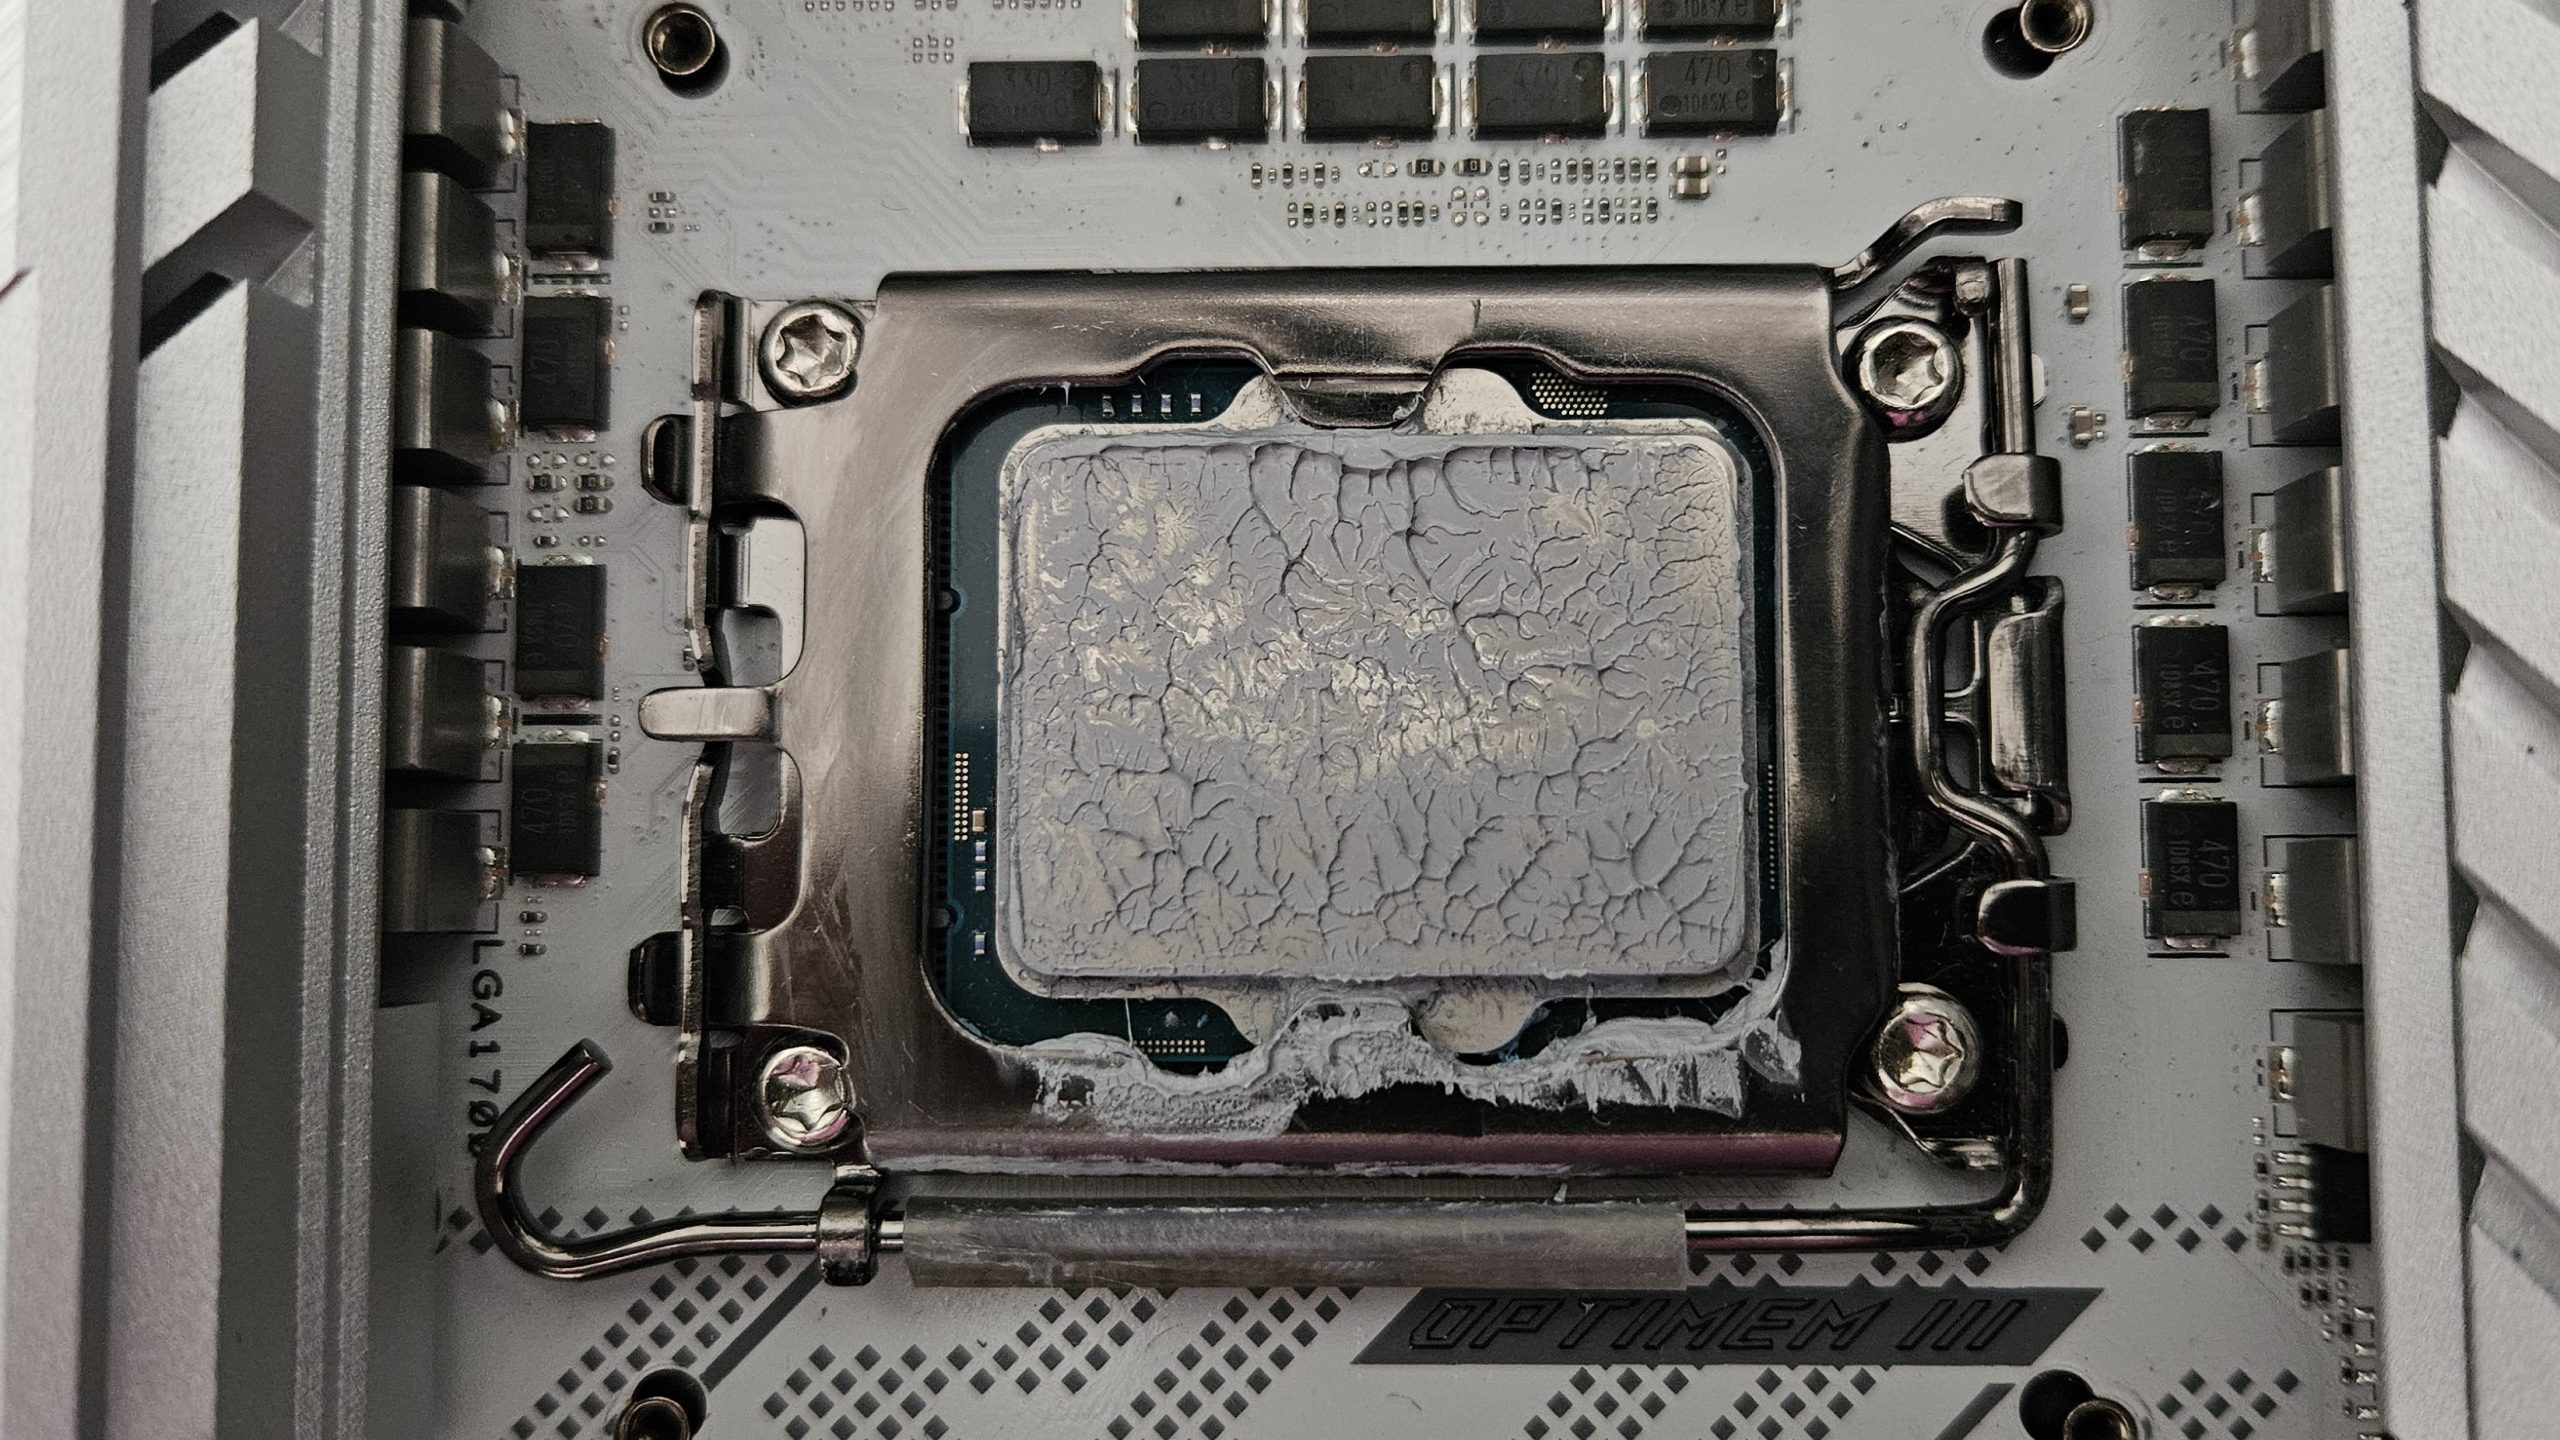
But you also have to be careful on the front of the mainboard, apart from the fiddly threading of the screws into the backplate, because the block is not self-centering. This means that the frame of the block can effectively block the next RAM slot. In addition to the contact pressure, the exact positioning of the block on the CPU is also left to the installer. The first assembly did not even make it through the 30-minute burn-in in the stress test before the “ProcHoT” emergency shutdown occurred. On the recommendation of Marc from Liquid Extasy, I then disassembled the block again and inserted the additional o-ring, which should make the block more suitable for my concave CPU. This is because the cold plate of the Uno is largely flat ex works. To do this, the accent plate must be removed and the 4 screws with H2.5 heads that hold the block together must be loosened.
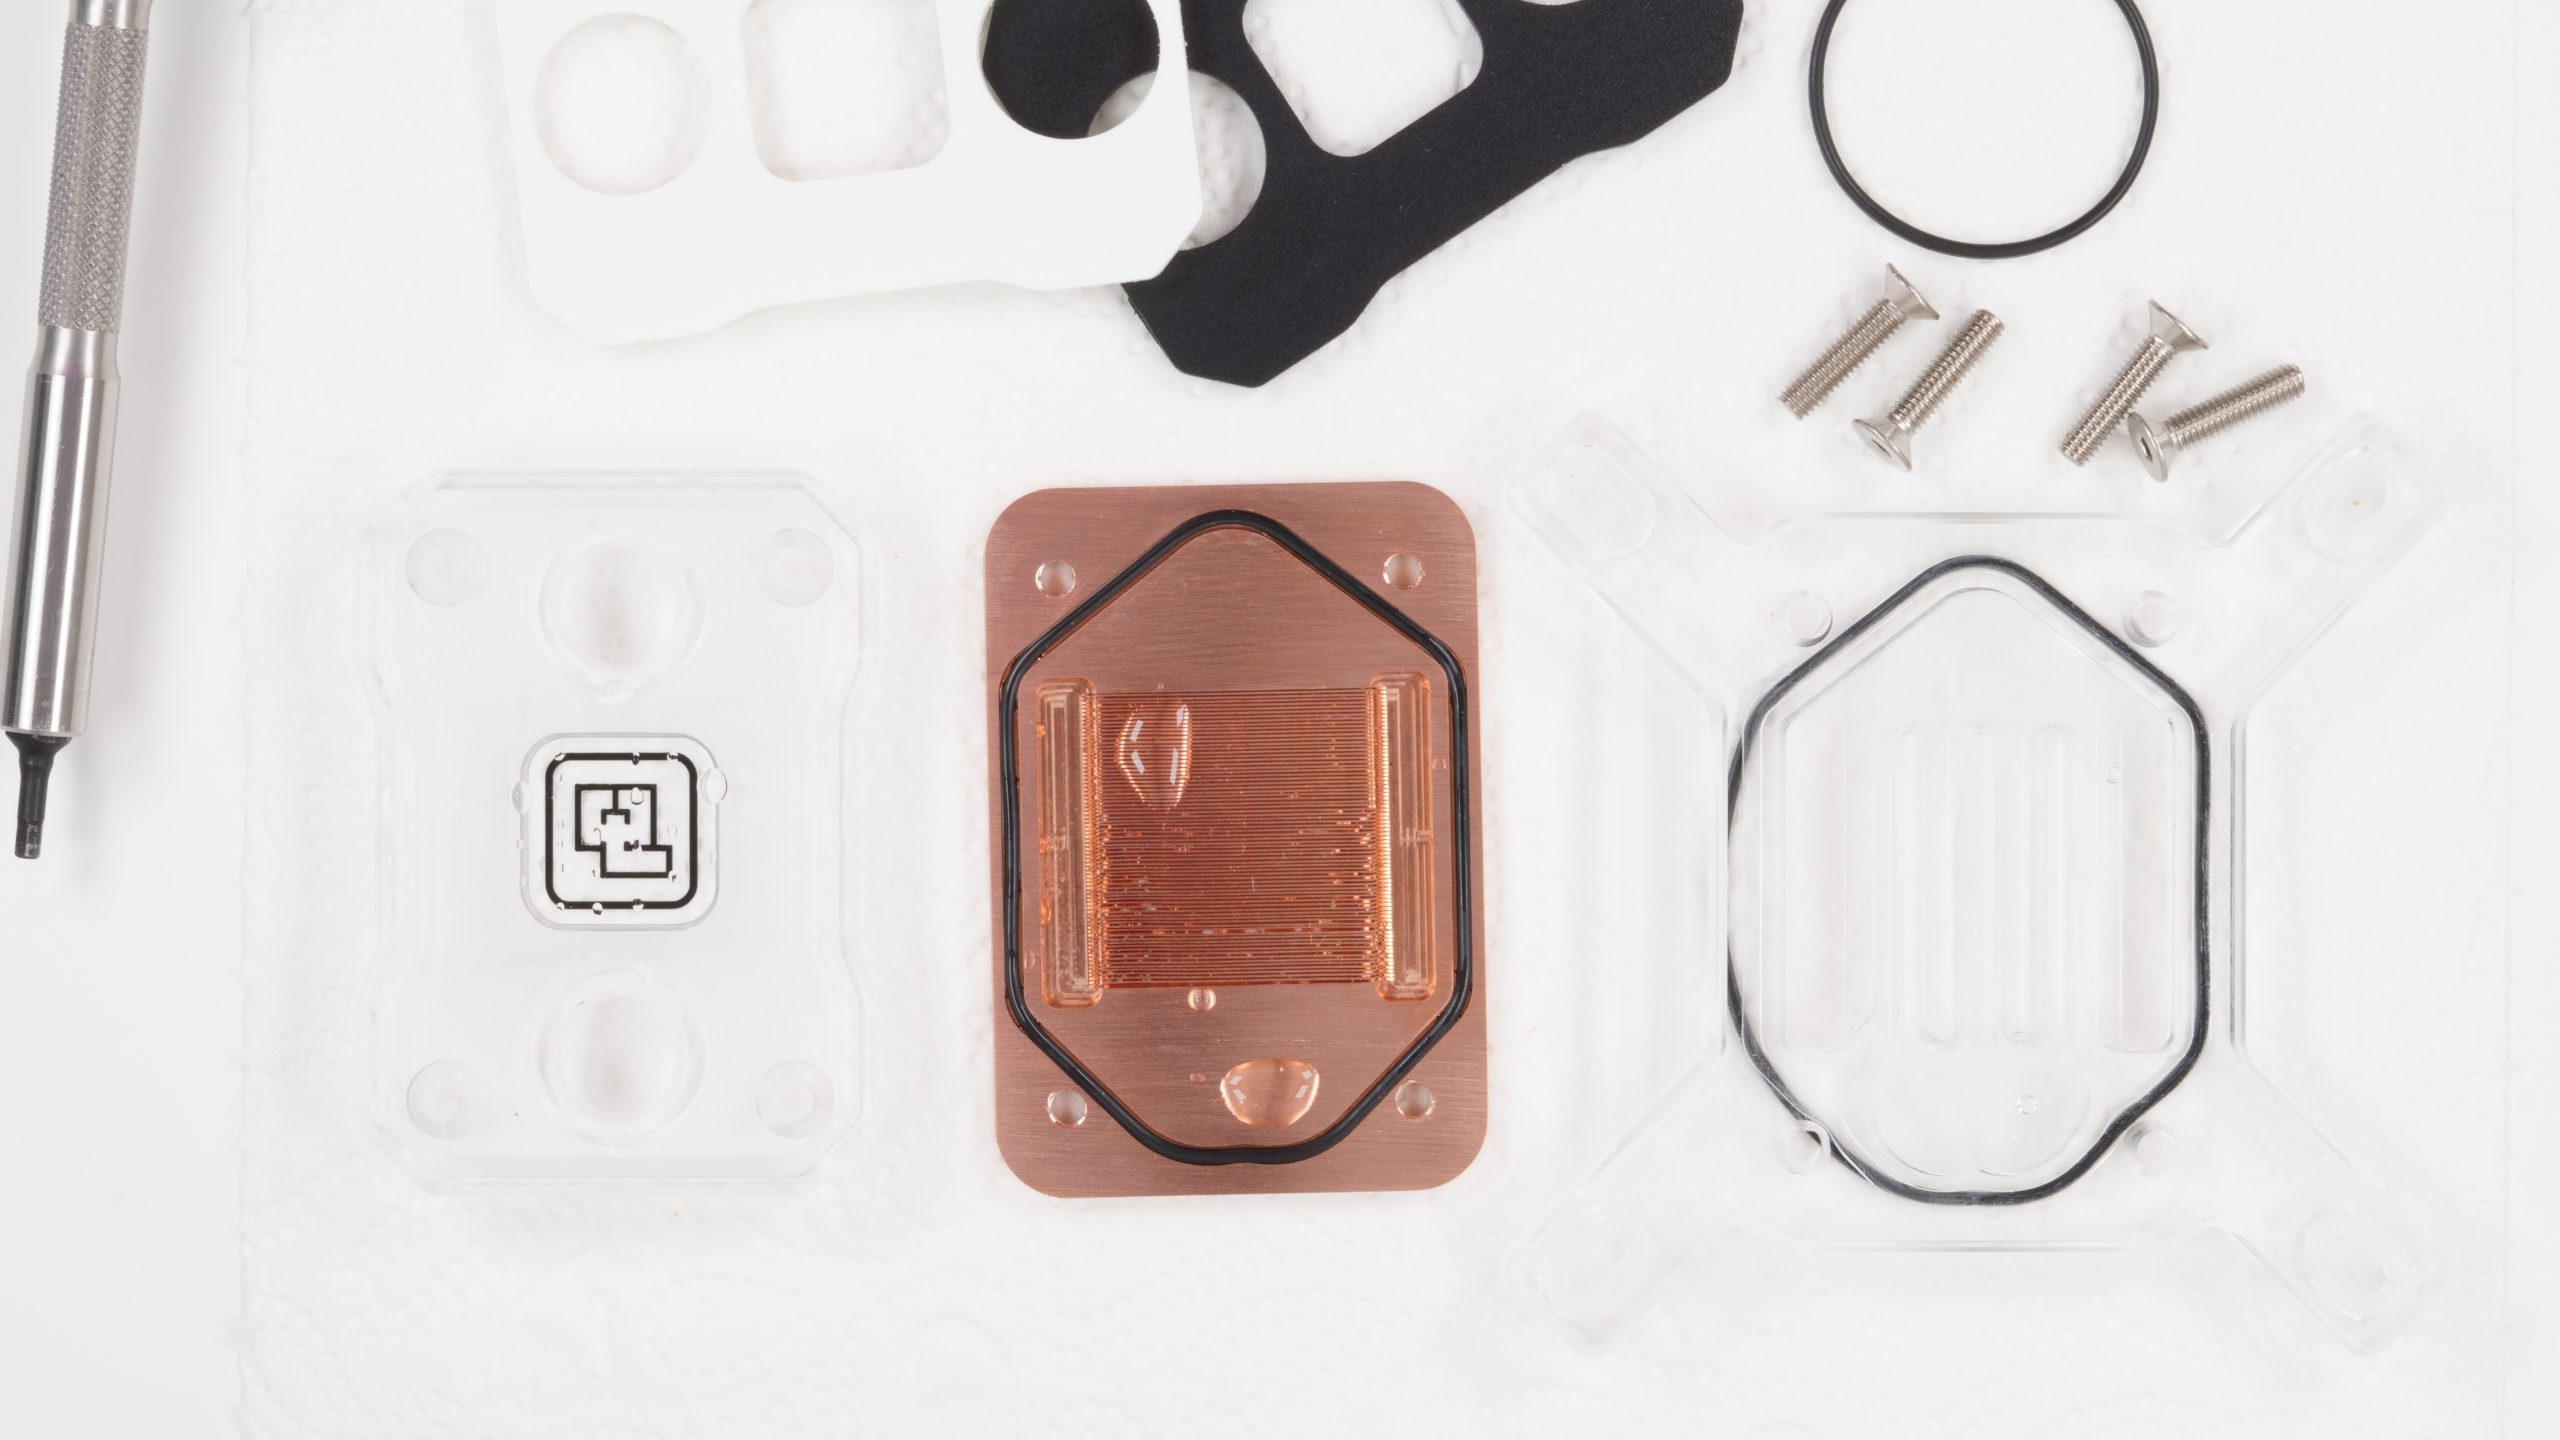
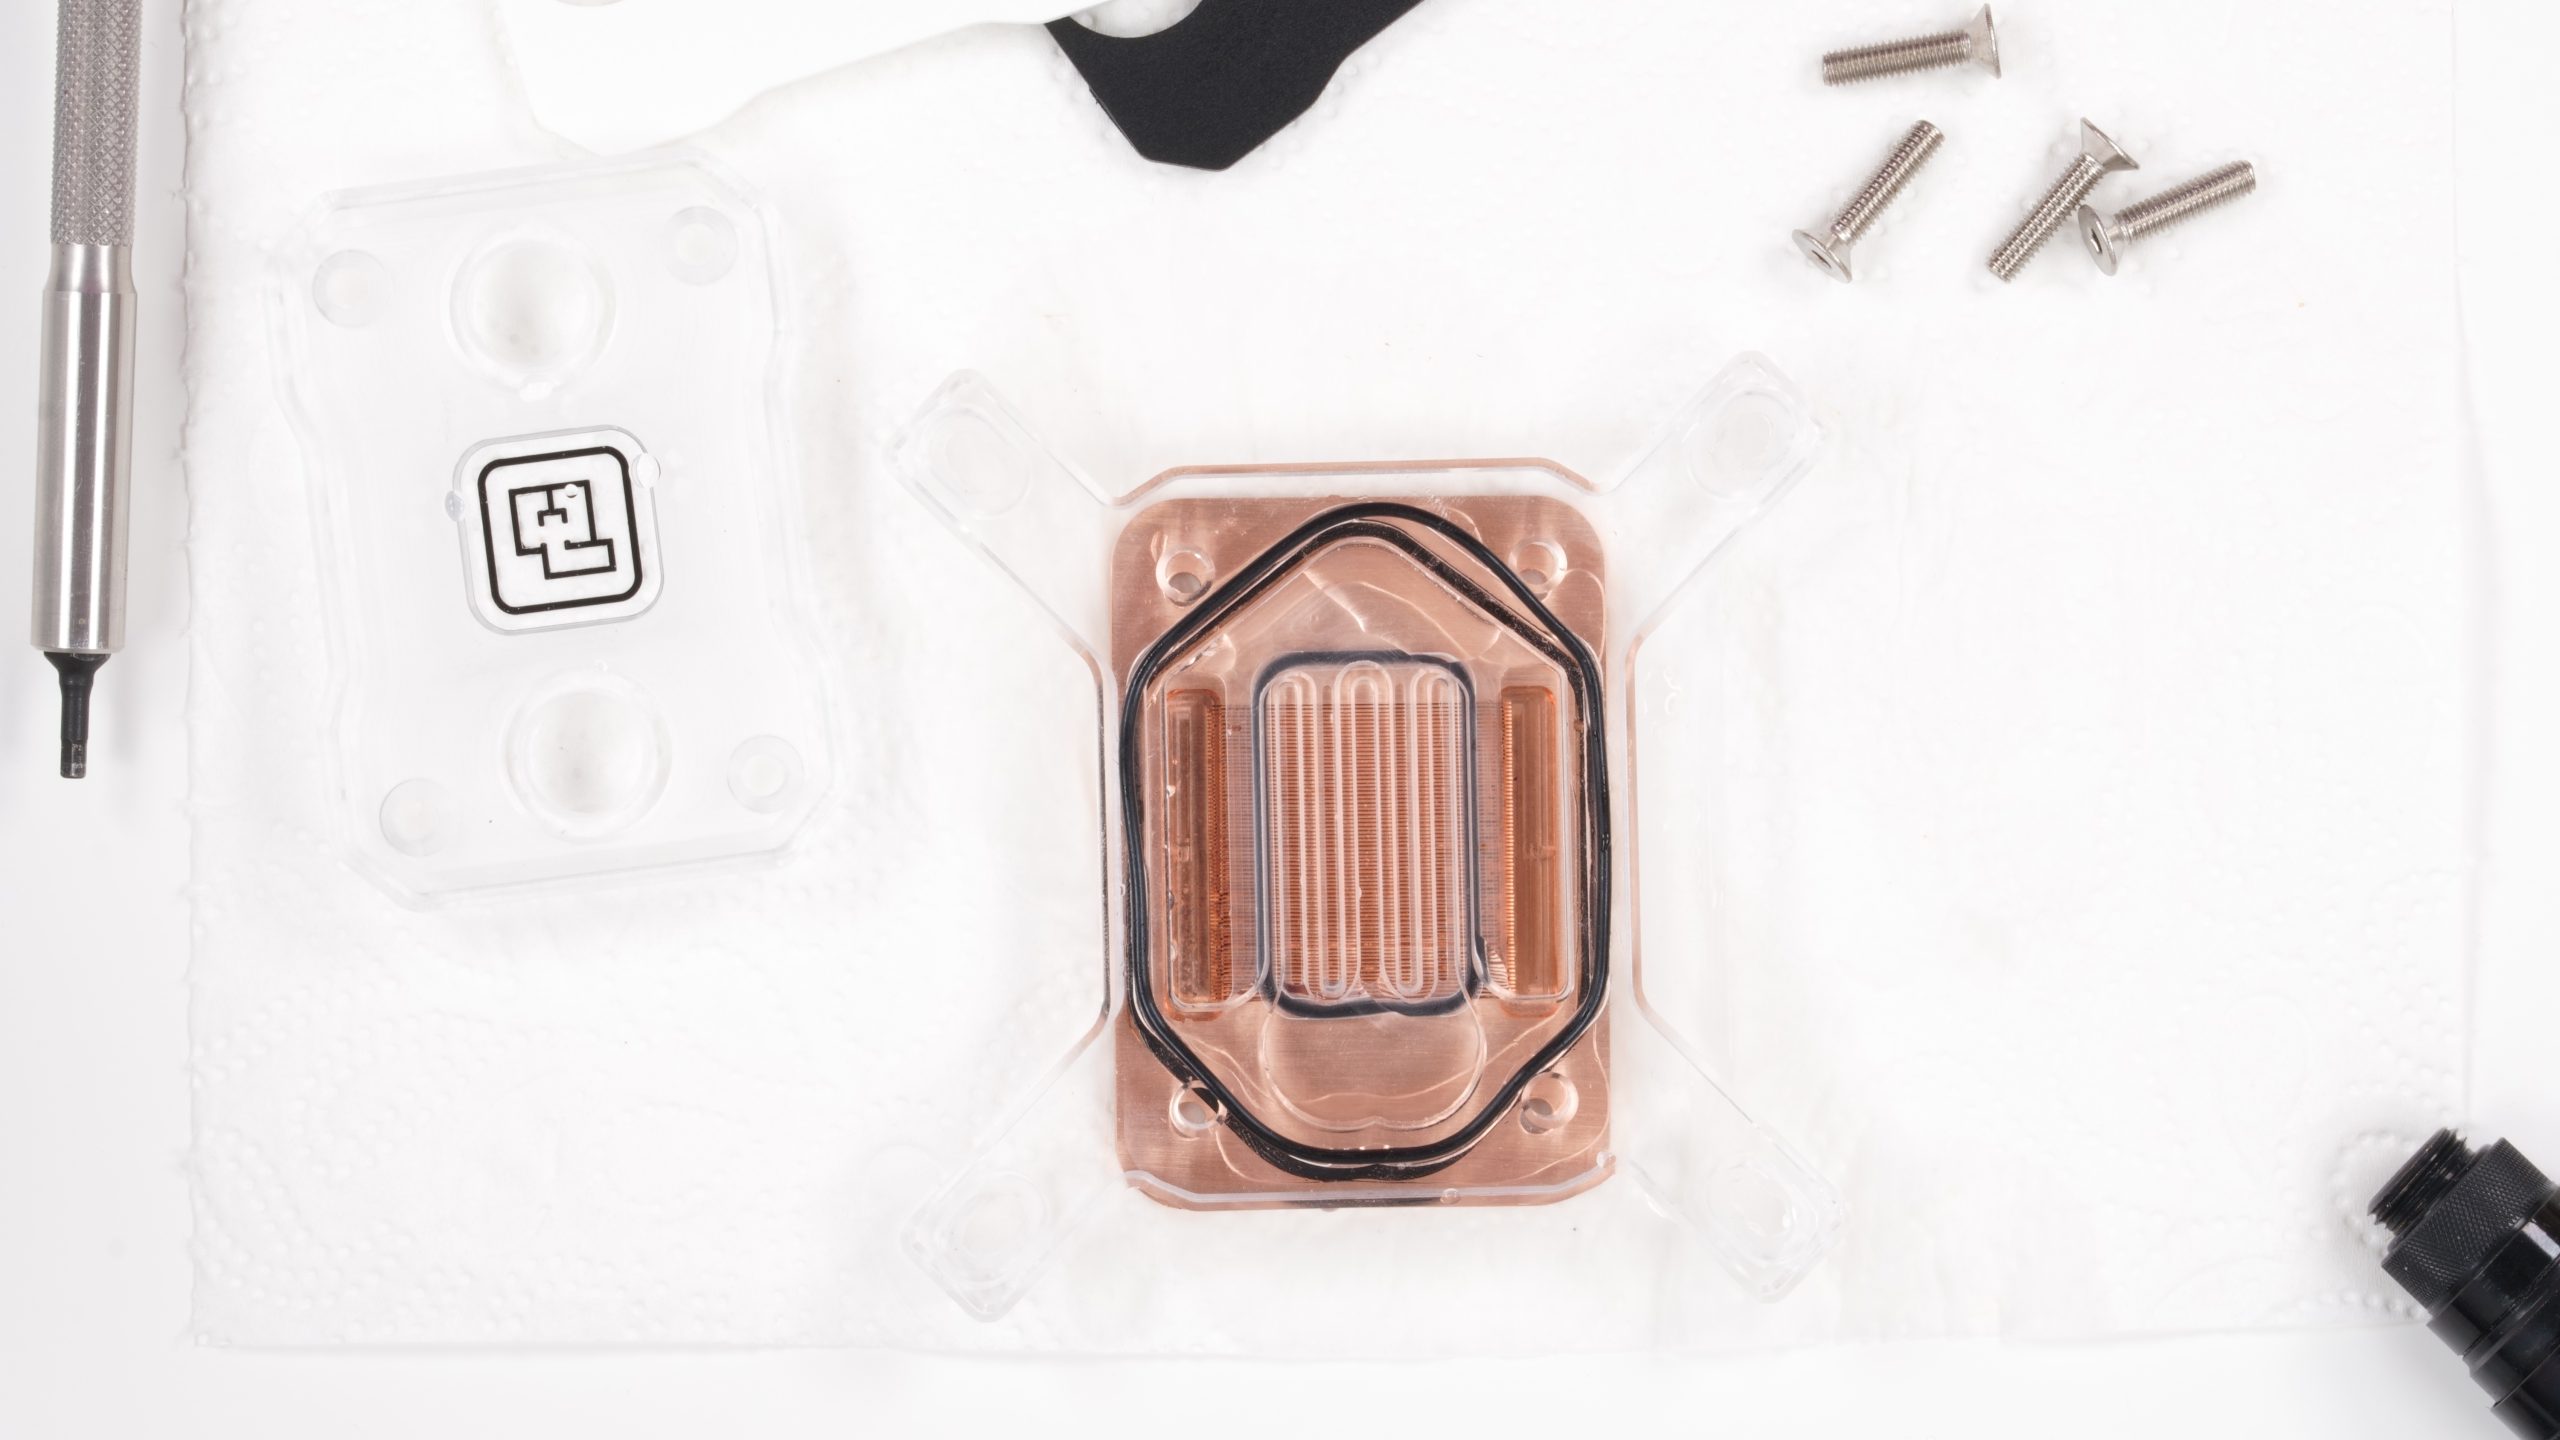
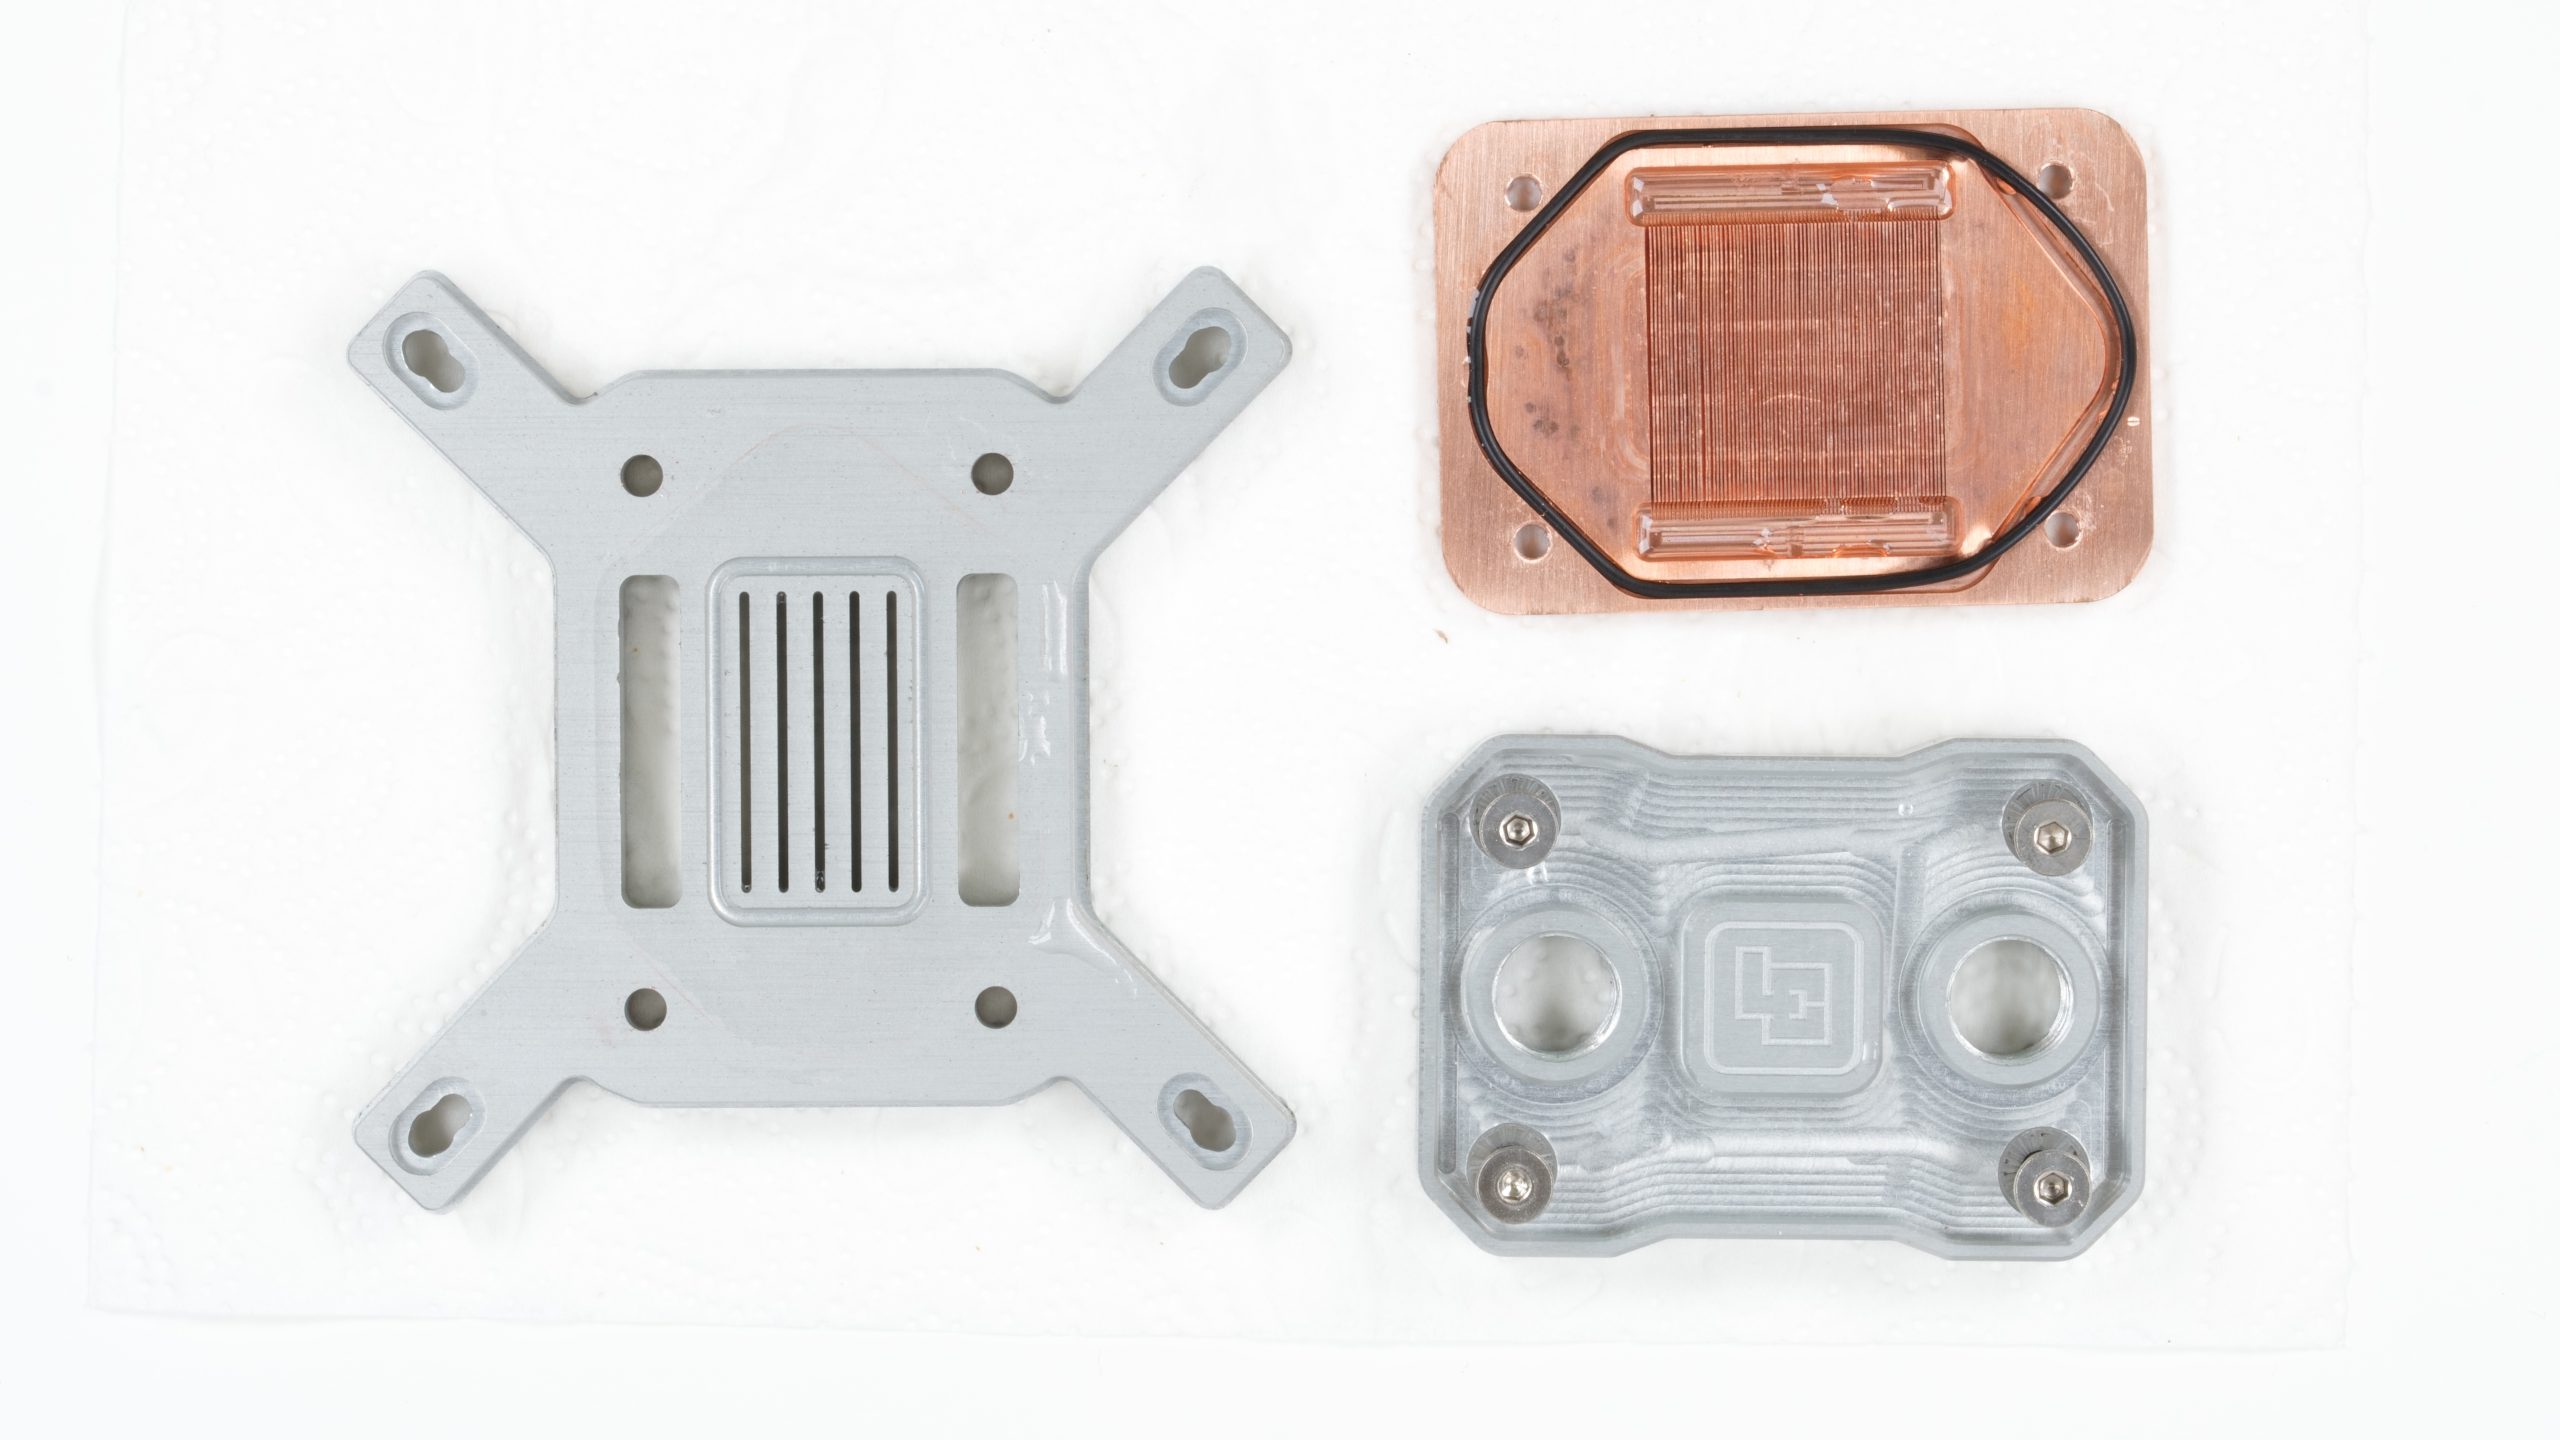
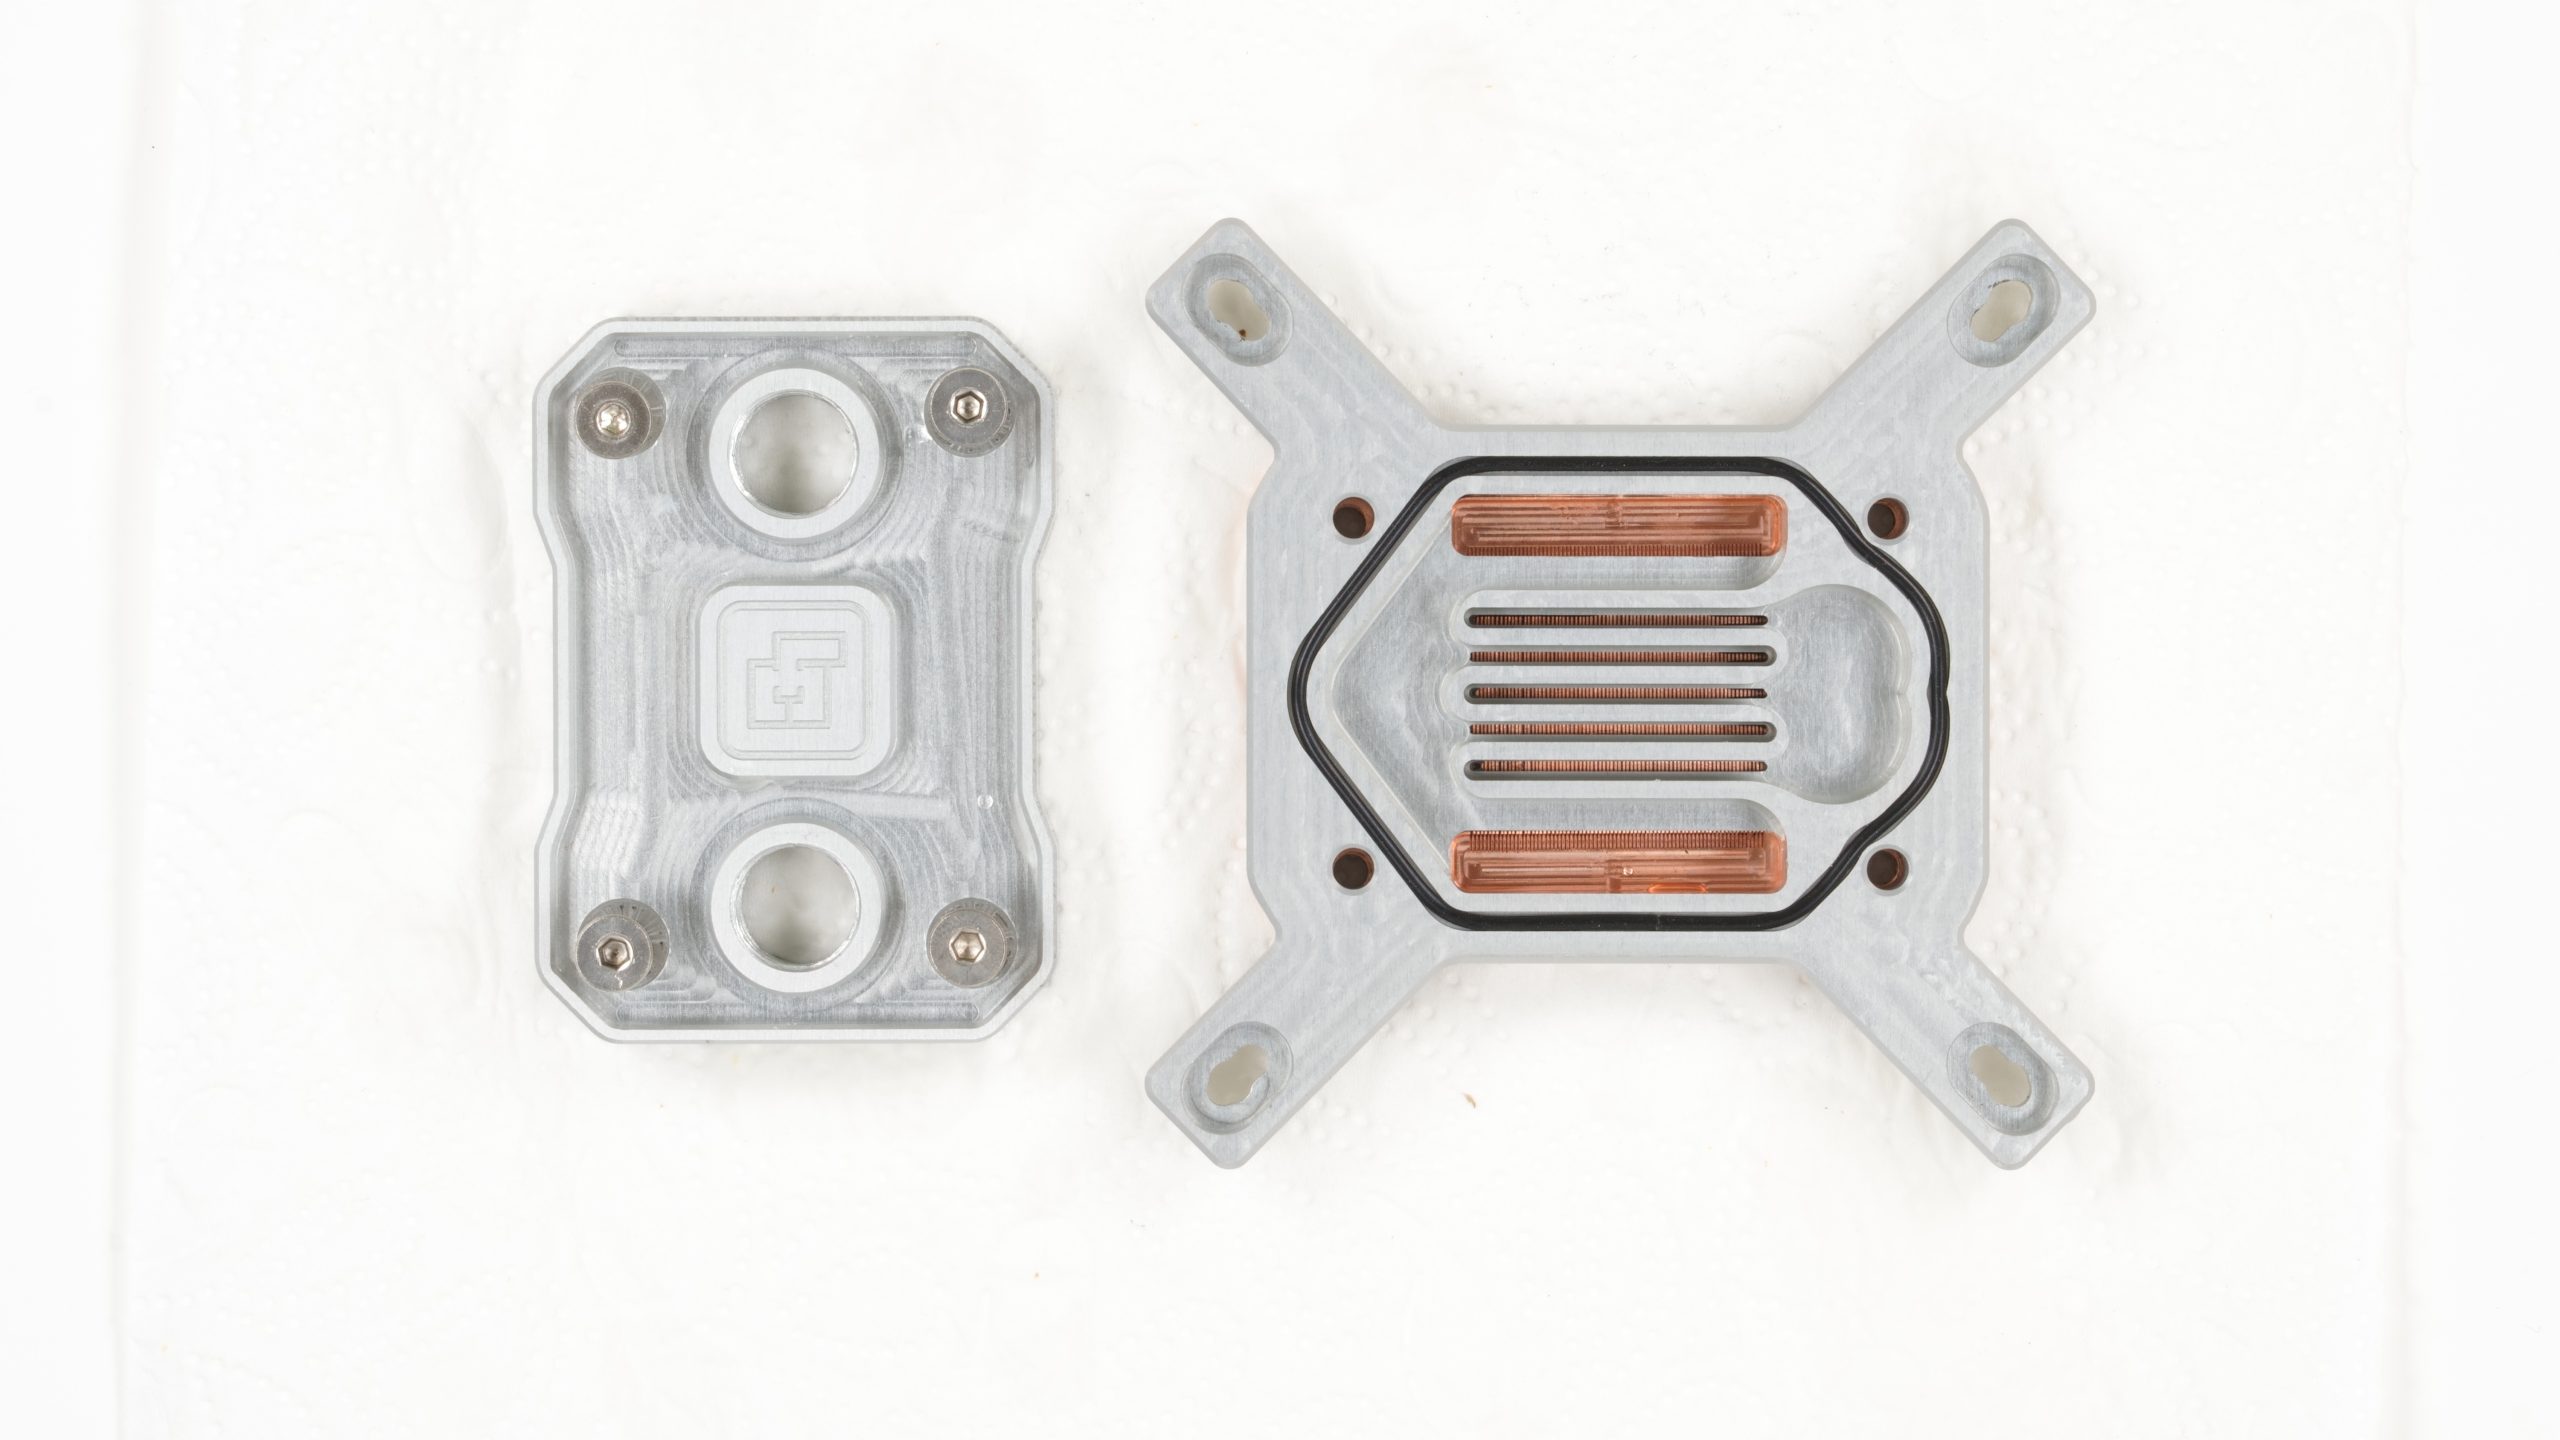
The sandwich consisting of the copper base plate, the nozzle plate, which also acts as a frame for the base, and the cover with the inlets and outlets is revealed. The additional O-ring is then inserted between the nozzle plate and the base plate and the block is reassembled. In practice, however, this proves difficult as one of the pre-installed O-rings is slightly too long and keeps popping out of the groove. After half an hour, I managed to fiddle it back together, and later I shortened the O-ring myself and reconnected it with superglue. According to Liquid Extasy, this is a bug that has already been fixed for future batches.
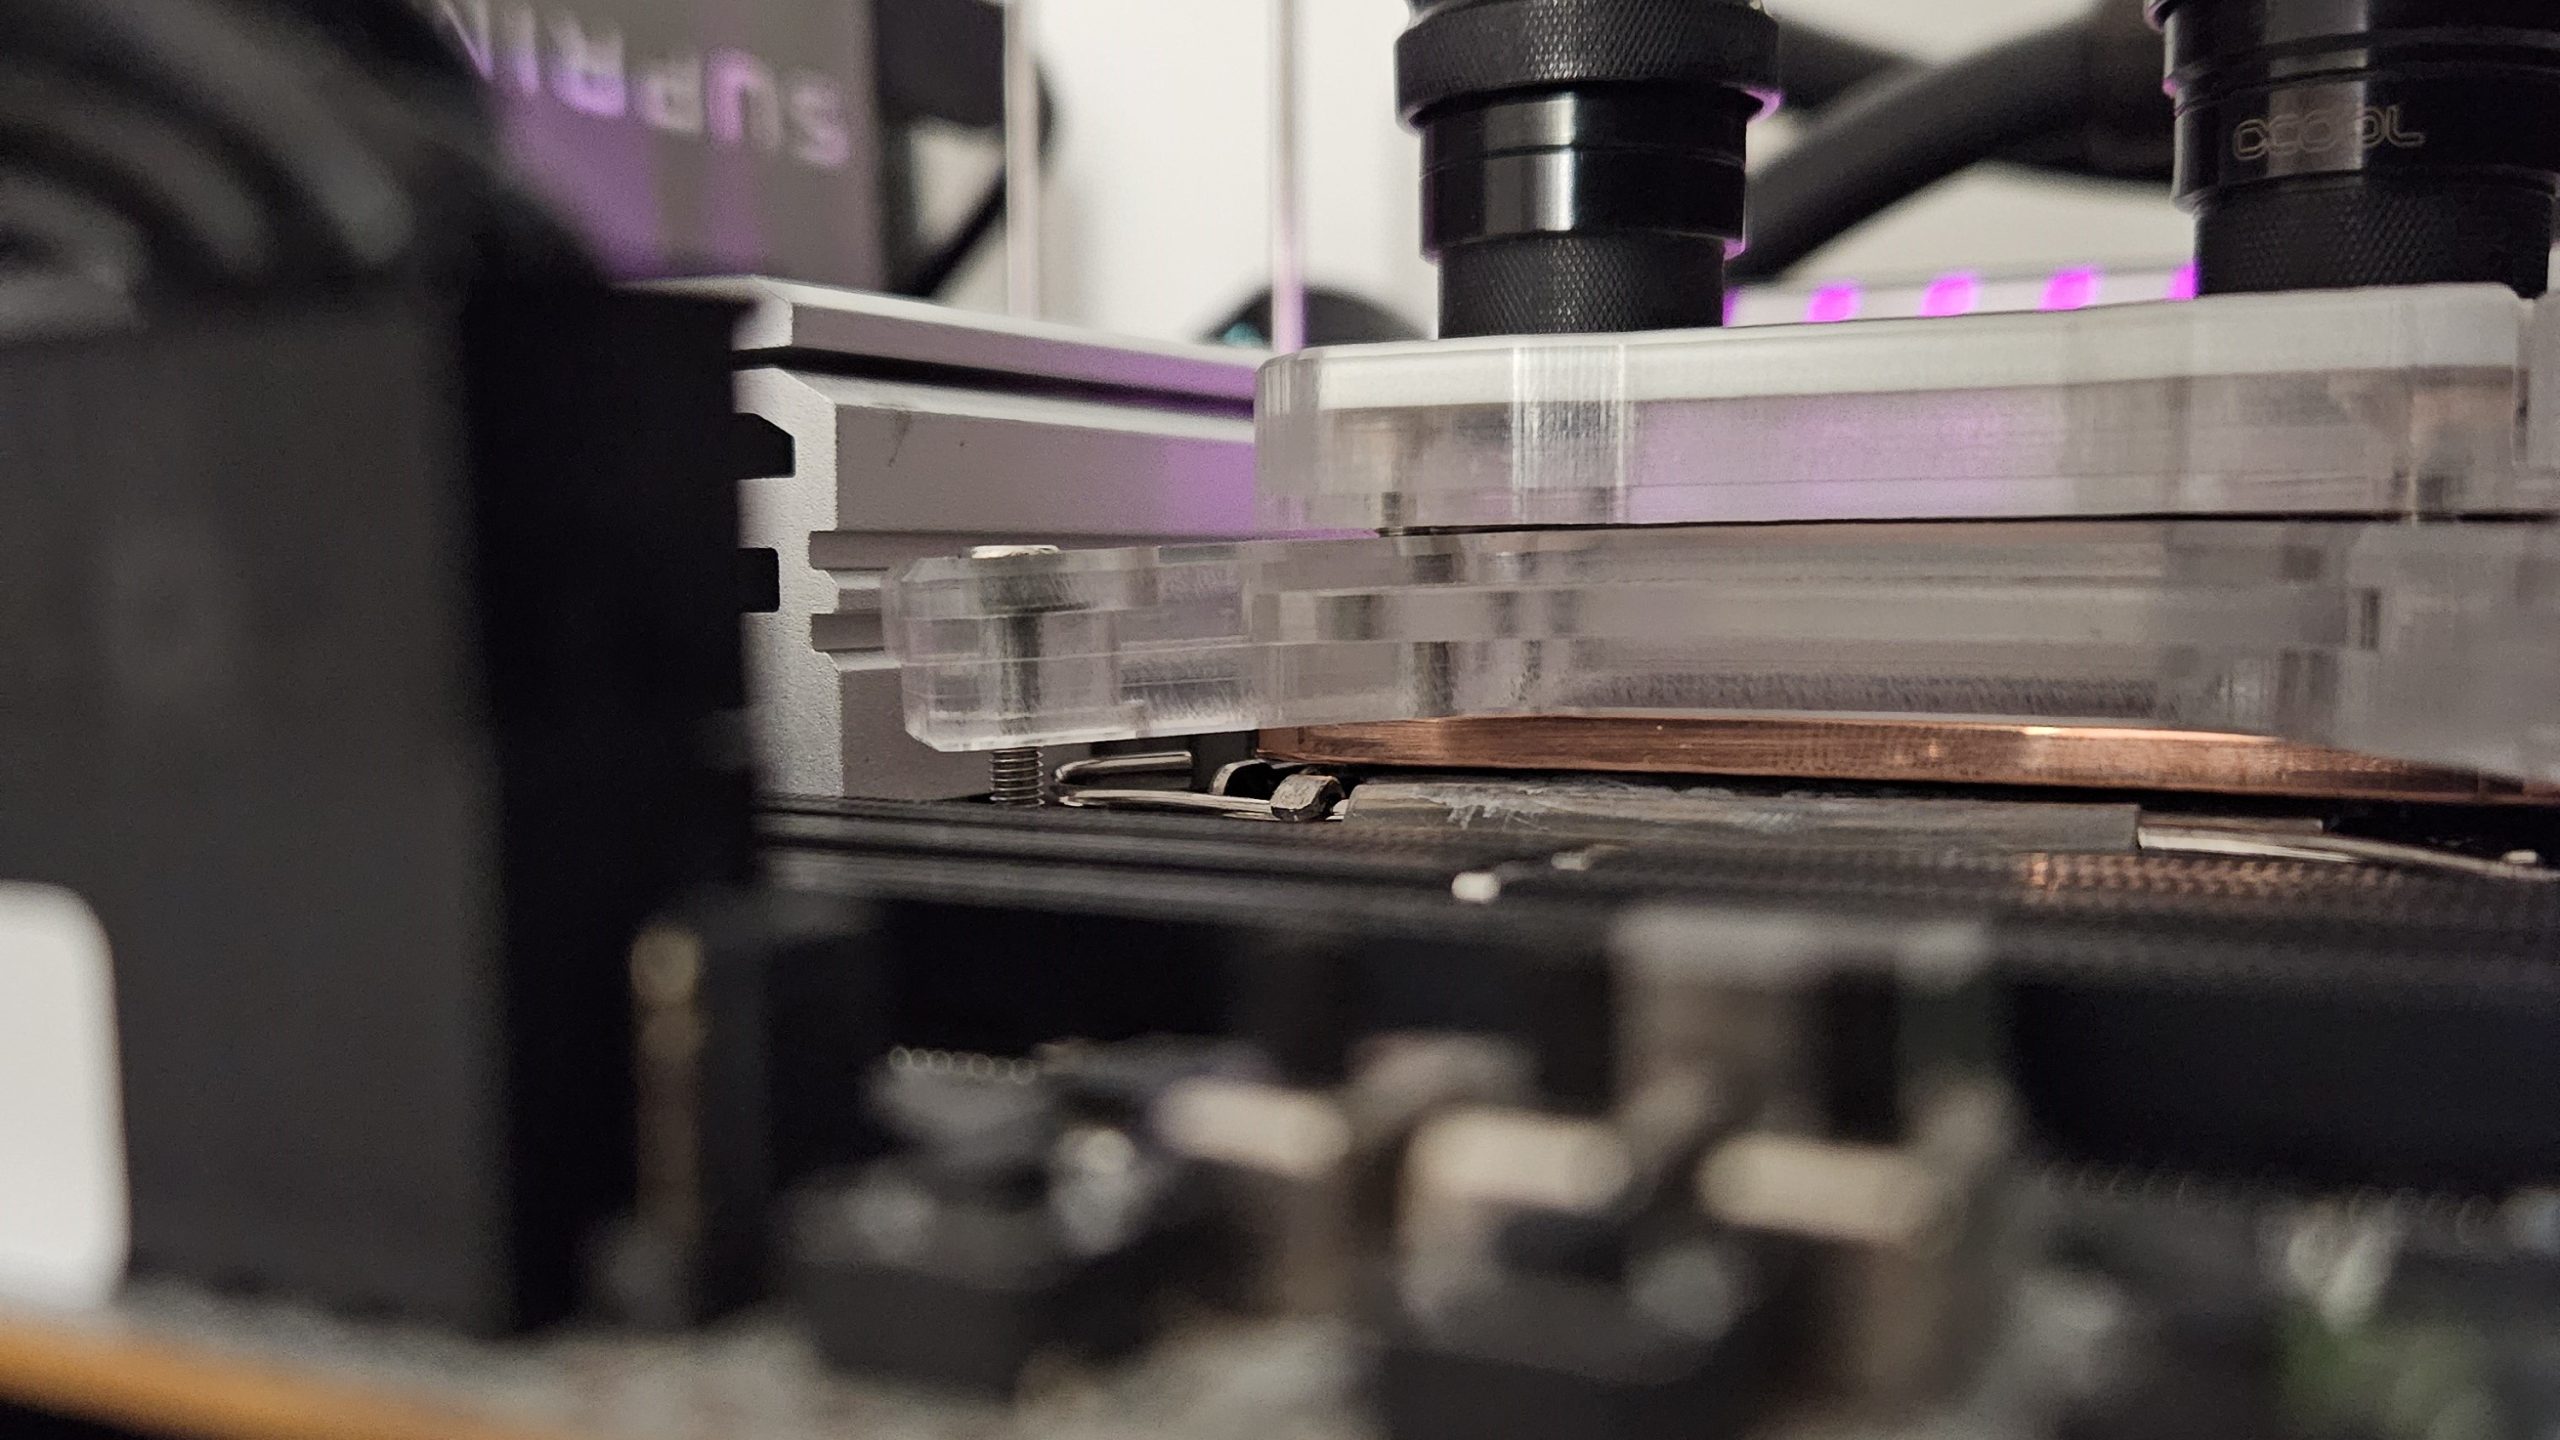
I then tried fitting the O-ring again several times with different torques. The acrylic version of the block performed best with a tightening torque of 0.3 Nm in combination with the additional O-ring. Unfortunately, the acrylic frame already flexes considerably here, so that the force cannot be fully transferred between the base plate and CPU. If the screws are tightened too much, the block can even leak, as the frame is effectively pulled away from the lid.
Aluminum upgrade for LGA1700
Then there is the frame or the nozzle plate and the cover also made of aluminum, whereby the block then costs 180 euros. In this configuration, the frame can transfer the forces noticeably better, so that the variant without the O-ring also performs significantly better. However, the aluminum Uno ran best with an O-ring and with 0.6 Nm, the most I thought the M3 screws were capable of. It’s important to note that water blocks with exposed aluminium innards should only be in a water cooling loop together with other aluminium components. Combining aluminium with copper leads to galvanic corrosion and will over time damage the components. For the test duration of a few hours I accepted this risk with my copper radiators in the loop, but this is definitely not suited for daily use.
We were sent the nozzle plate for AM5, but we didn’t have the right screws. As Liquid Extasy is effectively a “one-and-a-half man” show and no AM5 test system was available, the fact that the AM5 backplate uses UNC 6/32 threads and not M3 was simply overlooked. This could be screwed in, but then the backplate of the mainboard would effectively be defective. Marc from Liquid Extasy has already promised improvement and wants to supply us with suitable screws and plate springs as soon as possible. However, due to time constraints, this will have to appear in a separate article.
Overall, the mounting solution of the No. Uno is not really mature. Yes, it works somehow, and with a lot of feeling and patience you can get the block to perform reasonably well, but I wouldn’t be satisfied with it for 140 or 180 euros. Of course, you have to take into account that Liquid Extasy is effectively a start-up with small quantities, where every single block is made with a lot of passion and heart and soul. But you also have to look at the price-performance ratio of the block soberly and in relation to the competition.

The fact that an Alphacool backplate is used may seem unconventional at first, but it is a clever move because it works well and saves the development costs. I find it unfortunate that no standoffs are used and the contact pressure is more or less left to chance. There are fewer parts, so the block may look tidier, but if there is no defined stop, there is no need for the disk springs either. We have already given our feedback to Liquid Extasy, and we are excited to test whether a new revision or even a No. Due can perhaps solve these teething troubles. An upgrade with a more convex cold plate is allegedly already in the works.
No.UNO - Intel - Assembly instructions

- 1 - Introduction and test methodology
- 2 - Test hardware and systems
- 3 - EK-Quantum Velocity 2 D-RGB 1700
- 4 - Watercool Heatkiller IV Pro
- 5 - Alphacool Core 1 Aurora
- 6 - Aqua Computer cuplex kryos NEXT
- 7 - Thermaltake Pacific SW1 Plus
- 8 - Liquid Extasy No. Uno
- 9 - EK-Quantum Magnitude
- 10 - Corsair Hydro X XC7 RGB Pro
- 11 - Alphacool Eisblock XPX Aurora und XPX Pro 1U
- 12 - Results for Intel LGA 1700 – Core i9 13900KF
- 13 - Results for AMD AM5 – Ryzen 9 7950X
- 14 - Lessons learned, summary and conclusion


114 Antworten
Kommentar
Lade neue Kommentare
Urgestein
Veteran
Moderator
Urgestein
Veteran
Mitglied
Urgestein
Urgestein
Veteran
Urgestein
Veteran
Veteran
Mitglied
Urgestein
Urgestein
Veteran
Urgestein
Urgestein
Mitglied
Alle Kommentare lesen unter igor´sLAB Community →