


EK-Quantum Velocity² D-RGB – 1700
The Velocity 2 is EK’s first candidate that has to prove itself on LGA 1700. The scope of delivery is spartan – there is only the block pre-assembled on the backplate, a small tube of Thermal Grizzly Kryonaut and an Allen key. The block itself consists of a base plate made of nickel-plated copper and a top part made of acrylic or acetal in this version. The RGB cable for this is permanently installed, but long and has a direct ARGB 3-pin connector that fits most mainboards. The price here is 130 euros and conversion to AM5 is not possible.


In theory, the assembly process couldn’t be easier, as there are no springs, standoffs or washers, just the knurled nuts, which are also integrated into the backplate. In practice, however, the situation is somewhat different. This is because the block is inserted from the front with its bolts through the holes in the mainboard and then screwed in from behind. However, the threads of the stud bolts do not extend beyond the board of the mainboard, so it is effectively impossible to tighten them evenly. My first attempt at assembly by hand tightening by feel had terrible temperatures – 110 °C absolute core temperatures in a very short time. The online instructions talk about 0.6 Nm and the hex key included, but you can’t measure the torque with this. EK offers a solution for this, namely its own torque wrench for exactly 0.6 Nm for 23 euros in the webshop.


As no torque wrench is included, I first tried to tighten the nuts by feel using the 2.5 mm Allen key supplied – which is probably how most users do it. Unfortunately, my wrist is probably not sensitive enough, because even after 2 more attempts, the performance is suspiciously poor. As I wasn’t satisfied with this, but also didn’t want to buy a “disposable torque screwdriver” from EK, I bought an adjustable torque screwdriver with bit insert on Amazon. This was then used for a third assembly attempt, whereby all nuts were tightened gradually to 0.3 Nm, then 0.45 Nm and finally to 0.6 Nm, as required in the instructions. And lo and behold, temperatures improved by approx. 4 K!

In the end, this result also made it into the diagrams. How fair or unfair this is is for everyone to judge for themselves, because every other water block manufacturer also manages without special or even separately sold assembly tools. The name of the mounting solution “Exact Mount” is probably to be understood as an instruction to the user. Ordinary customers may have a torque screwdriver to hand and will need to make one or two attempts by feel to achieve a similarly good result. This is particularly annoying because the screws of this block are on the back of the mainboard, but it can be done. You don’t have to search the internet for long to come across reports of bolts being torn off because users have overtightened the screws, presumably in a desperate search for more cooling capacity.


Yes, the front of the block is pretty, with no visible screws, but couldn’t it have been done differently with more user-friendliness? Every assembly and disassembly becomes a real trembling act with fear for the sensitive hardware and, in my opinion, cannot be justified by wanting to hide 4 screws. Surely with more engineering and a little more cost, a solution could have been developed that could do both: Hide screws and be easy to install. But if the number of threads on the bolts is already being saved, you get the impression that cost optimization was more of a priority for EK – a pity, even if the block “only” costs 135 euros.

The fact that the block takes up the entire area of the base is really something. The RGB lighting is bright, but not obtrusive, and you can’t see any light spots. In addition, the surrounding heat sinks of the mainboard are also illuminated, which looks really chic here with my silver Z790 Apex board. The RAM slots can also be accessed without issues.


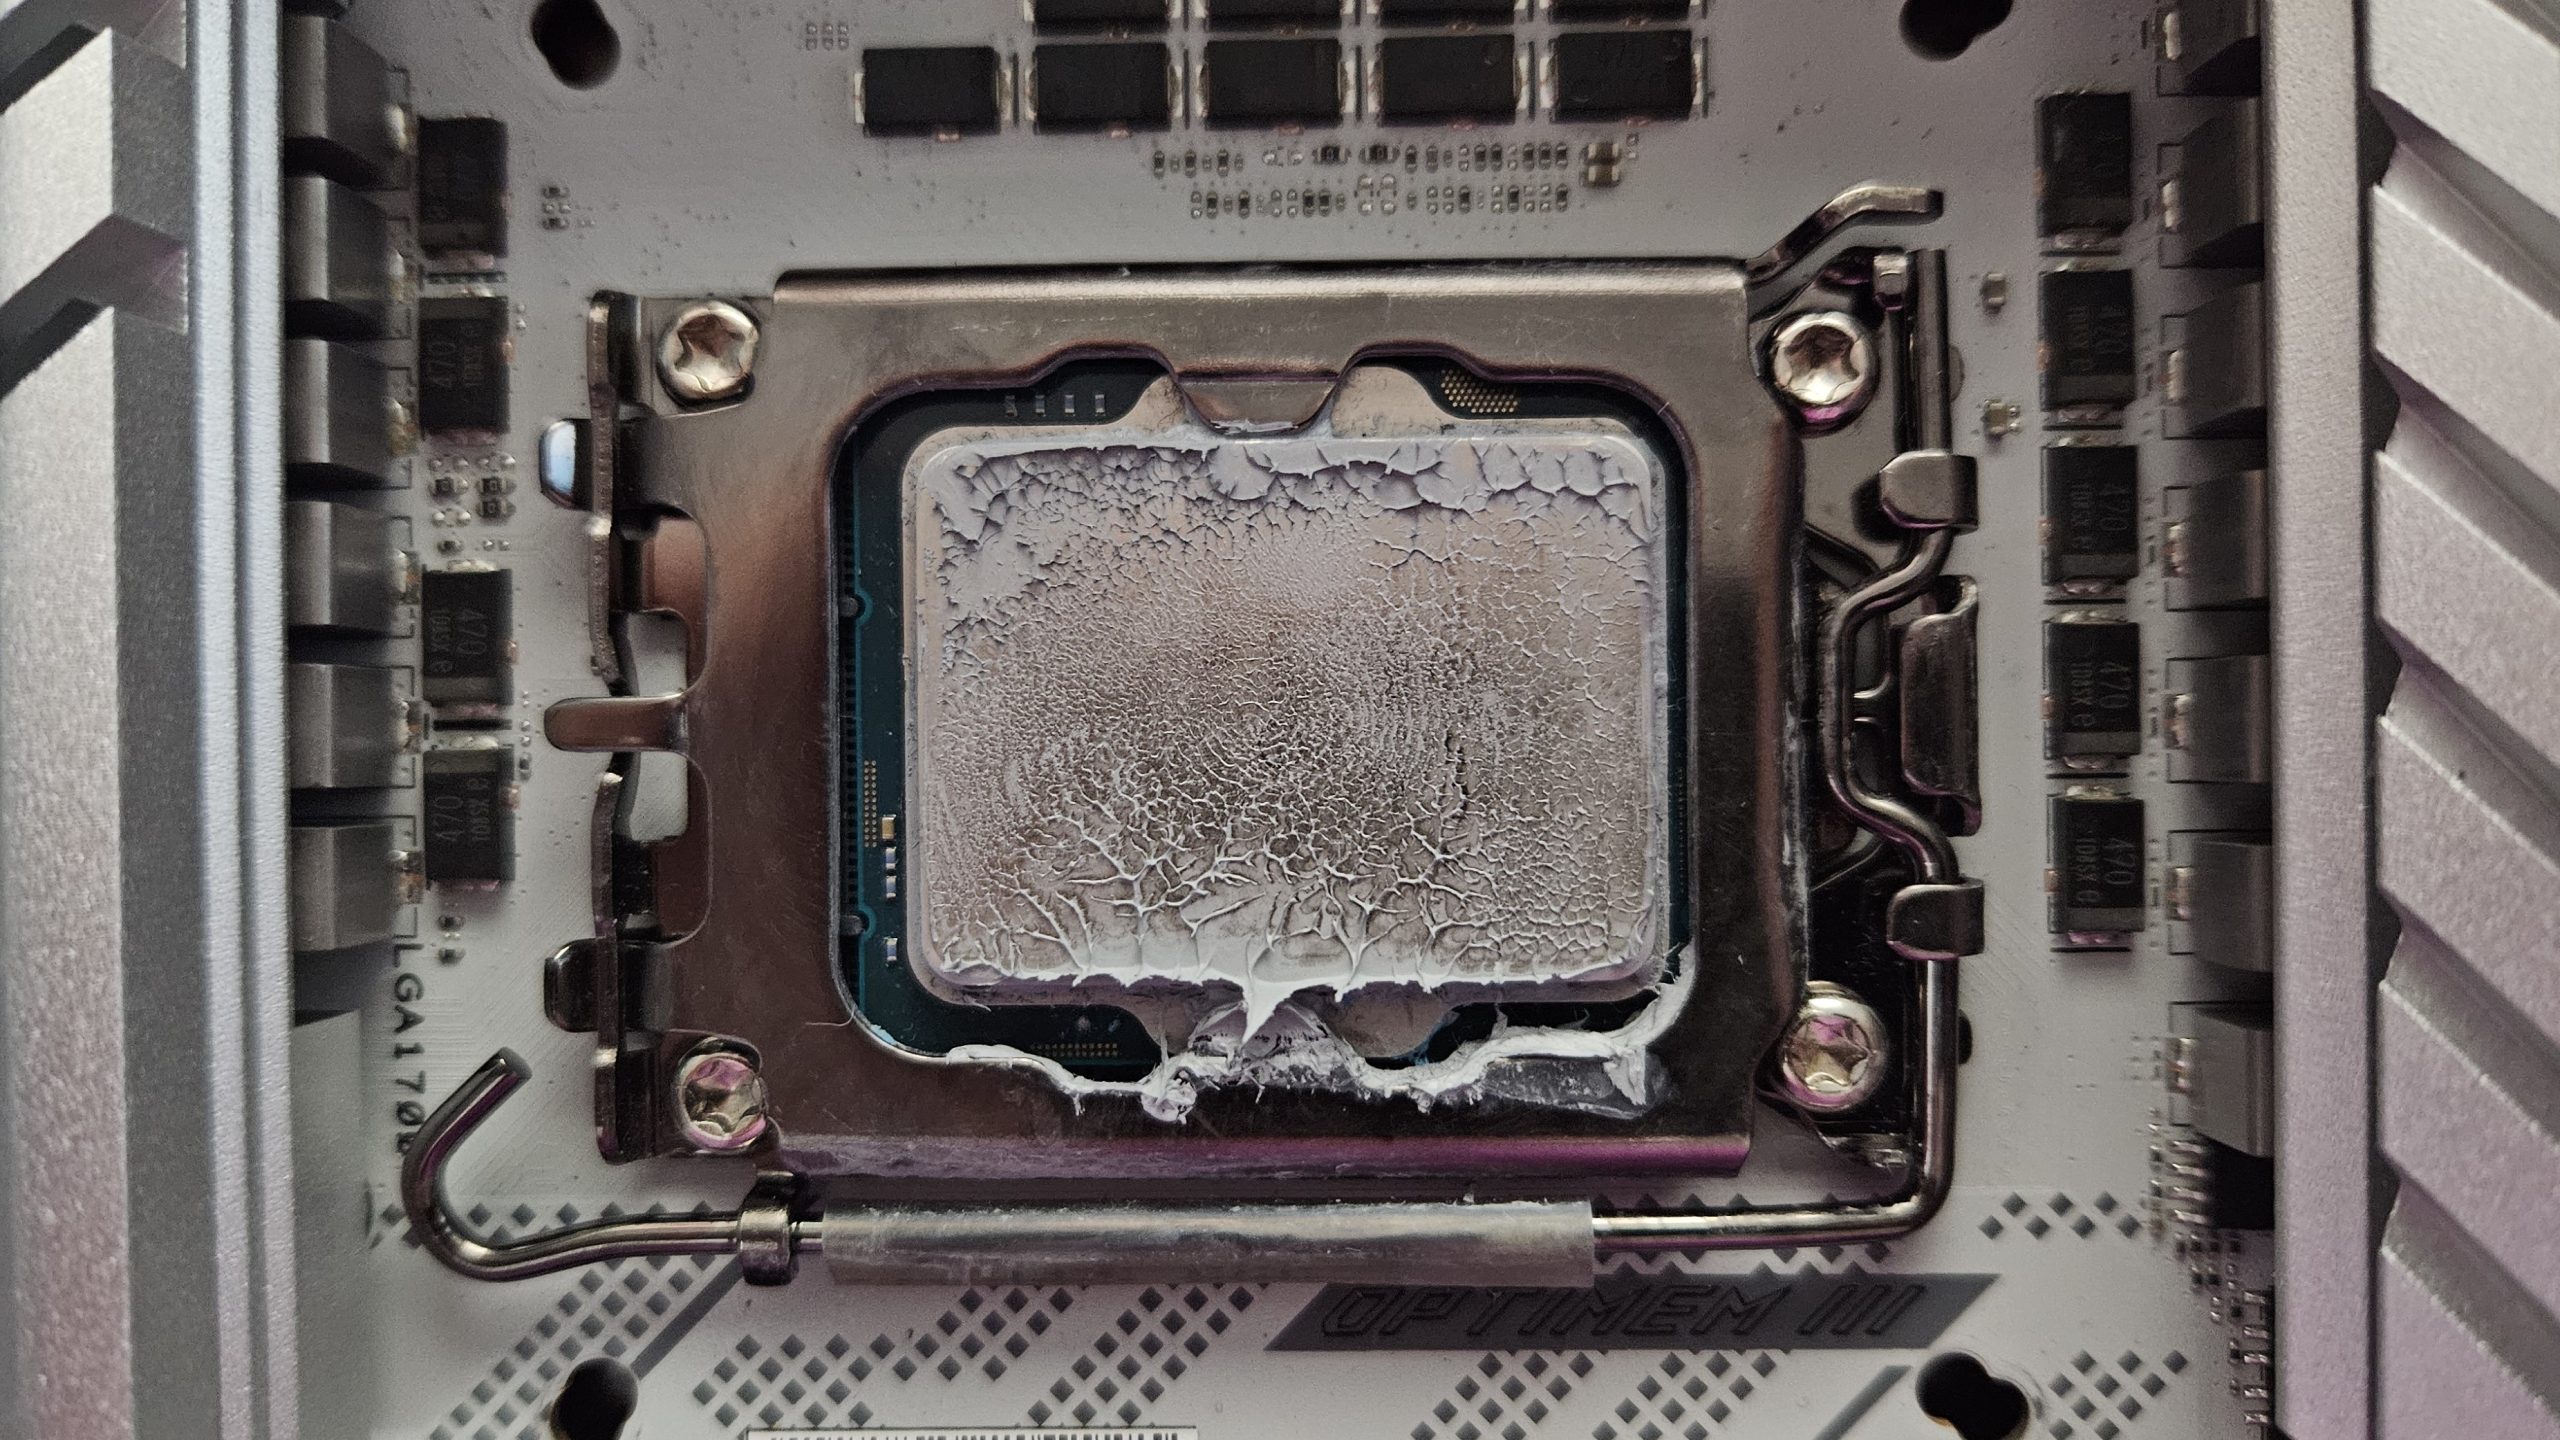
The first two thermal paste impressions are from my assembly attempts by feel or with the supplied Allen key. The last one is with a torque wrench to exactly 0.6 Nm and this one performed best and made it into the diagrams. The circular structures of the base plate can be seen in the impressions. However, it is also noticeable that the area with the finest thermal paste structure is distributed in a kind of crescent, in the pictures from the bottom left, over the center, to the bottom right. Unfortunately, optimum contact looks different. This block is not intended for conversion to AM5 – you would have to buy an extra block for this. Instead, the Quantum Magnitude from EK is used on AM5, which in turn can be adapted to LGA 1700.
EK-IM-3831109857663EK Water Blocks Quantum Line EK-Quantum Velocity² D-RGB, 1700, Nickel Acryl (3831109857663)
 | Auf Lager - 1-3 Werktage Lieferzeit | 130,91 €*Stand: 21.05.24 07:53 |
 | Zentrallager: verfügbar, Lieferung 3-5 WerktageFiliale Wilhelmshaven: nicht lagerndStand: 21.05.24 08:24 | 134,89 €*Stand: 21.05.24 08:26 |
 | Alsdorf: bei Vorbestellung in ca. 24h - 48h lagerndVersandlager: lagerndStand: 21.05.24 07:45 | 134,90 €*Stand: 21.05.24 07:47 |

- 1 - Introduction and test methodology
- 2 - Test hardware and systems
- 3 - EK-Quantum Velocity 2 D-RGB 1700
- 4 - Watercool Heatkiller IV Pro
- 5 - Alphacool Core 1 Aurora
- 6 - Aqua Computer cuplex kryos NEXT
- 7 - Thermaltake Pacific SW1 Plus
- 8 - Liquid Extasy No. Uno
- 9 - EK-Quantum Magnitude
- 10 - Corsair Hydro X XC7 RGB Pro
- 11 - Alphacool Eisblock XPX Aurora und XPX Pro 1U
- 12 - Results for Intel LGA 1700 – Core i9 13900KF
- 13 - Results for AMD AM5 – Ryzen 9 7950X
- 14 - Lessons learned, summary and conclusion


114 Antworten
Kommentar
Lade neue Kommentare
Urgestein
Veteran
Moderator
Urgestein
Veteran
Mitglied
Urgestein
Urgestein
Veteran
Urgestein
Veteran
Veteran
Mitglied
Urgestein
Urgestein
Veteran
Urgestein
Urgestein
Mitglied
Alle Kommentare lesen unter igor´sLAB Community →