


Test system and setup
Now let’s get to the measurement, where I rely on the central lab cooling with the chiller and another expansion tank (a total of almost 20 liters of water), as usual. Aqua Computer’s DP Ultra is used, which is filtered on a rotational basis. The water temperature is kept at a constant 20 °C, which greatly simplifies the determination of absolute temperatures and deltas. The internal GPU diode measures the chip temperature reliably from about 19 °C, but it quickly becomes inaccurate below that. Room temperature and water temperature are thus also approximately the same, which avoids dangerous condensate.

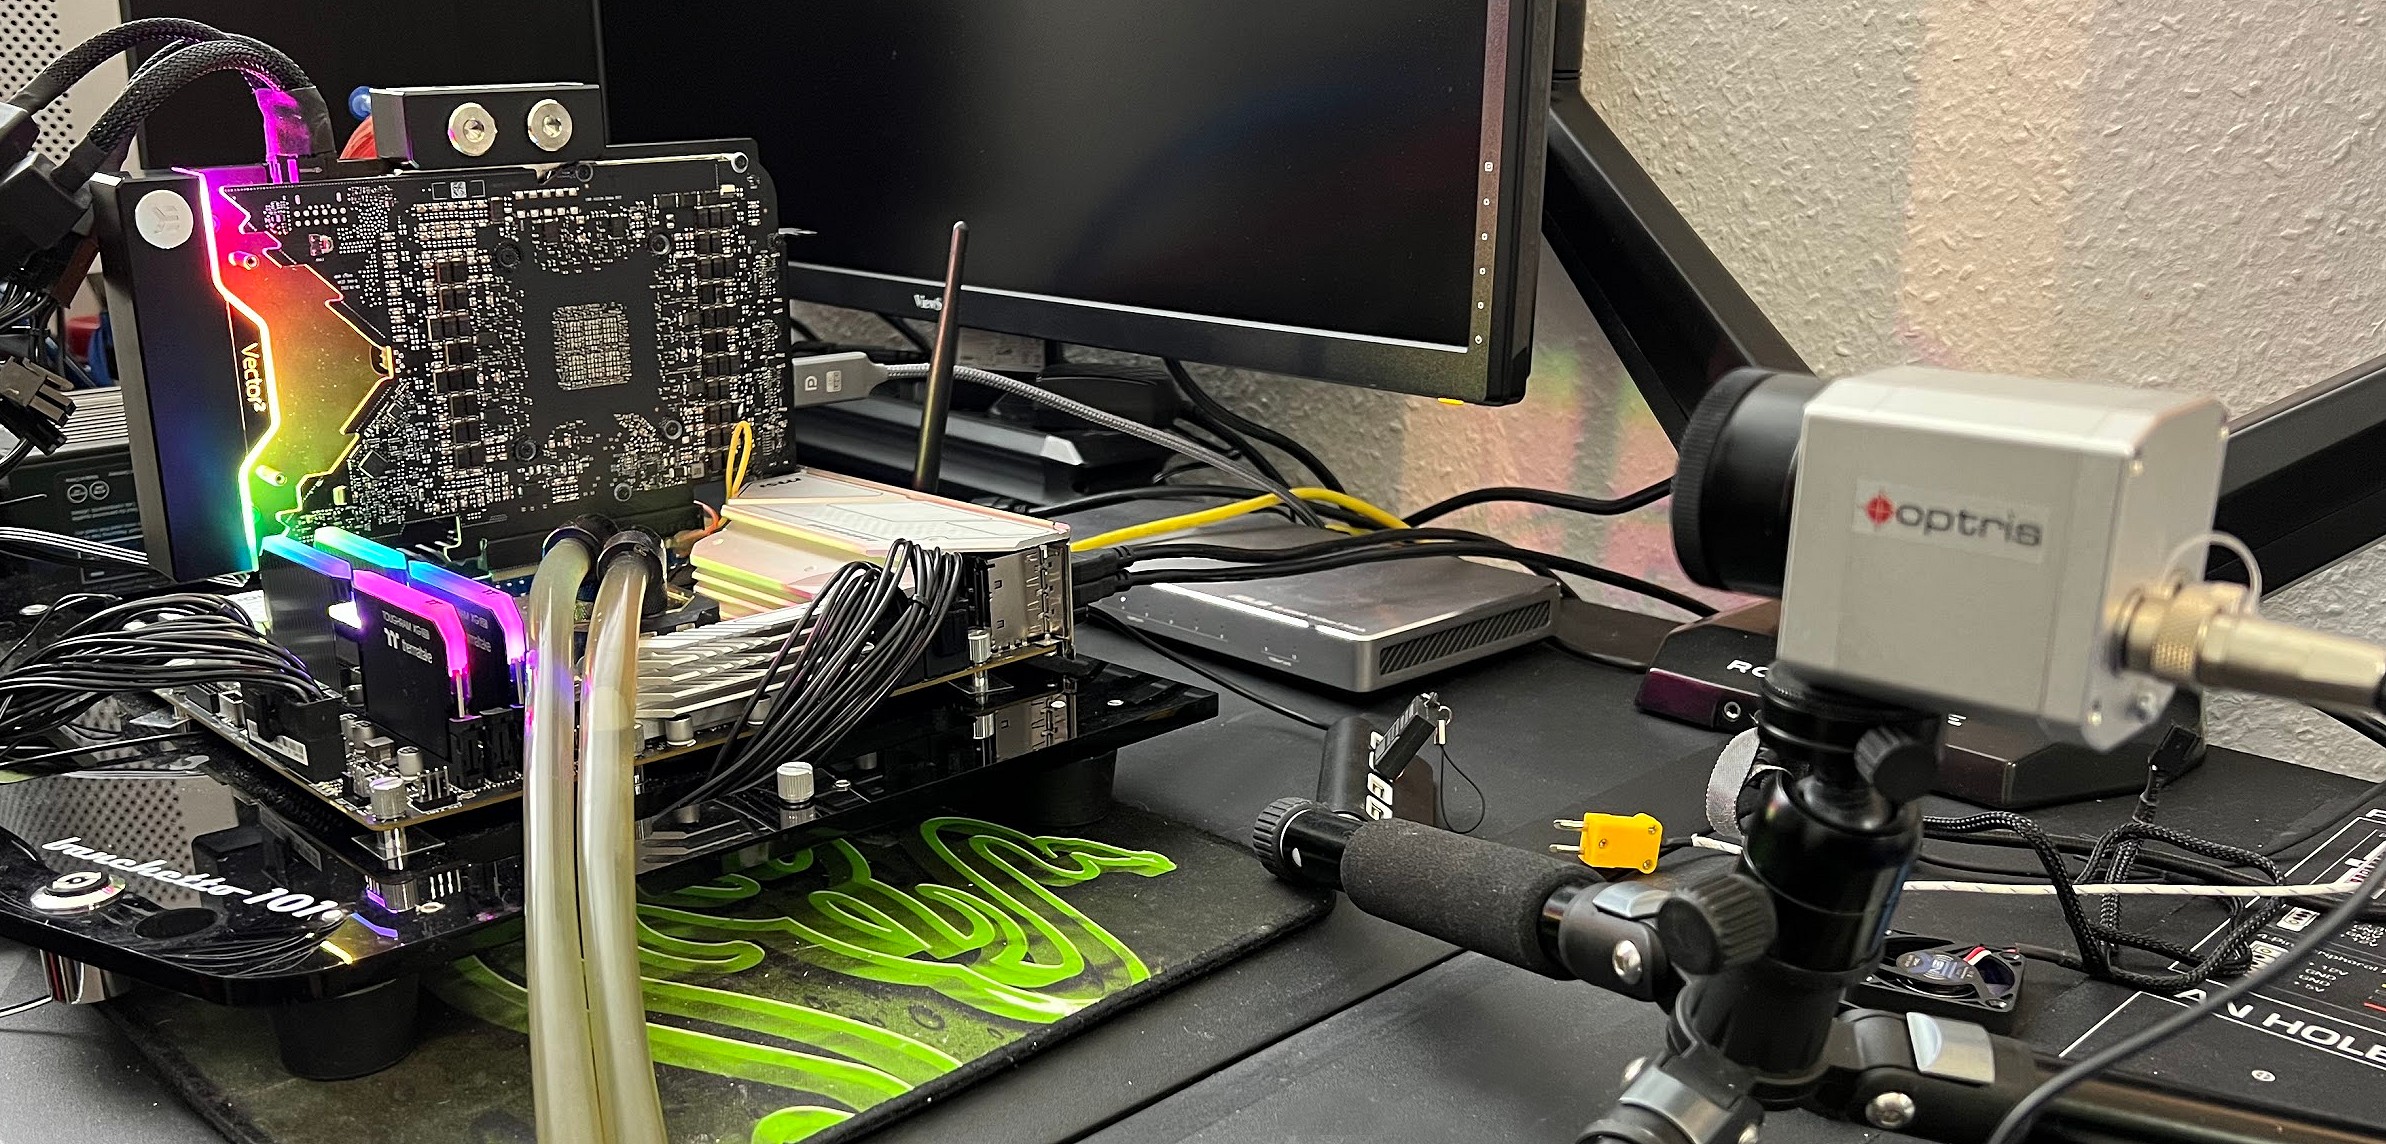
Temperatures are recorded using an engineering tool for the GPU diode and the substrate temperature of the GDDR6X (hotspot) and using a calibrated, high-resolution industrial camera for infrared measurements. The PI640 from Optris with a normal focal length is used here. The camera has a 640 x 480 pixel bolometer to capture thermal radiation. For the evaluation, I record a radiometric video, which I can also read out later at will.
| Test System and Equipment |
|
|---|---|
| Case: |
Banchetto 101 (modified) |
| Monitor: | Alphacool Ice Age 2000 Chiller, 20l additional reservoir |
| Power Consumption: |
Oscilloscope-based system: Non-contact direct current measurement on PCIe slot (riser card) Non-contact direct current measurement at the external PCIe power supply Direct voltage measurement at the respective connectors and at the power supply unit 2x Rohde & Schwarz HMO 3054, 500 MHz multichannel oscilloscope with memory function 4x Rohde & Schwarz HZO50, current clamp adapter (1 mA to 30 A, 100 KHz, DC) 4x Rohde & Schwarz HZ355, probe (10:1, 500 MHz) 1x Rohde & Schwarz HMC 8012, HiRes digital multimeter with memory function MCU-based shunt measuring (own build, Powenetics software) NVIDIA PCAT and FrameView 1.1 |
| Thermal Imager: |
1x Optris PI640 Pix Connect Software Type K Class 1 thermal sensors (up to 4 channels) |
| OS: | Windows 11 Pro (all updates) |
Now the cooler has to prove itself! I let the cooler sweat at exactly 450 watts in the MSI combustor for an hour in the slightly regulated cycle with about 100 l/h. You have to allow yourself this time, because only after a longer period of time will all areas of the board really be completely warmed up. Then measure for about 10 minutes and determine the average temperature.
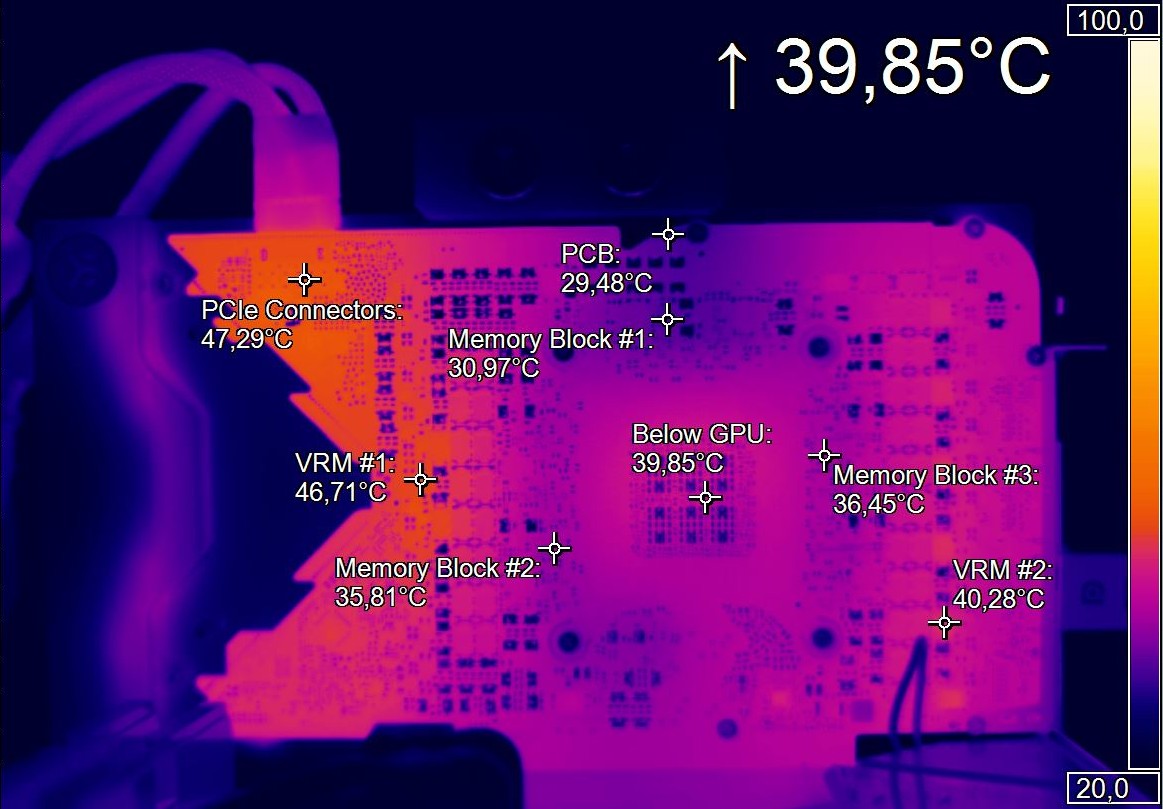
First, let’s look at the IR control values. The board temperature on the back already allows good conclusions about the component temperatures, even though deviations naturally still occur here due to the thermal resistance or hot tracks in and on the board (especially in the GPU area). And we also see that the not even 40 degrees of the areas where the backplate pads normally sit is nothing that would require their use at all.
Now let’s move on to the temperature measurement. A delta of around 26 Kelvin between the water and the GPU is acceptable, but you still miss the highest Boost step, since you would need temperatures around 40 °C for that. However, since it is only the second cooler for this graphics card that I could test, I naturally lack a corresponding reference value, but a small trend is already emerging. Compared to the possible maximum, one loses perhaps 30 to 45 MHz, which can easily be tolerated. The temperatures of the memory and voltage converter are very good, although slightly worse than Corsair’s block. So that fits.
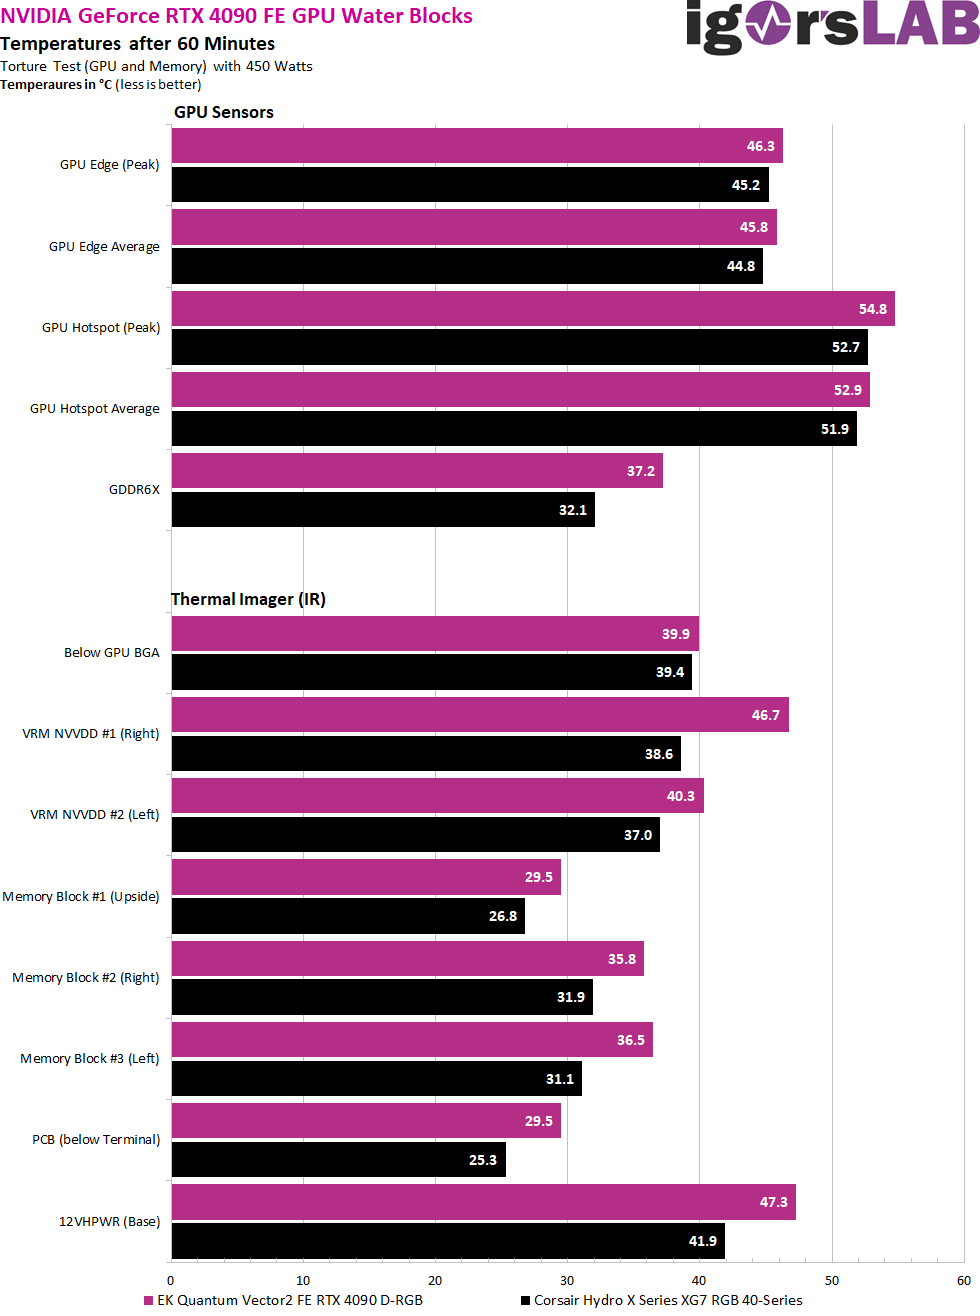
Despite narrowly missing the maximum target of about 40 °C for the GPU (Edge) by about 6 Kelvin, a clock of 2715 to 2730 MHz is very often present in Cyberpunk 2077 even after complete warming. Up to 41 °C it was even 2760 to 2775 MHz. For comparison: the air-cooled card only manages around 2580 MHz as an average here (whereby the clock fluctuates extremely). Almost 200 MHz more clock for free are certainly not bad. The gaming performance increases by around 2 to 3 percent, while the power consumption in gaming even decreases by around 5 watts. So, both coolers tested so far are on par.
Summary and conclusion
The cooler tested today is now the second in a series of planned tests, so I can already make a first comparison here. Whether there will really be a clear winner later on (or maybe two) will have to be seen. Especially when price and performance are taken into account. But until then, it is still a long way from offers, supply chains and the availability itself, because not every manufacturer will offer an FE cooler or is even interested in an objective test. Unfortunately, I already had to experience this as well. But let’s get back to EKWB’s water block.
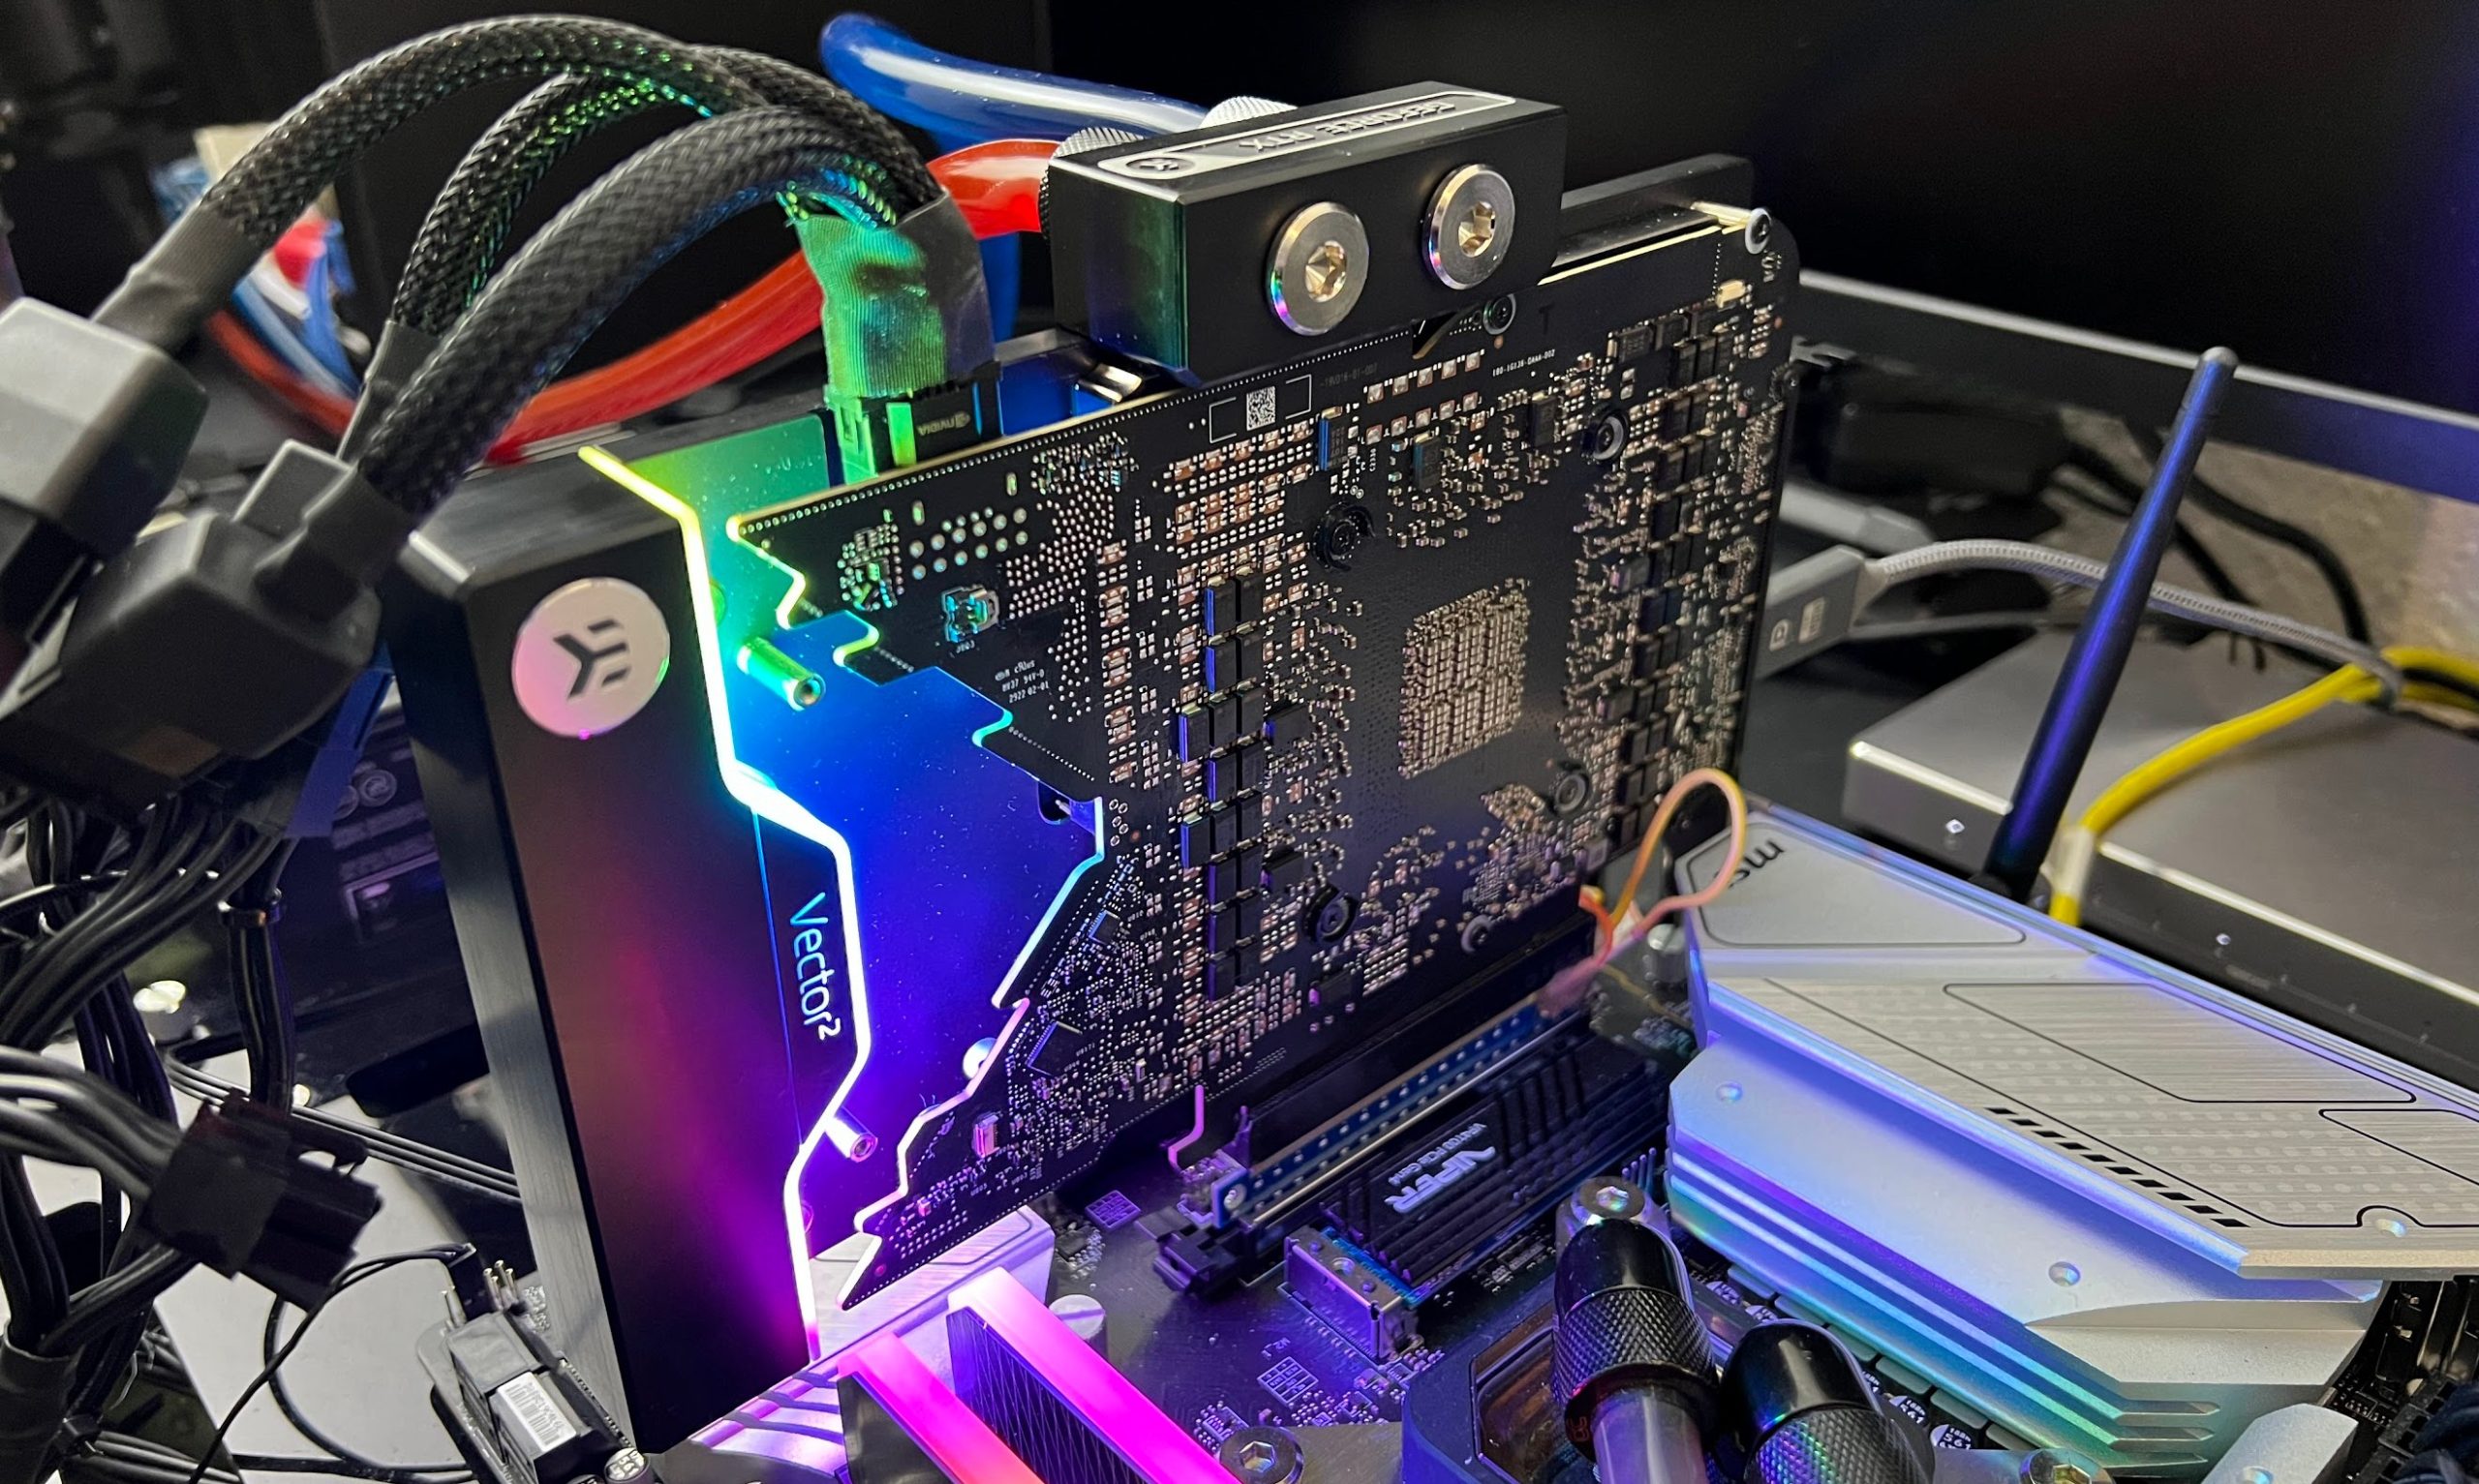
As in the first test, it is once again the case that you will hardly reach the loads tested here in normal gaming routine. The fact that the power consumption even drops a bit, although the average clock even increases slightly due to the higher Boost steps, is a nice gain that the customer is happy to take. The assembly of the water block is a bit more complex than Corsair’s, but the manufacturing quality fits. The black acetal including the massive terminal leaves a really high-quality impression, both visually and haptically. The discreet RGB stripe is well accentuated without creating a fairground feeling. Thanks for that.
What sets the cooler back a bit in a direct comparison are also the somewhat too cheap pads. In fact, it looks better in the second test with pads from Fujipoly. Because then you could also catch up with Corsair in terms of RAM, VRM and PCB, especially since the GPU temperature turns out very similar. The backplate is visually a real gain, but it does not help with cooling. If you cool the coils (the total of around 5 watts of own power dissipation is rather marginal), they get louder. The overall image on the board may change by about 1 Kelvin, but these are actually already measurement tolerances. I, for one, prefer a quieter card.
As always, it is purely a question of price whether you make the already extremely expensive card even more expensive by buying a cooler that, with prices starting at 239.90 Euros in the EK store, also breaks every budget and is exactly on the same level as the Corsair cooler. But in return, you increase the added value of the NVIDIA GeForce RTX 4090 FE in various ways: you save two thirds of weight, a lot of space and even some energy, while the performance increases slightly. Once again, it’s up to you to decide whether you can afford the surcharge.
EK homepage and store


21 Antworten
Kommentar
Lade neue Kommentare
Urgestein
Urgestein
Veteran
Urgestein
Mitglied
Mitglied
1
Neuling
Veteran
1
Veteran
Veteran
1
Neuling
1
Urgestein
Mitglied
1
Veteran
Alle Kommentare lesen unter igor´sLAB Community →