


Forcecare birth: We read the EEPROM
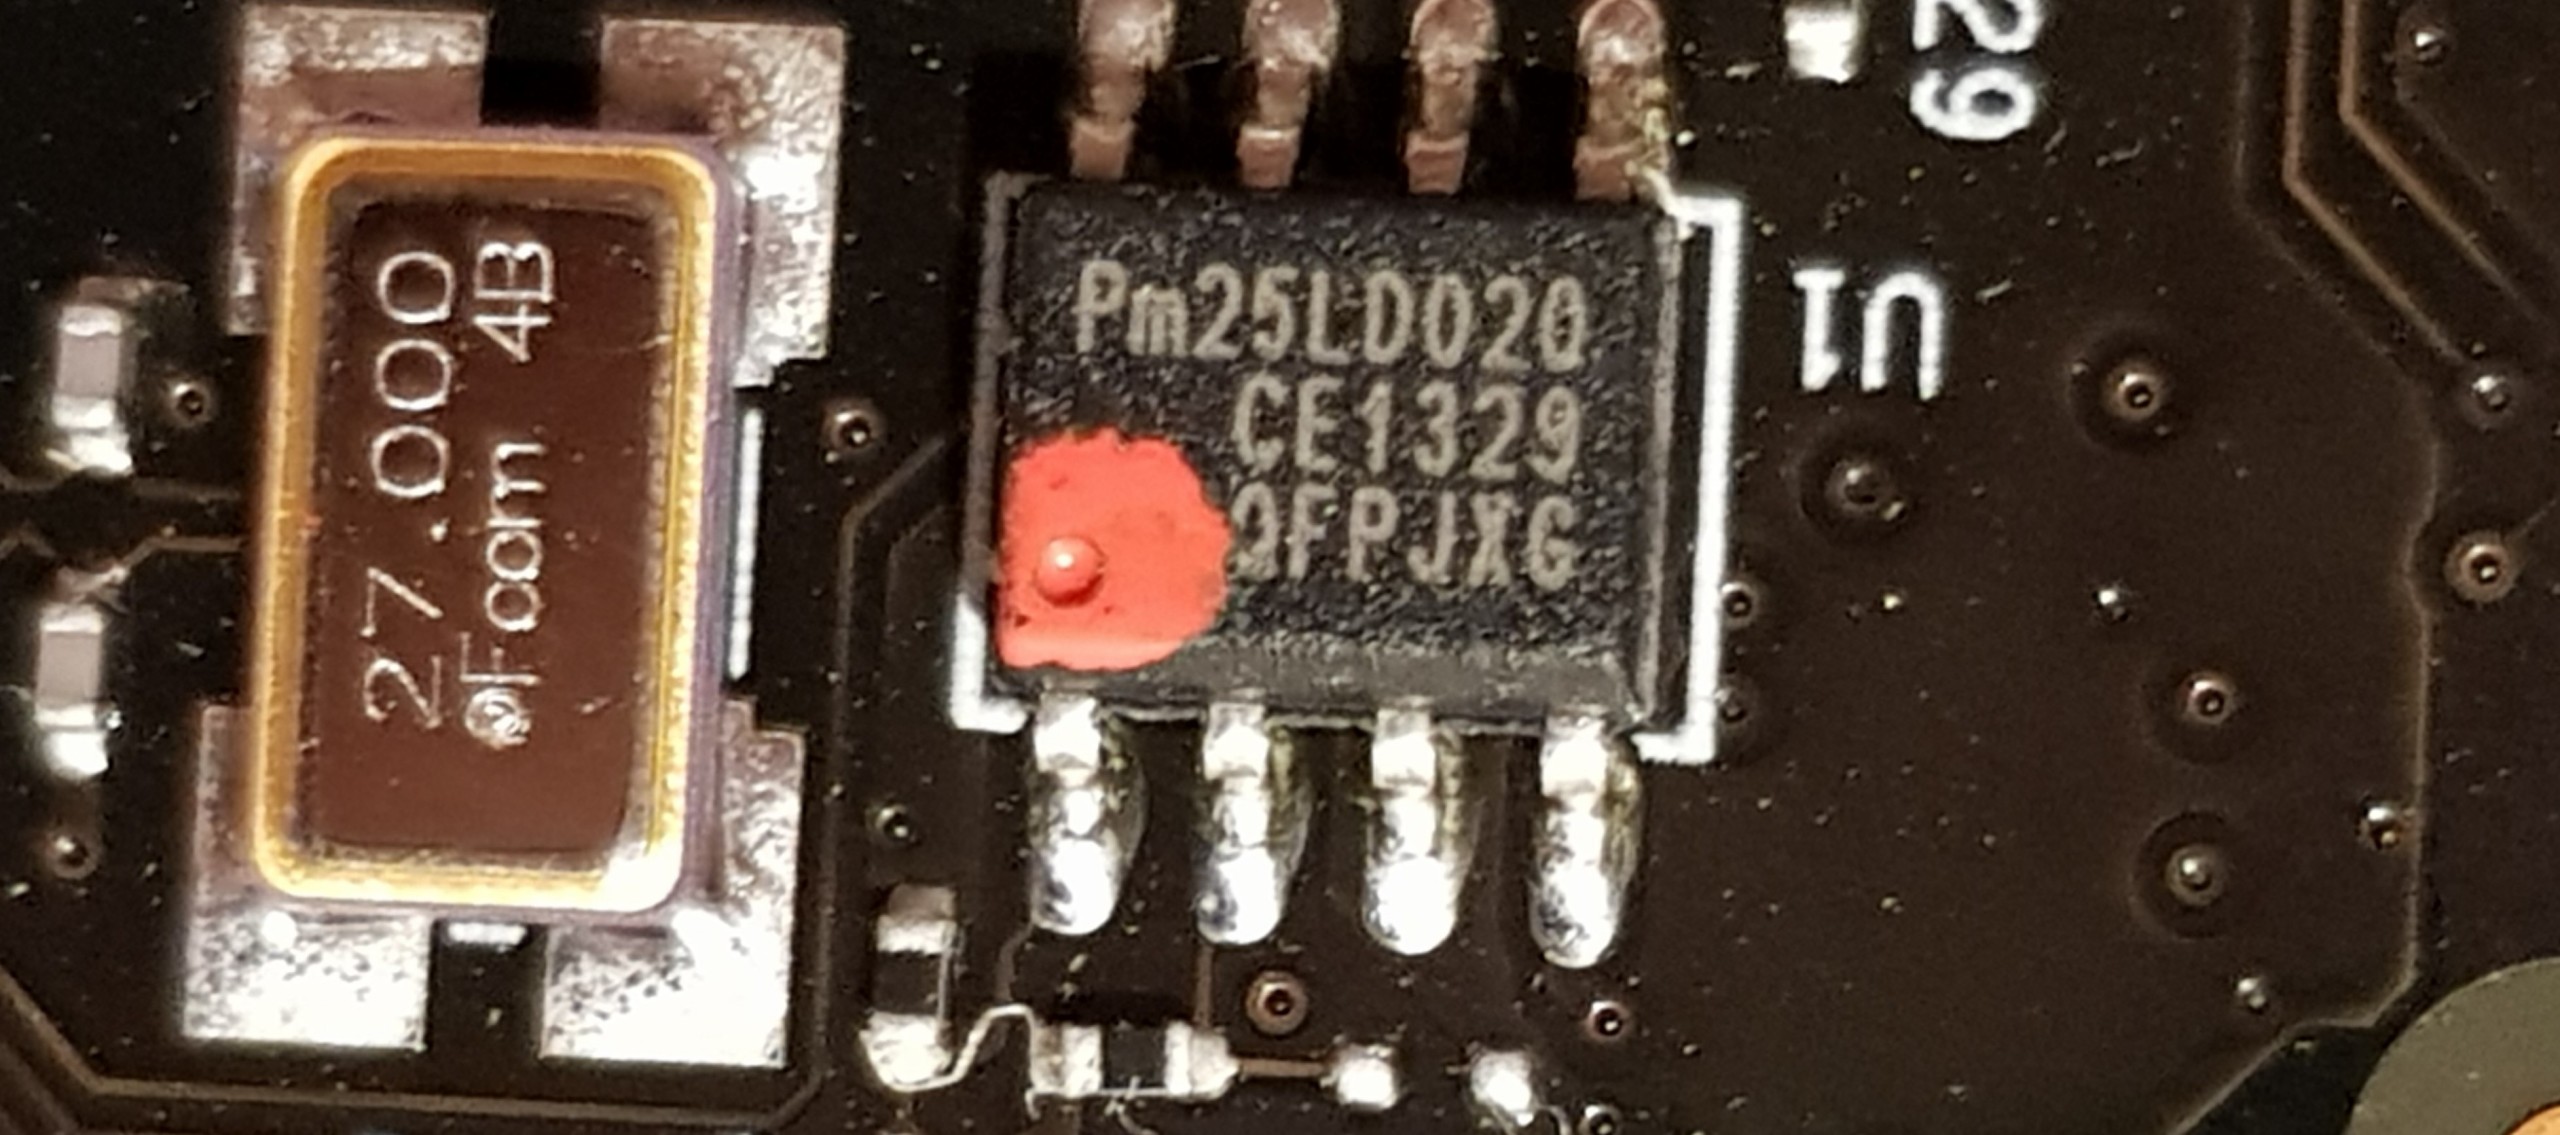
We can set aside the 1.8 volt adapter for these purposes. A glance at the chip installed on the back tells us that this is a standard 25XX080 model. Rarely, as in the following icon image, the PIN 1 of the EEPROM is marked as beautifully as is the case here with an older NVIDIA card as a reference!
In any case, the "small hole" in the image of the upper chip is striking. This is PIN 1! This is very important to avoid damage to the hardware!
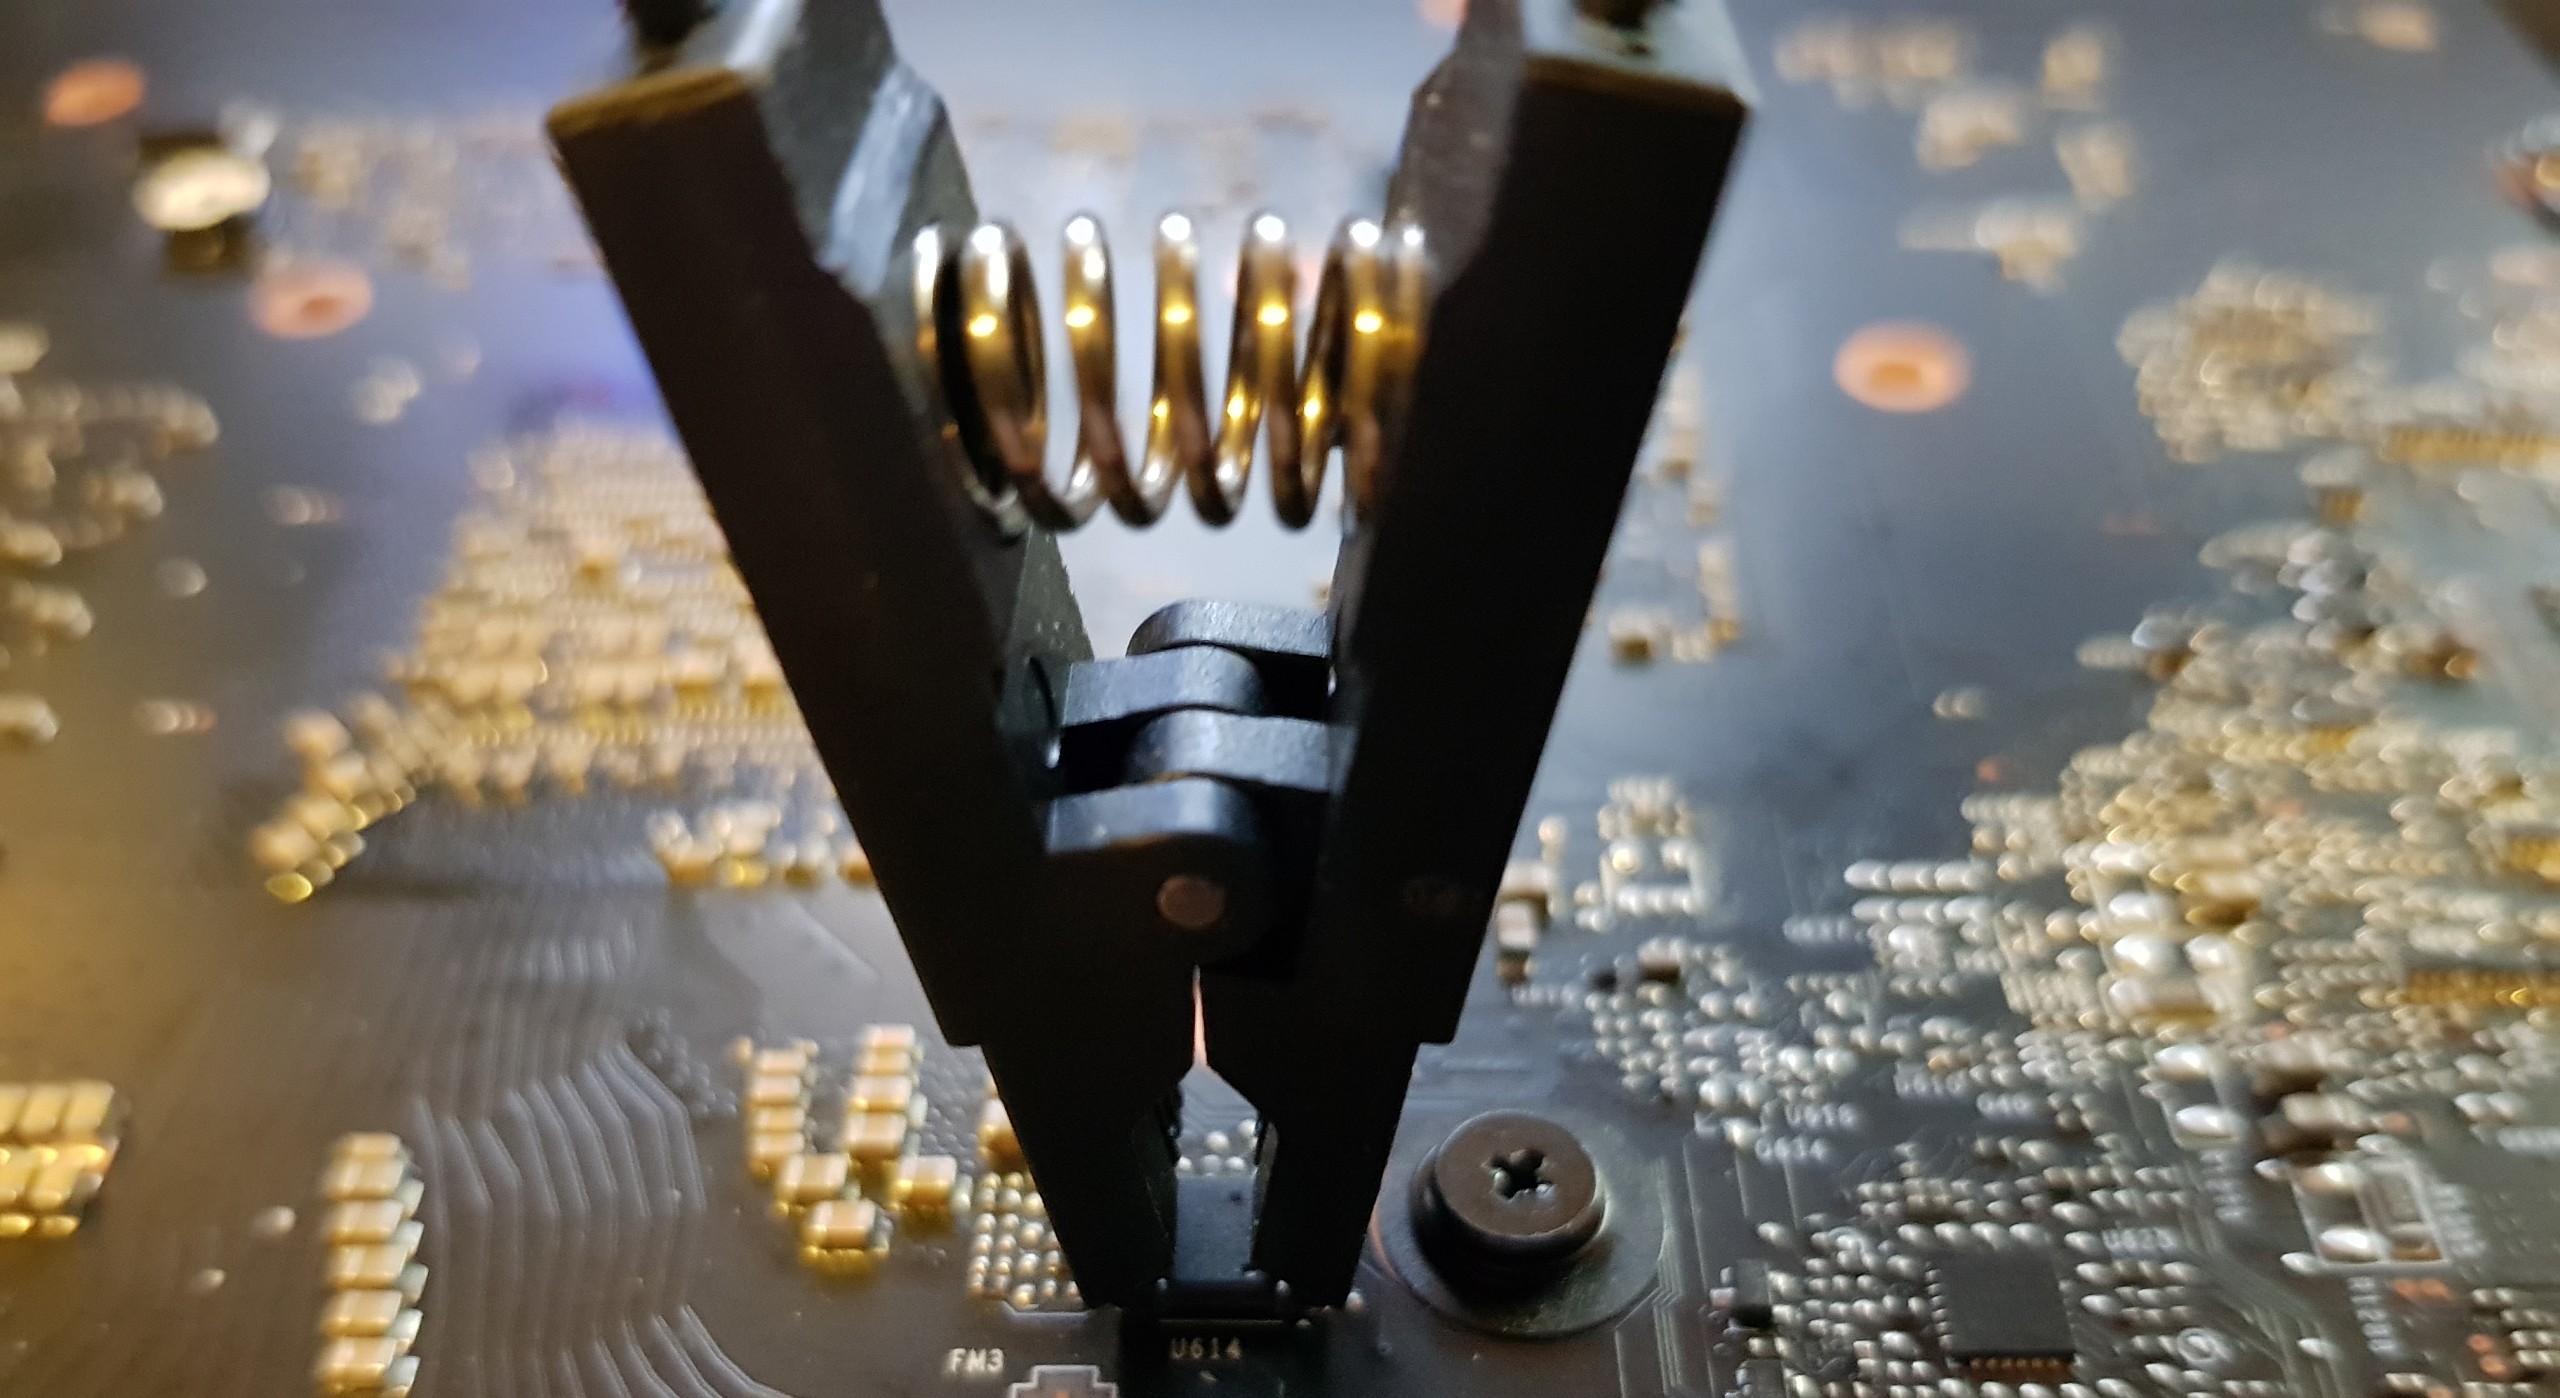
Equipped in this way, we have now installed the necessary driver and the appropriate software, clamped the pliers firmly to the chip and connected the programmer to the PC. That's it, because the rest is really little effort. The only thing that really matters is that you know the type and the necessary tension and that the pliers sit correctly. Be sure to note: the "red strand" on the adapter MUST be connected to the PIN 1 of the EEPROM! Otherwise there is a dead patient.
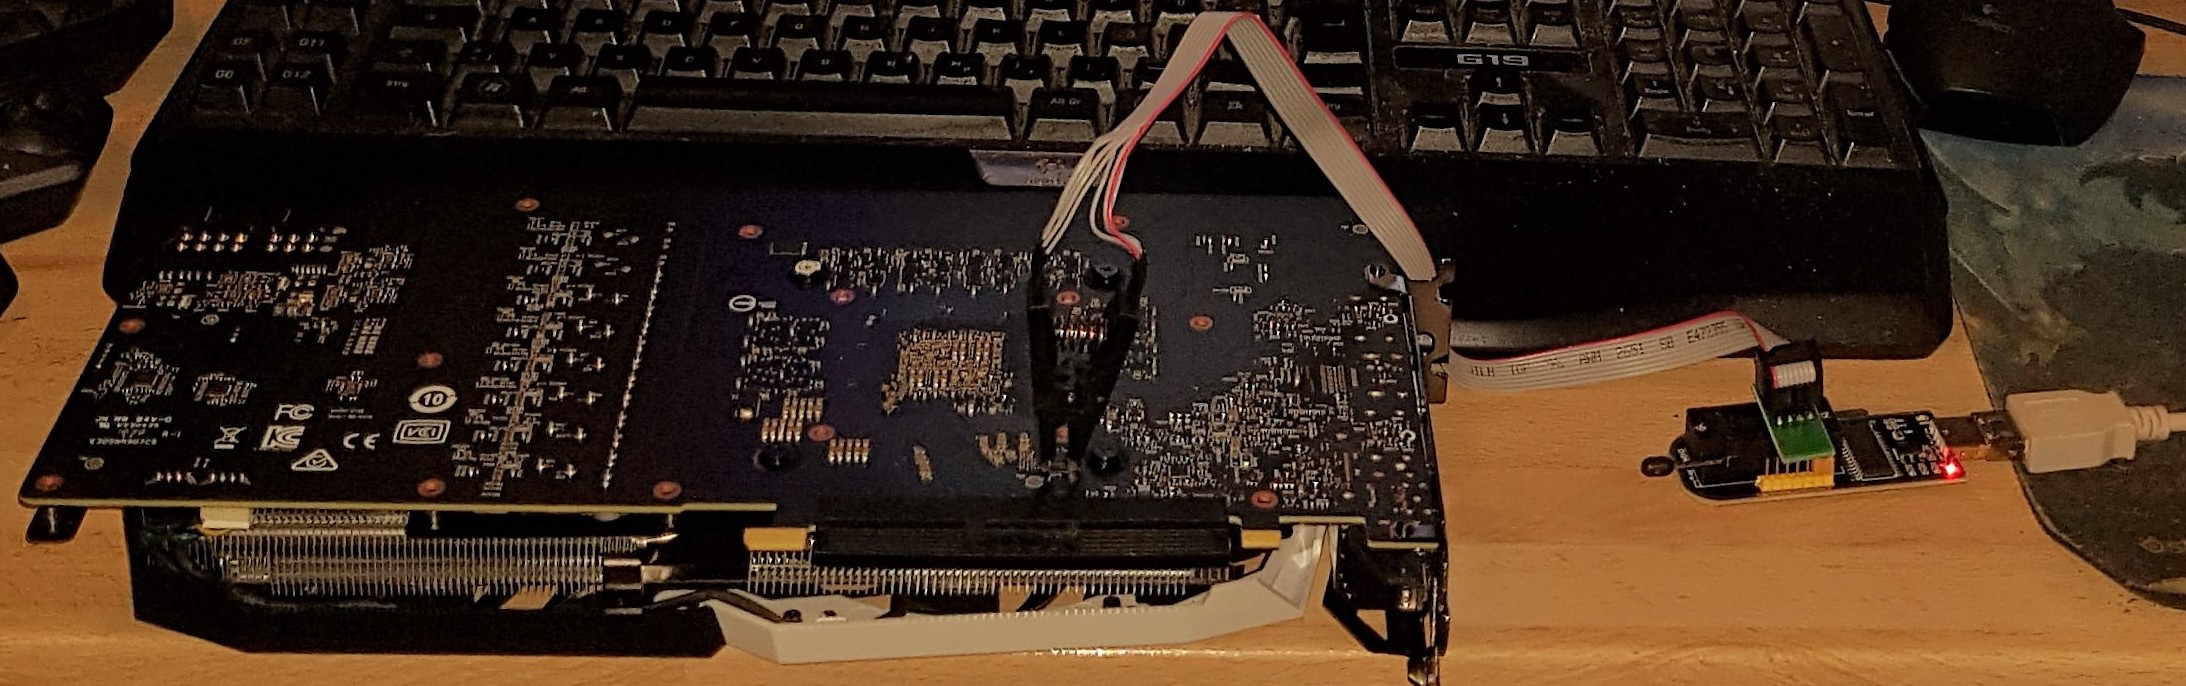
As you can see in the picture, the EEPROM is located on the back of the PCB in our test cards. So it is not necessary, at least with these two cards, to take them completely apart. However, this only works so easily and painlessly if the backplate has been screwed exclusively on the back and the EEPROM is really located there. This can vary completely from manufacturer to manufacturer, unfortunately.
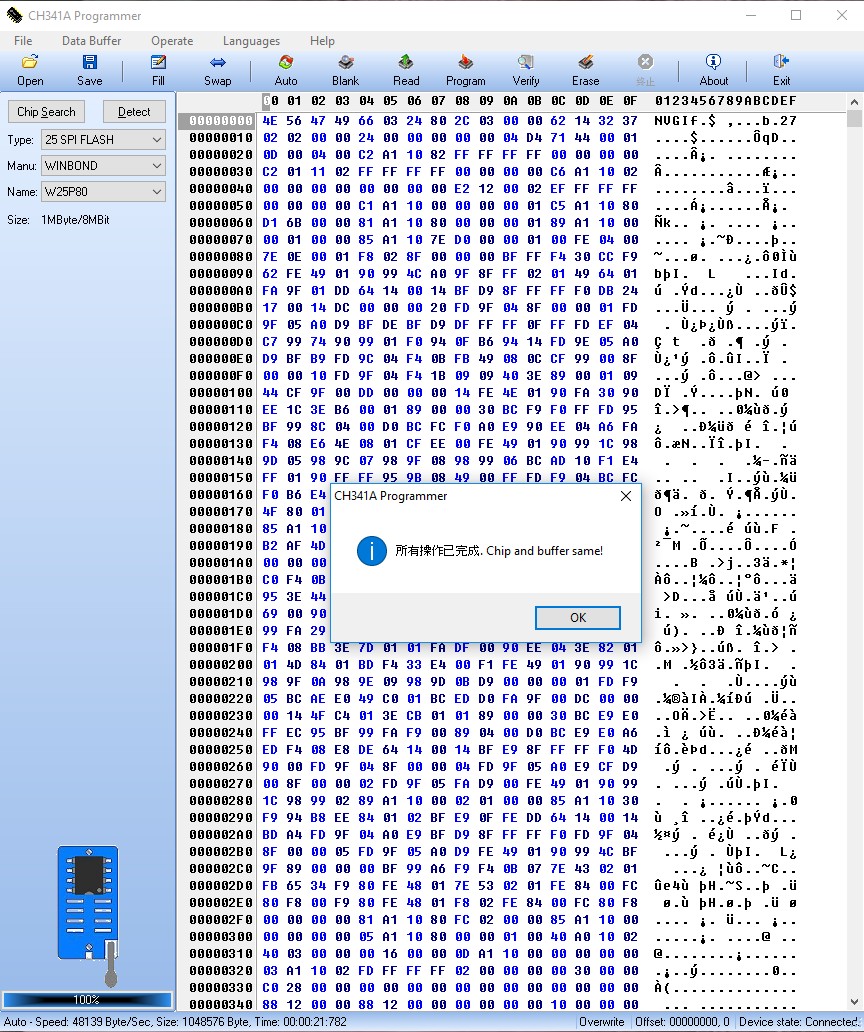
So we roughly set the chip type, in our case 25XX80, and press "Read". The BIOS, if we have done everything right, will now be read out of the chip. The programmer and the software are very flexible in terms of type selection, let's put it. The e-technician in one is a bit reluctant, but the "rough attitude" is enough and it even works! So save and finish. We still need the BIOS that we have received in the event of a case!
Now the other card with the donor brain, i.e. the GeForce MSI GeForce RTX 2070 Gaming Z, is connected and their BIOS is read out and stored in the same way. With both cards, by the way, we quickly extracted the BIOS with GPU-Z in the conventional way, you never know what something like this could be good for. But more on that.
We rewrite the MSI GeForce RTX 2070 Armor!
First you have to delete the EEPROM and you should also make sure that all contents have been deleted! You can only describe the EEPROM correctly if it has been completely deleted before. Possible data mish-mash must be ruled out, because one thing is also a fact: the data sets of what we have read bit by bit are longer than what NVflash or GPU-Z return to us as A ROM. Logical, because we read the entire chip in its full size.
![]()
Next comes the flashing of the card. We convince ourselves once again to have the BIOS of the MSI GeForce RTX 2070 Gaming Z in memory and then click on "Auto"!
Now we just have to wait for the things that are coming! Whether and how successful we were, you can now read on the next and last page!


Kommentieren