


More details about the settings + fine tuning:
- With fans, one likes to use a “downward” hysteresis, which means that the fans cool further down than the switch-on temperature. If I let a fan start at 50°C, for example, it would start there, cool down to 49°C, switch off again right away and then start again right away at 50°C – which is annoying to say the least if the fan is already audible there. So for many programs I can either activate some kind of hysteresis generically or even set it in numerical values. The AMD graphics cards do it in such a way that they switch on at a temperature of 60°C, cool down and switch off again at 50°C – a typical hysteresis.
- If very short CPU load peaks occur frequently now, case fans may constantly switch on and off. Here you can help yourself by giving the fans a certain delay to start, so 2 to 4 seconds already help a lot. In this case, the fan does not start immediately, but waits this time from reaching the trigger temperature. Within this time, however, the CPU fan has usually already lowered the temperature so much that there is no reason for the case fans to start up.
- If I control several fans through a fan curve, then these fans should all be identical in terms of diameter, maximum speed and also E-motor, because otherwise it can (and will) happen that these fans all run at the same speed in terms of fan speed in %, but due to these differences in design they convey different amounts of air and make noise.
- Several identical and therefore equally loud fans are louder than just one of them. So if I know the hearing threshold of one fan, but I use many of the same model, I have to set the hearing threshold lower.
Proof of Concept
Once all the desired fan curves have been created, it is a good idea to test them. With programs like HWiNFO64 or GPU-Z, temperatures as well as fans can be monitored specifically. I test the left part of the fan curve when the computer is idle, e.g. just when Windows is restarted – assuming that the fan control software is already running, or starts automatically at system startup. If the idle is ok, I can start to run some programs or watch on the net times in Youtube video. All of this should still not deliver any major load peaks – ideally, the fans run at low speeds here, or not at all, and nothing else can be heard.
For the right part of the fan curve, benchmarks are most useful, i.e. programs that test the maximum performance of the CPU and/or GPU. Thus, the temperatures can also be driven up quickly and it shows how this works with the fans. A popular CPU benchmark is the Cinebench, for the GPU the Furmark is something quite simple. These two give quite targeted maximum load to CPU and GPU, respectively. It is enough to make a few passes in each case. Then you can see if you are satisfied with the right part of the fan curve in terms of cooling and volume – or if you want to change the fan curve again.
The middle part of the fan curve is the most difficult to test specifically, since the usual benchmarks normally aim for maximum performance – and these usually do not correspond to real use. It makes more sense to test the middle part of the fan curve with your own, really used programs or games – most of them will provide medium loads for CPU and GPU and are thus he best test. Feel free to test everything possible and observe e.g. with HWiNFO64 or GPU-Z whether the desired temperature matches the desired volume. You simply have to approach your own optimum and adjust the fan settings afterwards if necessary.
So now the fans should be well adjusted!
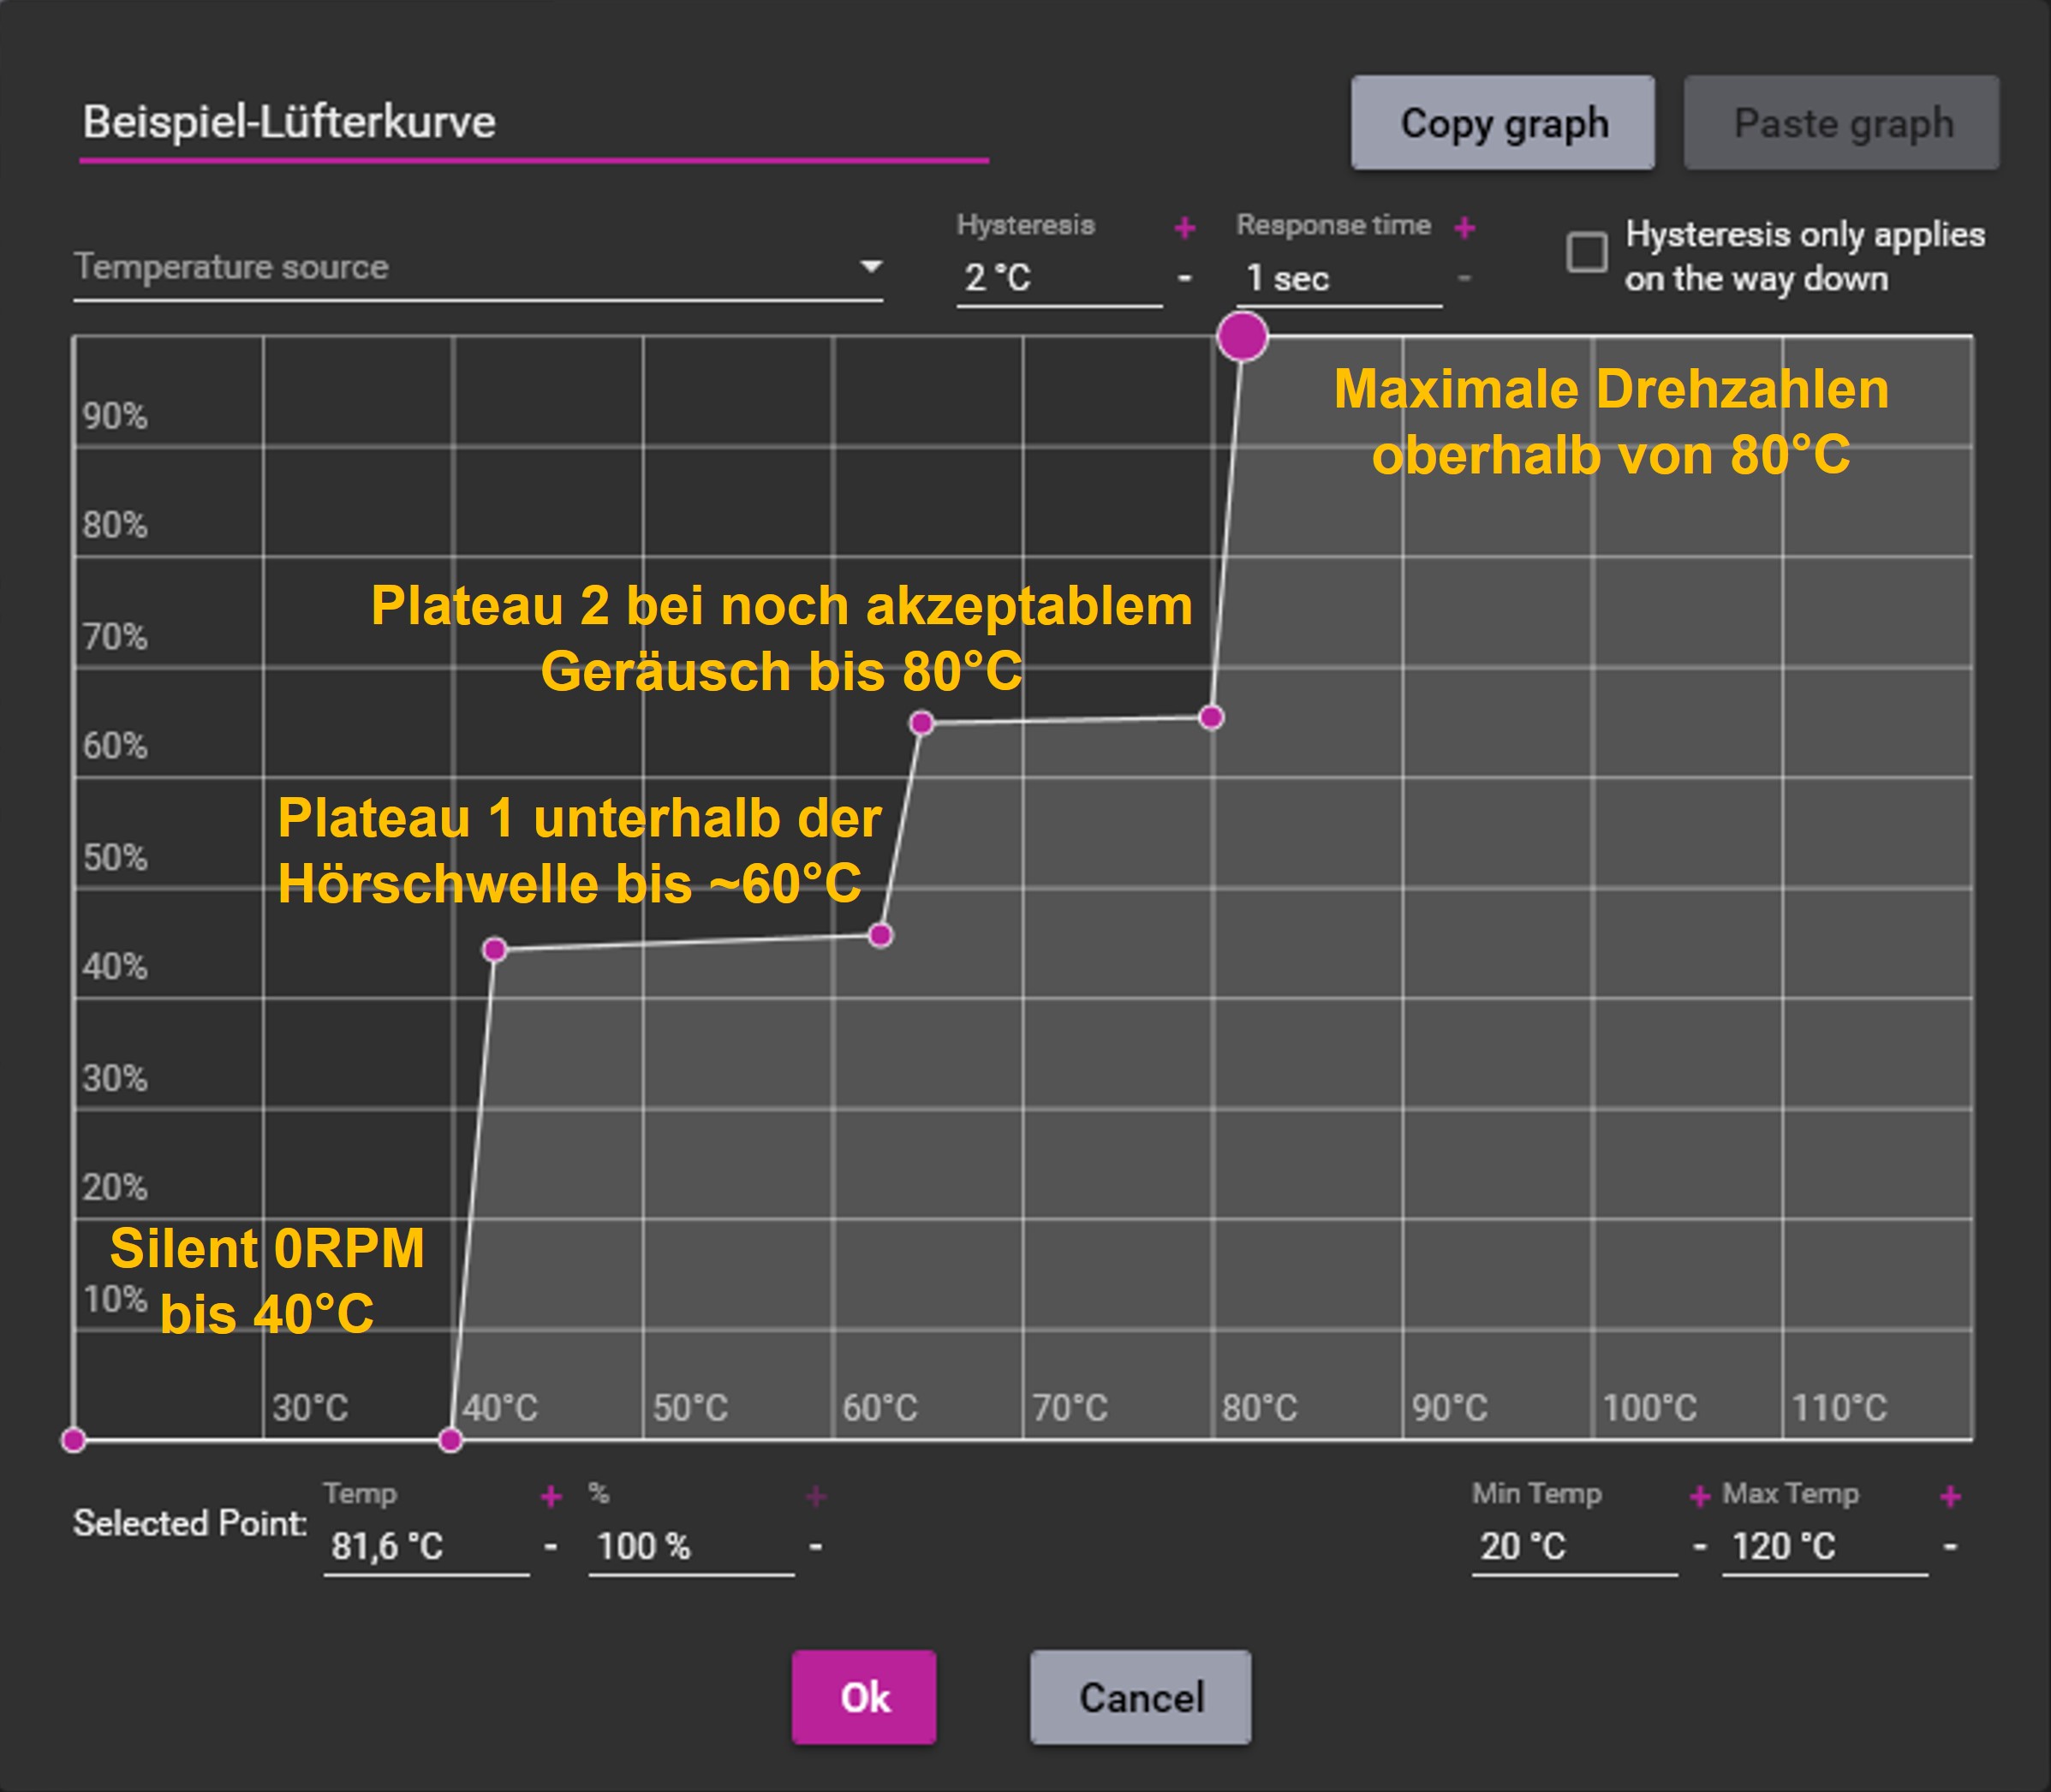
Again, back to the different fan curves mentioned at the beginning. I have tried to show the advantage of a linear curve with plateaus here, but of course it is also possible to use a purely linear curve. The progressive curve – or parts, keeps speeds and thus volume low over a wide temperature range, but then picks up significantly – this can also be considered a curve with a low plateau. The degressive curve behaves the other way round, rising steeply at first and then entering a kind of plateau at high speed.
Summary and conclusion
So, that’s it for today. For the professionals among you it is certainly nothing new, but those who are just getting into the matter are usually very quickly overwhelmed without help. And before someone accidentally loses interest, his hearing or even the expensive hardware just because the ventilation doesn’t work out, this little tutorial should help you not to do anything completely wrong, but to do everything right from the beginning.


153 Antworten
Kommentar
Lade neue Kommentare
Veteran
Moderator
Urgestein
Urgestein
Urgestein
Mitglied
Veteran
Urgestein
Urgestein
Urgestein
Veteran
Urgestein
Veteran
Urgestein
Veteran
Veteran
Urgestein
Veteran
Urgestein
Alle Kommentare lesen unter igor´sLAB Community →