


Preface and preparation
When I was asked if I would like to test the PLATFORM:6, I had to laugh for a moment. I still have to write the third part of my basement expansion story (see part 1 and part 2), but I can already reveal that I have used all the space available to me and that my desks are permanently mounted – including the flush-mounted cables for the wall-mounted monitors, etc. I can’t just throw everything over and put a new desk there. You can’t just throw everything overboard and put a new desk there!
On the other hand, the rickety tinkering table in the back corner of the room had been a thorn in my side for quite some time, and I couldn’t get the lavishly equipped desk out of my mind. My office job has made me really appreciate the height-adjustable desk, where you can work standing up for an hour or so, so your back doesn’t have to be in the same position all the time, and so on. That would be fine to have in the home office as well… After my editorial colleagues also had to decline the offer due to space constraints, I decided that the fridge would certainly find another place in the office and agreed to the review.
Initial situation: A rickety tinkering table with plenty of battle scars from many case tests. On the left of the picture you can also see the most important utensil of the office in summer – the fridge for cold drinks and the obligatory after-work beer.

When the kit arrived and was heaved into the basement with the help of the hefty UPS driver, it was finally clear to me that the fridge would definitely have to find another place.
Who just wondered why the driver helped carry it: I’ve known the good man for almost 20 years – from the computer store where I did my long-term internship.
Step 1: Get rid of the refrigerator!

Step 2: Get rid of the old tinkering table. In the future it will find a new place in the neighboring room, because on the PLATFORM:6 I will at most photograph the finished systems, but certainly not build any computers.

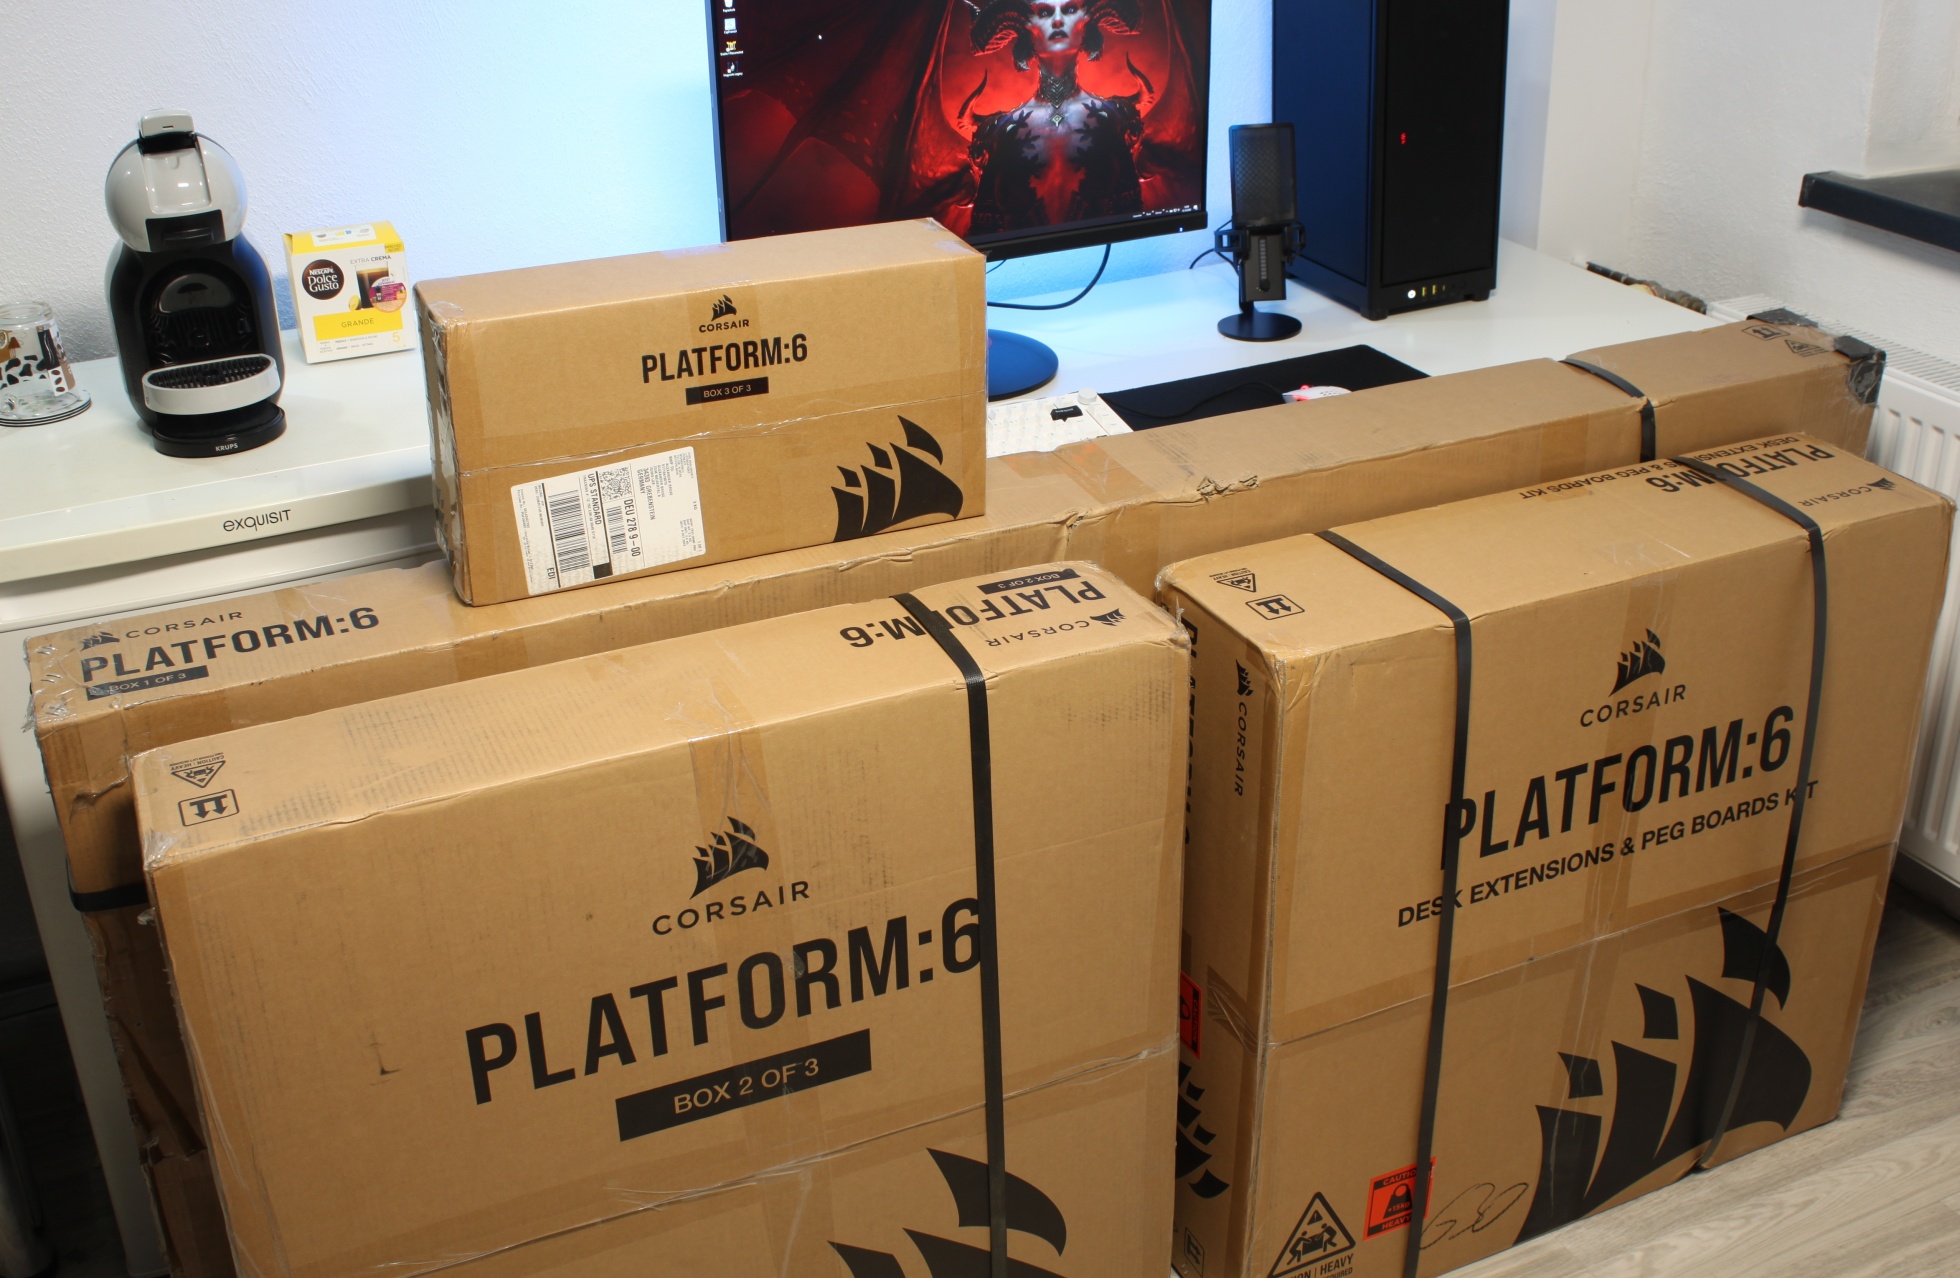
The unboxing was already on page 1, so I’m going straight to the build.
Construction
Intuitively, I had freed the tabletop from the box and left it upside down for now. Because I built the desk alone against the recommendation, I had to trick a little. In order to heave the top out of the box without scratching it, I placed the foam mat over the edge of the box, lifted the top onto the edge first at one point and then at the other, and then carefully let it slide onto the floor together with the foam mat.
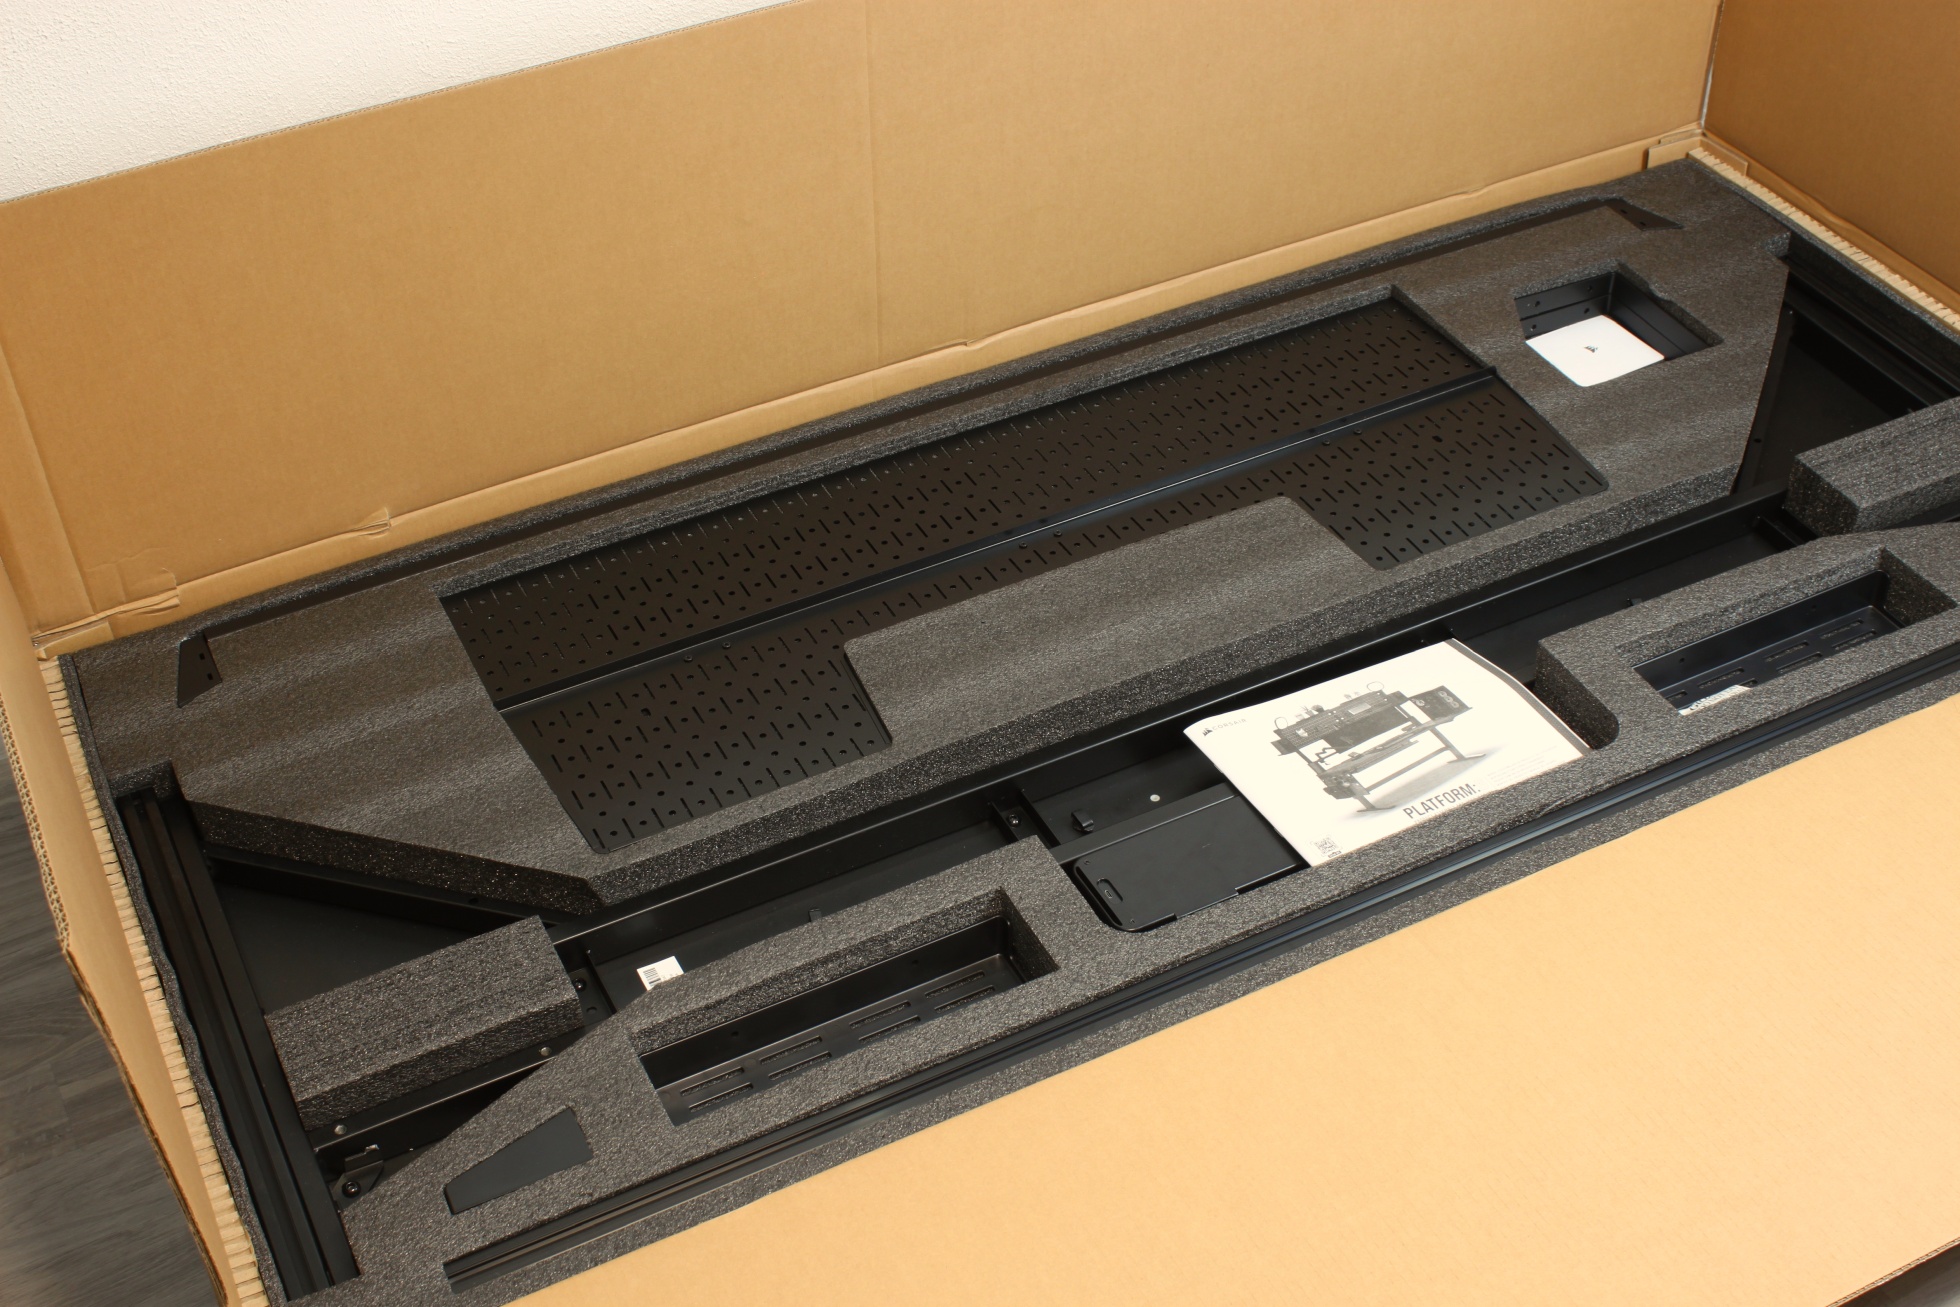


Before I do anything wrong, I thought I’d take a quick look at the instructions.

Couldn’t get started any other way than to put the plate upside down on the floor and that’s exactly what the first step of the instructions was. A blind chicken and so..

The motorized table legs are labeled and thus, at least without a right-left weakness, immediately positioned on the correct side. When screwing in the first screw, I immediately wanted to grumble – how are you supposed to turn this Allen key?

Ideally with the enclosed ratchet, Mr. Brose! Sometimes it’s worth looking inside the box first.

The table leg was quickly mounted, the stand even faster.

The basis for the desk’s cable management system is these massive support brackets:

The lush cable duct is screwed to them, which can be easily folded down later thanks to the hinge and wing screws on the front.

Quickly attach the control panel and the power supply for the height adjustment.


Fix the cables with the enclosed clips and the base is ready.

The next step is called “the big flip” in the assembly instructions. Here, the table is first erected on the back side:

And then placed on its own feet for the first time.

But before I operate the height adjustment for the first time, I wanted the whole table to stand up straight.

With the help of the good old spirit level everything was quickly straightened and the maiden voyage could begin. Okay, that went quickly and unexpectedly quietly!

A robust strut between the two table legs provides additional stability.

Then it was time to install the support rail. For this purpose, two sturdy columns with large clamps are mounted on the left and right.

Here, care must be taken to first mount one column, then insert the rail, and only then fix the second column, otherwise you will no longer be able to reach the groove.


Of course, I didn’t notice until both columns were fixed. If you don’t have any work, you make some for yourself.

You can mount all kinds of extensions on the universal support rail with so-called slot stones.

These are simply clicked into the desired groove and then tighten themselves when the corresponding component is screwed on.

Included are, among other things, two of the following plastic trays, which can be used to house the monitor’s power supply or an RGB backlight, for example.

However, I opted for the more discreet variant, because there are also some mounting points of the Rapid Route cable management system, which is already known from the CORSAIR cases, to which a strand of cable can be neatly attached with Velcro strips.

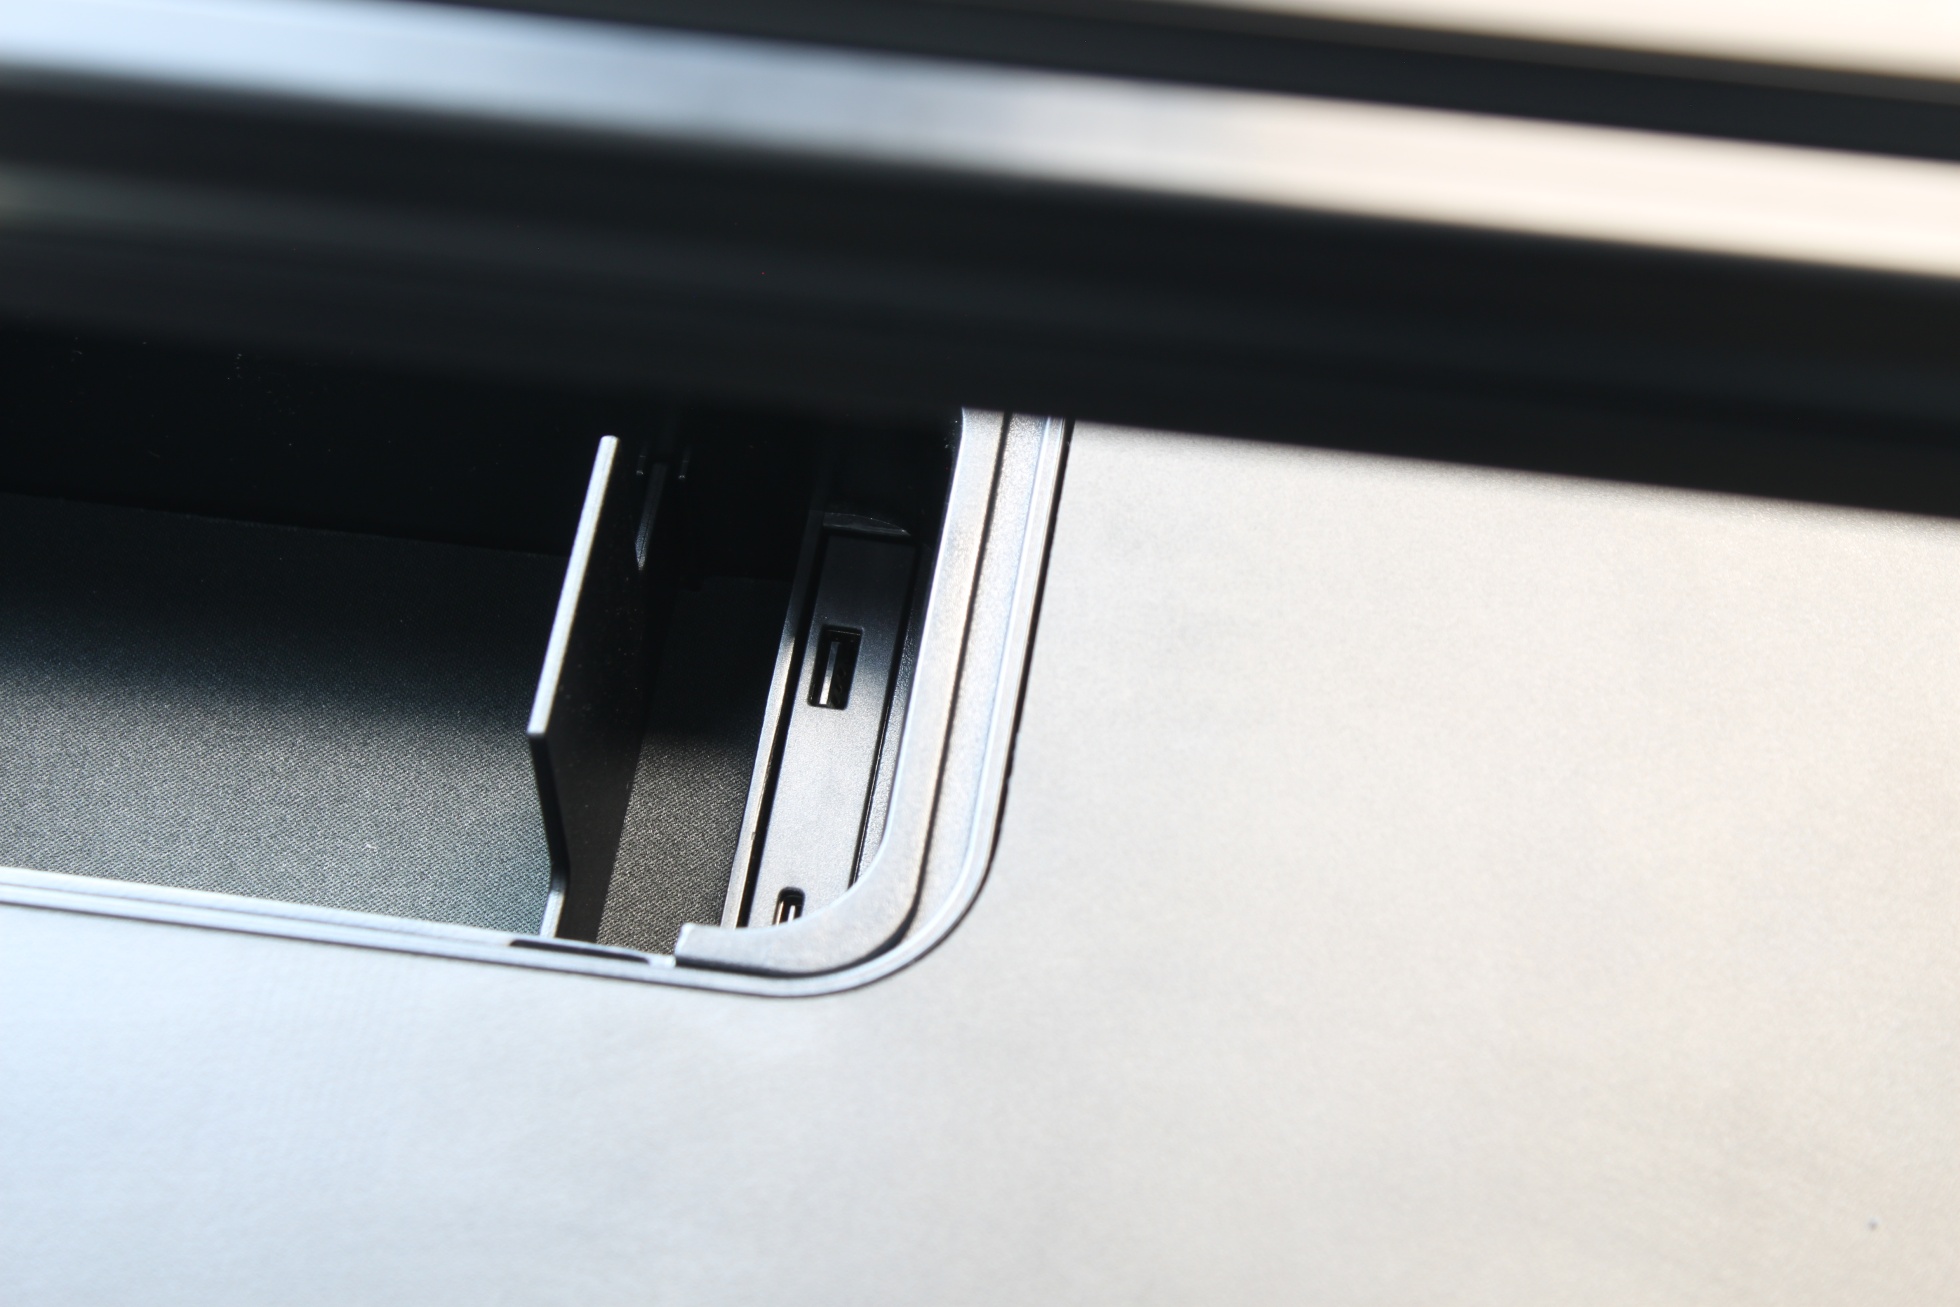
Before moving on to mounting the monitor bracket, I had to risk a look inside the small storage compartment. Large cutouts for easy cable management!

And indeed, USB (1 x Type-A and 1 x Type-C) are also available here, where the cell phone can be charged, for example.
The next step then has been the mentioned monitor holder.

Once you understand the system, the mounting is actually self-explanatory. First, the base of the mount is fixed to the carrier rail. It is very flexible because it can be moved across the entire width of the rail and thus you could certainly attach more than 2 monitors to the PLATFORM:6.


The branch for the two monitor arms is then plugged onto the base:

Two extensions and two gas pressure springs including ball joints for the VESA mounts are quickly put together.

Fixed with thick screws, the whole story makes a pretty stable and well thought-out impression.

In the last step, the 3-socket outlet, also equipped with USB (1 x Type-A and 1 x Type-C), was mounted on the tabletop. It can be fixed at the desired position on the tabletop by means of the clamp used here or also mounted on the carrier rail with a small adapter plate. Thus, the PLATFORM:6 was completely mounted in the ELEVATE variant.

Well, not quite. The Elgato adapter was still missing, which can be used to mount the WAVE Boomarm directly on the table, for example.


18 Antworten
Kommentar
Lade neue Kommentare
Moderator
Urgestein
Veteran
Urgestein
Mitglied
Mitglied
Urgestein
Mitglied
Veteran
Neuling
Urgestein
Veteran
Mitglied
Neuling
Veteran
Neuling
Alle Kommentare lesen unter igor´sLAB Community →