Cooling Fans Reviews

be quiet! Silent Wings 4 (Pro) 140 mm Case Fan Review – When the name says it all | Part 2

Fan measurement chamber and claim

And since there is currently no source that offers realistic and usable data, even in comparison, we invested a lot of time and money and simply developed our own fan measuring station with the advice of a cooling unit manufacturer and then calibrated it. Our colleague Pascal Mouchel has done a great job here and the result, the “Sarcophagus I” model, is now quite respectable. The heavy and solid body made of thick MDF boards is screwed, glued and soundproofed. How it all works and what we can and cannot measure in the end, you will learn in this article.

In the meantime, most of it has materialized really nicely, also with a lot of good feedback from the community and technical assistance from some industry partners. Of course, what we can measure from now on only meets semi-professional requirements, even though all measuring instruments have been calibrated in an elaborate and cost-intensive way. But that’s enough for all areas of PC self-construction and conversion. Of course, we are not a standardization company or the TÜV, but we try to measure everything as accurately as possible, which still remains within reasonably affordable limits.
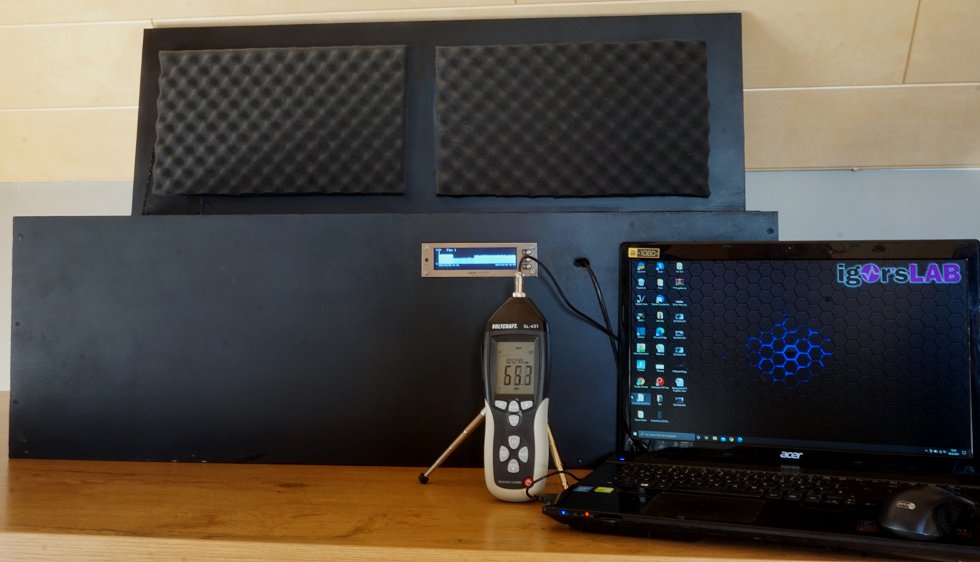
 

Measuring chamber with sound level control (measurement takes place separately)


A greatly simplified version with a long tube instead of the chamber would have been much cheaper, but it is so inaccurate due to its design that the values can only be considered a rough estimate with many errors. The pressure drop is immense and a serious sound level measurement is simply impossible due to the resonant body thus created. Values below approx. 30 CFM can hardly be evaluated meaningfully and are no longer particularly close to reality.

Tests as case fans and on radiators

Currently, there is always the question of what characteristics such a 120 or 140 mm fan really has. Not every model is suitable for all radiator thicknesses, and some supposed powerhouses lose so much pressure on radiators that they can hardly be called suitable. The information on volume flow (“throughput”) and static pressure in the data sheets does not help if something works well on a slim radiator and fails completely on a 45 mm radiator.

In the picture we can see the middle partition between the two chambers, which supports the fan and also the radiator. Decoupling is, of course, a top priority, and we thankfully had expert help in calculating the volume for the chambers. Each of the chambers is also expediently lined with nubby foam and designed in terms of material technology so that there are hardly any disturbing influences.

The “honeycomb” behind the fan was recommended to us by Black Noise and the cooling manufacturer. This means that all coolers are equally well integrated, because each has a different exit angle and this is exactly what can be compensated for. However, due to the honeycomb, there is no tear-off edge and the airflow is directed directly to the outlet.

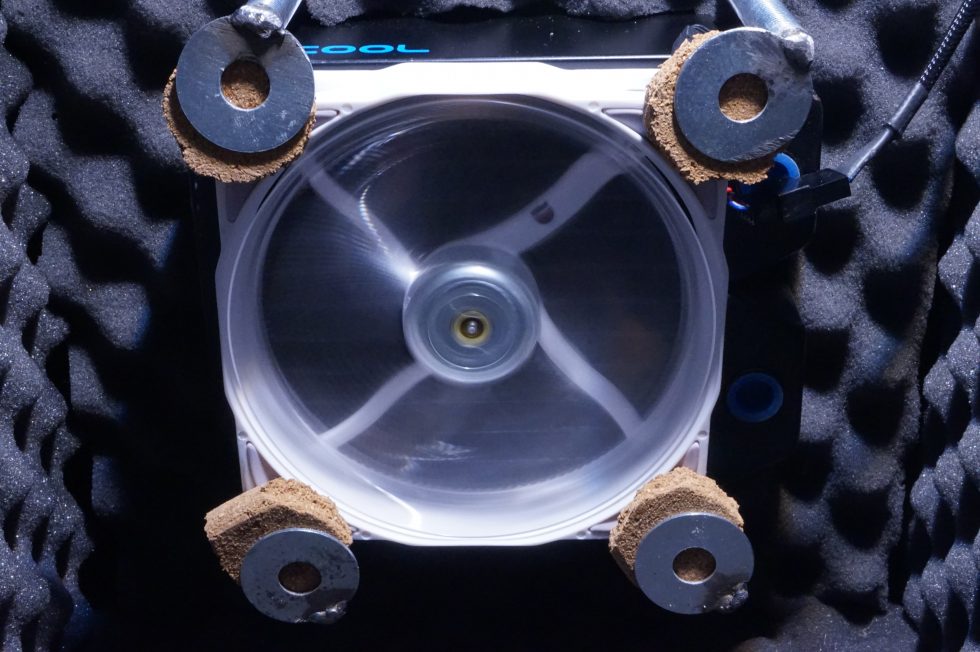
Radiators and fans are decoupled and screwed tight with their own clamping device. In the picture you can see very nicely the improvised clamp with thick washers and insulation material as a base. The control is done by an Aquaero purchased by us from Aqua Computer, so we can control and test the fans both by voltage (DC) or by PWM. Both are needed, because many fans, as some people don’t know, can’t be brought to the lower and upper limits of the speed range with pure voltage regulation and also show other anomalies, about which we will write something at the appropriate place.

Volume flow

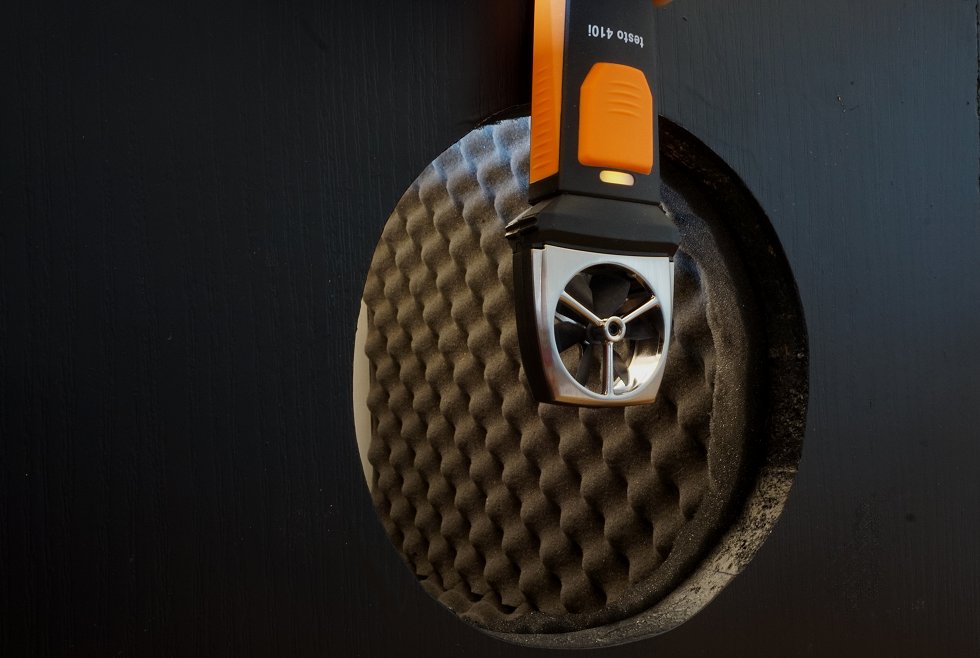
We measure the volume flow at the outlet of the second chamber, where the air is blown out. This range is covered relatively accurately by comparative measurement in the measurement setup of the refrigeration partner, so that our testo 410i now delivers quite reliable results to the electronic measurement data acquisition, which match the reference data of the professional measurement quite well. What is important here is not the price of the equipment, but rather the appropriate positioning and accurate calibration with series of comparative measurements.

Static pressure

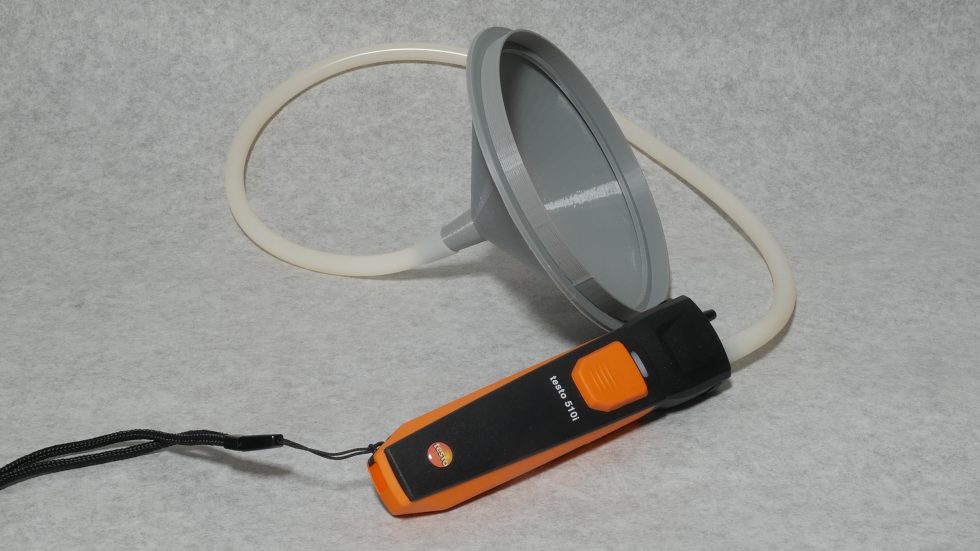
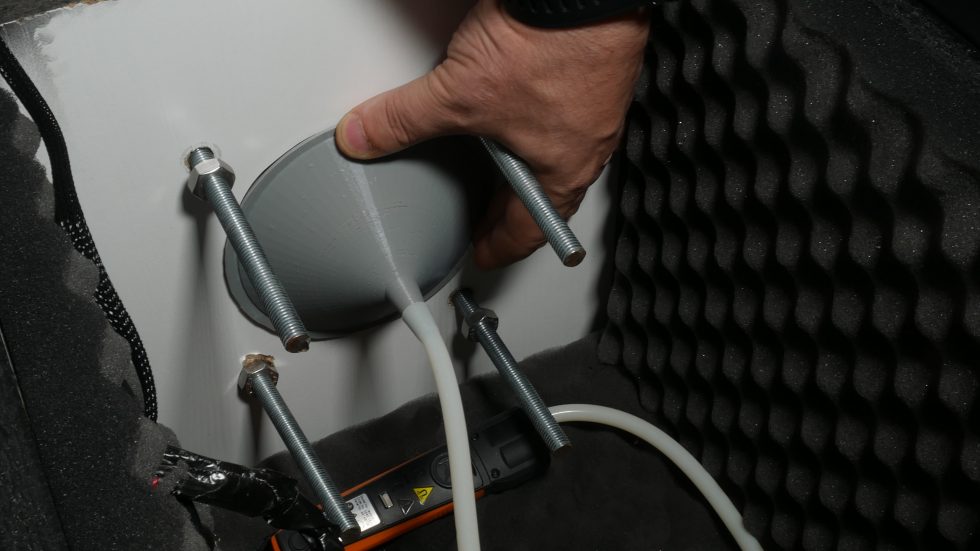
The measurement of the static pressure is carried out as usual as a differential pressure measurement. For this purpose, the special “bowl” is clamped so that it closes airtight. Here, too, of course, measurements were taken with borrowed, professional equipment and time-consuming calibrations were performed. For this measurement, we also use the 510i, a device we purchased ourselves from testo, and also collect the data wirelessly. Since many try to copy in the meantime, the angles in the 3D graphics and also in the following two photos are of course not quite correct, because without knowledge of the exact dimensions of the funnel, a copy is virtually pointless and it also only works really quite accurately within a quite small tolerance range. We also made comparative measurement series for this once again. In practice, the whole thing looks like the two pictures below.
The installation is trouble-free and the pressure receptacle now also closes perfectly thanks to a special seal. The rest is just a matter of calibration, which we also did once again. It is unlikely to be much more accurate with semi-professional methods. However, especially in printing, errors are quickly possible, which above all are not immediately recognizable. Even if the deviations are small, we will still measure all previous fans again and prepare them for the database.


Noise emission

Measuring the noise level is a bit tricky, but works quite well in the evening hours at the measurement location. We chose dBA or dBC because values below one sone can hardly be reliably measured with still affordable and calibrated equipment and the software conversions of various software programs tend to confuse and become inaccurate in this low range. Then rather dBA, especially since most people can do something with it. The measuring distance is 50 cm from the center axis of the fan inlet.

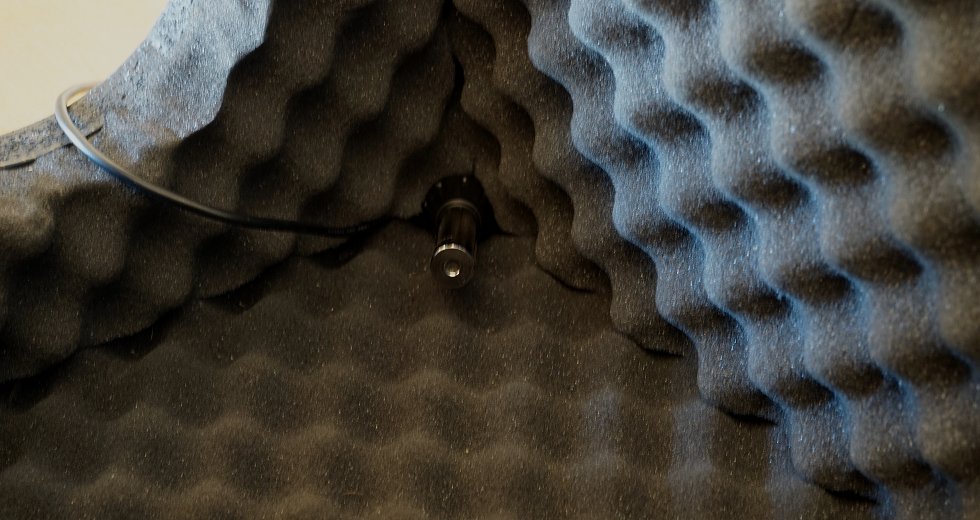
We take two approaches to these measurements. For quick and plausibility tests, we use a Voltcraft SL 451, which we have calibrated according to ISO and whose microphone we have placed decoupled from the body. The data acquisition takes place outside the measuring chamber. The Voltcraft SL 451 was kindly and uncomplicatedly made available to us by Conrad Elektronik. It is also the only component that has not been acquired by ourselves. All other measuring instruments including accessories and electronics were purchased by us or provided from private stocks.

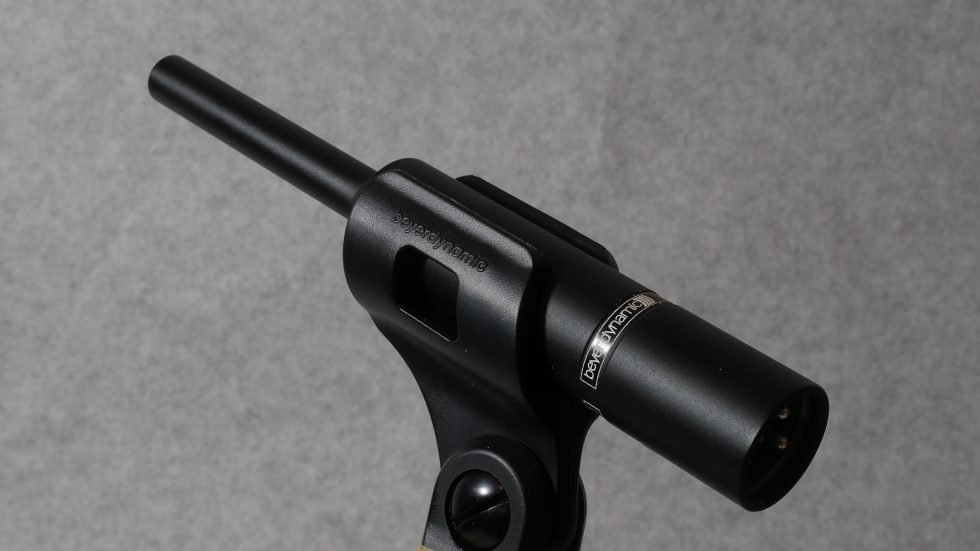
Our own acquisitions also include a calibrated measurement microphone with XLR connector and low-noise USB interface. The measurements are taken in the evening and night hours in rural areas, so that one can already be quite satisfied with a basic level of below 26 dB(A). Since everything will be above this anyway during the measurement setup with a distance of 50 cm, this should therefore not be a problem.

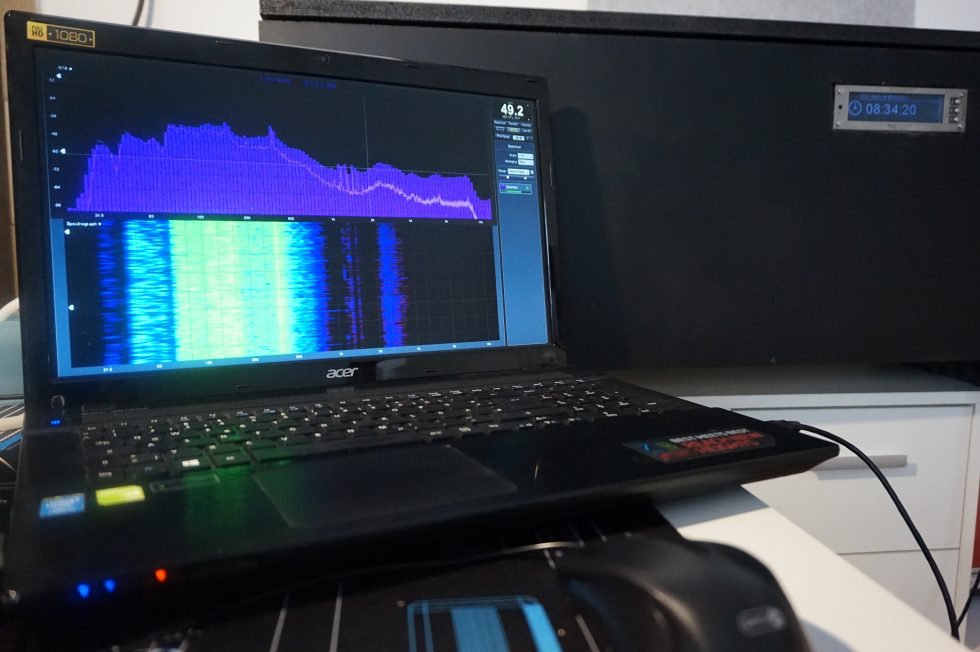
We also took the feedback from the community and evaluated the frequency band for each measurement, so you not only get the SPL values (sound pressure) in dB(A), but also a nice frequency analysis that helps to describe the sound character perfectly. Bearing or motor noises, vibrations or the tearing noise on the rotor – everything becomes mercilessly visible with it.

We won’t go into certain details and solutions in this article, because there is still some foreign know-how in this setup and some things would probably be too far for the normal consumer. Whoever is interested in this and would like to build something like this, is of course welcome to contact us. This also applies to all those who would like to contribute suggestions and tips, because we are still at the very beginning and can also still correct or expand.

New metrics and graphics

Apart from the fact that we now also record the minimum and maximum values for the flowing currents and the power consumption, we have fulfilled two further wishes of the readers and extended the measurement series in this respect. For the detailed description and explanation, please read the article linked here. It’s all in there.

Lüfter-Tests 2.0: Feedback, Messungen und neue Metriken für Gehäuse und Radiatoren am Beispiel des Phanteks T30

Test setup  
Housing / measuring chamber Two-chamber measurement setup with sound insulation, fully air-conditioned room
Volume flow and flow velocity testo 410i (calibrated)
Differential pressure measurement testo 510i (calibrated)
Sound level measurement Measuring microphone Class 2 and USB interface, Smaart 7, Voltcraft SL 451 (Conrad, permanent rental, calibrated),
Speed control and fan control Aqua Computer Aquaero 6 Pro
Commissioning March/April 2021


Kommentar

Lade neue Kommentare

b
bluedtke-dev

Mitglied

12 Kommentare 8 Likes

Vielen Dank für den Test! Habe schon länger überlegt, mal mit neuen 140mm Lüftern auf meinem Alphacool Aurora Pro 420 rumzuprobieren. Wäre da nicht der Preis...

Eine Kleinigkeit: auf Seite 5 ist statt dem Diagramm für den statischen Druck in mmH2O das Diagram für Volumenstrom in CFM aufgeführt.

Und noch was: Ich weiß nicht wie einfach es für euch ist - aber ein Diagramm mit Lautstärke vs. Volumenstrom fände ich echt toll. Ich weiß, wurde gerade erst umgestellt, aber man müsste das aus den vorhandenen Daten ja eigentlich errechnen können, oder? Ggf. mit einem Skript?
Die Diagramme mit RPM machen es natürlich einfacher, die Einstellung zuhause zu replizieren. Für meine persönliche Einschätzung eines Lüfters finde ich allerdings "Befördertes Volumen pro Dezibel" (oder so ähnlich) interessanter. Quasi die "Lautstärke-Effizienz".
Wenn es für euch viel Aufwand wäre, muss es nicht sein. Aus den vorhandenen Grafiken kann man es ja auch schlussfolgern. Vielen Dank nochmal :)

Antwort Gefällt mir

Igor Wallossek

1

10,222 Kommentare 18,926 Likes

Slider korrigiert, Danke! :)

Antwort Gefällt mir

G
Guest

Hm ehrlich gesagt wäre für mich das Aufdröhnen bei 700 und 1000 U/min eher ein Nogo oder auf jeden fall sehr, sehr unschön. Das kann ja doch ziemlich nerven. Vor allem ist das ja dann ein Regelbereich, der oft getriggert wird. Mir ist es egal, was der Lüfter über 1000 oder so macht. Meine Lüfter laufen eigentlich dauerhaft bei rund 300-400 (NF-A12x25) und im normalen Betrieb eigentlich selten bis nie über 800-900 Last. Über 1000 finde ich schon relativ laut und mitunter störend und die eigentlichen maximalen 2000 finde ich schon mega übertrieben. Also wirklich total übertrieben. Dass der 140er dann sogar 2400 macht und der 120Pro 3000. Wahnsinn. Aber ehrlicherweise muss man die Pro-Version dann ja auch nicht kaufen, schon korrekt.
Für mich jedenfalls ist die Lautstärke zwischen 300 und 1000 oder sagen wir 1200 U/min viel wichtiger als der Rest. Und wichtiger da der Bereich unter 1000 U/min. Aber da sind die Menschen natürlich auch unterschiedlich gestrickt, ganz klar. Und es kommt vor allem darauf an, ob man bspw. den PC auf oder unter dem Tisch stehen hat, schallharten Boden wie Fliesen hat etc.

Antwort 4 Likes

F
Furda

Urgestein

663 Kommentare 371 Likes

Hmm, der 140er scheint trotz etwas höherem Volumenstrom nicht besser performen zu können als der 120er. Komisch...

Die Lautstärke-Spitzen bei 1000 rpm (und 2000) sind ein no-go, vor allem bei dem Preis!

Schon krass, 30 Euro für Plastik und ein bisschen Kupfer. Mehrere hundert Euro für einen Build. Sehe ich nur für Enthusiasten. Der non-pro zu 22 Euro, für ein zwei Gehäuse-Lüfter, mag ok sein, wenn die Lautstärke-Probleme in den Griff zu bekommen sind.

Antwort Gefällt mir

Thy

Urgestein

1,843 Kommentare 744 Likes

Man muss das Rad ja auch nicht ständig neu erfinden, wenn es schon eine funktionierende Lösung gibt. Aber wahrscheinlich fehlen be quiet! dafür ein paar Patente.

Antwort Gefällt mir

F
Furda

Urgestein

663 Kommentare 371 Likes

Die "funktionierende Lösung" bringt halt nur dem einen Unternehmen allein Kohle in die Kasse.
Ausserdem belebt Konkurrenz den Markt und sollte für den Endkunden von Vorteil sein.

Antwort 1 Like

P
Pokerclock

Veteran

441 Kommentare 371 Likes

Signifikante Verbesserungen wird man wohl nur noch erreichen, wenn man die Lüfter deutlich dicker gestaltet. Wenn ich mir die kolportierten 800 Watt Grafikkarten und 300 Watt CPUs so ansehe, müssen wir irgendwann von diesem "Standard" mit 25mm abrücken. Mal ehrlich, eigentlich ist doch immer genug Platz im Gehäuse? Also auf geht's. Wo sind die 40er bis 50er Lüfter? :alien:

Antwort Gefällt mir

Thy

Urgestein

1,843 Kommentare 744 Likes

Ja, fände ich auch gut, wenn be quiet! mit diesem Lüfter konkurrenzfähig oder besser wäre.

Antwort Gefällt mir

LëMurrrmel

Veteran

168 Kommentare 137 Likes

Antwort: im Server natürlich! :cool:
Leider nur mit 40mm und 80mm Rahmenbreite. Und extra laut natürlich, dafür mit ordentlich Luftzug 🌪️

Hier ein Exemplar mit ca. 45mm Tiefe und 80mm Rahmenbreite in seinem natürlichem Habitat: einem 2HE Dual-Socket-Server mit 5er Lüfter-Reihe (Hotswap-fähig).

View image at the forums

Antwort 2 Likes

Pascal TM-Custom

Urgestein

1,122 Kommentare 1,361 Likes

Die Peaks wird aber der Normale User nie vernehmen da müsst ihr mit dem Ohr genau auf Lüfter drauf.

Ihr dürft eines nicht vergessen wir haben Messgeräte die sehr empfindlich reagieren. Klar das unser Micro alles erkennt aber im Normalen Betrieb wird das kaum einer merken und wenn es bei 1000RPM Brummt dann nimmt man 1050 oder 950 das macht unterm Strich absolut keinen Unterschied.

Jeder Lüfter egal ob Highend oder Günstig hat irgendwo ein Humming/ Resonanz im Drehzahlband jetzt mit denn neuen Messungen sieht man das alles wir gehen ja 100er Schritte nach oben mit der RPM es gibt sicherlich Lüfter die wir nicht erwischen mit Humming aber auch nur weil es sein kann das z.b bei 850 RPM es brummt und wir es durch die 100er Schritte nicht bemerken.

50er Schritt ist aber vom Aufwand noch extremer und auch sehr schwer zu treffen. selbst die 100er also z.b genau 1000 oder 800 usw. ist schon Sportlich man hat immer +- paar RPM aber da können wir nichts machen.

bq kann man hier nicht wirklich einen Vorwurf machen.

Und wir finden 100er Schritte ist mehr als ausreichend ich hänge jetzt schon Pro Lüfter mehrere Stunden dran bis ein Lüfter mal fertig ist.

Antwort 4 Likes

Klicke zum Ausklappem
Pascal TM-Custom

Urgestein

1,122 Kommentare 1,361 Likes

auch Noctua hat im Drehzahlband stellen in denen es brummt. Jeder Lüfter hat das, schaut euch alle Reviews an die wir gemacht haben und hört euch die Langzeit aufnahmen an, da hört ihr immer wieder ein heulen das ist Humming. 140er Lüfter haben meistens immer mehr denn drang zum Humming/ vibrieren als 120er.

Antwort 4 Likes

RAZORLIGHT

Veteran

356 Kommentare 262 Likes

Wenn es nicht ein so ausgeprägtes Humming wie bei den Arctic P12/14 ist, denn das hört man sehr.

ps. Danke für den Test!

Antwort Gefällt mir

Pascal TM-Custom

Urgestein

1,122 Kommentare 1,361 Likes

nee also mich stört es Persönlich nicht bei der dBa aufnahme hab ich immer ein Headset an und hör genau das was das Mikrofon hört.

Klar wenn man dann das Humming hört ist das ein wooow was ist da los Effekt, geht man aber dann an die Box ran und macht sie auf dann merkt man ok ist nicht so Wild. Wie es sich im ersten Moment angehört hat.

Aber auch hier ist jeder anders von der Wahrnehmung was ich nicht schlimm finde lässt dir oder einem anderen die Nackenhaare hochstehen. Lüfter kauf ist ja wie Ü-Eier keiner weiß was man bekommt bis man es auspackt und spielt. :D

Antwort 2 Likes

Tronado

Urgestein

3,764 Kommentare 1,968 Likes

Gut, dass du das noch relativierst, das "schlimme Humming" bei den Arctic P12/P14 hat schon die Runde gemacht, obwohl das 98% der Käufer kaum wahrnehmen werden. Nach eurem Test hieß es von allen Seiten "aber dieses Humming!". Vorher war keine Rede davon. Die Lüfter sind ja trotzdem für 5-7€ jedem Standard-Gehäuselüfter haushoch überlegen.

Antwort 4 Likes

Pascal TM-Custom

Urgestein

1,122 Kommentare 1,361 Likes

jaaaa man muss ja Kirche im Dorf lassen und sagen das was wir da machen ist Natürlich schon extrem Test bzw sehr sehr genau. Aber ihr wollt es ja so :D Alsooooo bitte.

Wir sind wirklich stolz auf das was wir da Leisten. Und mit eurer Hilfe wurde es ja immer besser. Daher auch mal ein Dickes Danke an alle die Ihre Ideen eingebracht haben das wir heute da stehen wo wir jetzt angekommen sind.

Nächste Stufe ist die Datenbank.

Antwort 4 Likes

Lagavulin

Veteran

229 Kommentare 187 Likes

Vielen Dank an Dich Pascal und Igor für den Test und Deine Erläuterungen zur Einordnung der Messwerte (Humming etc.). Auf die Datenbank freue ich mich sehr.

Antwort 2 Likes

ApolloX

Urgestein

1,674 Kommentare 951 Likes

Sehr interessant, danke. Aber bei 20€+ sind die schon auch nicht mehr günstig. Hm ...

Antwort Gefällt mir

RAZORLIGHT

Veteran

356 Kommentare 262 Likes

Also ich meine mich zu erinnern, dass das Humming auch schon vor dem Test Thema war, zumindest im englischsprachigen Raum.

Ich hatte selber einige P12/14 hier und das Humming war selbst dann sehr prasent, als ich es mit meinem popeligen Smartphone Mikro aufgenommen habe, kann dir die Samples gerne zukommen lassen, sind auf Soundcloud.
Wenn es nur bei 1-2 Drehzahlen vorkommt ok, aber bei mir ist es genau anders herum, ich muss regelrecht die Drehzahl suchen wo mir die P12 ARGB die ich derzeit auf der Liquid Freezers 360 habe, kein Humming produzieren, sind auch über ein Jahr eingelaufen.

Antwort Gefällt mir

F
Furda

Urgestein

663 Kommentare 371 Likes

@Pascal Mouchel
PWM ist ja Pulsweite in Prozent %. Rechnet Ihr also für Eure Messungen die Schrittweite von 100 Rpm in Prozent entsprechend runter, also rund 8% pro 100 Rpm bei max 1200 Rpm (100%), oder etwa 3% pro 100er-Schritt für einen max 3000-Rpm-Orkan?

Ja das ist aufwendig so, aber nötig für eine einheitliche MessDatenbank. User müssen dann zurück rechnen zu individuellen %.

Eure Messgeräte sind sicher sehr empfindlich. Die Messkammer sehr gut für Vergleich- und Reproduzierbarkeit. In der realen Welt kommen leider andere Faktoren dazu.
Da ist a) die Resonanz irgendwelcher Teile vom/im Case, wie Blech (Humming), oder Glas (Pfeiffen), oder Staubfilter/Öffnungen (Rauschen) etc.
Dann b) dass selten nur ein Lüfter alleine im Einsatz ist, sondern ein Verbund von zB je zwei in der Front, Deckel und/oder Boden, Radis etc, wobei jeder Verbund einzeln geregelt wird in der Geschwindigkeit.

Diese und andere Faktoren machen jeden PC zu einem Unikat. Persönlich messe ich jeden Lüfter-Verbund einzeln, in 5% Blöcken, wobei jeder Block in 1% Schritten vermessen wird. So höre ich jede für mich persönlich störende Drehzahl eines Verbunds und kann diesen 5% Block in der Steuerung überspringen (= Treppe, anstatt Kurve/Linie). Ja aufwendig und leider nötig für mich, aber die reduzierten Geräusche ist Lohn für die Mühe.

Auf alle Fälle sind Eure Messungen sehr hilfreich. Methodisch, als auch und sehr wichtig (!), aus meiner Sicht stets glaubwürdig. Top Anlaufstelle.
Auf die kommende Datenbank bin ich gespannt, die wird sicher top! Danke für Eure Mühe!

Antwort 1 Like

Klicke zum Ausklappem

Danke für die Spende


Du fandest, der Beitrag war interessant und möchtest uns unterstützen? Klasse!

Hier erfährst Du, wie: Hier spenden.

Hier kannst Du per PayPal spenden.

About the author

Review Team

Werbung

Werbung