Anyone who buys a new AMD Ryzen 7000, no matter which model, will certainly curse the high temperatures and thus also get annoyed about the usually high power consumption under full load. However, it is very easy to remedy the situation if you know how and also observe a few basics so that the system really remains stable. The reason that the article is only appearing today is because I stressed this system with the advanced settings for a whole 24 hours with a loop in Inventor 2021 Pro with everything in it.
High FPS numbers in real-time 3D rendering, very demanding CPU compute and rendering, and various partial benchmarks with mixed loads. And I can spoil it in advance: There are situations where the whole thing really brings something and others where the added value is limited. This is exactly why a single benchmark is not enough and it takes a bit longer.
If a system was really unstable, it crashed here after a few hours at the latest. The one I show you today went through well. I have done all this exemplarily for the larger CPU, mainly because of time reasons, but everything is almost 1:1 transferable and I will also add more options for the smaller CPUs at the relevant places. For all those who want to read all the articles about the launch of the new CPUs beforehand, here is the selection (the launch article also describes the test system in detail):
The right mix of adjusted V/F curve and power brake for the PPT
Yes, you can also just set the PPT limit to almost any wattage in Precision Boost Overdrive and hope that this already helps. Yes and no, because the factory-set, too high voltages of the stored V/F curve remain. And if you lower the power target, you have the cooler CPU, but it also becomes significantly slower in relation. Fixed undervolting with an offset of approx. -0.09 volts is also quite possible. Less is not possible with my CPU, unfortunately the stability test showed that. Only this variant has also not been particularly purposeful over all games.
We will therefore do two things today that seem to make sense for a Ryzen 7 7950X. On the one hand, it’s gaming, where you don’t get much above 140 watts (720p) and almost always stay below 100 (1080p and higher). There you can very calmly adjust the V/F curve AND use a PPT limit. After a few tests, I determined 125 watts as the most sensible value, since more frugal games are not affected by the limit and demanding ones get a maximum of 15 to 17 watts taken away. This balances out well later, as we will see. But in both cases I had to touch the V/F curve. I will now explain to you step by step how this can be done in just a few steps.
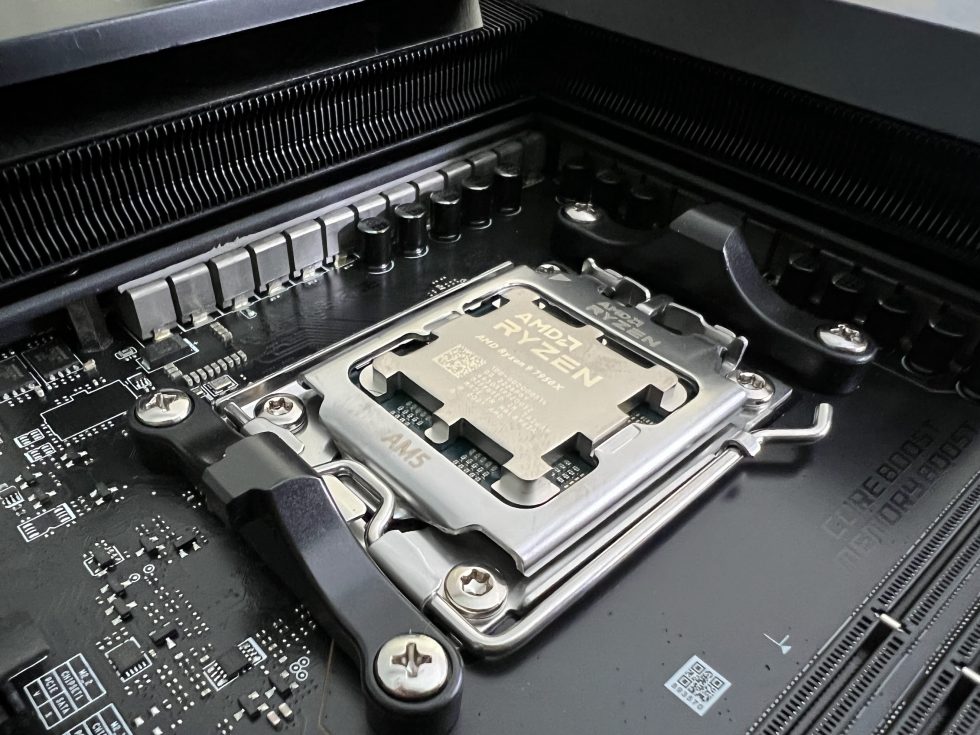
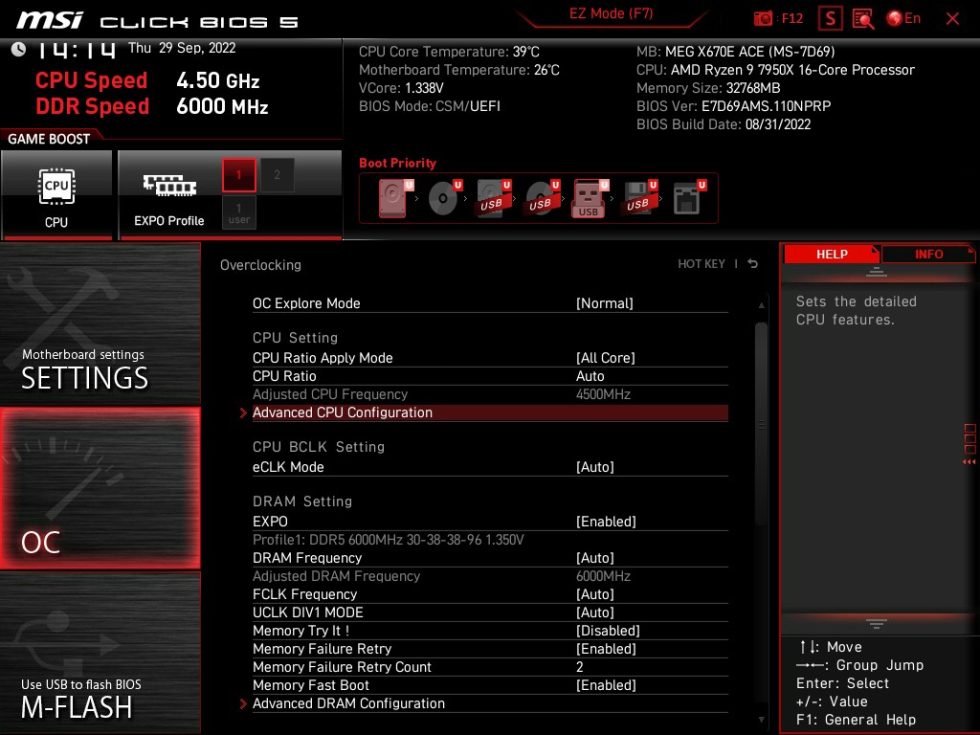
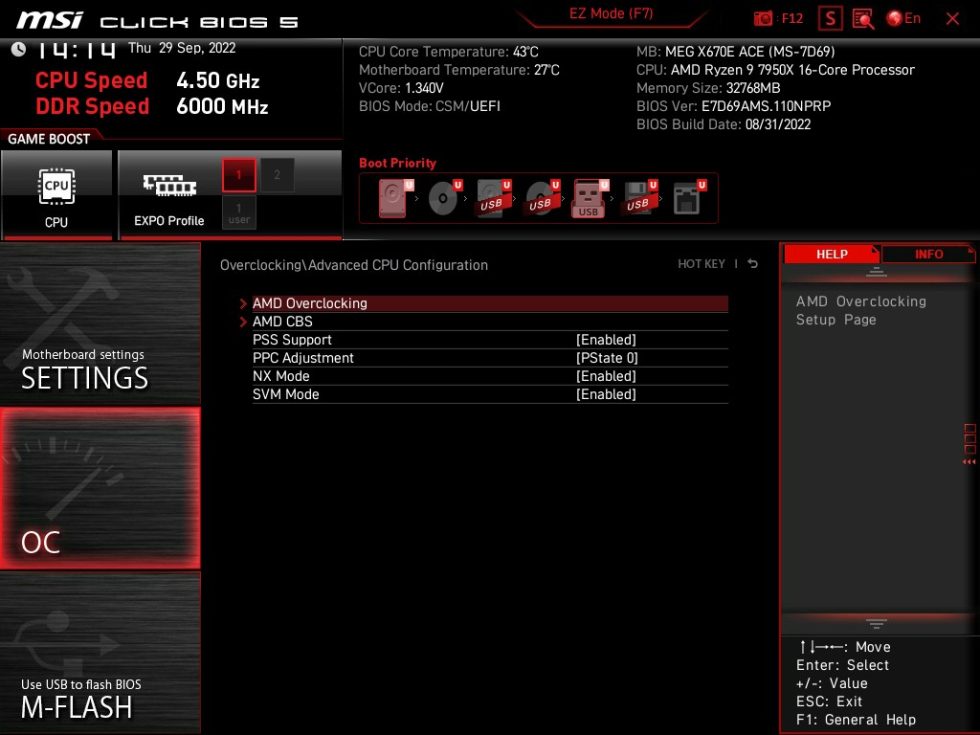
First of all, there is no way around the BIOS. The automatisms from the Ryzen Master eat up buckets of time, but they are not better in the end. Most of the time you achieve nothing to very little. First, we go into the BIOS and go to the (advanced) section, where we also find the settings for overclocking. This is somewhat different depending on the manufacturer and board, but in the end everything is always very similar.
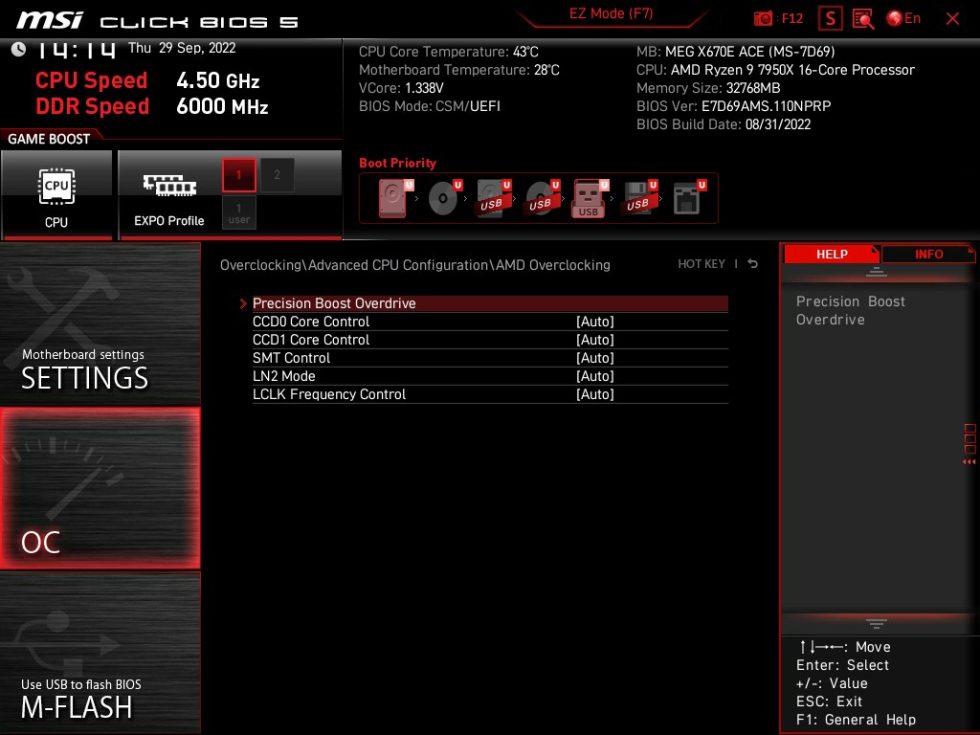
Like looking for the advanced CPU settings, on some boards you can find AMD Overclocking (or even Precision Boost Overdrive) right in the top menu as well. Anyway, I had to shimmy around a bit first.
What we ultimately need is “Precision Boost Overdrive” (PBO). This is called the same for all boards from here on because it is an AMD implementation.
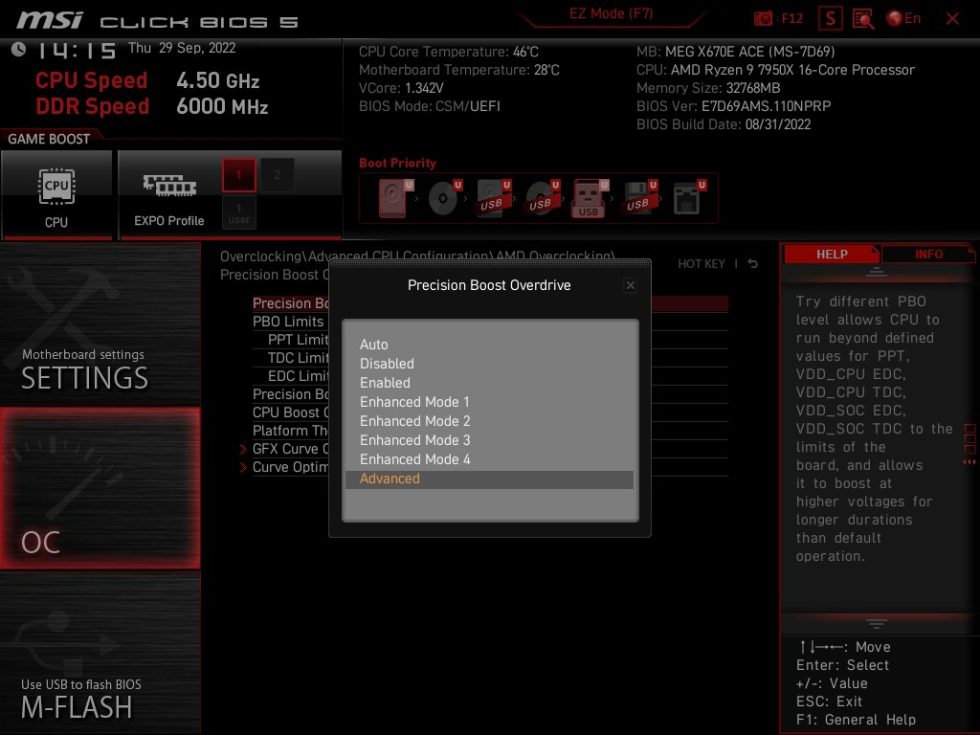
PBO has several modes. The one we need is the so-called “Advanced” function, which unlocks more submenus for us. because that’s exactly what we need.
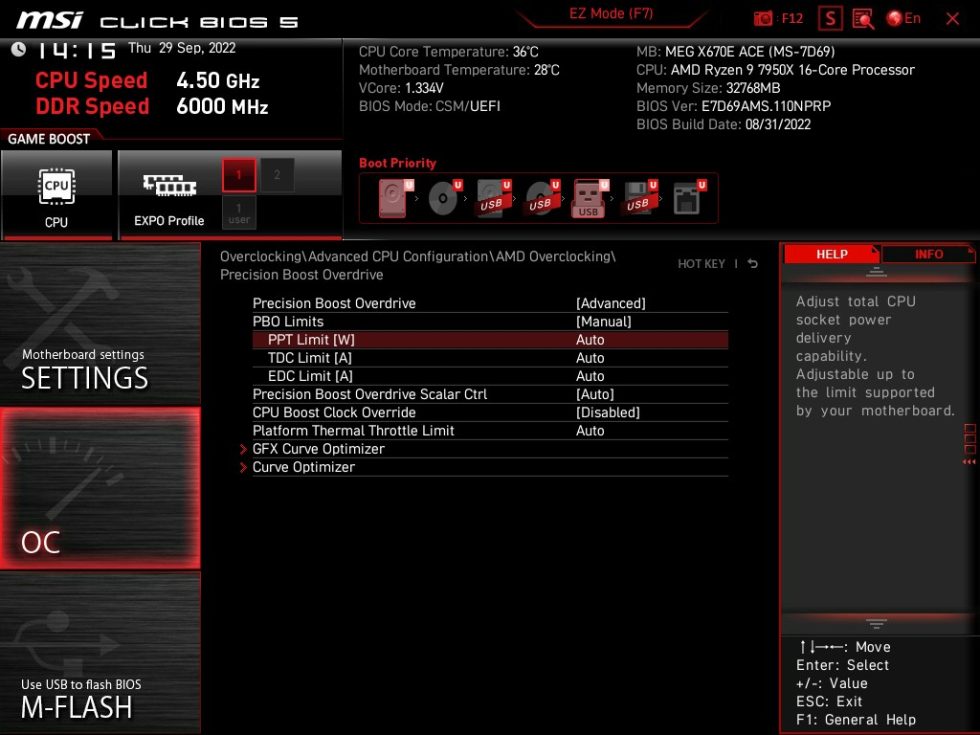
Now we have to decide what to do with our PC. Trimming the so-called PPT limit only makes sense if we want to render or have to generate very heavy compute loads and need the full power of the system. Then you can enter e.g. 125 watts as PPT limit (Ryzen 7 7700X e.g. 85 watts) in order to not influence gaming, but to thermally slow down the system so that rendering even works with a good air cooler without real throttling.
Of course, this can be tested individually for each cooler. However, you should always set the value high enough so that the CPU temperature remains below 95 or 90 degrees even after several minutes (without a big clock loss), but better below 85 °C. Or you only play and/or never render anyway. Then you just leave the PPT limit at <auto>. I have tested both variants and givechmarkt, so that later everyone can decide for themselves what kind of thrifty he is.
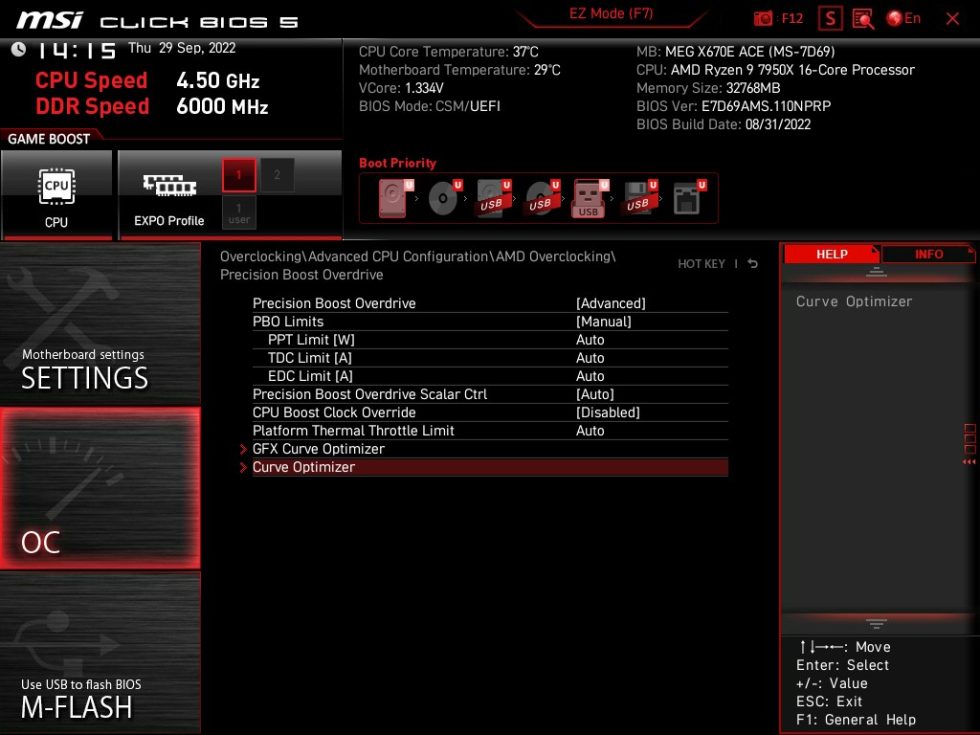
However, the Curve Optimizer is much more important. However, we leave out the functions for PBO Scalar (x10) and CPU Boost Override, which are popular with Zen3, and only use the Curve Optimizer.
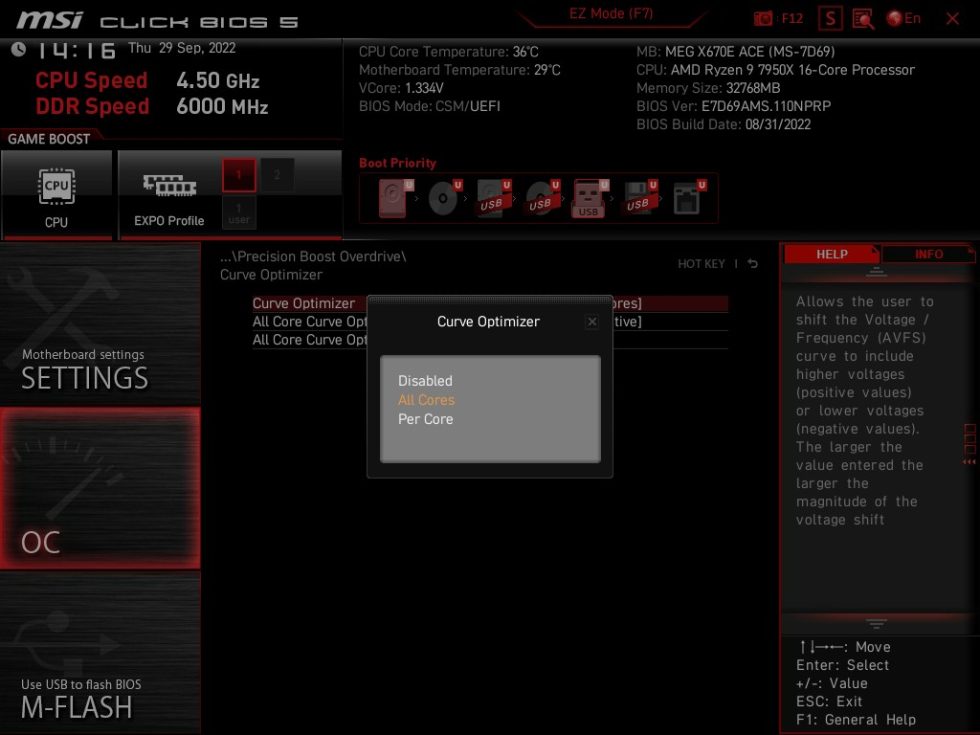
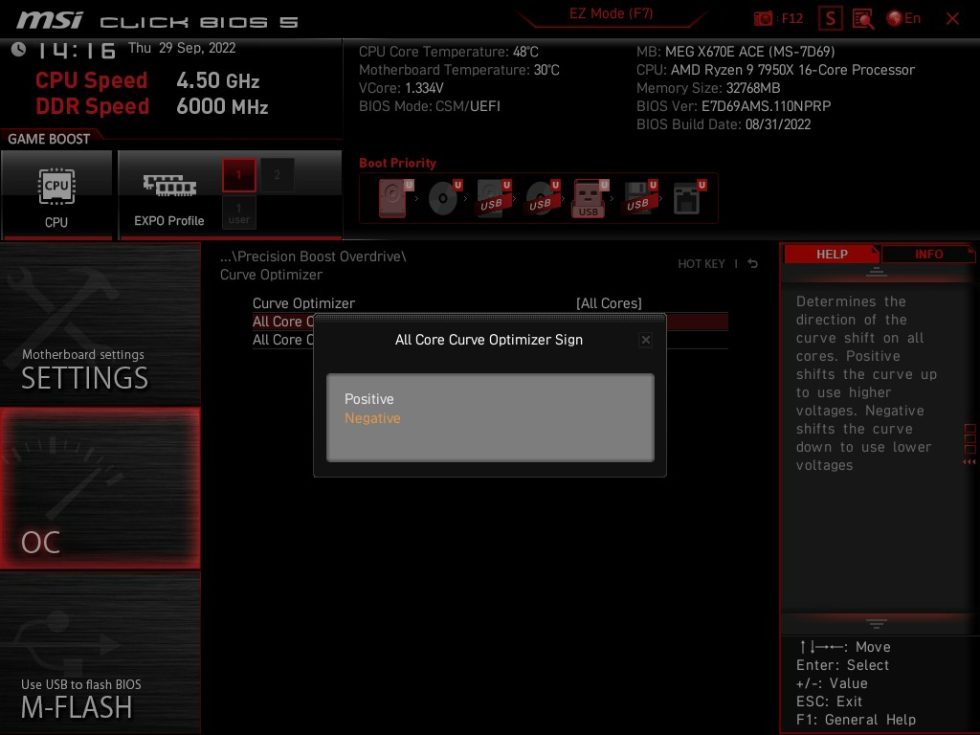
Now we have to consider how much time we want to invest. My settings for the Ryzen 9 7950X worked even on the worst core, so you should opt for <All Cores> to get a feel for the matter first. If you want to spend the time, you can still optimize every single core manually later, because the procedure is always the same.
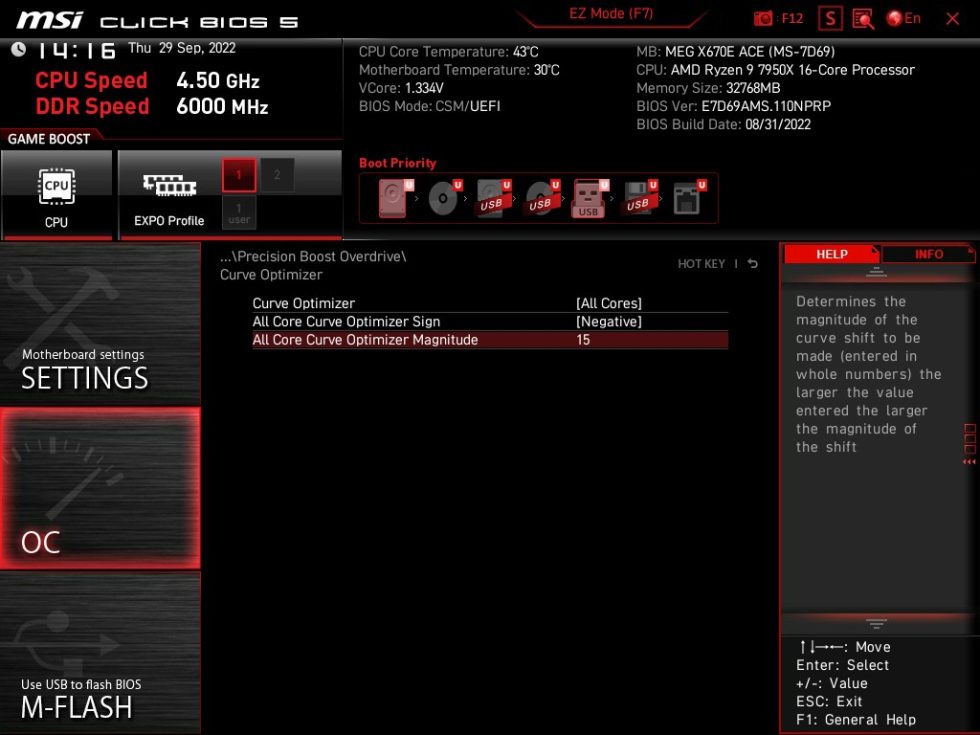
Now it is important that we choose the negative direction, i.e. the voltage reduction. After all, we want to save and not heat. However, you must not overdo it here either.
How high you set the magnitude value depends on the CPU and the chip lottery. For me, even the worst core ran stably at 15. Higher values often crash the system immediately or only a little later. CPUs with a CCD like the Ryzen 7 7700X can still manage 20, but anything else would be a miracle. If you do that individually, you can try to set at least the best cores to 20 or even 25 for the 8- or 6-core. But, unfortunately, you do not have a guarantee.
Once we have done that, we save the BIOS changes and reboot. After that, you should do extensive stability tests, which is always a good idea.
- 1 - Einführung, Advanced PBO und Curve-Options
- 2 - Gaming: FPS Bars
- 3 - Gaming: FPS Curves
- 4 - Gaming: Percentile Curves
- 5 - Gaming: Frame Time Bars
- 6 - Gaming: Leistungsaufnahme CPU
- 7 - Gaming: Leistungsaufnahme CPU & GPU
- 8 - Gaming: Effizienz in Einzelspielen
- 9 - Gaming: Zusammenfassung Performance, Verbrauch, Effizienz
- 10 - Workstation: CAD und Rendering
- 11 - Workstation: Leistungsaufnahme, Temperaturen und Fazit









101 Antworten
Kommentar
Lade neue Kommentare
Urgestein
1
Moderator
Urgestein
Urgestein
Mitglied
Mitglied
Urgestein
Veteran
Urgestein
Veteran
Veteran
1
Urgestein
1
Urgestein
Urgestein
Alle Kommentare lesen unter igor´sLAB Community →