


We test the heatsink
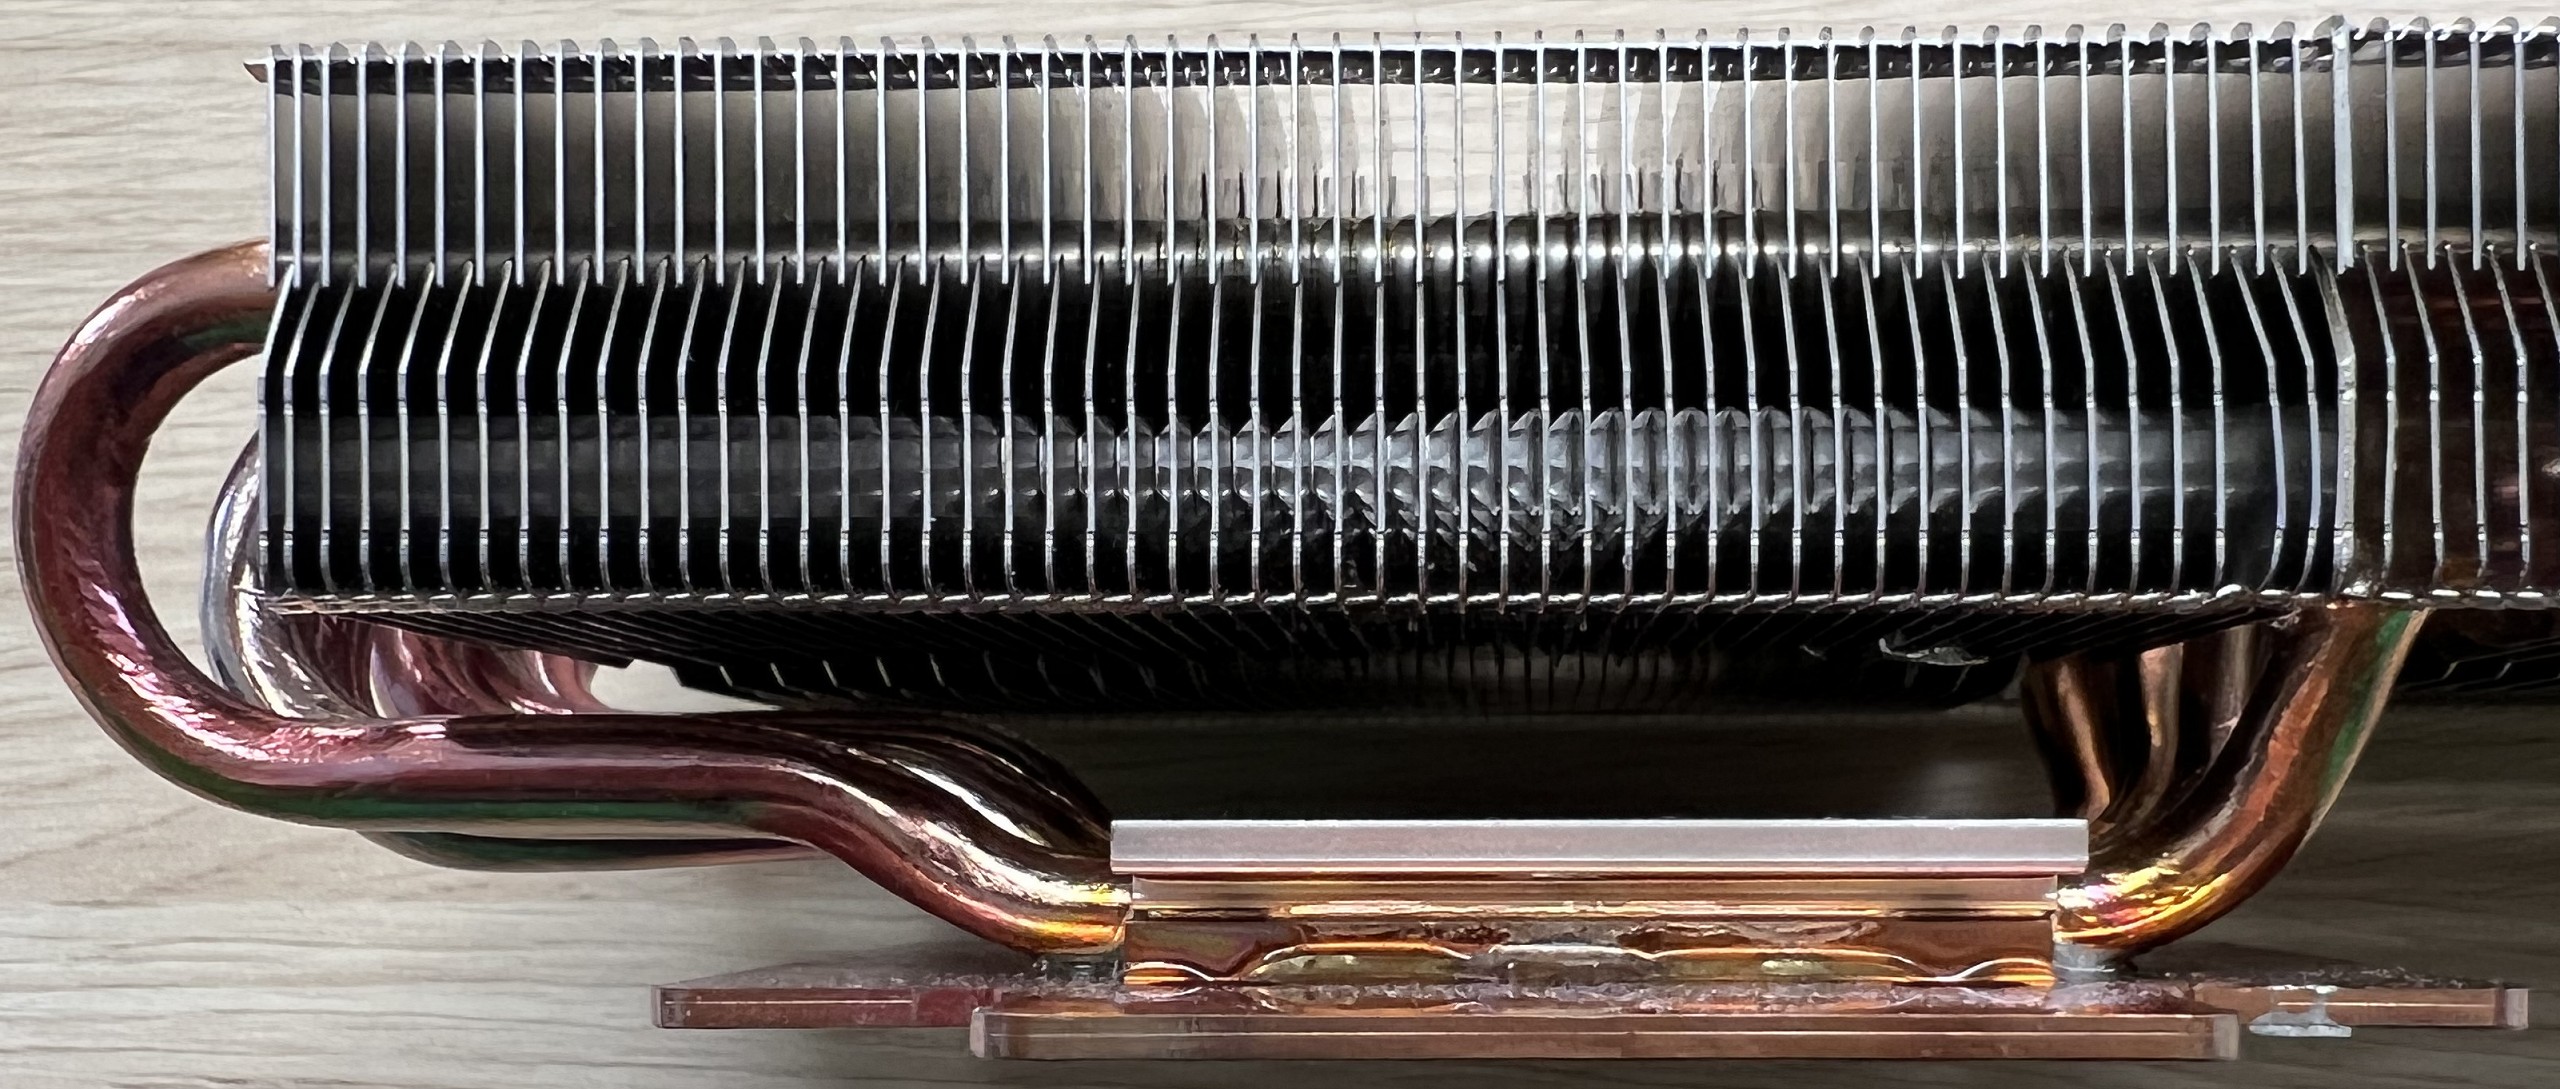
A very important part of a cooler is always the heatsink. We can already see very nicely on the picture of the prototype at that time, how the neatly bent copper heatpipes (inside it is a composite material) were tinned and then soldered to the copper heatsink. Since it is a manually produced prototype, the solder joints are so easy to see. In the final version you can’t see all that under the nickel coating. Whereby – exactly I set immediately and laser me through the coating and check whether that is still real, pure copper in the retail.
Unfortunately, I can not break off the Heatsink, but it is already a kind of well-kept secret that Raijintek does not lead the heat pipes closed through the Heatsink, but simply divided them in the middle of the Heatsink. Well, the knowledge is one thing, but the technical implementation is much harder than you think. That’s exactly why you don’t see it so often. The reason is simple, but expensive. A heat pipe only really works optimally in one direction. However, if you heat it up in the middle and hope that the transport of the waste heat to the two cooler ends will also work optimally, then you have made a complete mistake with an asymmetrical design. Yes, it still works, but not optimally. The use of two individual pipes instead of one continuous one unfortunately costs almost twice as much, because significantly more work steps and precision are required.
The heatsink comes to the customer nickel-plated in the final cooler, and before we do a material analysis, we take a closer look at the bottom. The tool marks are clearly visible and we now also understand why it simply doesn’t work without thermal paste:


And now we examine the cooler lasagna and laser our way through the layers. We start with the already recognized nickel, of course. The whole thing then transitions nicely into pure copper and also remains solid. That’s what the customer wants.

What you can already see above: from the 7th shot with the laser, the copper starts to glow. How this looks in detail, you can see here again with the 300x magnification of the EA-300, because the red in the middle is really the glowing copper and the layers, which I just let evaporate layer by layer.

Which would clarify that there are no secrets at all and the heatsink is made of exactly what it was advertised as. But the waste heat also needs to be dissipated, and that’s where we’ll continue on the next page.


99 Antworten
Kommentar
Lade neue Kommentare
Urgestein
Urgestein
Veteran
1
Veteran
Urgestein
1
Urgestein
Urgestein
1
Urgestein
Urgestein
Urgestein
Urgestein
Urgestein
Urgestein
Urgestein
Urgestein
Veteran
Alle Kommentare lesen unter igor´sLAB Community →