


Dismantling without depression
Before screwing, for example, with GPU-Z you should log the temperatures in the idle and under load for at least 30 minutes and record the room temperature. This later helps to better classify the result and detect possible errors.
Things like "Order is half life" follow you since Mutti's best helicopter times, but it makes perfect sense to arrange and store his shaves and unscrewed parts in such a way that you can get the slaughter cow patched up again later.
We use a small screw box with several compartments including lids, so that the screws can be finely separated for the outside and inside. There is a reason for this, because from time to time these differ – albeit often only insignificantly, which ultimately only makes it more difficult – in length or diameter.
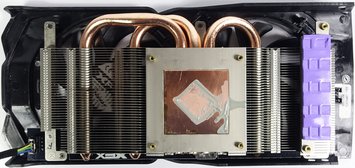
Almost always the actual heat sink is screwed through the board from behind with at least four screws. If it also contains an integrated heat sink for the voltage converters, two or three additional screws are added. In these cases, it is important to remove the cooler before continuing to dedicate yourself to the backplate.
Generally speaking, the same applies to professionals: Photograph everything step by step if you are not 100 percent sure. This also helps and especially if you want to rebuild the card after one year because of an RMA case and has now forgotten almost all the details. If you want to change the cooler, bag all the original parts cleanly and best not forget the label.
Once the screws with a seal have been removed, the rules of the respective manufacturers apply. If you just want to check whether the card has been screwed properly, you can do so where there is no seal on it. If it is not really firm, then either put on a hand or complain – depending on the decision or Risk-taking. We warned.

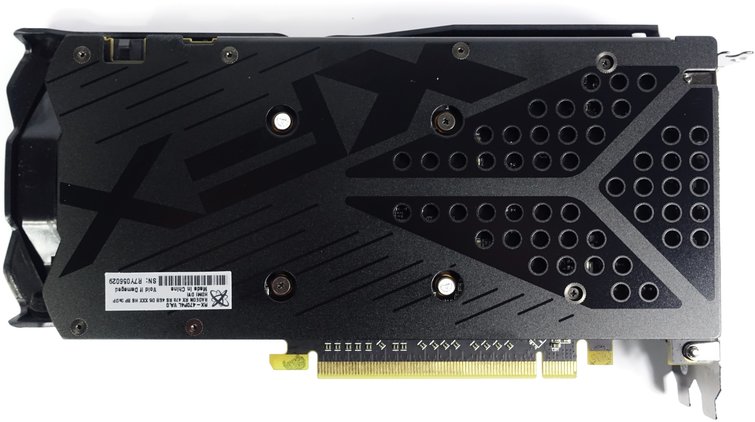
The screwing of the backplate is such a thing, because not all screws are accessible and removable from the back. However, this almost always has technical reasons and is not a harassment of the customer or a specially designed extra hurdle against screwdrivers.
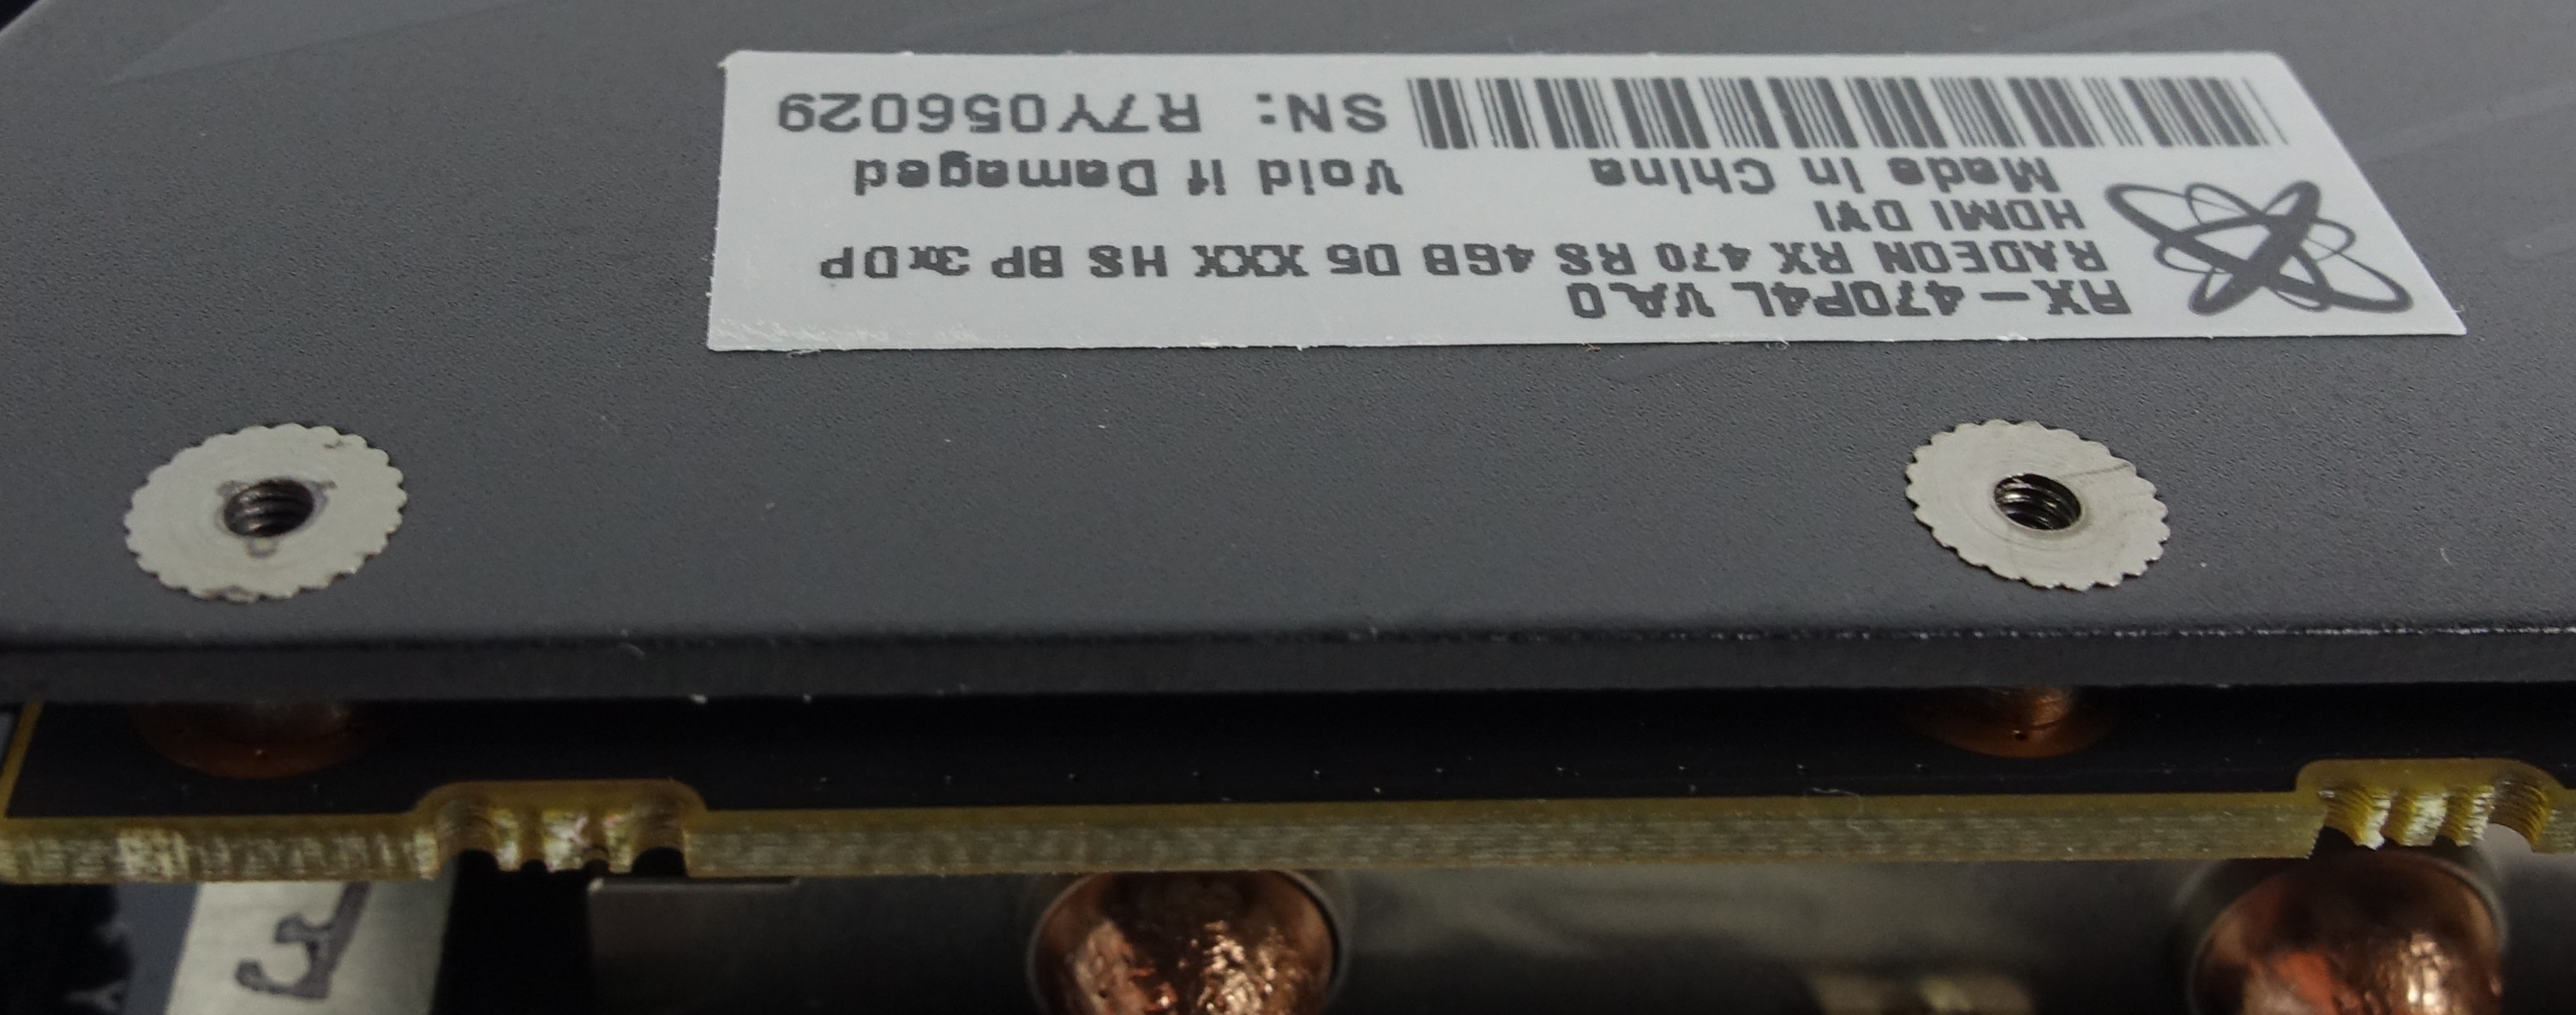
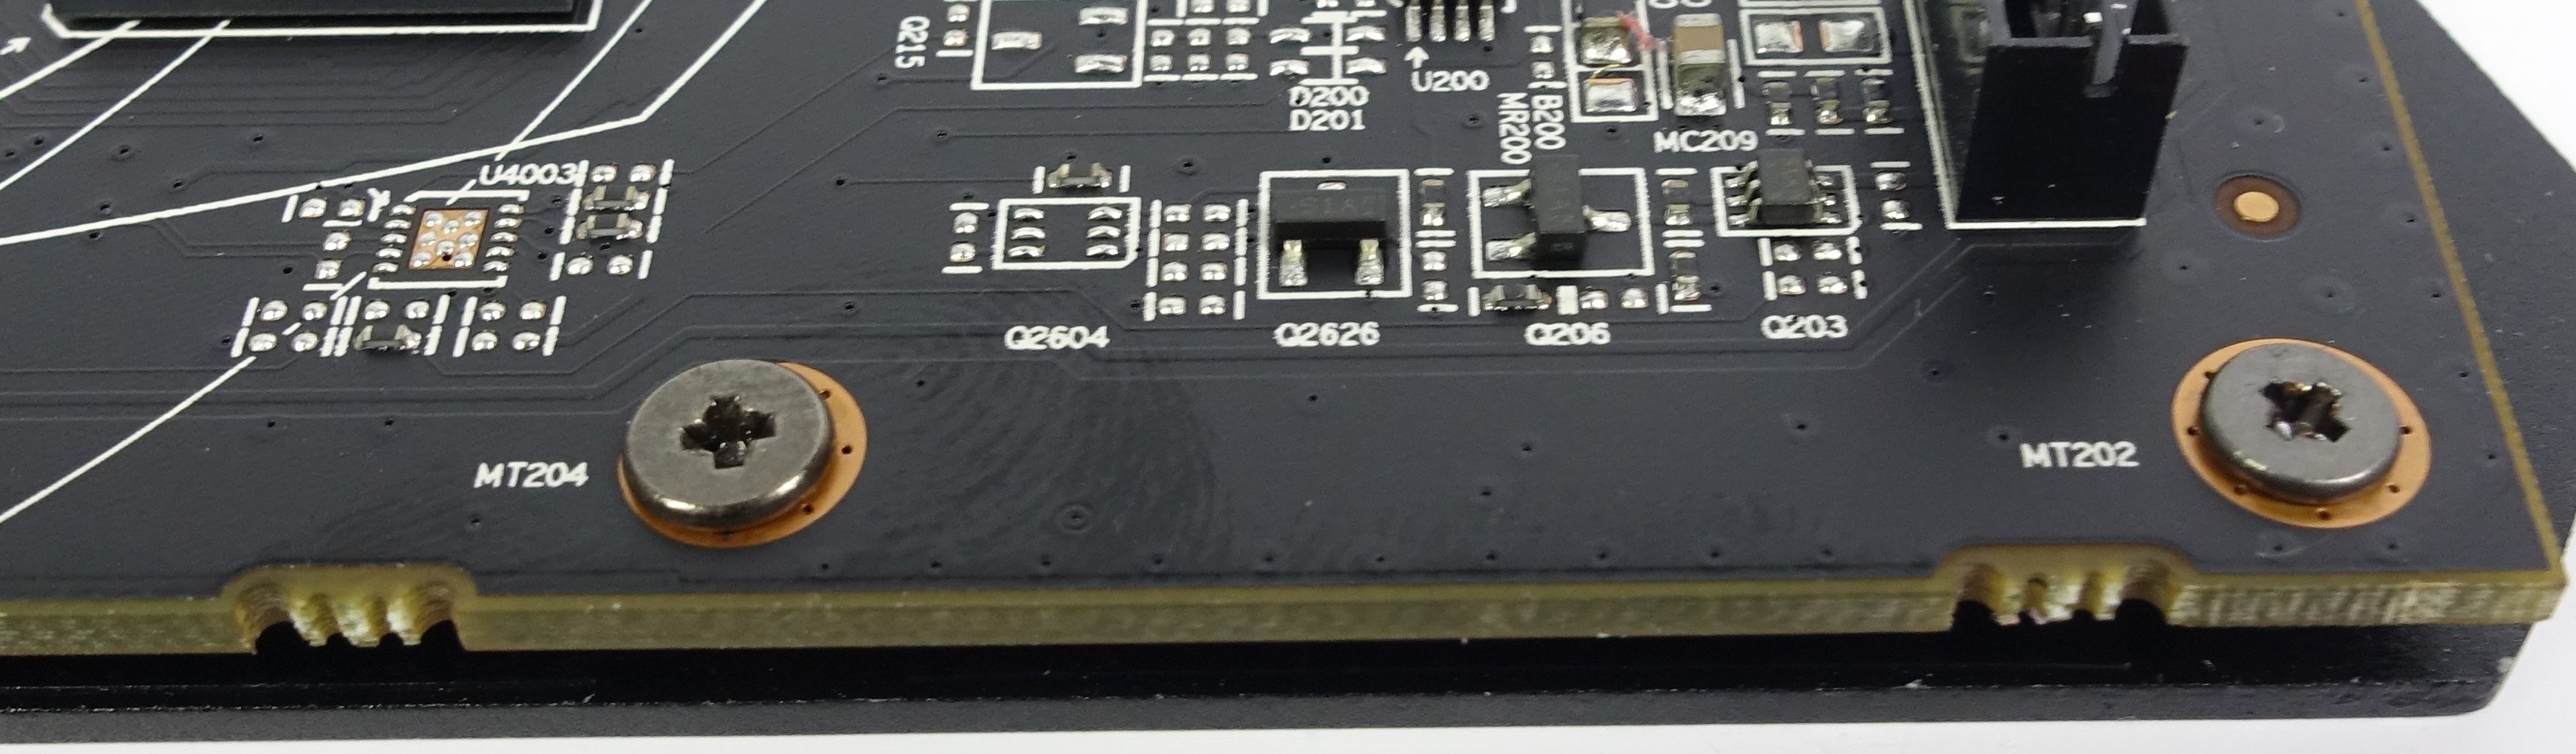
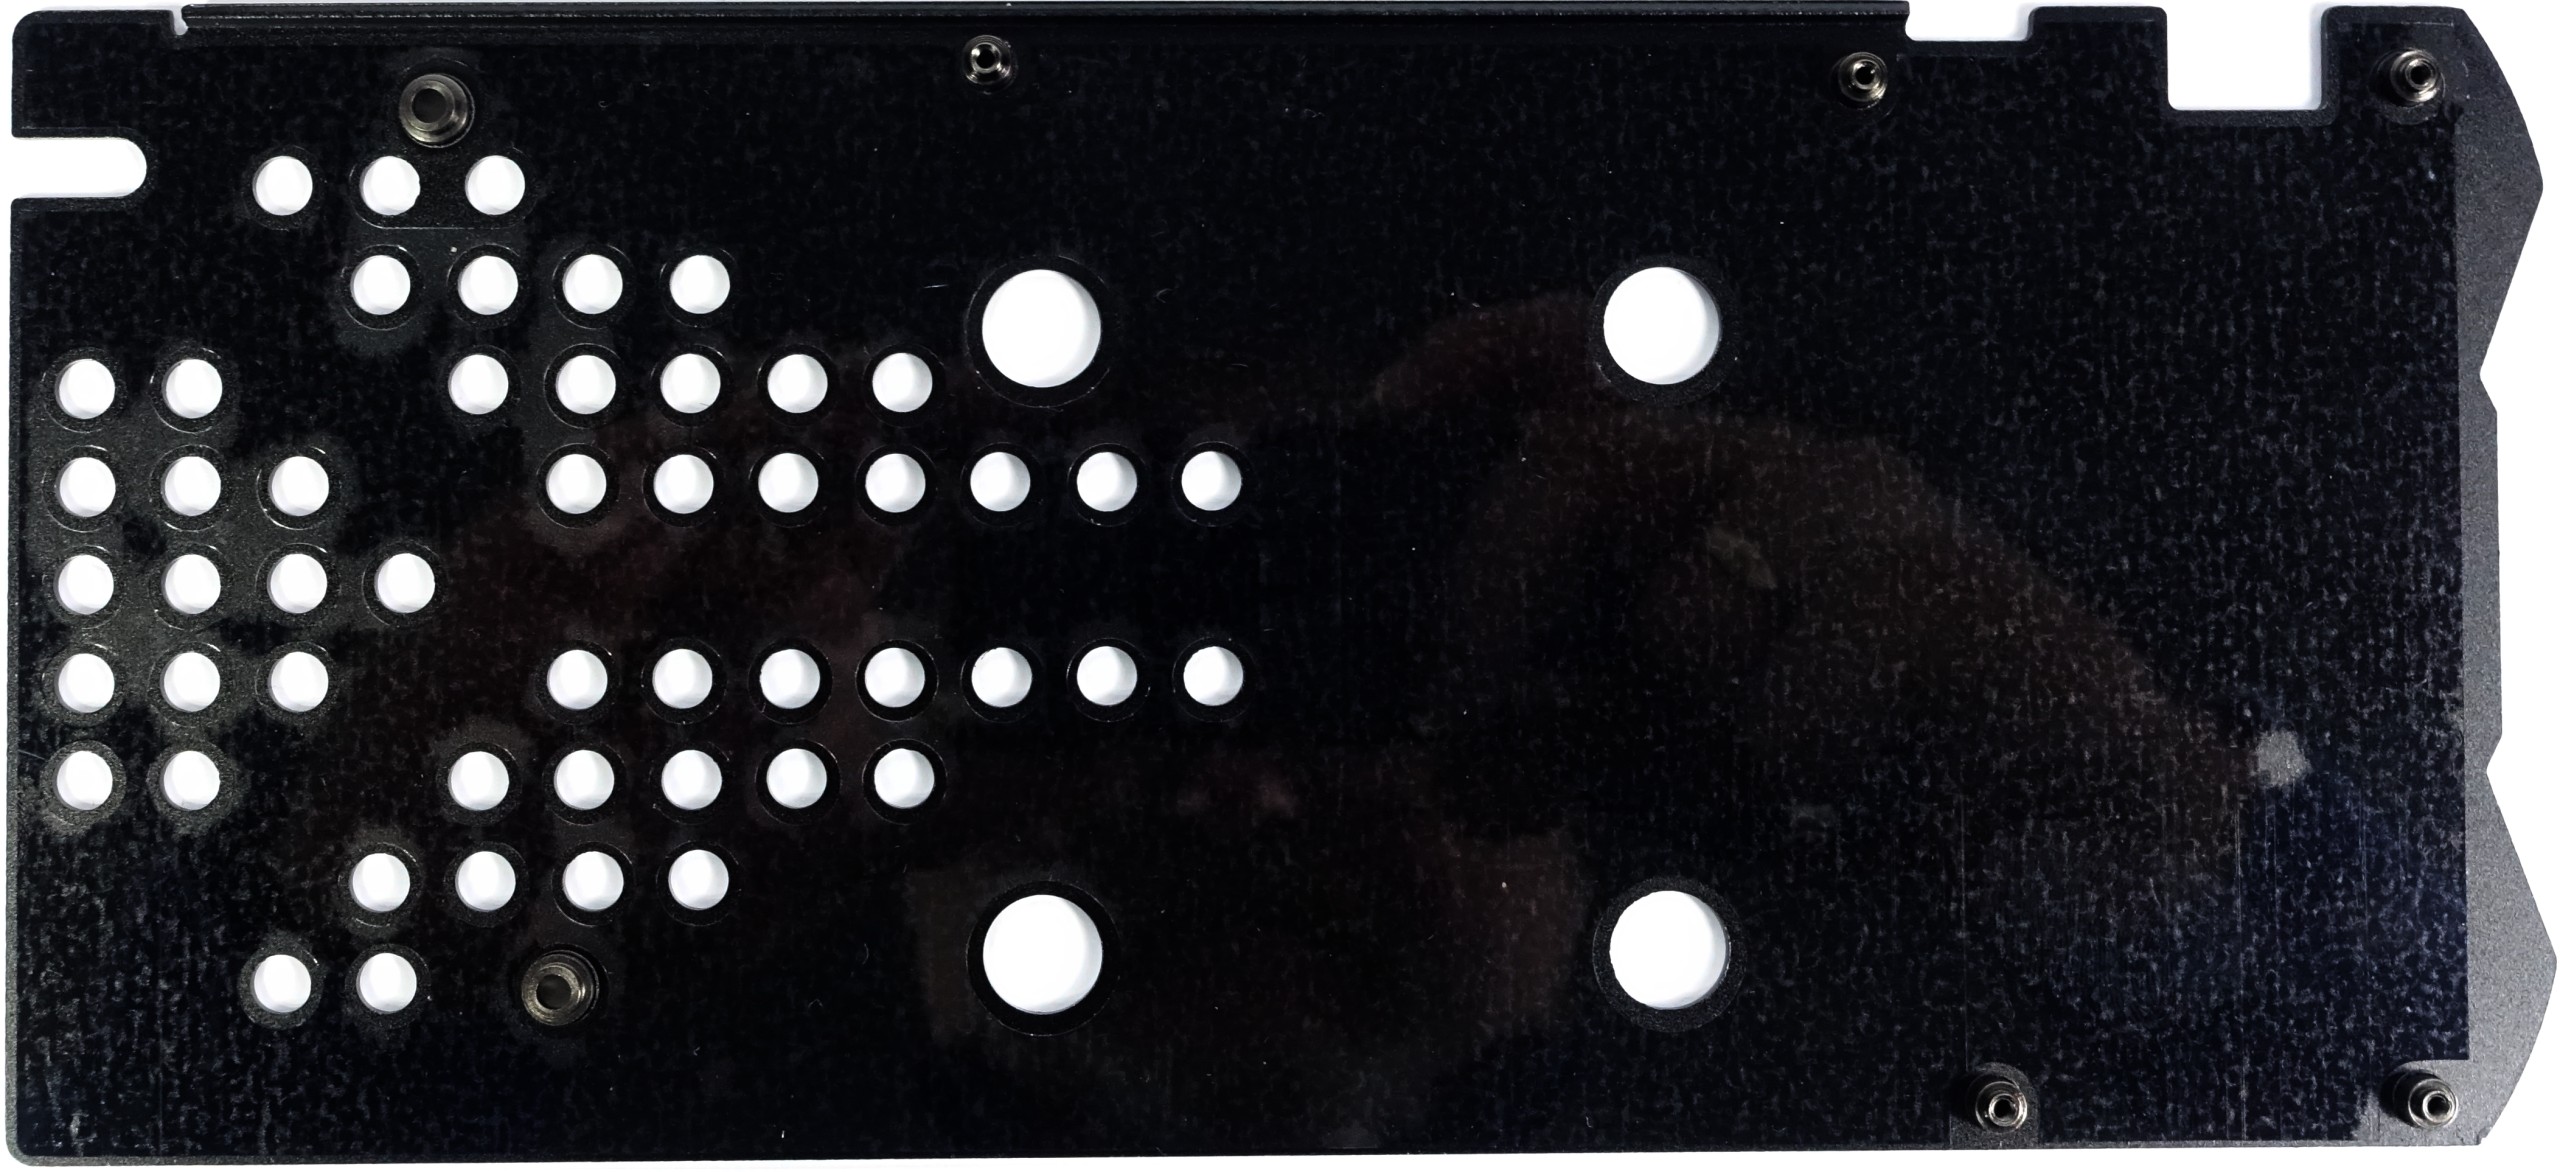
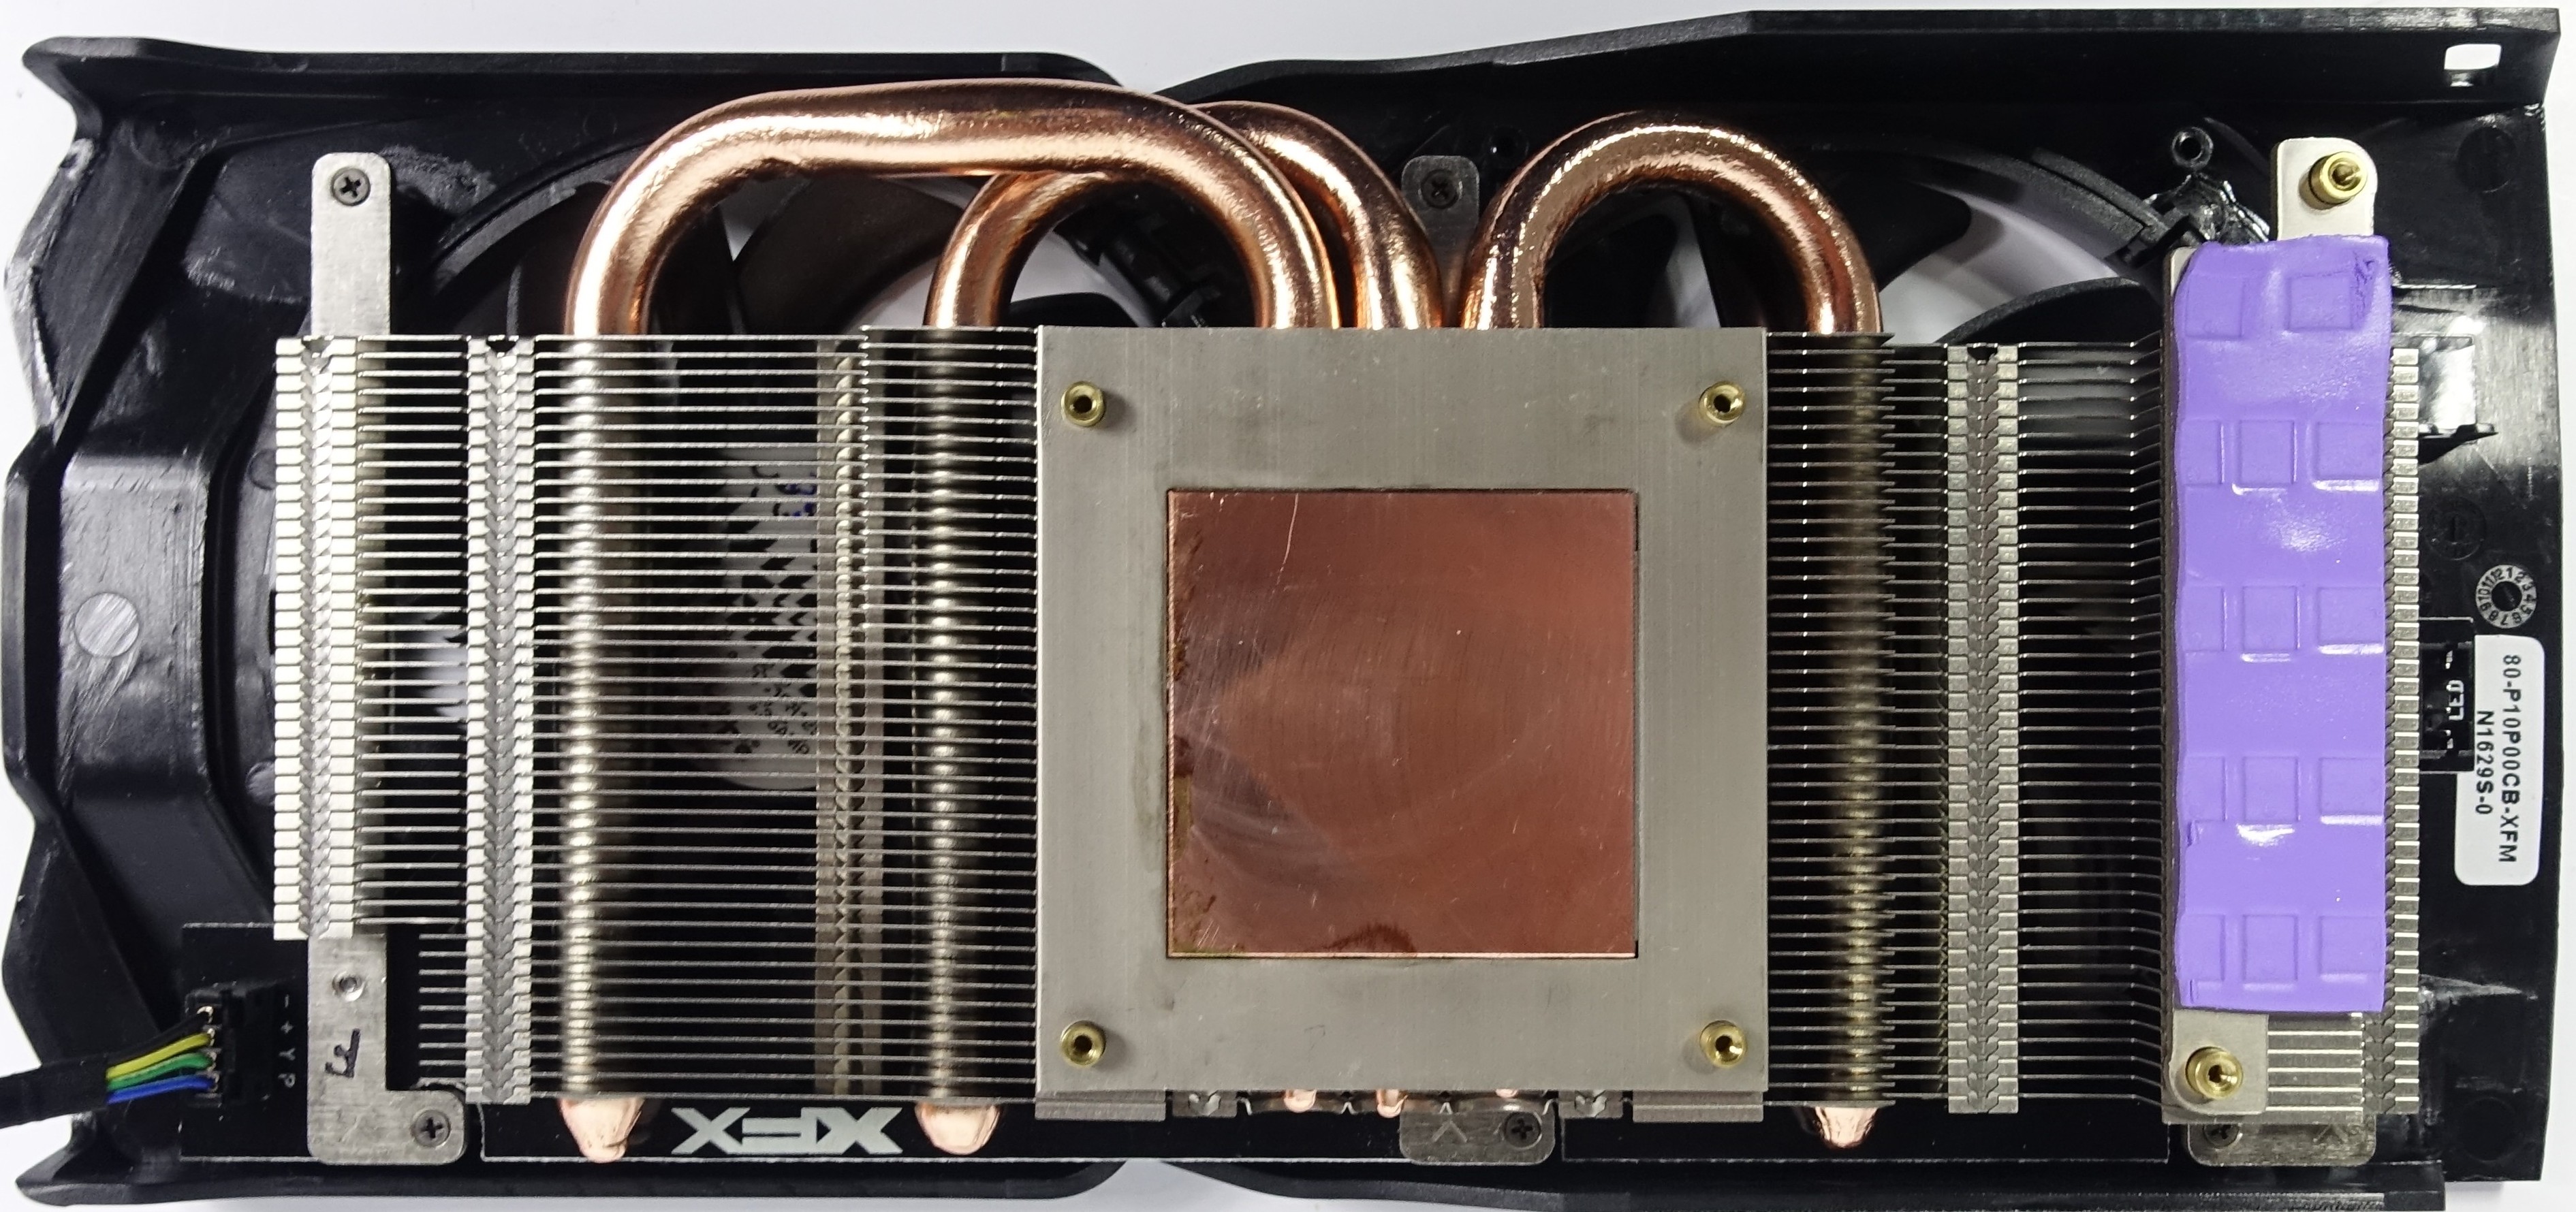
As you can see, in our specific case XFX dispenses with an inner mounting and cooling frame, which could have been used as a threaded counterpart for the backplate. Therefore, the nuts are inserted into the baking plate (picture above) and is screwed from the front of the board (picture below). These screws are often shorter than those for the voltage converters on the back.
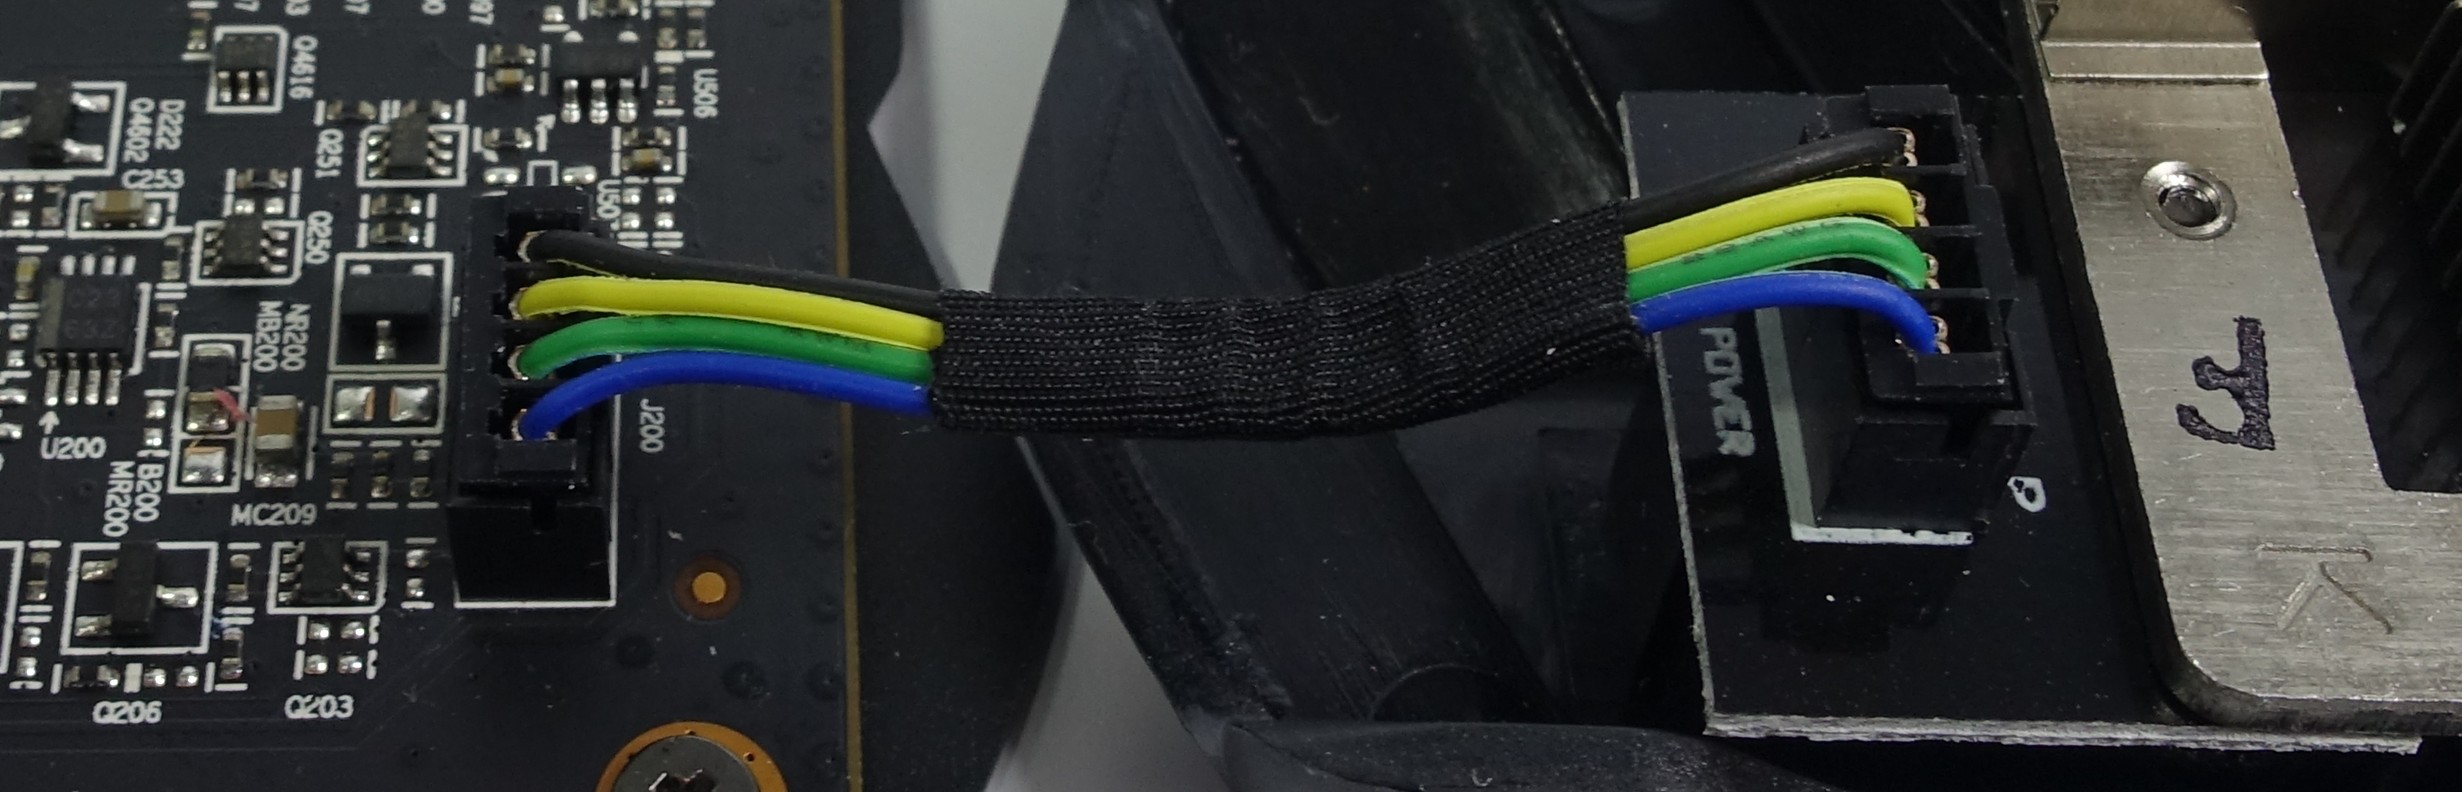
Of course, this can only be done once you have completely removed the whole cooler. But here, too, pitfalls lurk in the form of various supply lines and plugs. In case of doubt, simply take a more frequent picture when several similar cables have been plugged in side by side. This should be pulled off really carefully, because the manufacturers never make these cables longer than really necessary and the plugs often sit very tight. When assembling later, it is important to make sure that no cables are grinding on the fans before screwing the story back!
Most backplates do not have thermal contact with the board (which is actually regrettable), but have a maximum insulating folling in the event of a failure, so that there are no possible short circuits. However, we will also discuss this later when it comes to including the components in improved cooling.
Note pad #4
• With e.g. GPU-Z log the different temperatures of the original
• For safety reasons, photographically document everything and every step
• Assorted and securely storing screws
• Pay attention to all connecting cables to coolers and LEDs
• Do not use force once something is stuck
Why so pamphlets? We're getting really clean.
The industry uses various methods to provide a graphics card with thermal paste. Often this is already applied by the cooler OEM to the heat sink (screen or pad printing or soft pads from a transfer film) or it is used at the moment of the wedding – i.e. placing the cooler on the board – correspondingly portioned liquid paste.
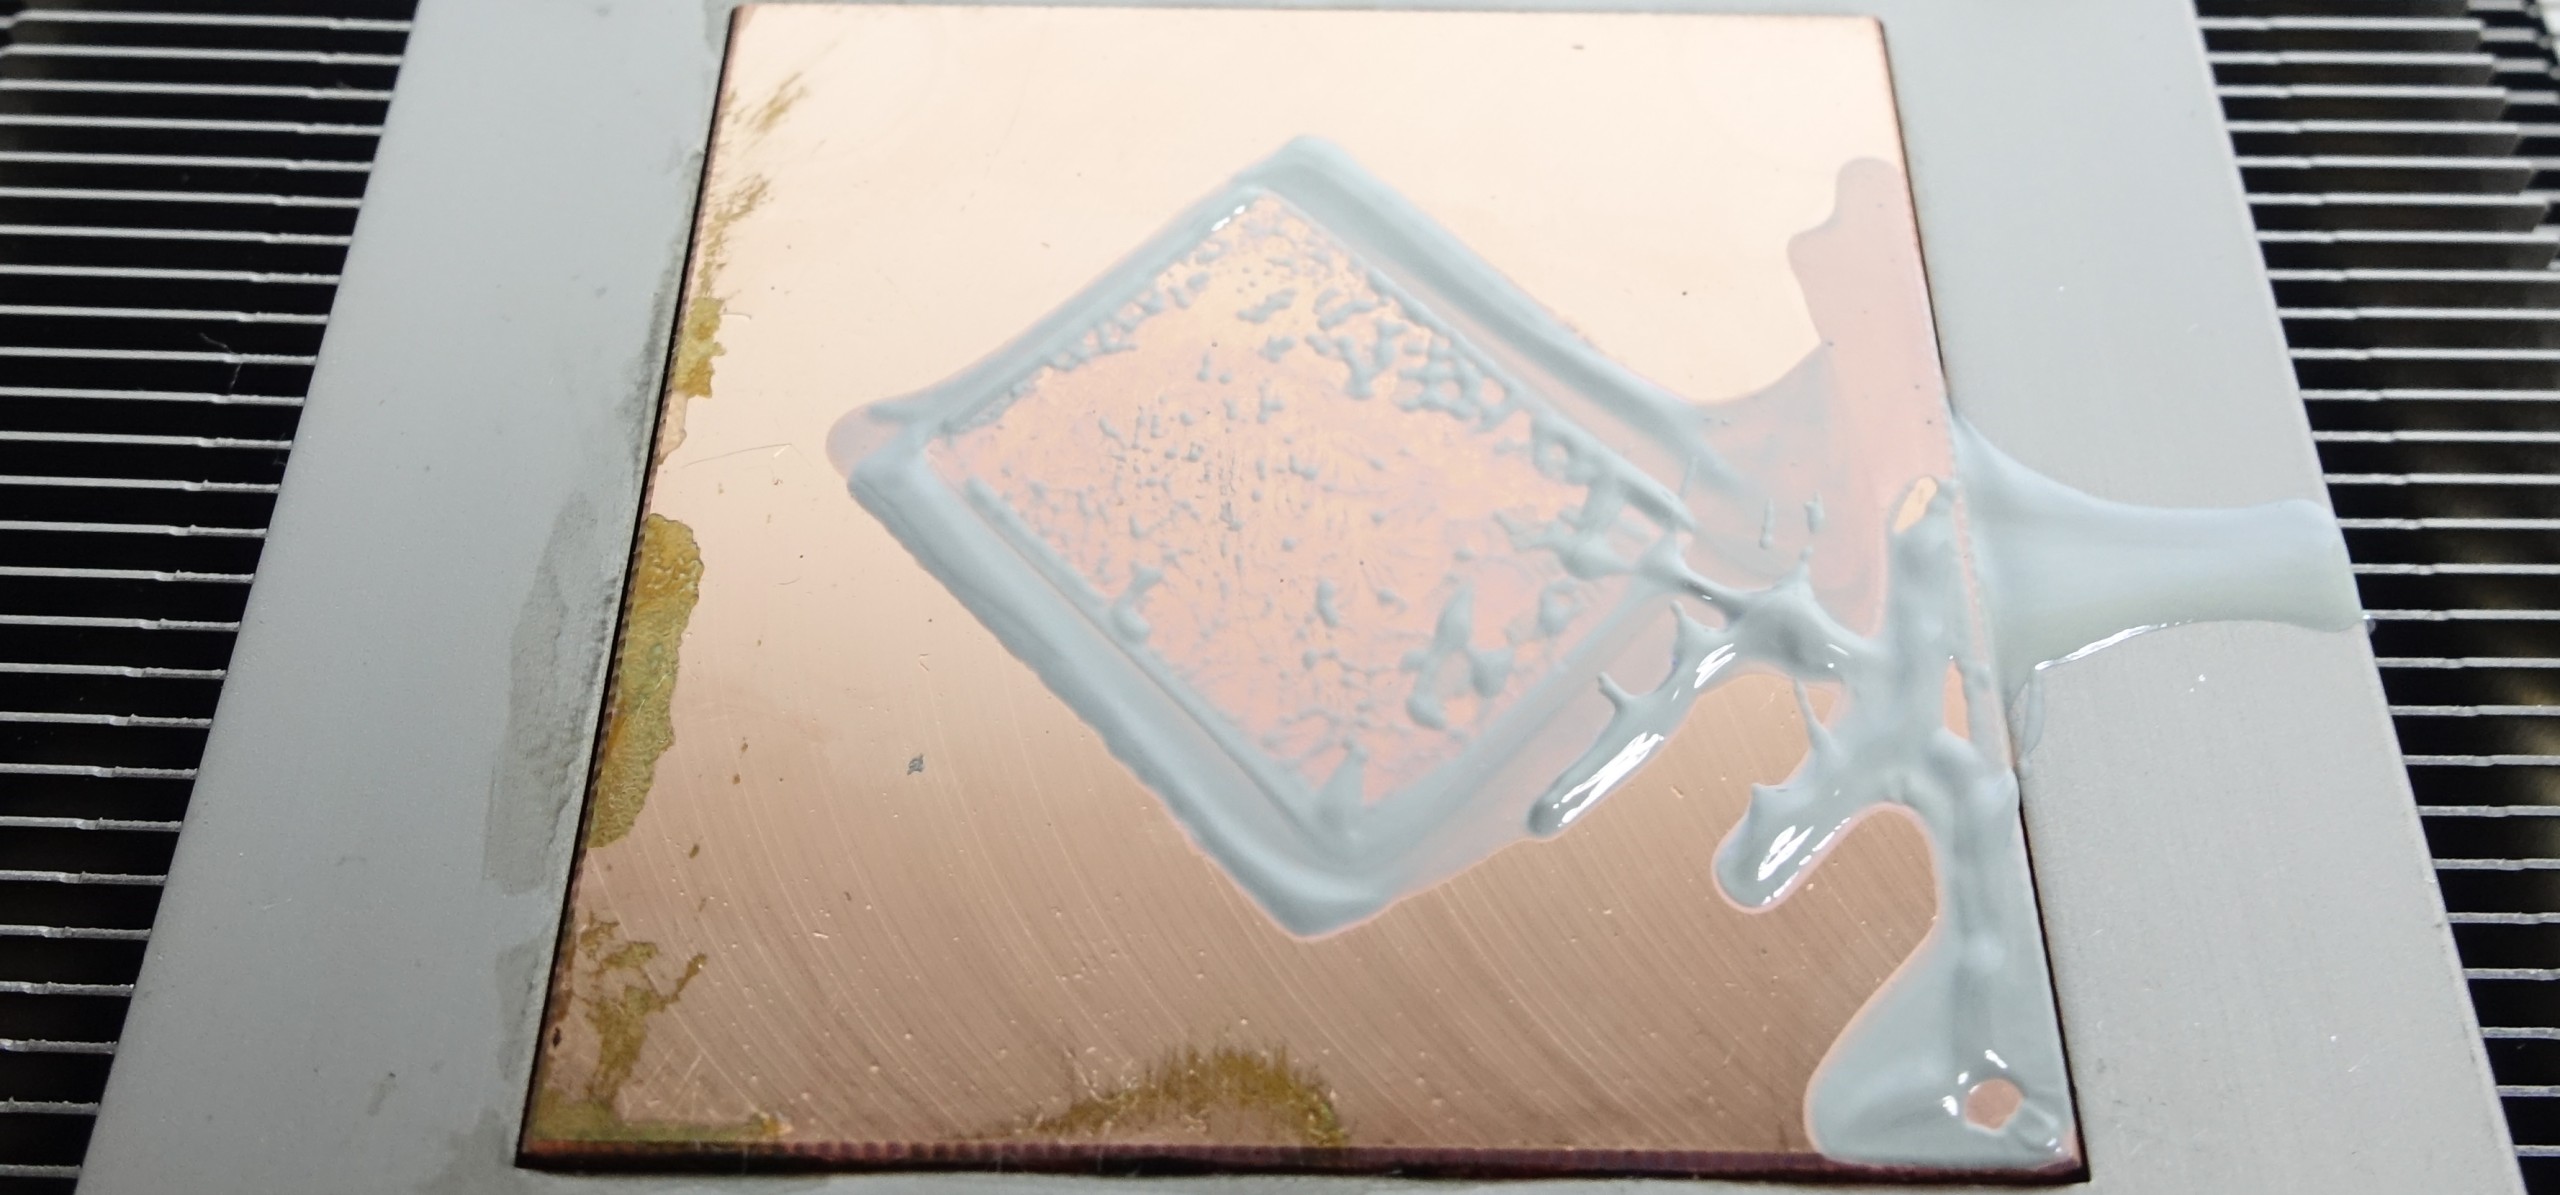
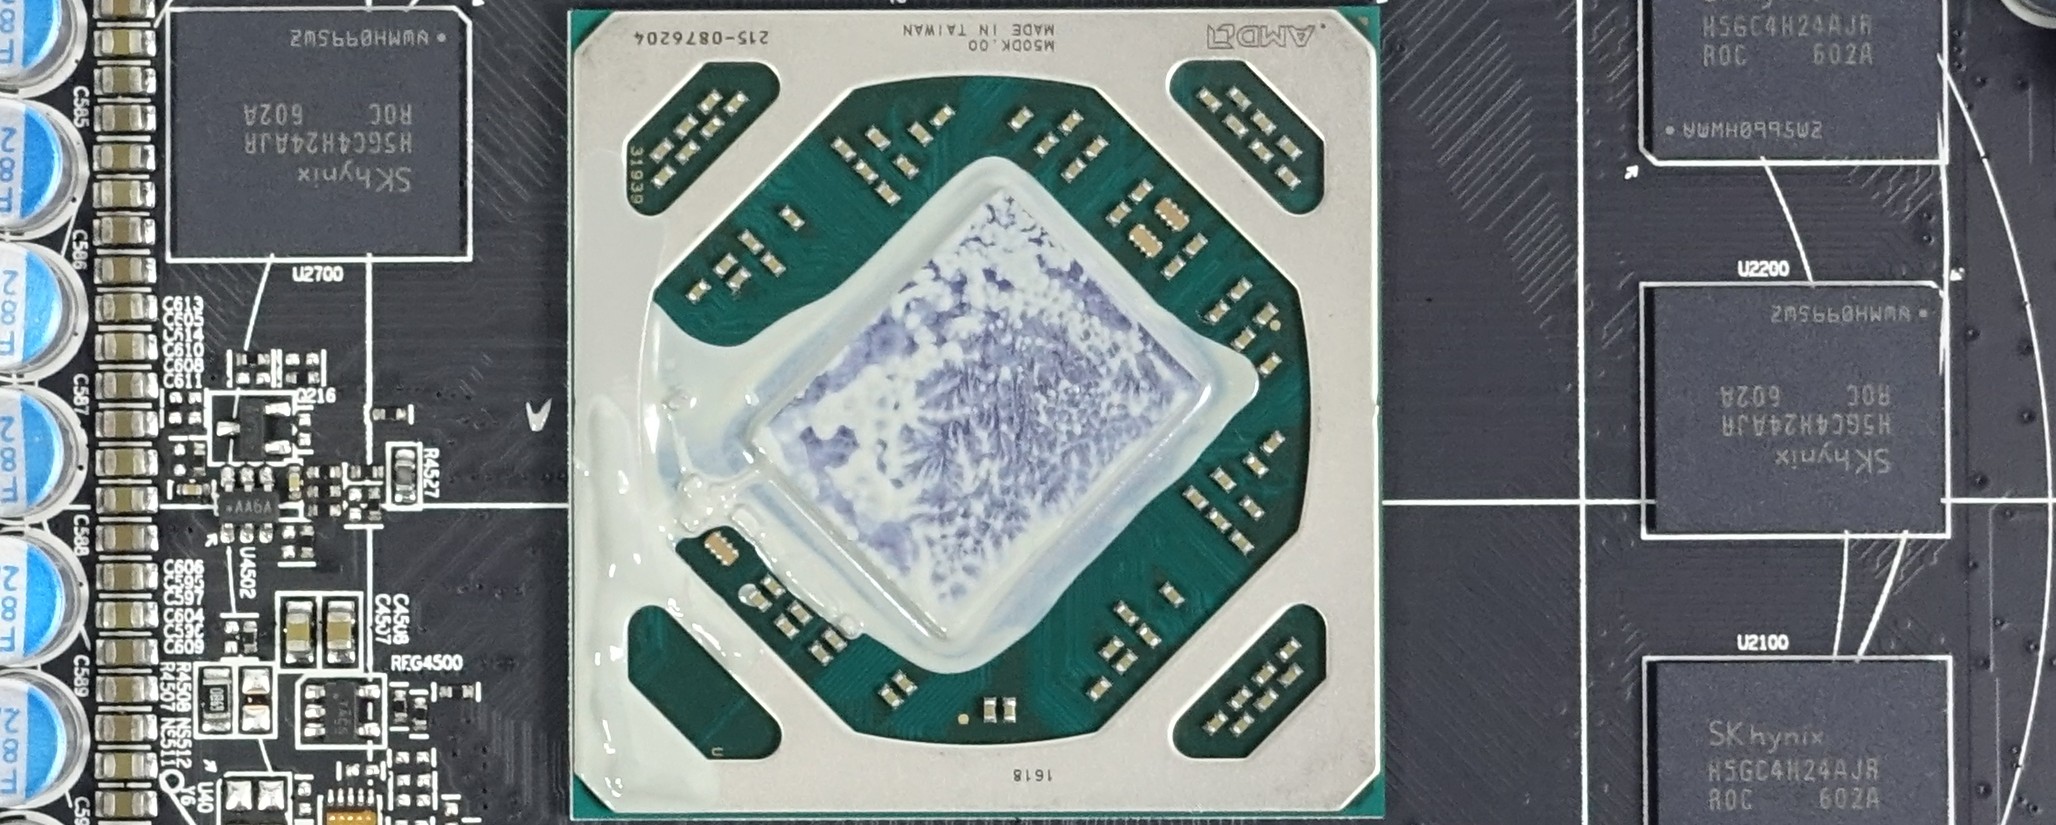
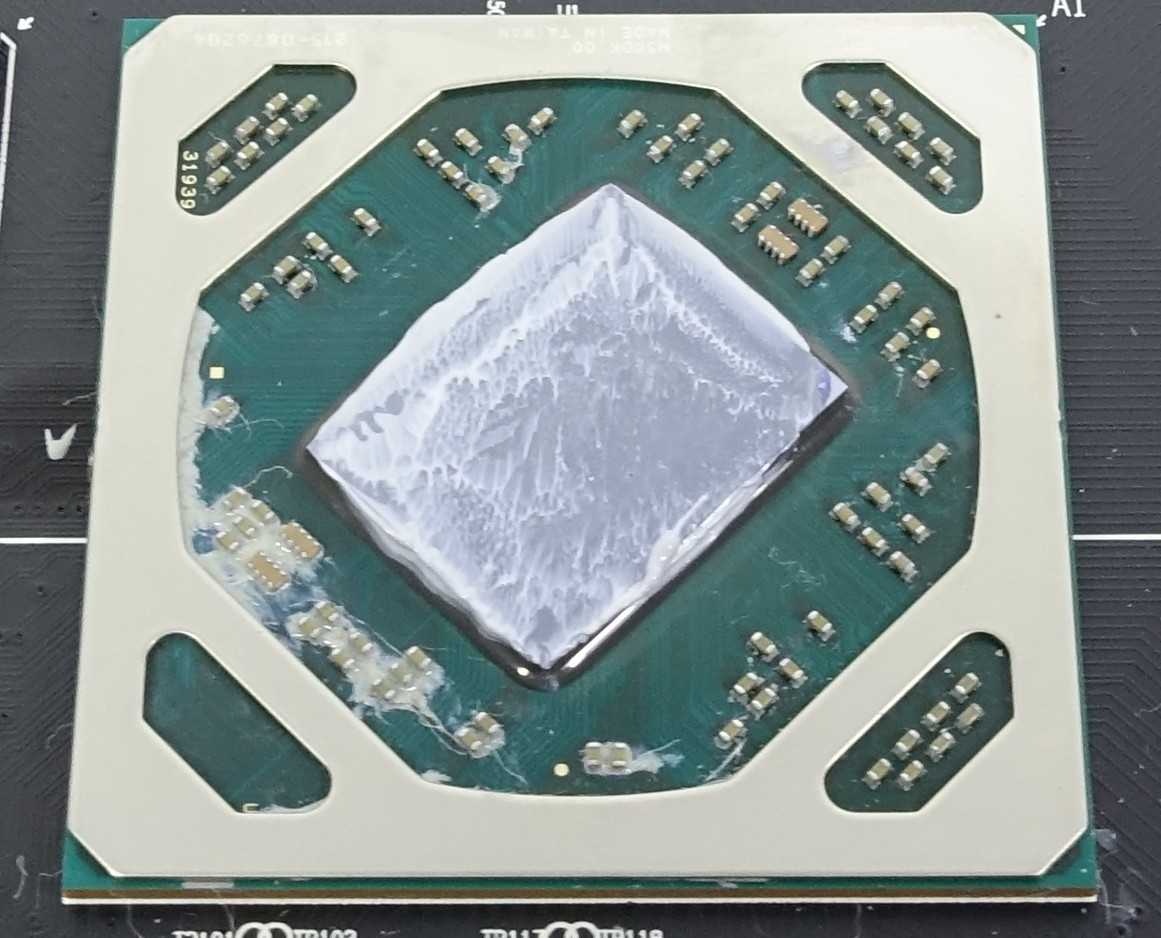
Almost always, however, it is too much of a good thing and in the case of our test object even a real schmandkuchen! We have been able to collect over one gram of thermal paste for later tests and will therefore be able to test and compare it with an expensive product with the same assembly and under identical conditions.
 |
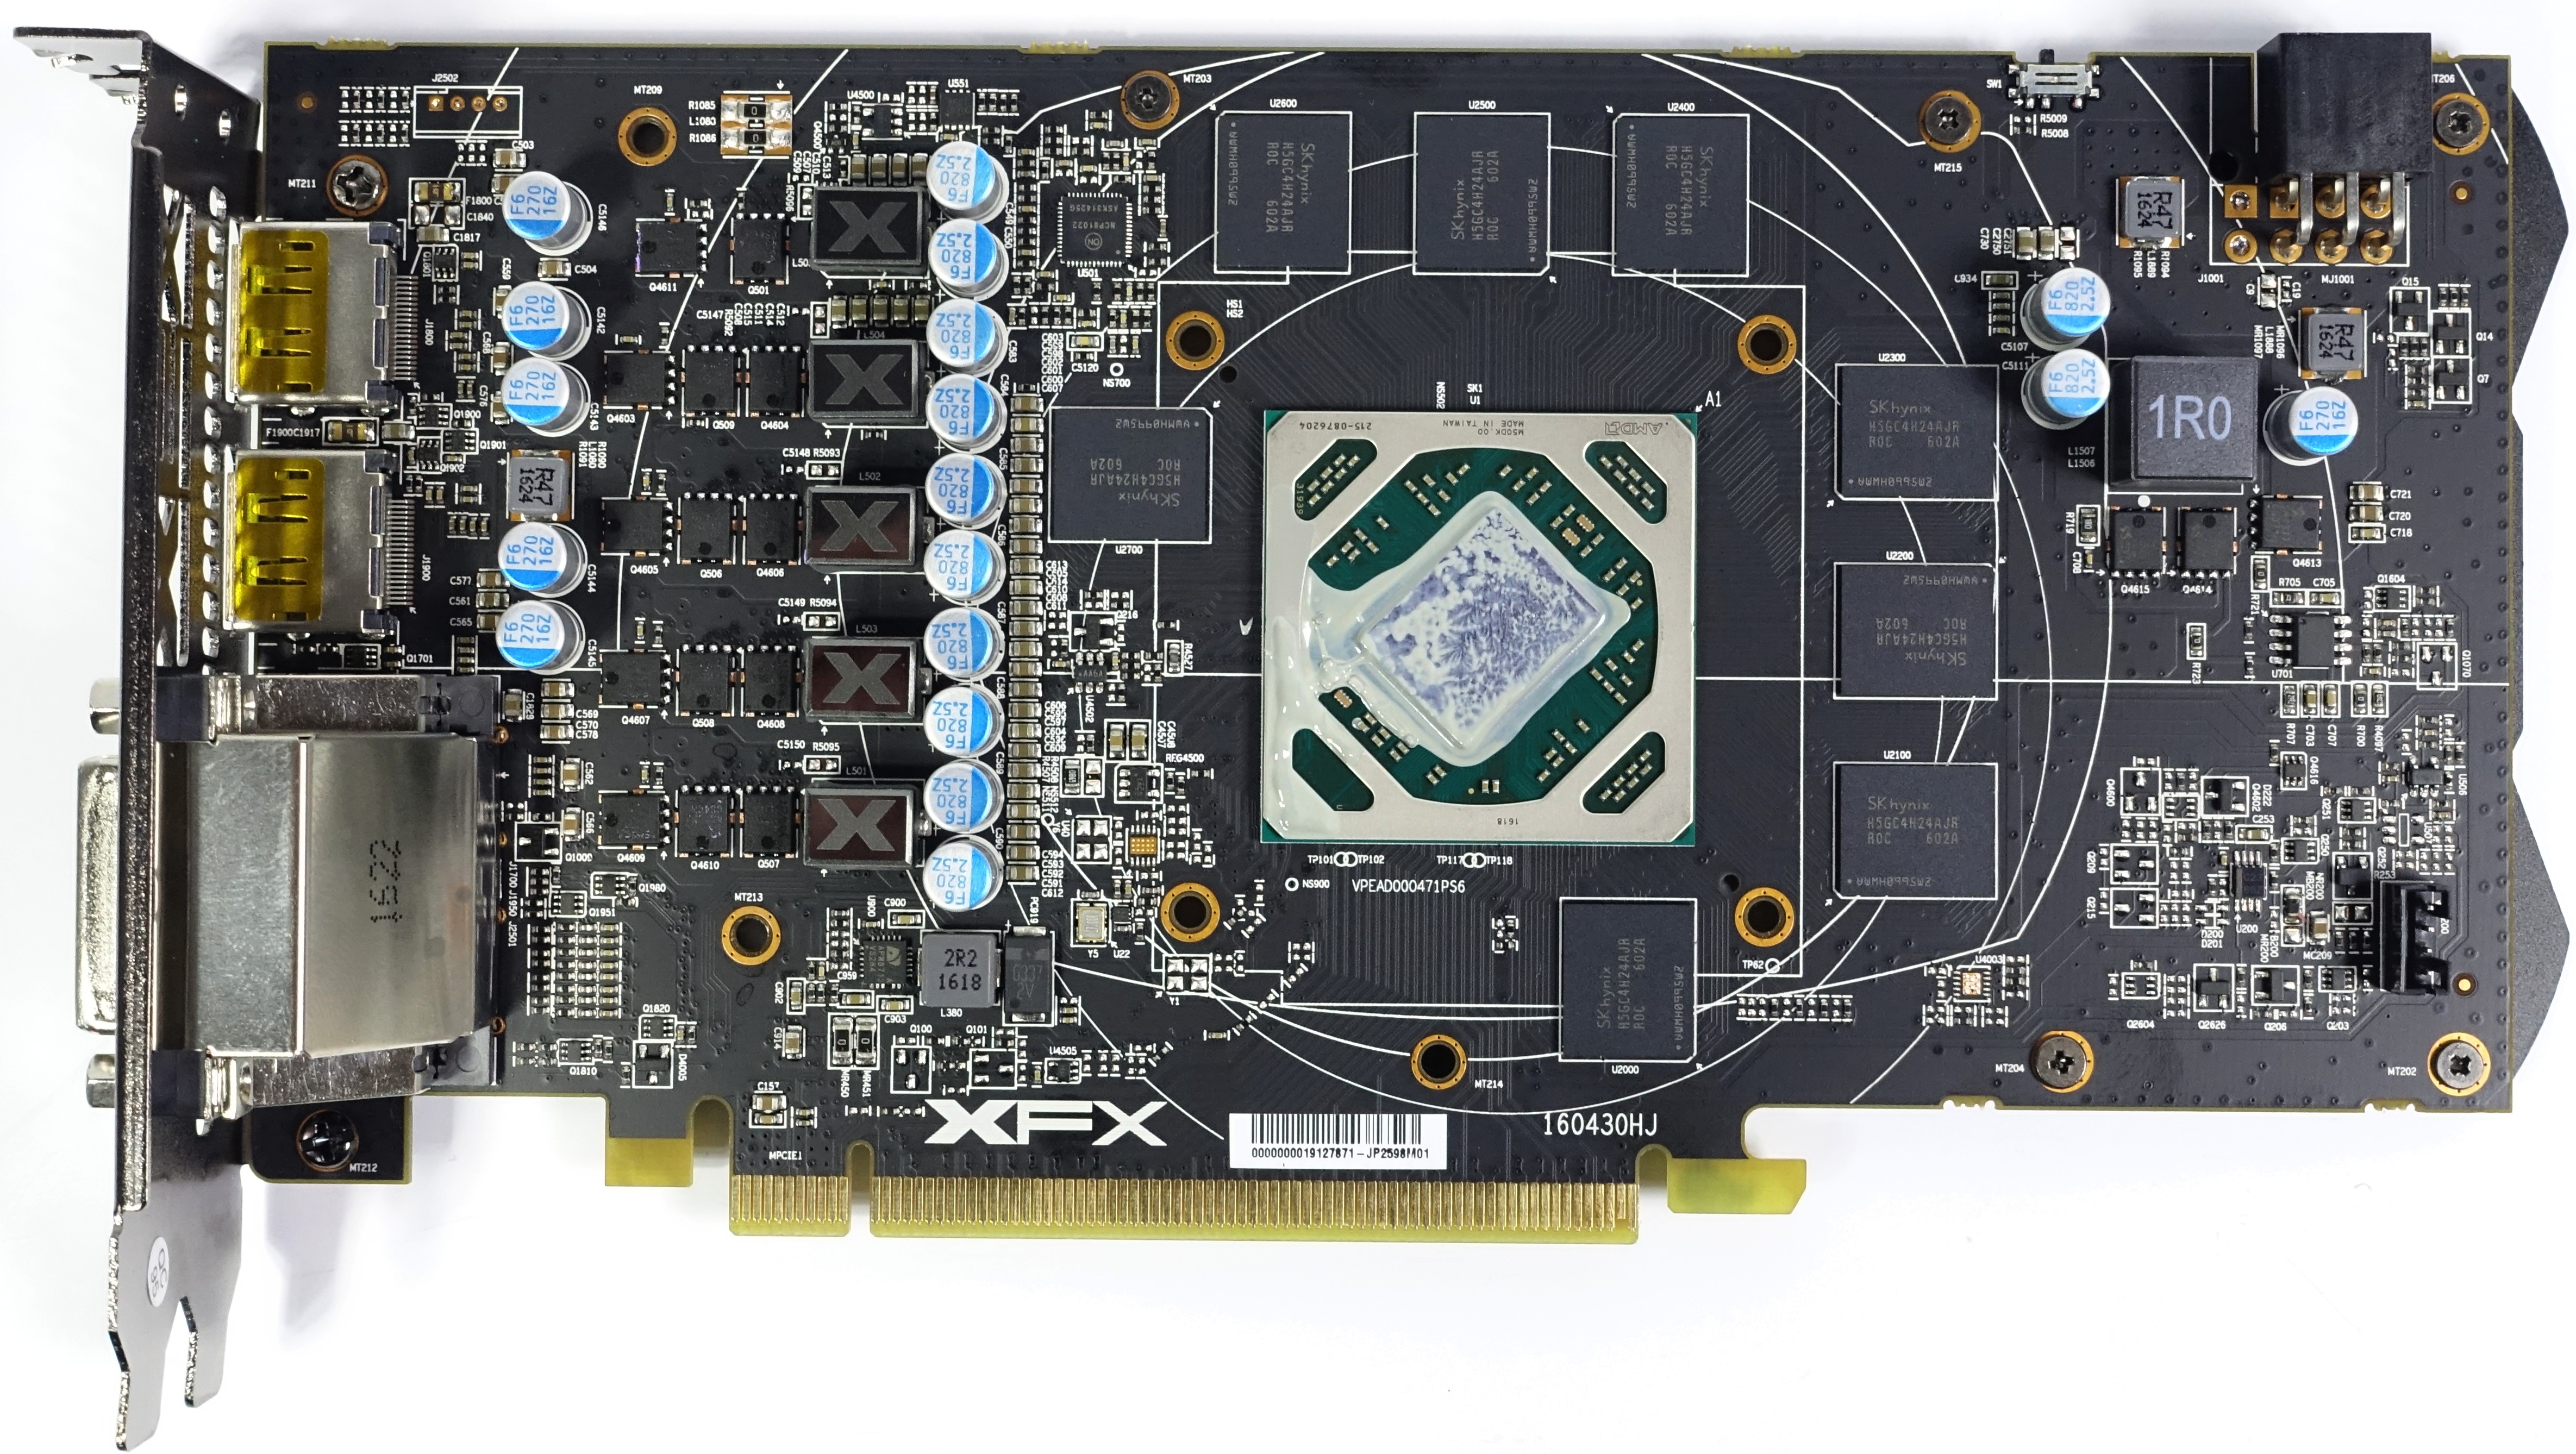 |
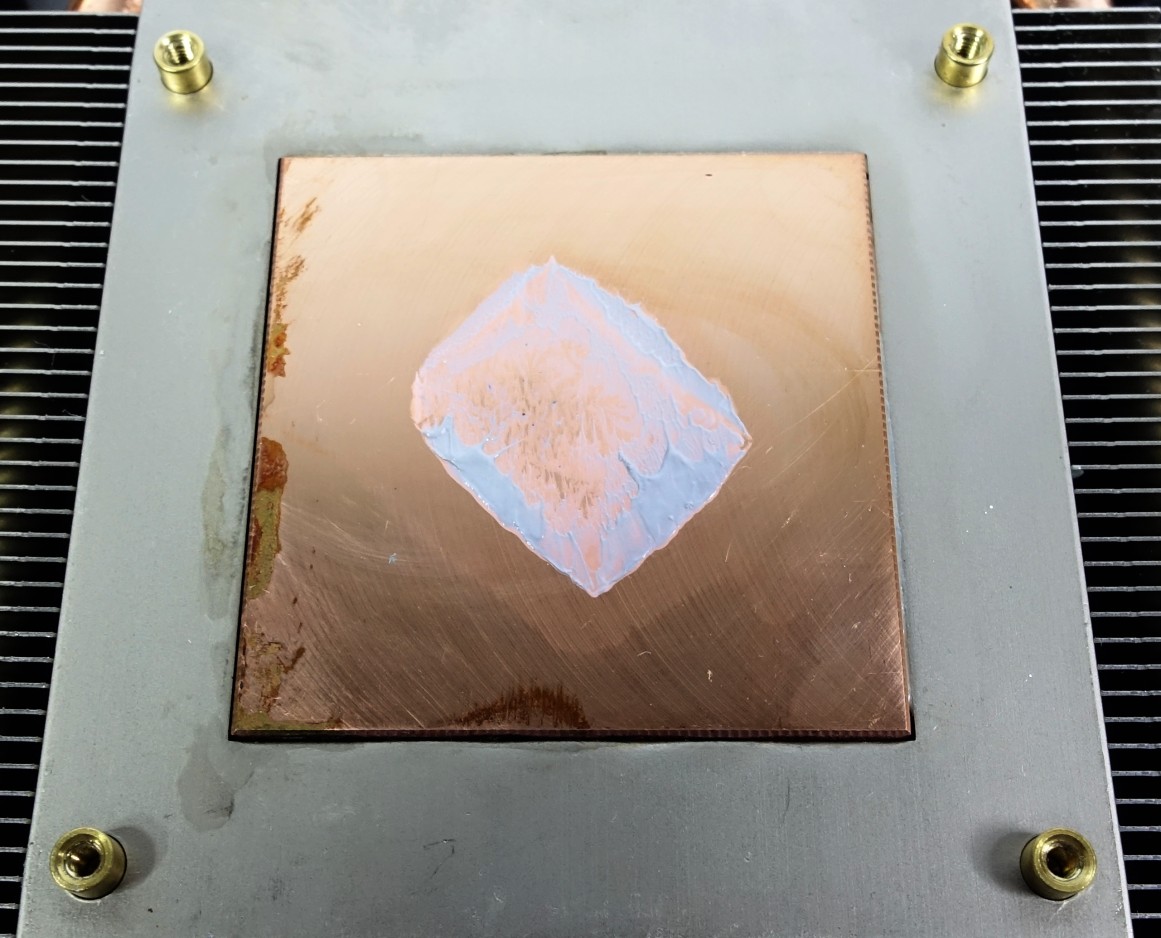
As we can see, this paste has been used so abundantly that half the base has been filled with it. There is no question that this is nonsense, but it is not dangerous. These very simple silicone pastes are generally non-conductive and therefore the possibility of short circuits is not given.
 |
 |
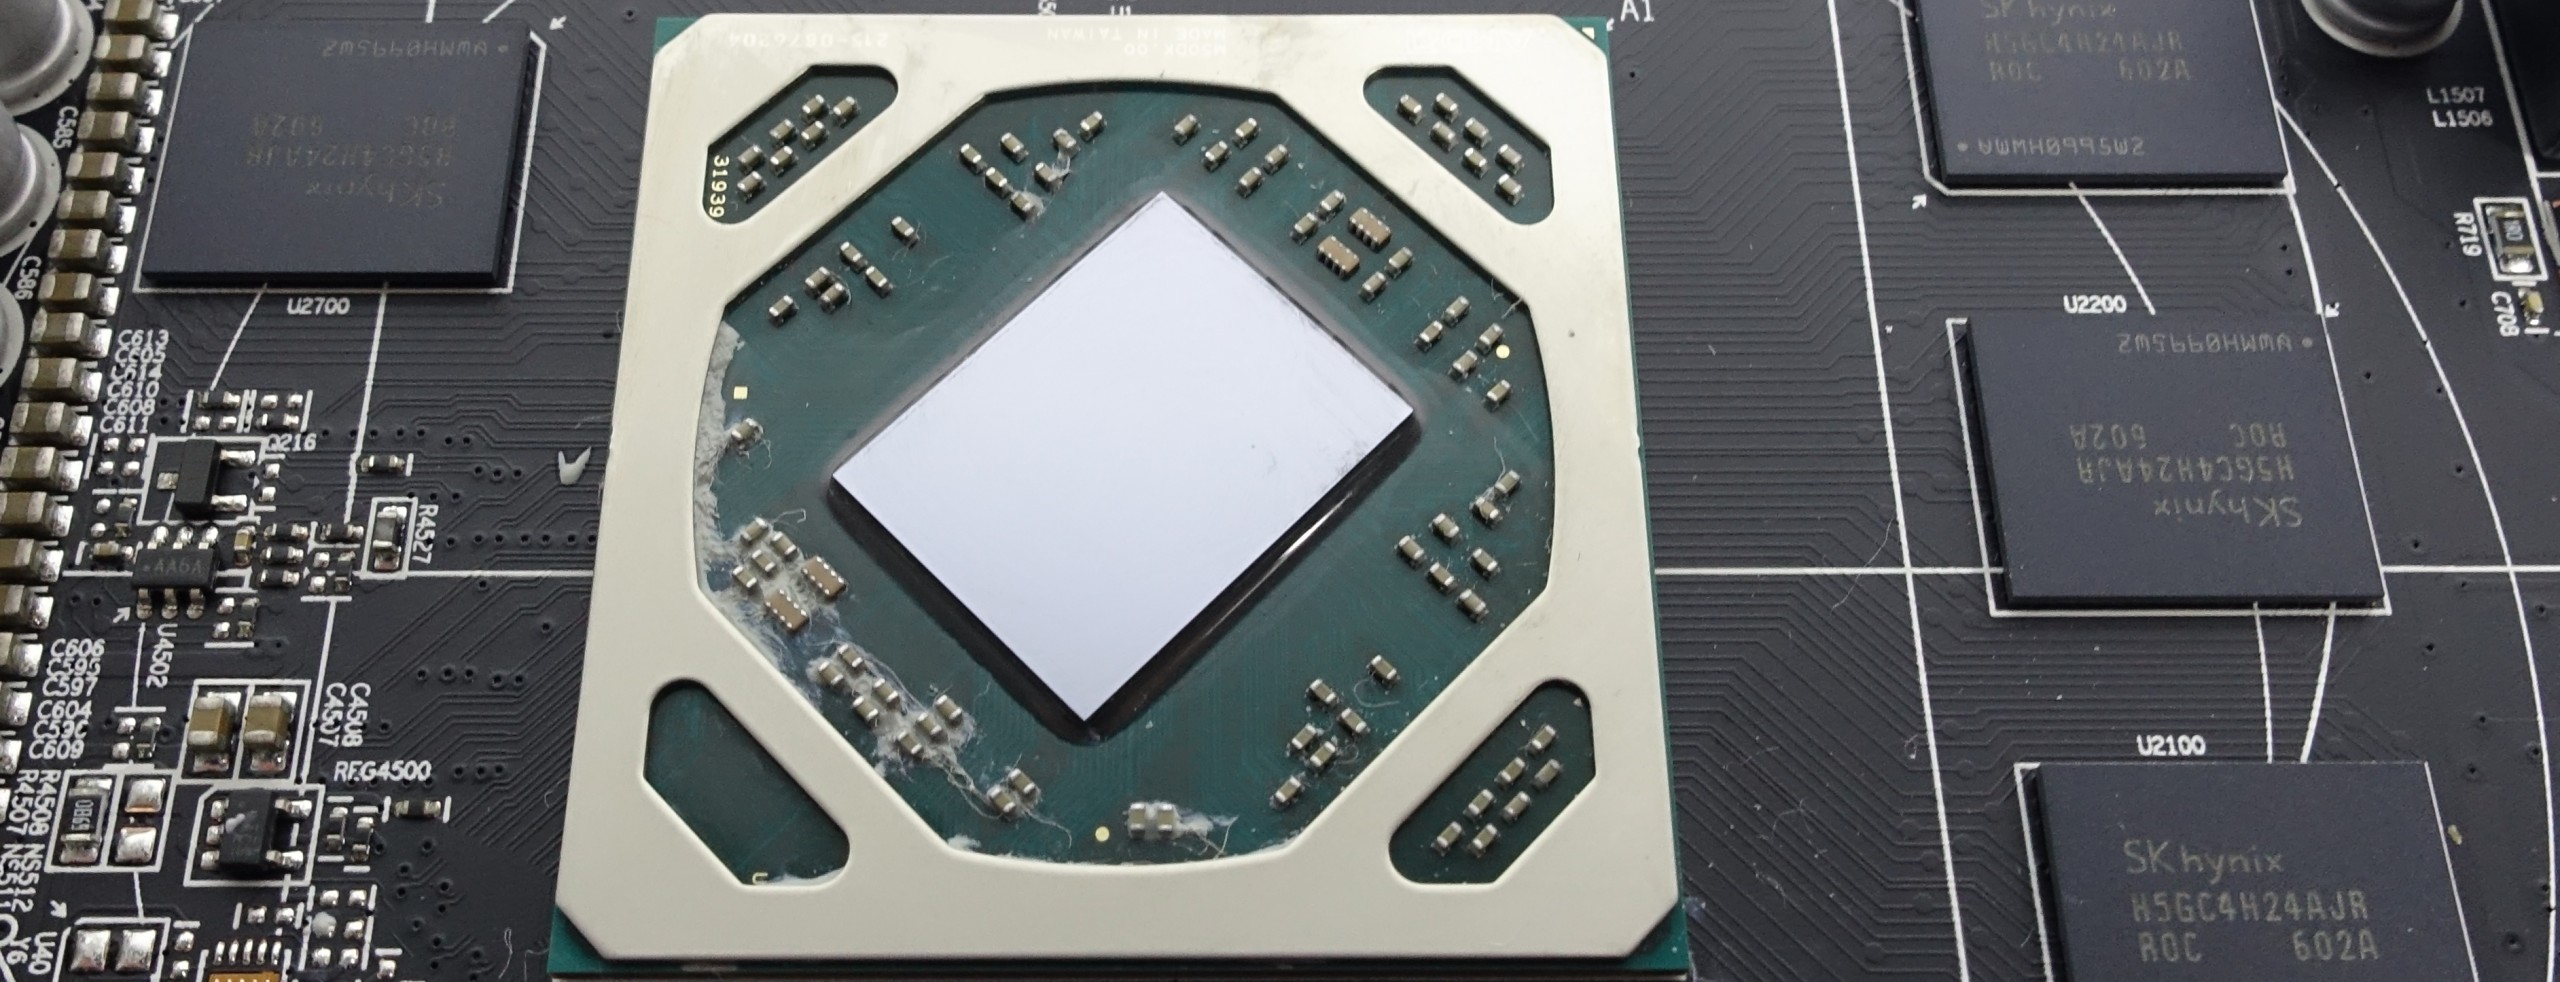
In spite of everything, a very thorough large-scale cleaning is recommended, in which all this is wiped off with a soft cloth in the first operation, which can be removed without any further aids. With the heat sink you have to take extra care that leftovers of the old paste can remain here in various grooves, which also applies to ground heatpipes.
This definitely needs to be completely cleaned, as mixing different pastes can be extremely counterproductive. Various cleaning kits from specialist retailers or, in case of doubt, even the significantly cheaper isopropyl alcohol (2-propanol), which is available at Amazon or pharmacies for example, from around four euros per litre, help here. On the other hand, it is better to do without the contaminated, more aggressive burning spirit. Completely unsuitable are any azeto cleaner, nitro dilution and the domestic nail polish remover, which can also be based on 2-propanol, but often contains other additives.
The socket also means to be pre-impregnation – especially any mechanical cleaning actions such as cockroaches or scratching must be omitted. Even the too strong rubbing with a cloth is already dangerous from a certain degree. What doesn't go away stays better and only the chip itself needs to be polished to a high gloss.
Note pad #5
• Old paste must be removed as much as possible without solvent
• Do not use sharp or sharp objects, do not scratch and scrape
• Use suitable solvents sparingly and carefully (2-propanol, accessories)
• Do not use aggressive solvents (nitro, acetone, etc.)
• Avoid solvents as much as possible in the GPU socket area, do not leave puddles
Perfect application of the right paste
So what is the right paste? There are tons of tests in the depths of the Internet, which usually also contradict each other clearly. Actually, each of these tests, which does not also respond to the fan speeds after the change, or the temperatures of the other components, more or less worthless.
With the exception of real water cooling without fans, the control mechanisms of current graphics cards such as AMD's Power Tune or Nvidias Boost ensure that the temperature behavior of the GPU controls the fan control, the voltage regulation and, of course, the clock significantly influenced!
The bottom line is that the clock can suddenly be held longer at the apparently same temperature, or the fans can rotate more slowly or both. In addition, a direct reduction in fan activity to a higher thermal load ensures other components, which are then cooled less at the same or even higher power dissipation! Doesn't exist? We'll show you what can really happen and what almost everyone just goes over with nonchalance.
The necessary burn-in time to achieve the best performance is also a topic that is almost never taken into account. We had all pastes "burned in" over a total operating time of 24 hours per paste, which dragged the test, but it was worth it to us. This is exactly what we would encourage every screwdriver to do in order to be able to assess the actual performance more objectively.
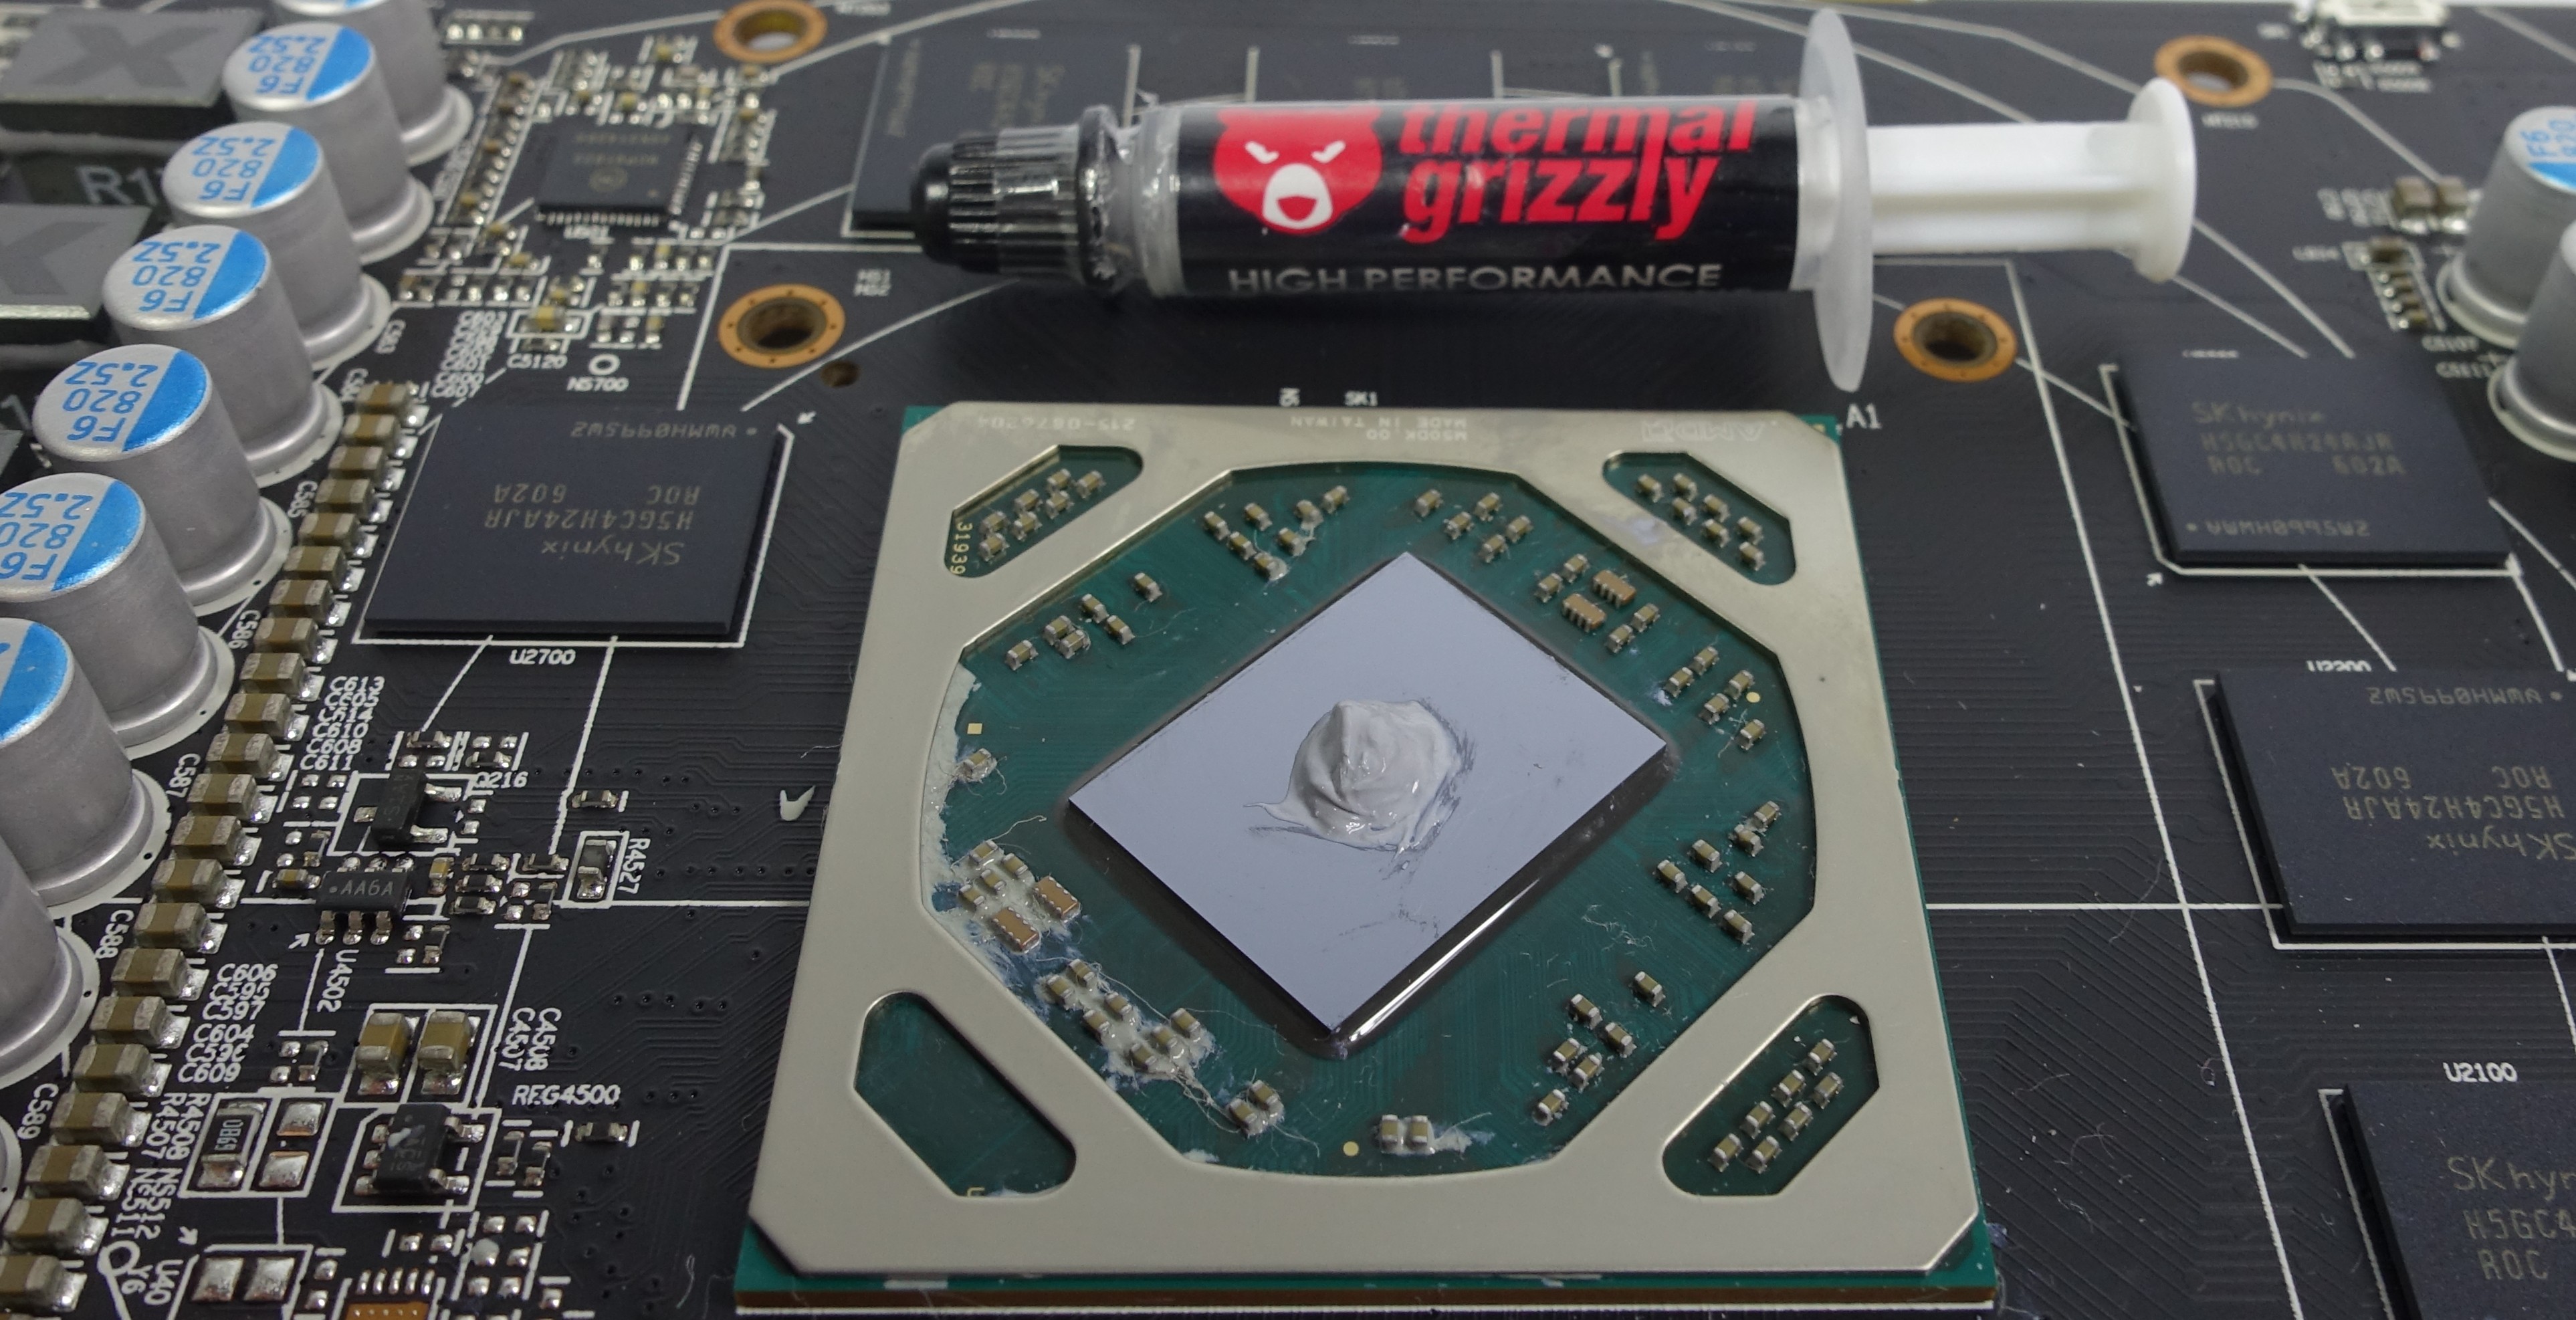
Since we generally prefer the blob method and the mutual screwing of the four GPU screws diagonally over cross, the selection of the most convenient paste is actually the most important task. Once again: A lens-sized blob is enough and it may also leak a little paste on the sides after the tightening. Better than to provoke blanks. If you have completed the burn-in described above, you should also check the four relevant screws again and, if necessary, Follow suit.
In addition to the basic properties such as the highest possible thermal conductivity (i.e. low thermal resistance), consistency plays a very important role. Tough pastes with high viscosity (e.g. Diamond pastes) are certainly a perfect melee weapon for the removal of waste heat in the hands of professionals with a lot of experience, but for the normal user they are incalculable and difficult to use. In order to be truly successful, one would then have to preheat such a paste, in sufficient quantity on the with approx. Apply 60 to 70 degrees preheated heat sink and immediately screw everything.
 |
 |
Let us control ourselves in between. These two pictures show that the blob shown above was absolutely sufficient and hardly anything over- or has leaked out. In addition, it shows a very thin and above all continuous WLP layer, which is all silly with spatula & Co. ad absurdum.
Let's get to the Gretchen question – the price. Not everything that is expensive and/or is advertised flowery is really suitable. The relatively small differences in the result – namely, when one evaluates under adjusted operating situs and with a check of the fan activity – many products automatically exclude due to the lack of real added value and added value.
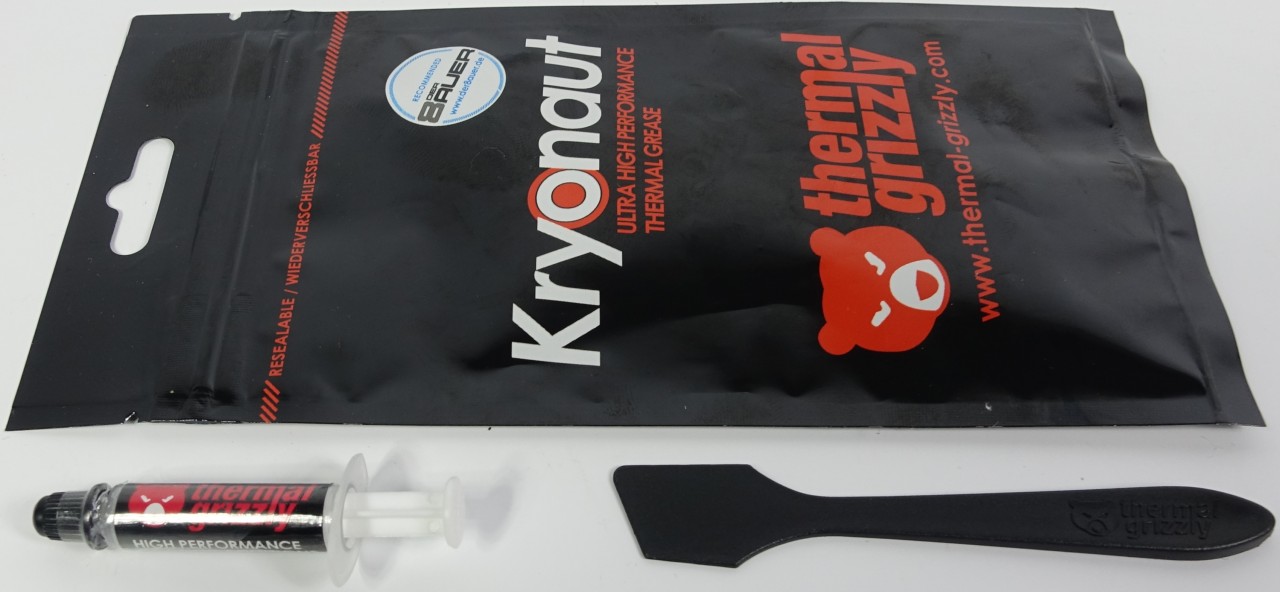
We have been working exclusively with the Gelid GC Extreme for a long time (almost three years) and have also checked each newly tested thermal paste for suitability for our test systems. The significantly more expensive cryonaut from Thermal Grizzly has replaced the GC Extreme in our graphics card testing system, but is also a small, nasty price bolt.
However, since you need significantly less than the amount contained in the smallest tube for the conversion of a graphics card, this quickly becomes relative again. The cryonaut, for example, is slightly thinner or more supple than the GC Extreme, but does not tear up and is therefore also a well-suited candidate for very smooth radiator floors. We would recommend them for all types of heat sinks and DHT floors (directly mounted, ground heatpipes) in good conscience, although there would certainly be suitable alternatives.
Note pad #6
• Use only non-conductive, non-tough pastes
• The paste should have the shortest possible burn-in time
• Advertising statements on thermal conductivity are often misleading – i.e. question
• Read various product tests and check the quality of the reviews
• Not everything that is expensive is really good
• Use blobing method with a non-tough paste
• Diagonal and step-by-step tightening over cross
Assembly and function test
So equipped, we go back to the assembly in exactly the opposite order and, above all, do not forget the fan cables. After a thorough visual inspection, for which you can also use the recommended photos, the first electrical function test is carried out without load. With tools like GPU-Z, the temperatures can be tested and logged in the idle.
 We use our thermal imaging camera with warning function for hotspots
With the same room temperature, the GPU temperature should not be worse. If so, then something has been done wrong and may be returned to zero again. If not, you can gradually increase the load and also compare the temperatures with the pre-action condition. If you notice lower fan speeds, you should adjust the fan curve to the new, lower temperatures and raise the speeds to the previous value under load. We shall see why these adjustments are so important.
Note pad #7
• Detailed visual test after complete assembly
• Functional tests without load
• Rework in case of errors or defects found
• Comparison of logged temperatures with increasing loads up to stress test
• Burn-in over several hours
• Do not eat after burn-in!


Kommentieren