


If you now have such a computer based on the Ryzen 7 2700X, you should first install CPU-Z, HWMonitor or HWInfo as well as Cinebench R15 / R20 and of course Prime95. Furthermore, you need the program Furmark, so we will use the GPU a little later to have it nicely warm in the case! These programs can be found via Google and they do not cost a penny. After installing the programs (put shortcuts on the desktop) we restart the computer and go to the bios.
There we check the settings of the CPU, the Rams, the Load Line and whether Precision Boost Overdrive (PBO) is activated. PBO is a type of auto overclocking that is activated in the Bios. Here, the processor is supplied with the maximum power (watts and volts) – within the permitted AMD specifications – by the motherboard, with the aim of achieving the boost clock in the best possible way. even surpass it and keep it as long as possible. (always dependent on the heat paste, the cooling, etc., but the Igor likes to explain this to you)
Let’s take a look at the bios of the MSI X470 Gaming Pro Carbon (you can get into the bios by starting to boot after the computer, as long as the Delete button presses until the image looks something like this), whereby the BIOS and GUI look different with each manufacturer. In the overclocking tab, we check that the CPU ratio on Auto (Ratio on Auto lets the processor boost to the AMD specifications) and the XMP profile of RAM must be set to profile 2 (3200 MHz).
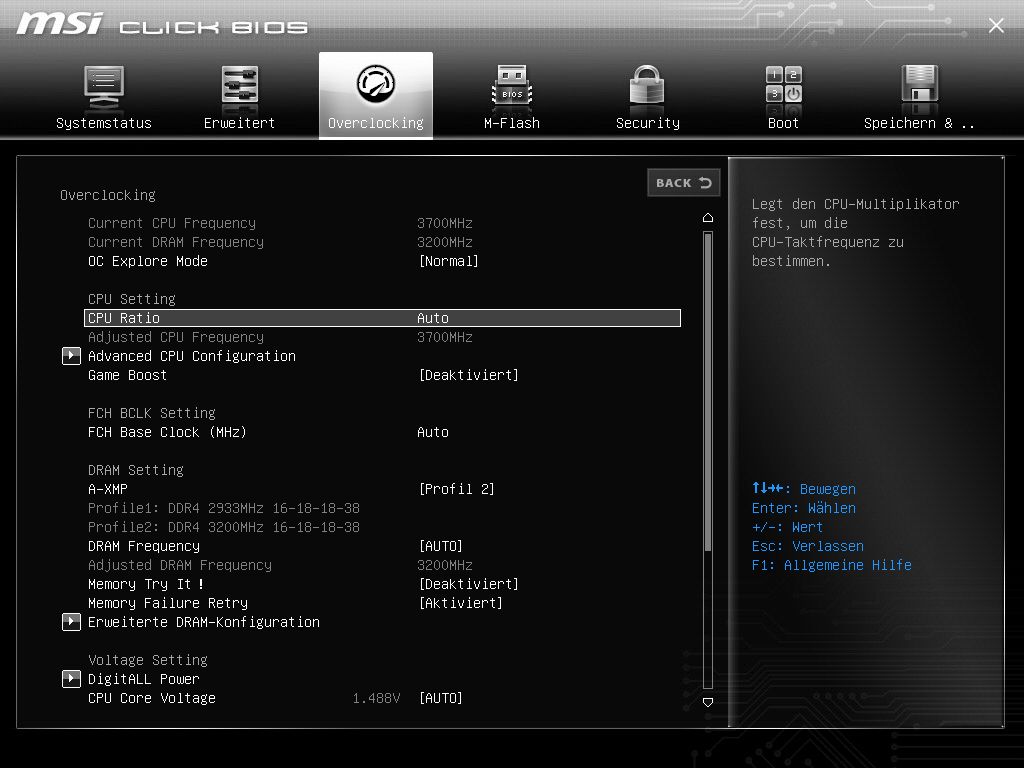
And on, here the “CPU Core Voltage” must be set to Auto.
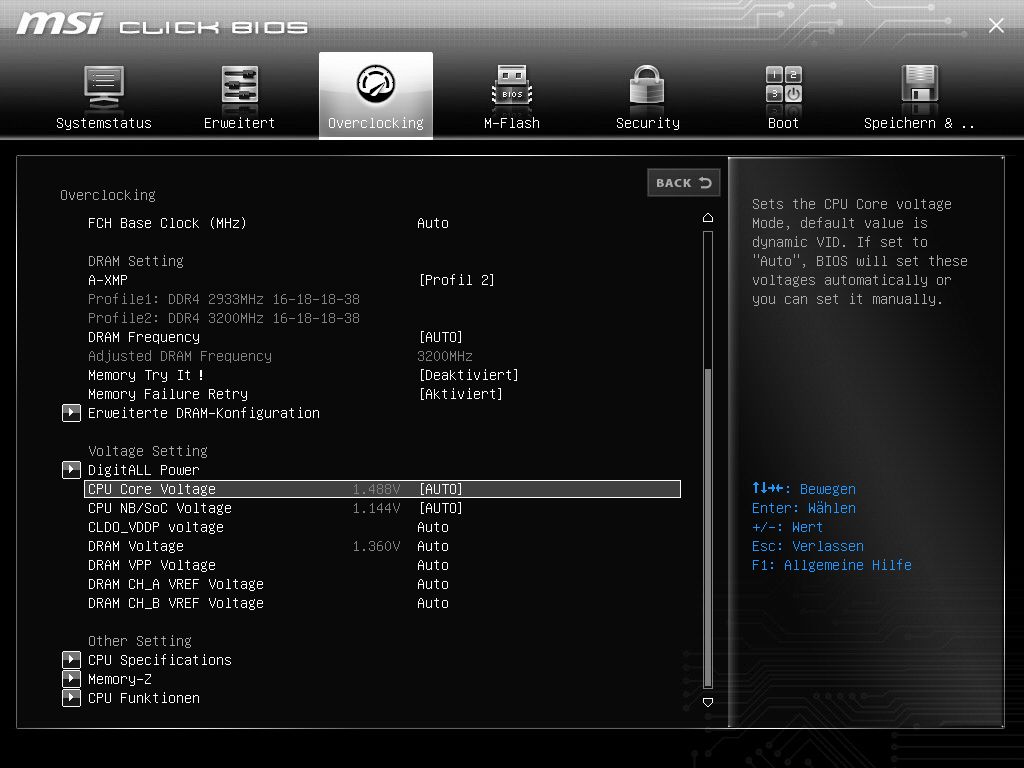
Next step: We click on the submenu “DigitALL Power”

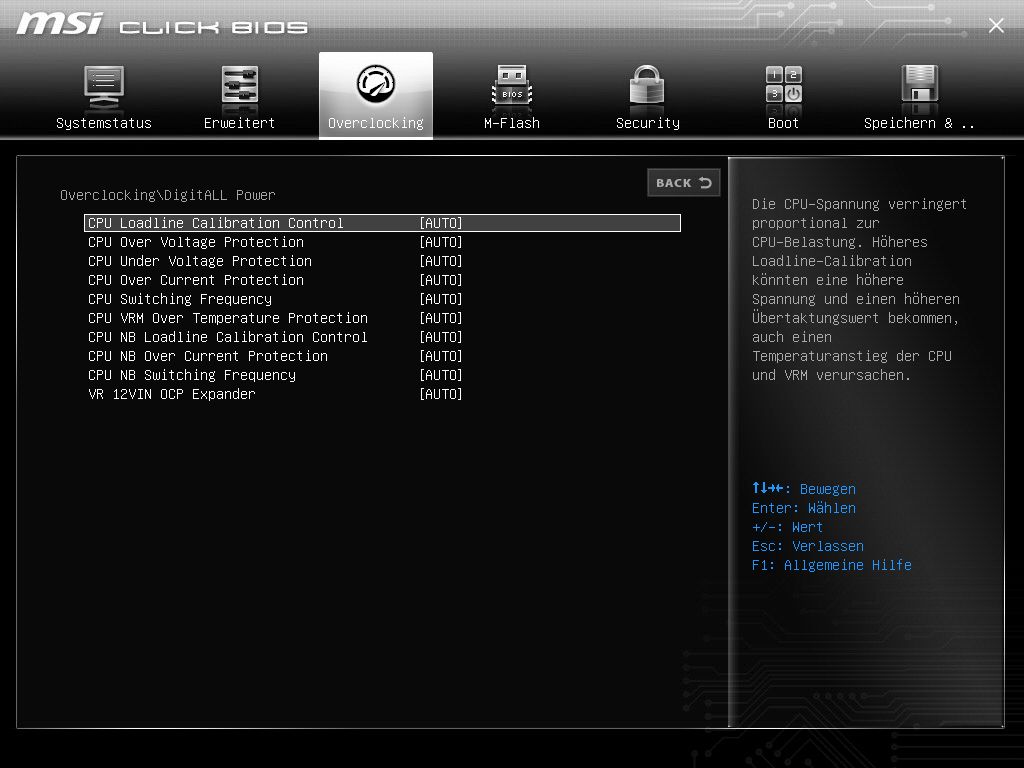
Now you have to check that the Load Line Calibration is also set to Auto:
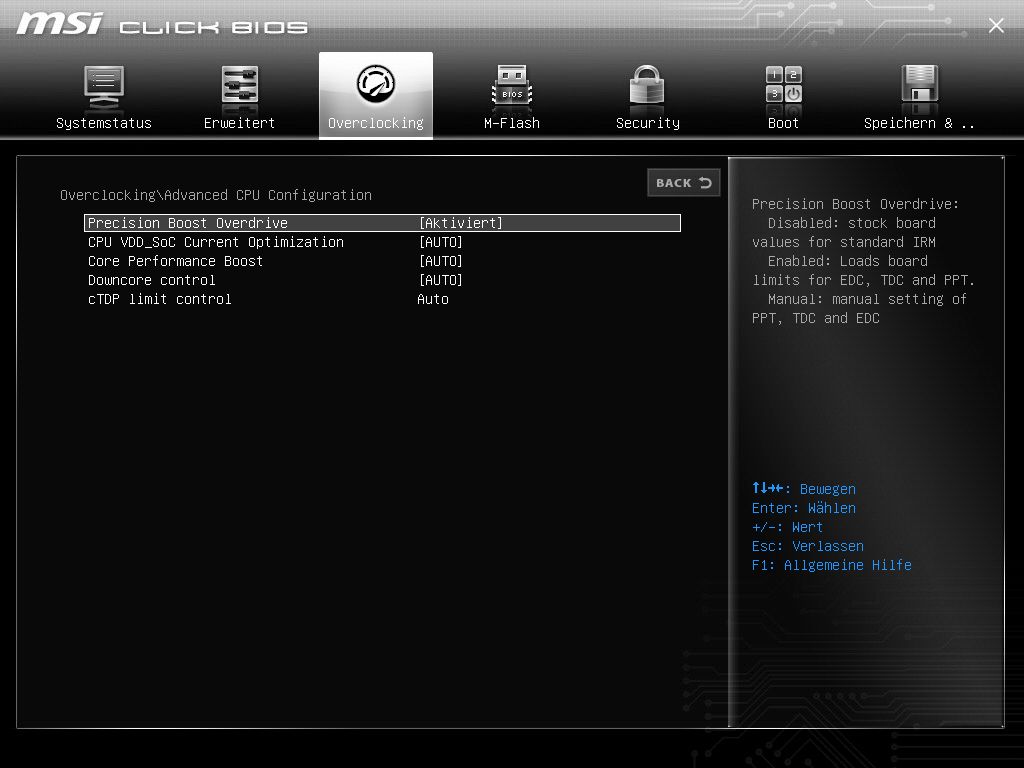
Clicking on the “Advanced CPU Configuration” does not hurt:

Checks that PBO is activated and that the “cTDP limit control” is on auto (here you could limit the CPU regarding its thirst for leaky socket juice, e.g. 105 watts that AMD specifies, but then you can’t unleash the full power of the CPU)
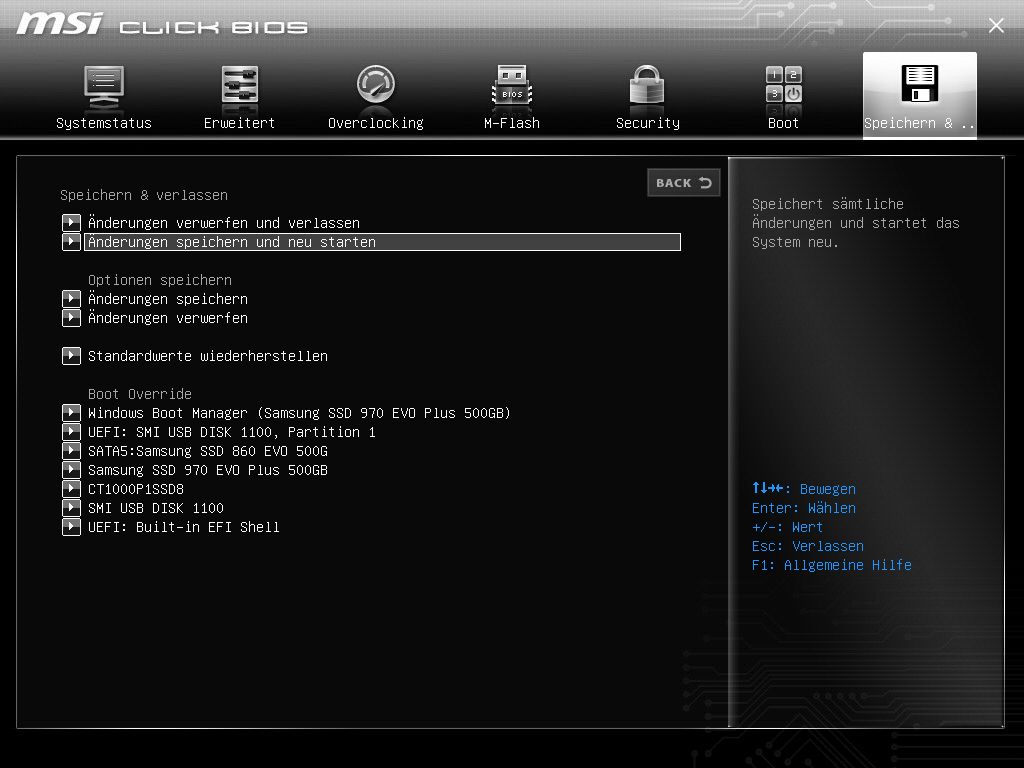
So now only missing? In the tab memory, save the changes and restart!
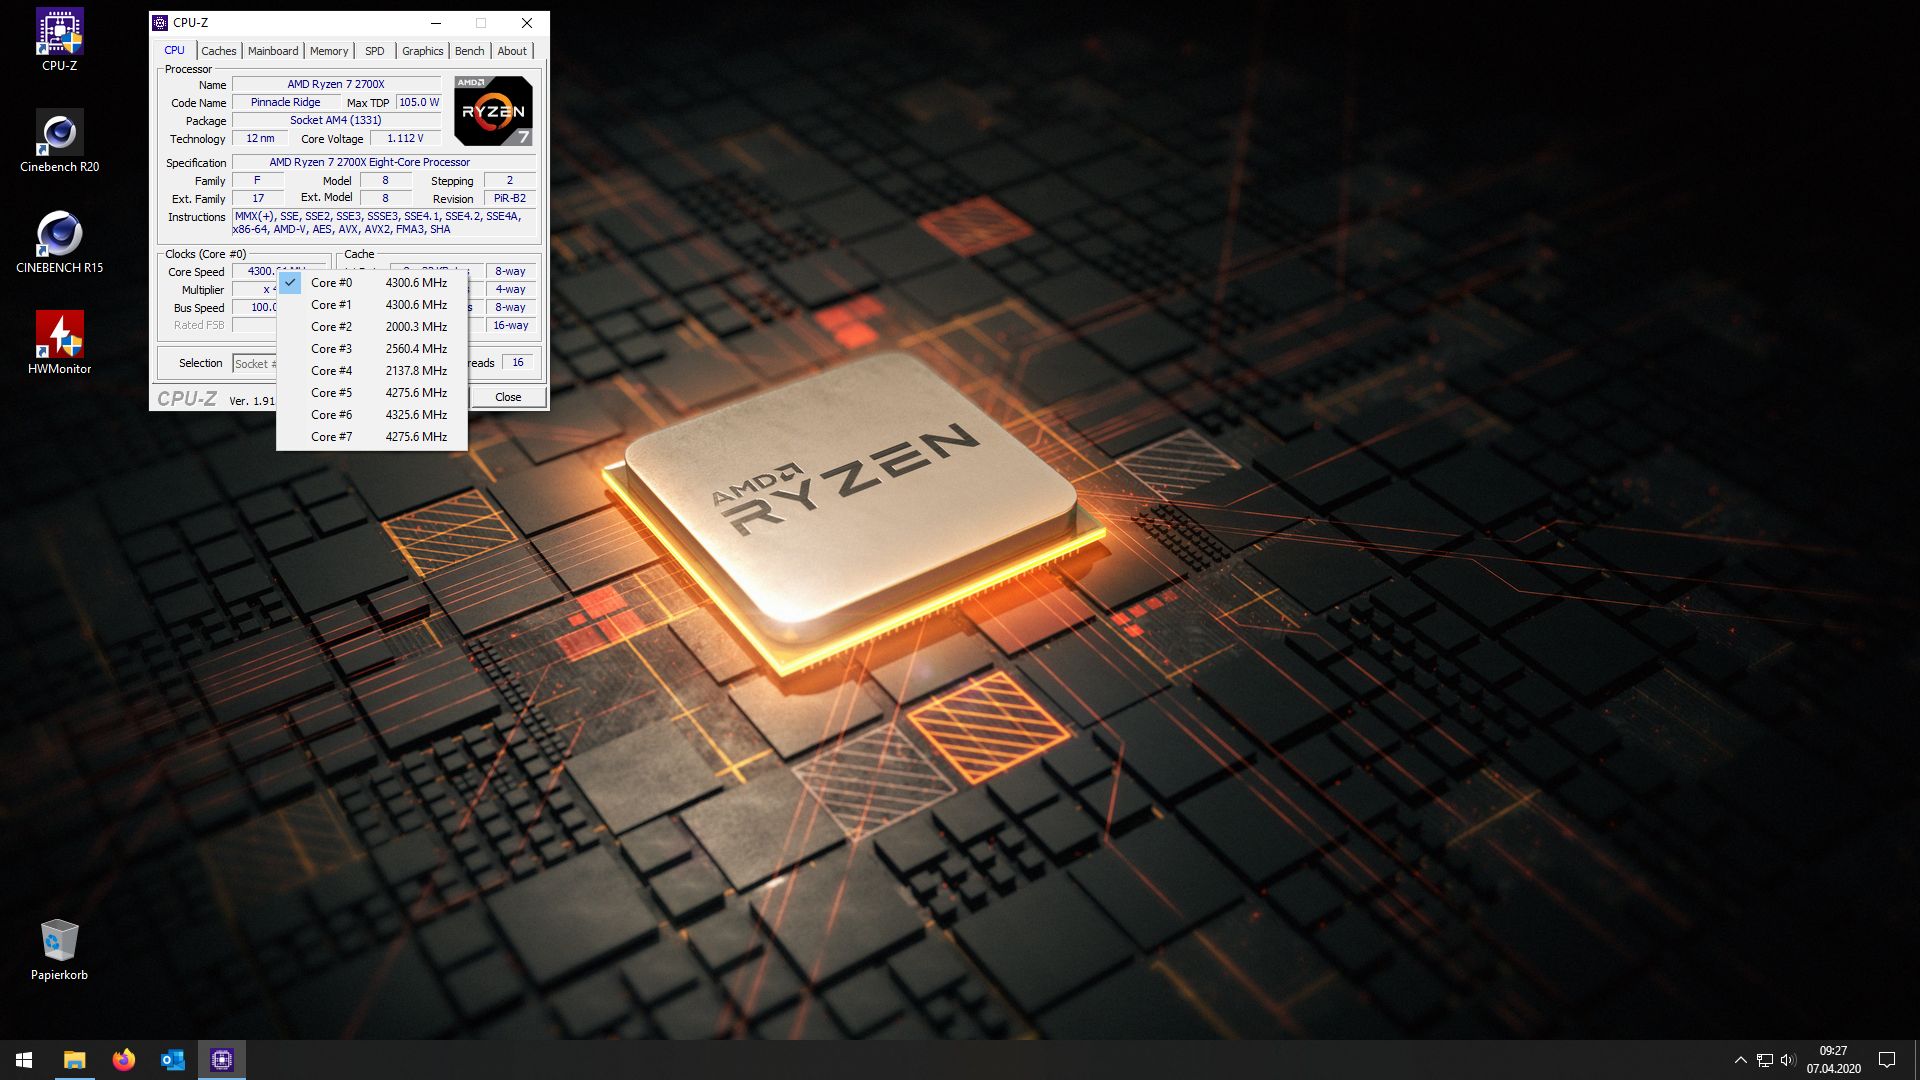
After the computer is back in Windows, we can start CPUZ alternatively you can also use the above.c. Programs HWMonitor or HWInfo and we take a look at the clock rates and the core volts in the idle. (Recommendation uses CPUZ, which is clear for the beginning and shows the essentials) A lot of things would have to move here? The voltage will be in the range 0.8 to 1.51 V and the clock rates of the cores somewhere between 2000 and 4350 MHz. Tip on the edge, with the right click on the displayed Core Speed, you can see the clock rates of all cores. CPUZ shows the core voltage at 1.112 V and the clock rates bounce through the area.
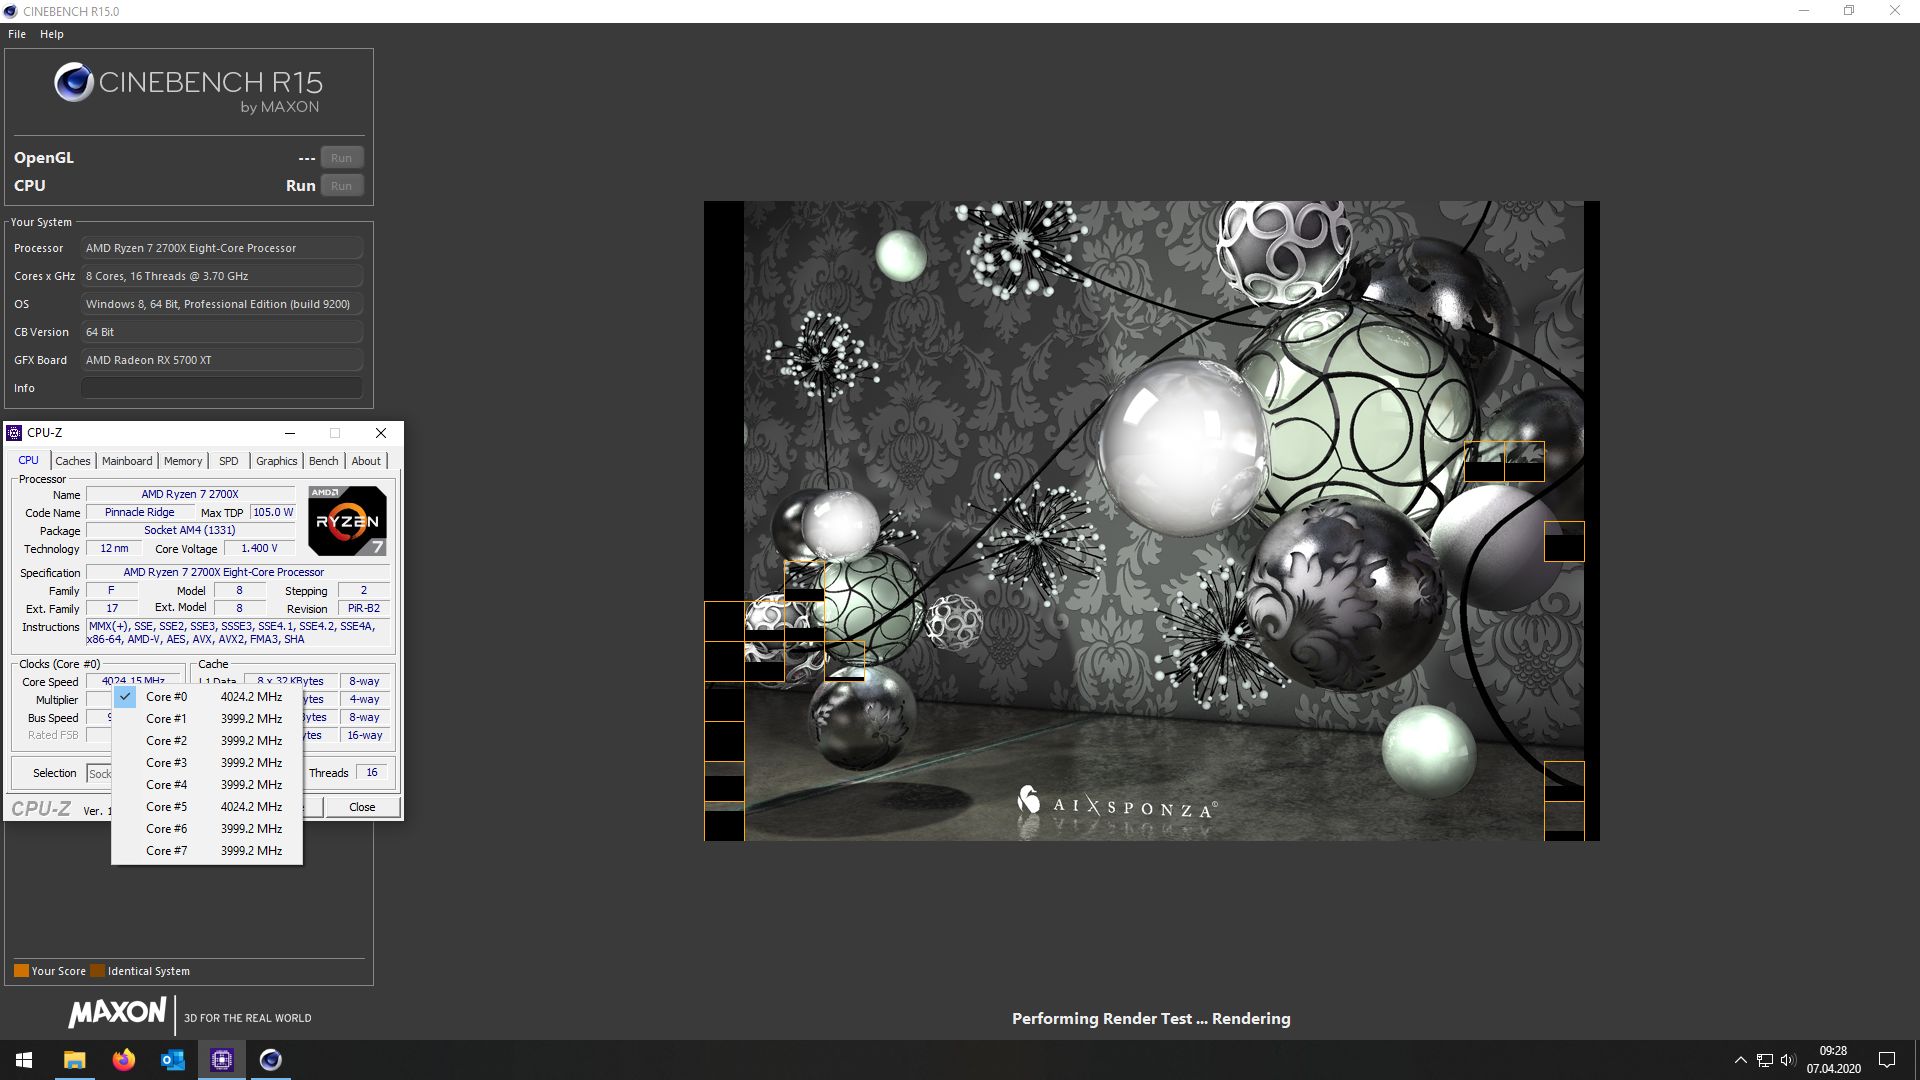
Now it really starts by starting Cinebench R15 (alternatively also R20), I recommend the R15, which does not last that long and is completely sufficient for the following purposes. We look at how the voltage behaves under load. Here we see that the Ryzen 7 2700X with PBO holds the voltage at the beginning of 1.416 volts and at the end drops to 1.4 volts.
Now we restart the computer and set up the LLC. But first of all, what the ignorant among us. Now comes… As already mentioned at the beginning of the review, now comes the little excursion to the topic: the Load Line Calibration and me!


Kommentieren