


Even though compared to CPU and GPU, RAM overclocking probably has the smallest impact on your daily computing experience, specific memory sensitive applications can see a big boost from optimizing your PC’s memory, like we covered in our Cyberpunk 2077 memory roundup. So today we want to show how we overclock and – equally important – stability test RAM kits, and how you can do it, too. This is intended to be a general guide and overview of the factors that you should be aware of when overclocking your system memory.

Since these include many variables, often platform-, motherboard- or sometimes even BIOS-specific, it’s hard to give exact recommendations in this scope. However we try to provide a complete picture and will update the guide, should new facts come to our attention. Of course, if you already know most of the basics like clocks, timings etc. and you don’t feel like fact checking, you can of course skip those pages. This guide of course is by no means the perfect be-all and end-all tutorial, but rather aims to summarize the best practices and things you should watch out for, created by the community, for the community
Possible Data Corruption – A big caveat that you should definitely read before proceeding
First of all, we have to start with an important disclaimer. If you overclock your CPU or GPU, in the worst case your system crashes or bluescreens, then restarts and you are back to a clean sheet of OC paper. But when a RAM OC is unstable you might for one not notice it right away and secondly face severe consequences in case of file corruption on your system or complete irreparable damage to your operation system installation.
Think of it this way, if your PC is a brain that’s constantly processing data, an unstable memory overclock is basically like introducing Alzheimer’s into that brain. Memories might get corrupted, changed or outright lost. Needless to say, you don’t want to do important work in this state or even worse do any file system repair, like is often triggered automatically by system crashes at next startup, as these “repairs” in an unstable state will often do even greater harm.
So validating the stability of your systems RAM overclock is imperative for maintaining integrity of your OS installation and data that you are processing on a daily basis, even if it’s just Windows doing stuff in the background. So how do you validate stability while the system is running, while you should not run your daily OS install at the same time in fear of corruption?

Basically it always comes down to having a separate boot medium that you do the stability checking with, before you go back to your actual boot medium, as in your actual OS. A probably well-known tool for this is Memtest86, which has been around for a long time and is available in ISO images ready to go for thumb drives to boot off of, do stability tests an nothing else. Also some motherboard BIOS’s even have Memtest86 integrated, so you don’t even need to bother with separate media.
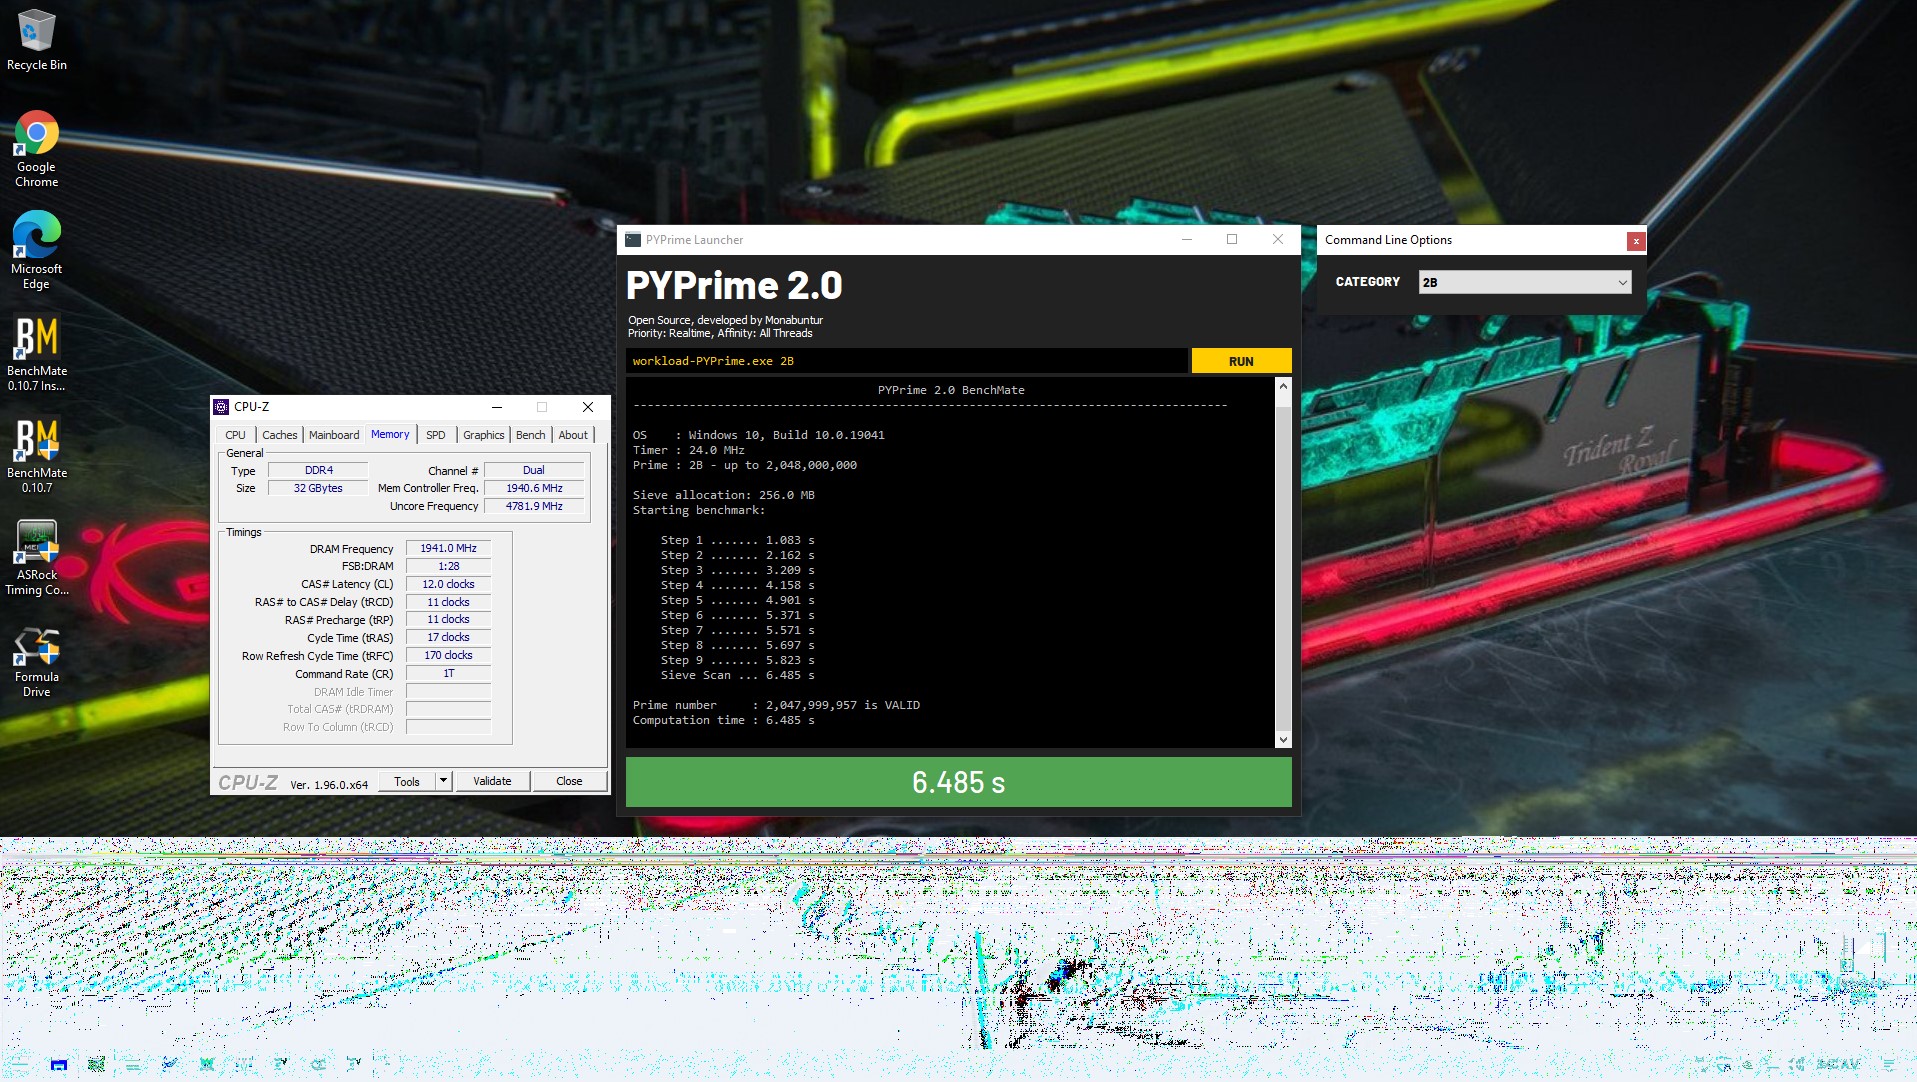
For quick testing this approach is fine, e.g. to validate if your RAM kit is actually stable at the manufacturers XMP spec or if an individual module might even be defective. However for manually overclocking and tuning memory for best performance, I would always recommend a separate and entire Windows installation. The reason simply being that from there you can run multiple different stability testing programs, which we will get to later, and you can also check if performance has actually improved and not worsened, which can happen, especially if you only tune part of the memory timings manually.
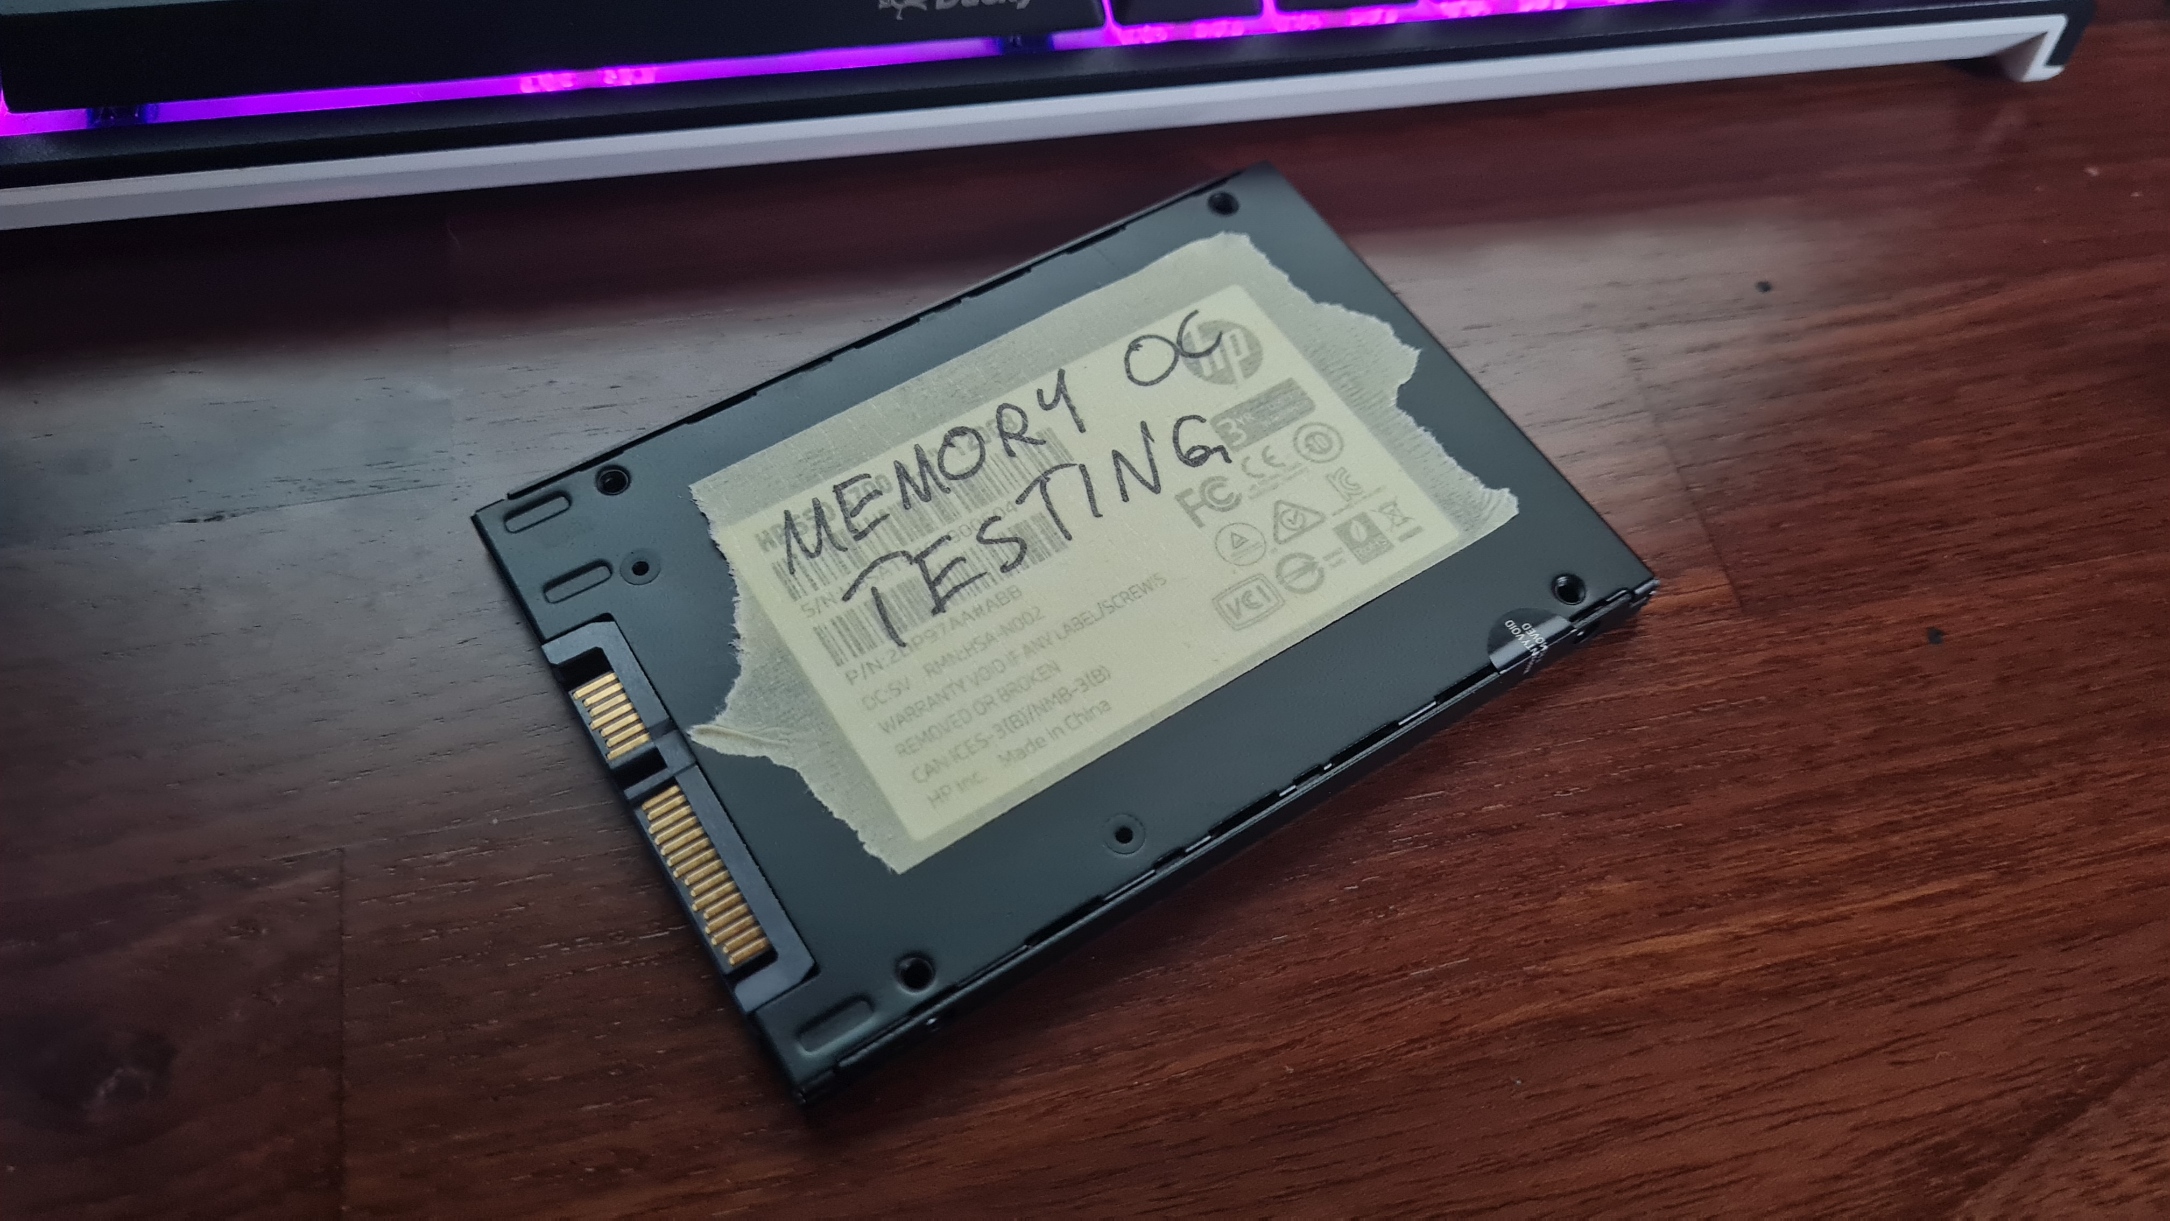
So my recommendation is, get a dedicated small SSD, like 120 GB which you can get relatively cheap these days, and create a separate Windows installation on it with the apps needed for testing stability and performance. Then, before you start overclocking your RAM, unplug all media like SSDs or HDDs that carry any important data from the system, connect only the dedicated Windows install SSD for RAM testing and only then start tuning your memory. ONLY once you have validated your system for full stability, connect again your regular media and boot your daily OS.
This probably sounds like an overkill approach, but trust me, once you have lost sensitive data to an only very slightly unstable RAM OC, it really isn’t. Foresight is always better than hindsight. 😉
Platform limits and performance validation
Another aspect you should be aware of before starting to overclock, are the limitations of the platform you are working with. A prime example for this is the Infinity Fabric clock limit on modern AMD Ryzen CPUs, where you do not want to exceed the memory clock beyond the highest stable value for 1:1 synchronous operation with the memory controller and cache, to avoid regressions in performance.
So in a case where the maximum stable IF Clock Limit of your given CPU is 1900 MHz, in 99% of cases you want to be operating your RAM at DDR4-3800 and not higher. However, this does not mean, you can’t “overclock” your RAM beyond this point, since timings are equally important for the performance of your memory. So being able to tighten the timings, while keeping the memory clock the same, can also yield a big performance increase.
In that vein, you can also face limits caused by how many memory channels and ranks per channel you are running and therefore how much load the integrated memory controller (IMC) of your CPU has to deal with, what memory topology the motherboard has that you are running, what memory ICs are on your RAM modules and even how the PCB of the RAM modules is laid out. Mostly, you won’t know about the limits until you run into them, but you should be aware that there are factors that are outside or only indirectly in your control, while doing RAM overclocking.
Equally important is the use case you are doing the memory overclock for. So basically, what you want to get out of it? Since all applications are different in how they use CPU instructions and therefore also the system memory, some are more sensitive to increases in bandwidth, while others rather prefer lower latencies for better performance.
While synthetic benchmarks like the AIDA64 Cache & Memory Benchmark or the Geekbench 3 Multi-Core Memory Performance score, which we use in our RAM kit tests, can give you a rough impression of how performance might be affected, you should also always test the actual application(s) that you want to speed up. That might mean rendering a specific project in Adobe Premiere or Cinema 4D, or playing a specific part of a game while recording the FPS with a tool like FrameView, to effectively have a benchmark that you can use for before/after comparisons.
As mentioned already, some applications’ performance only scales with bandwidth or latency and not both. And in other cases, increasing the memory clock while leaving some timings at auto, can cause those auto timings to be set way too loose by the motherboard, which in turn causes you to actually lose bandwidth or latency with an overclock.
Hence, as also with CPU and GPU overclocks, you should always do a before test run in your benchmarks, run the same benchmark after having done your overclock and then compare the two results to ensure that you haven’t actually taken a step back in performance.


63 Antworten
Kommentar
Lade neue Kommentare
Urgestein
Veteran
Urgestein
Mitglied
Urgestein
Urgestein
Urgestein
Mitglied
Veteran
Urgestein
Mitglied
Urgestein
Mitglied
Urgestein
Urgestein
Urgestein
Urgestein
Mitglied
Veteran
Alle Kommentare lesen unter igor´sLAB Community →