


Color performance after calibration
If you absolutely want/must calibrate your gaming monitor, you can of course do so. I have performed a software calibration using Calman Ultimate. But this is also possible with DisplayCal or the software from DataColor for the SpyderX. Both achieve similarly good results, which are also completely sufficient for a gaming display. But before we look at that, let’s take a look at the performance with corrected white point.

OSD Setting D65
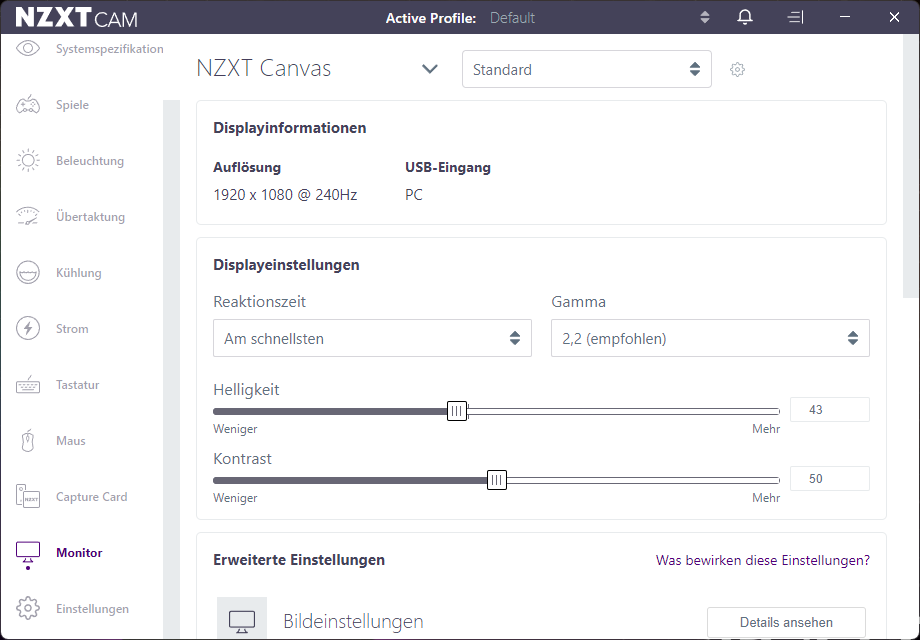
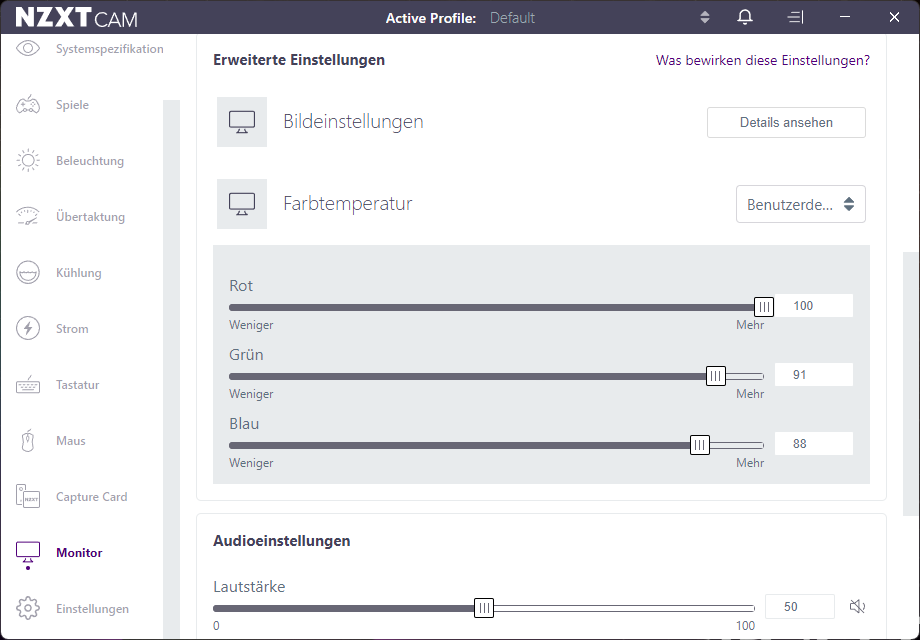
Unfortunately, you can’t see any numbers or percentages in the OSD, so I have the pictures from the NZXT Cam software for you. I recommend at least for the white point settings etc. that you install the software. (Attention: the USB-B to USB-A must be connected)
If you reconfigure it at home, you don’t need to do anything else from my point of view. This is basically enough for everyday use.
Gray Scale, Saturation, ColorChecker @ D65
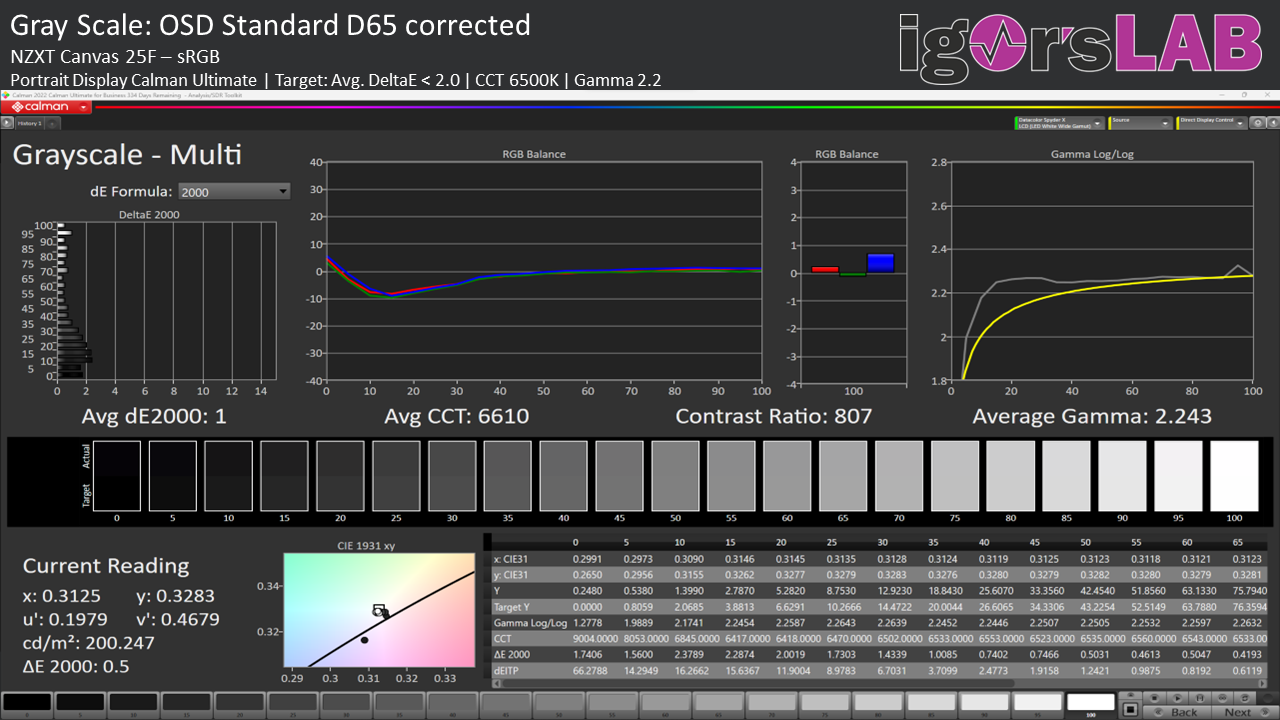
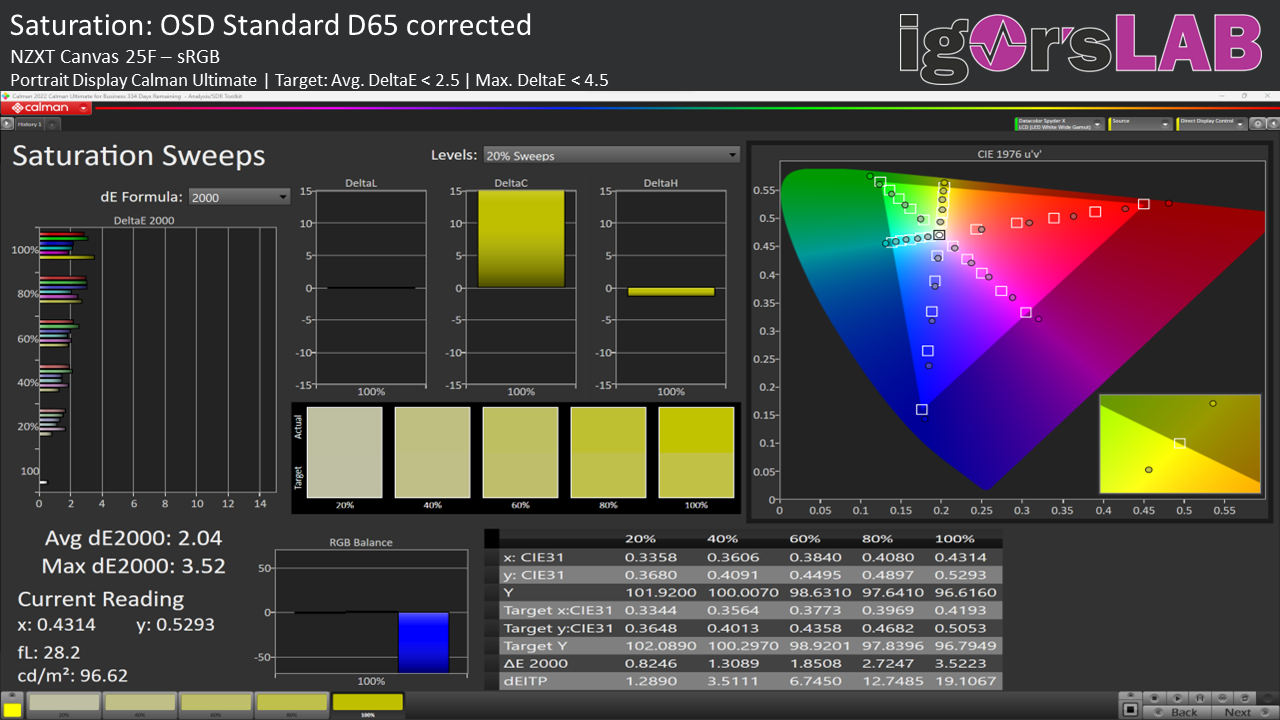
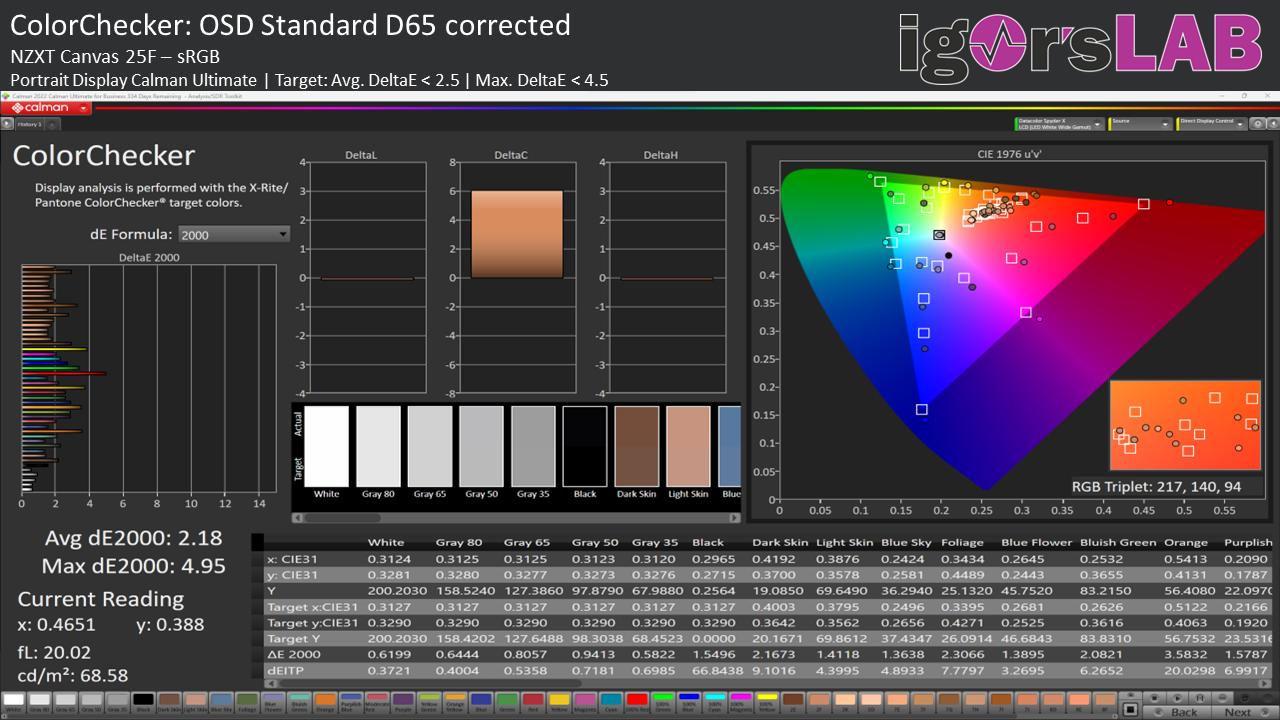
The gray scale performance is already really good with the “right” white point. The saturation is also somewhat better. The color fidelity remains basically unchanged. Why the white point is not quite right in the end? This is due to the gamma curve, which unfortunately does not quite fit. The only thing that helps is calibration.
Gray Scale, Saturation, ColorChecker after a software calibration with Calman Ultimate
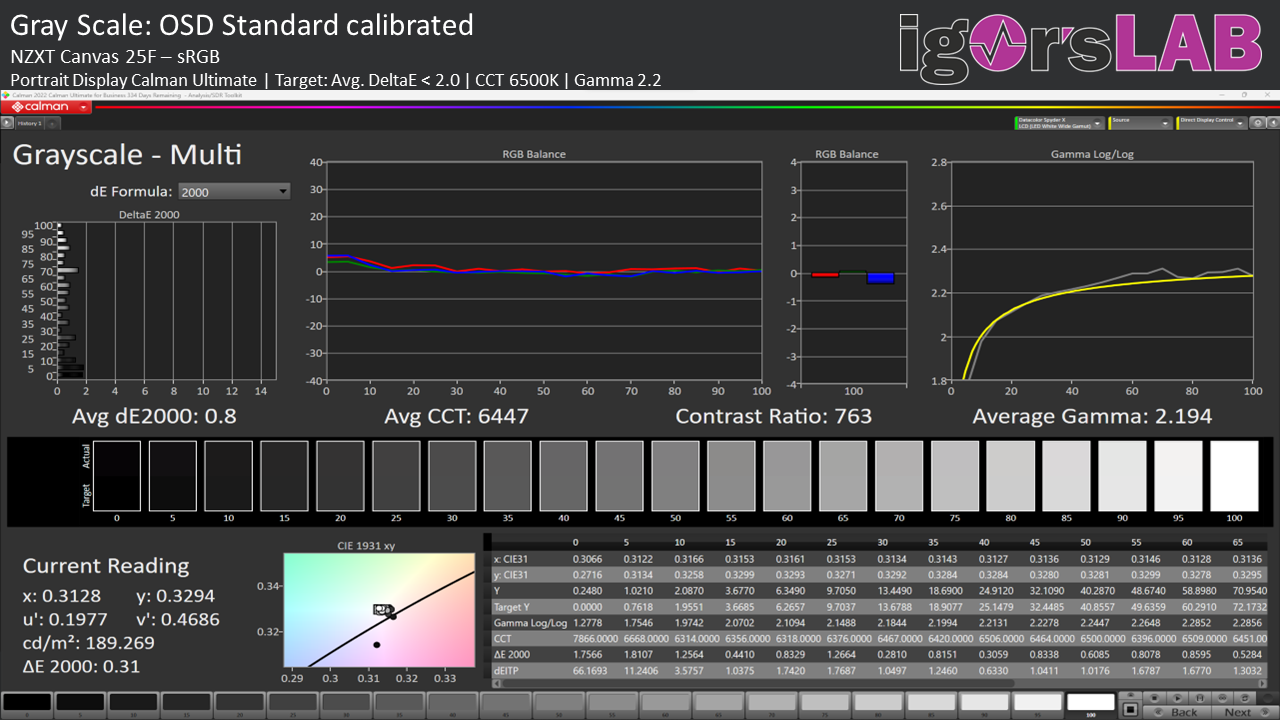
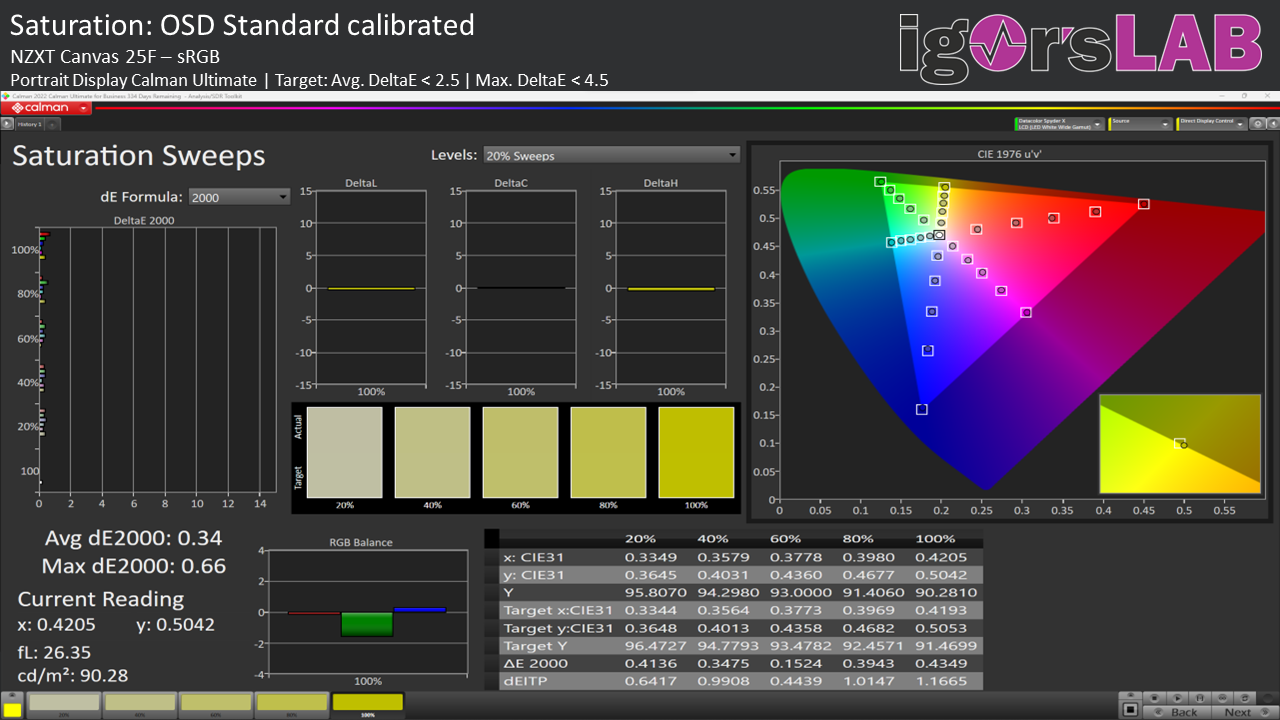
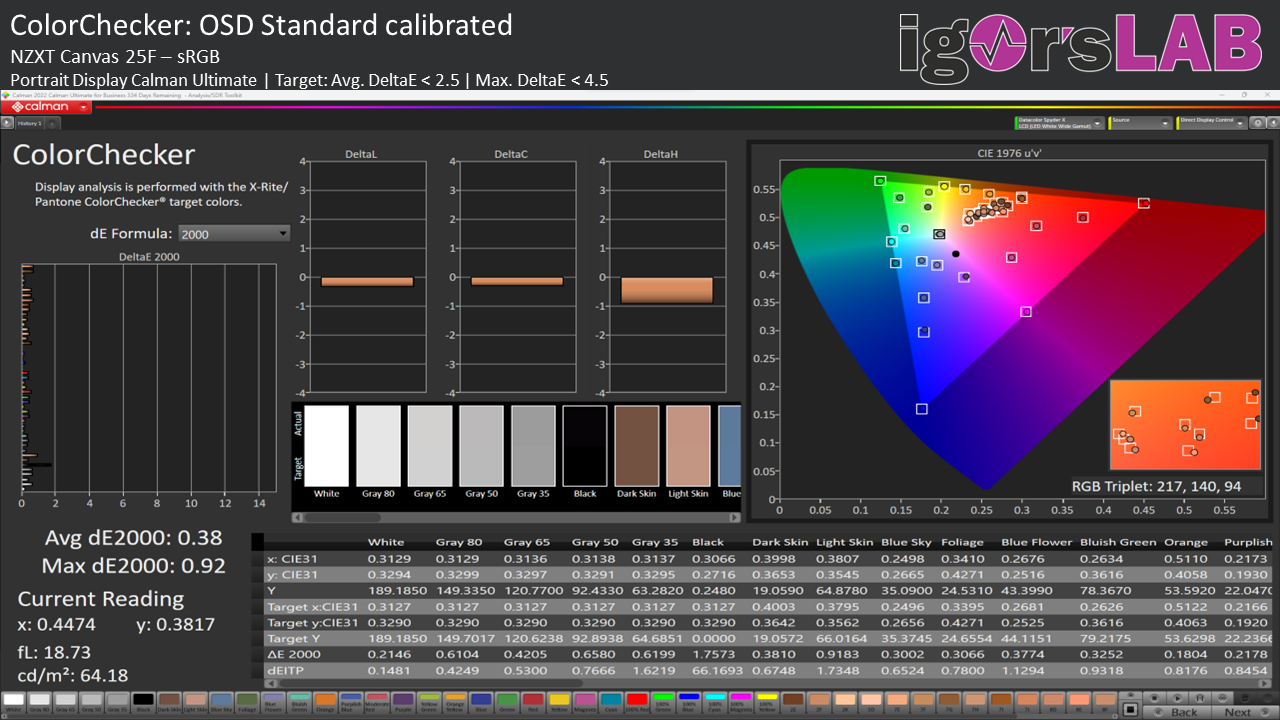
There you go, if you want, the NZXT can deliver really well (almost perfectly) in the sRGB color space!
Uniformity
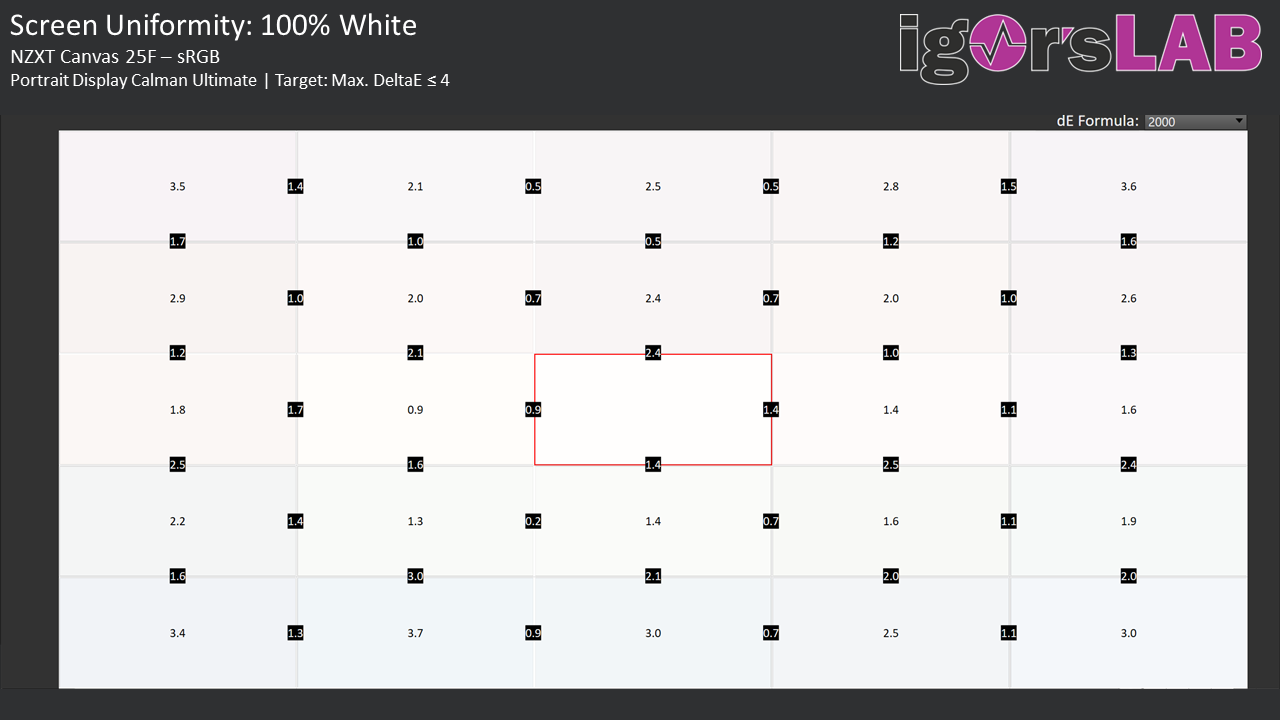
The IPS panel looks very uniform and hardly suffers from the notorious IPS glowing or bleeding. I particularly liked that – at least that was the case with my sample. Glowing and bleeding can vary from sample to sample.
Image errors
The NZXT Canvas 25F has a flawless and viewing-angle stable IPS panel. In my test, the monitor ran over the NVIDIA RTX 4090 and was detected as G-Sync compatible. Likewise with the Radeon RX 6900XT via FreeSync Premium. Text display is no problem thanks to the RGB subpixel layout of the IPS panel.
Sound reproduction
There are no speakers installed, but you can connect your headphones / headset to the monitor (via jack) (note: only audio out – no mic in). The same applies to the mouse or keyboard. Thus, in the end, you only have one USB port occupied on the PC.
Webcam and microphone
No rating – as not available.

- 1 - Introduction, Features and Specs
- 2 - Workmanship and Details
- 3 - How we measure: Equipment and Methods
- 4 - Pixel Response Times
- 5 - Variable Overdrive
- 6 - Display Latencies
- 7 - Color-Performance @ Default Settings
- 8 - Direct Comparison
- 9 - Color-Performance calibrated
- 10 - Summary and Conclusion


7 Antworten
Kommentar
Lade neue Kommentare
Moderator
Moderator
Veteran
Moderator
Urgestein
Veteran
Moderator
Alle Kommentare lesen unter igor´sLAB Community →