


Board analysis and power supply
The Founders Edition features the PG143A, a completely redesigned circuit board. While the board partners mostly continue to use the boards of their own RTX 3070 custom models, NVIDIA has made everything new for the FE. This board is a middle ground of the shaped design of the RTX 3080 and the more staid variant for the RTX 3070. Another interesting side note is that AIC didn’t get any design templates for this board in particular, so they don’t know exactly what custom design NVIDIA was planning.
What else? The type of power supply for the GPU is single-track again, and you don’t split the main power supply in two. MSVDD is therefore omitted and only NVVDD (blue) remains. This is the traditional core voltage, what we like to call GPU voltage. There are only 5 single phases in total, generated by either a uP9511P or the pin-compatible NCP81610 (depending on availability). Each of the 5 phases can drive two voltage transformers simultaneously, i.e. in parallel, so that for NVDD we have a total of 10 voltage transformers on only 5 phases.
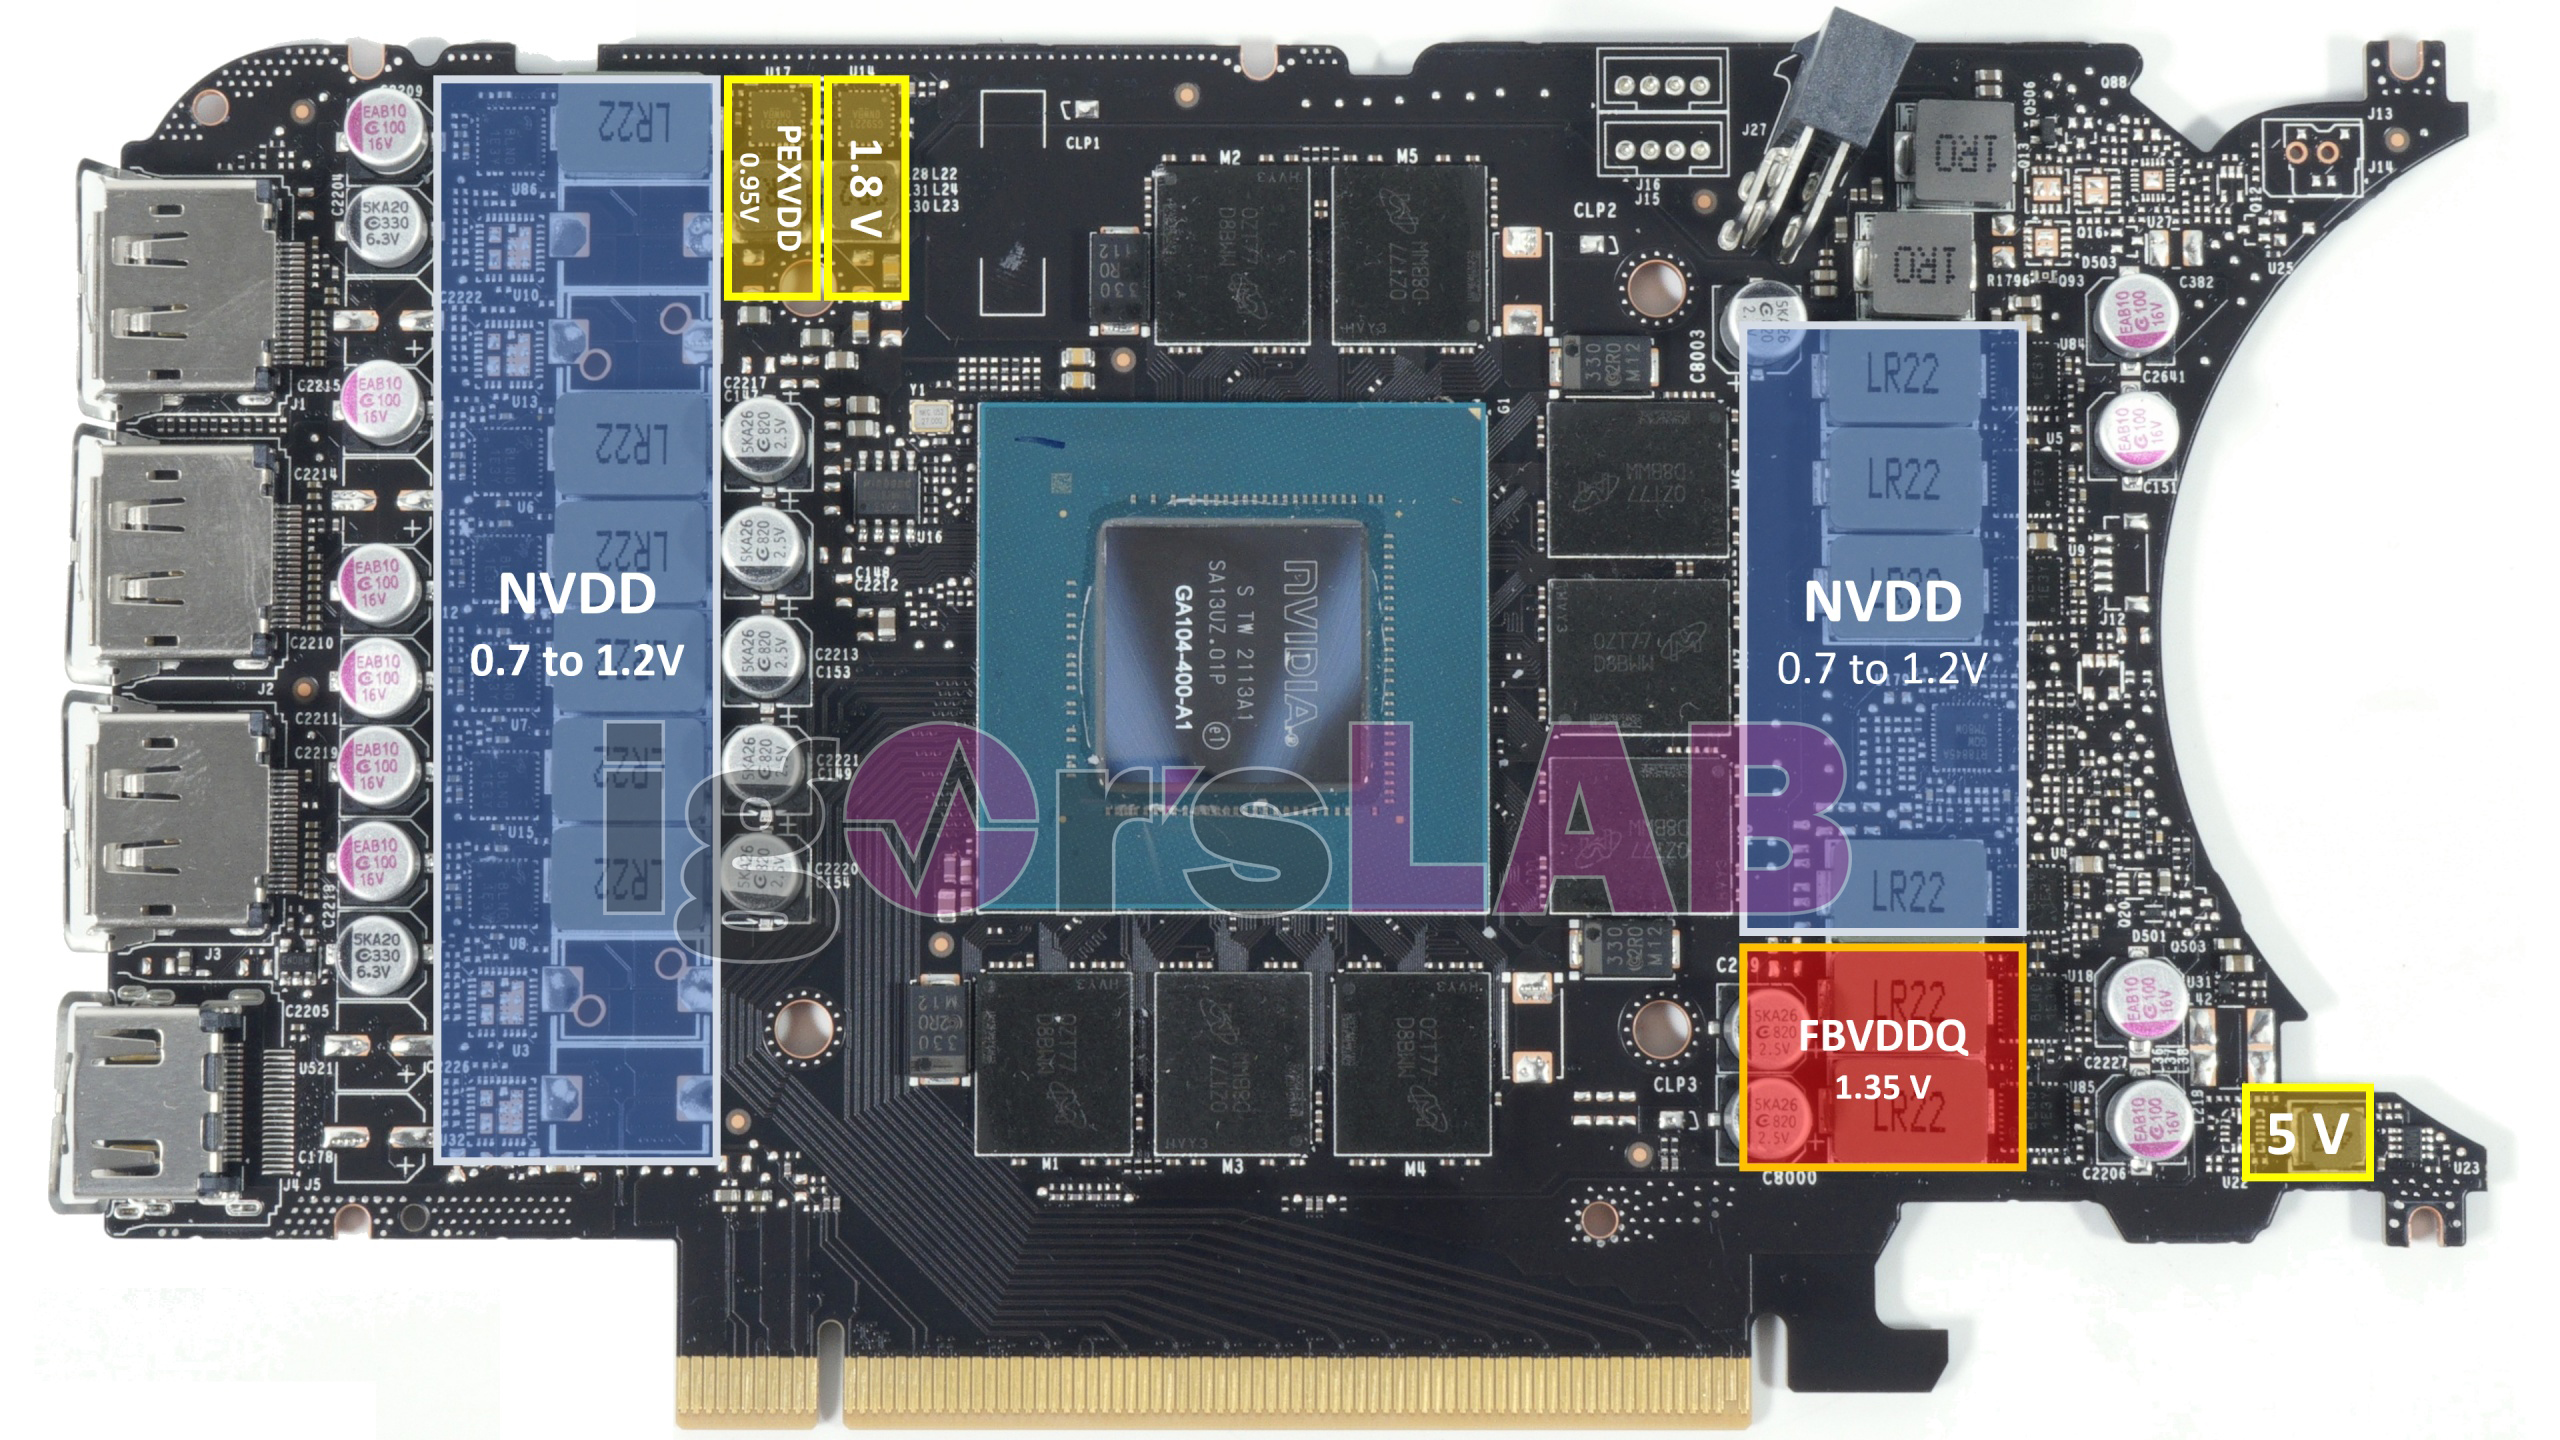
These 10 control loops are each fitted with Alpha & Omega’s slightly cheaper AOZ5311NQI 50-A powerstages, which do not provide true MOSFET DCR, but do offer temperature protection circuitry and a readout output. The voltage range of NVVDD is between 0.7 and 1.2 volts maximum, whereby the maximum value can never be reached by the end user without special firmware and software. For the power-hungry GDDR6X memory (FBVDDQ), NVIDIA uses a total of 2 phases generated by a low-cost step-down converter in the form of the RT8845A. The powerstages are the same as for NVDD.
 For input smoothing one coil with 1 µH behind which a shunt is placed is used for the 12-pin connector as well as for the PEG motherboard slot (on the backside). The voltage drop of the shunt is used to measure the flowing currents. A uS5650Q from UPI is used for this (back side). On the front next to the GPU you can still see the 8, each 1 GB GDDR6X modules from Micron with 19 Gbps. That’s about as exciting as it gets.
Cooler and disassembly
Disassembling the cooler is easy this time. Nine knuffy Torx screws loosen and gone is the two-piece backplate, four more and the slot bezel falls too. The rest is then quickly done, only the attachment with the clamp is no longer square, but rectangular. Torx 6 and done. The body is mainly made of light metal with a quite clever surface and feels valuable. The actual cooler is multi-part and consists of an efficient full copper heatsink with five heatpipes soldered to the back, four of which run lengthwise to the end of the card and one of which leads to the slot bracket.
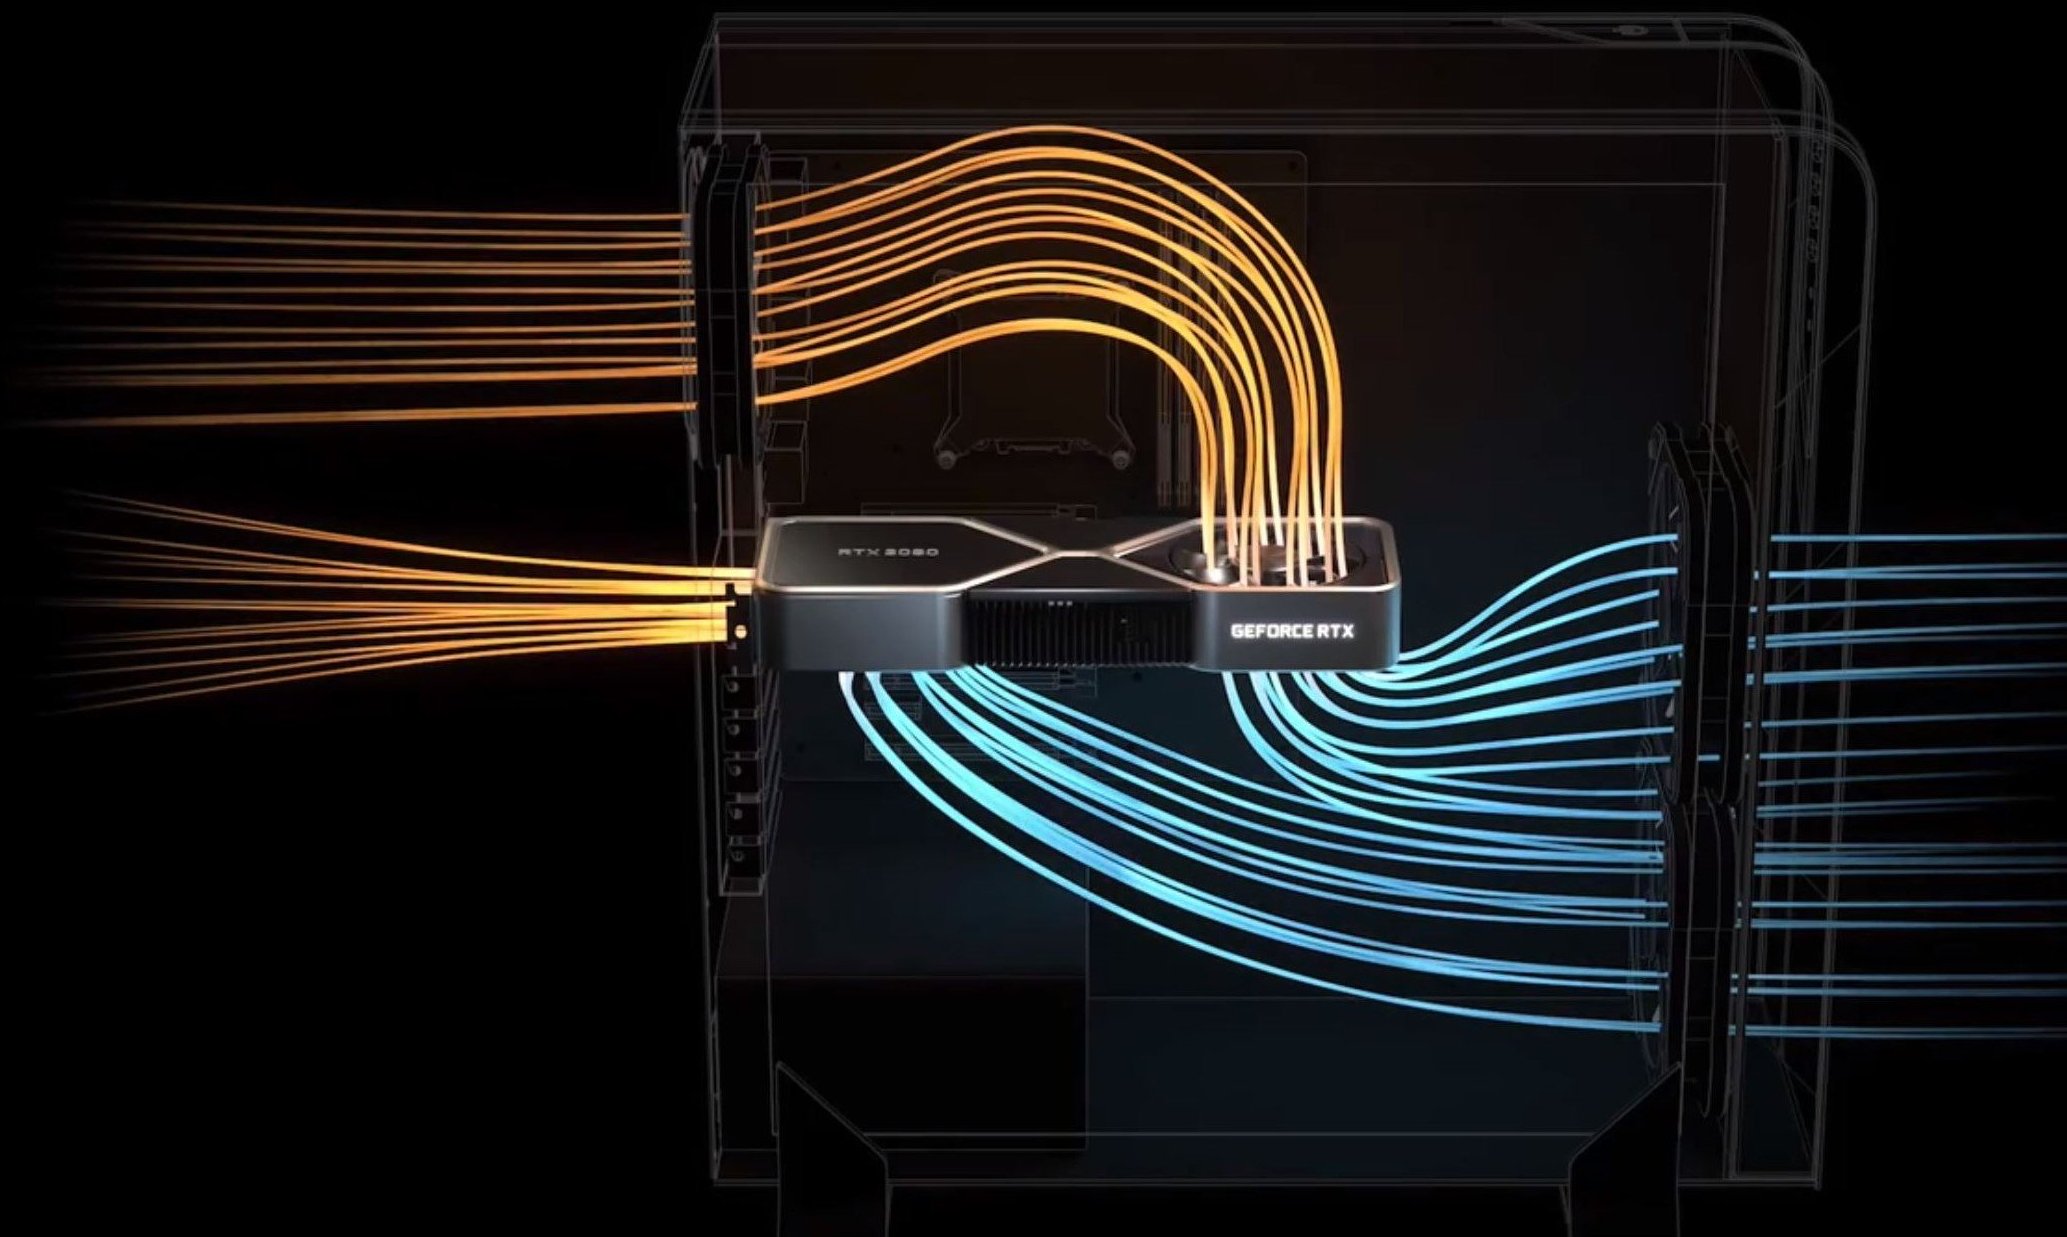
Above the heatsink and the open construction sit a total of two PWM-controlled 8.5 cm fans with a very interesting rotor blade geometry, which is almost reminiscent of the design of radial fans. Well, almost. But the maximum speed of the two separately regulated fans of up to 3800 and 3400 rpm, respectively, also suggests evil at first, but it can also remain quiet. Depending on what is actually retrieved. Let’s hope it stays a lot quieter than the card could if it had to.
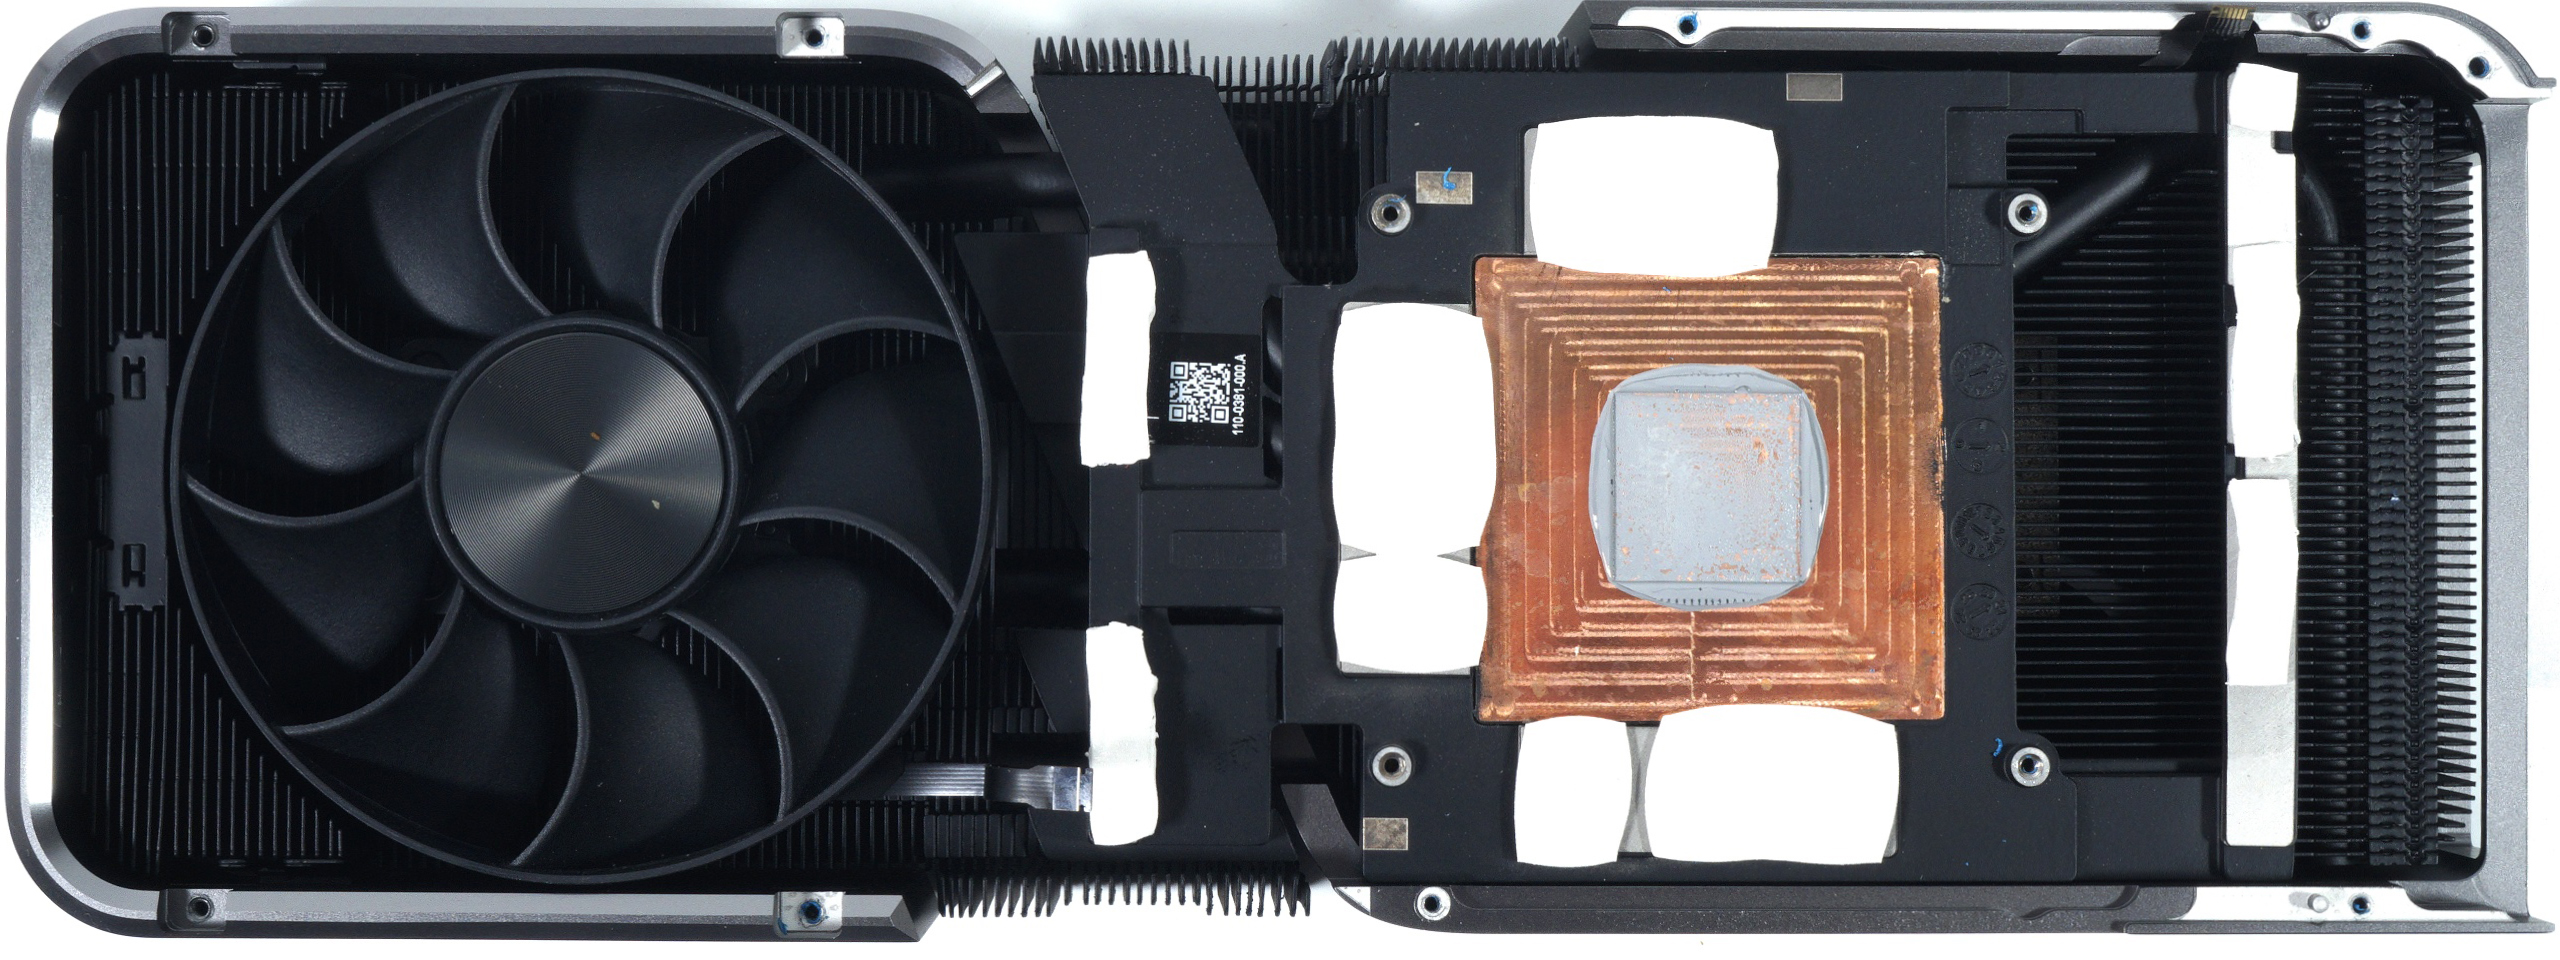
The backplate is also made of light metal, which has been coated matt black on the outside. The manufacturer thermally connects a limited area under the coils of the NVVDD phases to the backplate, but has (unfortunately) left out some areas.

There has already been a lot of speculation about the principle with the different intake and exhaust directions, so I won’t repeat myself, but just try the foil again. We will see the test in the closed case anyway.

- 1 - Introduction, Unboxing and Technical Data
- 2 - Test System and Methods
- 3 - Teardown, PCB Analysis and Cooler
- 4 - Gaming Performance WQHD + FHD/RTX
- 5 - Gaming Performance Ultra-HD/DLSS
- 6 - Detailled Metrics and Graphics for all Games
- 7 - Frame Times vs. Power Draw
- 8 - Power Draw and Efficiency for all single Games
- 9 - Power Consumption Summary and Hi-Res Measuring
- 10 - PEG, Transients and PSU Recommendation
- 11 - Temperatures and Thermal Imaging
- 12 - Noise, Frequency Analysis and Audio-Sample
- 13 - Summary and Conclusion


15 Antworten
Kommentar
Lade neue Kommentare
Veteran
Veteran
Veteran
Mitglied
Urgestein
Mitglied
Veteran
Veteran
Veteran
Mitglied
Urgestein
Urgestein
Urgestein
Urgestein
Alle Kommentare lesen unter igor´sLAB Community →