


Temperature
Since almost all users will certainly use the fans, which the manufacturer attaches original, I deliberately refrain from measuring with supposed reference fans. This quickly becomes a farce, as the radiators can be constructed very differently. But then it is not ensured whether such a comparison fan performs optimally at a certain speed on the radiator in question. The manufacturers usually know this better than a tester and if you wanted to do it right, you would have to work with at least two references, one with a lot of static pressure and once with a lot of throughput. However, the possible gain of knowledge then no longer justifies the time expenditure.
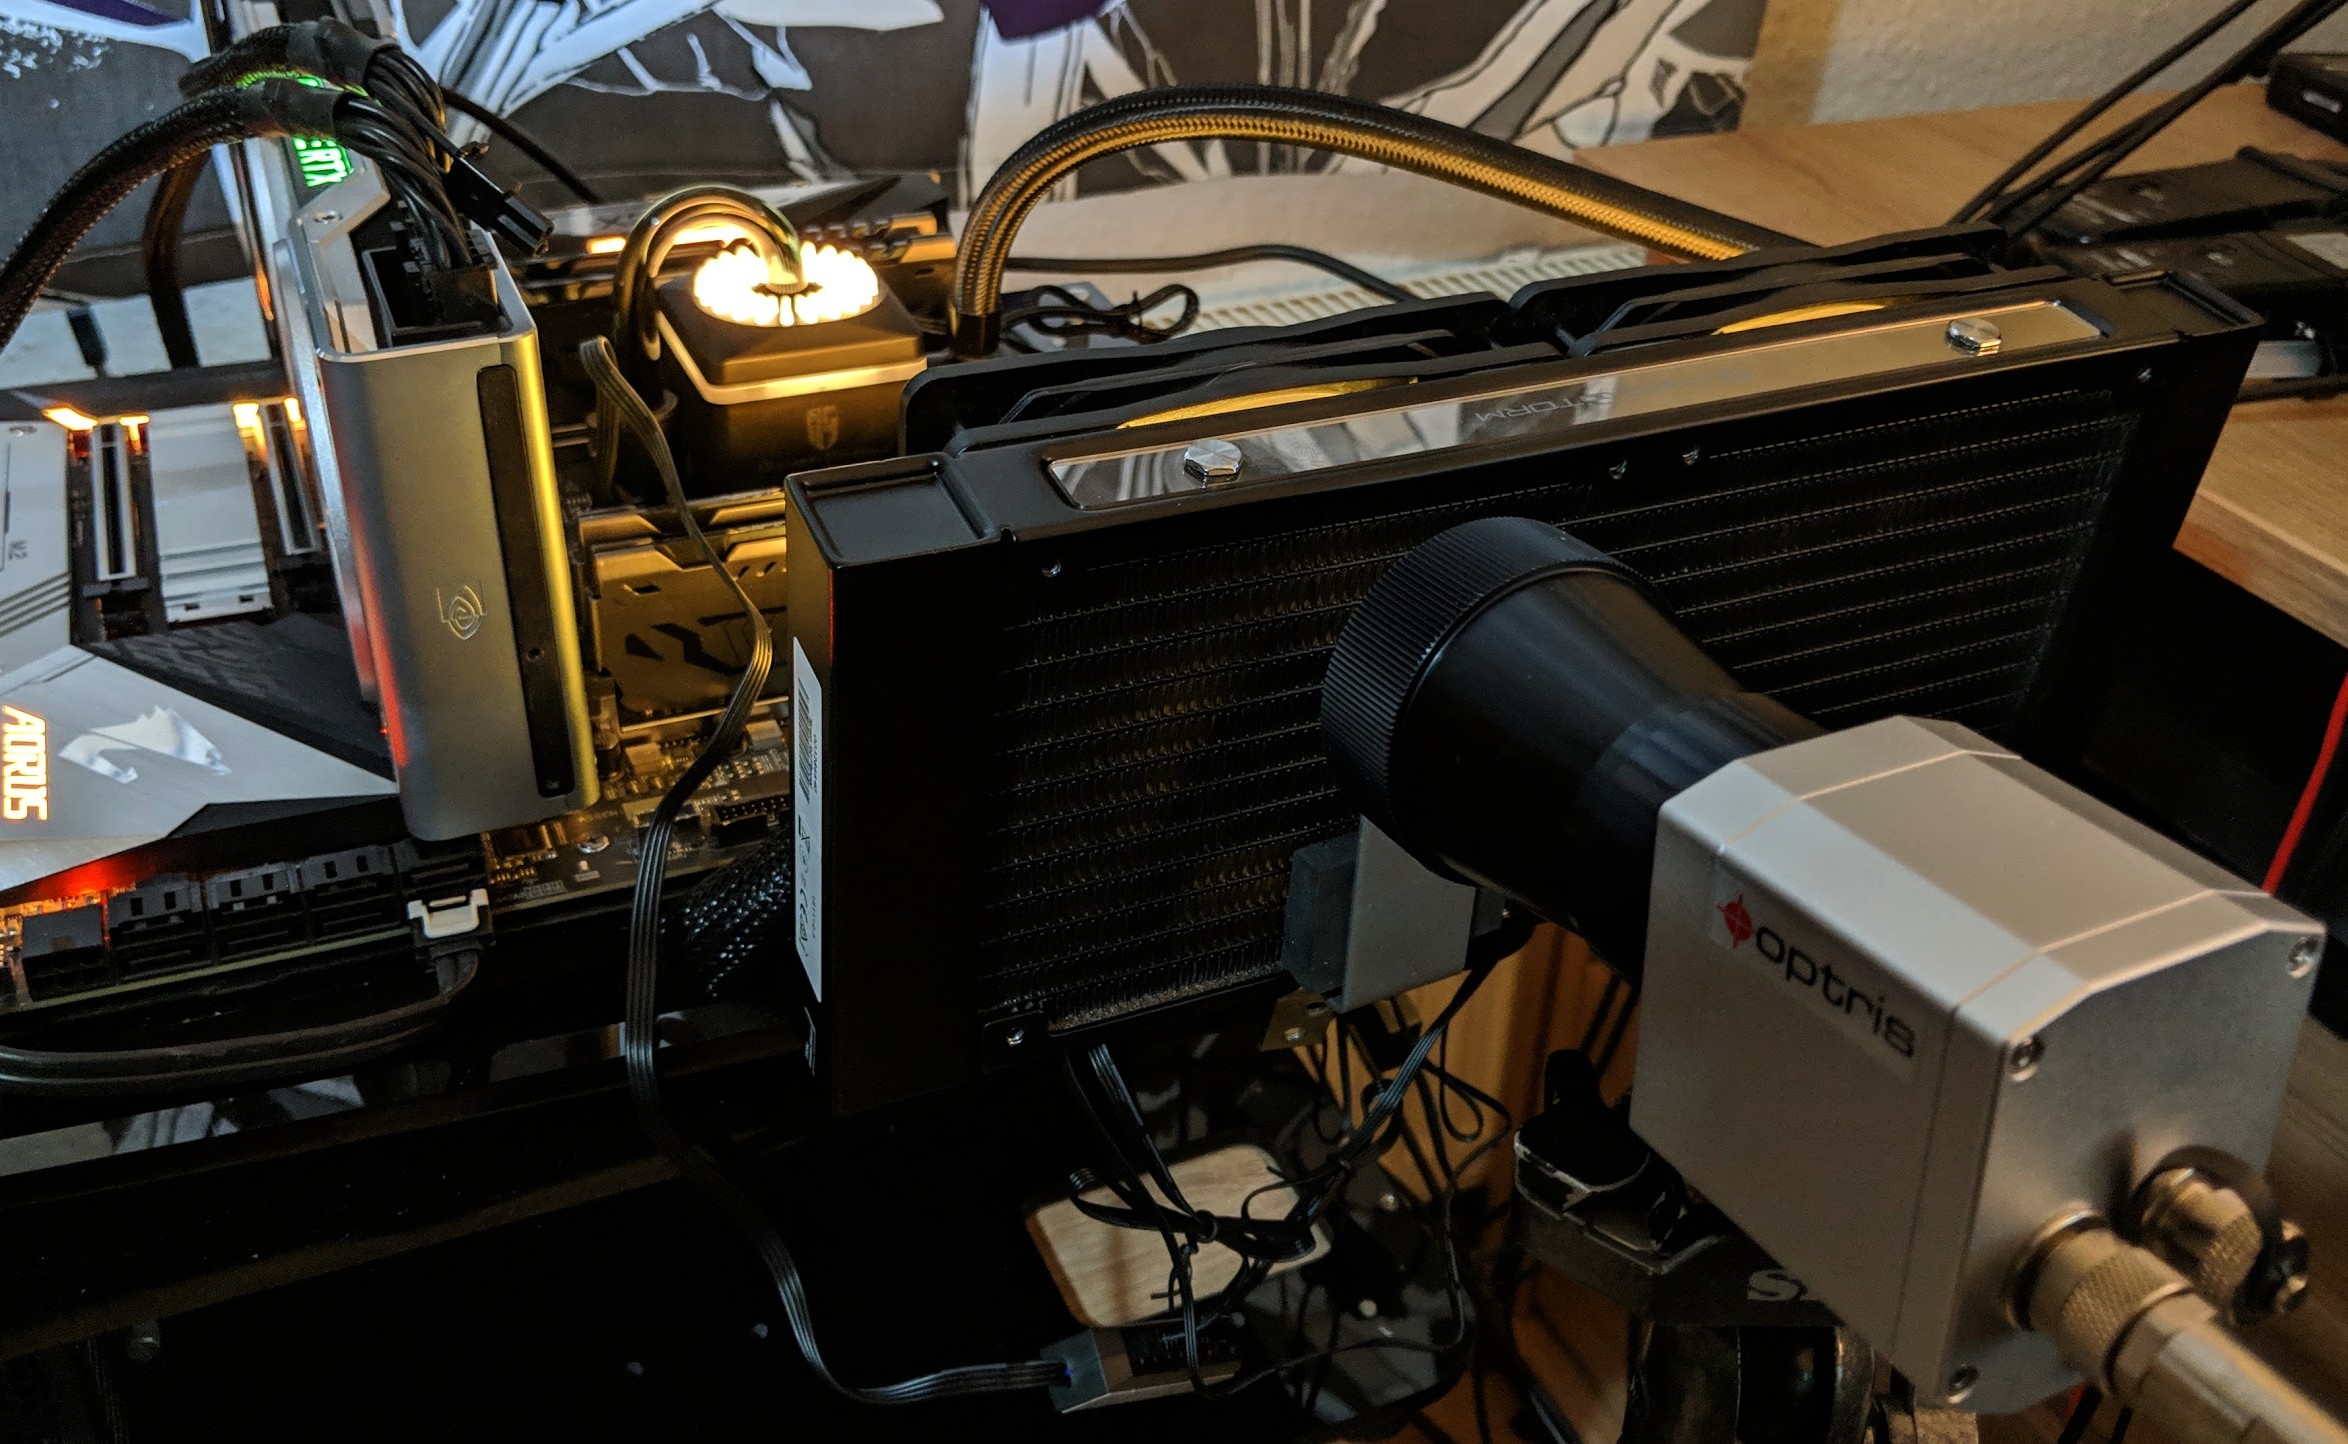
All measuring on the CPU is a bit tricky, so I wrote a small program for internal use, with which I can continuously increase the processor load. Together with the monitoring of the power supplied to the CPU as a whole, you can almost exactly adjust the waste heat, i.e. the power that the cooling ultimately has to dissipate. For this purpose, I log a total of 4 temperatures, which are divided into the maximum core temperature, the temperature of the CPU package, as well as the water temperatures at the radiator at the feed (intake) and the outlet (outtake).
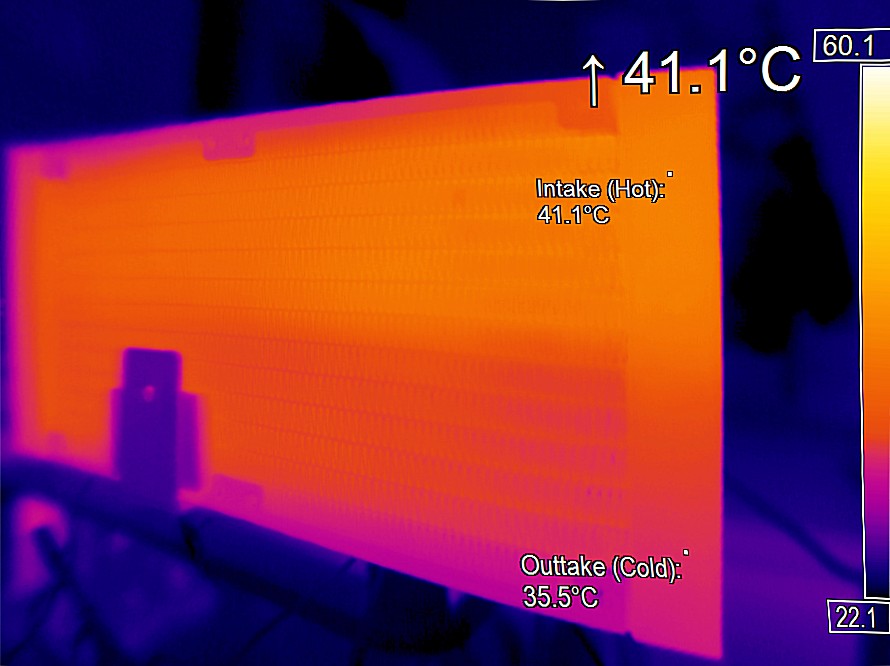
I measure the water temperatures with the infrared camera directly on the sheet metal opposite the two connections, as this is the highest especially during the intake. I also use the macro lens to check the effect of the slats during heat flux. The native resolution of 640 x 480 pixels on the bolometer for approx. 4 cm2 checked area is really sufficient. However, I have not been able to find any flaws; the workmanship fits perfectly.
Let's move on to the performance I've determined in 25-watt increments. The range from 50 watts to 250 watts should be more than sufficient. First, I leave the control of the fans to the reference mainboard of the test setup. This is also the normal use case, which the user will mainly use. We read the temperatures of the CPU and water on the left of the primary axis, the speed of the fans (green curve) on the right secondary axis.
We see that the cooling performance is enough to cool an 18-core Intel at 250 watts and also have reserves for more. This can be left to stand, because this cooling surface is no longer much better without your ears falling off. But we will discuss the more than 1500 rpm in a moment. The water tempers remain well below 40 °C even at the intake, which is really good.
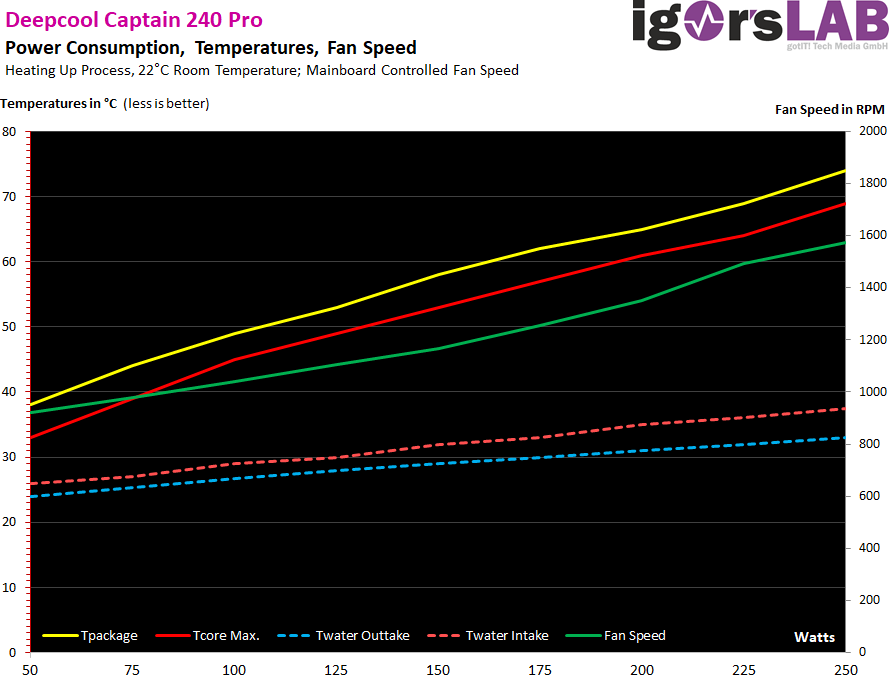
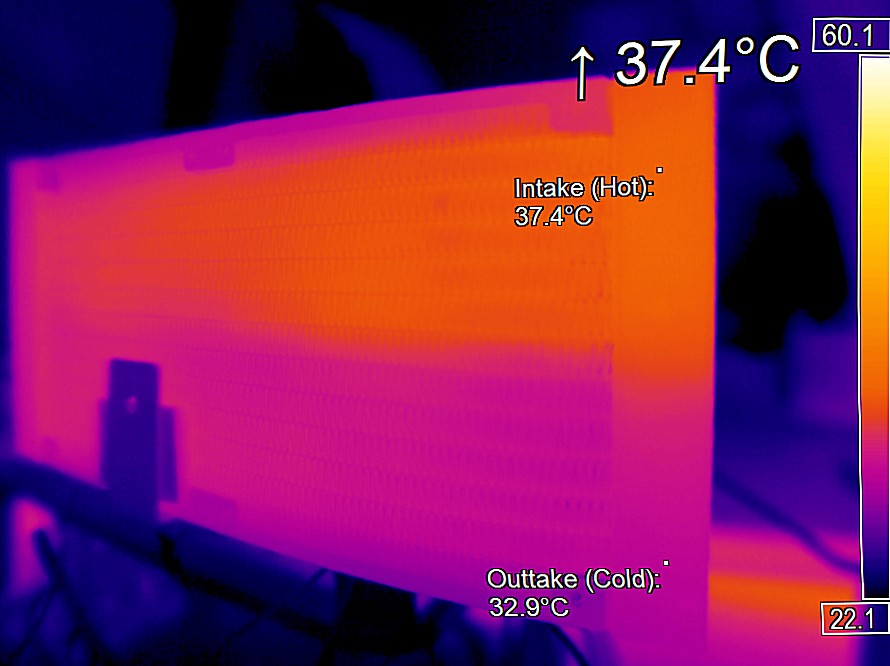
The image with the IR wide-angle lens shows very clearly the areas in which the strongest cooling occurs. Incidentally, the cushion-feeding of the IR-frog lens was later carried out on the PC. The measured abundant 37 °C at the intake is a good value and the delta of 4.5 degrees between intake and outtake can not be criticized with this small amount of water and radiator surface.
But what if you like it rather quietly and prefer fixed fan speeds? In order to be able to test the complete range permanently and safely even with weaker coolers (for later comparisons), I set the value to 1000 rpm. With the Captain 240 Pro, 800 rpm would certainly have been up to 200 watts, but no one can do so many measuring series. Nevertheless, the curve with the 1000 rpm is already a very reliable helper for an assessment.
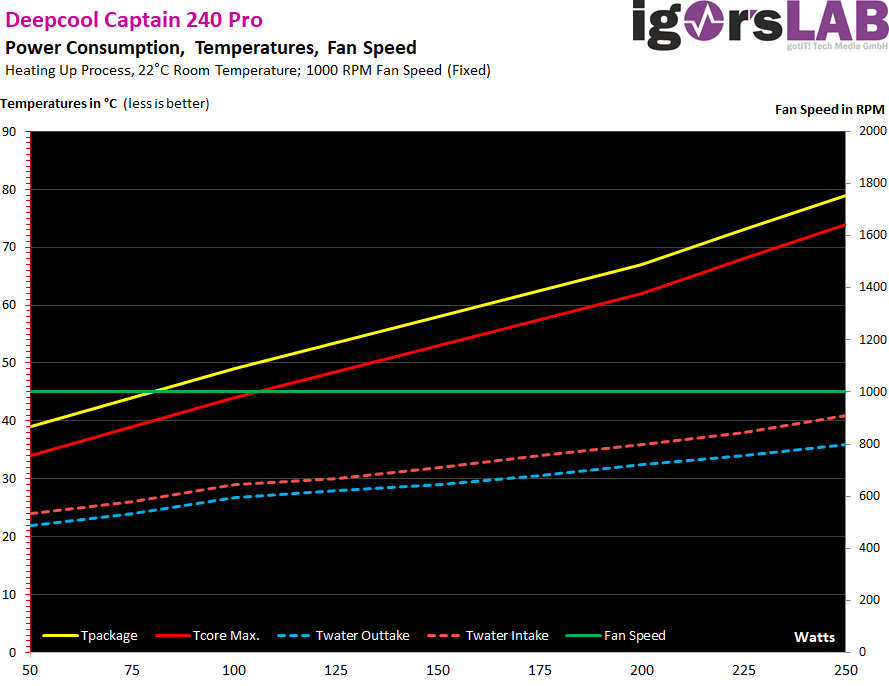
The almost 80 °C for the package are also good at 250 watts, but for my personal taste then also the upper limit. You don't have to have more. The water becomes warm up to 41 °C, the delta remains the same. That's fine, because I already had AiO cooling solutions with over 50 °C (and more) in tests. So the bubble for the pressure equalization should have nothing to do here.
Incidentally, I have also been able to prove that the RGB accumulation does not help with cooling. It's a pity, but it's the reality. Even in icy blue light. And you discharge another 6 watts of waste heat into the housing. But it looks nice for all those who like such a thing.
Noise ("volume")
I measured all this at a distance of 50 cm perpendicular to the radiator. The distance is practical and sufficient to ensure that the air flow does not directly hit the membrane of the measuring microphone and distorts the results. By the way, the value in the audio chamber for switched off fans was less than 29 dB(A), the output value was completely without switched on technology was less than 25 dB(A). This can no longer be measured with a normal sound level meter, so I like to resort to the insulated chamber and the measuring microphone.
In order to be able to compare the curves well, I used the respective start and end values of the measurements for the axis labeling, both in the noise and in the speeds. And behold, it coincides beautifully within the usual measurement tolerances!
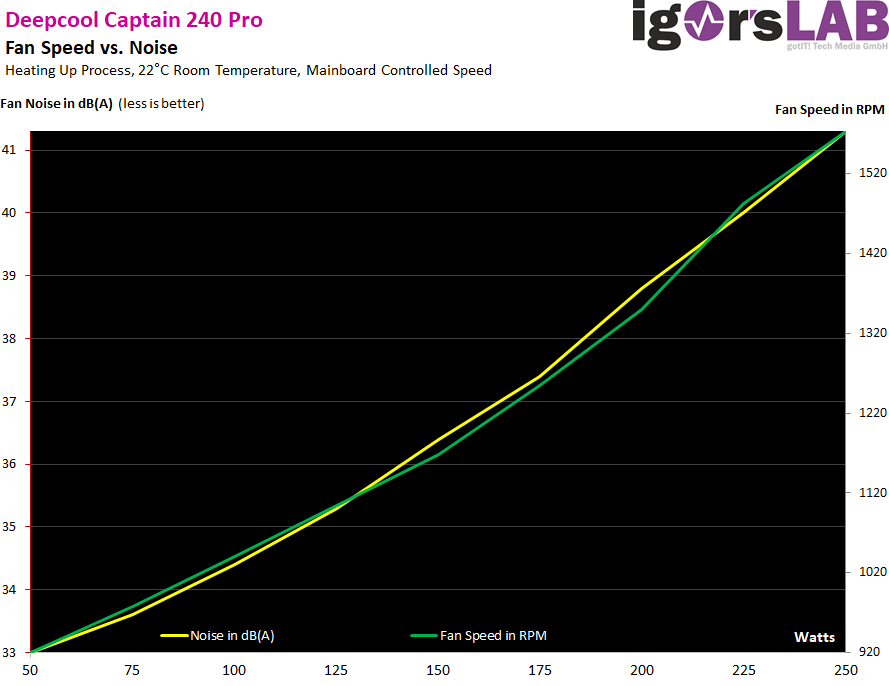
It is therefore also very easy to read at which power dissipation which speeds are concerned and in which noise emission the whole thing ends. The approx. 34 dB(A) of both fans at 1000 rpm is a good value, which also proves that Deepcool has caught up quite well with the fans.
Summary and conclusion.
Leaving aside all the points that might speak for one or the other user against an all-in-one water cooling, the Deepcool Captain 240 Pro is a really round thing. The radiator with the pressure equalization bubble is a nice innovation, that can please. Otherwise, the entire AiO is nothing groundbreakingly new, but a very consistent evolution of the process models.
This makes Deepcool really thoughtful, because you get a model that has been tried and tested for years and only improved in important details, whose initial teething problems should have been eliminated long ago. With a street price of just over 110 euros, the overall package is not even bad, on the contrary. The accessories in the light bulb sector are more than complete and versatile than Raijintek's Orcus 240.
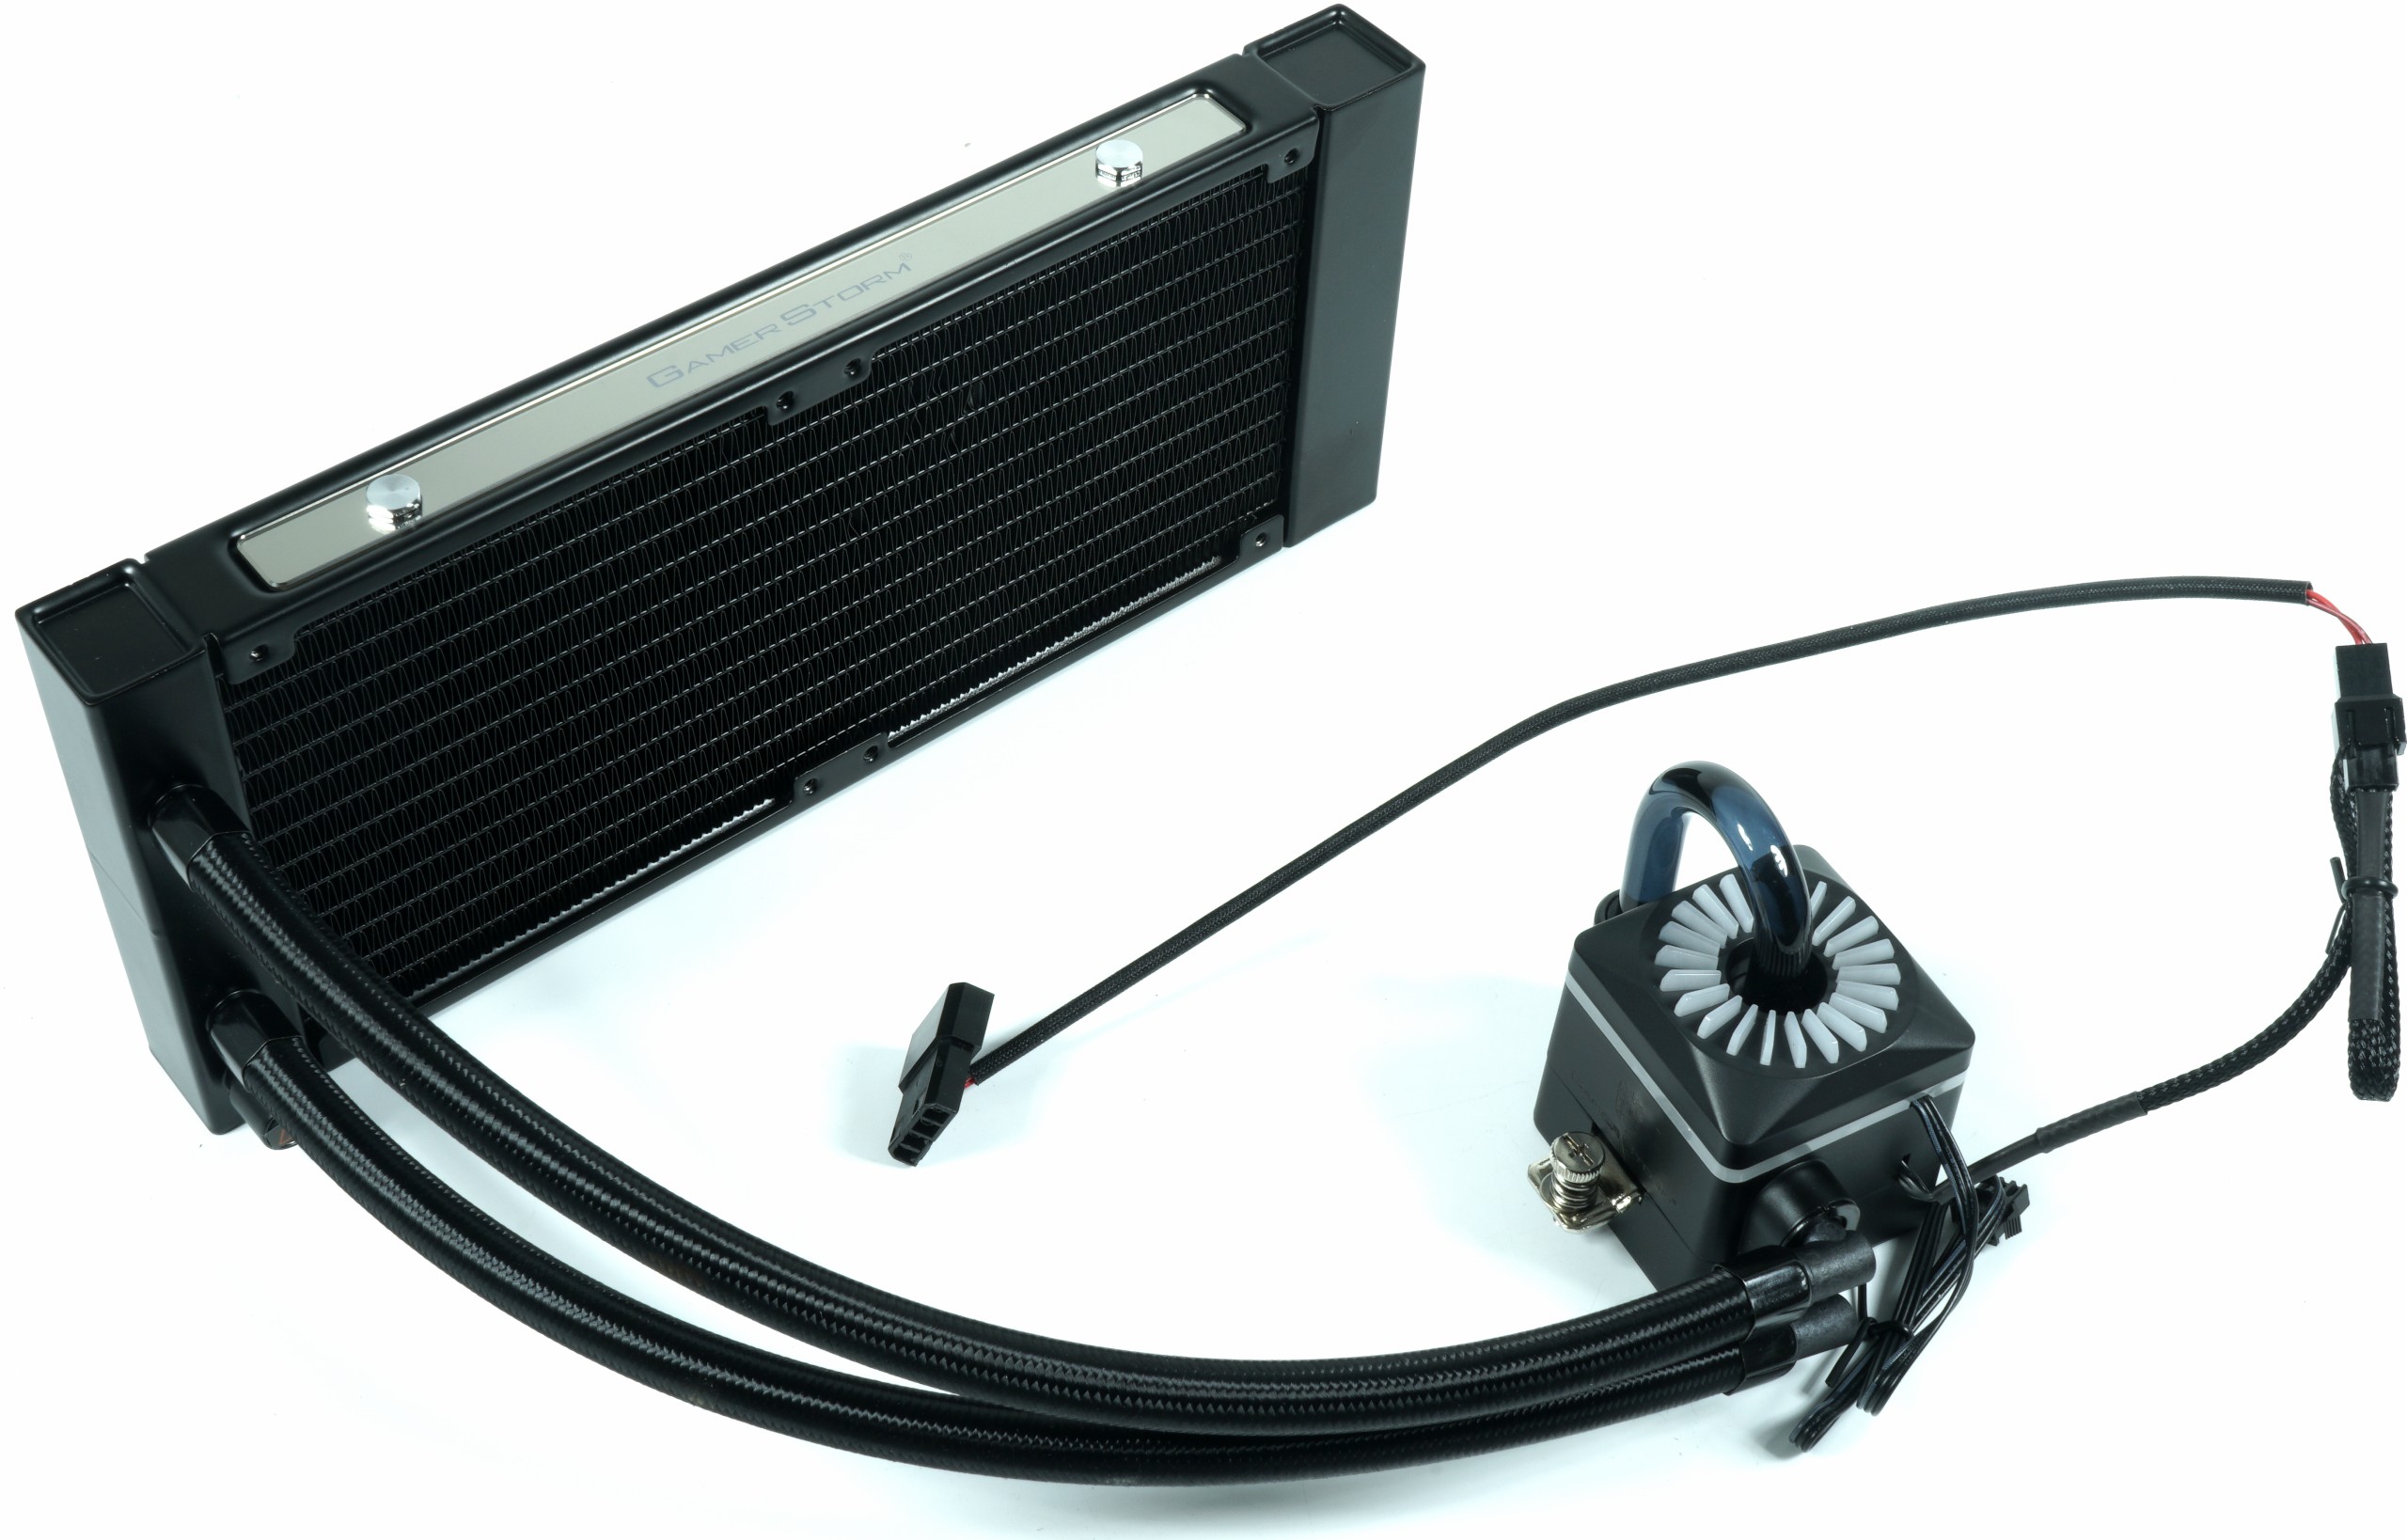
The assembly kit is good average and I have seen it better, but also much worse. Mounting the plastic baking plate is not a witch's work, just in detail, depending on the base, a tick too fiddly. On the positive side, however, the kit can be mounted completely without a pump and it can always be attached the same, no matter which base. The hose length of 30 cm is unfortunately only average and you will quickly reach limits with larger housings.
It is good that this pressure compensation also allows a recument installation (pump above) or a front assembly (radiator in the front of the housing), provided that the short hoses are sufficient for this purpose. Cooling performance and noise are good, the fans do a good job, even if there are quieter fans on the market. For an AiO compact water cooling, however, they are easy to use as original assembly. The entire RGB lighting, including a addressable connection, adapters and an enclosed controller as an alternative to the motherboard are really exemplary.
Well Done, one would almost say. I couldn't find anything really negative, except that, as always, the aluminum of the radiators bothered me. I hope Deepcool has a good chemist who has prepared the coolant in such a way that nothing corrodes. After all, we have already seen enough galvanic battlefields. Incidentally, this is also the only point that I cannot test. But it will last. Let's hope so.


Kommentieren