


A small PC for the virtual video studio
 As you know by now, I also do on YouTube. The necessary space
 for a hearty Laber corner a small studio I was able to clear quite quickly and also the greening of the walls was actually not a big act. Just more and more technology in the same space? I only work with OBS, a maximum of 3 cameras and no more than two microphones. I save the recordings directly to a handy Fast SSD with 1 TB of Storage from Seagate.
The advantage: I don't have to stream everything to the NAS and then copy it back to the editing PC for video editing, but at the end I simply take the video clips in my hand to the workstation. Thanks to USB 3.1 and the beautiful Type-C cables, this is a breeze. My only problem was the PC that needed it, for which my laptop had to be used. I'm not Krösus and i'm able (or will) to add a separate complete PC for each crap. So far, I've celebrated everything with my notebook including Nvidia graphics and NVEnc. But the laptop is too bulky and, above all, too noisy. In addition, assembly and dismantling are very annoying in the long run.
This is exactly where AMD comes into play with its APU and ASRock with the matching mini-PC in the form of the DeskMini A300. Apart from memory, the disk and an APU, you don't have to use anything but the cooler. Finished. At less than 150 Euros, the mini-PC from ASRock is actually really cheap, because you get a small housing with a built-in motherboard with an integrated DC-DC power supply and 19-volt laptop power supply, as well as the cooler designed up to 65 watts. And I don't want to stream and gamble in real time, God forbid.
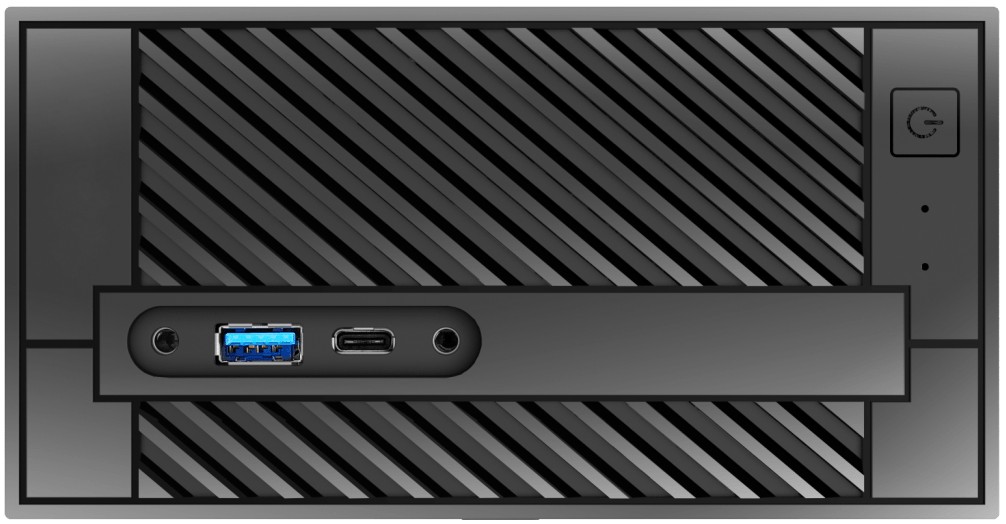
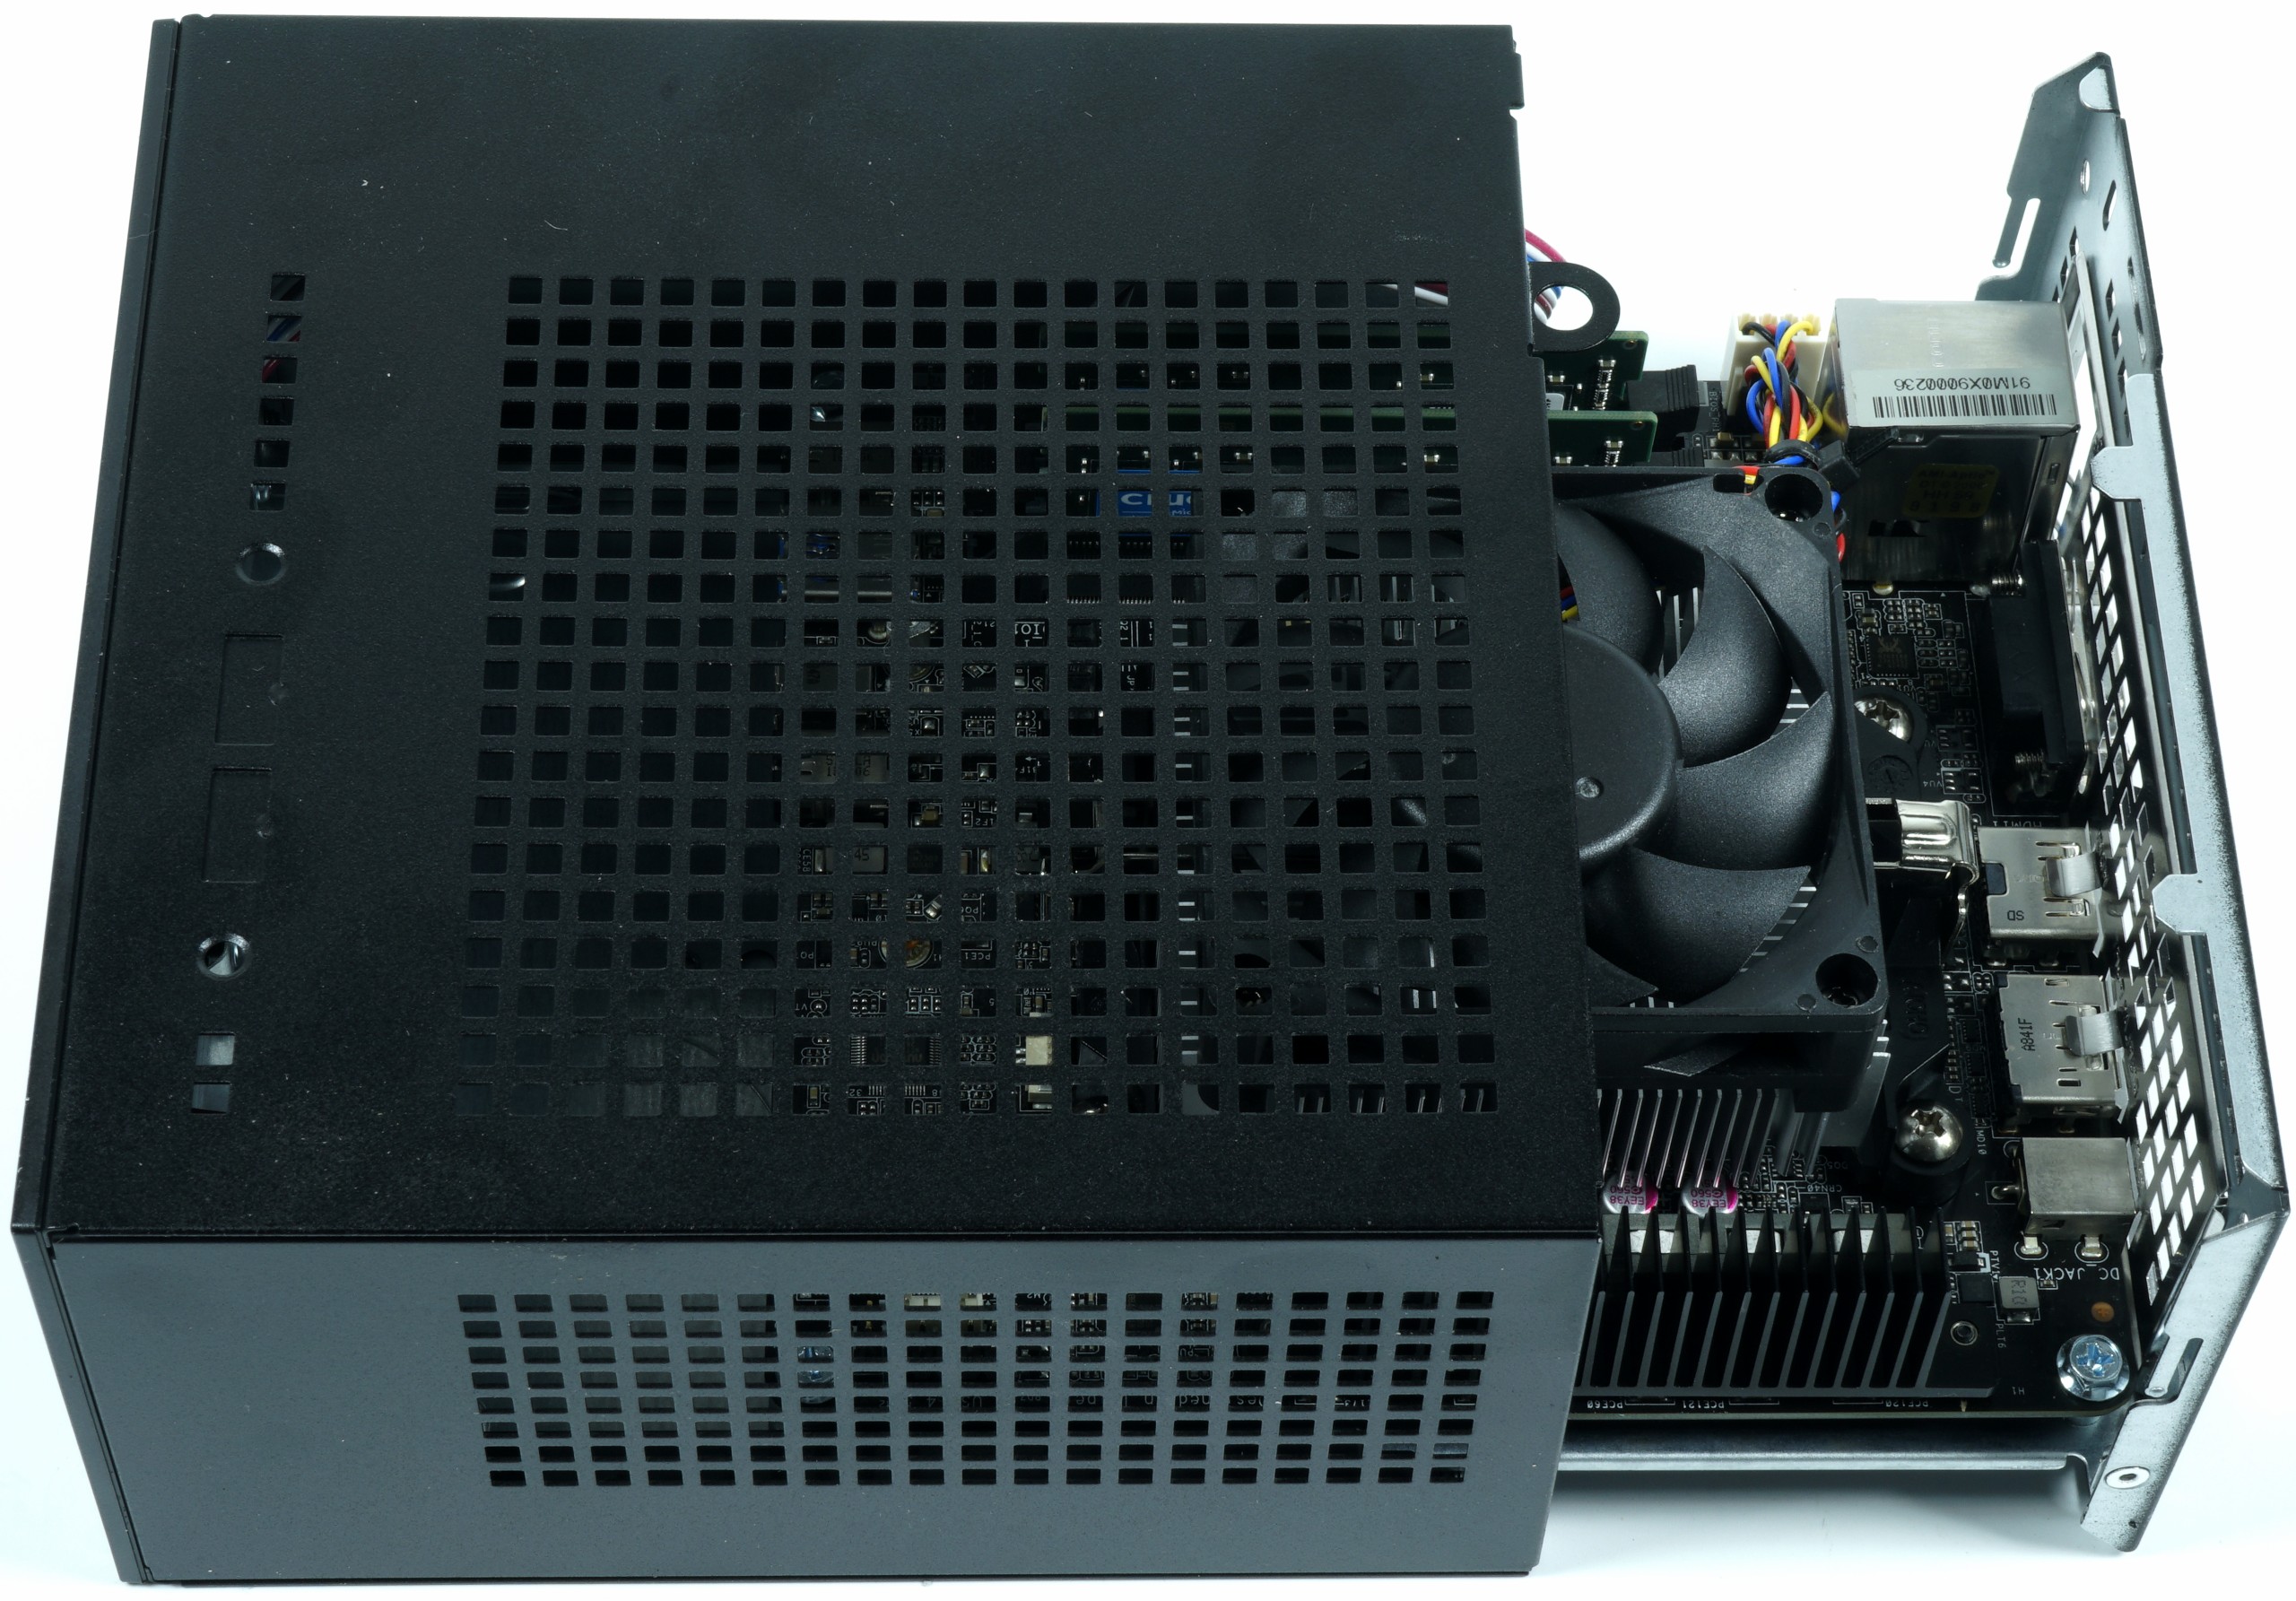
You can place the part for upright, lay it down normally or even attach it to the back of the monitor via Vesa-Mounting. The USB 3.1 Type C is positioned at the front, which is quite convenient for my portable data mission. There is also a USB 3.1 Type-A, on which the HDMI grabber for the main camera hangs.
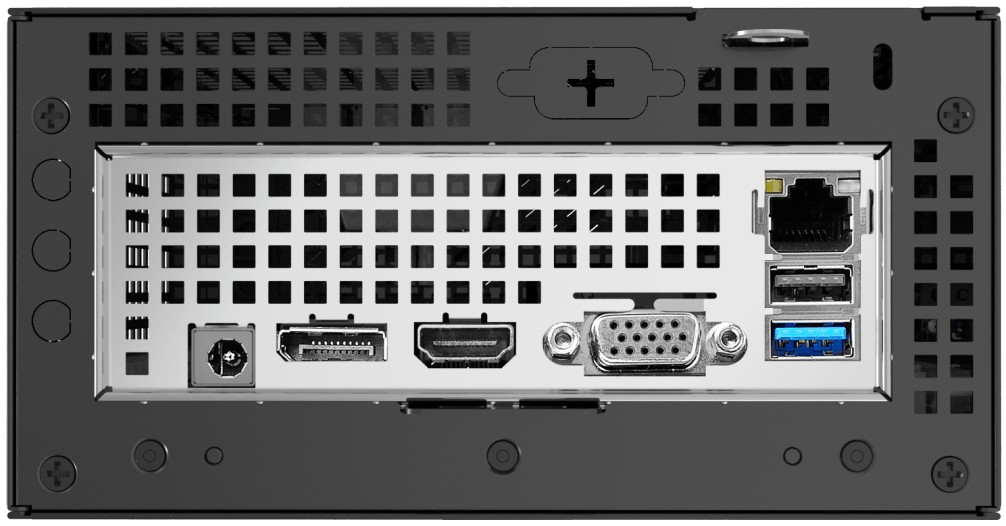
On the back you will find the 19V power supply connection, HDMI or DisplayPort for the monitor, the Ethernet port and USB 3.1 and 2.0 respectively as Type A. There hangs a USB 2.0 hub for keyboard, mouse and table microphone. On USB 3.1 there is a suitable hub for up to two USB cameras and my XLR sound solution. This would even free up a USB plug. Data-wise, the bandwidth here is completely sufficient at all connections.
Assembly and Limits
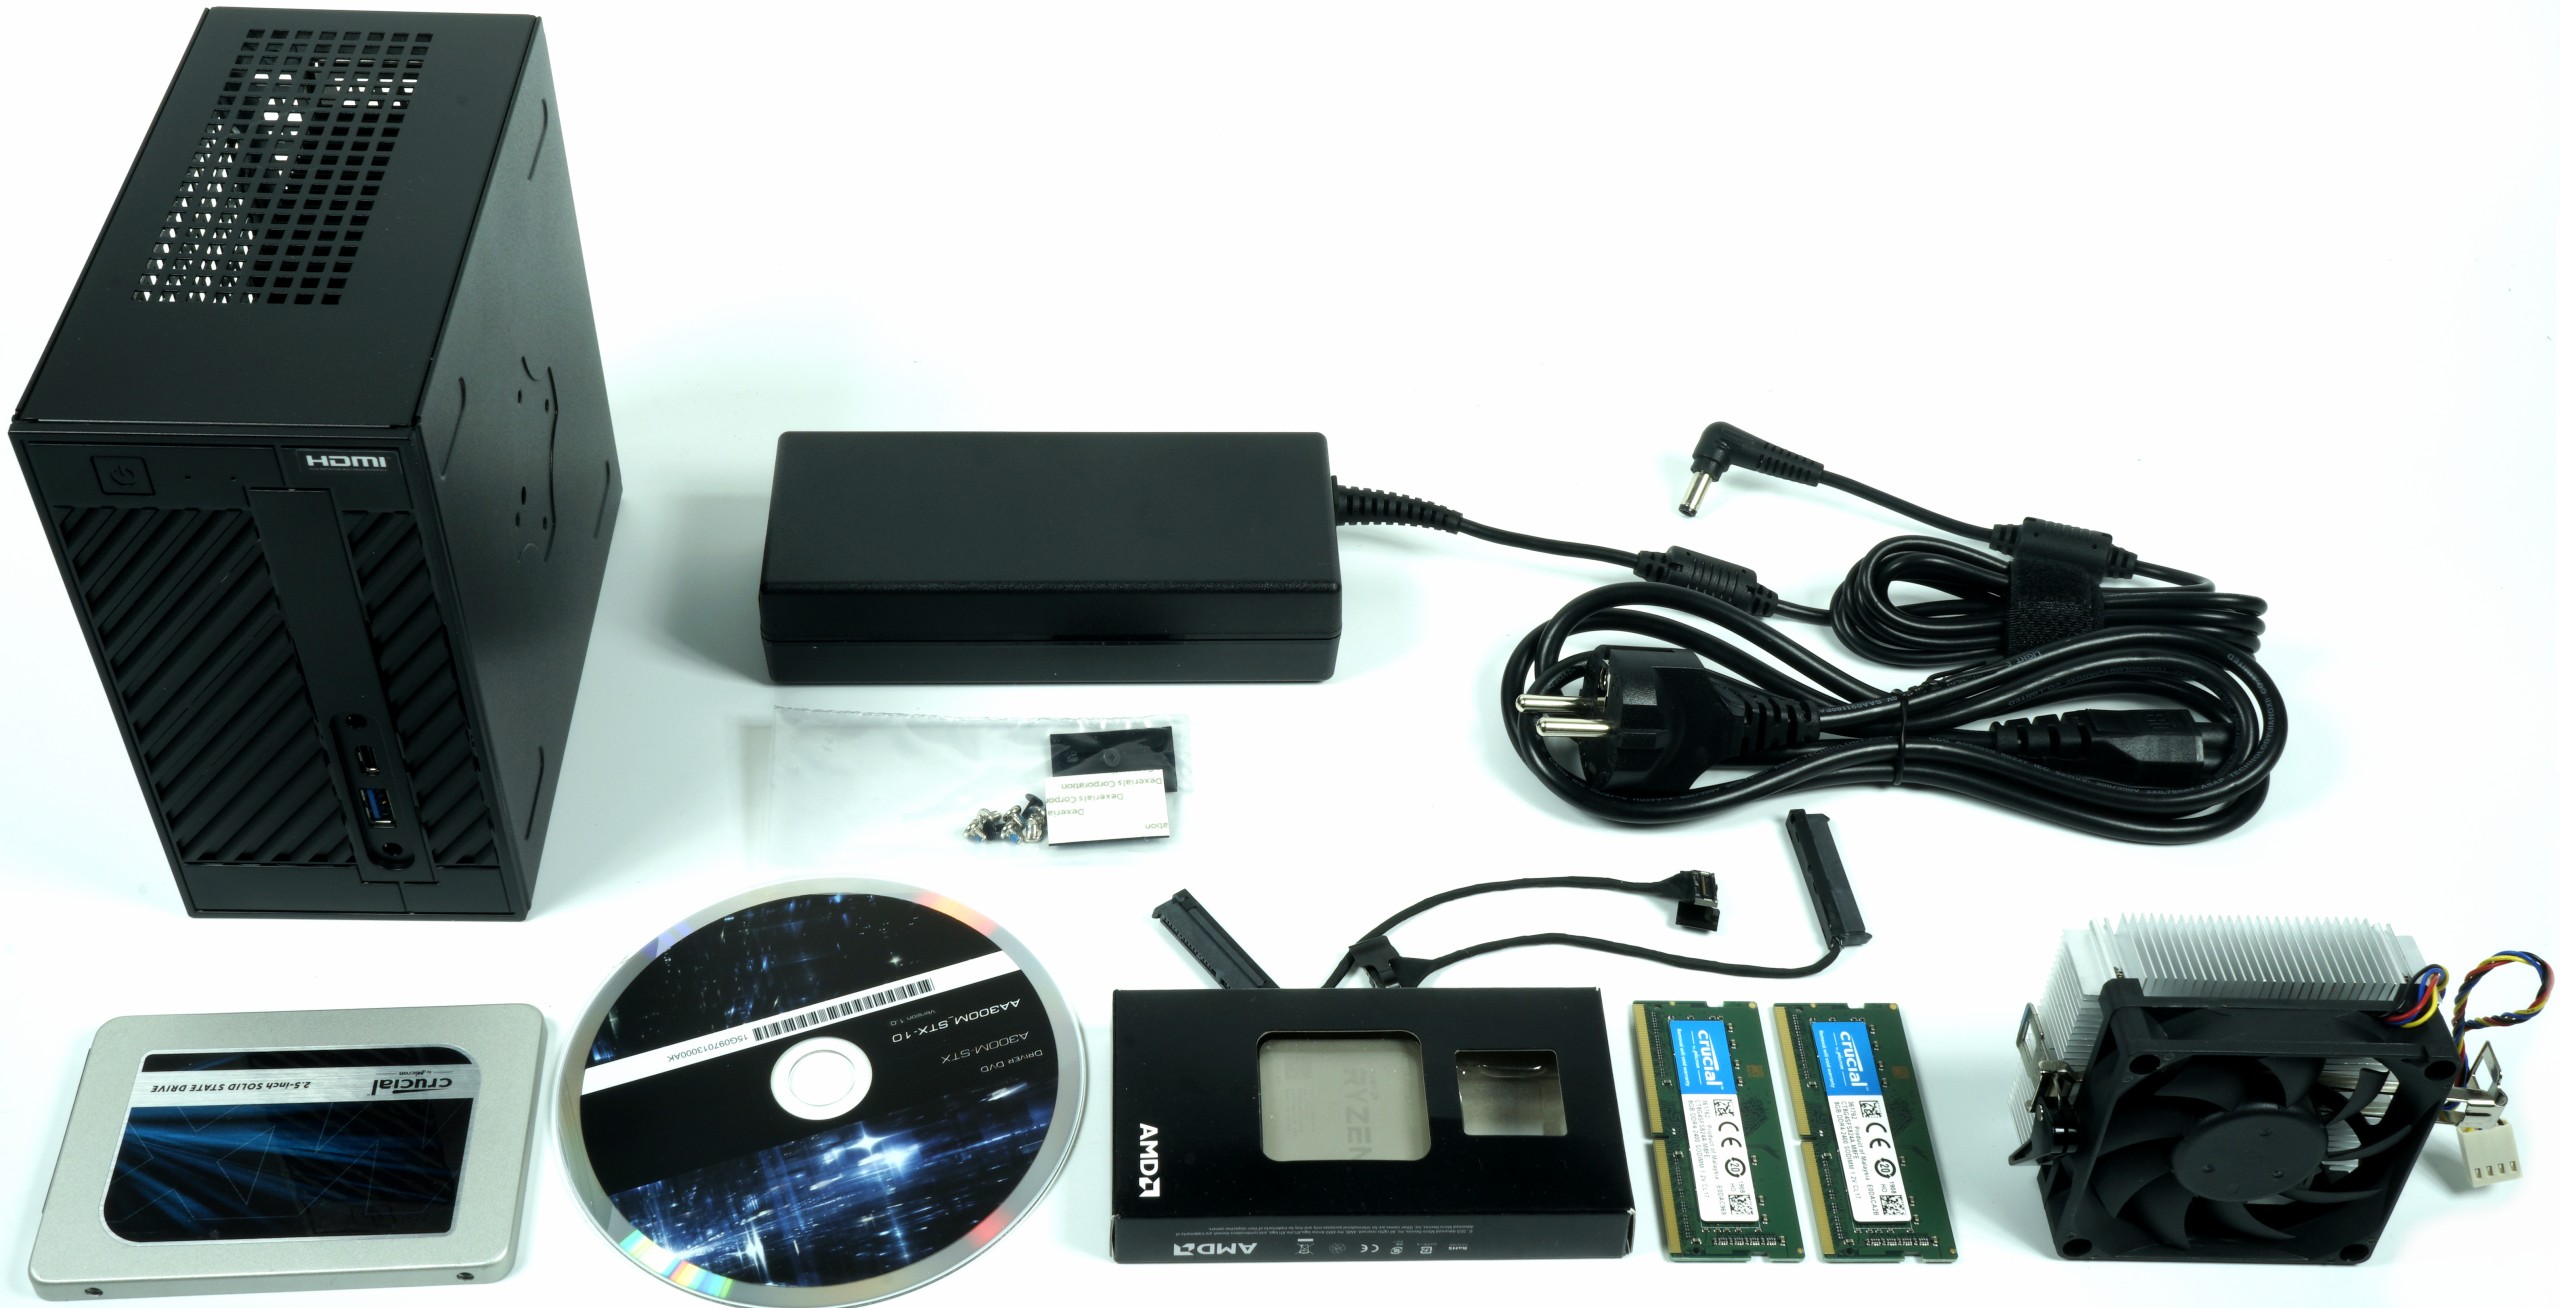
The assembly is really fixed, honestly. You only loosen four small screws on the back and pull out the outsliding of the barebone. The first time I used the APU was to make the socket fitted, even if AMD's sockets are much more insensitive than Intel's LGA socket. But you never know…
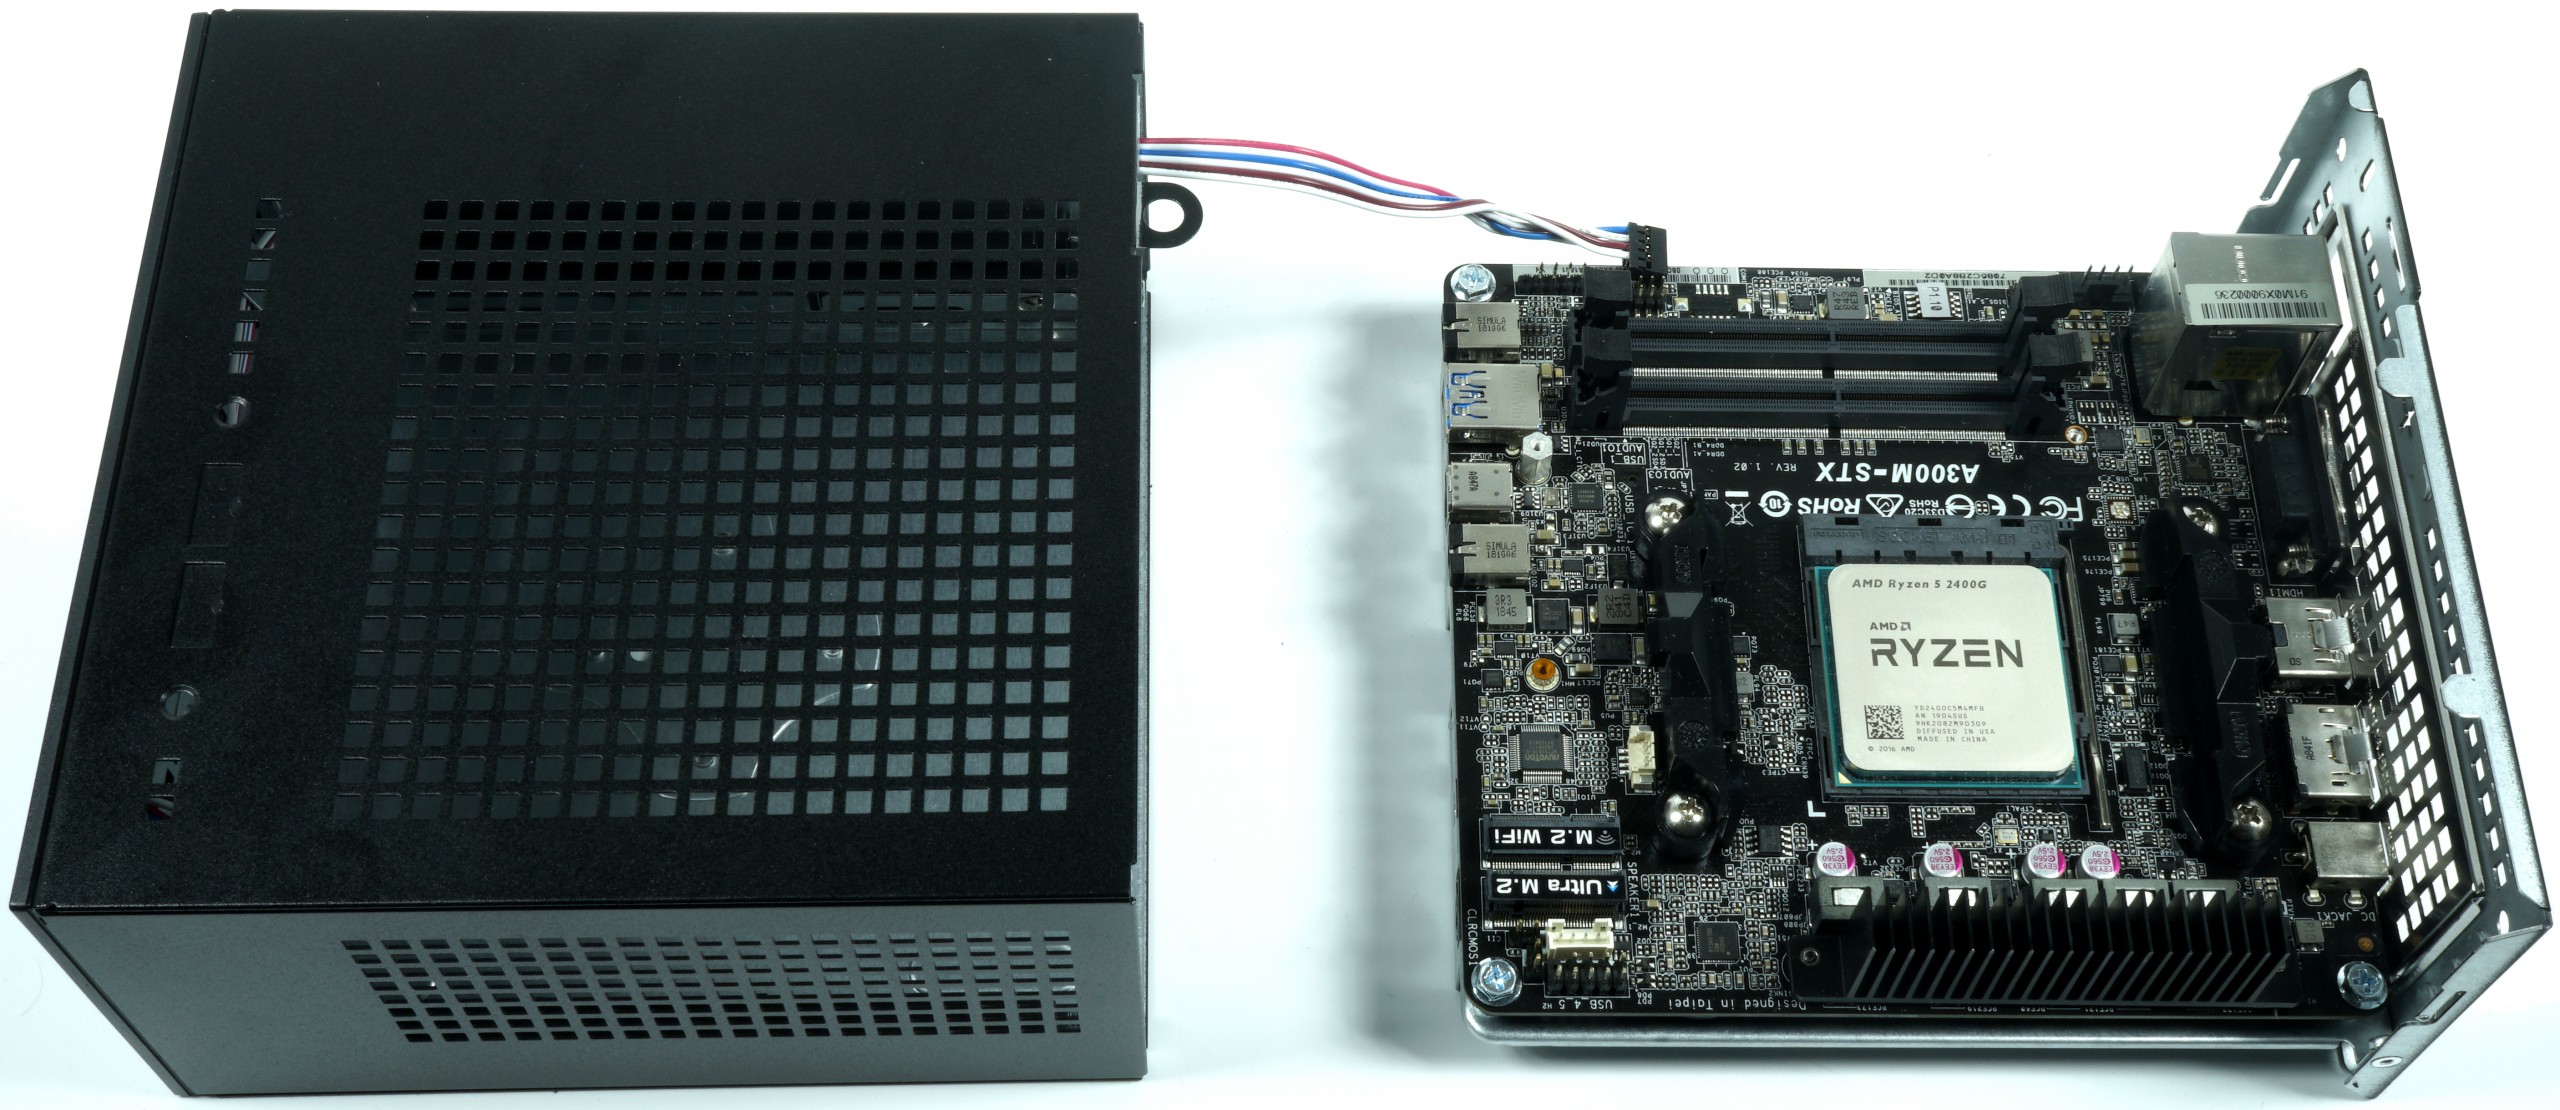
The motherboard is already (almost) fully equipped including DC-DC power supply for the partial voltages. You could insert an M.2 WiFi module below the M.2 socket for the SSD, but I don't need it, because Ethernet is more fixed and stable. The rest is already complete and you can start right away. The board is very functionally equipped in terms of component selection, but luxury and high-end should not be expected at this price.
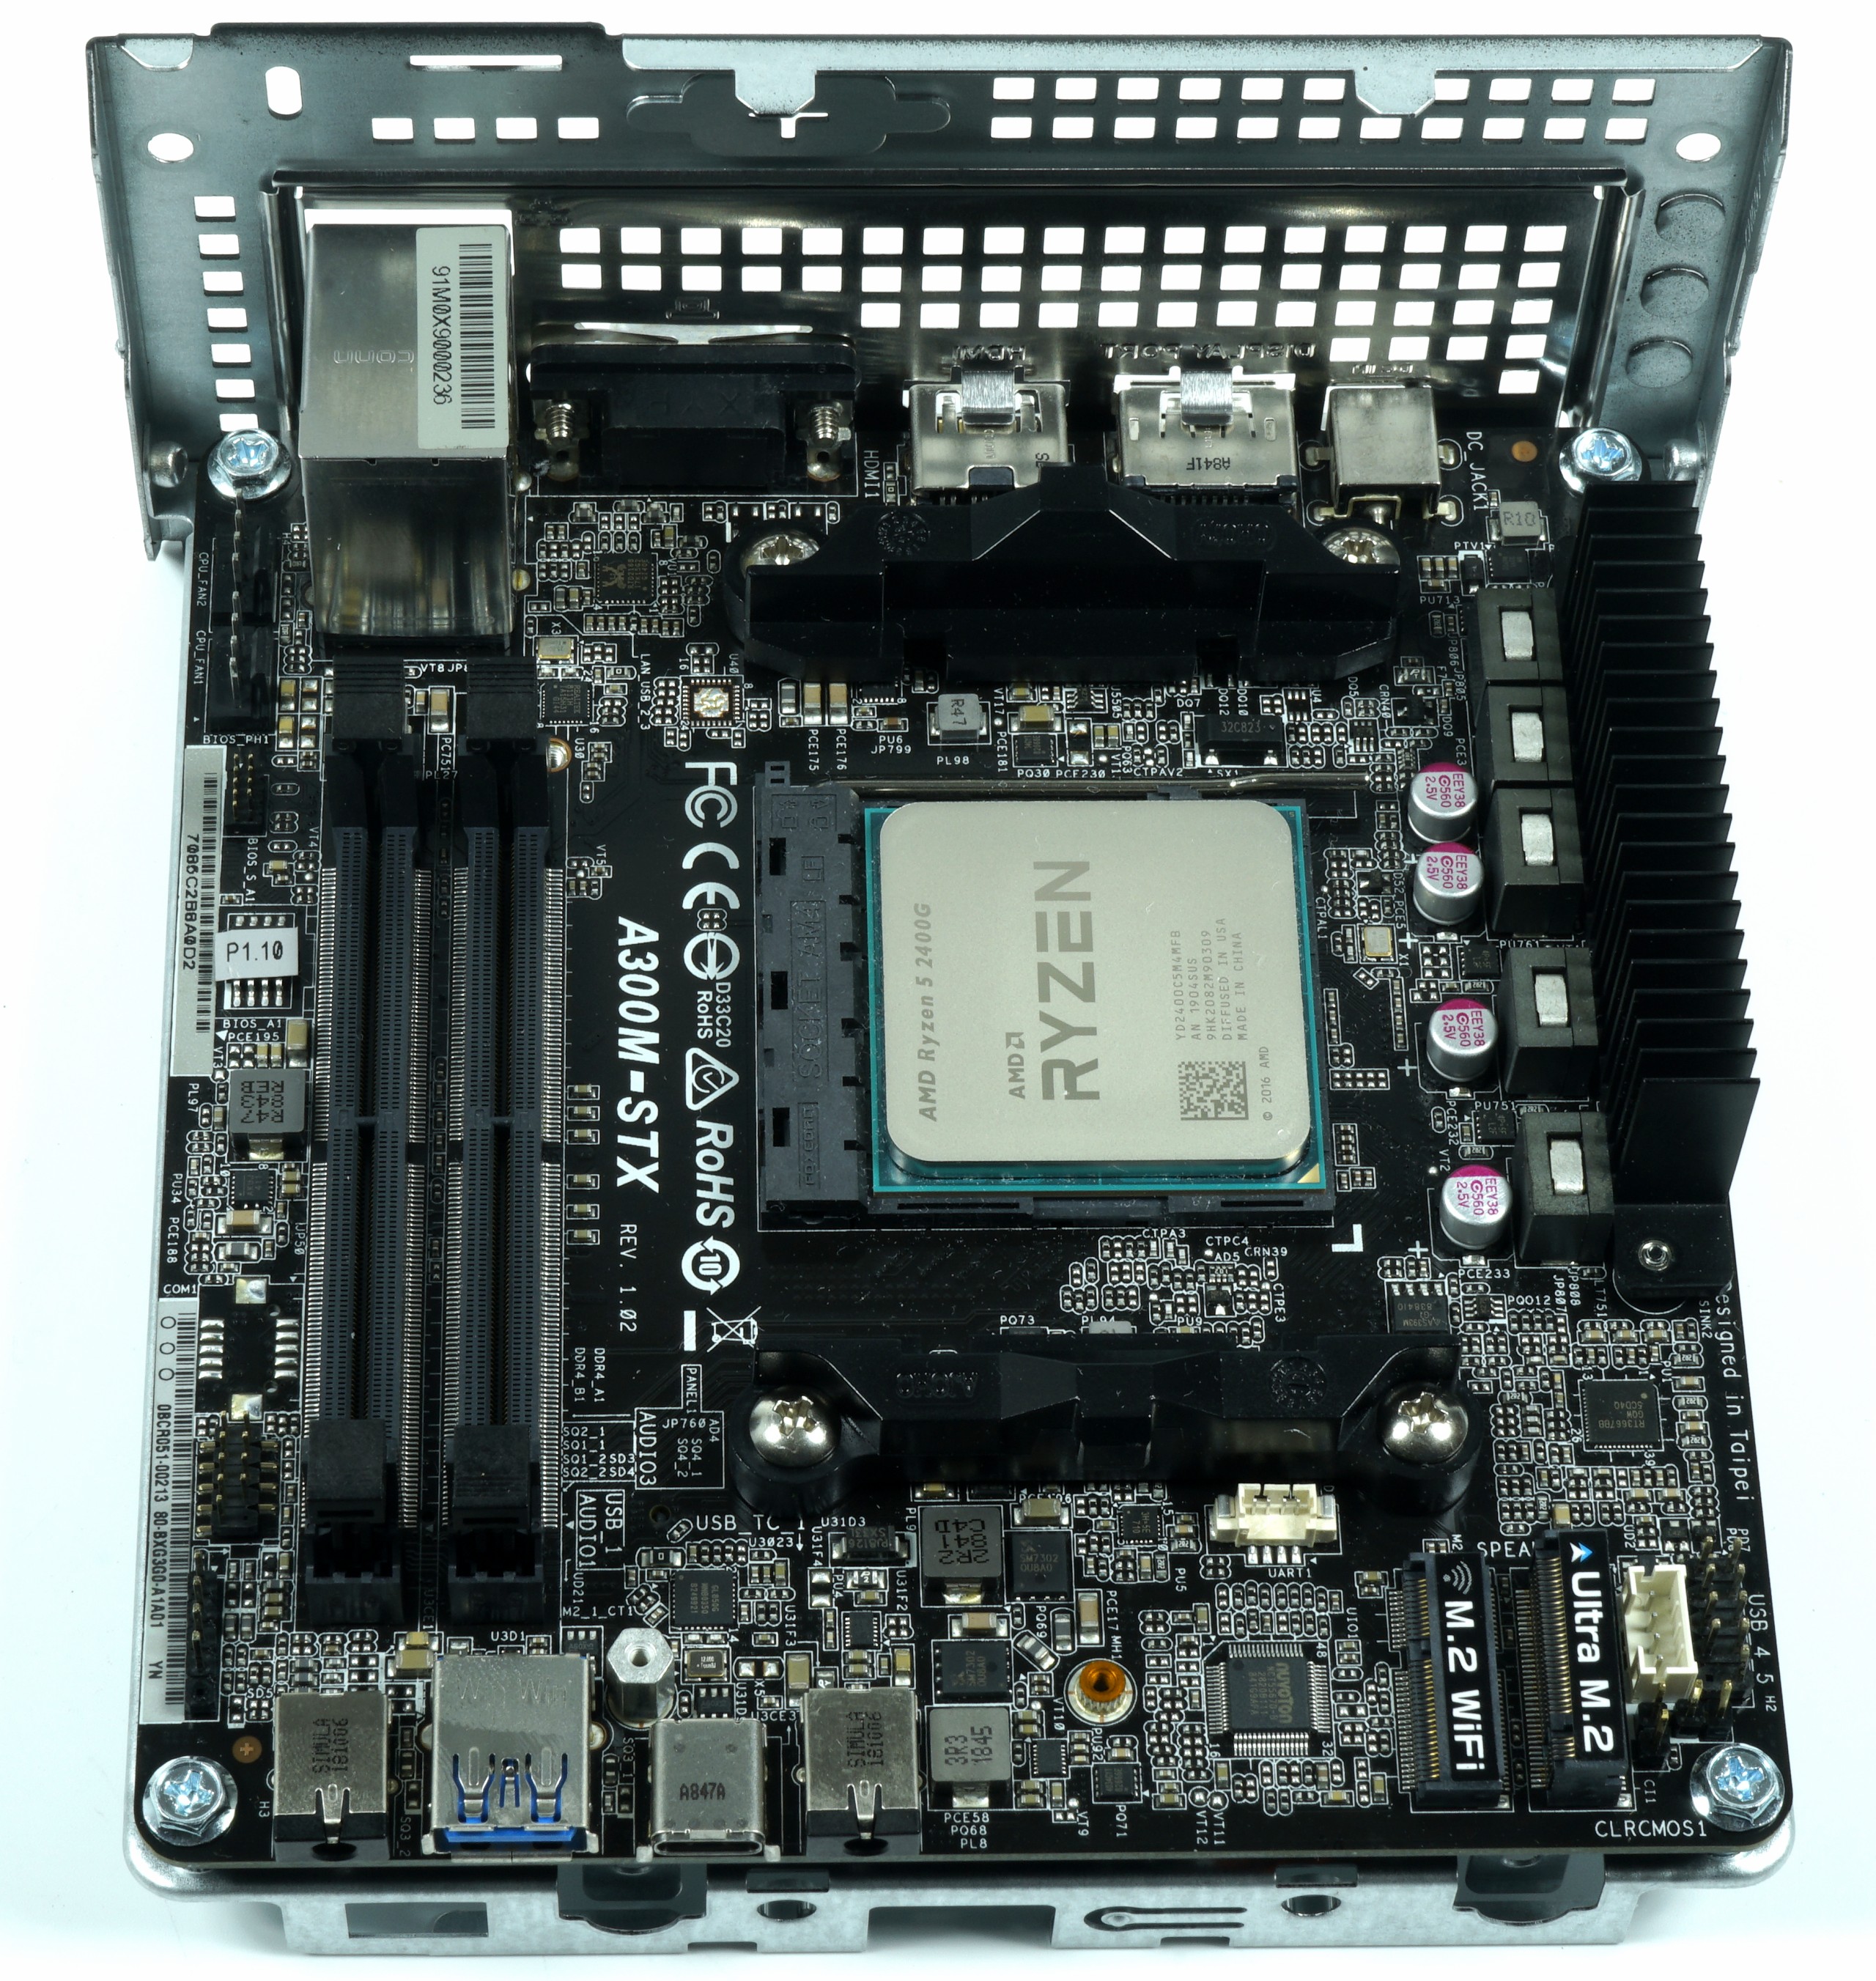
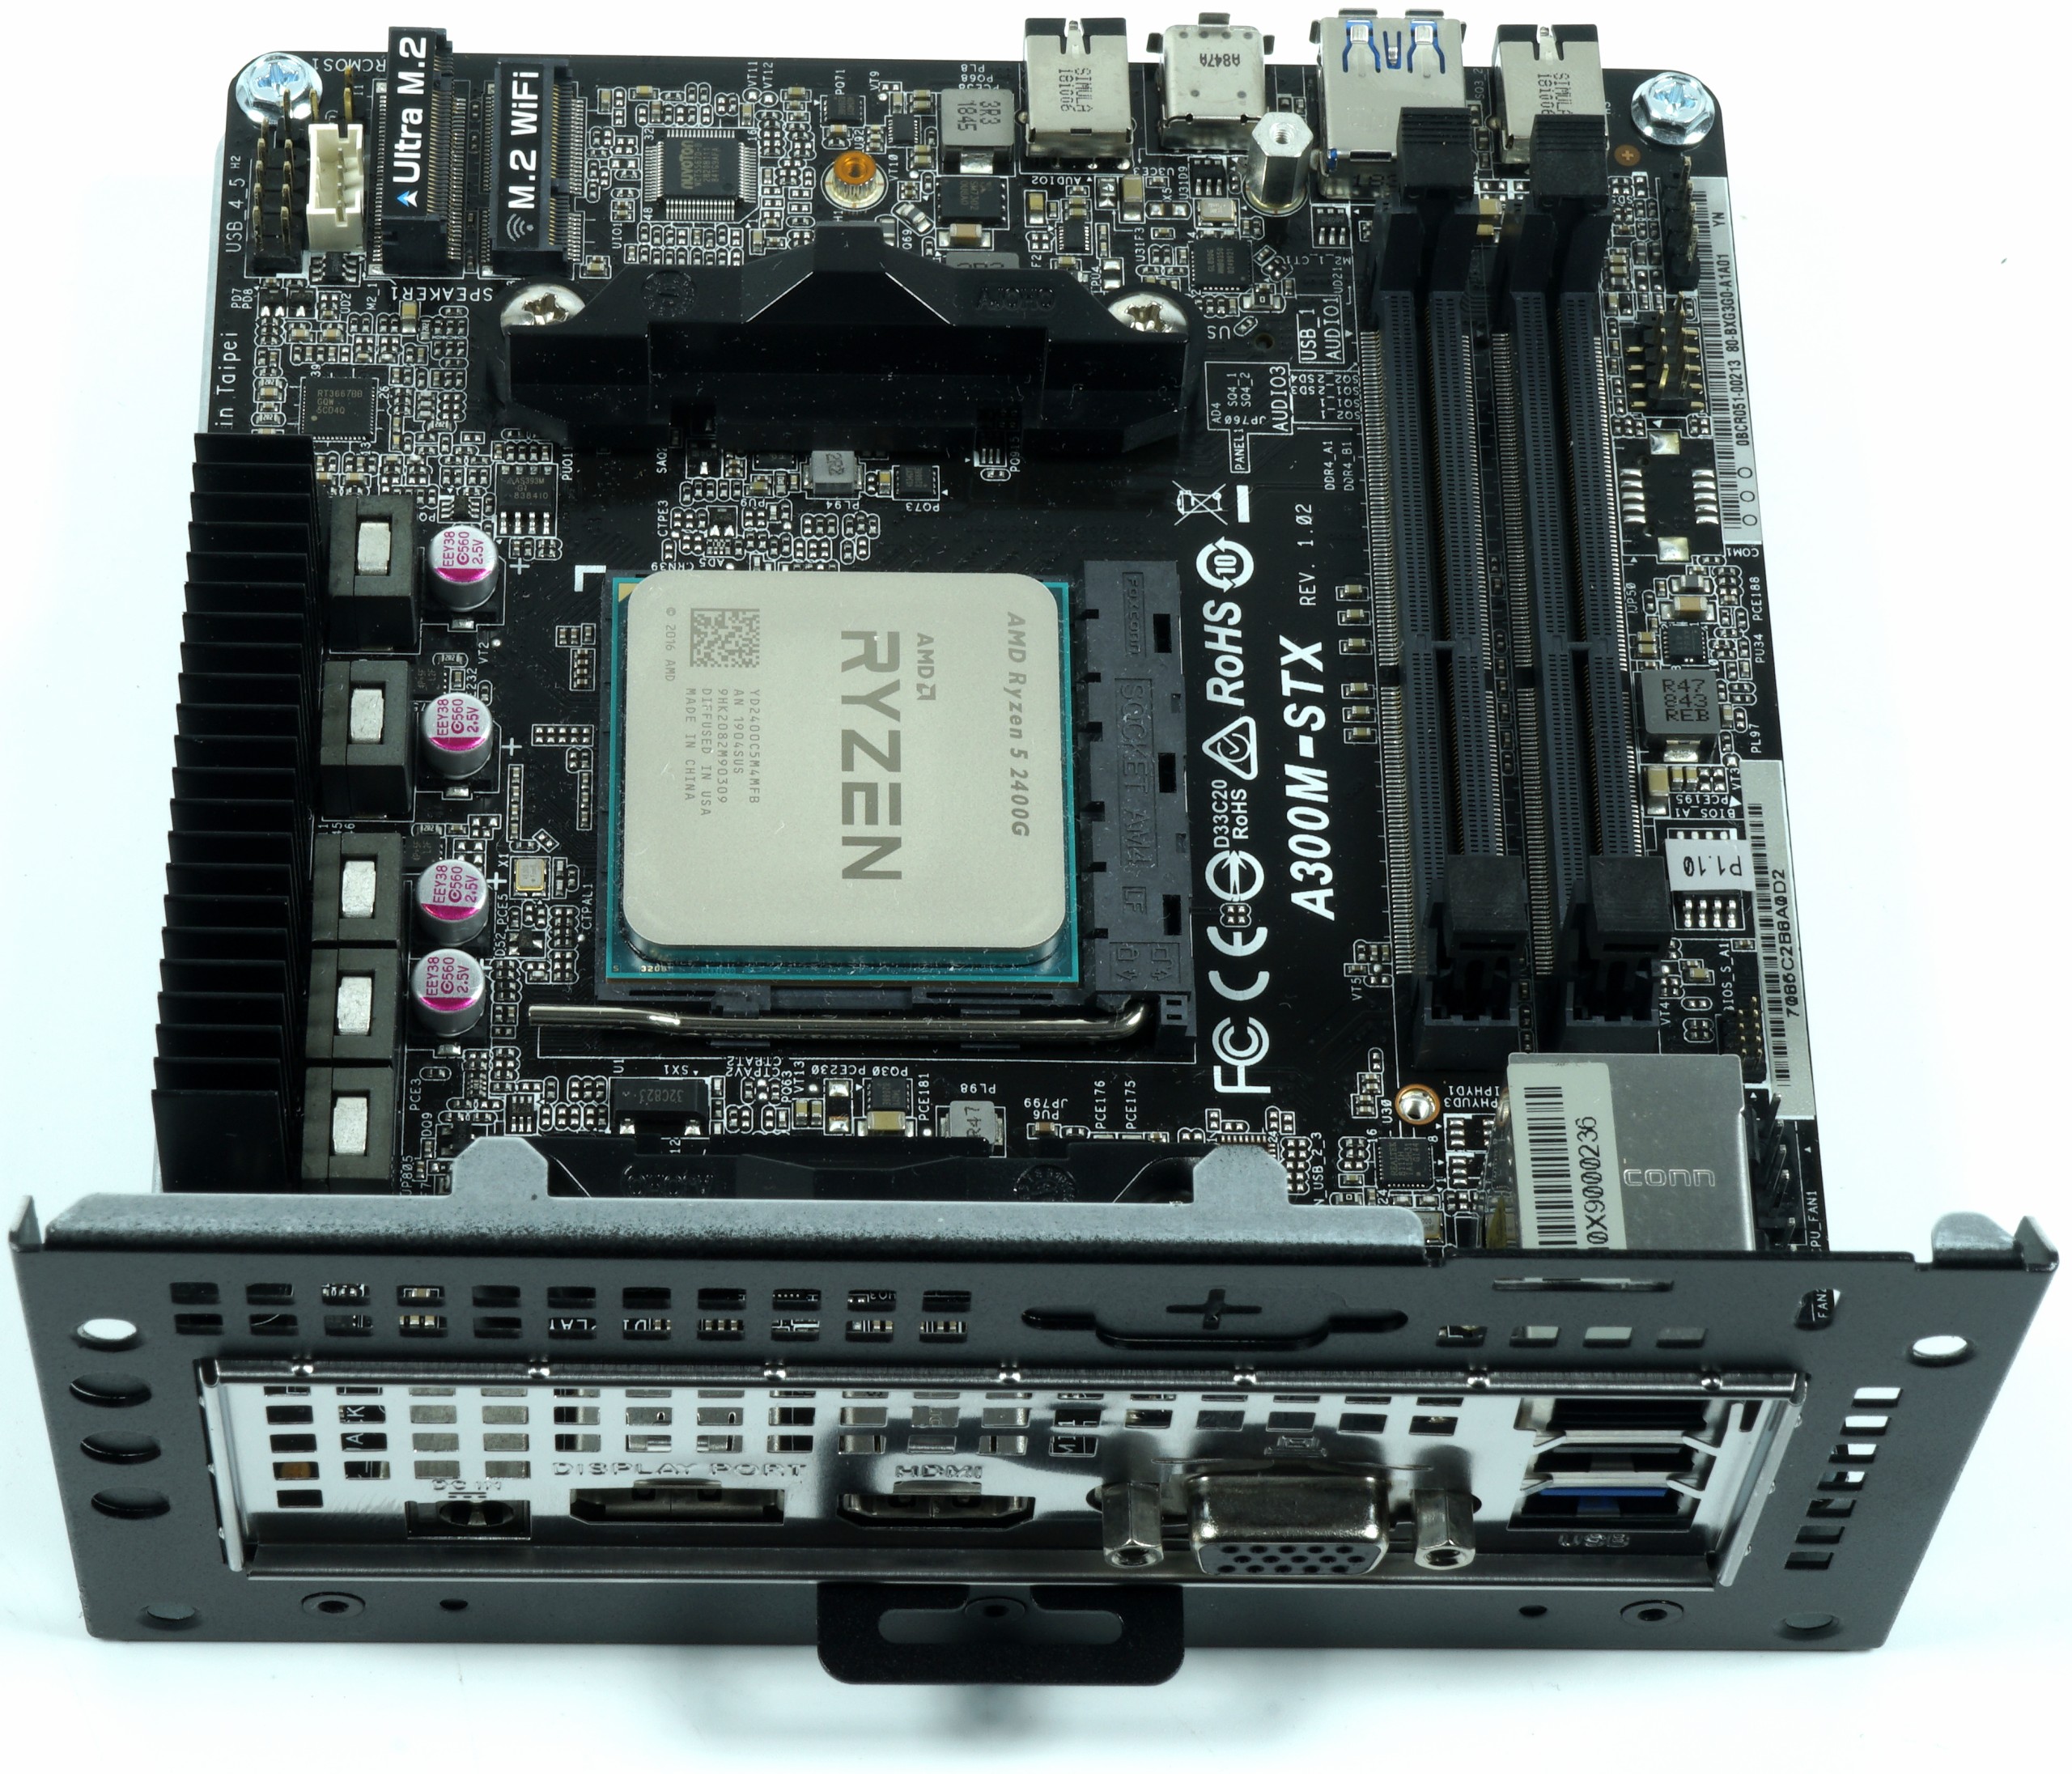
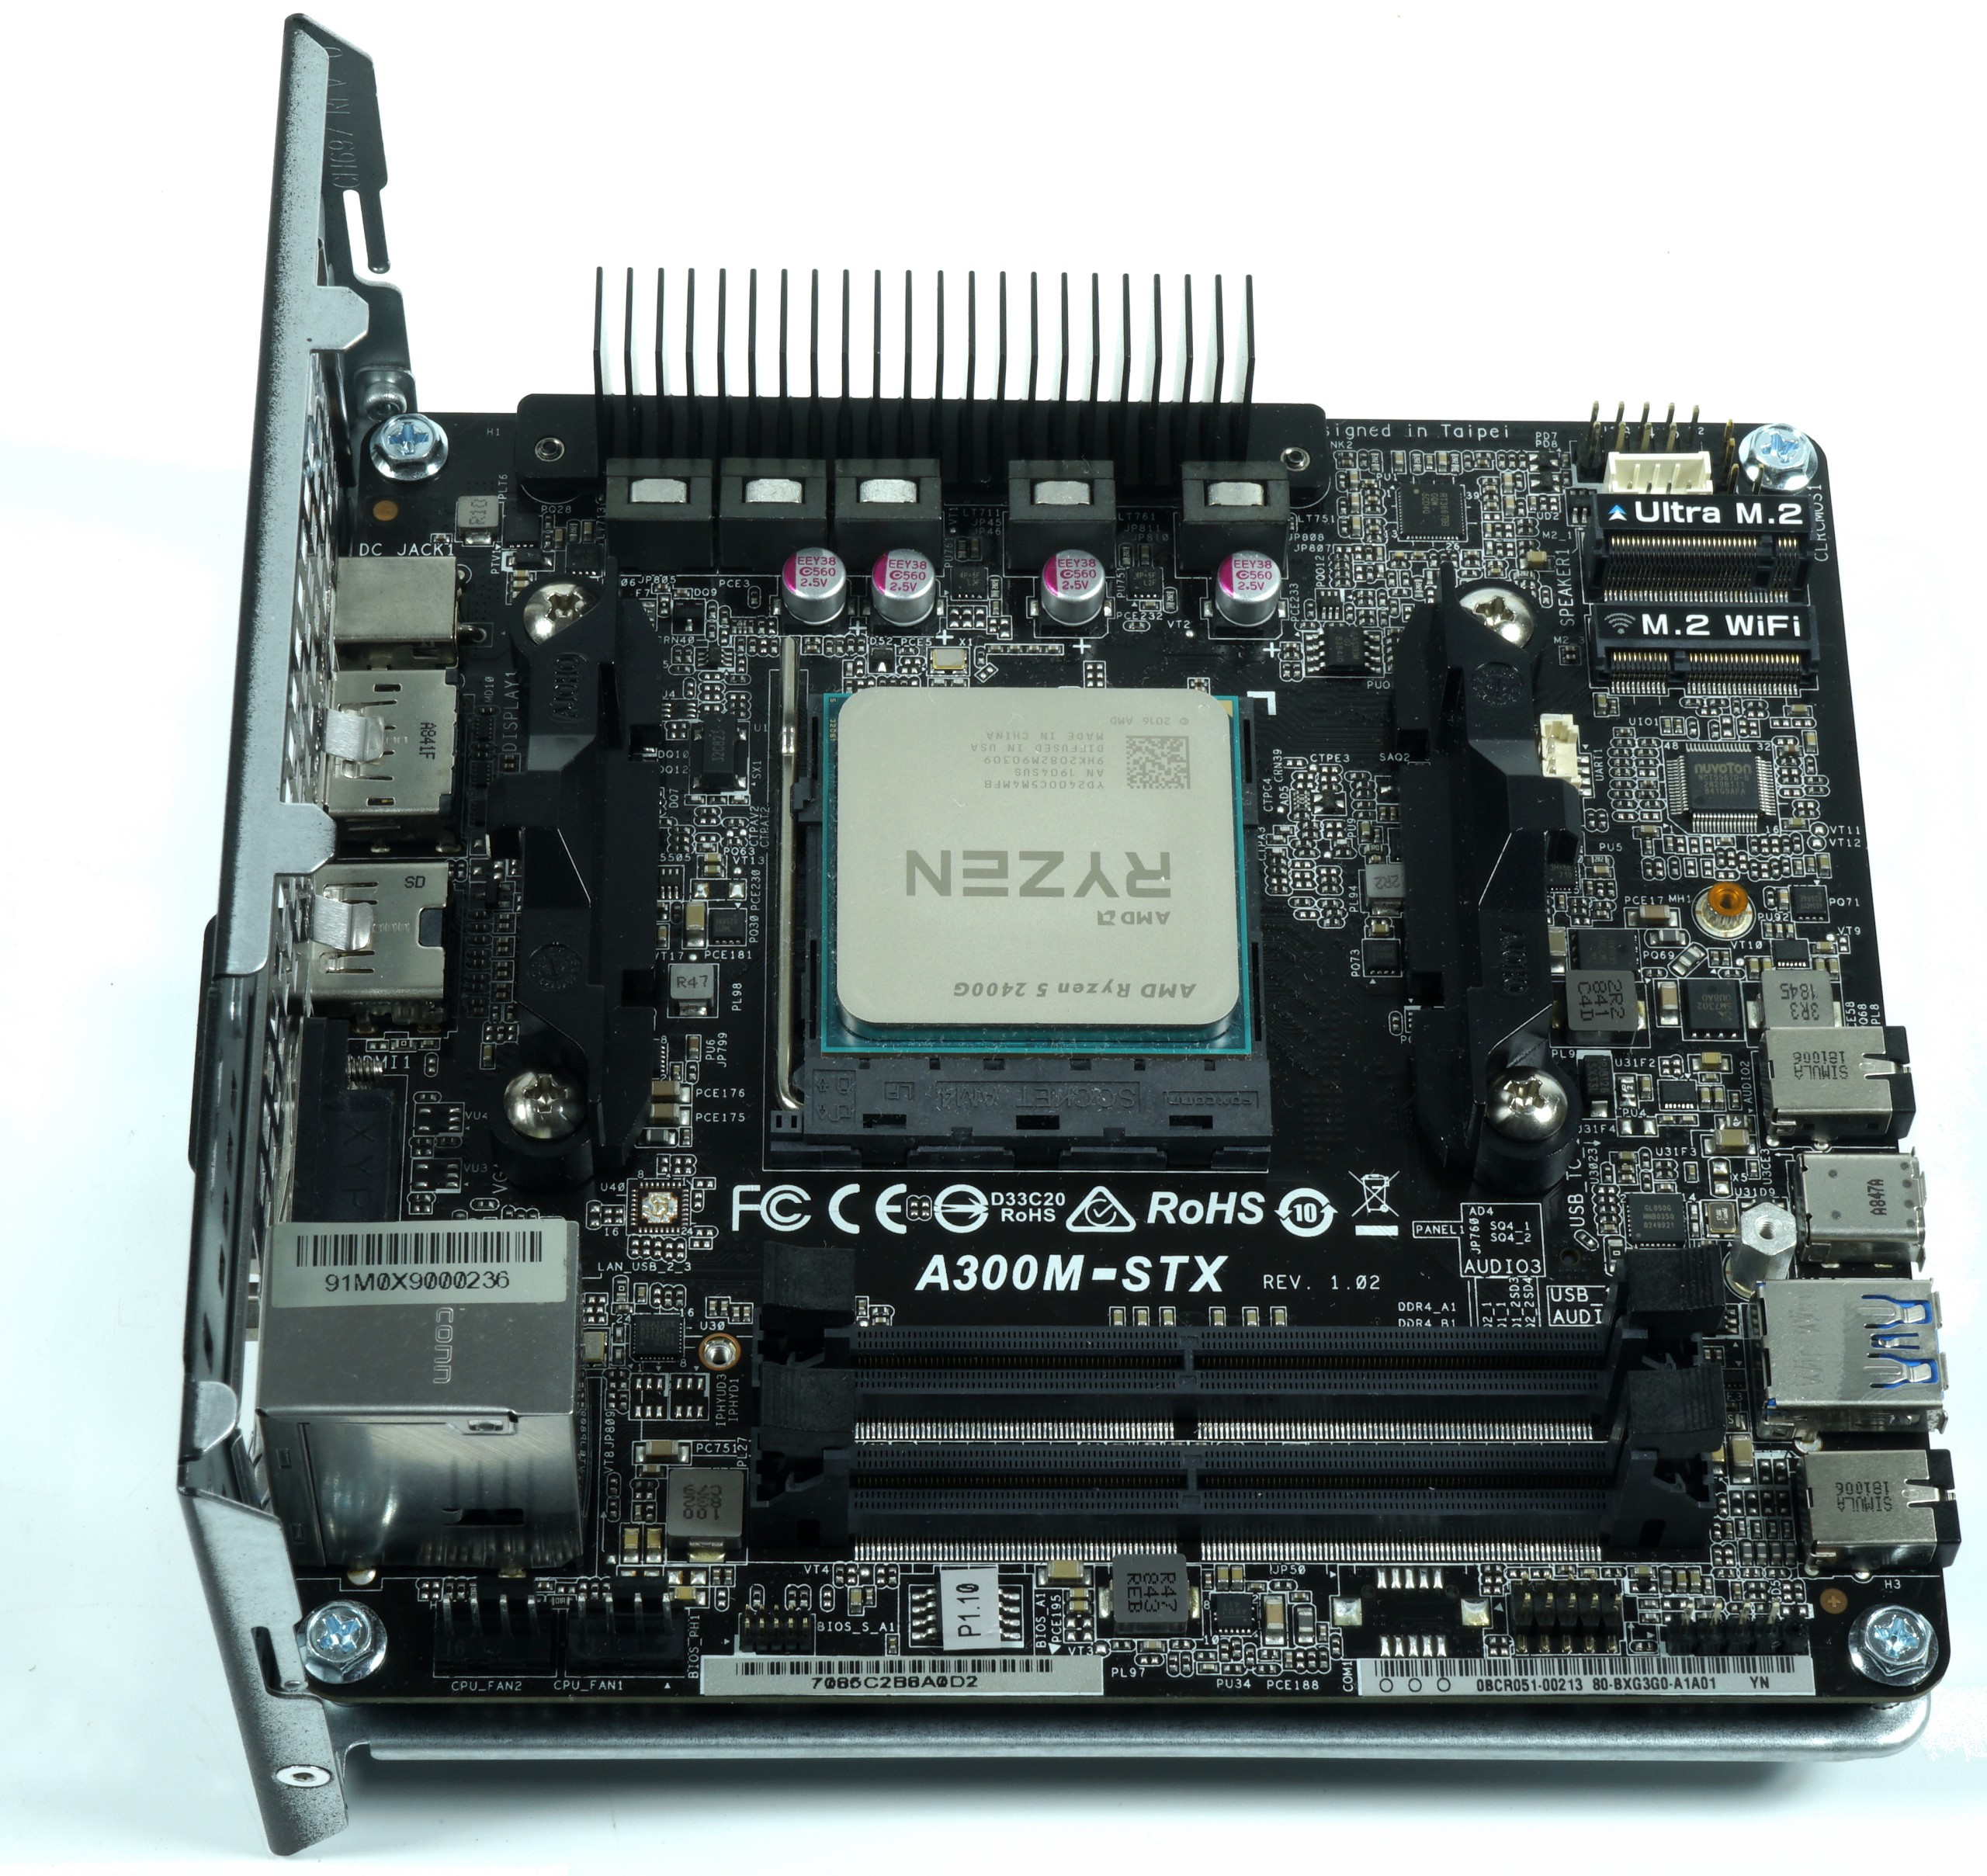
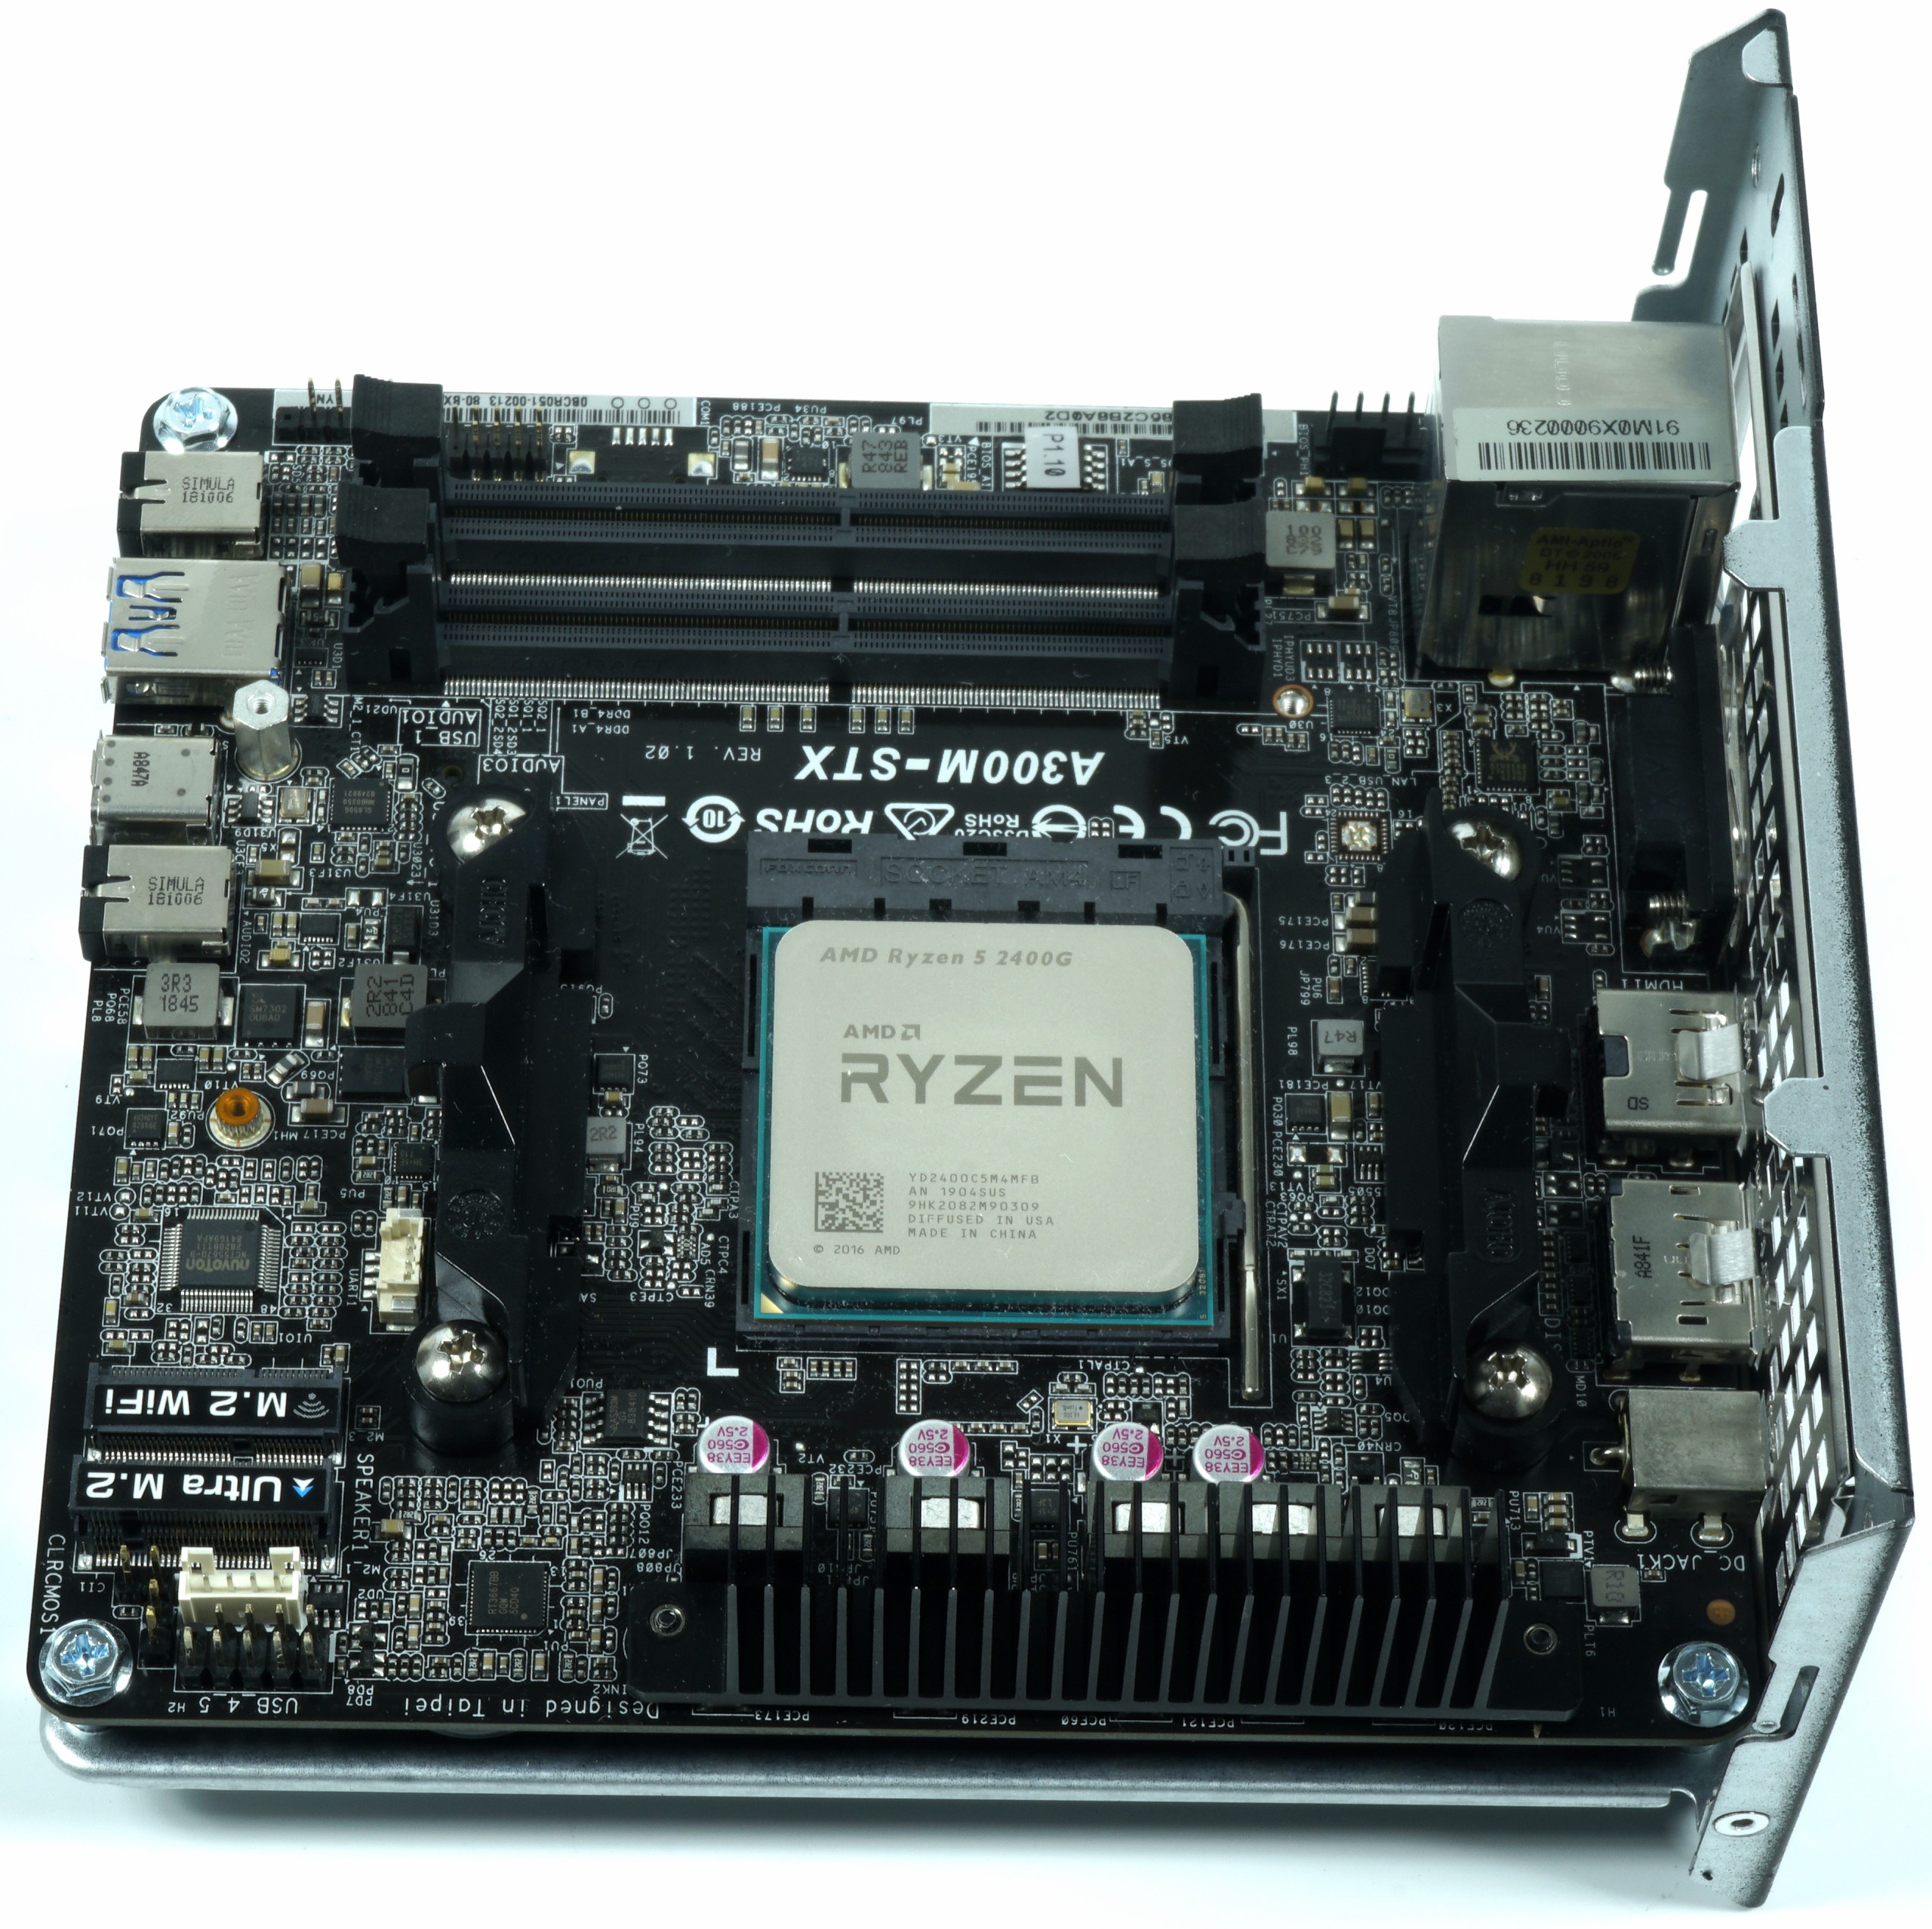
With memory, that's one thing. While the usual notebook technology is very often found on the Intel boards, ASRock has also installed normal sockets for the short SO-DIMM. This is rather unusual, but better than the recitable assembly. I bought two modules DDR4 2400 with 8 GB each from Crucial, which require 1.2 volts. With a bit of luck, they even run up to DDR4 2666 CL17 with this tension. But because I don't want to play, it's rather marginal.

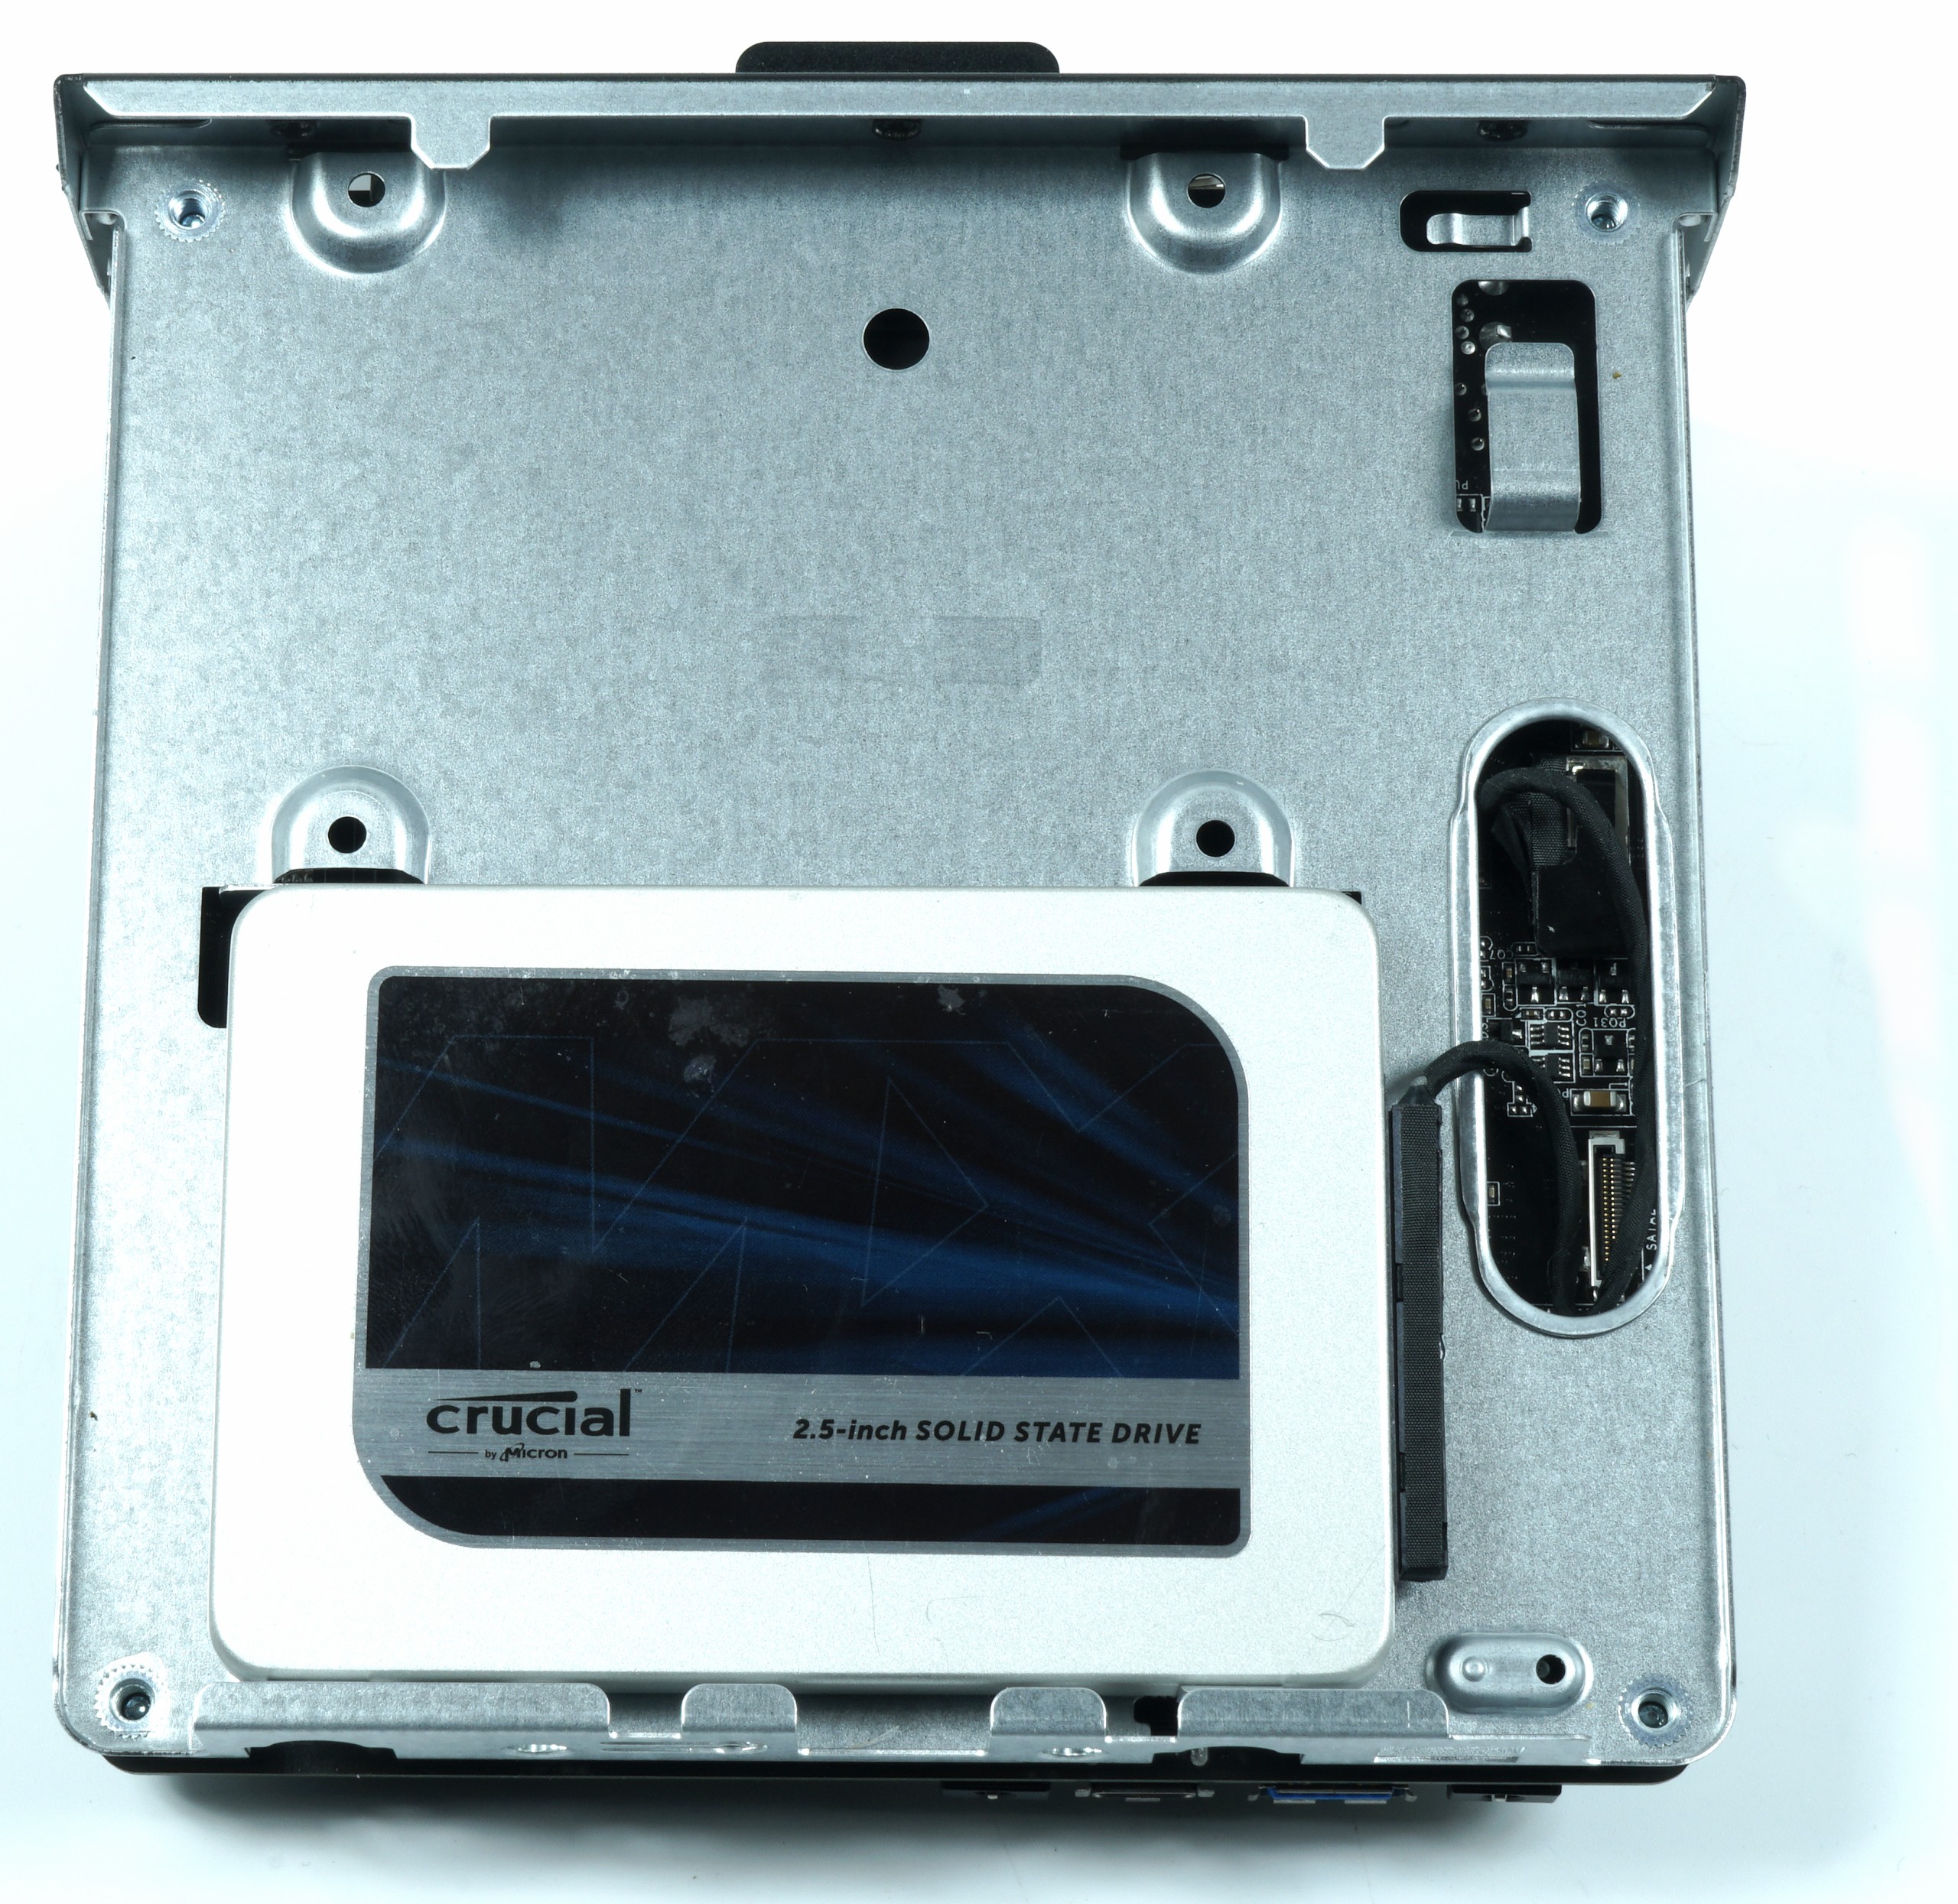
I forgo the M.2 SSD and build my own crucial from my remaining stocks. The 1 TB size is quite oversized, but maybe I would like to save it directly on the disk and not only externally. I don't know yet. And that's why I install the SSD on the bottom of the motherboard frame and connect it to the motherboard with the included SATA adapter. Notebook technology is used here, because there are no real SATA connections. You could mount up to two 2.5" drives, but only one of them without releasing the motherboard from the frame. Enough, though.
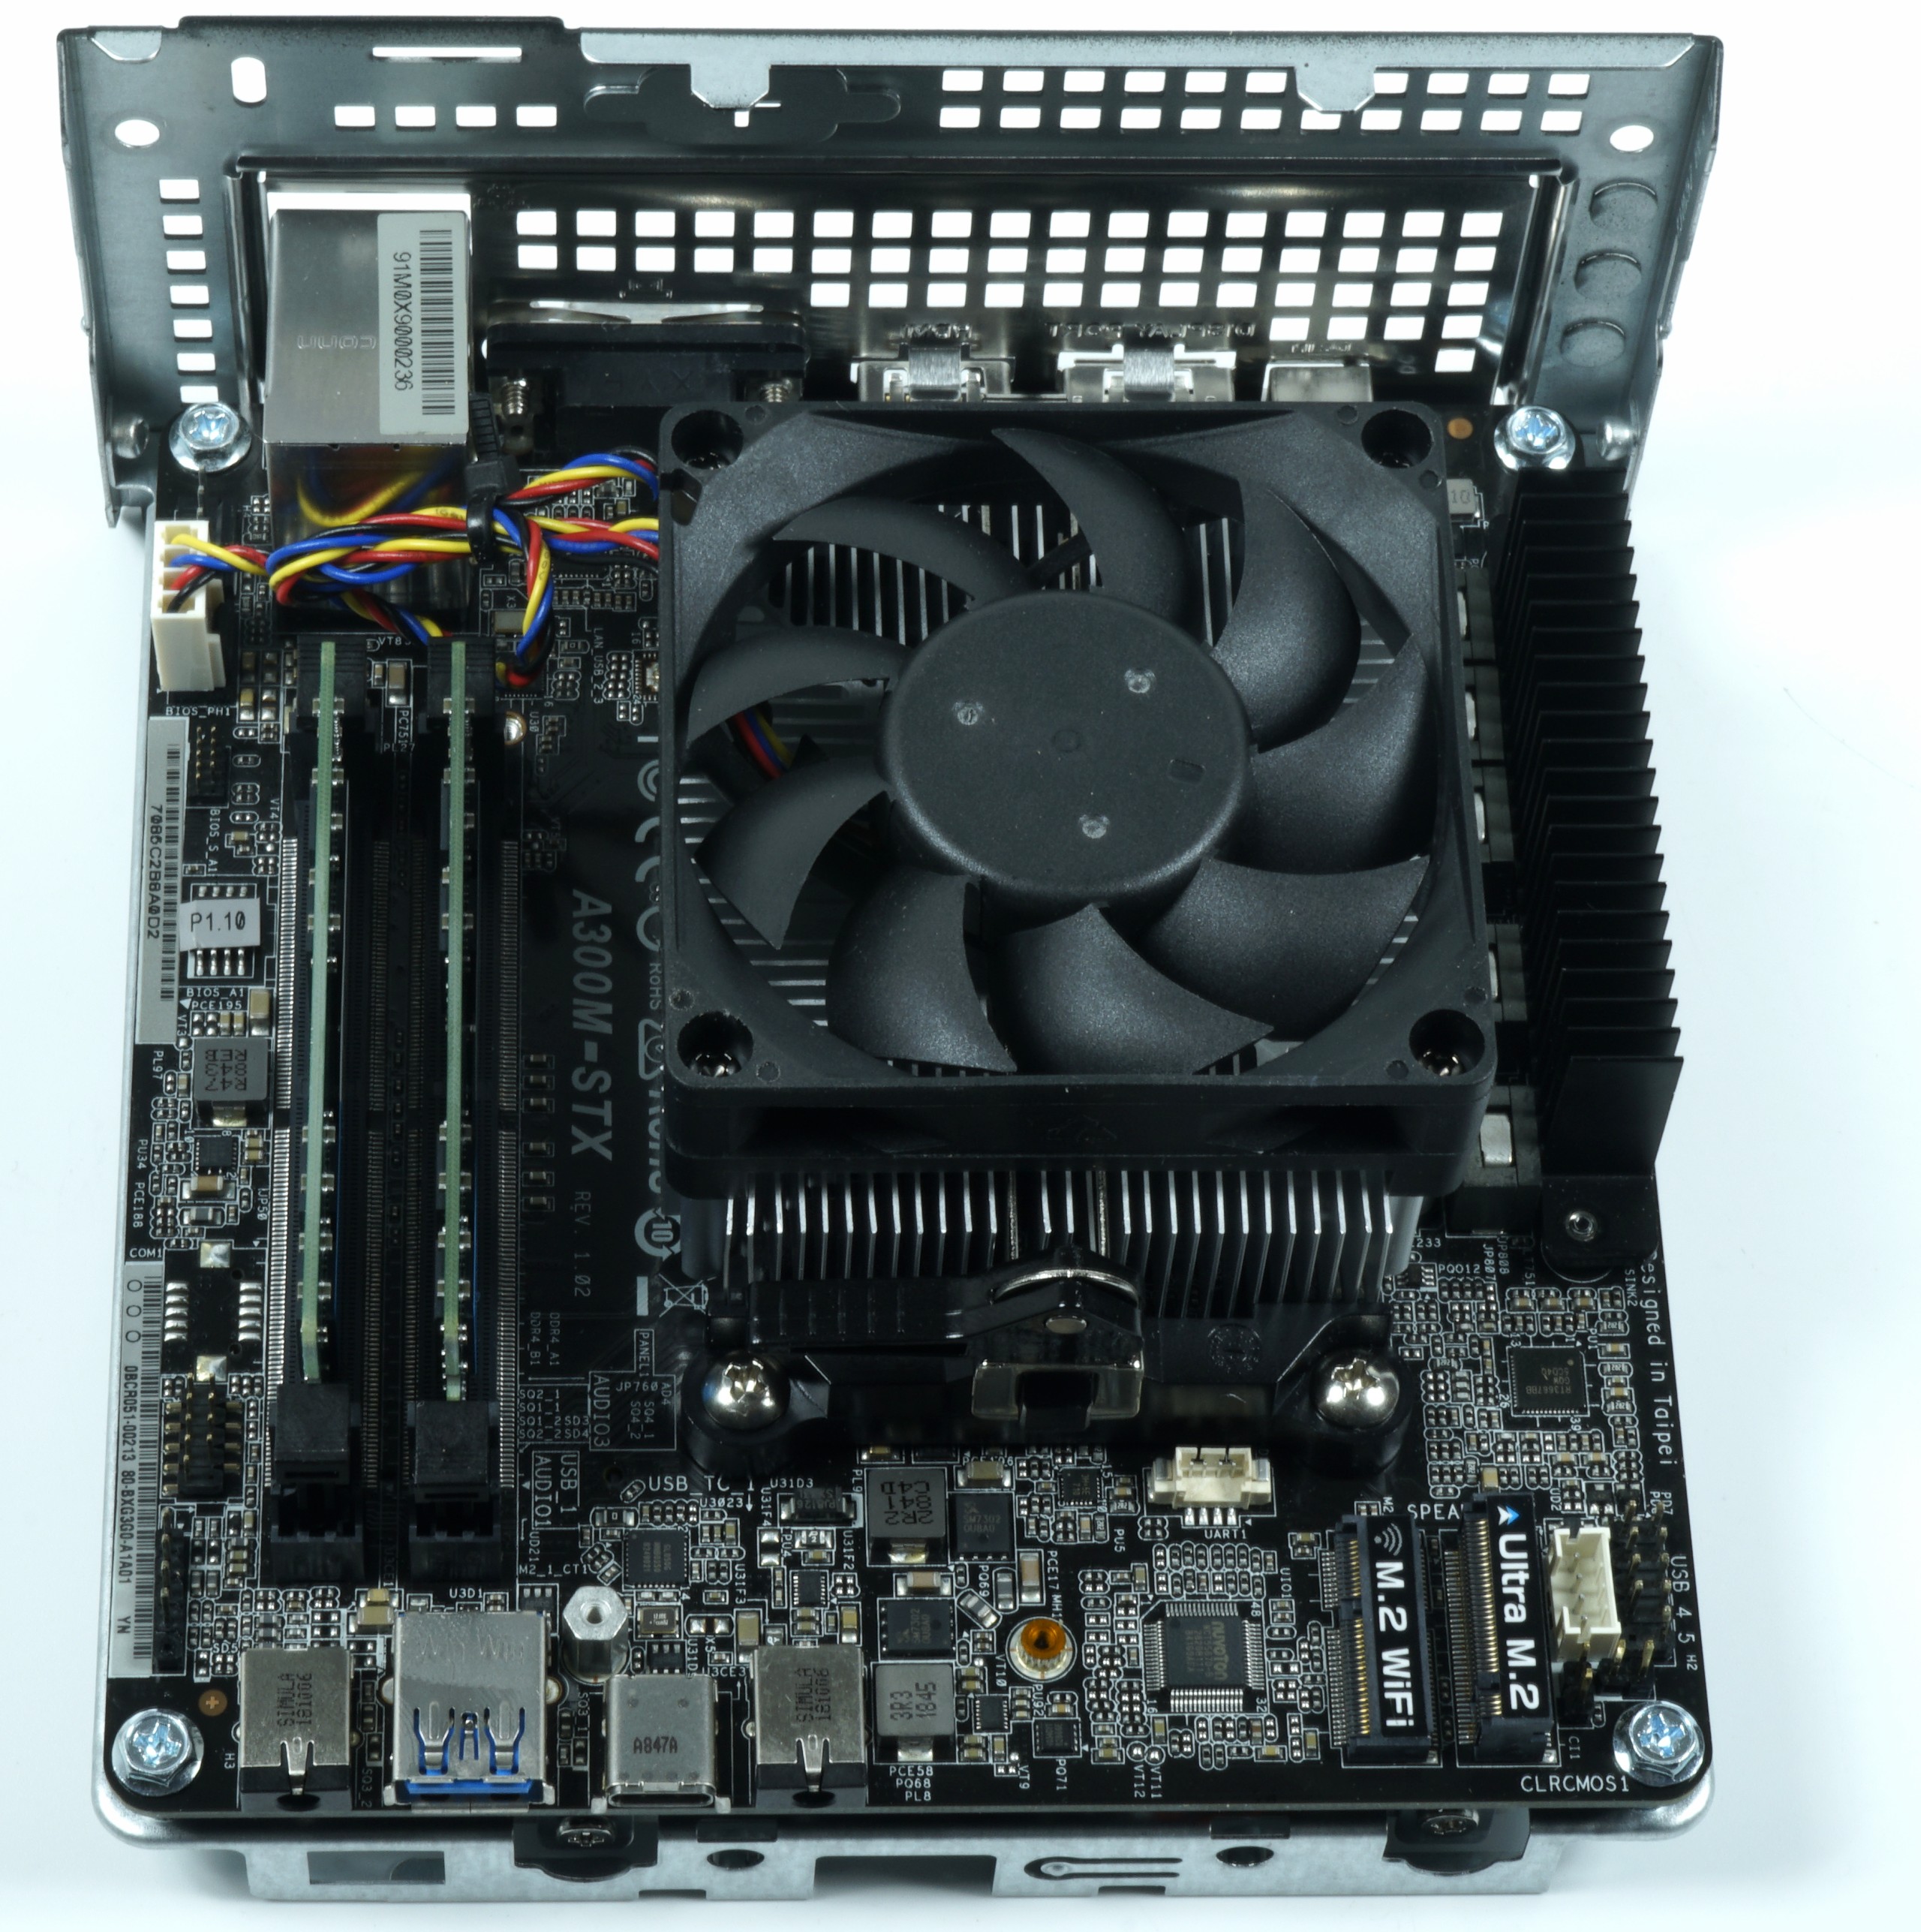
So, now quickly put the cooler on top and its fan connected. This is a tiny aluminium block made of continuous casting with a 7 cm look set-up Miefquirl. That such a savings solution can not be quiet, I quickly understood and acted, but for that I have an extra chapter on the next page. First of all, I have to test the general functionality. The assembly then proceeds just as fast as the picking.
Quick start and manual with specifications
Before I write a wolf and at the end nobody reads it, I have attached the most important contents for the assembly and the data of the manual as an original PDF. If you want, take a look, the rest will find out on the next page how I was able to tame the fan and what hurdles there were with OBS and how to handle them quite easily.
Schnellstart
Handbuch


Kommentieren