


I’ve been testing the Maximus Z790 Hero motherboard from Asus for a while now and today I finally and officially have the review ready for you. In our baseline article about DDR5 RAM tests, the board was already mentioned very positively and has therefore established itself as the backbone for the test system. Not least the reliability and reproducibility of RAM overclocks convinced me of this theoretically less suitable 4-DIMM motherboard, although various 2-DIMM alternatives were also available. Of course, we will also cover in detail what makes the Z790 Hero so special and better in terms of RAM-OC. But let’s first start with a very classic unboxing.
Unboxing and features
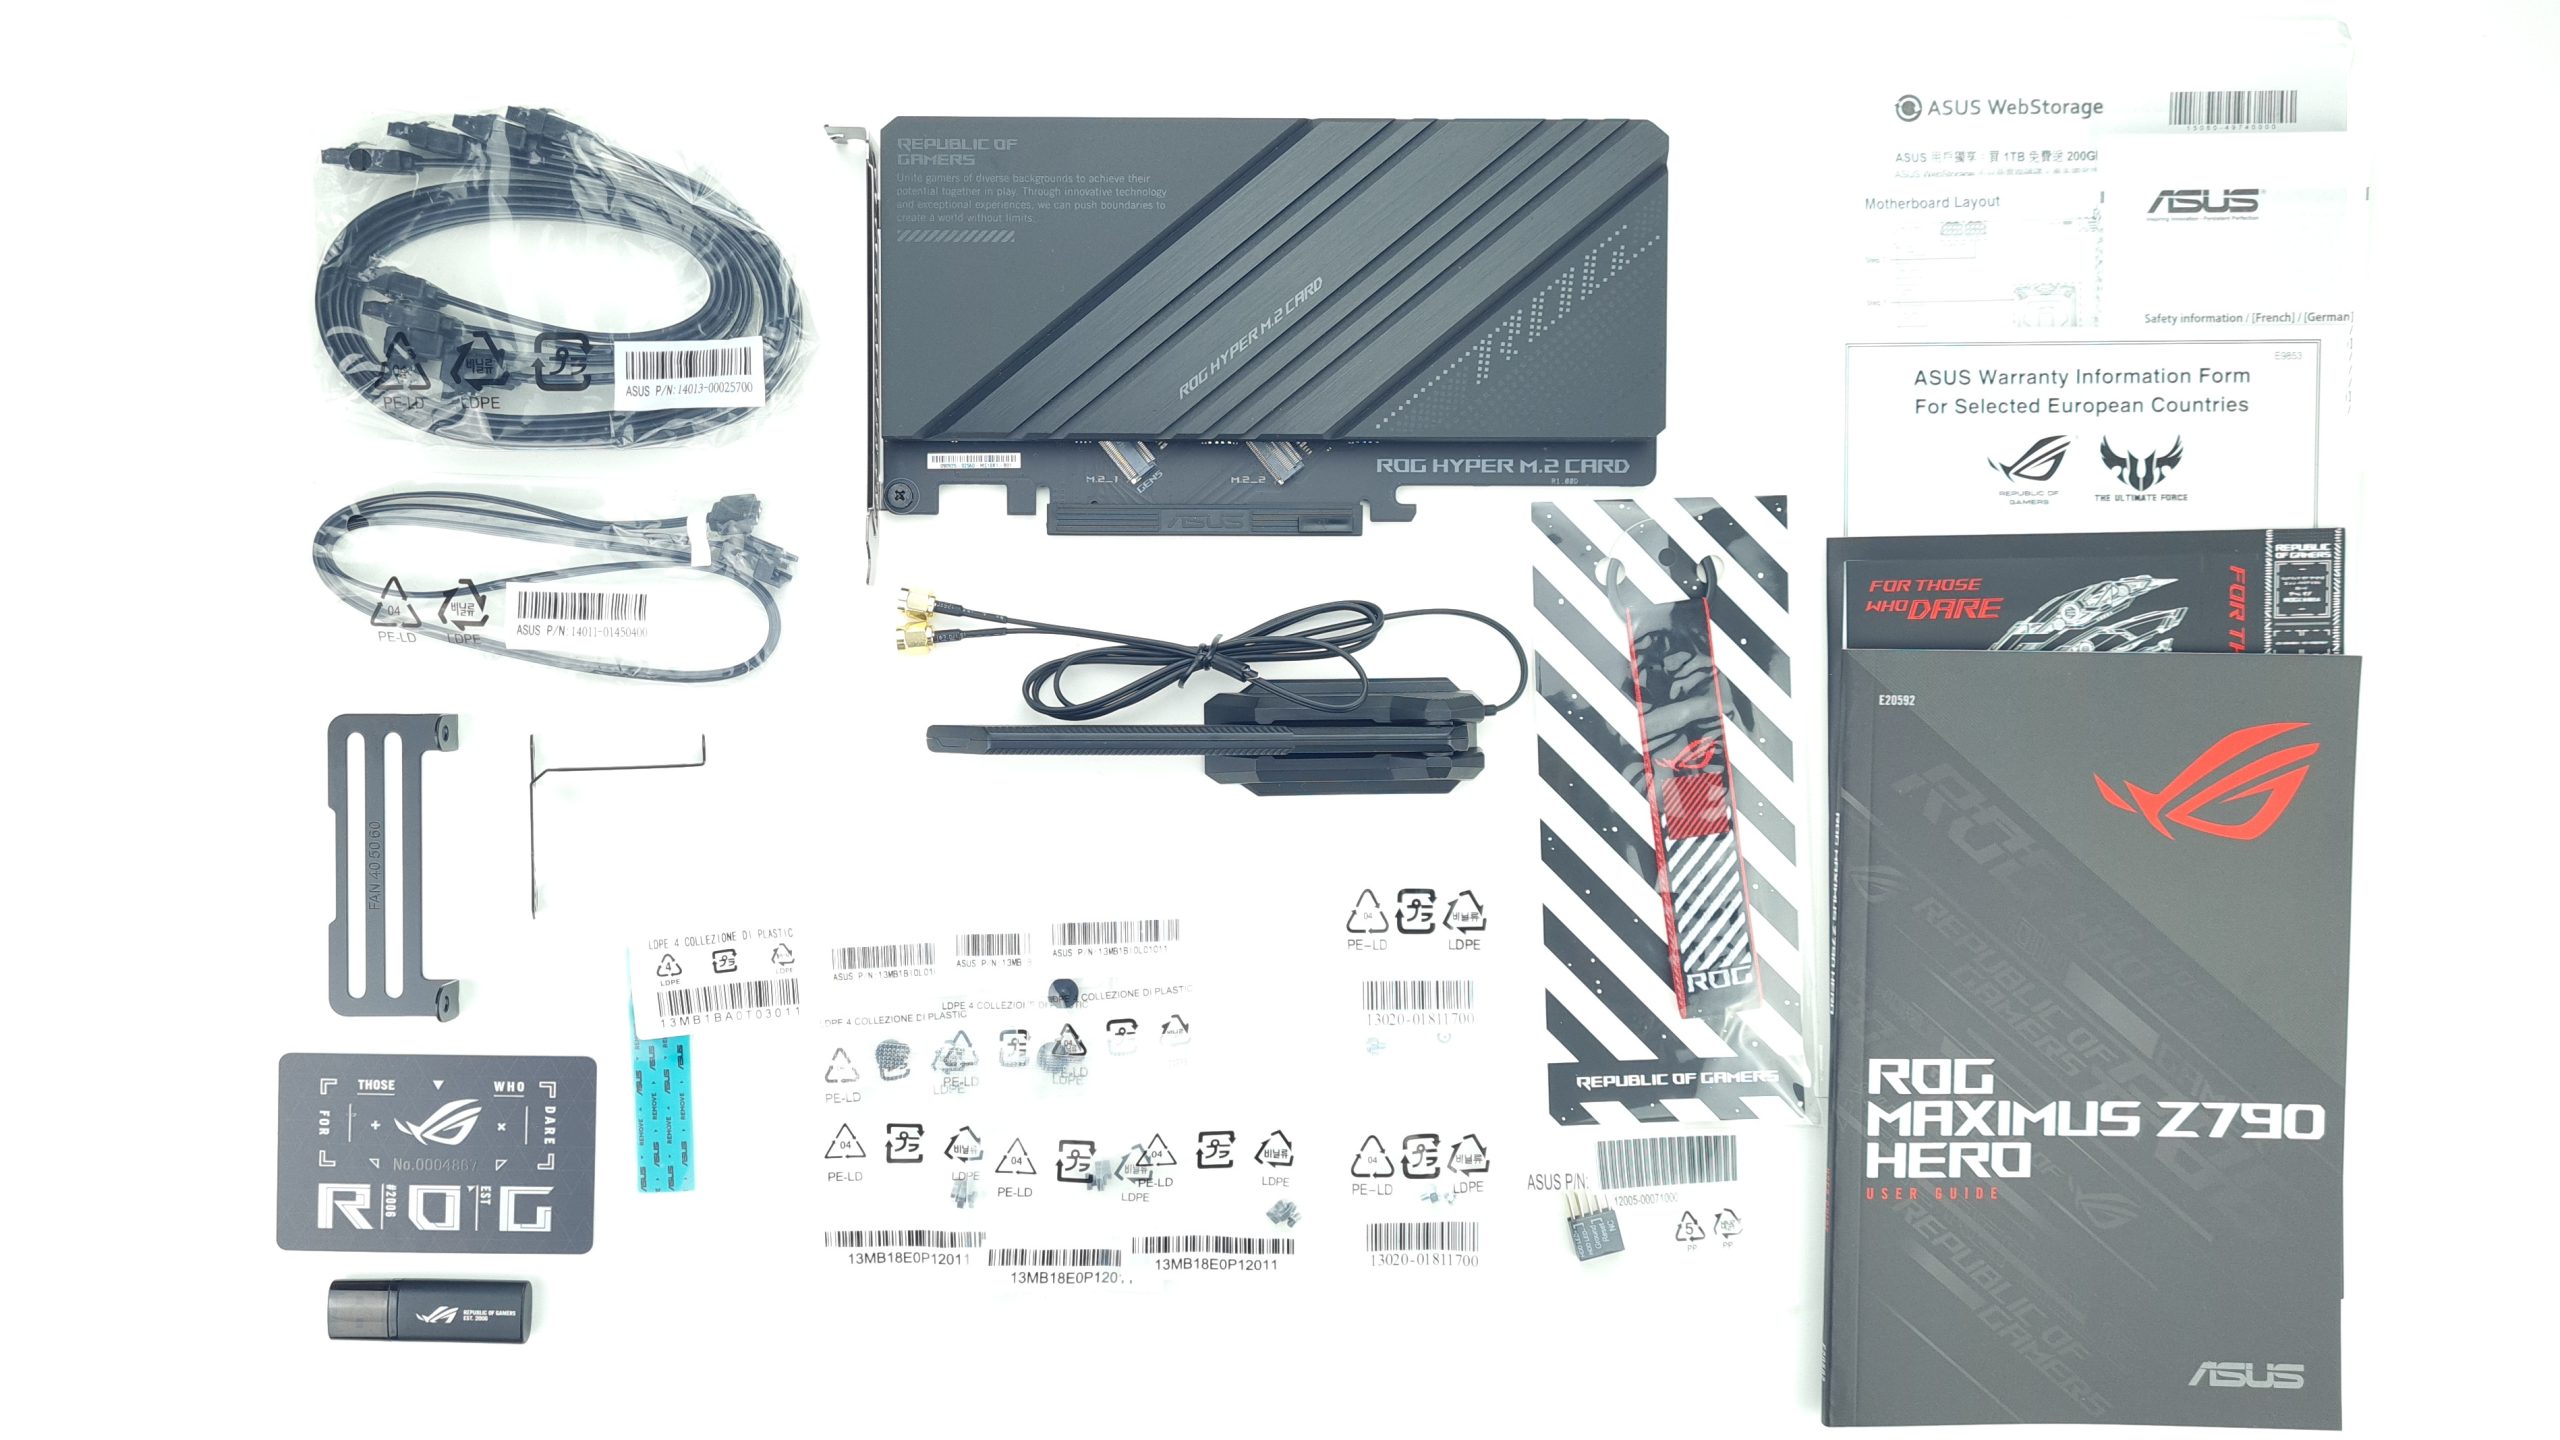
The scope of delivery includes the usual suspects like the manual, SATA cables and M.2 screws as well as some special features. On the one hand, there is a ROG Hyper M.2 Card, a PCIe x16 plug-in card on which two M.2 SSDs with up to PCIe Gen5 can be installed. Also rather unusual are two metal profiles that can be used to attach 40-60 mm fans near the DIMM slots for cooling the working memory. A separate antenna with magnetic stand is included for the integrated WLAN, and the usual driver DVD is replaced by a USB stick.

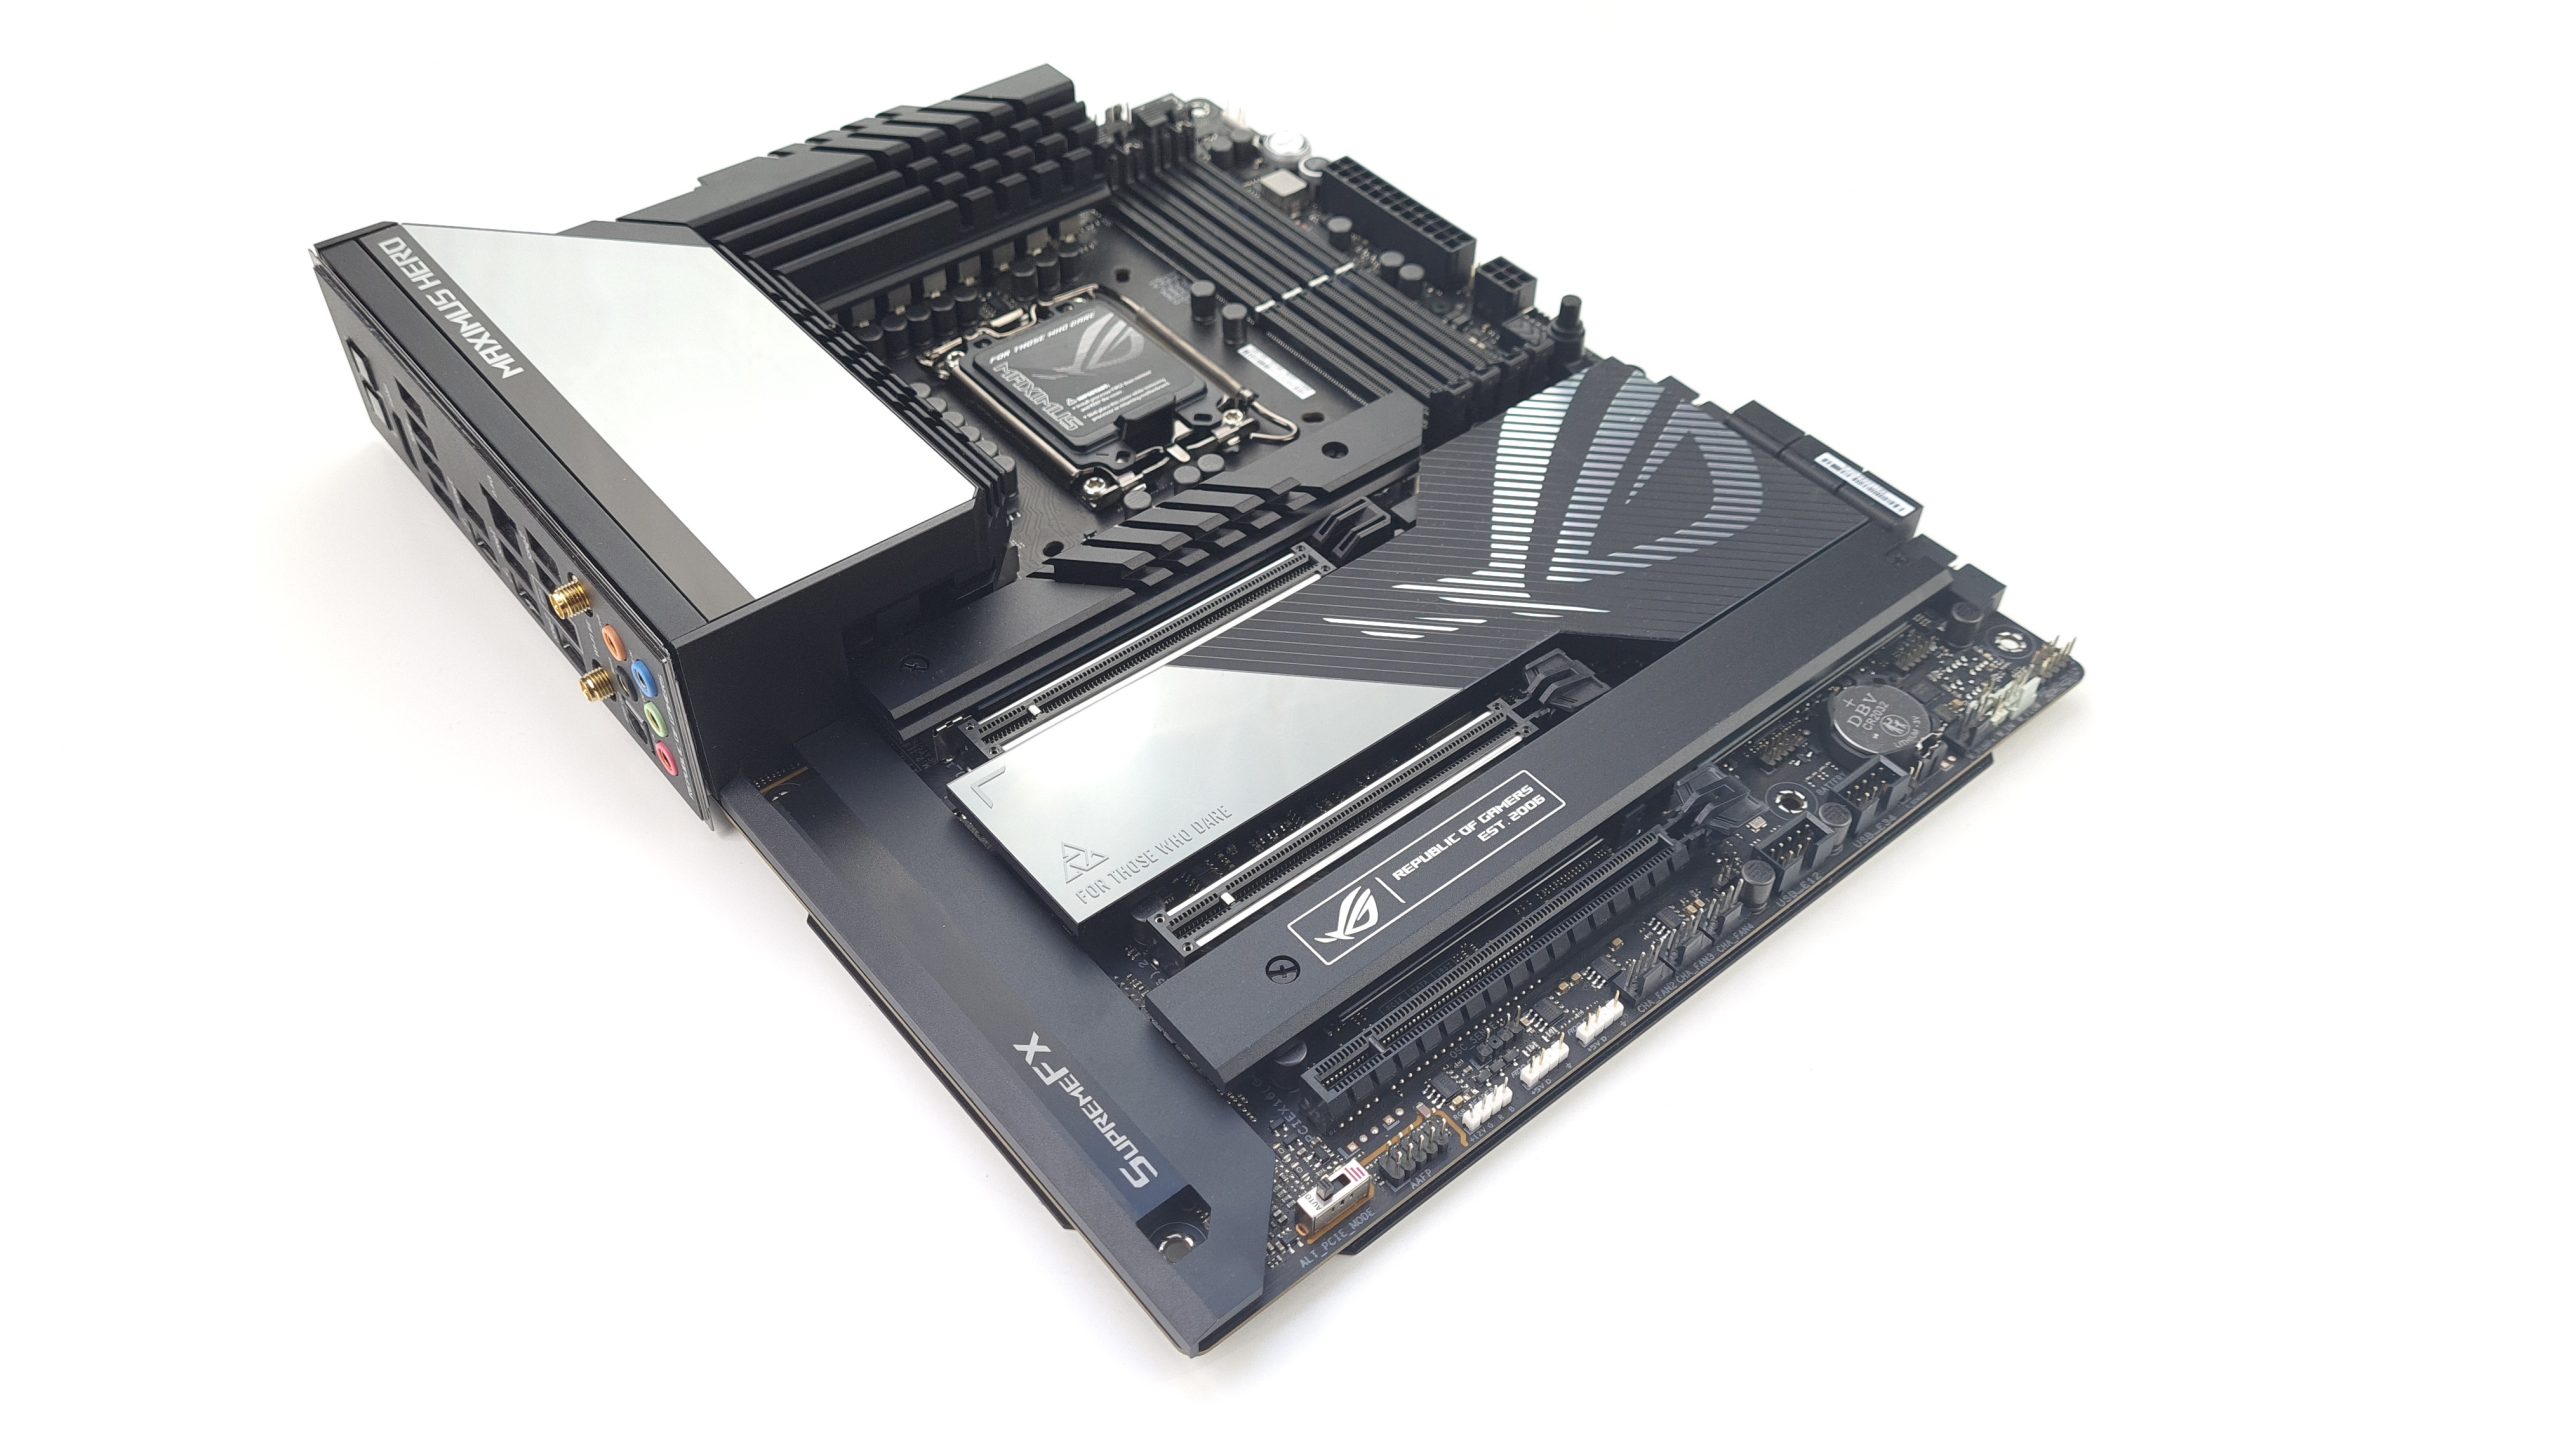
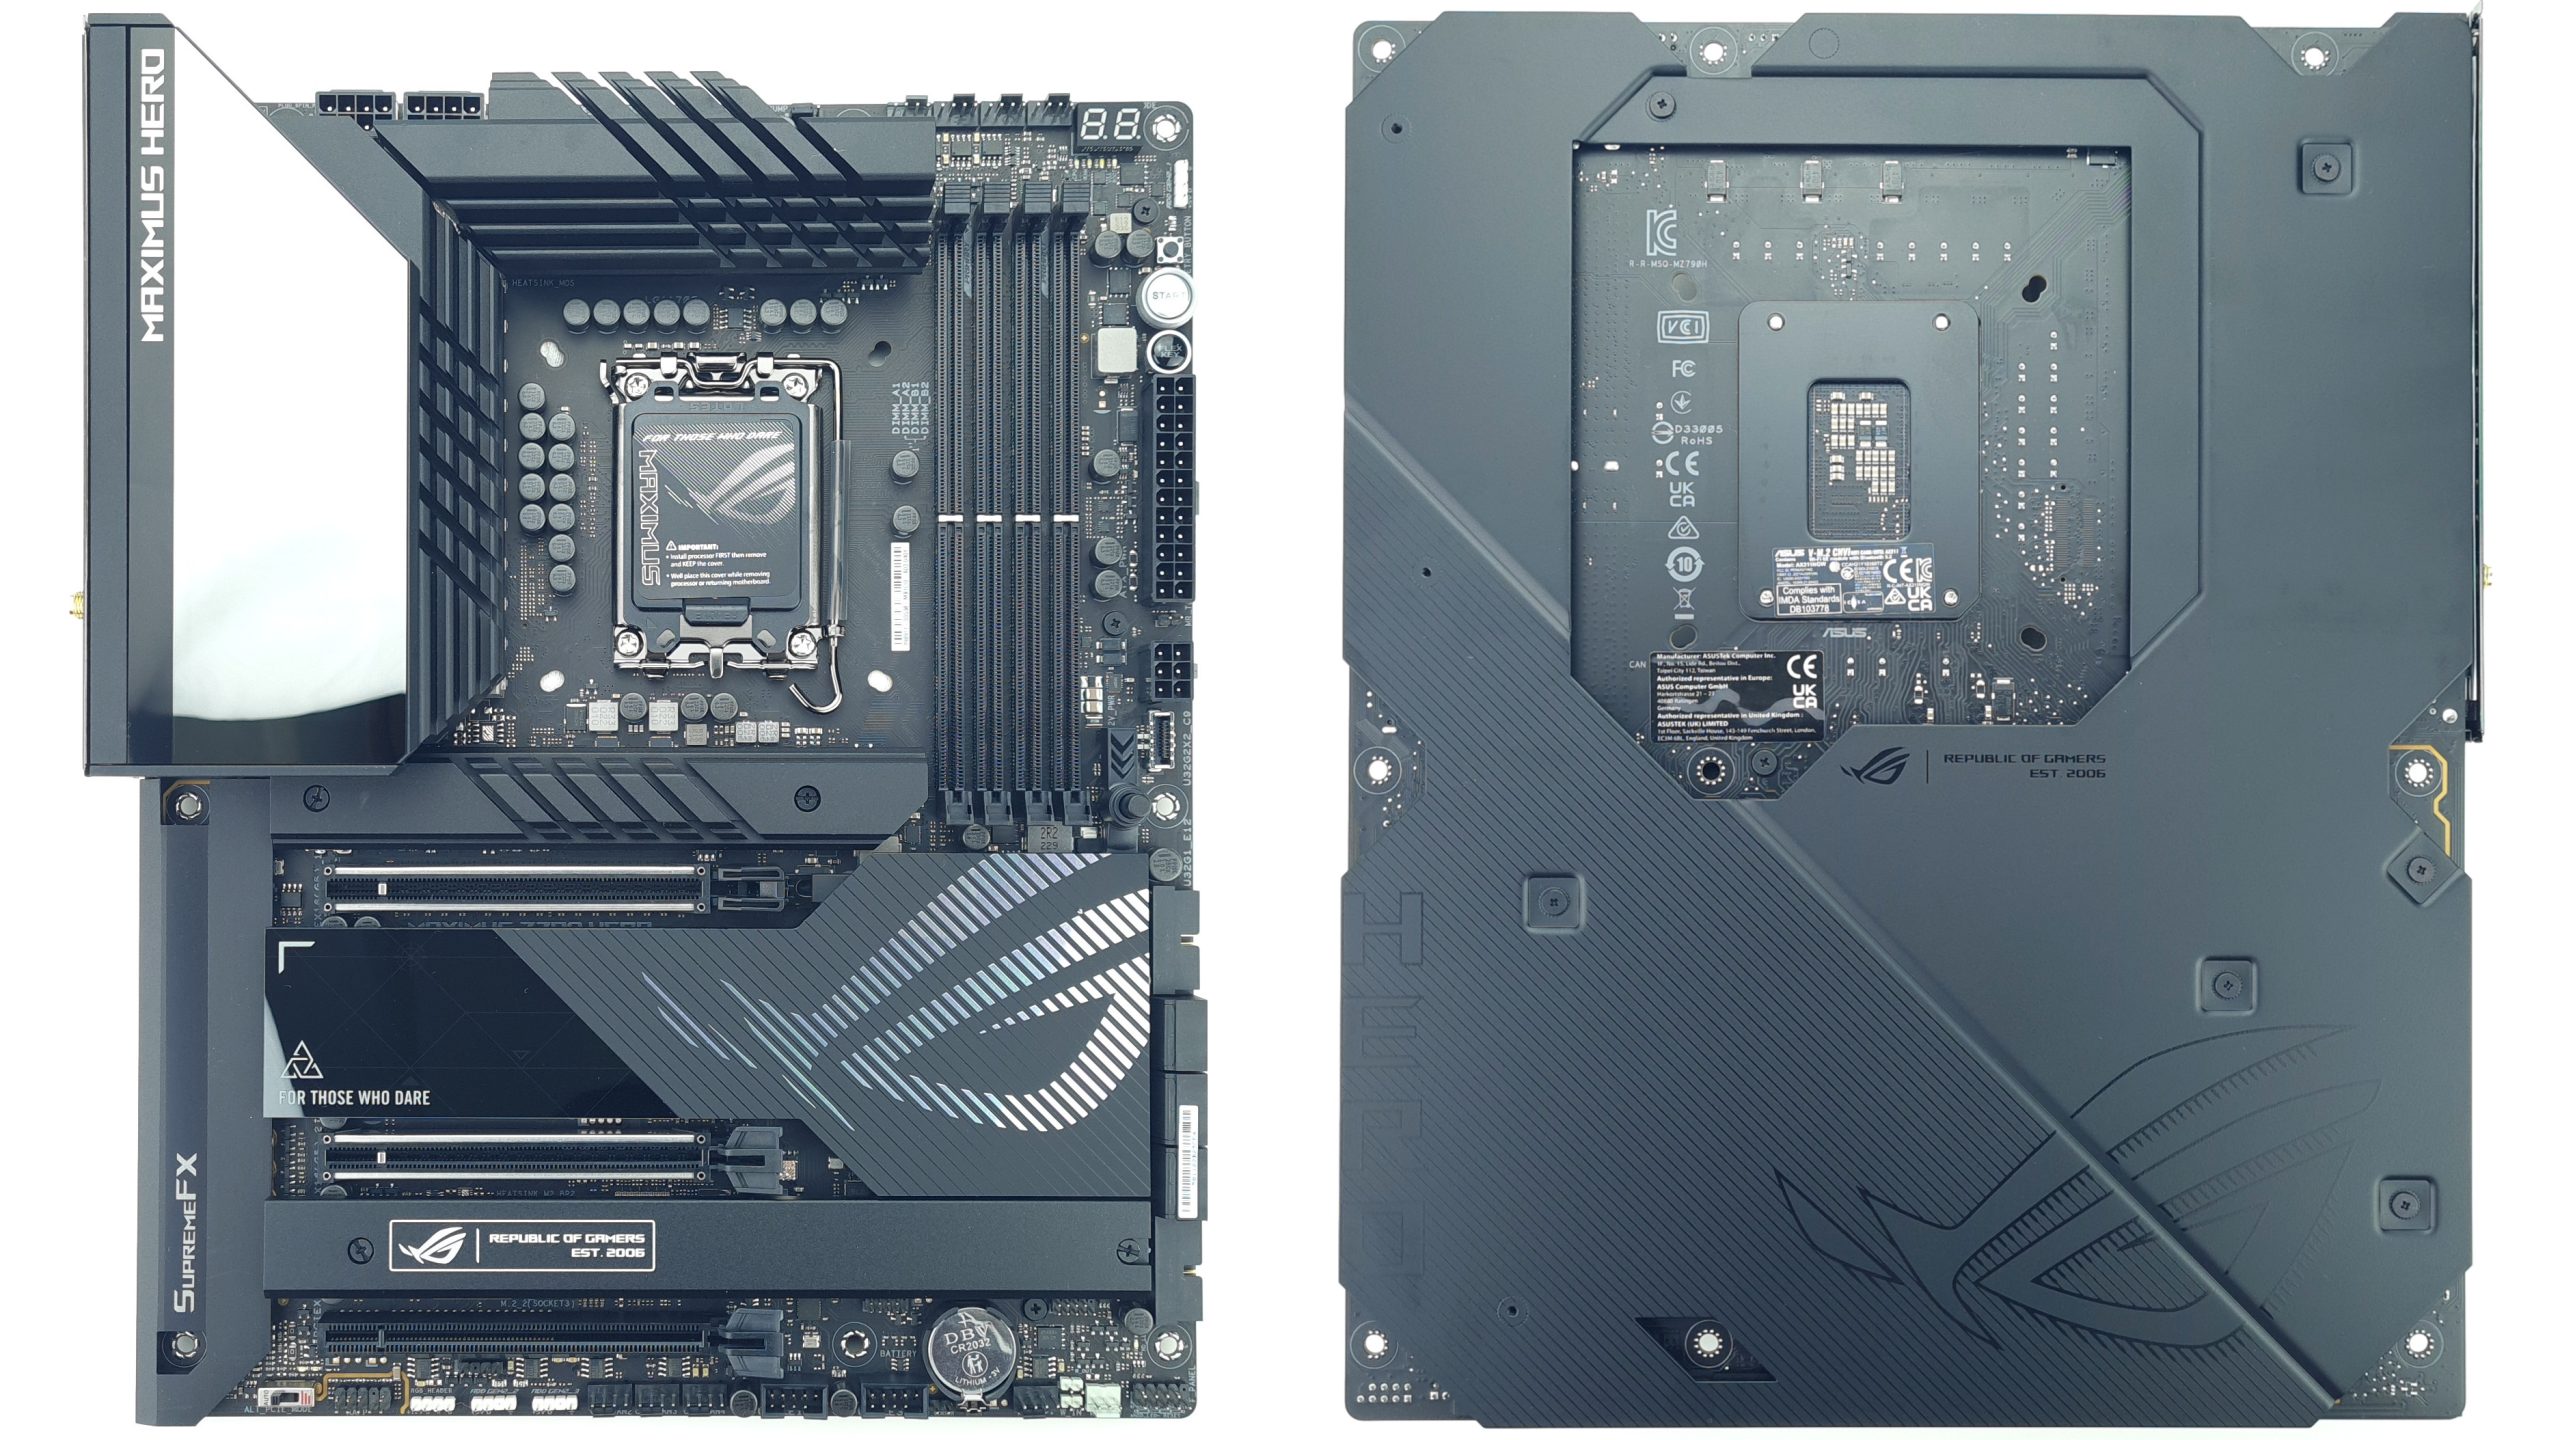
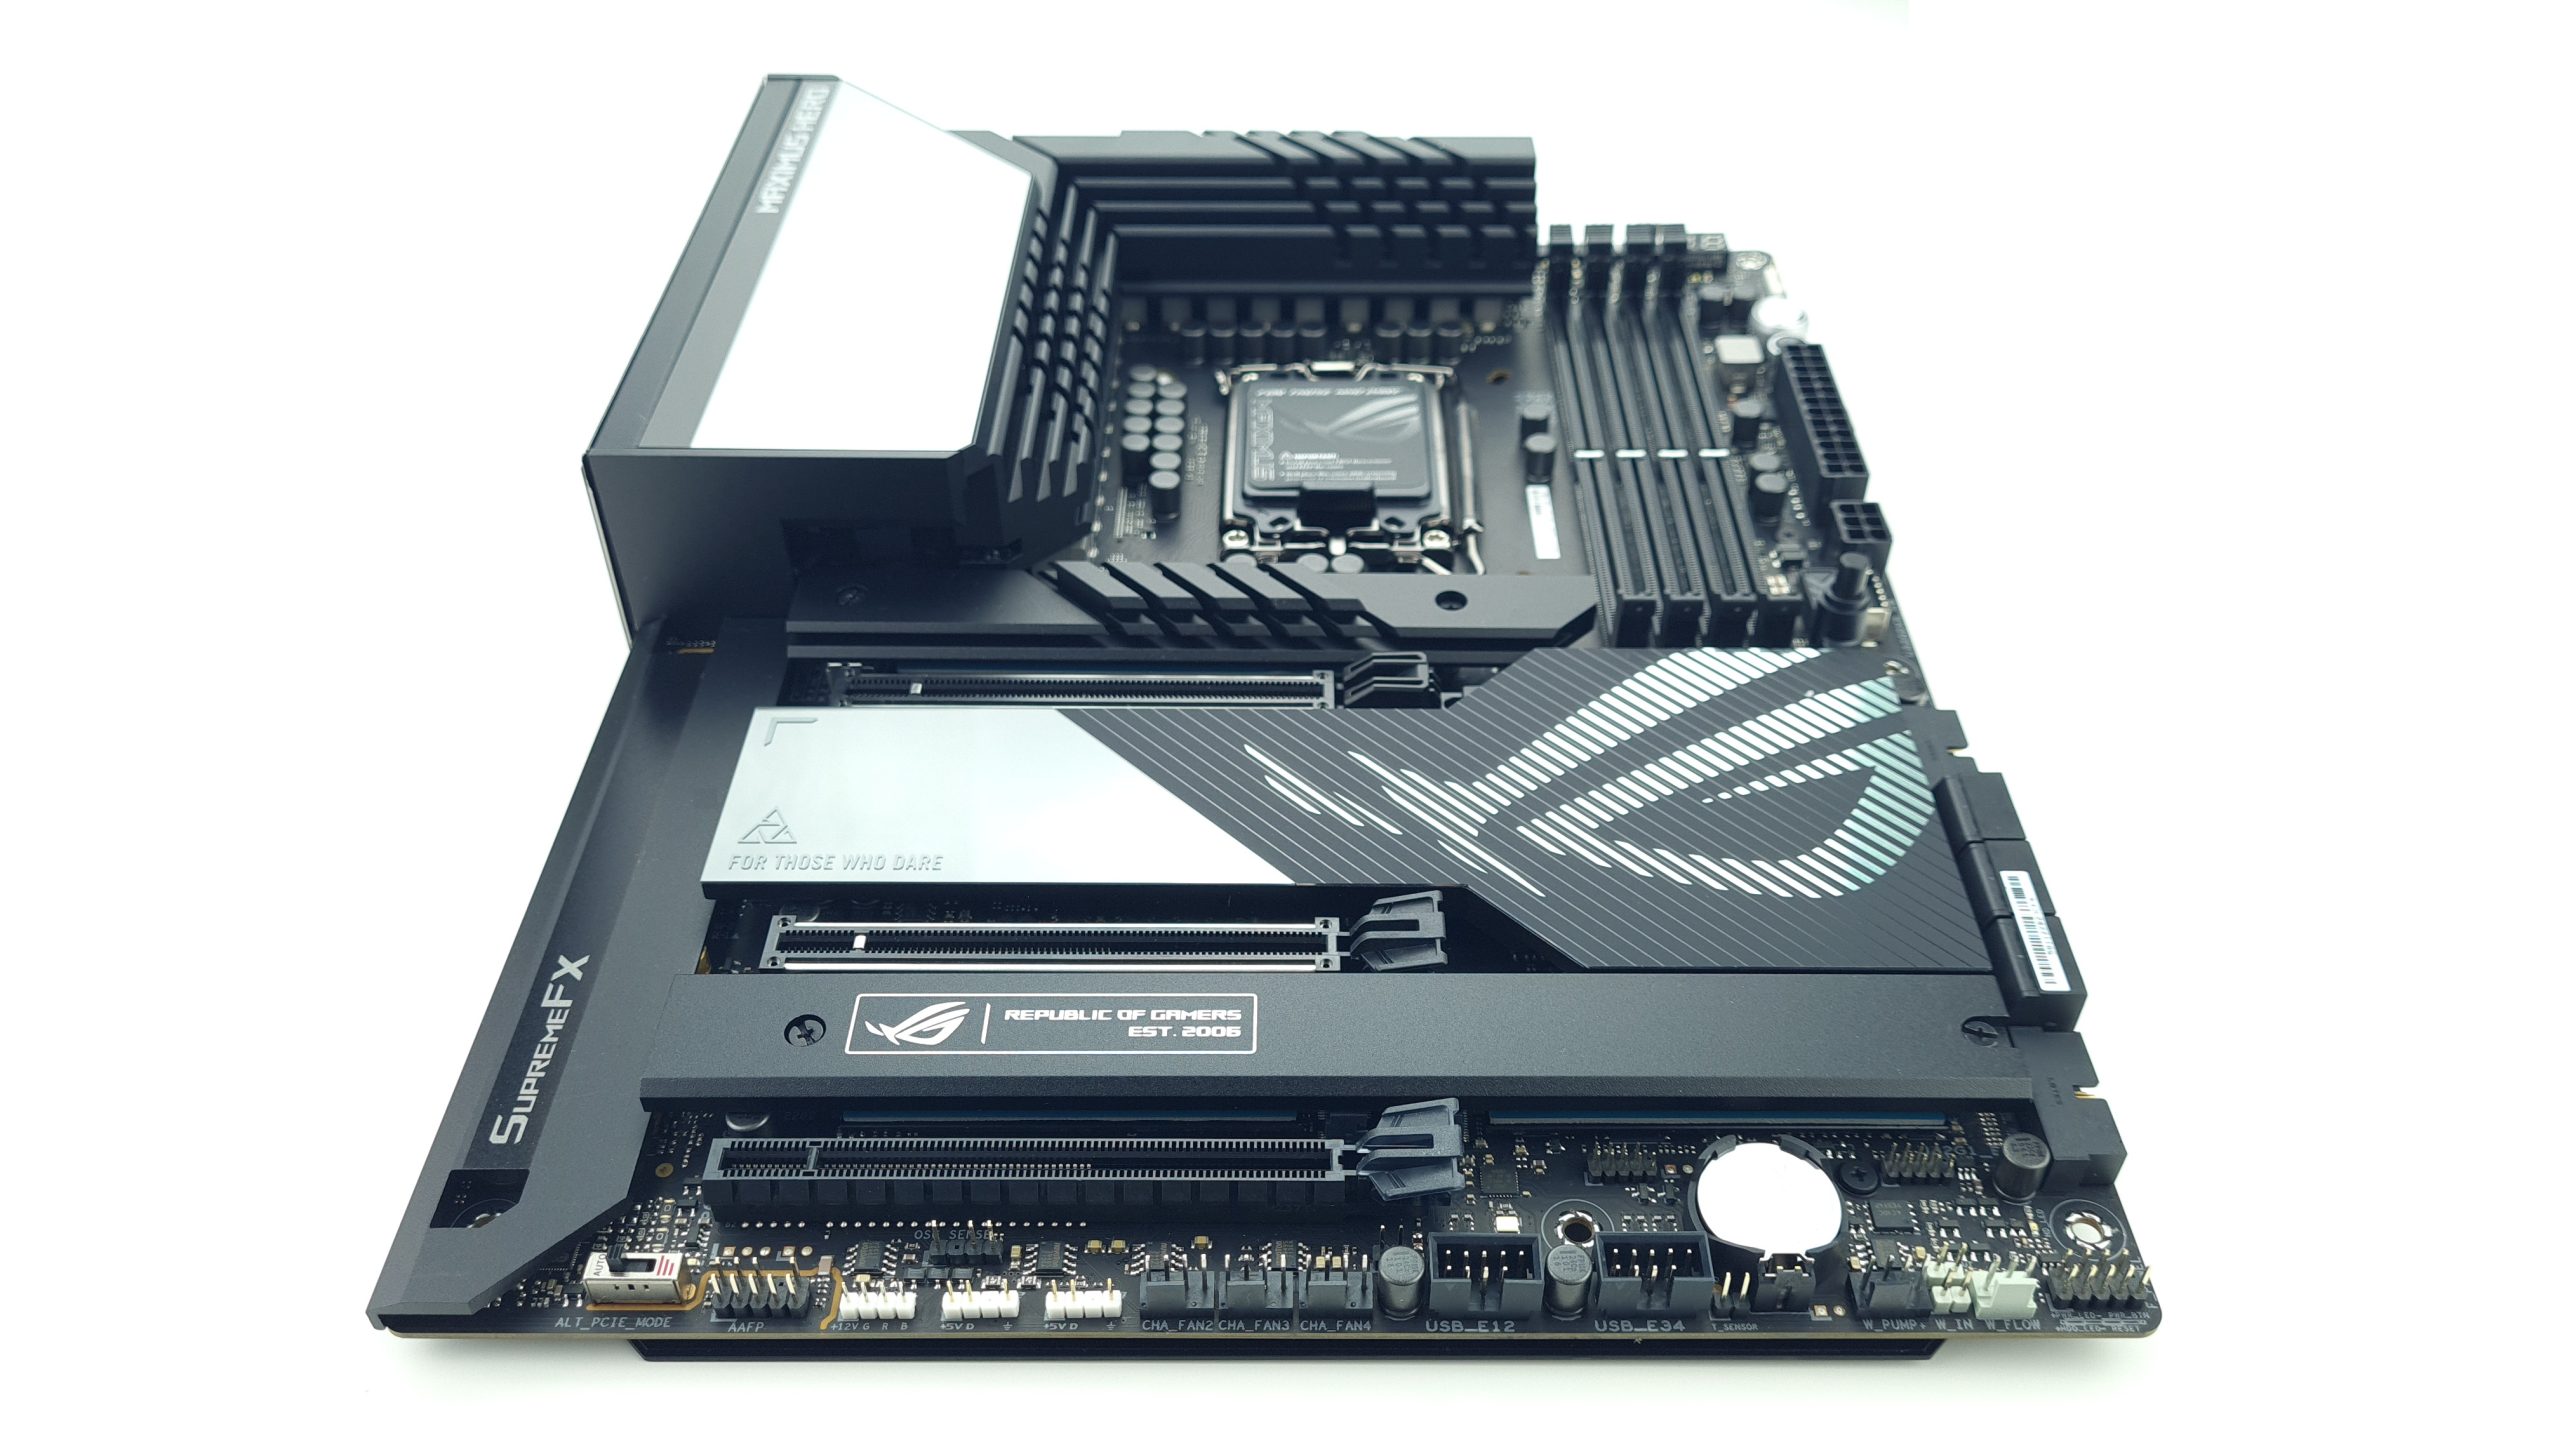
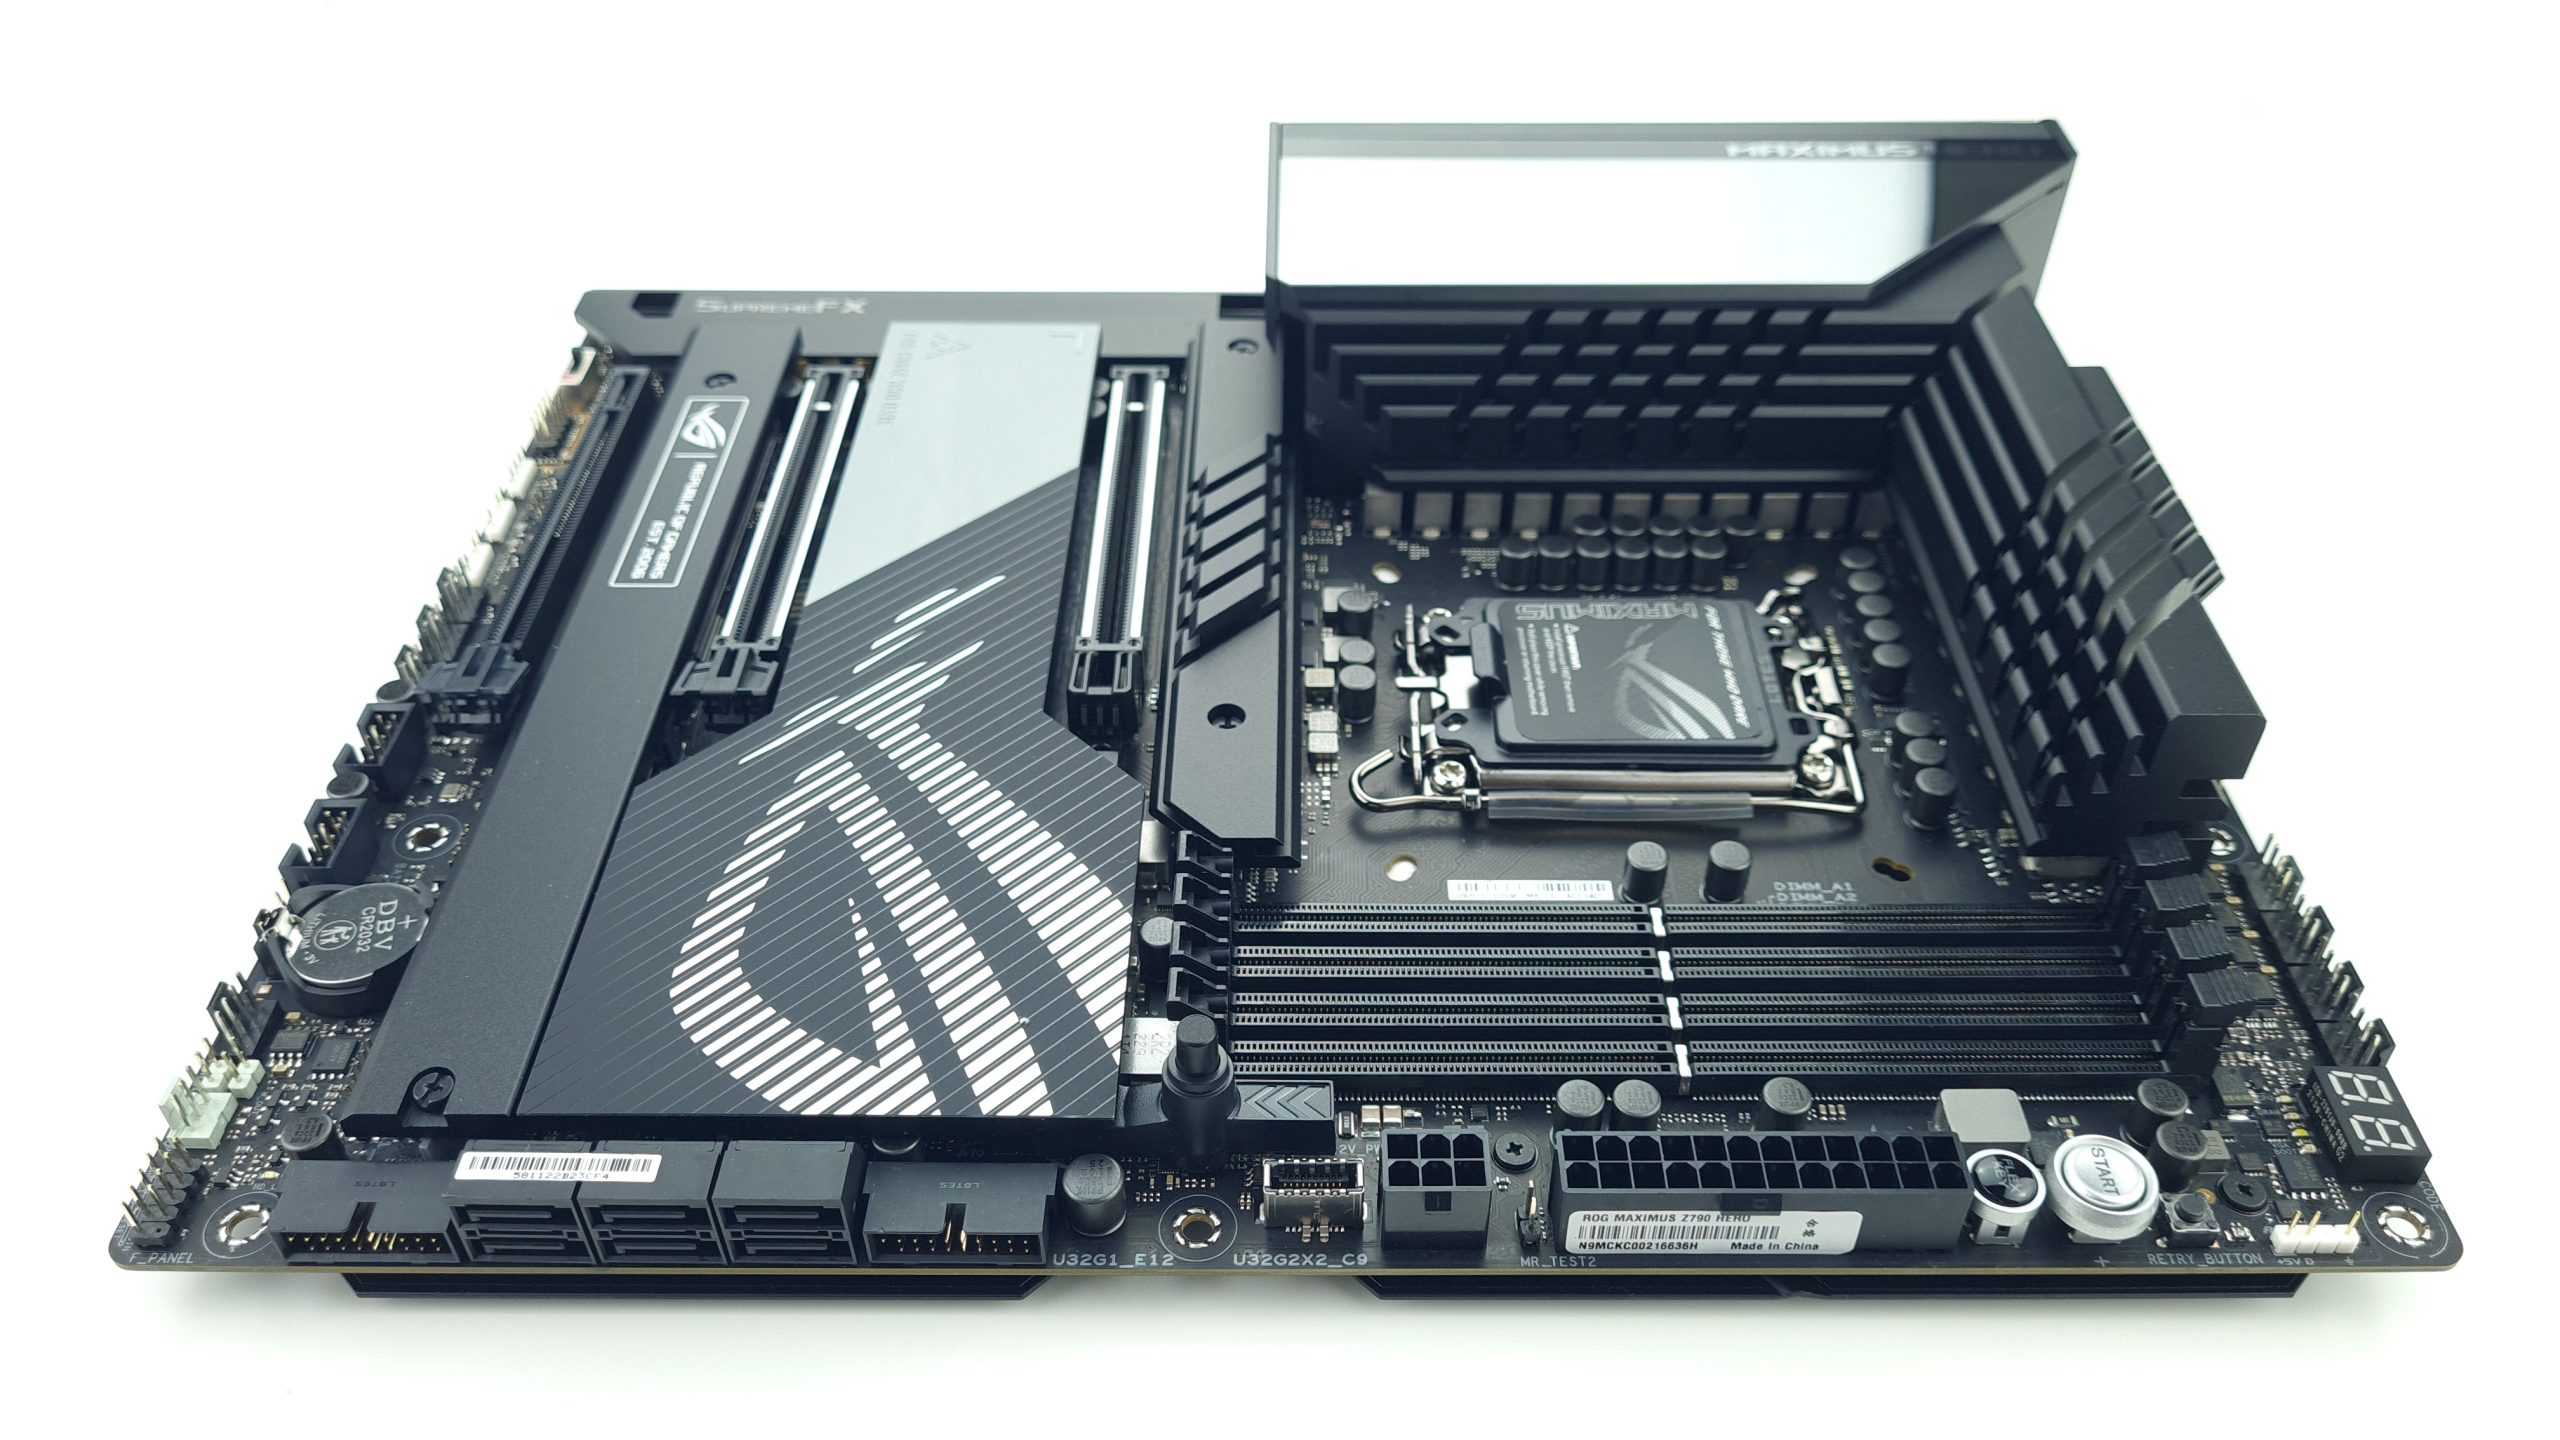
The board fits the ATX standard in terms of dimensions without overhangs and follows a relatively conservative layout with 4 DIMM slots to the right of the CPU and 3 PCIe x16 slots. The upper two are directly connected to the CPU via PCIe 5.0 and can optionally be operated simultaneously in x8/x8 mode. Additionally, an M.2 slot is connected to the CPU above the first PCIe slot, with 4.0 speed, and hidden behind an integrated heat sink.
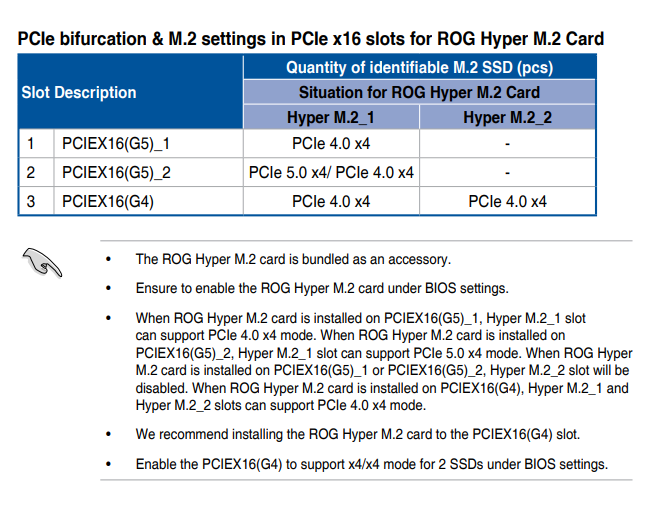
Two more M.2 slots, also equipped with a heat sink, are still available above the 3rd slot. PCIe slot with x8 and these are all connected via the Z790 chipset via PCIe 4.0, which then in turn communicates with the CPU via the conventional DMI 4.0 x8 connection. The M.2 slots on the ROG Hyper M.2 card can only be used simultaneously when it is installed in the lower PCIe 4.0 slot. If the expansion card is installed in one of the PCIe 5.0 slots, only the first M.2 slot of the card works, and only if the card is installed in the second PCIe slot, the first M.2 slot runs with PCIe 5.0. The graphic in the manual shows this more clearly.
The PCIe slots have a switch in the lower right corner that allows you to directly control the speed of the x16 slots to the CPU – auto (5.0) on the far left, 4.0 in the middle and 3.0 on the right. Especially for older PCIe cards that cannot automatically negotiate a slower standard, this is a very useful debugging feature.
Along the lower edge, audio, two USB 2.0 ports and 4 PWM ports for fans or pumps follow, of course, RGB headers – 1x times as 5050 and 2 times digitally addressable. Furthermore, there are dedicated sensor connections for a flow sensor and 3 temperature sensors here.
On the right side, in addition to 24-pin and additional 6-pin power connectors, there are two USB 3.2 Gen1 connectors for 2 Type A ports each on the front panel and one USB 3.2 Gen2 port for a Type C port on the front panel with up to 60 W of power, which requires the additional 6-pin.
There are also 6 SATA 6 Gbit/s ports between the USB ports, with the right 4 coming directly from the Z790 chipset and supporting RAID for boot media. The left 2 ports come from a separate Asmedia controller. In the upper right corner, there are various controls that are especially relevant for the OC. Besides the power-on and flexkey button, which can be assigned with reset, safe boot or control of the RGB lighting, there is a dedicated retry button that forces a restart by disconnecting the power supply. For far debugging, there is also a Qcode display and Q-LEDs that inform about the progress of the post process.
Along the top edge, you’ll then find 4 more 4-pin PWM connectors, which can also be operated in 3-pin DC mode, just like all other fan connectors on the board. Only the two 8-pin EPS connectors for the power supply of the CPU are then positioned in a recess of the heatsink.

These are actually both needed when an i9 CPU is overclocked with more than 400 W permanent power consumption. In addition, Asus uses solid pins for all of the board’s power connections, which bring lower contact resistance and thus lower heat development.
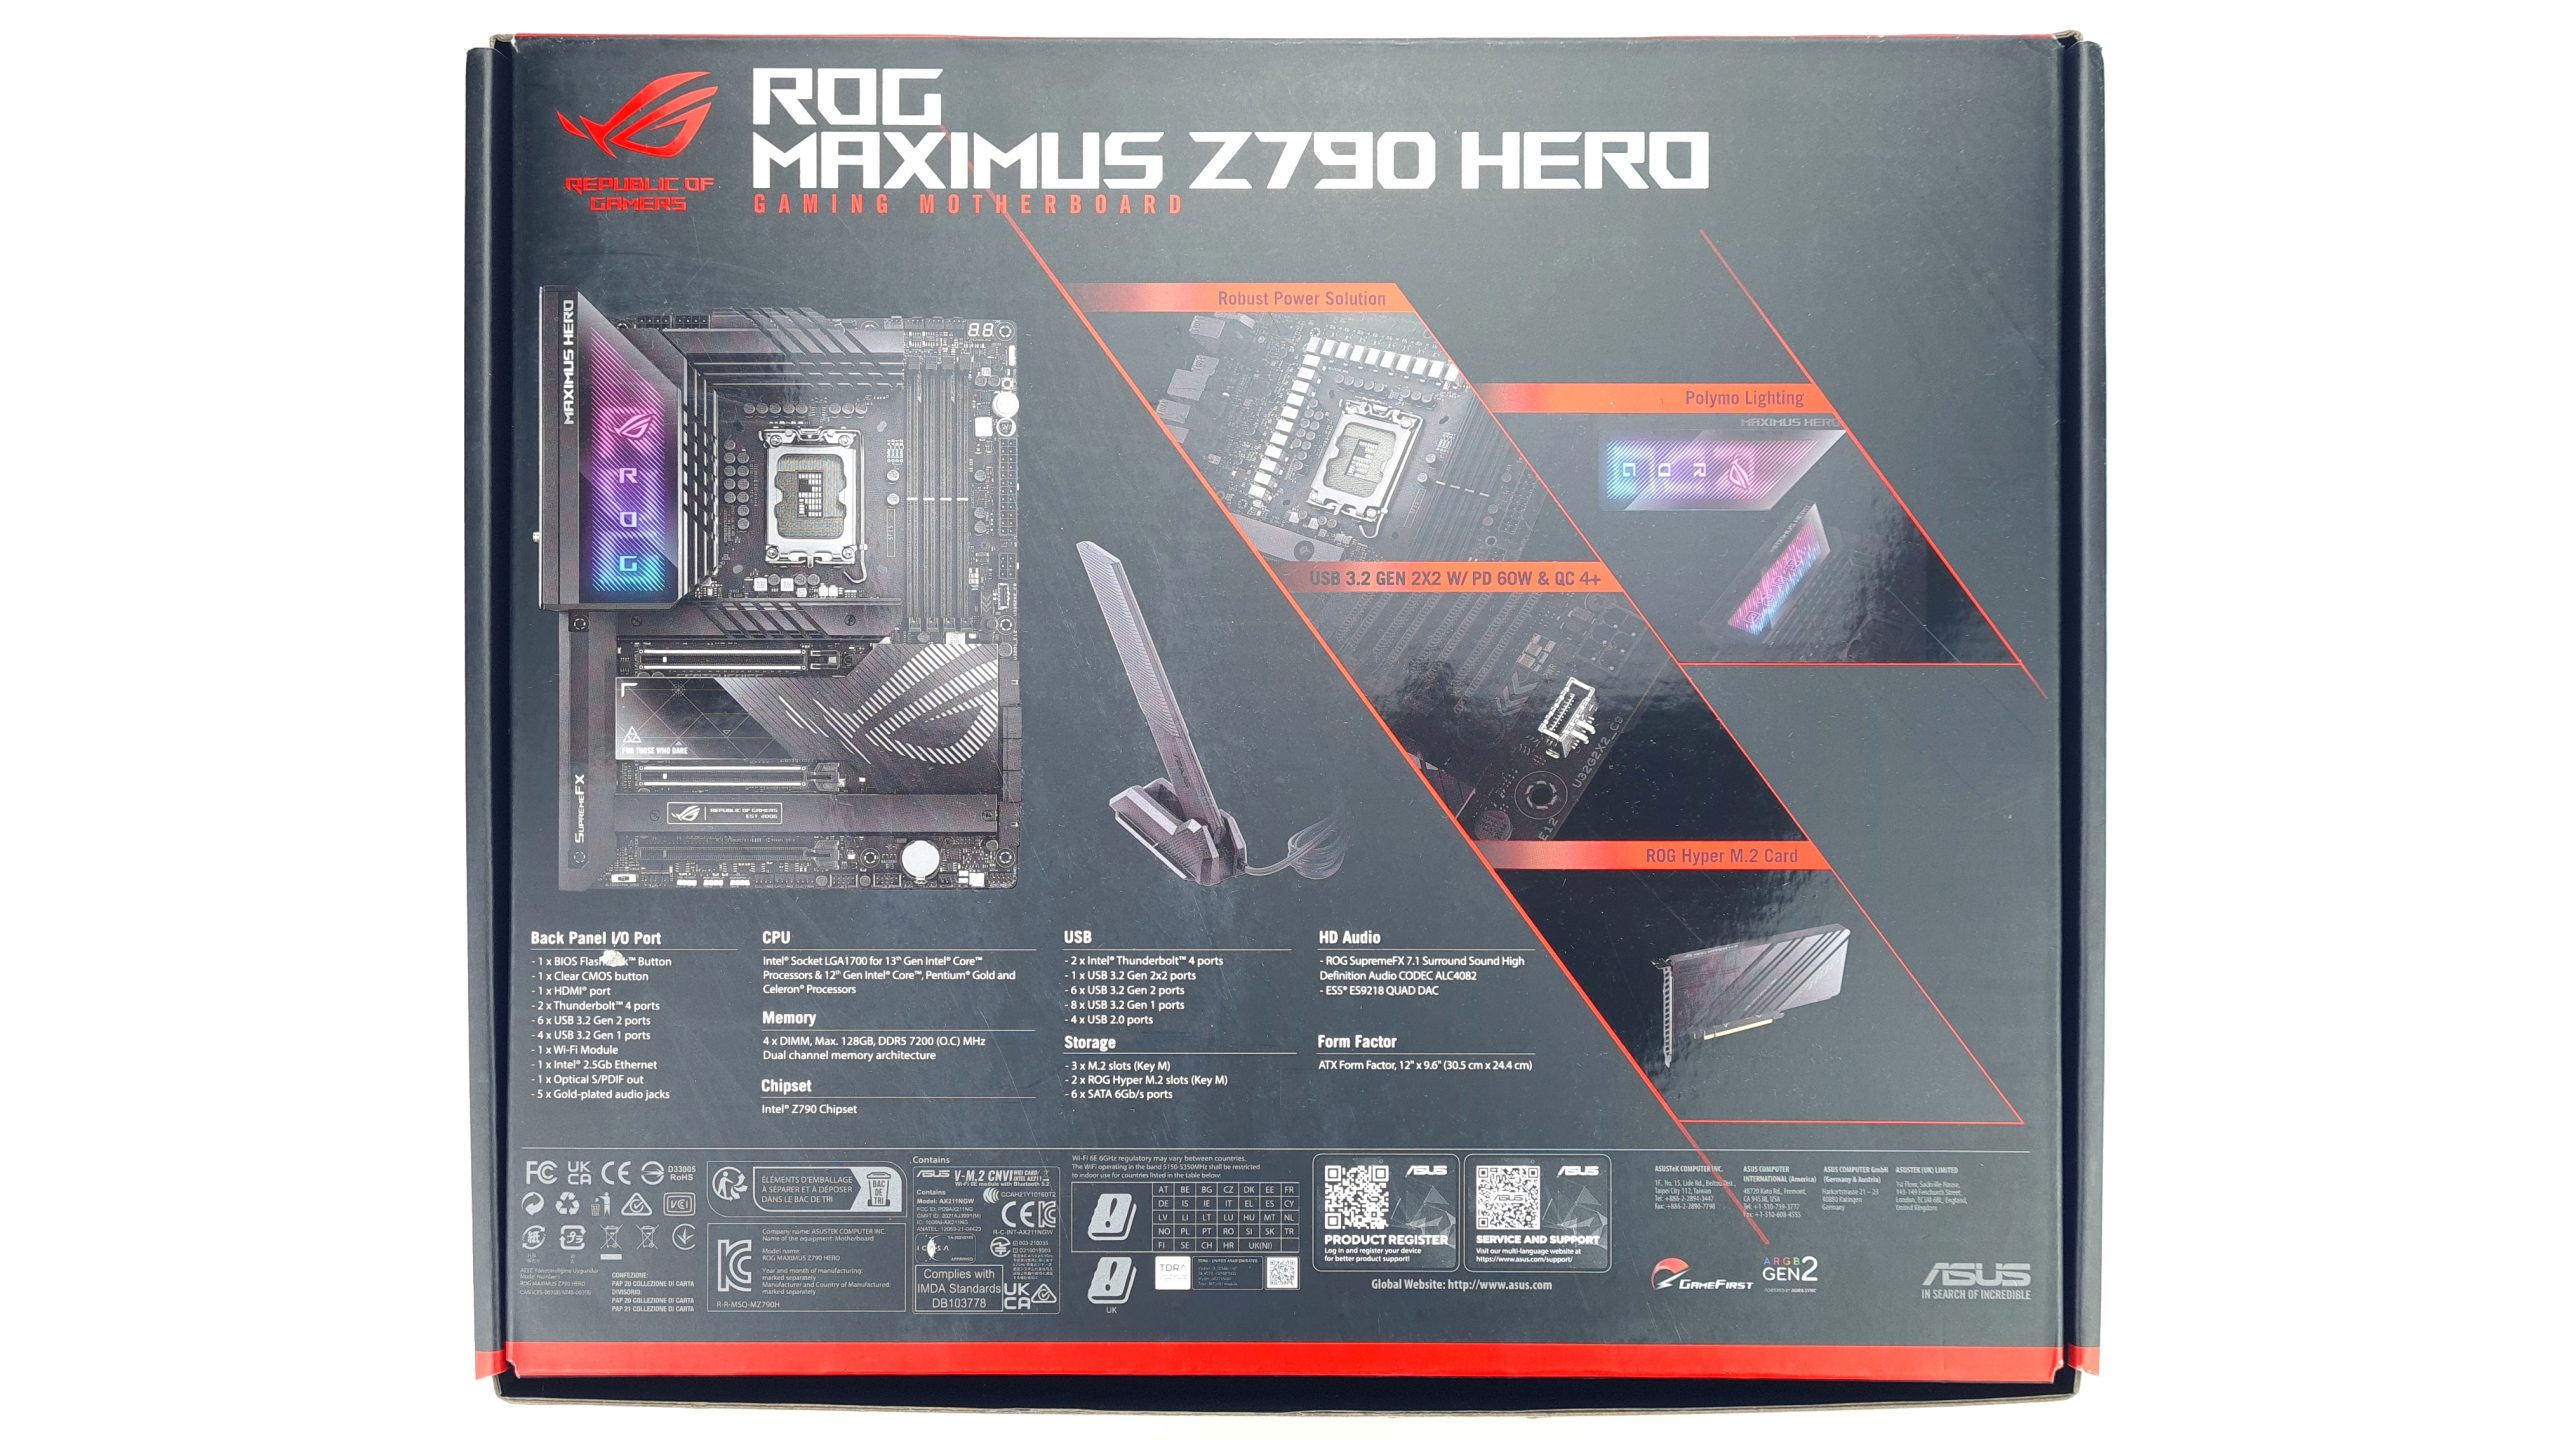
Finally, a look at the rear IO is not to be missed. First of all, there are buttons for Clear CMOS, with which the BIOS can be reset, and for BIOS Flashback, with which a BIOS file can be loaded from a USB stick via the marked USB Type A port even without a working CPU. This is followed by an HDMI port for display output of the iGPU (if available in the CPU) and 4 USB 3.2 Gen1 ports with 5 Gbit/s. In terms of USB, there are also 6 3.2 Gen 2 ports with 10 Gbit/s, 5 of them as Type A and 1 as Type C. Another two Type C ports are supplied with Thunderbolt 4, and can thus deliver up to 20 Gbit/s and also transmit the video signal of the iGPU via Displayport 1.4.
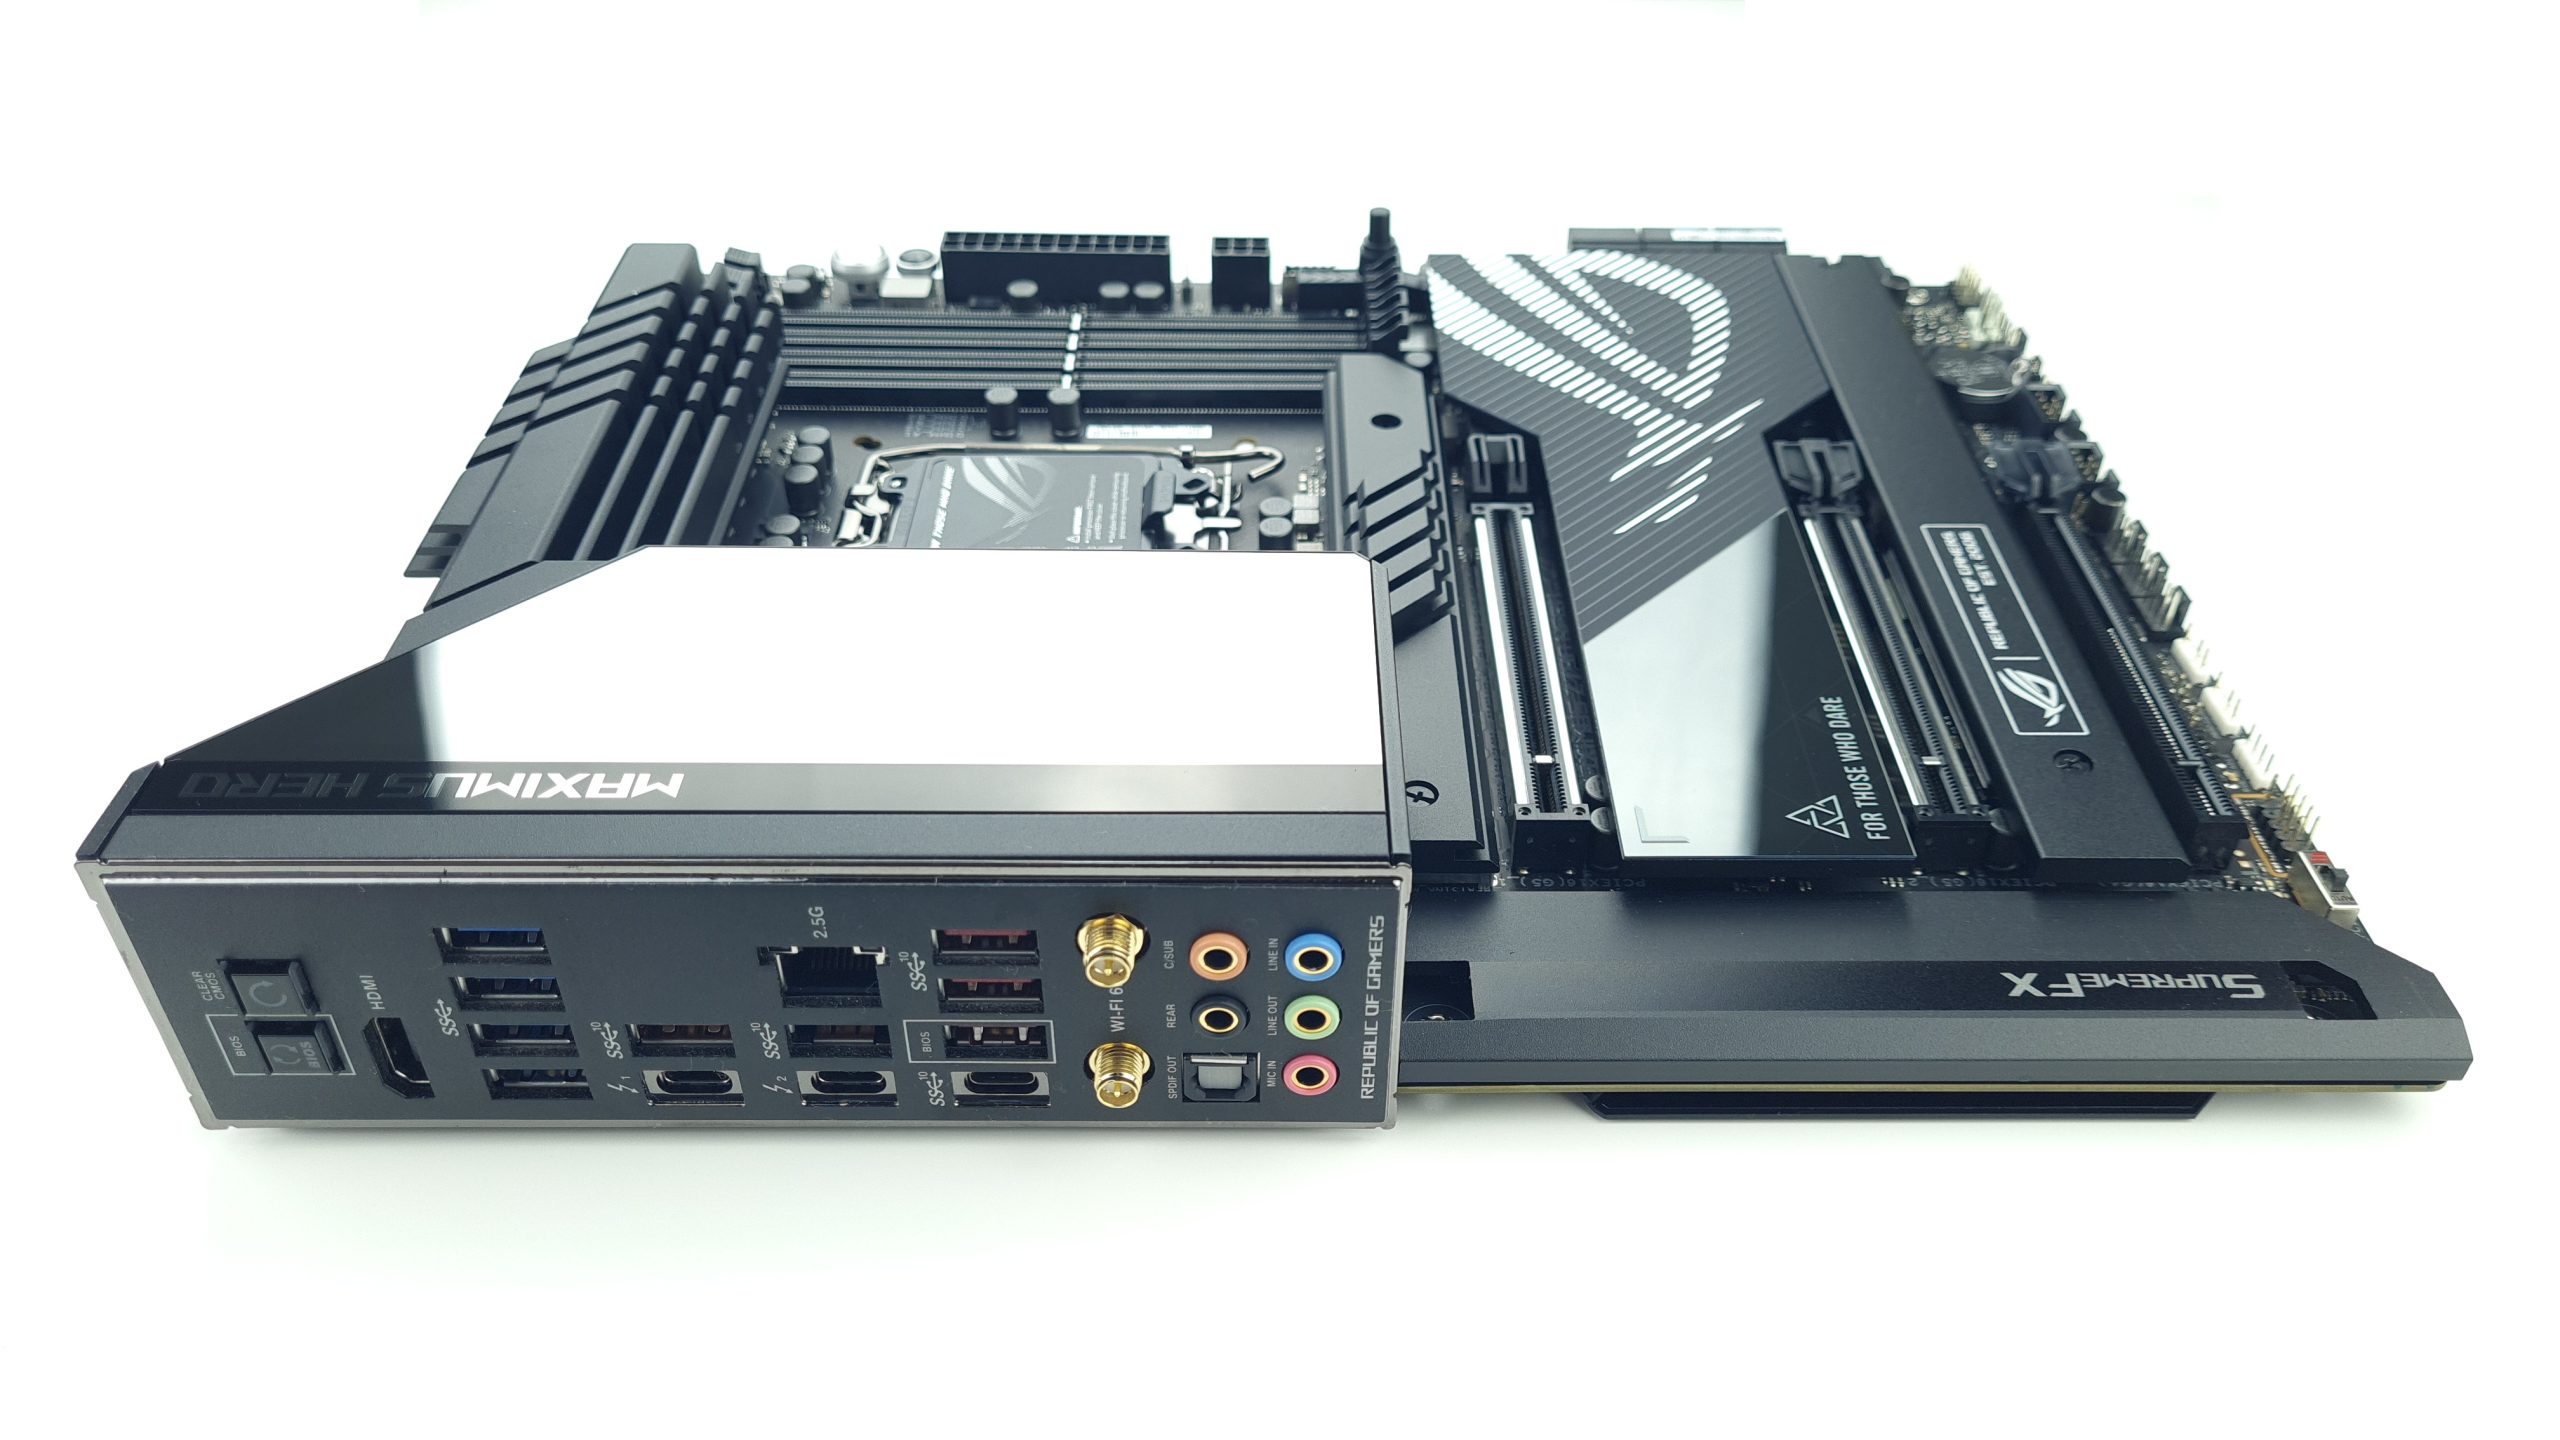
For networking, there is a 2.5 Gbit/s Ethernet port and Wi-Fi 6E with Bluetooth 5.2, both via an Intel controller. For audio, there’s another digital S/PDIF at the bottom and 5 3.5mm jack connectors for 7.1 ROG Supreme FX surround sound, powered by a Realtek ALC4082 rebranded by Asus as the SupremeFX audio solution.


25 Antworten
Kommentar
Lade neue Kommentare
Mitglied
Urgestein
Veteran
Neuling
Urgestein
Mitglied
Mitglied
Urgestein
Urgestein
Urgestein
Mitglied
Urgestein
Veteran
Veteran
Urgestein
Urgestein
Urgestein
Veteran
Veteran
Alle Kommentare lesen unter igor´sLAB Community →