


Fan measurement chamber and claim
And since there is currently no source that offers realistic and usable data, even in comparison, we invested a lot of time and money and simply developed our own fan measuring station with the advice of a cooling unit manufacturer and then calibrated it. Our colleague Pascal Mouchel has done a great job here and the result, the “Sarcophagus I” model, is now quite respectable. The heavy and solid body made of thick MDF boards is screwed, glued and soundproofed. How it all works and what we can and cannot measure in the end, you will learn in this article.
In the meantime, most of it has materialized really nicely, also with a lot of good feedback from the community and technical assistance from some industry partners. Of course, what we can measure from now on only meets semi-professional requirements, even though all measuring instruments have been calibrated in an elaborate and cost-intensive way. But that’s enough for all areas of PC self-construction and conversion. Of course, we are not a standardization company or the TÜV, but we try to measure everything as accurately as possible, which still remains within reasonably affordable limits.
A greatly simplified version with a long tube instead of the chamber would have been much cheaper, but it is so inaccurate due to its design that the values can only be considered a rough estimate with many errors. The pressure drop is immense and a serious sound level measurement is simply impossible due to the resonant body thus created. Values below approx. 30 CFM can hardly be evaluated meaningfully and are no longer particularly close to reality.
Tests as case fans and on radiators
Currently, there is always the question of what characteristics a 120 or 140 mm fan really has. Not every model is suitable for all radiator thicknesses, and some supposed powerhouses lose so much pressure on radiators that they can hardly be called suitable. The information on volume flow (“throughput”) and static pressure in the data sheets does not help if something works well on a slim radiator and fails completely on a 45 mm radiator.
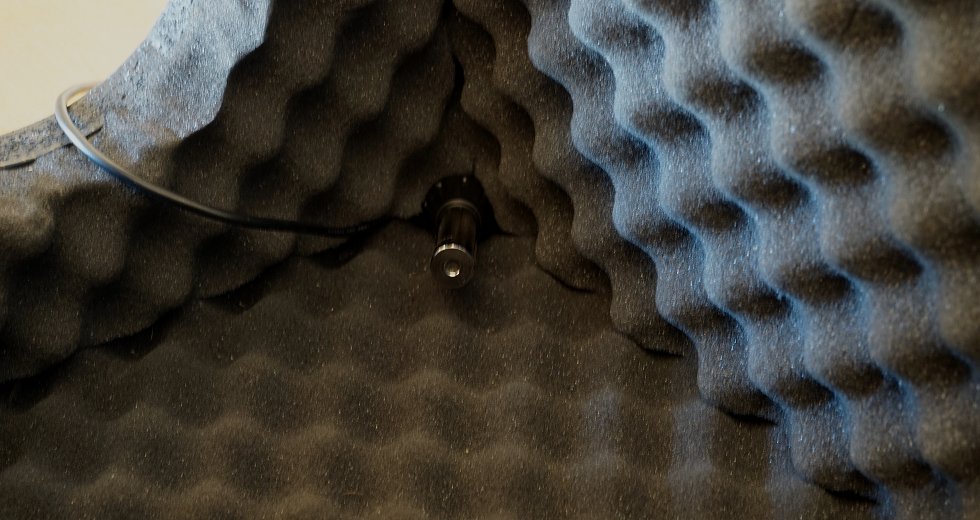
In the picture we can see the middle partition between the two chambers, which supports the fan and also the radiator. Decoupling is, of course, a top priority, and we thankfully had expert help in calculating the volume for the chambers. Each of the chambers is also expediently lined with nubby foam and designed in terms of material technology so that there are hardly any disturbing influences.
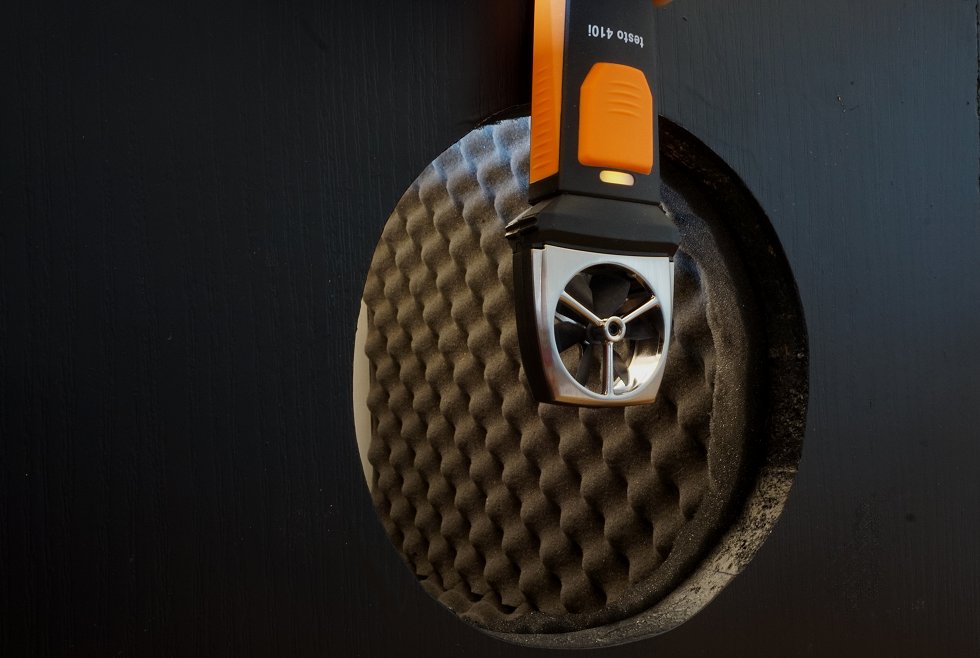
The “honeycomb” behind the fan was recommended to us by Black Noise and the cooling manufacturer. This means that all coolers are equally well integrated, because each has a different exit angle and this is exactly what can be compensated for. However, due to the honeycomb, there is no tear-off edge and the airflow is directed directly to the outlet.

Radiators and fans are decoupled and screwed tight with their own clamping device. In the picture you can see very nicely the improvised clamp with thick washers and insulation material as a base. The control is done by an Aquaero purchased by us from Aqua Computer, so we can control and test the fans both by voltage (DC) or by PWM. Both are needed, because many fans, as some people don’t know, can’t be brought to the lower and upper limits of the speed range with pure voltage regulation and also show other anomalies, about which we will write something at the appropriate place.

Volume flow
We measure the volume flow at the outlet of the second chamber, where the air is blown out. This range is covered relatively accurately by comparative measurement in the measurement setup of the refrigeration partner, so that our testo 410i now delivers quite reliable results to the electronic measurement data acquisition, which match the reference data of the professional measurement quite well. What is important here is not the price of the equipment, but rather the appropriate positioning and accurate calibration with series of comparative measurements.
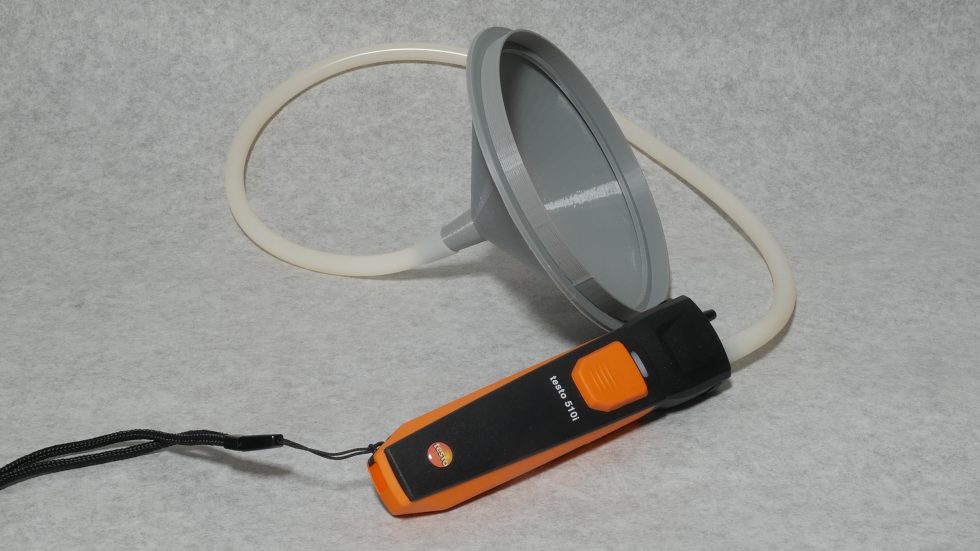
Static pressure
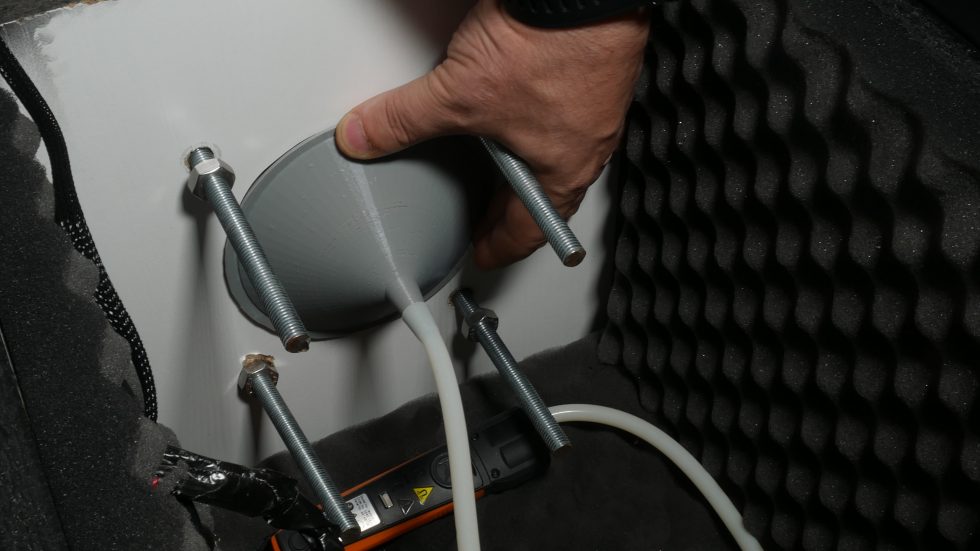
The measurement of the static pressure is carried out as usual as a differential pressure measurement. For this purpose, the special “bowl” is clamped so that it closes airtight. Here, too, of course, measurements were taken with borrowed, professional equipment and time-consuming calibrations were performed. For this measurement, we also use the 510i, a device we purchased ourselves from testo, and also collect the data wirelessly. Since many try to copy in the meantime, the angles in the 3D graphics and also in the following two photos are of course not quite correct, because without knowledge of the exact dimensions of the funnel, a copy is virtually pointless and it also only works really quite accurately within a quite small tolerance range. We also made comparative measurement series for this once again. In practice, the whole thing looks like the two pictures below.
The installation is trouble-free and the pressure receptacle now also closes perfectly thanks to a special seal. The rest is just a matter of calibration, which we also did once again. It is unlikely to be much more accurate with semi-professional methods. However, especially in printing, errors are quickly possible, which above all are not immediately recognizable. Even if the deviations are small, we will still measure all previous fans again and prepare them for the database.

Noise emission
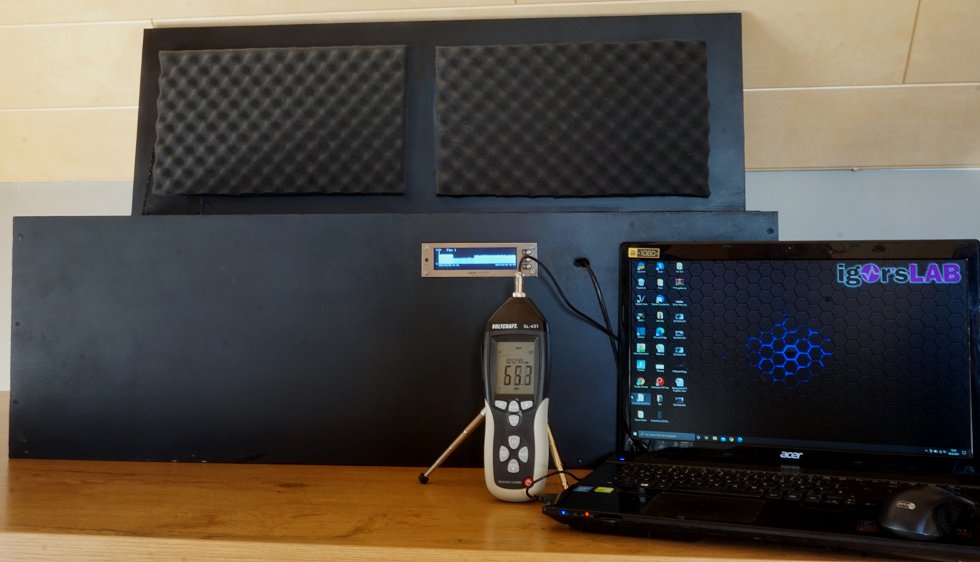
Measuring the noise level is a bit tricky, but works quite well in the evening hours at the measurement location. We chose dBA or dBC because values below one sone can hardly be reliably measured with still affordable and calibrated equipment and the software conversions of various software programs tend to confuse and become inaccurate in this low range. Then rather dBA, especially since most people can do something with it. The measuring distance is 50 cm from the center axis of the fan inlet.
We take two approaches to these measurements. For quick and plausibility tests, we use a Voltcraft SL 451, which we have calibrated according to ISO and whose microphone we have placed decoupled from the body. The data acquisition takes place outside the measuring chamber. The Voltcraft SL 451 was kindly and uncomplicatedly made available to us by Conrad Elektronik. It is also the only component that has not been acquired by ourselves. All other measuring instruments including accessories and electronics were purchased by us or provided from private stocks.
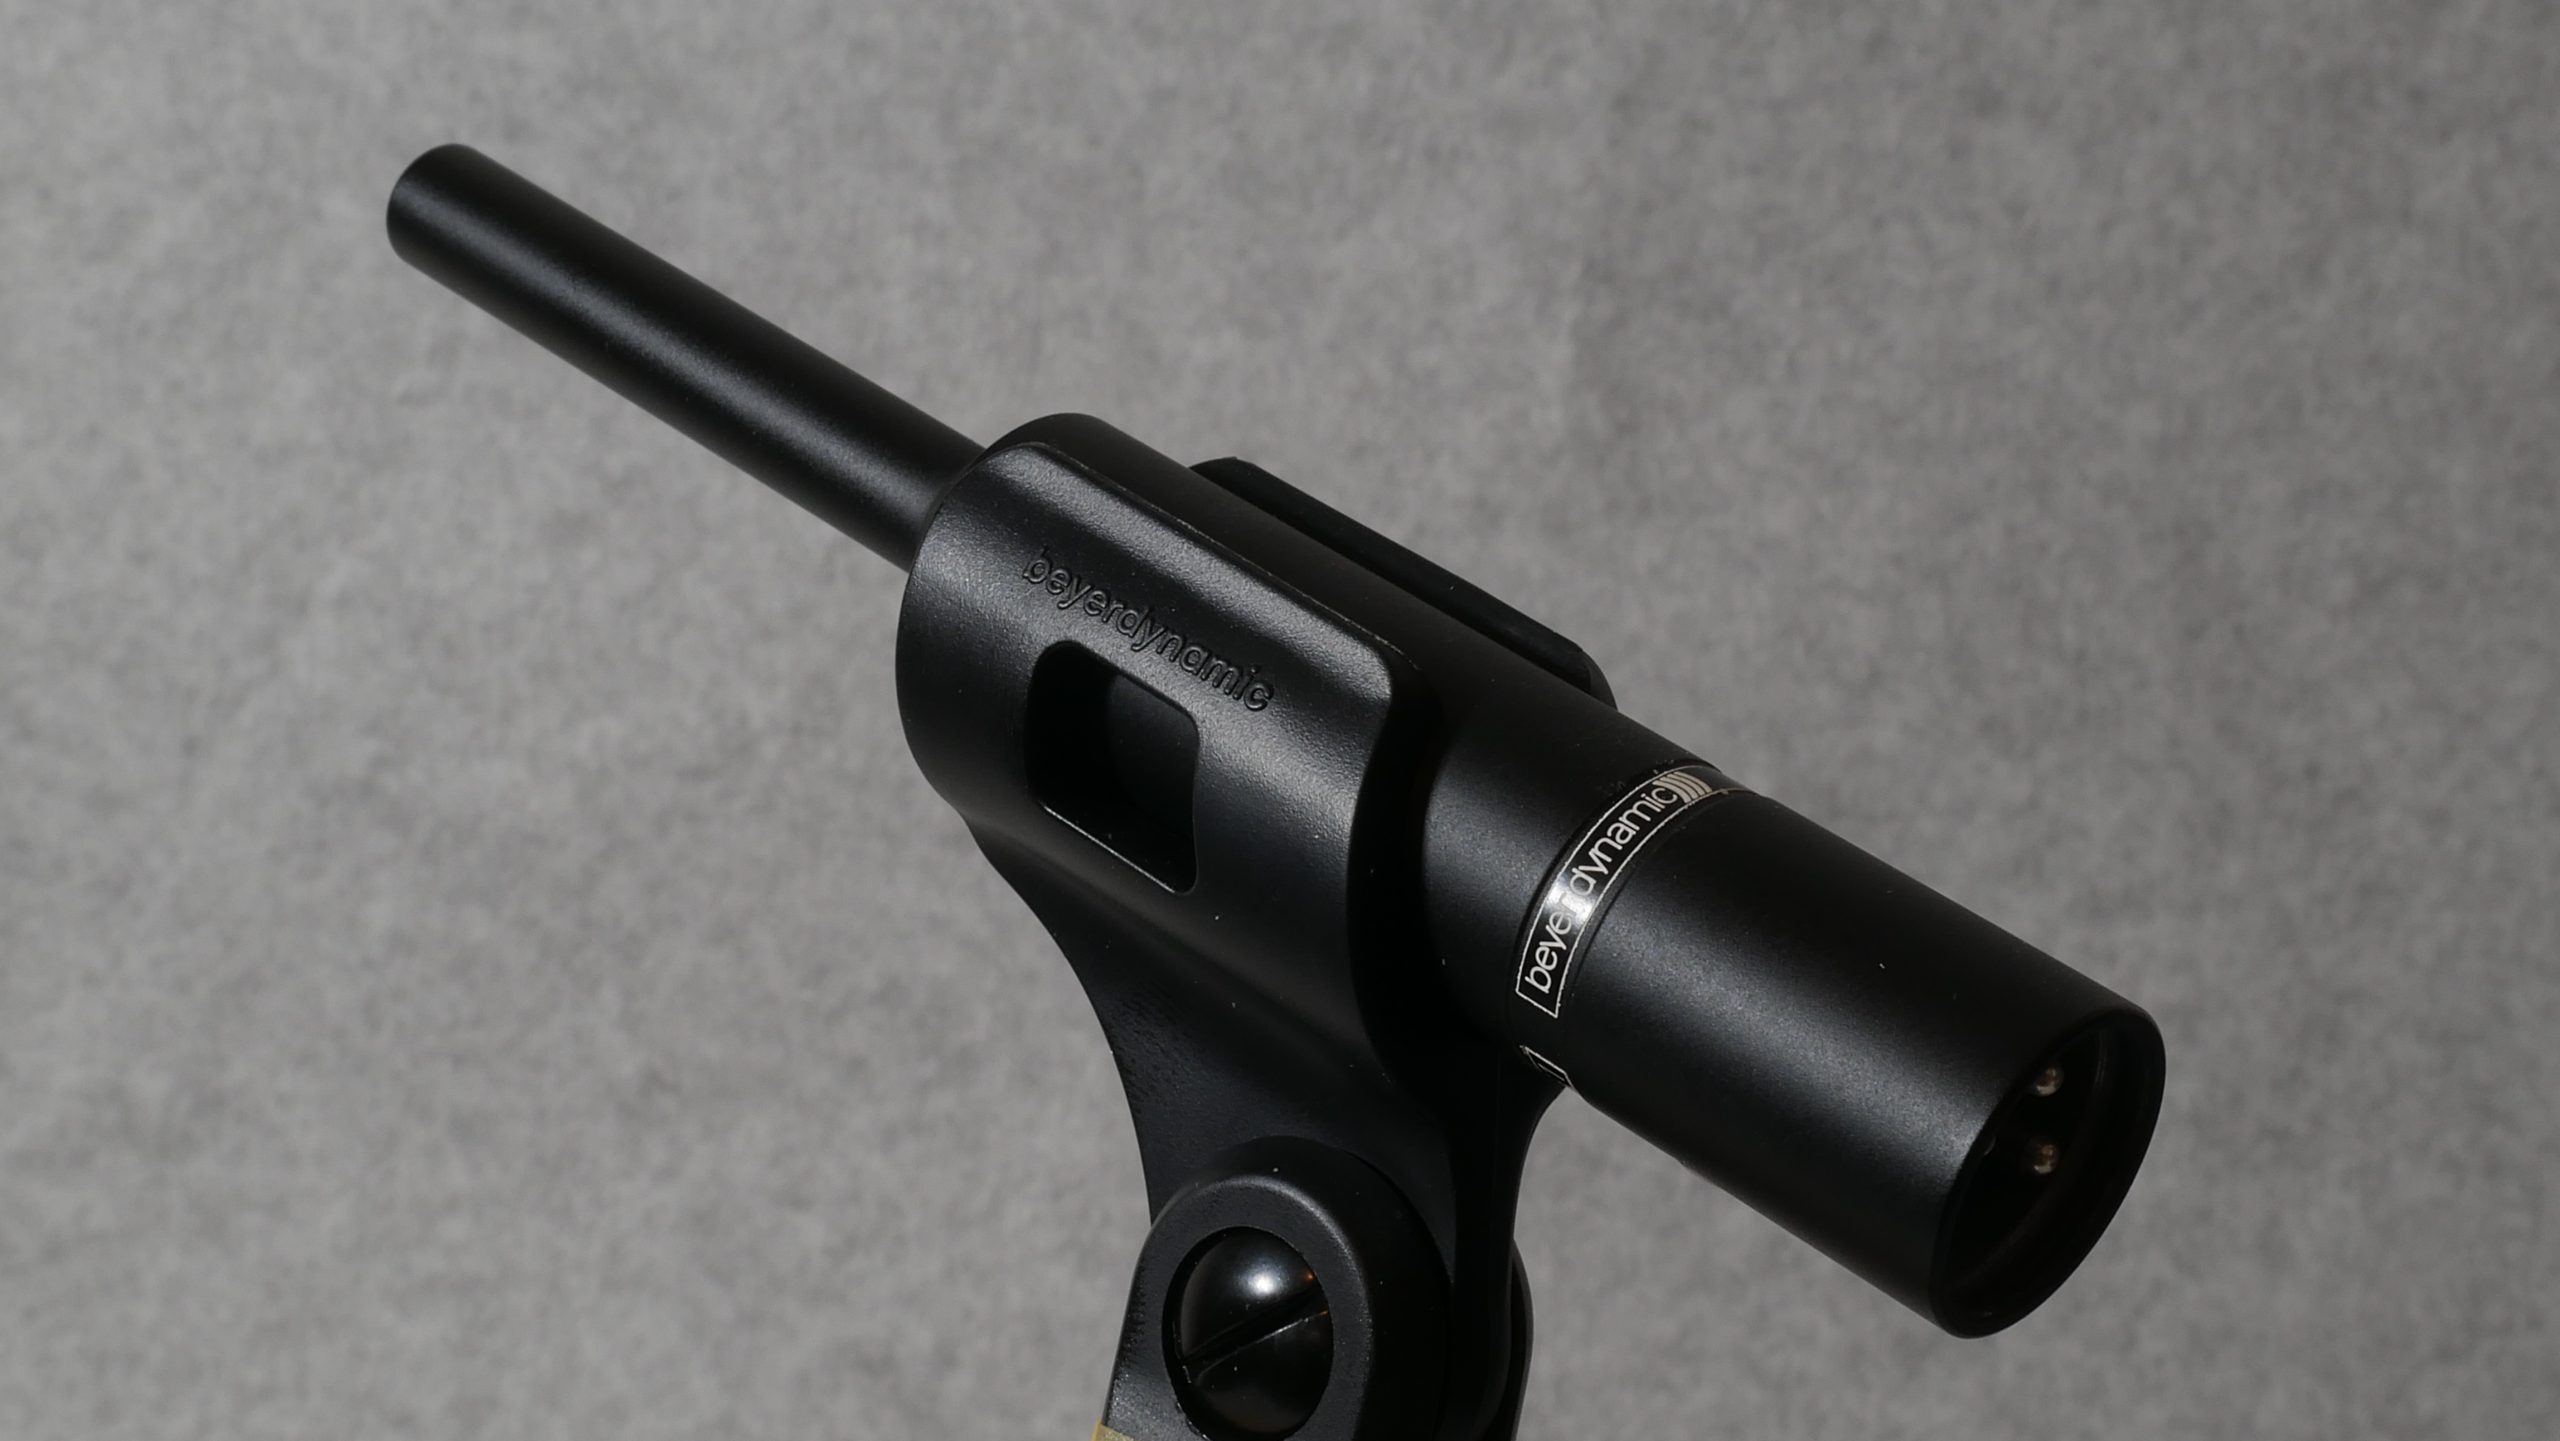
Our own acquisitions also include a calibrated measurement microphone with XLR connector and low-noise USB interface. The measurements are taken in the evening and night hours in rural areas, so that one can already be quite satisfied with a basic level of below 26 dB(A). Since everything will be above this anyway during the measurement setup with a distance of 50 cm, this should therefore not be a problem.
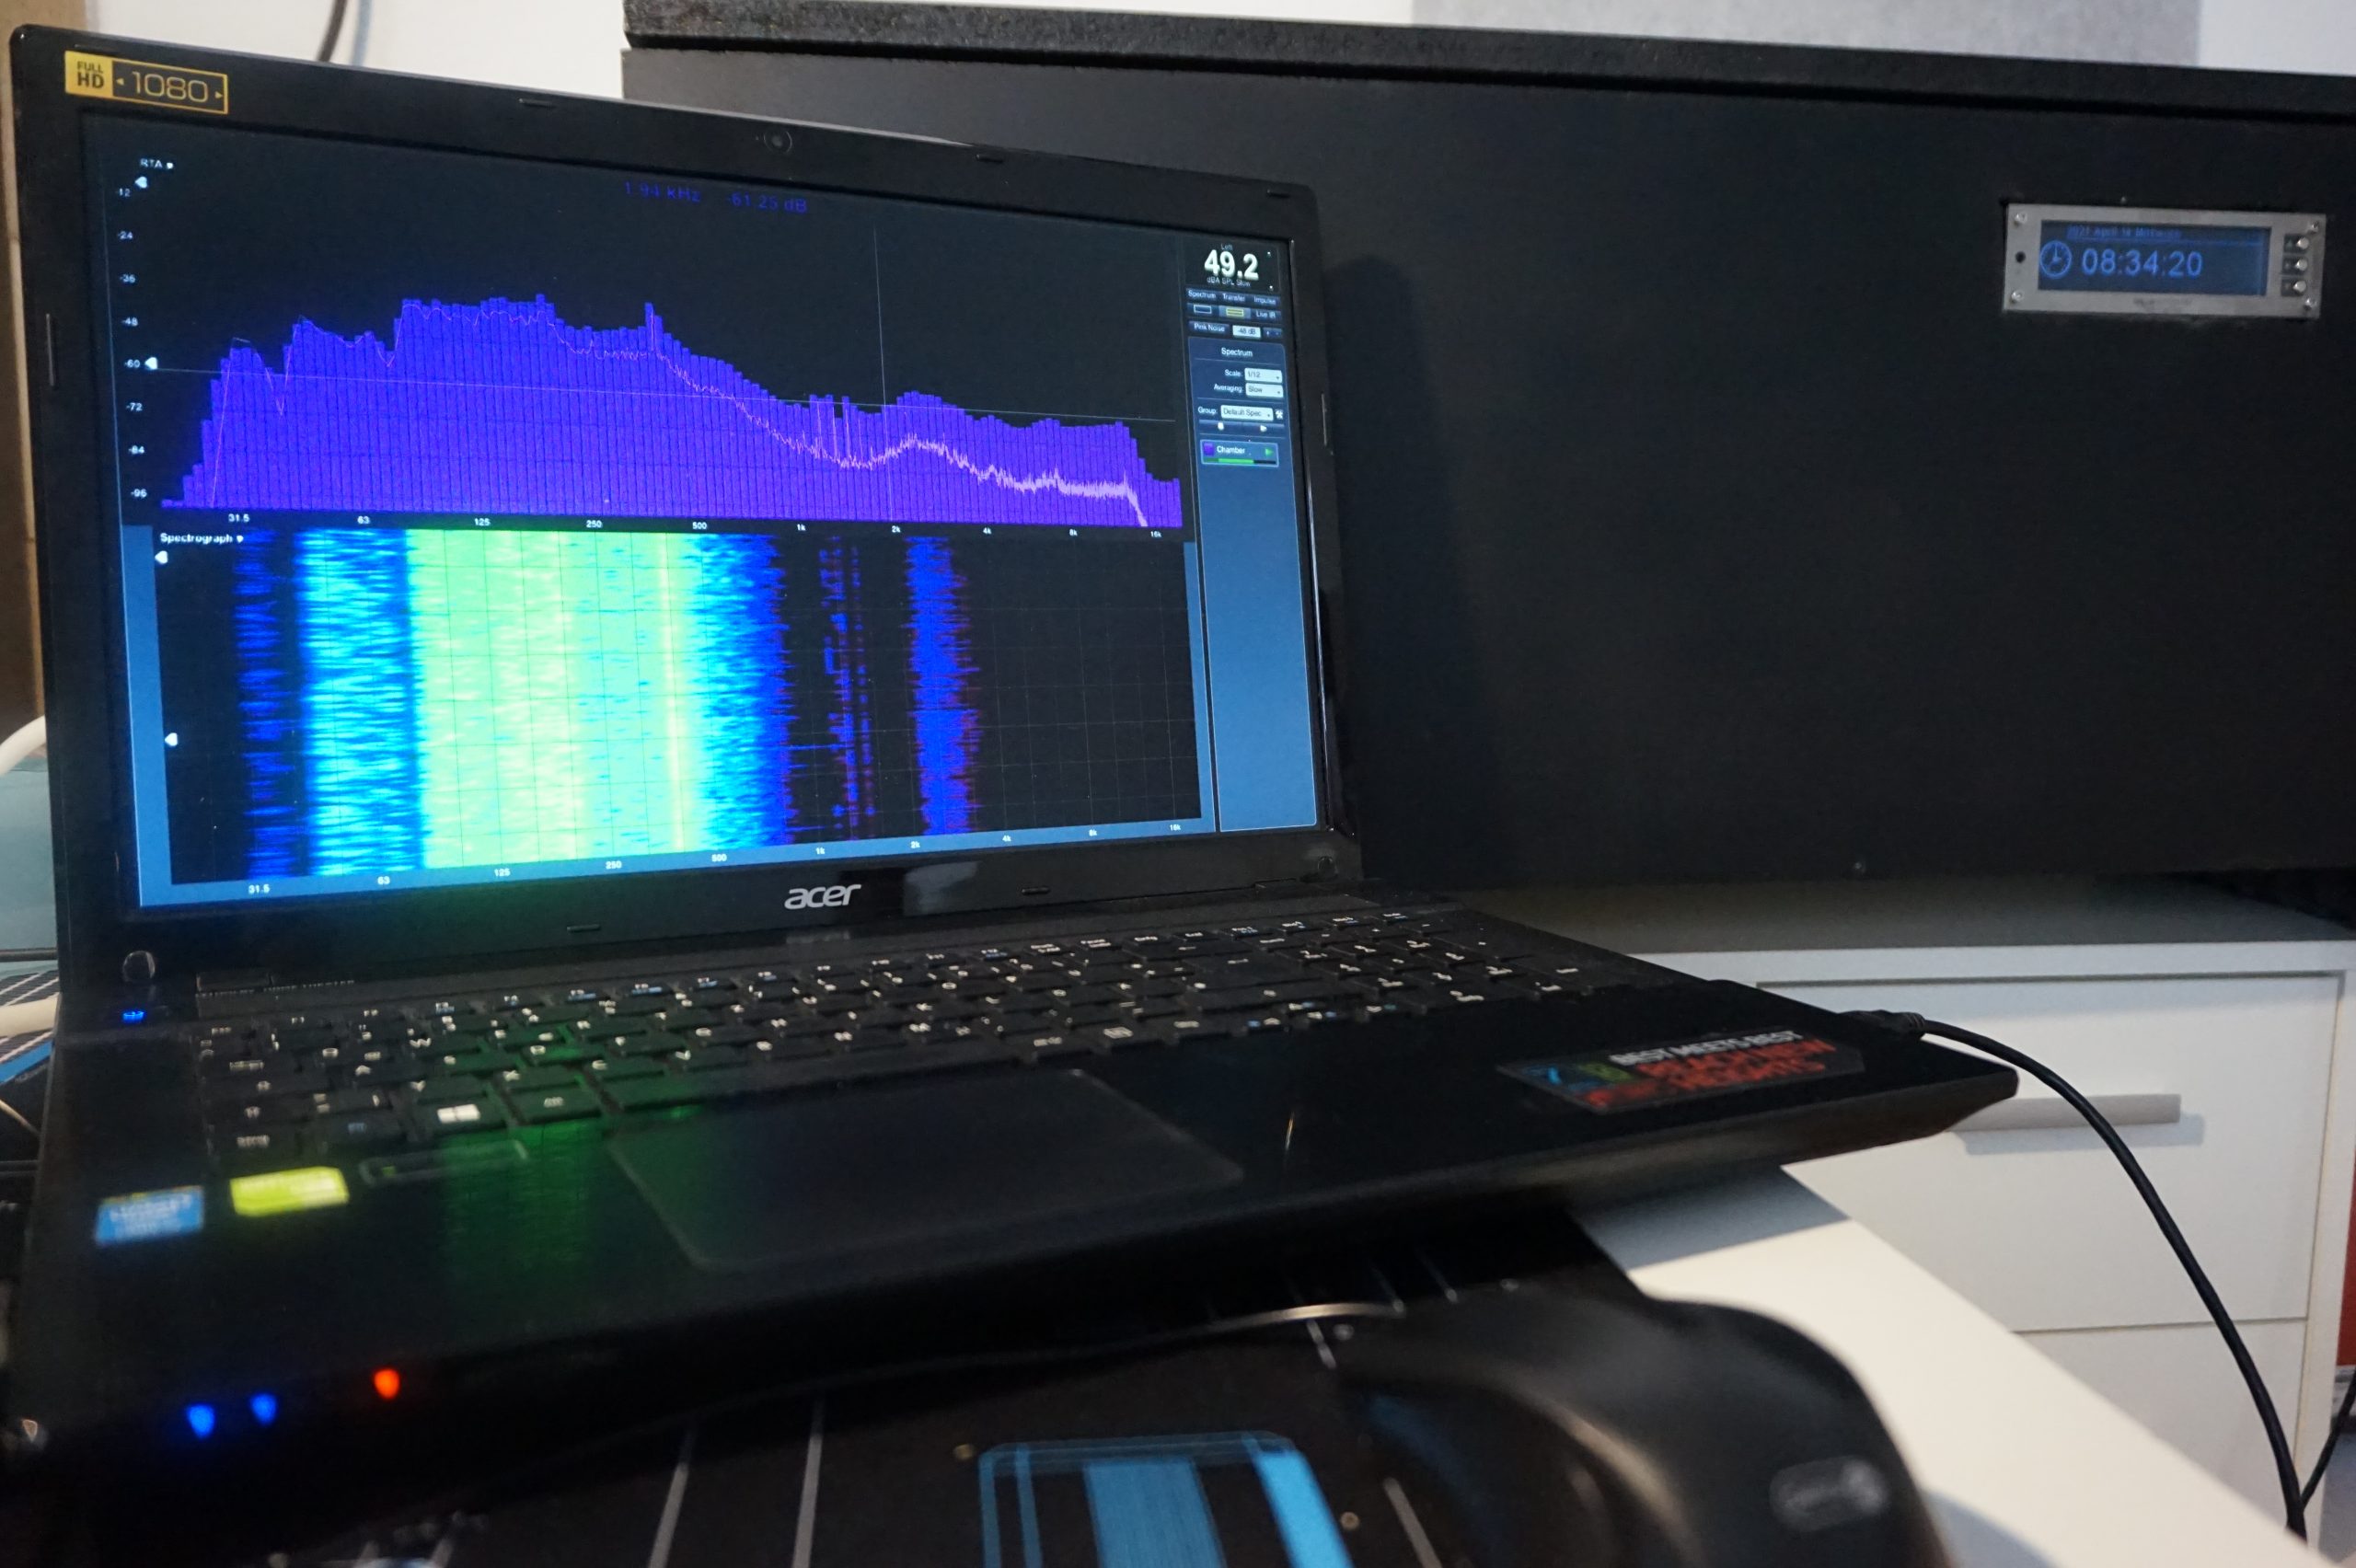
We also took the feedback from the community and evaluated the frequency band for each measurement, so you not only get the SPL values (sound pressure) in dB(A), but also a nice frequency analysis that helps to describe the sound character perfectly. Bearing or motor noise, vibrations or the tearing noise on the rotor – everything becomes mercilessly visible with it.
We won’t go into certain details and solutions in this article, because there is still some foreign know-how in this setup and some things would probably be too far for the normal consumer. If you are interested in this and would like to build something like this, you are of course welcome to contact us. This also applies to all those who would like to contribute suggestions and tips, because we are still at the very beginning and can also still correct or expand.
New metrics and graphics
Apart from the fact that we now also record the minimum and maximum values for the flowing currents and the power consumption, we have fulfilled two further wishes of the readers and extended the measurement series in this respect. In order to be able to really objectively assess the fans, we first graduated the resulting volume flow and measured the sound pressure level in many individual steps. The result for a fan then looks like this compared to the reference fan:
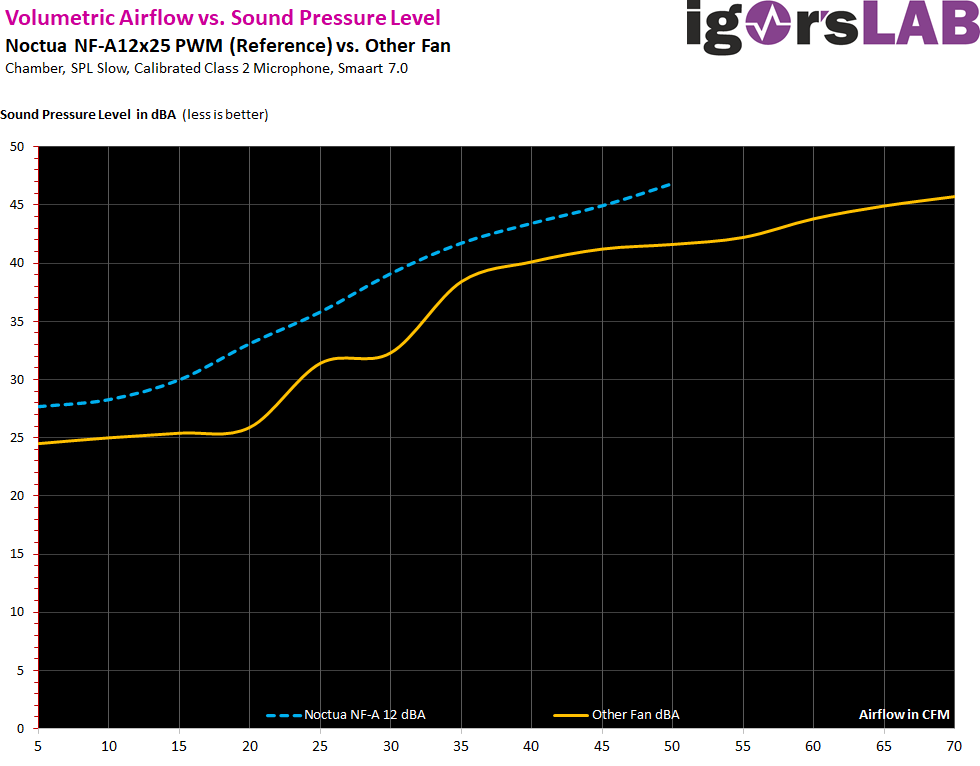
We can see that the increase in the sound pressure level of our test fan is not as balanced compared to the reference, but the level is still lower at a comparable volume flow. In addition, the fan tested and compared here also delivers a significantly higher volume flow due to a 50% higher maximum speed, which is ultimately bought with a similar sound pressure level as the reference fan, but whose performance is significantly lower.
And because we just wrote about the speeds, there are also new comparative graphics for this, at the express request of the reader, by showing which speeds are necessary to achieve a certain volume flow. In practice, we can now also see where the dip in the upper graph comes from in terms of volume, because there is a speed range (rather a smaller window) where the fan does not perform so perfectly and spins higher to reach the desired CFM than a more even rise in the curve would have led us to expect.
What we measure and what the result looks like can be seen on the next page using a selected fan as an example, which is anything but our reference. That’s exactly what we are still looking for 🙂
| Test setup | |
| Housing / measuring chamber | Two-chamber measurement setup with sound insulation, fully air-conditioned room |
| Volume flow and flow velocity | testo 410i (calibrated) |
| Differential pressure measurement | testo 510i (calibrated) |
| Sound level measurement | Measuring microphone Class 2 and USB interface, Smaart 7, Voltcraft SL 451 (Conrad, permanent rental, calibrated), |
| Speed control and fan control | Aqua Computer Aquaero 6 Pro |
| Commissioning | March/April 2021 |


16 Antworten
Kommentar
Lade neue Kommentare
Urgestein
Urgestein
Urgestein
Urgestein
Urgestein
Urgestein
Mitglied
Urgestein
1
Veteran
1
Urgestein
Urgestein
Veteran
Urgestein
Alle Kommentare lesen unter igor´sLAB Community →