


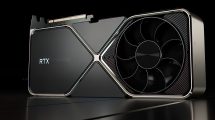
Overclocking
Manual overclocking with air cooling is average, if you can withstand the fan, which then works at a slightly over 2500 rpm at maximum speed. On the one hand, of course, as always, we have the GPU lottery, on the other hand it is difficult with air to reach the 2.1 GHz limit even in closed enclosures and, if so, to keep it permanently. The memory was also moderately overclocked, but it is also getting quite hot, so you should think about this carefully.
Temperatures and clock rates
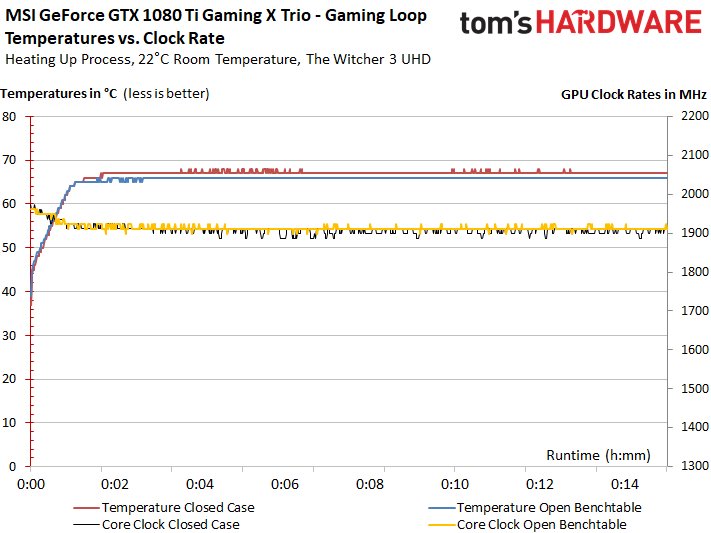
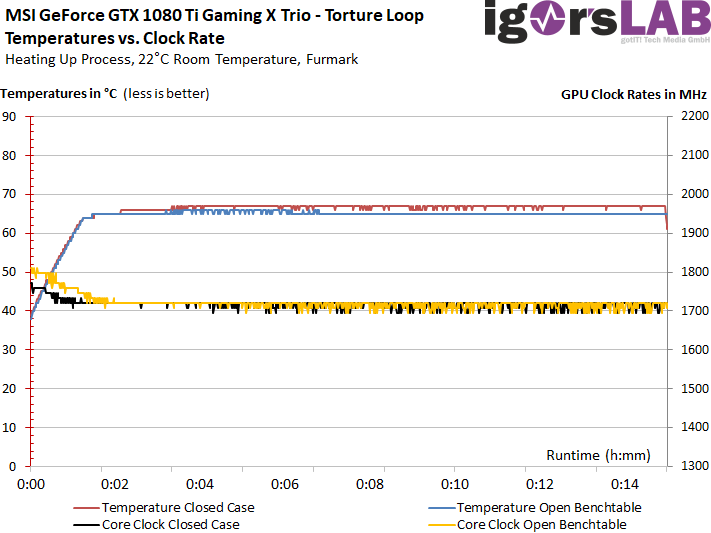
First, we compare the achieved start and end values for temperatures and GPU clock (boost) in tabular form:
| Initial |
Final value |
|
|---|---|---|
| Open Benchtable | ||
| GPU Temperatures |
39 °C | 66 °C |
| GPU clock | 1974 MHz | 1911-1923 MHz |
| Ambient temperature | 22 °C | 22 °C |
| Closed Case | ||
| GPU Temperatures |
40 °C | 67 °C |
| GPU clock | 1974 MHz | 1898-1911 MHz |
| Air temperature in the housing | 22°C | 40°C |
| OC (Open Benchtable) | ||
| GPU temperatures (approx. 2530 rpm) | 28 °C | 62 °C |
| GPU clock | 2068 MHz | 2055 MHz |
| Ambient temperature | 22°C | 22°C |
Overview Graphs: Temperatures vs. Clock
For better illustrations now again the respective courses considering our timeline of a total of 15 minutes each for the warm-up time.
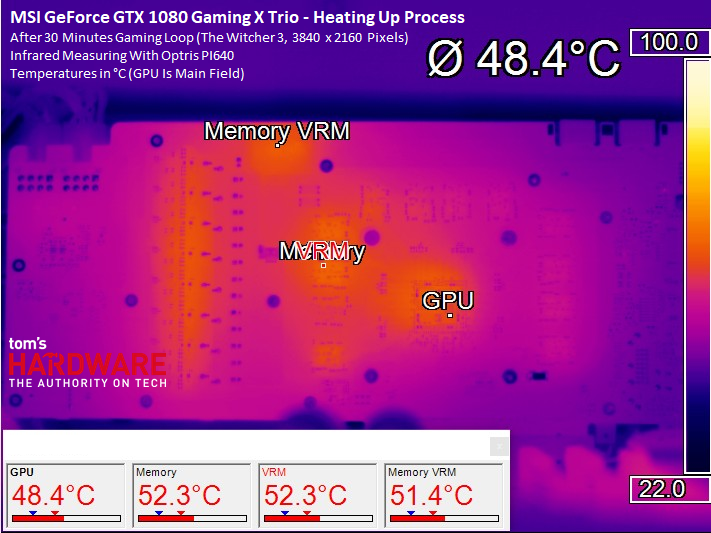
Thermal analysis of the back of the board
Finally, we consider the thermal analysis of the respective load states. In order to better understand the results and the cooler, let's first compare the warm-up and cooling phases.
Warming up and cooling
As a hotspot, we first select the GPU, some memory modules, and the two voltage converter groups for the GPU (left, vertical) and memory (top, half-left). It will then be interesting to observe the heat development and migration.
When the fully heated board cools down, we see that most of it is dissipated via the GPU and its package.
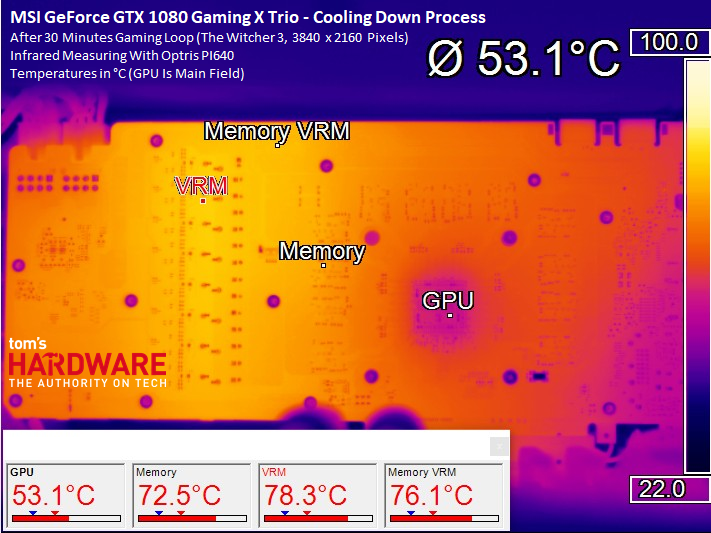
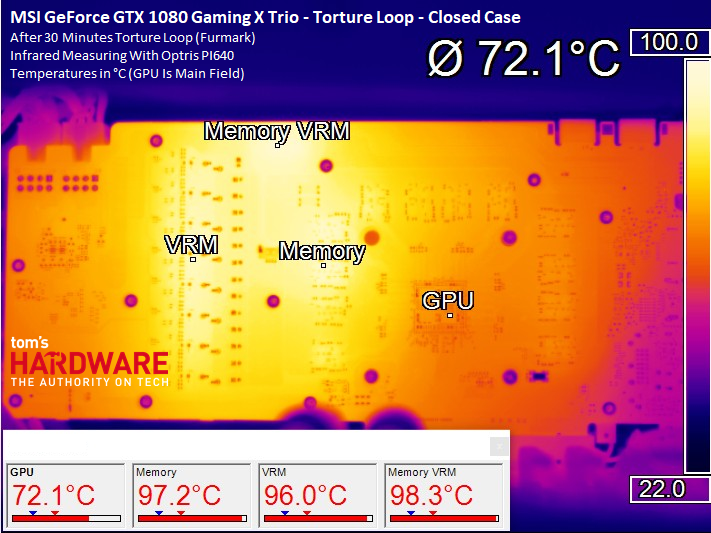
Operating temperatures after 30 minutes
We see that the VRM range of the memory and the memory modules positioned close to it become very hot, with the waste heat moving very strongly over time towards the GPU due to the lack of a directly cooling VRM heat sink, thus reducing the memory modules on the way with heats up. We have already been able to show this fact to the responsible MSI engineer here in the laboratory and we are curious to see whether our proposals will be incorporated into this revision.
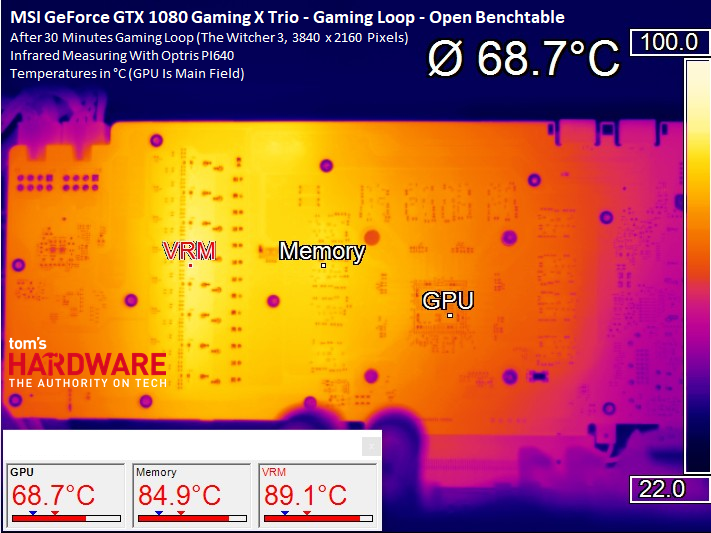
We can clearly see that the values measured below the GPU package are higher than those of the GPU diode inside. Here, the GPU indirectly also cools the board. Nothing dramatic, but a clear indication.
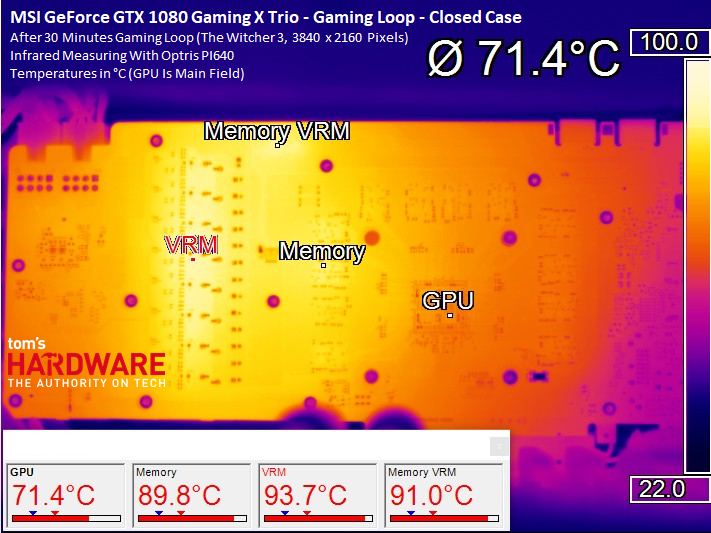
The stress test shifts the temperature load more in the direction of memory and memory VRM, which is easy to see.
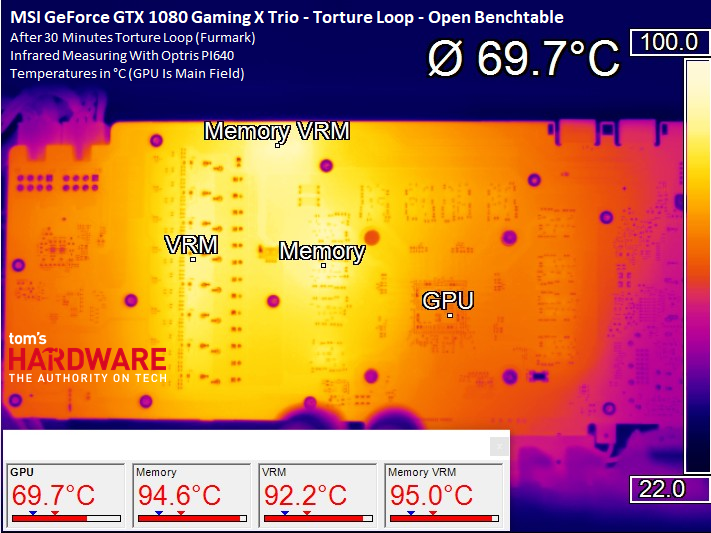
In the stress test, we then measure after approx. 30 minutes on the hottest memory module in the closed housing approx. 98 degrees, 3 degrees more than the manufacturer specifies in the work area specifications. This is not really dramatic, but it is somewhat borderline.
- 1 - Einführung und Übersicht
- 2 - Platine und Spannungsversorgung im Detail
- 3 - Gaming Performance: 2560 x 1440 Pixel (WQHD)
- 4 - Gaming Performance: 3840 x 2160 Pixel (UHD)
- 5 - Leistungsaufnahme im Detail
- 6 - Temperaturen, Taktraten, OC und Wärmebildanalyse
- 7 - Kühlerdetails und Geräuschentwicklung
- 8 - Zusammenfassung und Fazit


Kommentieren