


Important foreword
In the following I will describe the procedure using a Sapphire RX 5700 XT Pulse as an example, and also convert the values only very moderately, so that the hardware is guaranteed not to be damaged. Everything else is then the responsibility of each user himself. Otherwise, the restrictions made on page one and the terms of use listed there apply (please read before using the software!).
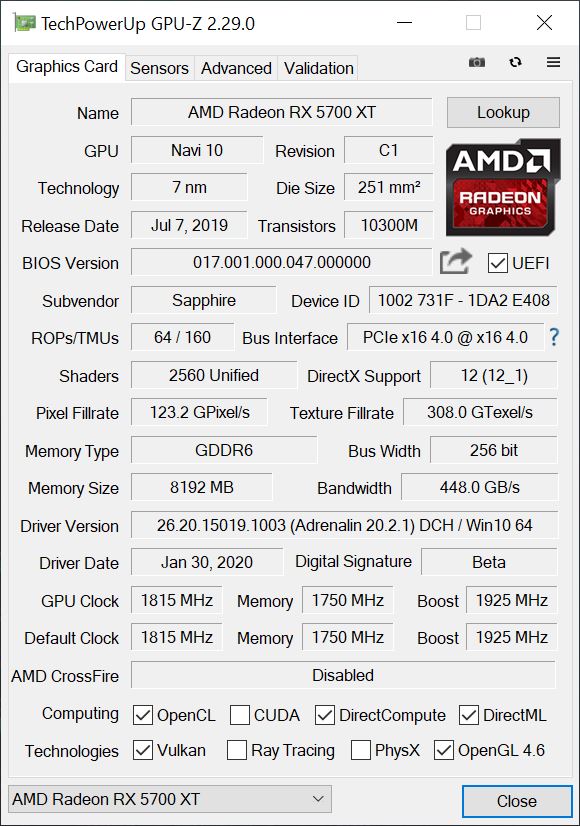
1. Extracting the VBIOS with GPU-Z
First of all, of course, we have to extract the original BIOS of the graphics card in question and save it on the hard disk. For this purpose, we use GPU-Z from TechPowerUp (TPU). After we have saved the BIOS to the hard disk, we then continue working in the MPT.
2. Modification of the PowerPlayTables in the MPT
This is done as usual and already known, whereby I will briefly outline the individual steps again. Most of it is self-explanatory and for more in-depth interventions I ask to approach the community in the forum. If you are not familiar with the most important basic terms, you should protect yourself and your hardware from such programs anyway. But what is absolutely necessary: the program MPT has to be started as administrator and the buttons “Delete SPPT” and “Write SPPT” are not needed in combination with the BIOS editor!
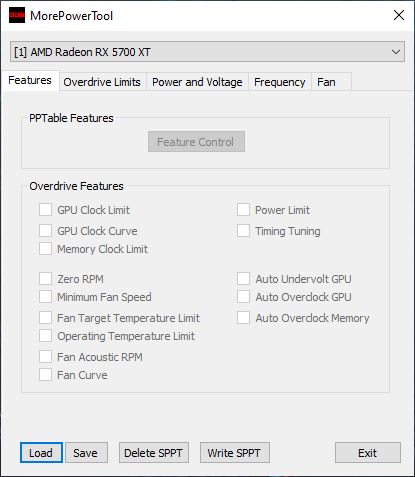
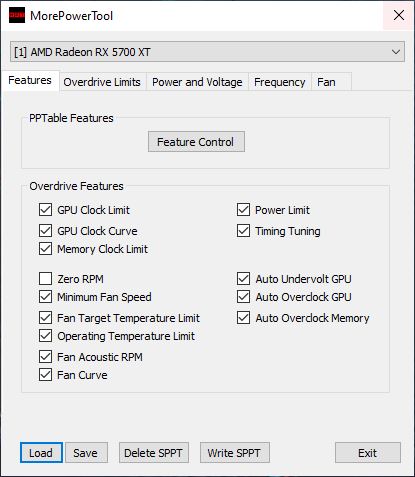
Either you click with the right mouse button on the program icon and then on “Run as administrator” or you set the corresponding permanent default in the shortcut properties. In the lower area you can use “Load” to load the default settings for your selected graphics card from the previously saved BIOS (or a settings file of the MPT) into the MPT and save them later as a special settings file by clicking “Save”. The program changes mostly only the upper and lower limits of the Wattman settings or blocks input possibilities or releases them. However, the software does not completely replace the Wattman from the Radeon software or other overclocking tools, but instead extends their input possibilities!

Under “Overdrive Features” you can define which areas you want to enable or disable in Wattman. It is best if everything should be selected. Some options in the SoftPowerPlayTables seem to be optional or will be available in future Wattman versions.
Overdrive-Limits, Power-/Voltage-Limits and clocks
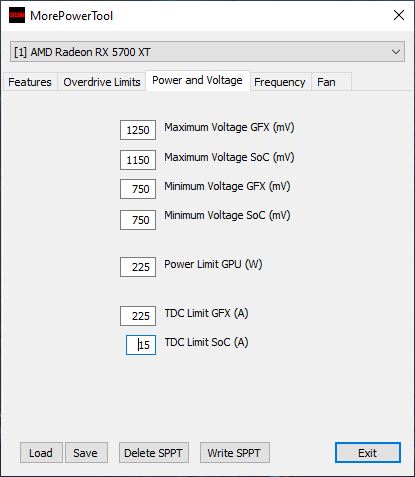
The name “Overdrive Limits” actually says it all and the labeling of the individual fields is also clear and self-explanatory (picture below right). Values, which exceed or fall below the possible limits, are ignored by the Wattman. If you want to use the fan control with Zero Fan Speed, you have to enter a 1 instead of the 0 for “Zero Fan Control”! The voltage and power limits should be used with special care (picture below left)! Even if the graphics card has internal protection mechanisms, using inappropriate values can at least lead to instabilities and system crashes! Particularly with the SoC, overconfident specifications can lead to a fast collapse or overheating and throttling of the card.
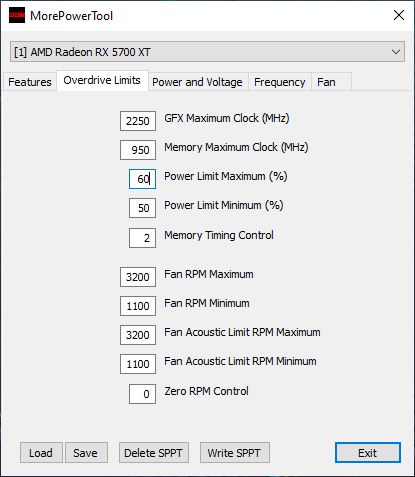
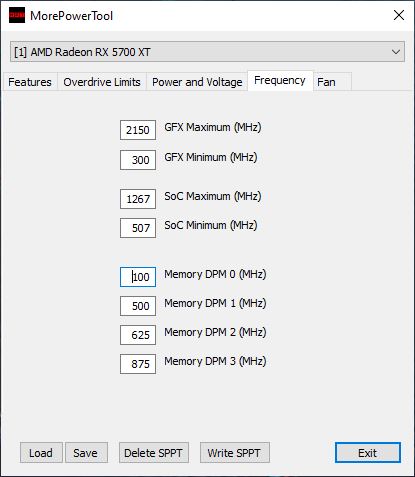
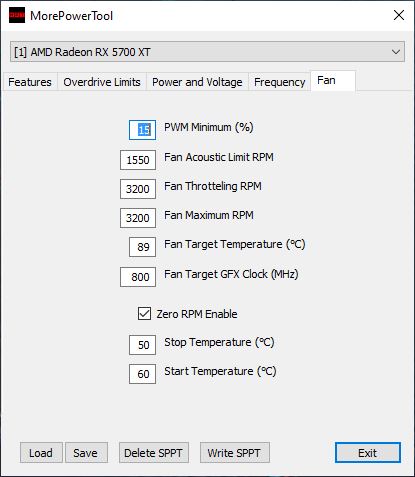
The same applies, of course, to the frequency specifications (bottom left picture). The fan control (picture below right) is a good option to adapt the graphics card with air cooler to the individual needs and operating conditions (case) and also to optimize it acoustically. The option “Zero RPM Enable” only sets the check mark (status “activated”), in order for it to be visible at all, the value for the Overdrive Limits must already have been set to 1 (see above). This function is only visible and selectable at all if the fan control is set to “Automatic”. If you have set this option to “Manual” at any time (see also “Fan Curve” under Overdrive Features!), the “Zero RPM Control” is not visible!
Finally, the changes are written to the MPT settings file with “Save” and not to the registry with “Write SPPT”. We need this settings file for the BIOS editor!

3.1. Modify the NAVI BIOS with the RBE
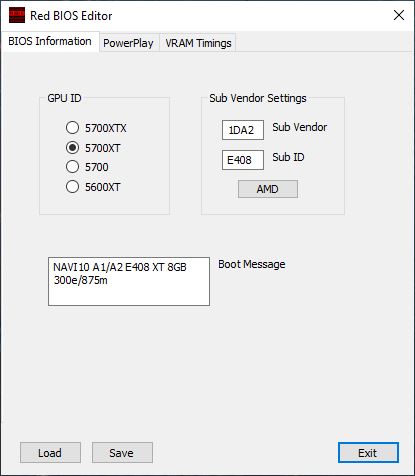
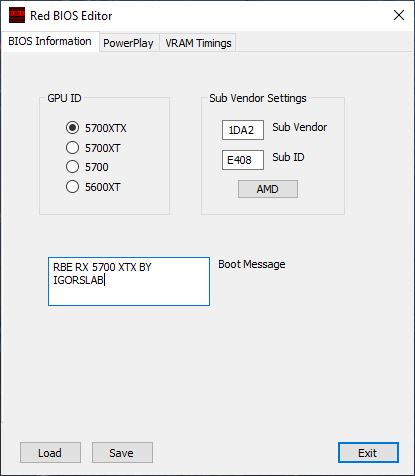
Now we start the program RBE and open with “Load” the previously saved BIOS (or a suitable BIOS of our choice). It is not necessary to change the GUID, but you can turn your card into an XTX (visually). But this does not make it faster for the time being. The identification of the manufacturer is also rather unimportant, but you can at least pretend. It is important to note that the Radeon RX 5500 XT is currently not (yet) supported.
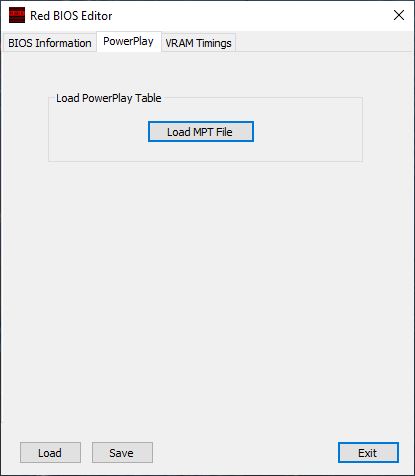
Then we switch to the tab “PowerPlay” and load the settings file created above from the MPT. What you can do optionally is to change the VRAM settings. If you use e.g. a foreign BIOS of another card, then you can optionally change the settings for the identification of the memory modules. If and what this does in detail, the community will surely find out. This also concerns the stored strings, which should only be changed manually if you really know what you are doing. But wait…
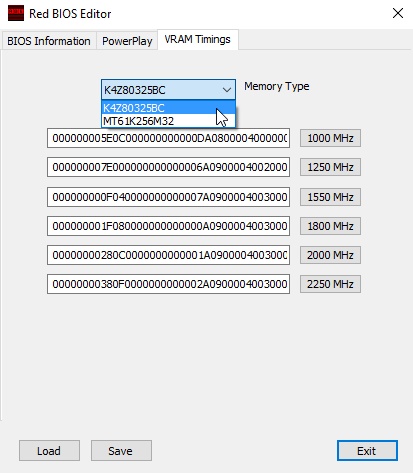
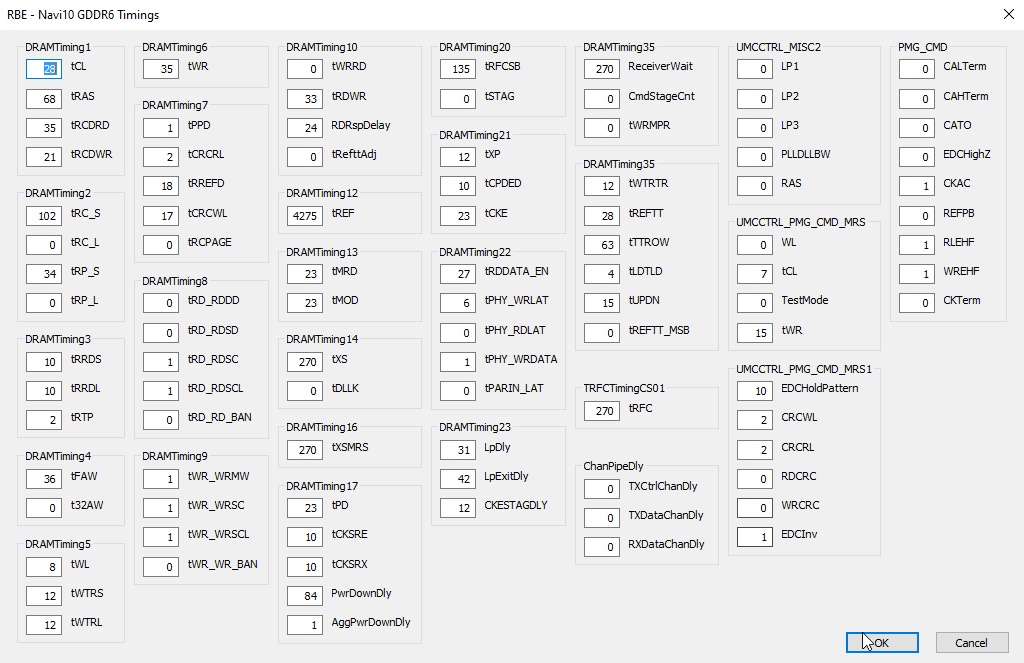
The operation is actually quite simple now. The only important thing is to pay attention to which RAM modules were installed on the card, whose BIOS you read in! The rest is actually almost self-explanatory. Switch to the tab “VRAM Timings” and you will first see the module selection (depending on the data read in so far) and the six strings for the individual clock stages. Afterwards you can open the actual editing window via the button for the individual frequencies, because the string stored in the BIOS is initially completely cryptic and thus unusable for almost all users. But that’s where the RBE comes in: what you see after opening the timing editor looks like the BIOS of a better equipped motherboard, and the timing settings are actually similar to those of the memory.
However, one should not make any changes at a whim without some basic knowledge, because this will definitely go wrong and in the best case will only lead to instability. But this is exactly where i see the experienced and experimental community now! if you have tested your own settings and think they are worth to be made publicly available to other users – go ahead! our forum is exactly the right place for that. And maybe one day we’ll have a Hall of Fame of sorts with the best DRAM mods? come on, you’ve got the tools for it now!
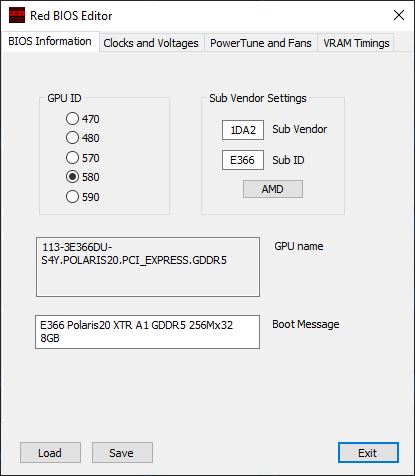
3.2. Modify the Polaris BIOS with the RBE
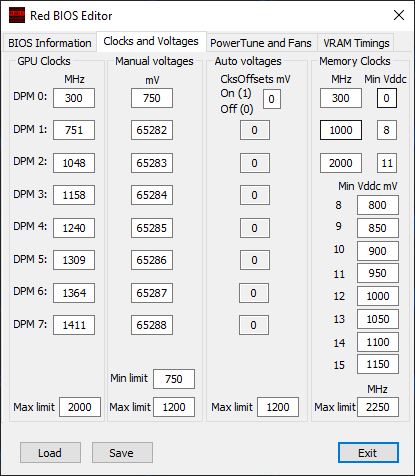
The tabs for Polaris only become visible after you have loaded the appropriate BIOS, but we already know that. Changing the GPU-ID should be considered three times before, because almost always the card will not start anymore (e.g. 570 to 580) and it remains a real matter of luck. Under “Clocks and Voltages” you will find the most important settings to breathe some more life into the card. The labels are self-explanatory.
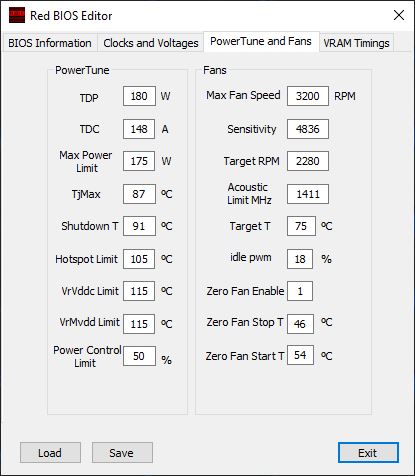
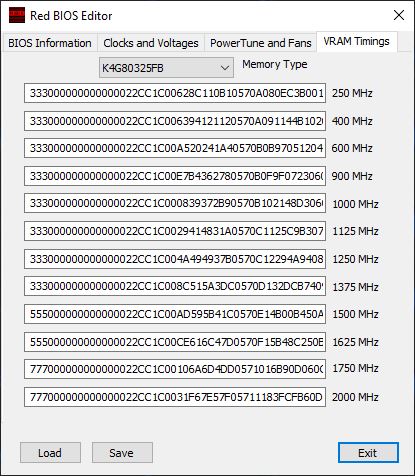
Power Tune provides more resources, but should not tempt you to get carried away. So always only release as much as necessary, otherwise you will get roast piglets faster than you would like. The fan control can also be adapted and is really an interesting field for your own experiments. However, you should be really careful with the memory timings. Up copying can work, but it doesn’t have to.
Explanation and instructions for the new Curve Editor
Since this part is a bit more extensive, I have published a separate article for it, which can (and should!) be read here below:
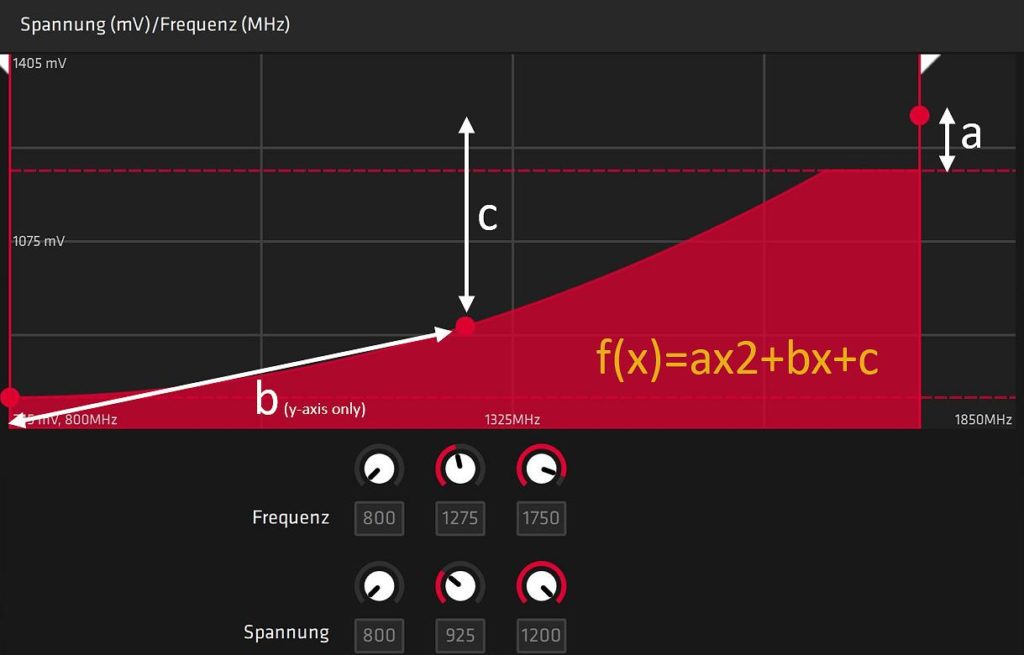
All about the Curve Editor and the default values (Click here!)
We are already done with this, so that we only have to save the new BIOS with “Save”. How this works with the flashing, you will learn on the next page. Before I have all for you in a short video:


56 Antworten
Kommentar
Lade neue Kommentare
Neuling
Mitglied
Mitglied
Mitglied
Mitglied
Moderator
Mitglied
Mitglied
Urgestein
Mitglied
Urgestein
Urgestein
Mitglied
Mitglied
Mitglied
Mitglied
Moderator
Neuling
Neuling
Alle Kommentare lesen unter igor´sLAB Community →