


Icebreakers and price breakers arenot quite accidental lycomal and so I was looking forward to the Raijintek Samos NV 2080 Ti RBW, which trudged in as a pre-model directly from the manufacturer here. Well, there was no final packaging yet and there was still some improvisation, but the product itself was final, if already used. And one thing I can and must get rid of in advance: the part is almost unbeatable for the price. Good average hits price war – gong for the first round please!
In my two articles "GeForce RTX 2080 Ti – Why water cooling is more important than manual overclocking and this does not bring much" and especially "Nvidia GeForce RTX 2080 Ti Founders Edition water-cooled? Forget it, here's the much faster alternative!" I used to go into very detailed detail about the cooling problem and the advantages of a potent water cooling system.
In addition, with the EK Waterblocks EK RTX 2080 Ti RGB, the Phanteks Glacier G2080Ti , the Watercool Heatkiller IV Fullcover and the Aqua Computer Kryographics Next I already had four other coolers in the test, all of which were not failures. How this monetary battle announcement will now be beaten is clarified by this exclusive test.
![]()
Since the Otto Normal customer can check the GPU temperatures with selection tools at most, I offer in this article a usual elaborate infrared test with the video of the heat flow and the temperature development, because at the latest with the memory and the There are sometimes extreme differences in voltage converters, which are difficult to determine with normal tests. Testing is always carried out with a maximum power consumption of just under 380 watts for the graphics card board and a constant water temperature of 20 °C, as well as a room temperature of 22 °C and the same Witcher 3 gaming loop in Ultra HD.
All the companies requested have also delivered test samples so far, even if it sometimes took a little longer. Unfortunately, Bitspower has so far, in contrast, and despite direct contact to Asia, completely refused to test. The cooler offered should work equally for all RTX models with reference board, which would have been quite interesting. However, it can at least be assumed that due to such a wide range of supported layouts, the performance may have fallen a bit by the wayside. Perhaps this is also the reason why sampling was not carried out in the end.
Unboxing, scope of delivery and assembly
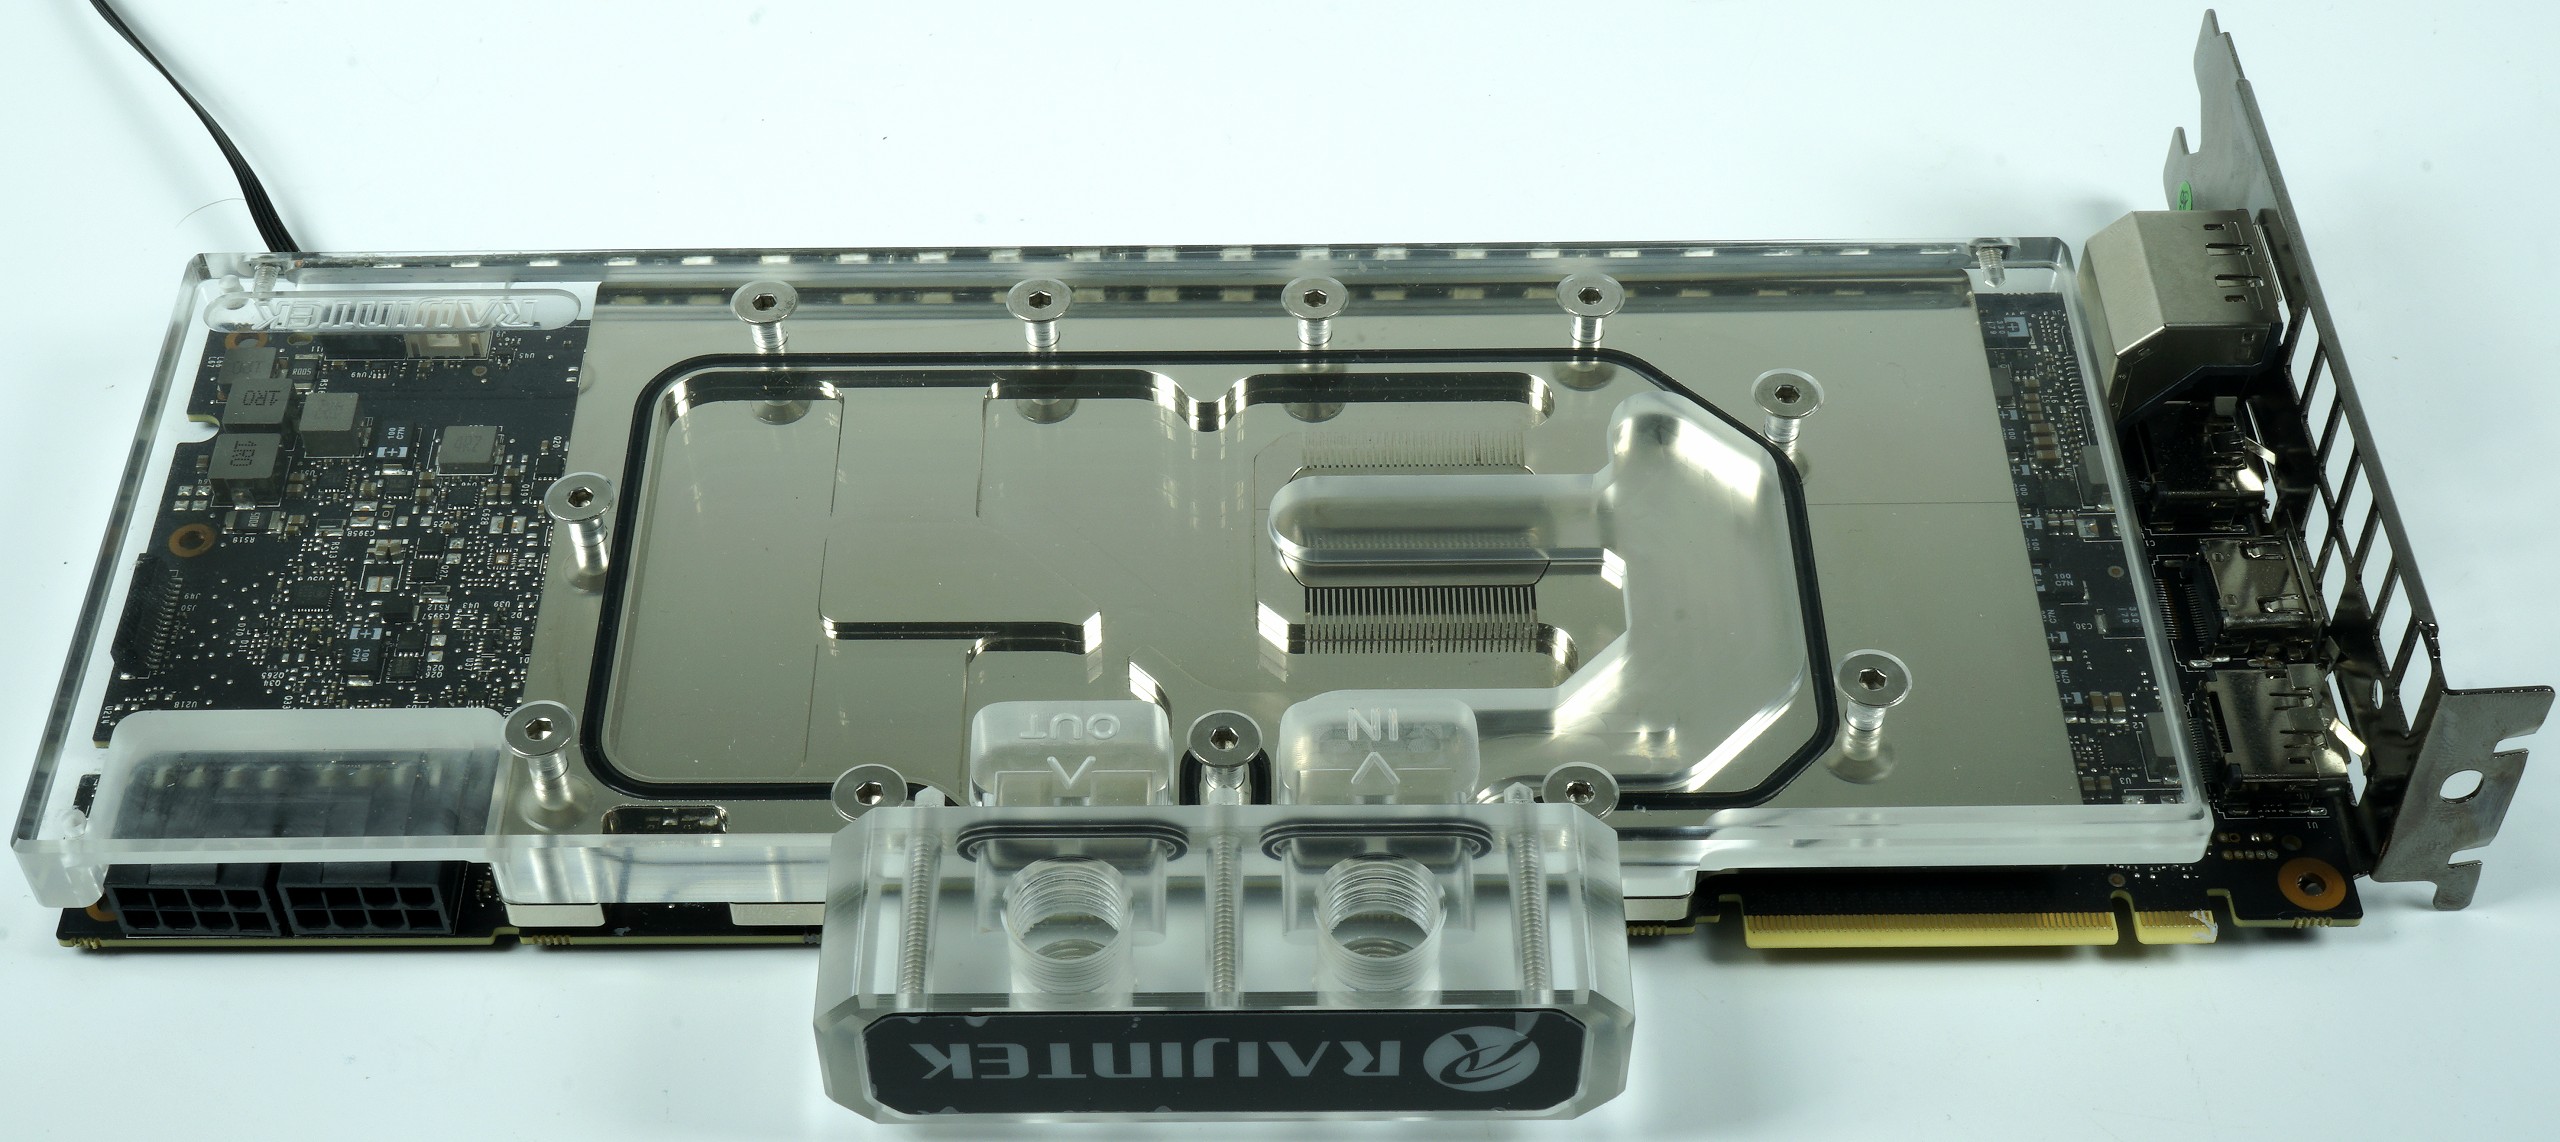
The fully assembled water block, a backplate, the matching screws and sufficient 1 mm thermal pads in decent quality are supplied. The RGB lighting is integrated at the bottom of the acrylic cover, but can also be unscrewed. With RGBpx you rely on an addressable RGB port, which is not to be connected directly to every motherboard with simple 12V RGB control, which is really a pity.
At least an adapter to the most common 12V ports shouldn't fail. Newer motherboards from Asus now have such a connection, as do various products from Corsair, NZXT or InWin. But a backward-compatible option would be really nice. Perhaps the manufacturer still has an insight? Let's see. Otherwise, the final packaging will still contain plugs and thermal paste.
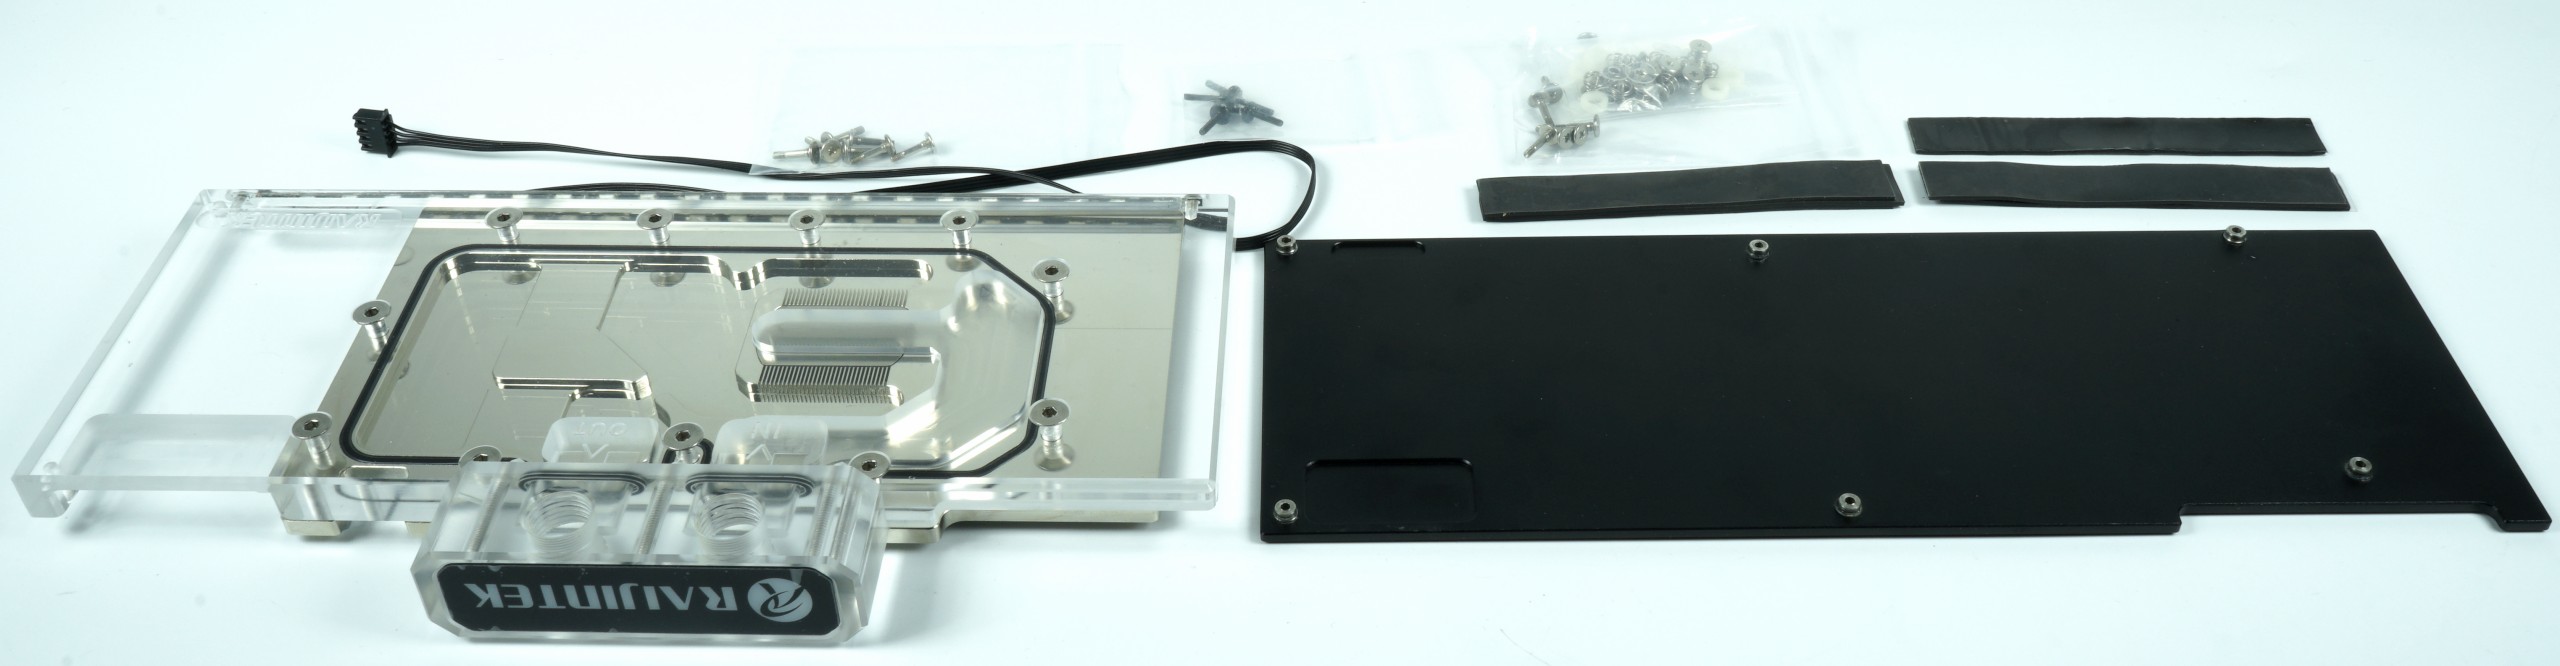
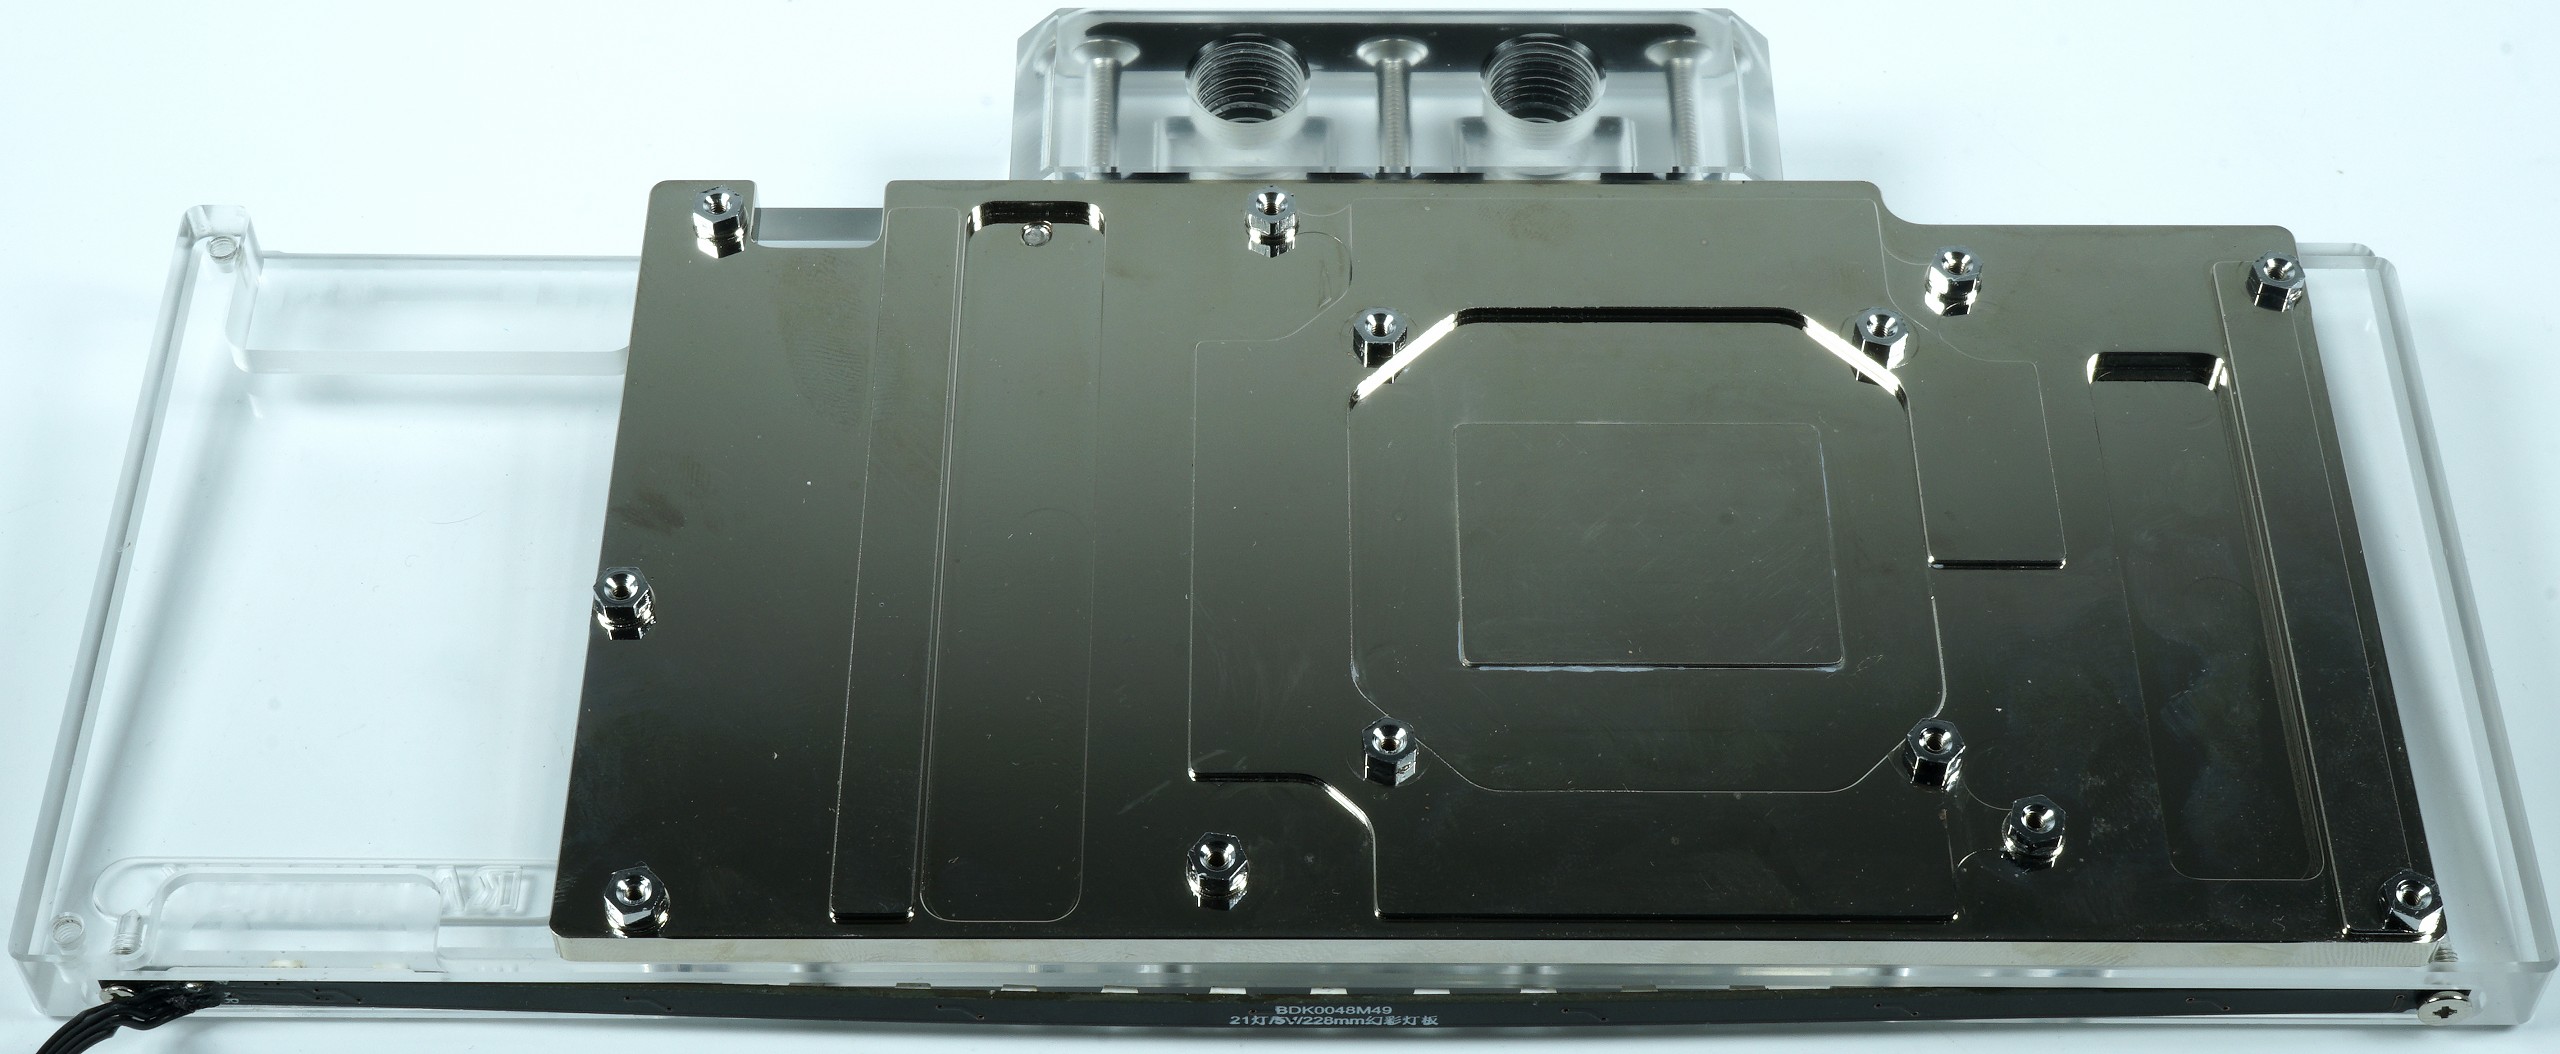
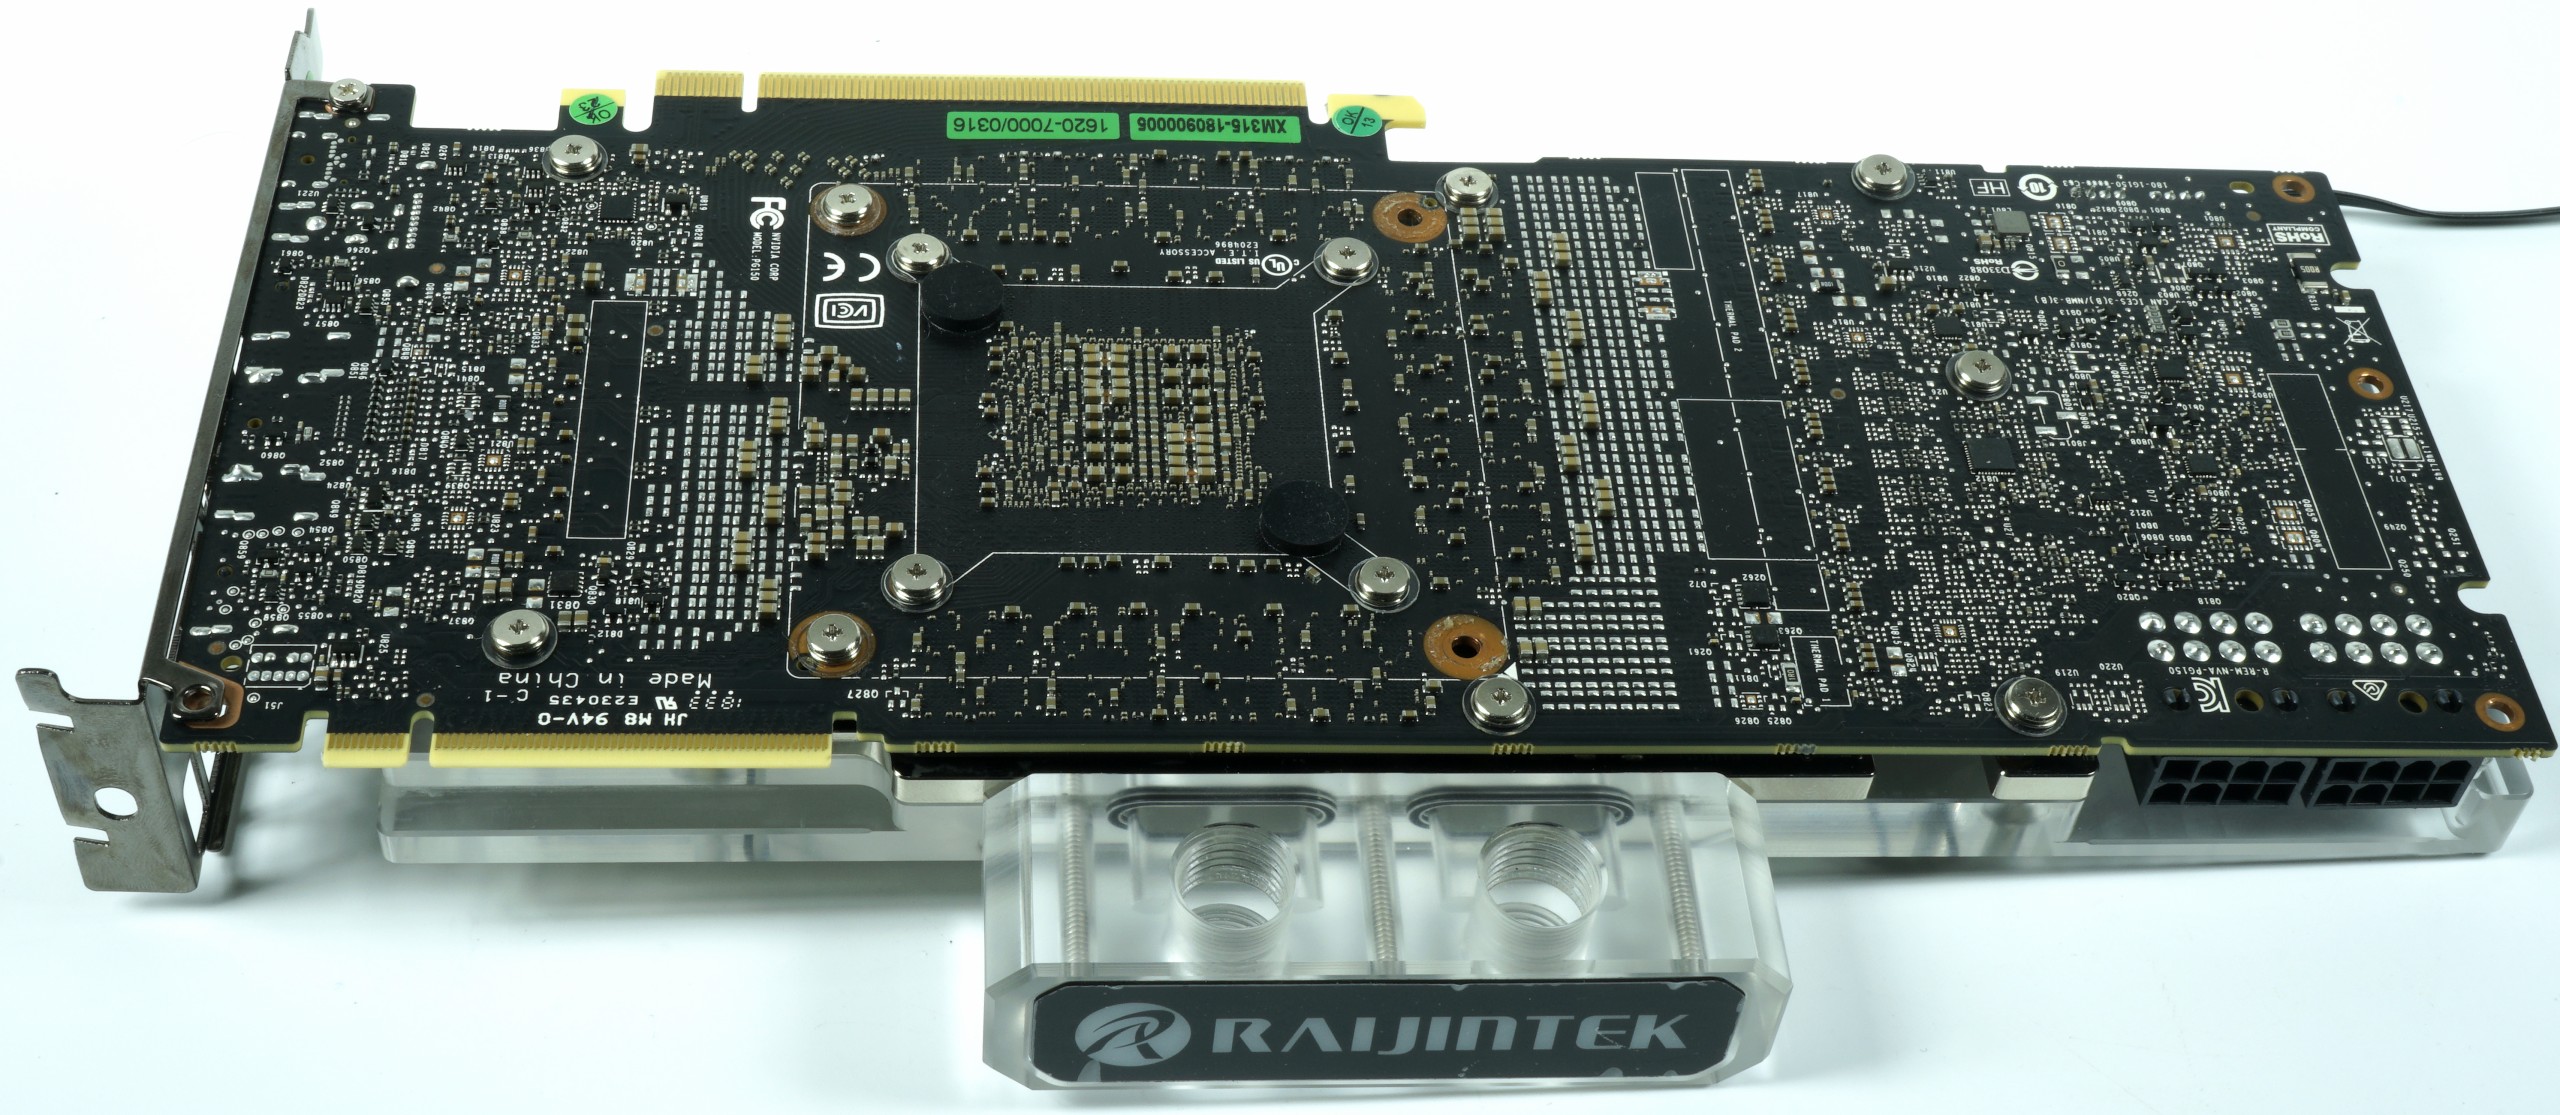
The unofficial (because I determined) data are interesting parameters. The entire block weighs 842 grams, is a maximum of 24.5 cm long and 12.5 cm high up to the top of the terminal (without it is 10 cm). The workmanship is fine and the edges are all very neatly deburred.
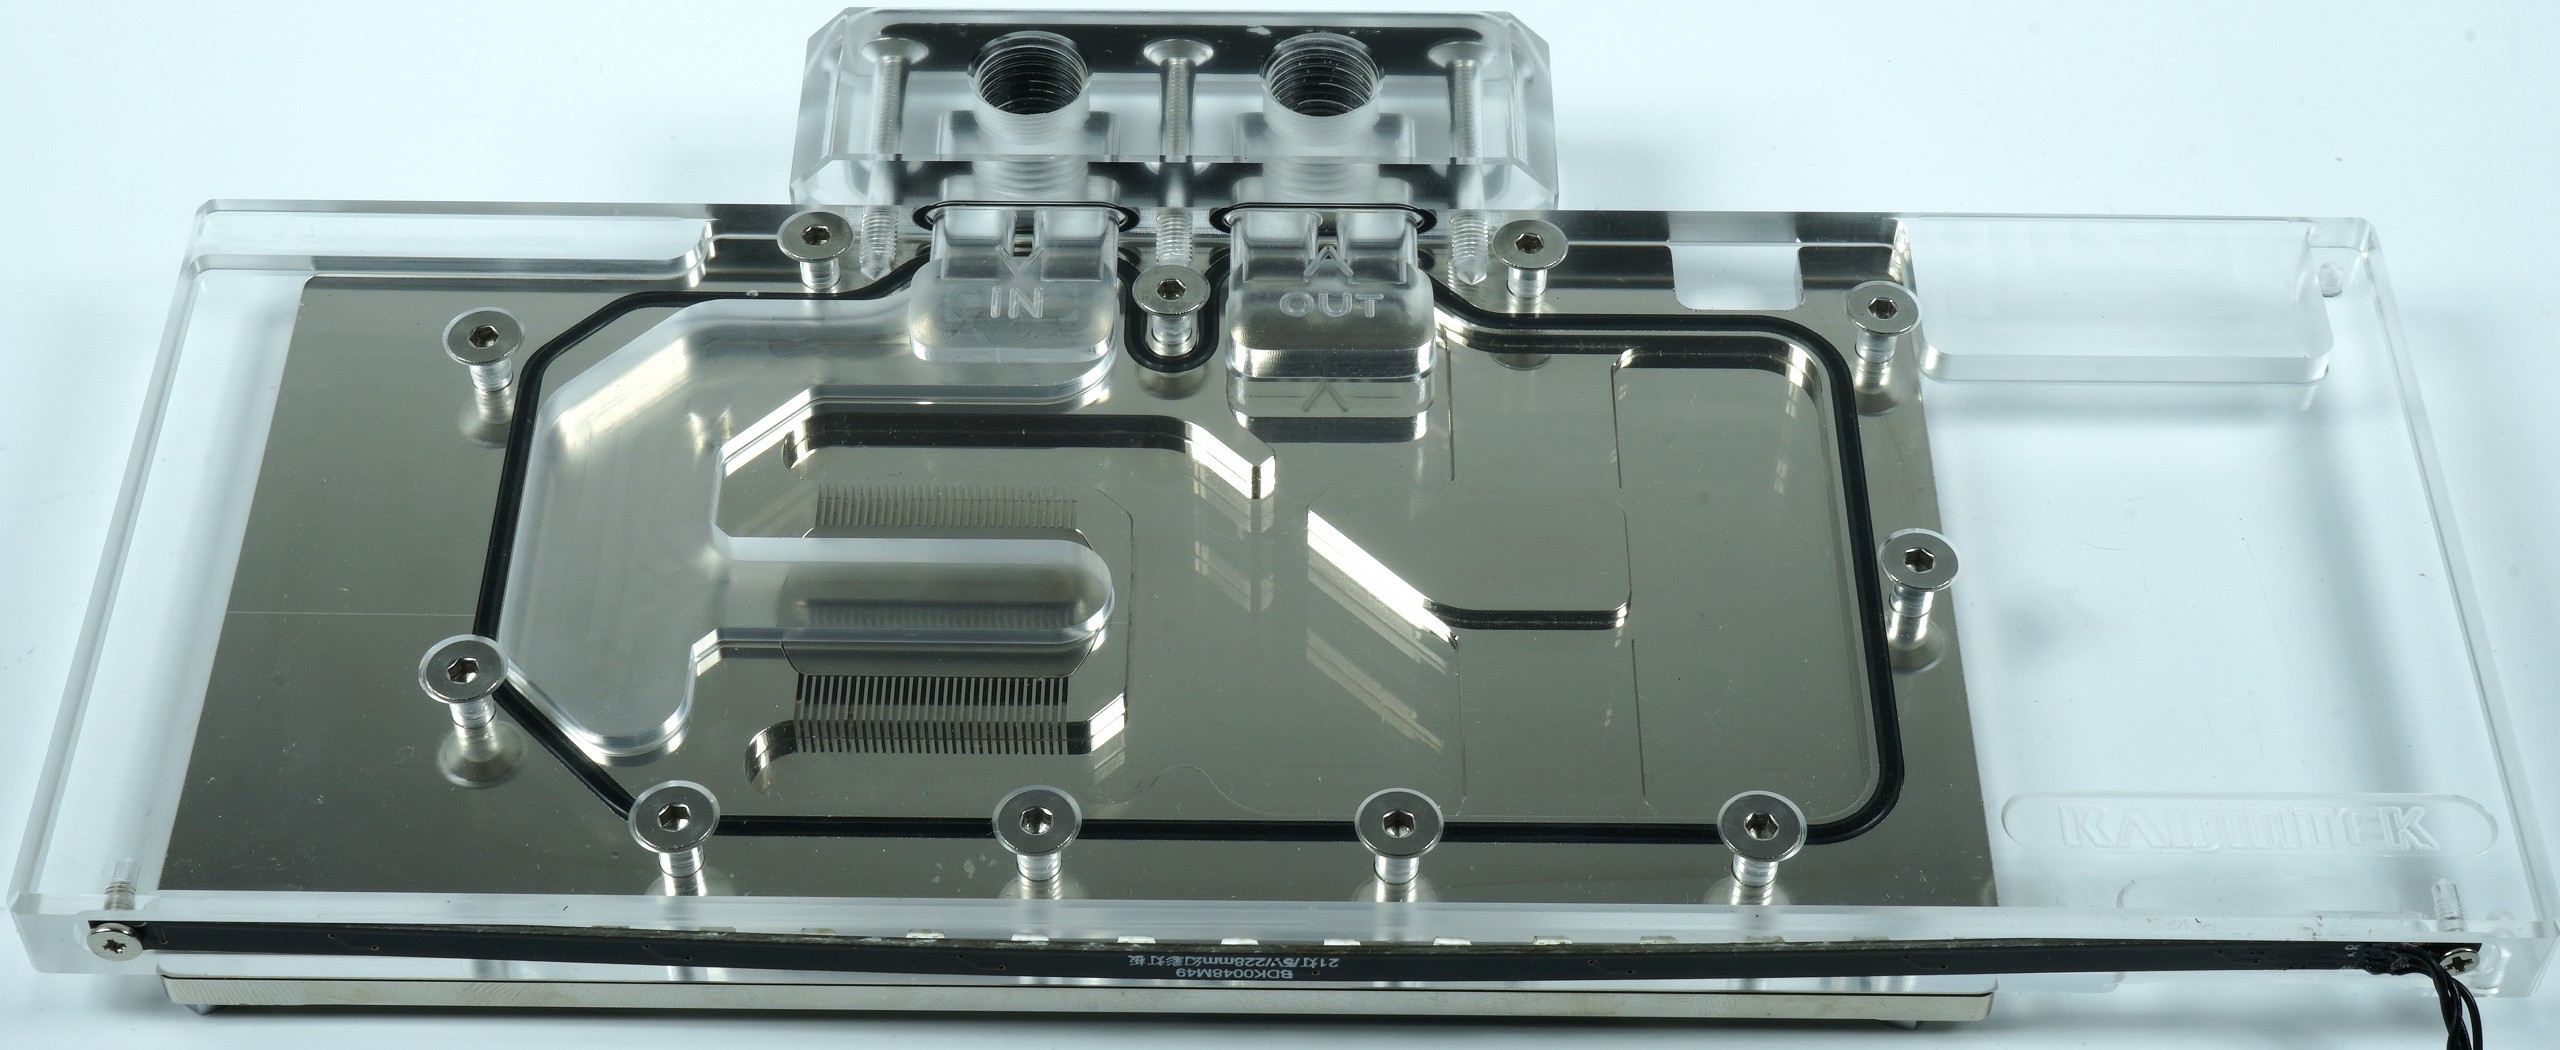
The CNC milled solid copper cooling block is nickel-plated and weighs approx. 800 grams. The spacers are fit tight enough and are not as easy to turn out as the EK RTX 2080 Ti from EK Water Blocks. The supplied spring screws are ok, but finally it will be normal Phillips screws, which is much more comfortable. In addition, there are acrylic washers, which promises more safety.
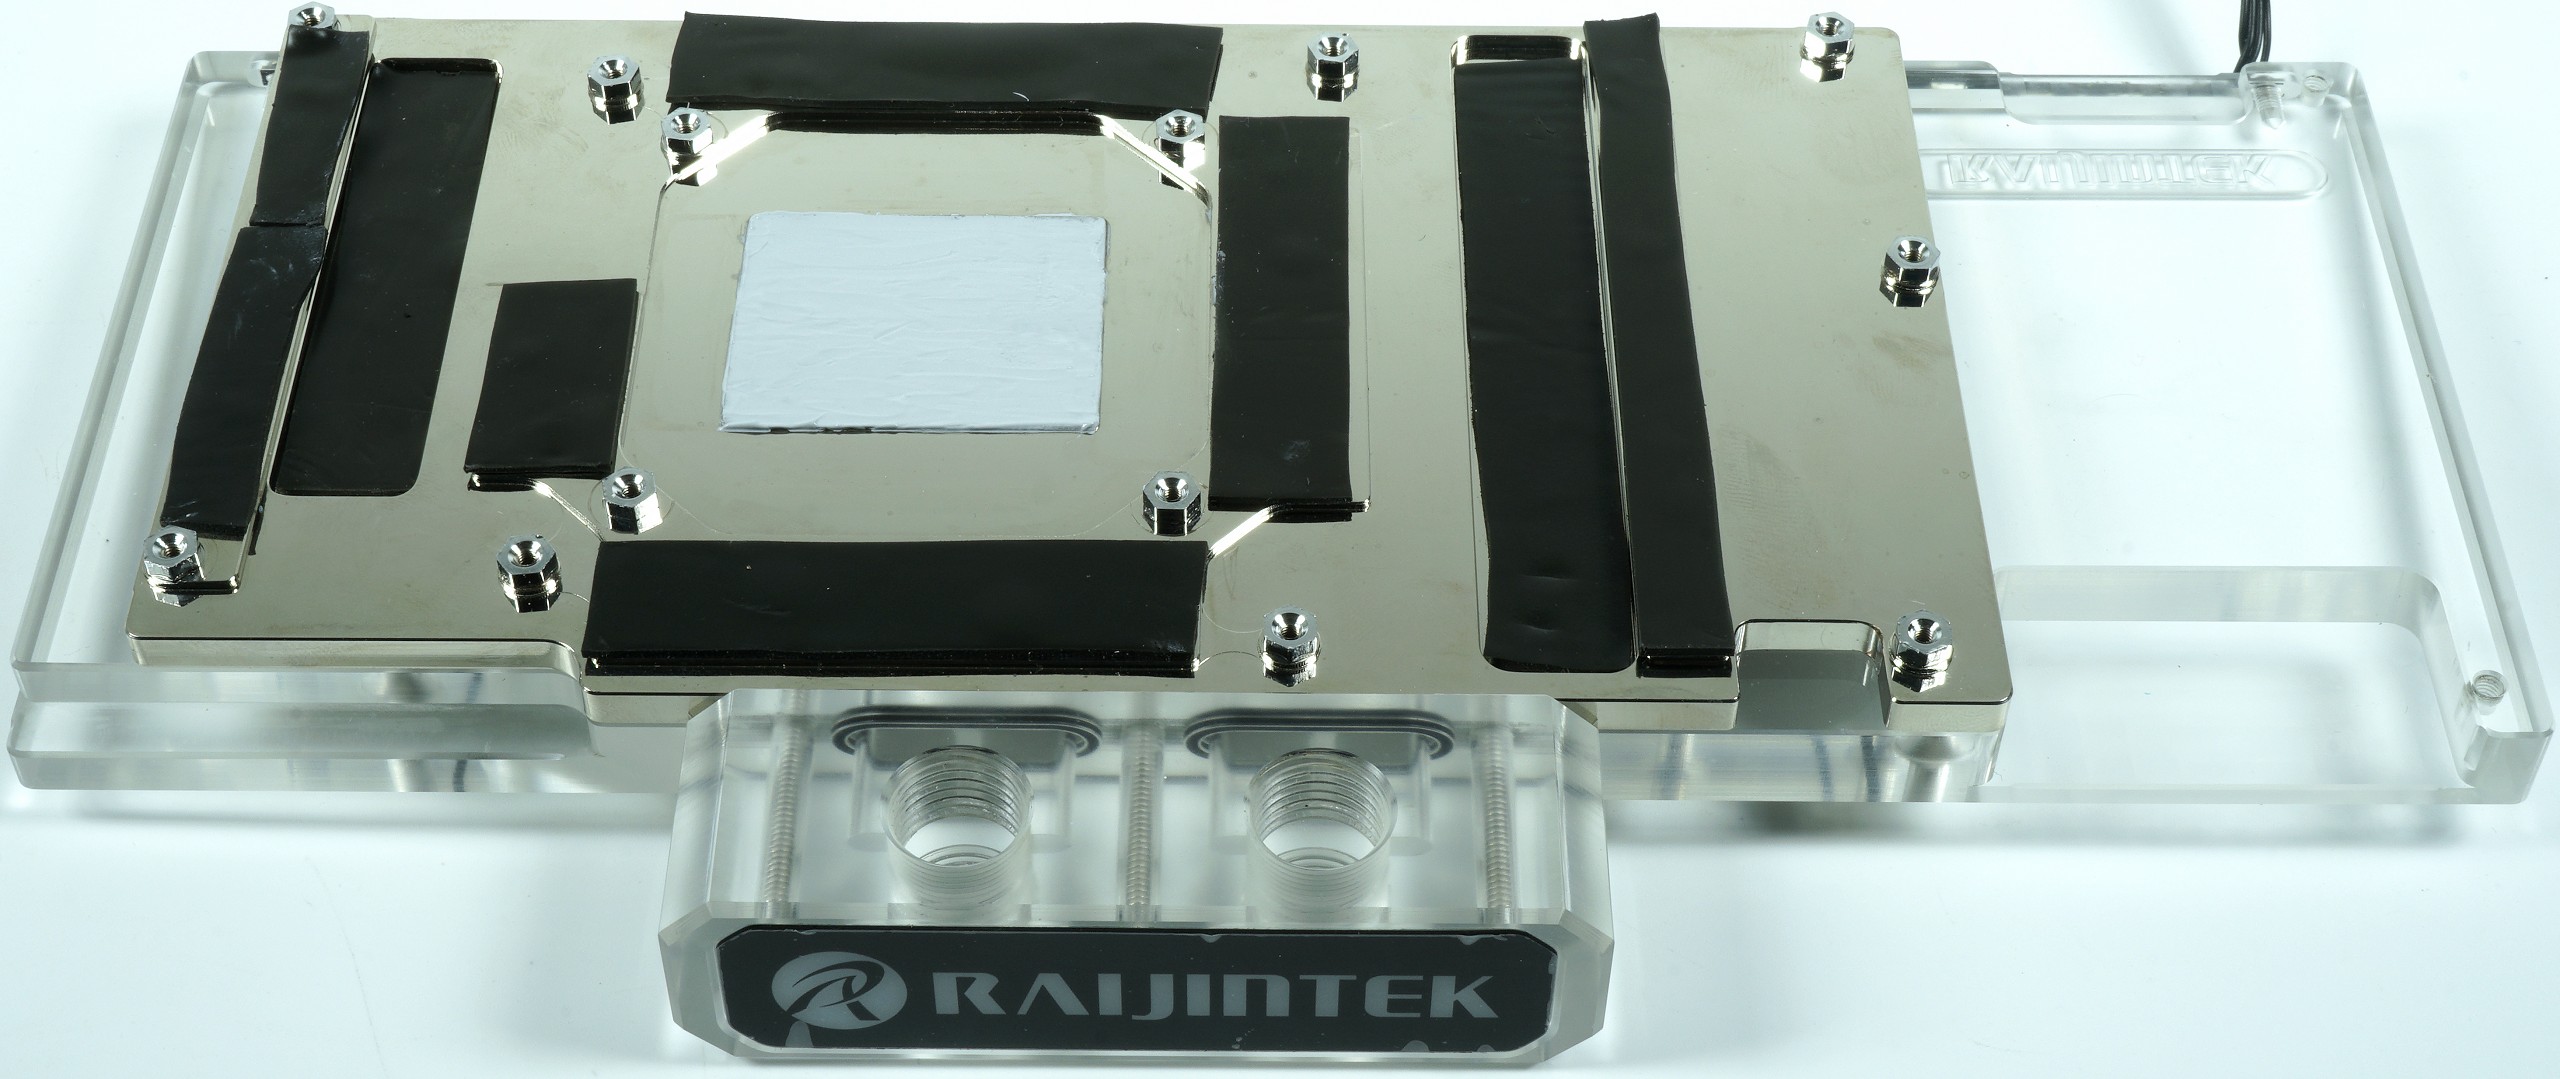
The 1 mm thermal pads logically have a higher thermal resistance than the 0.5 mm pads used by some competitors. However, these require a very tailor-made production and any tolerance overshoot would be punished immediately during assembly. It is a pity that the manufacturer no longer trusts himself here, because the block I measured manually was produced exactly enough to represent even smaller columns well.
The pad assembly and the thermal paste is done (with me) generally on the cooling block. This is safer and nothing can go wrong when the board is set up later. Of course, I also show the exact sequence and the screwing as part of my further linked video. So just take a look, it's worth it, too.
Unfortunately, you can see the board of more than 15 montages, because I have also tested various other prototypes in between. If a complete basic cleaning for the optical overkill were to be carried out each time, the protective varnish on the board would already be off. However, if you don't want to be a smudge in private, you can glue the whole edges with the paste with insulating tape or Tesa film or apply the paste to the heat sink straight away.
With reasonably good skills, you've done everything in less than 30 minutes. Also the connection to the terminal and the RGB output of the motherboard are not a witch's work, but with the latter you would have to resort to an Asus model, which my test system unfortunately does not give. That's why the cooler stays dark for the night. But it also has its charm.
Unfortunately, the backplate does not have a cooling function, but you could insert some 3 mm pads on the areas of the voltage converters (and even only there!) to use this additional cooling surface.

And here is the promised video, which is worth it alone:
Technical data (pre-)
Before I put this conversion into operation on the next page and measure it, quickly see everything tabularly for all readers at a glance:
Technical data:
Base body: copper, nickel-plated
Lid: acrylic glass
Frame: None
Connection terminal: acrylic
Delivery:
Cooler without connections (thread G1/4)
Two locking screws G1-4 ("plug")
OEM thermal paste
Thermal pads
Fixing material (screws, washers)
RGBpx connection cable (fixed with stripe)
Test system and measurement methods
I have already described the test system and the methodology in the basic article "How we test graphics cards, as of February 2017" (English: "How We Test Graphics Cards") in detail and therefore, for the sake of simplicity, now only refers to these detailed Description. So if you want to read everything again, you are welcome to do so.
If you are interested, the summary in table form quickly provides a brief overview:
| Test systems and measuring rooms | |
|---|---|
| Hardware: |
Intel Core i7-8700K @5GHz MSI Z370 Gaming Pro Carbon OC G.Skill TridentZ DDR4 3600 1x 1 TByte Toshiba OCZ RD400 (M.2, System SSD) 2x 960 GByte Toshiba OCZ TR150 (Storage, Images) Be Quiet Dark Power Pro 11, 850-watt power supply |
| Cooling: |
Alphacool Ice Block XPX 5x Be Quiet! Silent Wings 3 PWM (Closed Case Simulation) Thermal Grizzly Kryonaut (for cooler change) |
| Housing: |
Lian Li PC-T70 with expansion kit and modifications |
| Monitor: | Eizo EV3237-BK |
| Power consumption: |
non-contact DC measurement on the PCIe slot (Riser-Card) non-contact DC measurement on the external PCIe power supply Direct voltage measurement on the respective feeders and on the power supply 2x Rohde & Schwarz HMO 3054, 500 MHz multi-channel oscillograph with memory function 4x Rohde & Schwarz HZO50, current togor adapter (1 mA to 30 A, 100 KHz, DC) 4x Rohde & Schwarz HZ355, touch divider (10:1, 500 MHz) 1x Rohde & Schwarz HMC 8012, digital multimeter with storage function |
| Thermography: |
Optris PI640, infrared camera PI Connect evaluation software with profiles |
| Acoustics: |
NTI Audio M2211 (with calibration file) Steinberg UR12 (with phantom power for the microphones) Creative X7, Smaart v.7 own low-reflection measuring room, 3.5 x 1.8 x 2.2 m (LxTxH) Axial measurements, perpendicular to the center of the sound source(s), measuring distance 50 cm Noise in dBA (Slow) as RTA measurement Frequency spectrum as a graph |
| Operating system | Windows 10 Pro (1809, all updates) |


Kommentieren