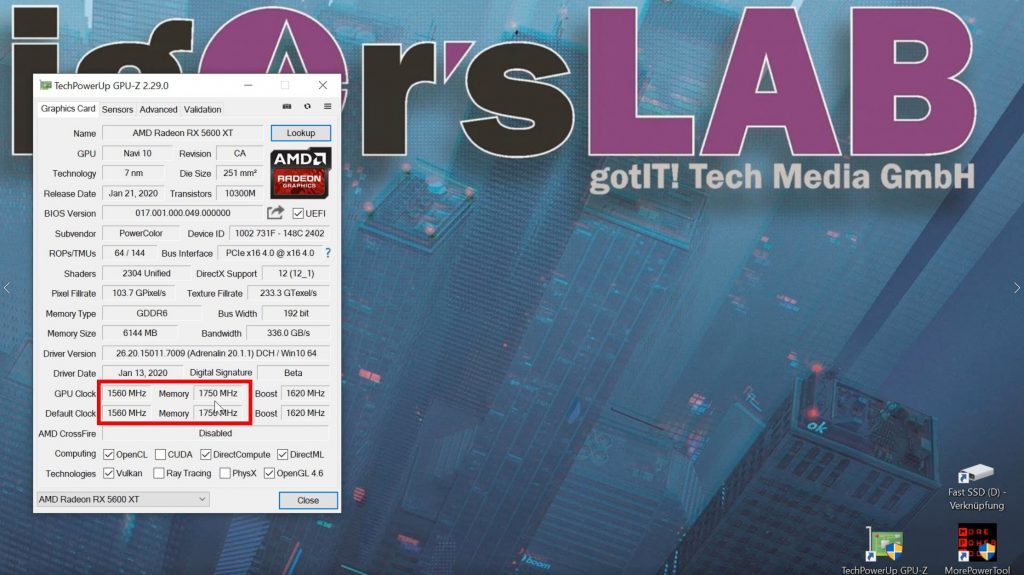
After rebooting the PC, we start GPU-Z and check the data. If we did everything right, the new data is now in the GPU-Z screen, so it’s just as if we really flashed the BIOS!
The advantage of our variant: if we maybe don’t want to use this upgrade later on, we can simply start the MorePowerTool, select the device and with “Delete SPPT” we can undo everything again without risky flash! In this case, too, the PC must be restarted before these changes can take effect.
- 1 - All new limits and the old BIOS
- 2 - FPS with old BIOS
- 3 - MorePowerTool: Select the Graphics Device
- 4 - MorePowerTool: Load Data (BIOS)
- 5 - MorePowerTool: File Selection
- 6 - MorePowerTool: Maximum GPU Clock Rate
- 7 - MorePowerTool: Maximum TGB and TDC
- 8 - MorePowerTool: New GPU Clock Rate
- 9 - MorePowerTool: Write the SoftPowerPlayTable (SPPT)
- 10 - MorePowerTool: Confirm and Exit
- 11 - Check all Changes width GPU-Z
- 12 - FPS with New BIOS
- 13 - MorePowerTool: Decrease the Memory Clock Rate for more Stability
- 14 - MorePowerTool: Write SPPT and Confirm
- 15 - FPS with stable Memory Clocks
- 16 - A little bit more OC with the Afterburner
- 17 - FPS with all Tweaks and Conclusion


Kommentieren