


Yes, so exactly THIS conversion I couldn't miss. After I had already converted some cards in the past, this time the current GeForce GTX 1650 has to believe in it. And if you would like to read my reviews again, please be invited to do so. In the article "Do-It-Yourself: We build a passively cooled GeForce GTX 750 Ti" I made an AMD cooler from Sapphire suitable by means of nail scissors and in the practical article "Pascal becomes passive: We build a fanless GeForce GTX 1050 Ti" also had to direct predecessor.
So now it hits the current model and I even forgo any fans. Is that going well? But fear doesn't apply, and the difficulties lie more in the choice of radiators and mechanical conversion, rather than in the ugly comet tail of potentially glowing cards. Because there is still Nvidia's boost and emergency stop.
One goal – two settings
This time I even take the proof with a total of two different profiles, relying on a 47-watt setting on the one hand and a 60-watt interpretation on the other. Since the original card could allow up to 100 watts, it unfortunately uses an external 12-volt connection. But no matter, the cooler I chose did not collide with this socket and after a long search it fit something out of my fundus. But everyone will now rightly ask themselves why 47 and 60 watts are now.
The answer is quick. The original is approved in gaming up to 76 watts and is thus far above what my many years of experience and investigations in the fanless passive conversion of graphics cards have filtered out as a limit. Of course, with Nvidias Boost there is now a nice tool where voltage curves can also be corrected manually. But at 60 watts I can see the limit with such a small chip, so that such a construction can still be used in the summer without loss over a longer period of time.
With the GeForce GTX 1050 Ti and its 68 watts, I still needed a thermal switch, which became active in an emergency. This time, however, I deliberately refrained from doing so, because thanks to Boost 4.0, there was still something going on in terms of tensions. From my point of view and the many measuring ranges, the variant with 60 watts represents the thermally sensible limit range.
The 47 watts, on the other hand, result from the minimally adjustable power target of this card, the then manually changeable voltages and the resulting game performance in Full HD, which should necessarily still be in playable regions. And yes, without spoiler can already confirm that the GeForce GTX 1050 Ti is still properly furnished. And absolutely silent!
The passive cooler as the heaviest hurdle
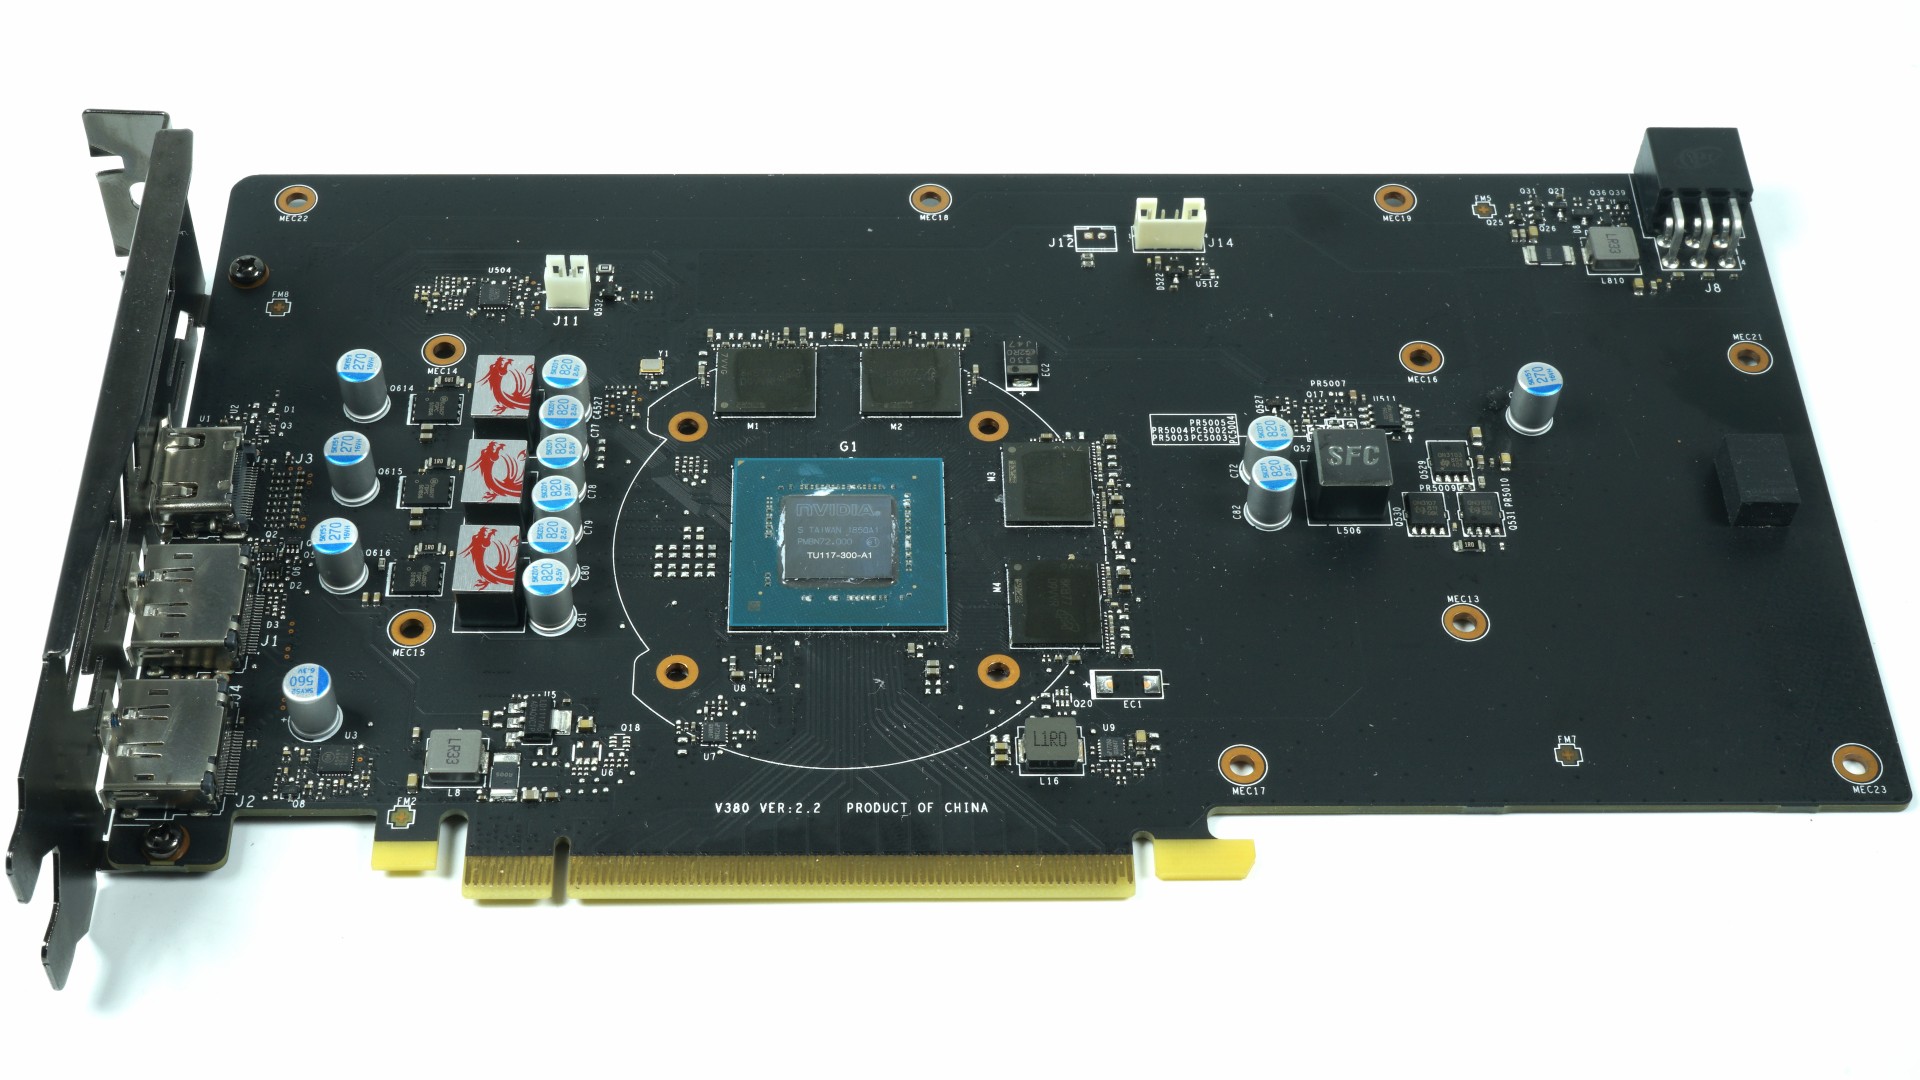
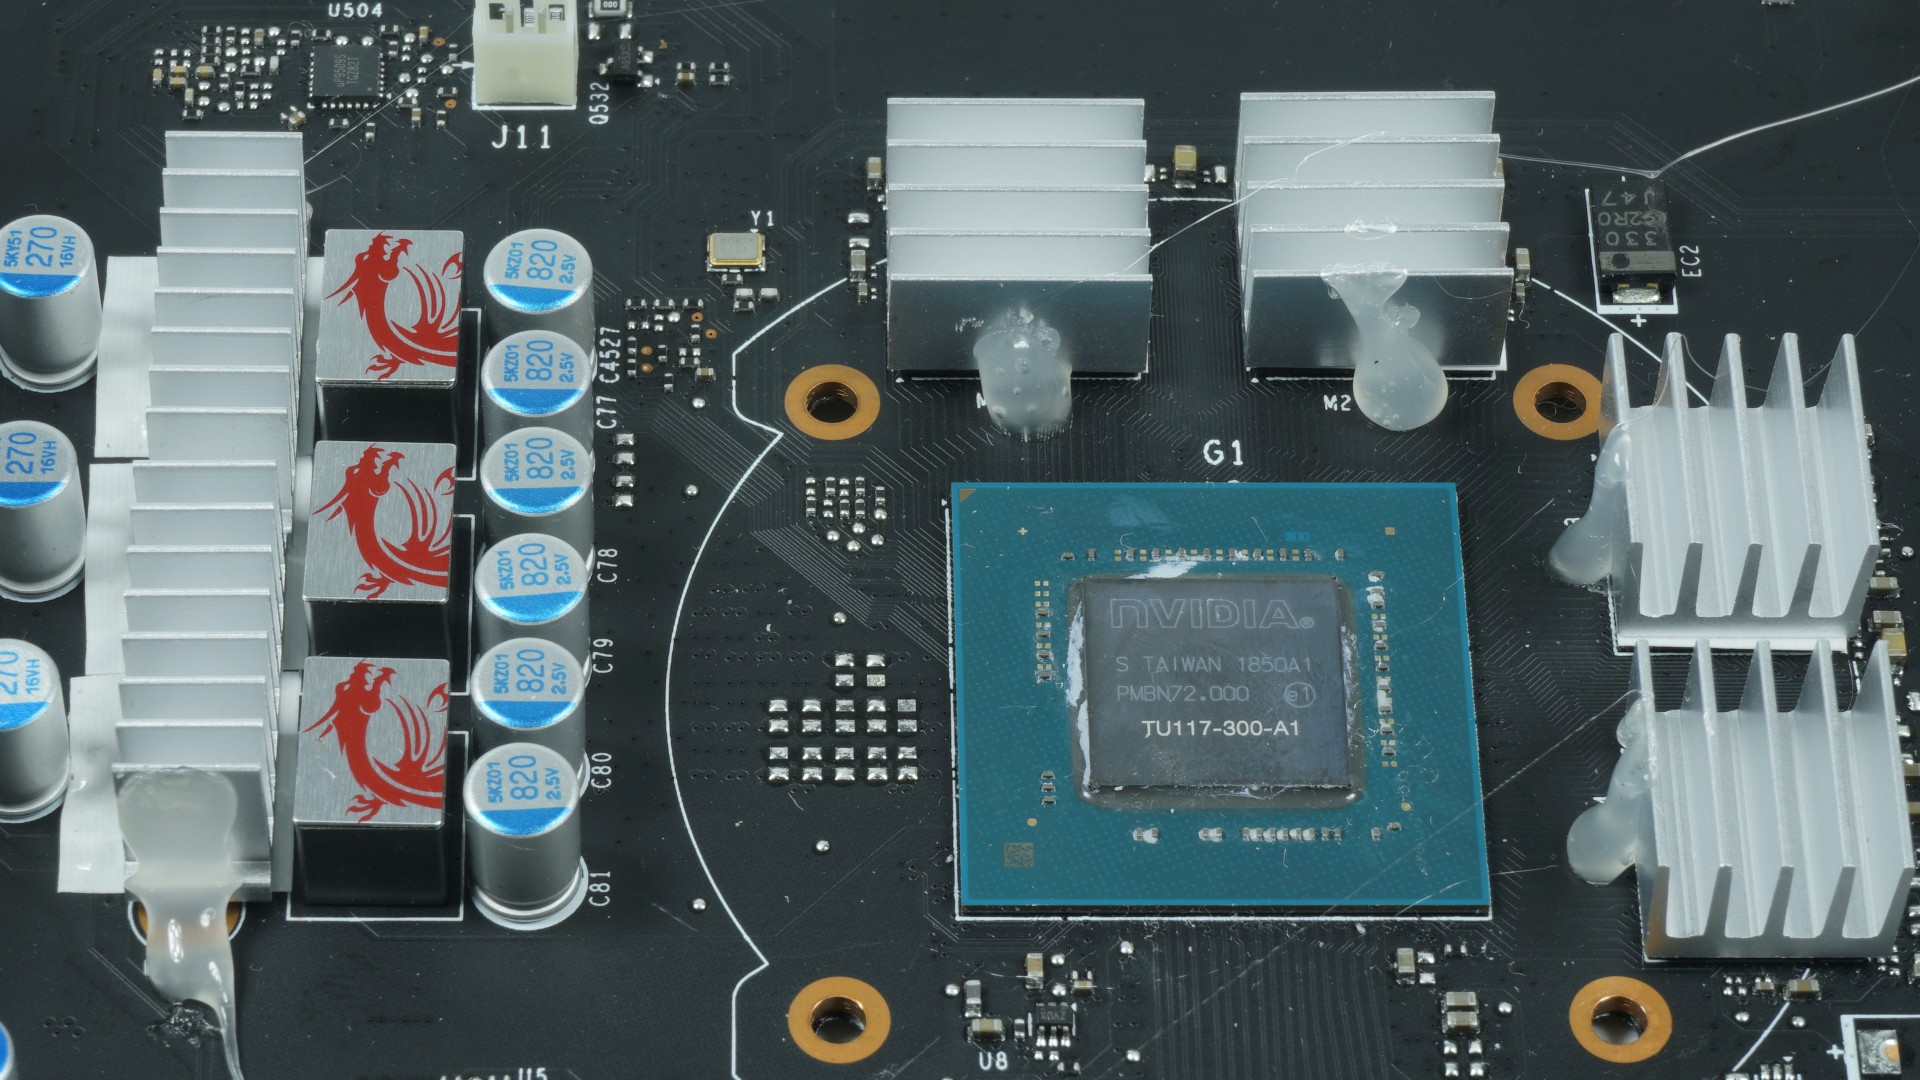
The main problem is the slightly built-in board of the MSI card, whose vacancies are already in the wrong places. With the GPU's voltage converters and their coils placed close to the GPU, there are quick problems when the heatpipes of the coolers with the coils or the glued-on aluminium coolers of the RAM modules or of the VRM collide. In general, however, it is possible to operate the GDDR6 of the GTX 1650 without a cooler, if it is clocked down by at least 200 MHz. The loss of performance is hardly measurable even with the 60-watt setting.
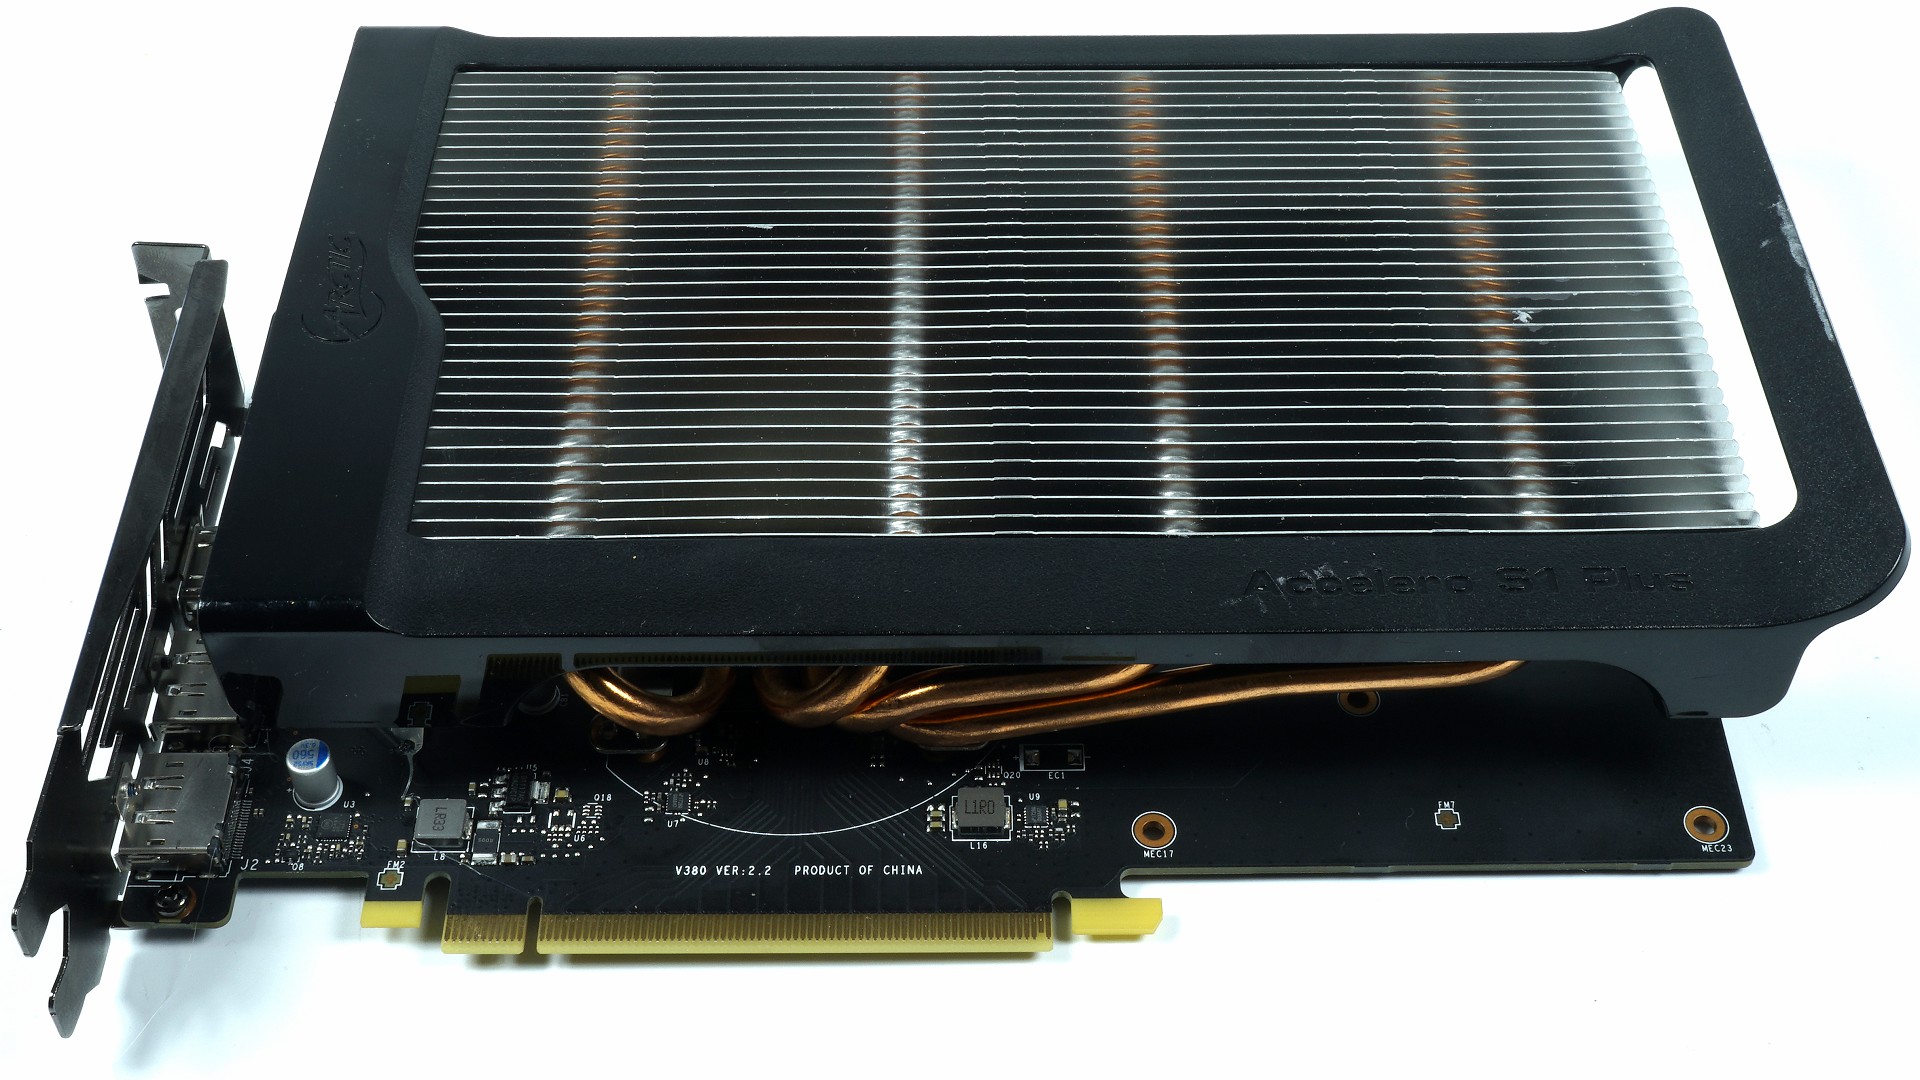
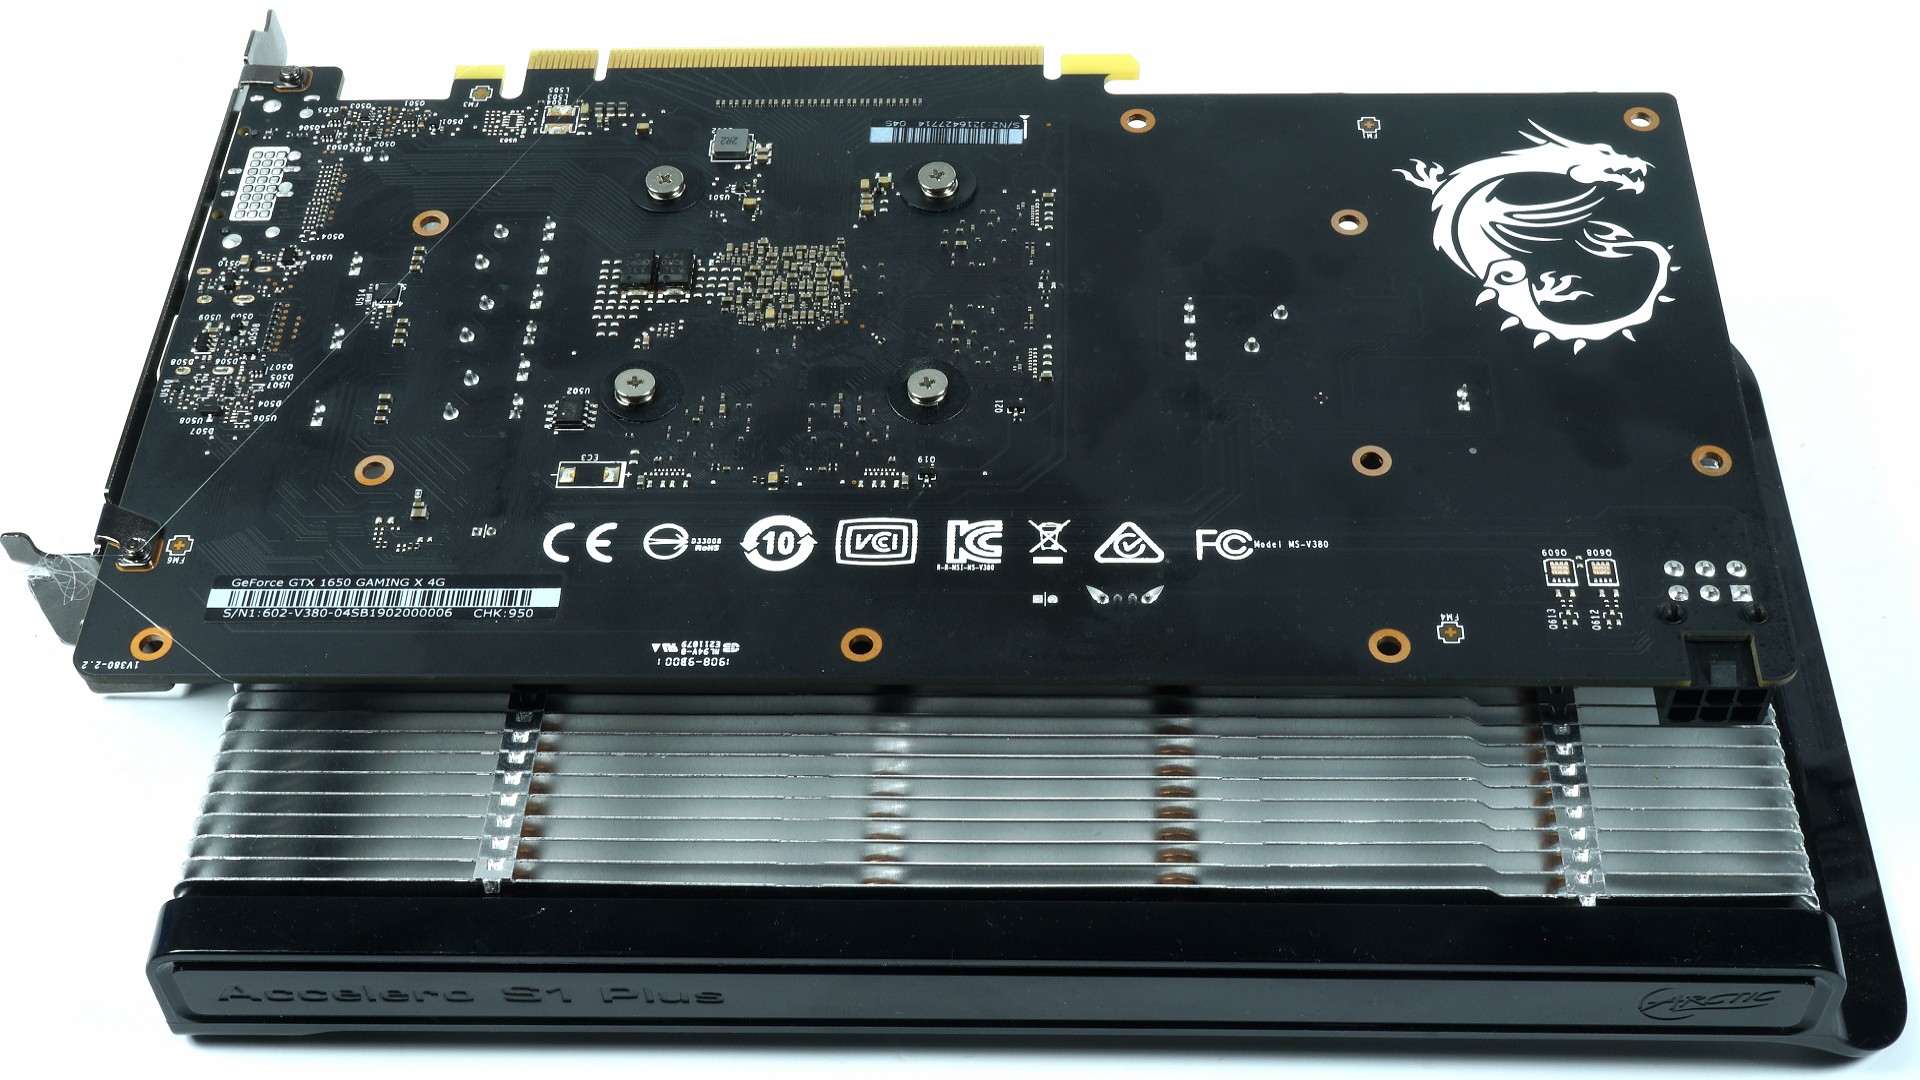
Nevertheless, there is still a problem with the general attachment of the cooler, as the hole distances on the board of the GTX 1650 are again narrower than with larger cards. In general, however, all coolers fit with a hole spacing of 42 or 43 mm, as we used to on AMD graphics cards such as Radeon HD 7750. There is, for example, a the Arctic Accelero S1 Plus. Since I was experimenting with a passive Radeon HD 7790 together with HIS, the parts and documents were still archived. The limit of the sensible coolable was also less than 65 watts, so I could use something here.
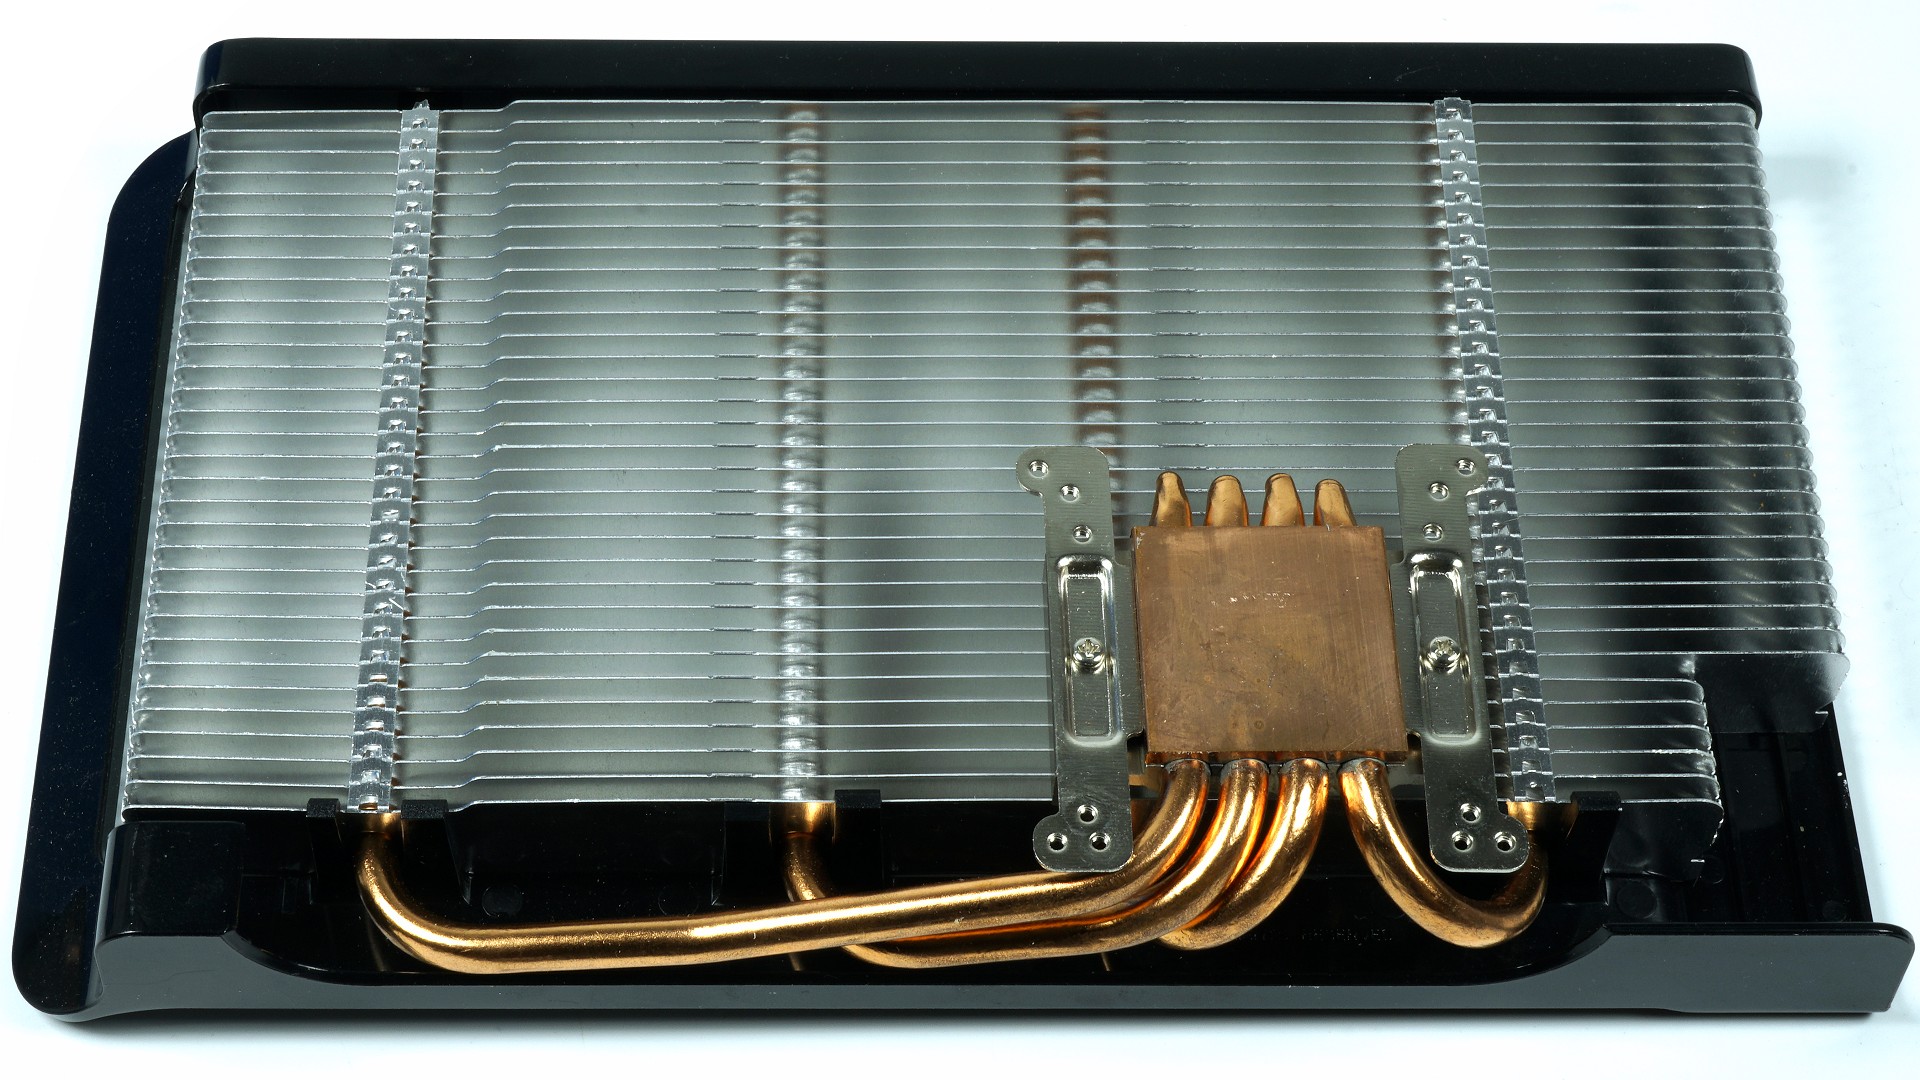
The advantage of the Accelero S1 over the MSI cooler lies in the neat full copper heatsink and the four 4 mm heatpipes, which are led out at the bottom and which distribute the waste heat much better and larger to the cooling fins. The initially tested MSI cooler without fan fails on the one hand due to the individual, but somewhat slow heatpipe, the pressed Ali heatsink and the somewhat too tight cooling fins, which have not been optimized for passive operation.
I cool the three VRM of the GPU by means of two small aluminium heat sinks, which I rely on special adhesive pads that various companies supply for such coolers. I deliberately dispensed with the original thermal adhesive, because it quickly causes total damage to the glued components during dismantling, because it bakes with them so tightly that it can only be done by force. Mostly crooked.
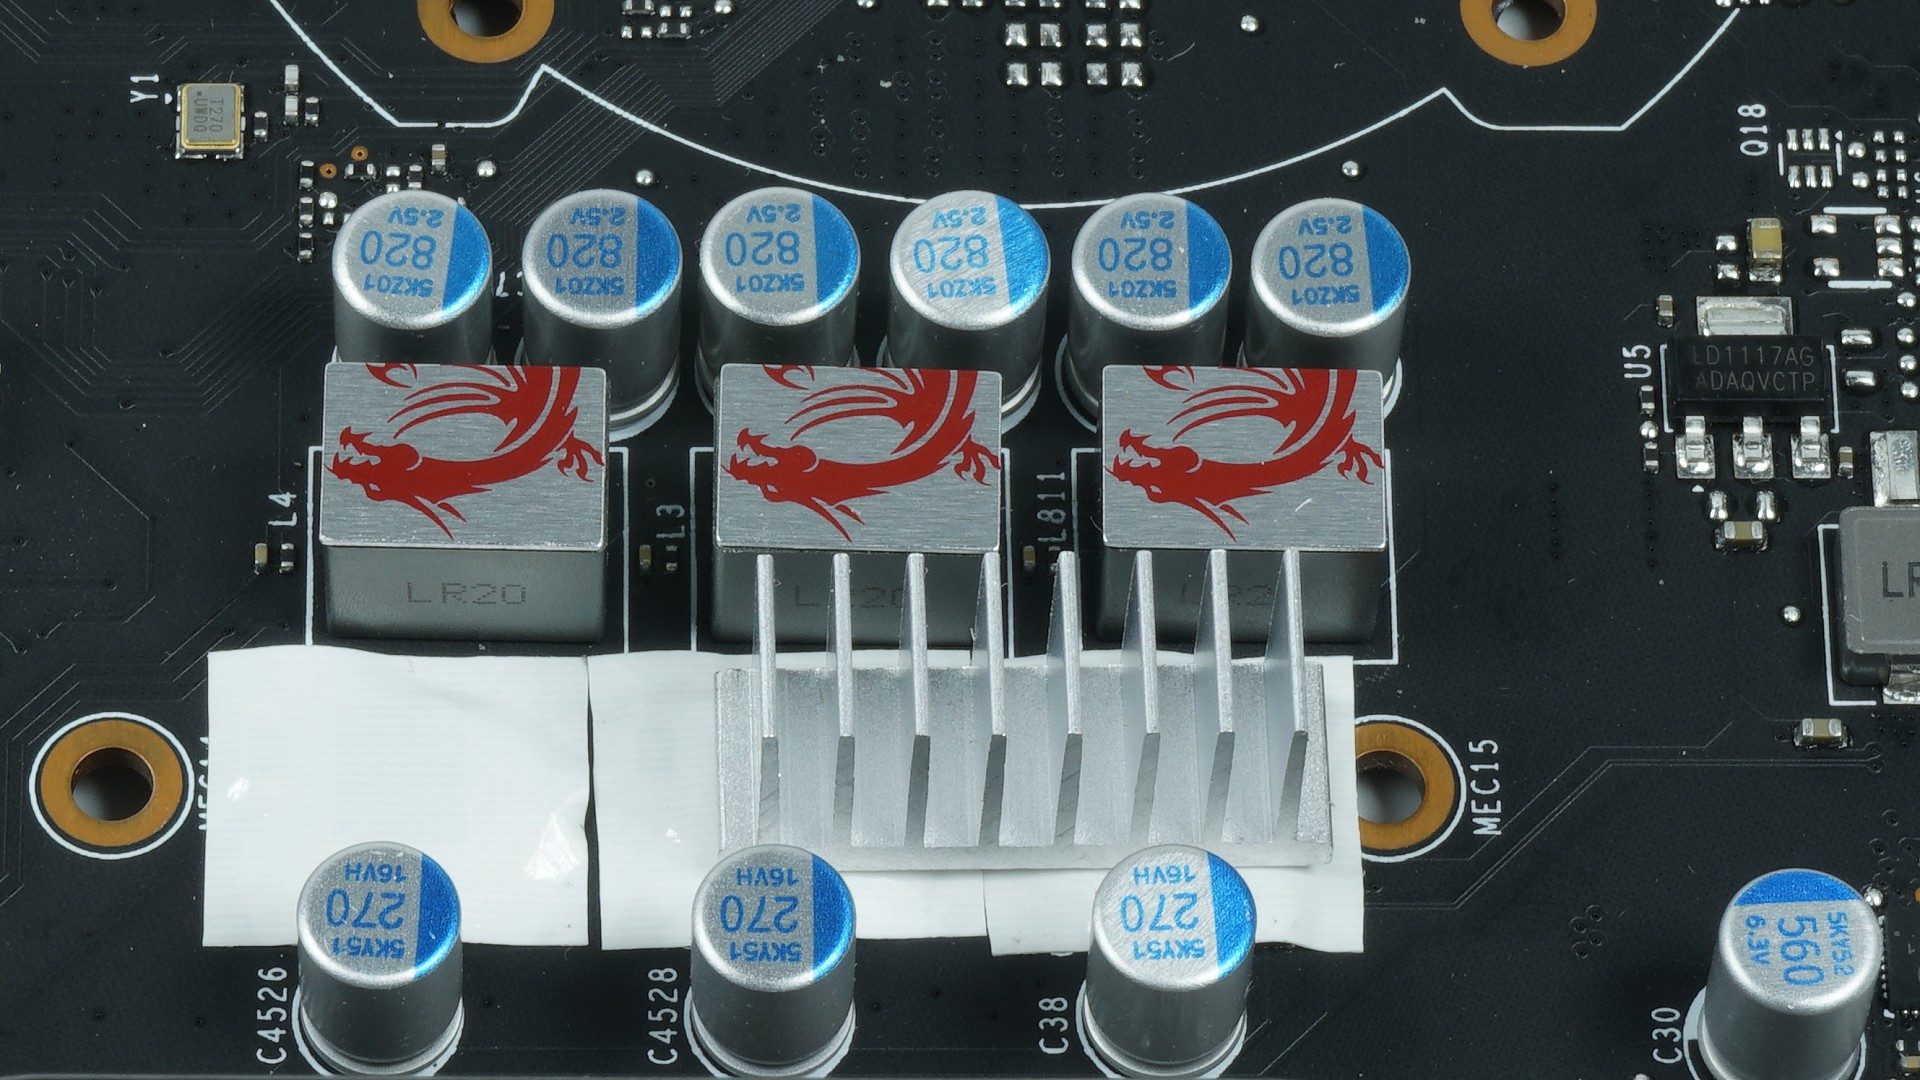
I also give the store another cooling surface, but it would be possible with a little less beat without it. However, the accelero S1 Plus's original memory heat sinks are a little too high because the RAM is positioned very close to the GPU. There are also flatter parts of e.g. Gelid. But now I do not trust the adhesive pads, as they now use Arctic, Gelid and raijintek, a metre across the way, because fallen coolers often leave deadly traces on the motherboard.
That is why I fixed the already glued coolers in the places with good hot glue, where this then does not touch or cover any components – i.e. on the free, unused surfaces of the boards such as the RAM side to the GPU and at the VRM at the two nearby holes. This is much easier to remove during dismantling, but it is sufficient and represents my motherboard insurance. You never know…
The conversion is done quite quickly, even if the stoppers in the form of small washers for the GeForce GTX 1650 are a little too short. So you really shouldn't screw to the bitter, but crisp end, but only to the point where the cooler is sufficiently firm. And please alternate so as not to bend corners or edges, but always make sure that the GPU plan is on the heatsink and that the contact pressure is the same everywhere.
The overhang is very practical in the housing installation with horizontally lying card, whereby I have made my measurements and the 24-hour continuous load operation standing, i.e. vertically. In addition, all this can only be achieved if the housing is large enough and the air can circulate sufficiently well. The 47-watt variant is also the safer option for such cases, especially in the announced Sahara summer. That's really risk-minimized high three.
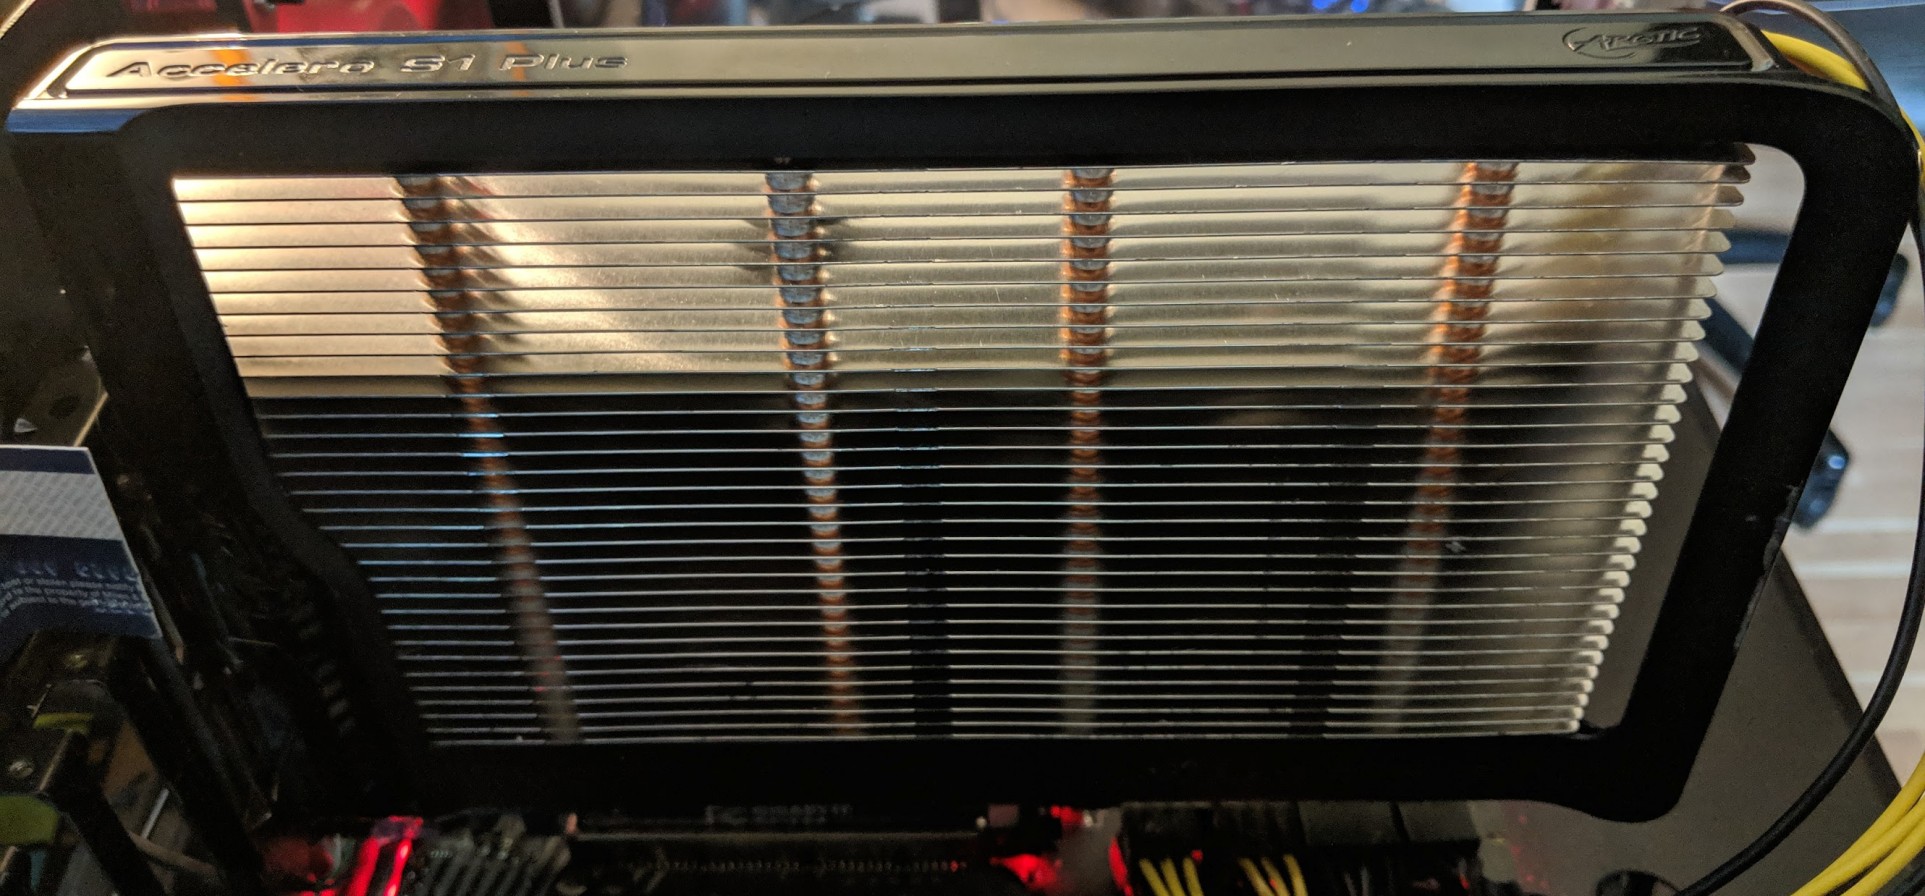
How well all this goes then, we will see on the next page, everything has been screwed together. And yes, it really works!
Test system and measurement methods
I have already described the new test system and the methodology in the basic article "How we test graphics cards, as of February 2017" (English: "How We Test Graphics Cards") in great detail and therefore, for the sake of simplicity, now only refers to this detailed Description. So if you want to read everything again, you are welcome to do so.
If you are interested, the summary in table form quickly provides a brief overview:
| Test systems and measuring rooms | |
|---|---|
| Hardware: |
Intel Core i7-7700K (analogous to TH US) MSI Z270 Gaming Pro Carbon AC 16GB KFA2 DDR4 4000 Hall Of Fame @DDR4 3200 1x 1 TByte Toshiba OCZ RD400 (M.2, System SSD) 2x 960 GByte Toshiba OCZ TR150 (Storage, Images) Be Quiet Dark Power Pro 11, 850-watt power supply |
| Cooling: |
Alphacool Ice Block XPX 5x Be Quiet! Silent Wings 3 PWM (Closed Case Simulation) Thermal Grizzly Kryonaut (for cooler change) |
| Housing: |
Lian Li PC-T70 with expansion kit and modifications Modes: Open Benchtable, Closed Case |
| Monitor: | Eizo EV3237-BK |
| Power consumption: |
non-contact DC measurement on the PCIe slot (Riser-Card) non-contact DC measurement on the external PCIe power supply Direct voltage measurement on the respective feeders and on the power supply 2x Rohde & Schwarz HMO 3054, 500 MHz multi-channel oscillograph with memory function 4x Rohde & Schwarz HZO50, current togor adapter (1 mA to 30 A, 100 KHz, DC) 4x Rohde & Schwarz HZ355, touch divider (10:1, 500 MHz) 1x Rohde & Schwarz HMC 8012, digital multimeter with storage function |
| Thermography: |
Optris PI640, infrared camera PI Connect evaluation software with profiles |
| Acoustics: |
NTI Audio M2211 (with calibration file) Steinberg UR12 (with phantom power for the microphones) Creative X7, Smaart v.7 own low-reflection measuring room, 3.5 x 1.8 x 2.2 m (LxTxH) Axial measurements, perpendicular to the center of the sound source(s), measuring distance 50 cm Noise in dBA (Slow) as RTA measurement Frequency spectrum as a graph |
| Operating system | Windows 10 Pro (1809, all updates) |


Kommentieren