


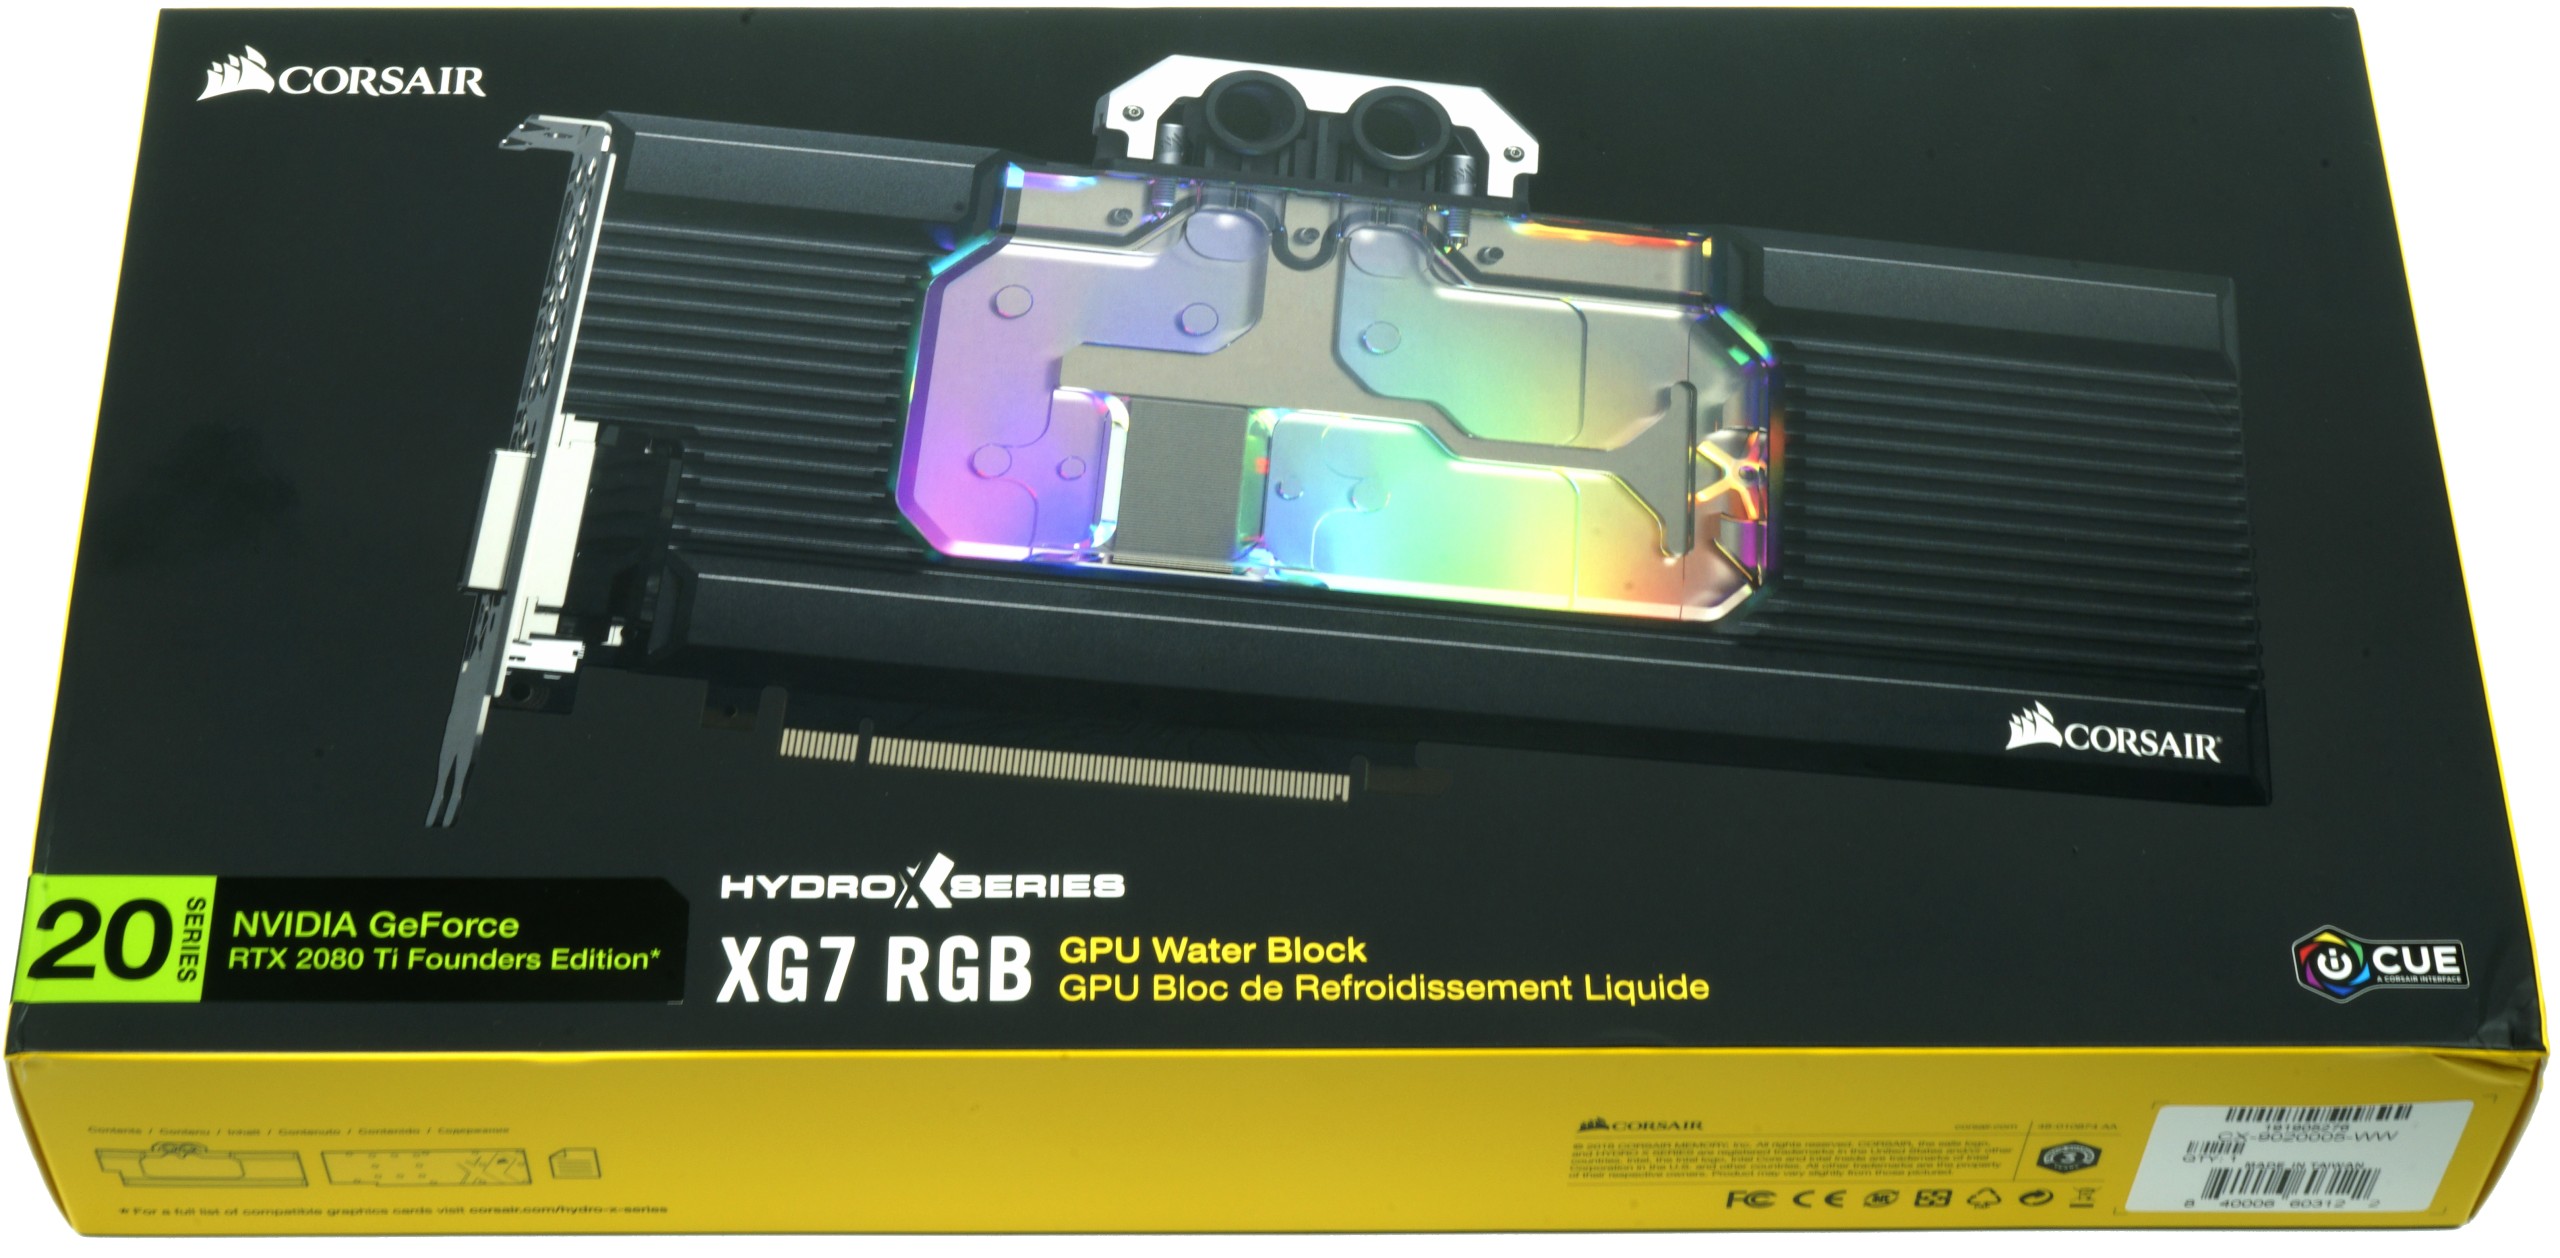
Corsair has also recently entered the water plans sector with the Hydro-X series, offering selected products (all manufactured by experienced finishers). I had already tested a part in a PC project, today the GPU water block has to believe in it. Cold maker or blender? That's what I already know now and you after reading the review. And yes, it can be considered a successful premiere, even if small flaws in the finish can never be completely ruled out. But always beautiful in turn…
In my two articles "GeForce RTX 2080 Ti – Why water cooling is more important than manual overclocking and this does not bring much" and especially "Nvidia GeForce RTX 2080 Ti Founders Edition water-cooled? Forget it, here's the much faster alternative!" I used to go into very detailed detail about the cooling problem and the advantages of a potent water cooling system. This is exactly the idea I always take up with such tests, because better than a good cooling is always an even better cooling. The mouse does not bite off a thread.
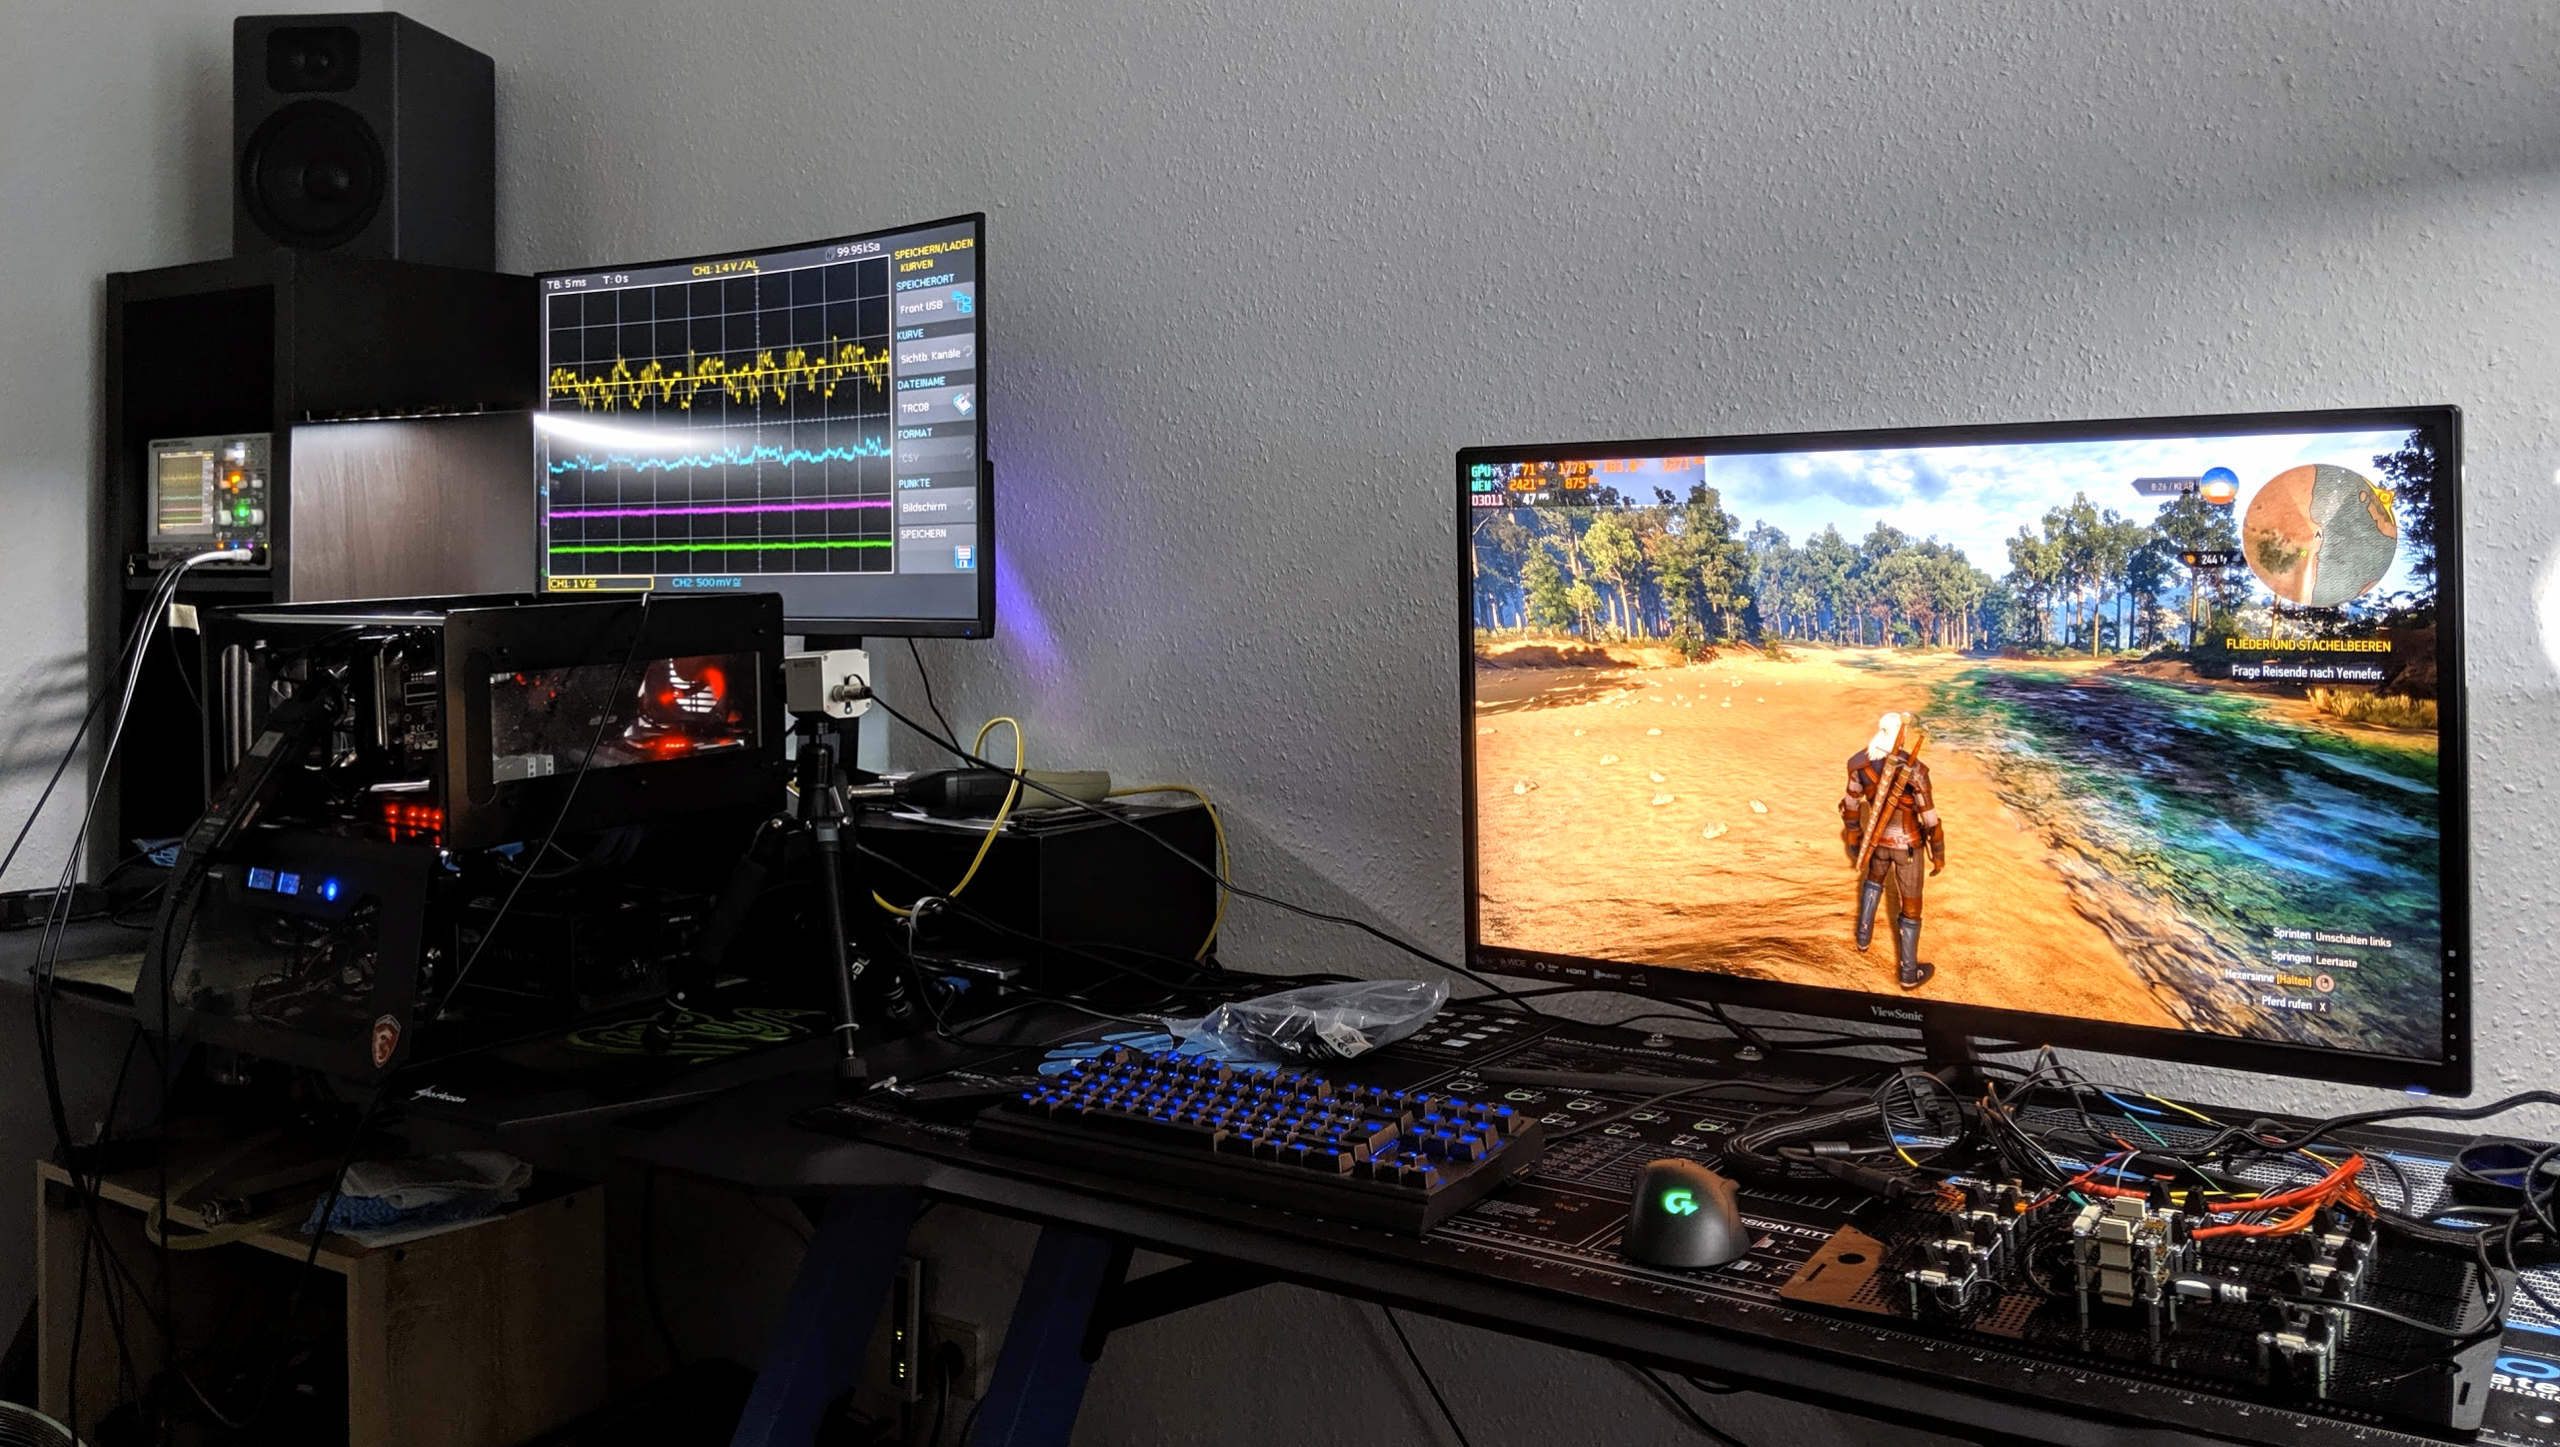
Since the Otto Normal customer can check the GPU temperatures with selection tools at most, I offer in this article a usual elaborate infrared test with the video of the heat flow and the temperature development, because at the latest with the memory and the There are sometimes extreme differences in voltage converters, which are difficult to determine with normal tests. Testing is always carried out with a maximum power consumption of just under 380 watts for the graphics card board and a constant water temperature of 20 °C, as well as a room temperature of 22 °C and the same Witcher 3 gaming loop in Ultra HD.
All the companies requested have also delivered test samples so far, even if it sometimes took a little longer. Unfortunately, Bitspower has so far, in contrast, and despite direct contact to Asia, completely refused to test. The cooler offered should work equally for all RTX models with reference board, which would have been quite interesting. However, it can at least be assumed that due to such a wide range of supported layouts, the performance may have fallen a bit by the wayside. Perhaps this is also the reason why sampling was not carried out in the end.
Unboxing, scope of delivery and assembly
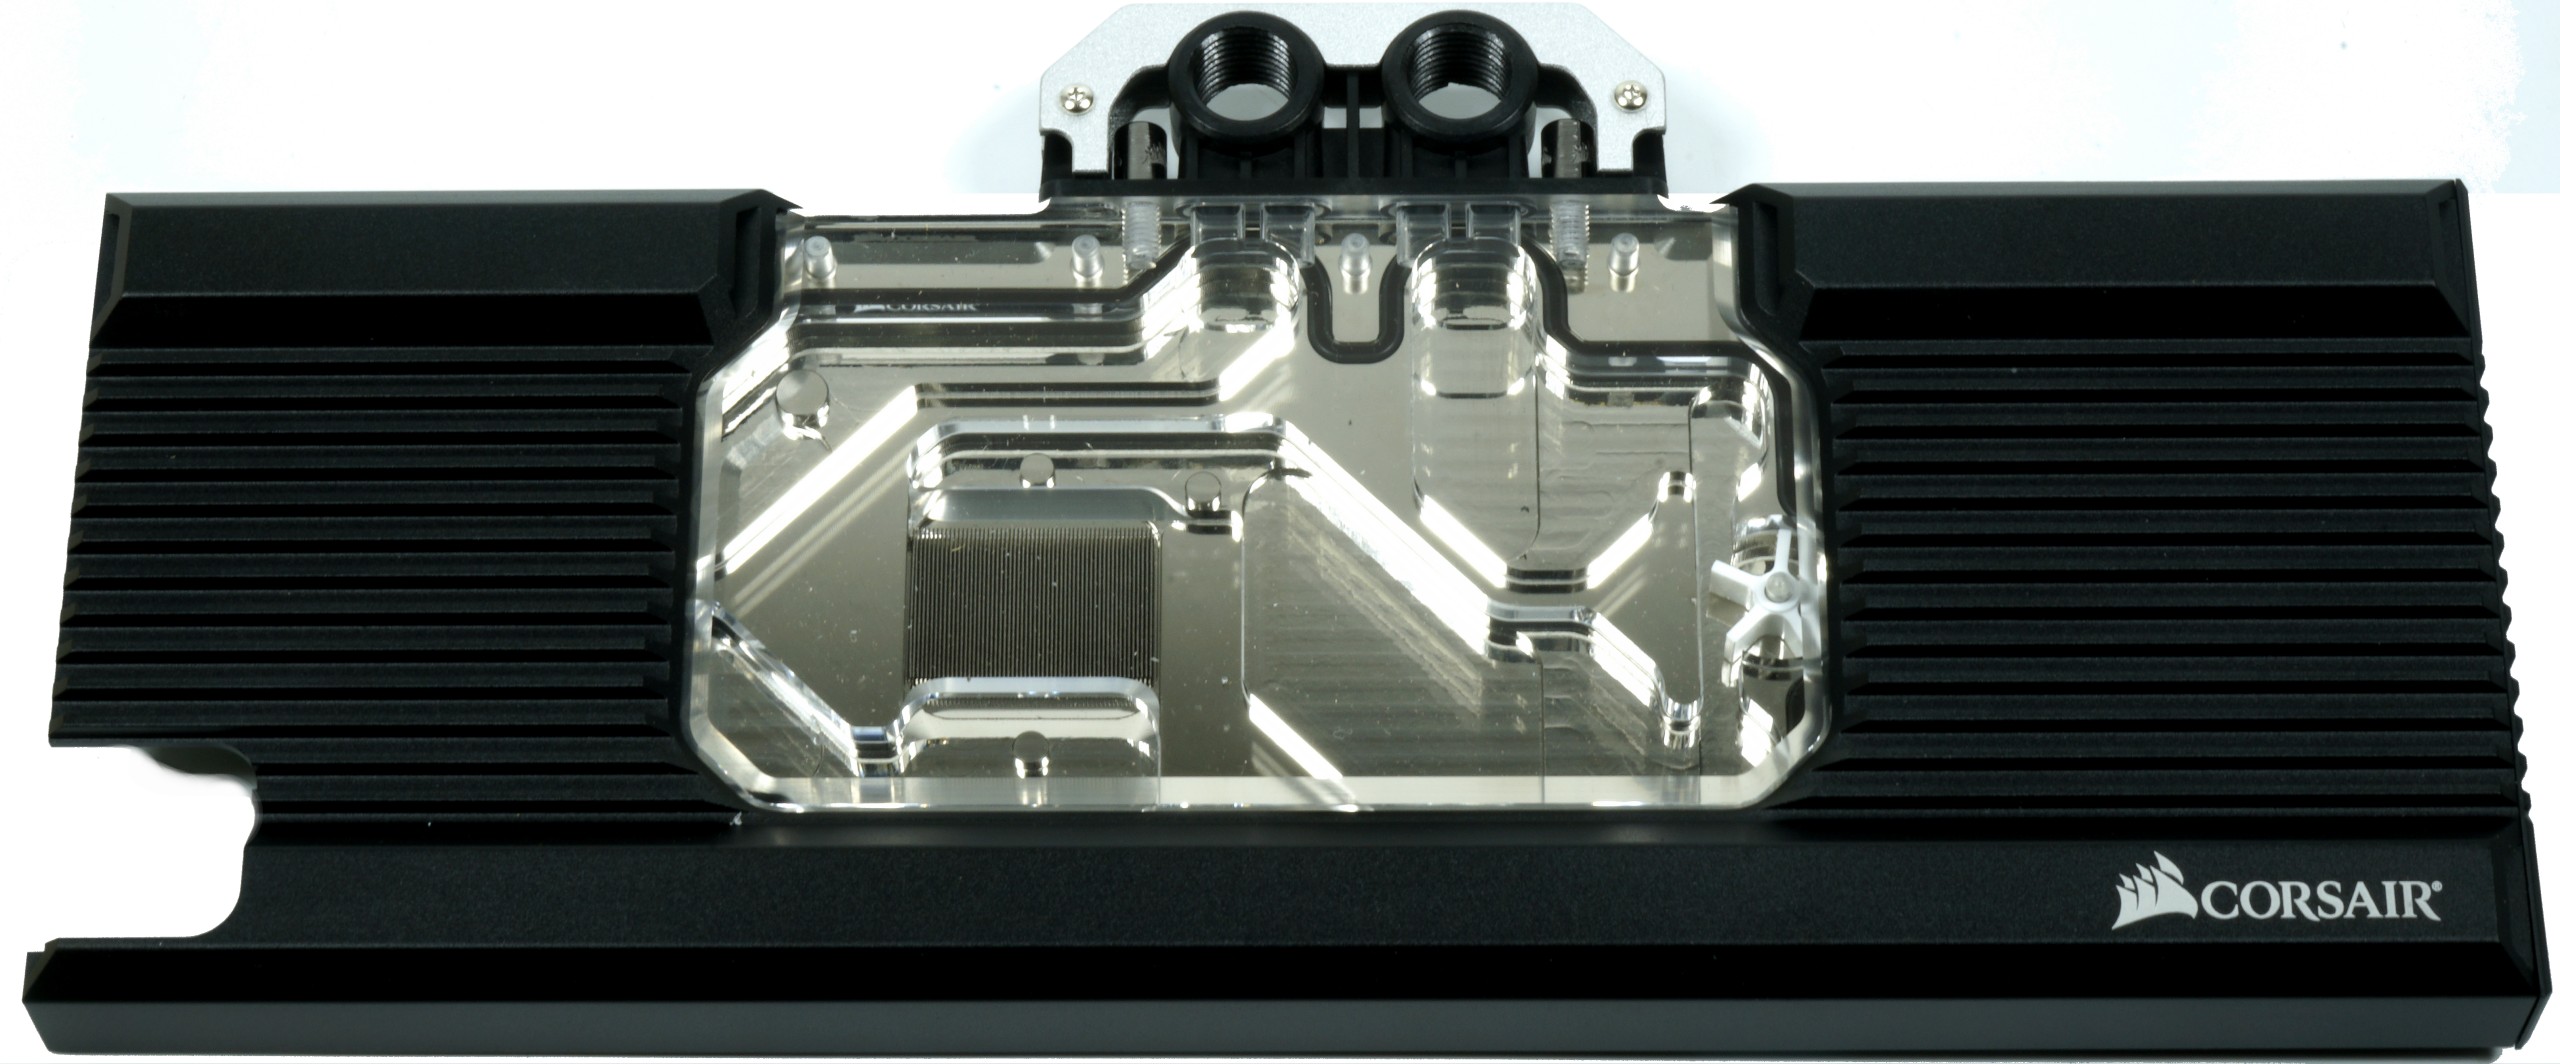
The complete built-in water block, a very neatly designed backplate (but without cooling function), the matching screws and already assembled 0.5 mm thermal guide pads in decent quality and applied thermal conductive paste under a Protective cover. Addressable RGB lighting is already integrated. You rely on your own addressable 5V RGB connector, which is not directly connected to every motherboard, which is really a pity. Here you have to be careful when selecting the motherboard whether the Corsair connection is directly supported.
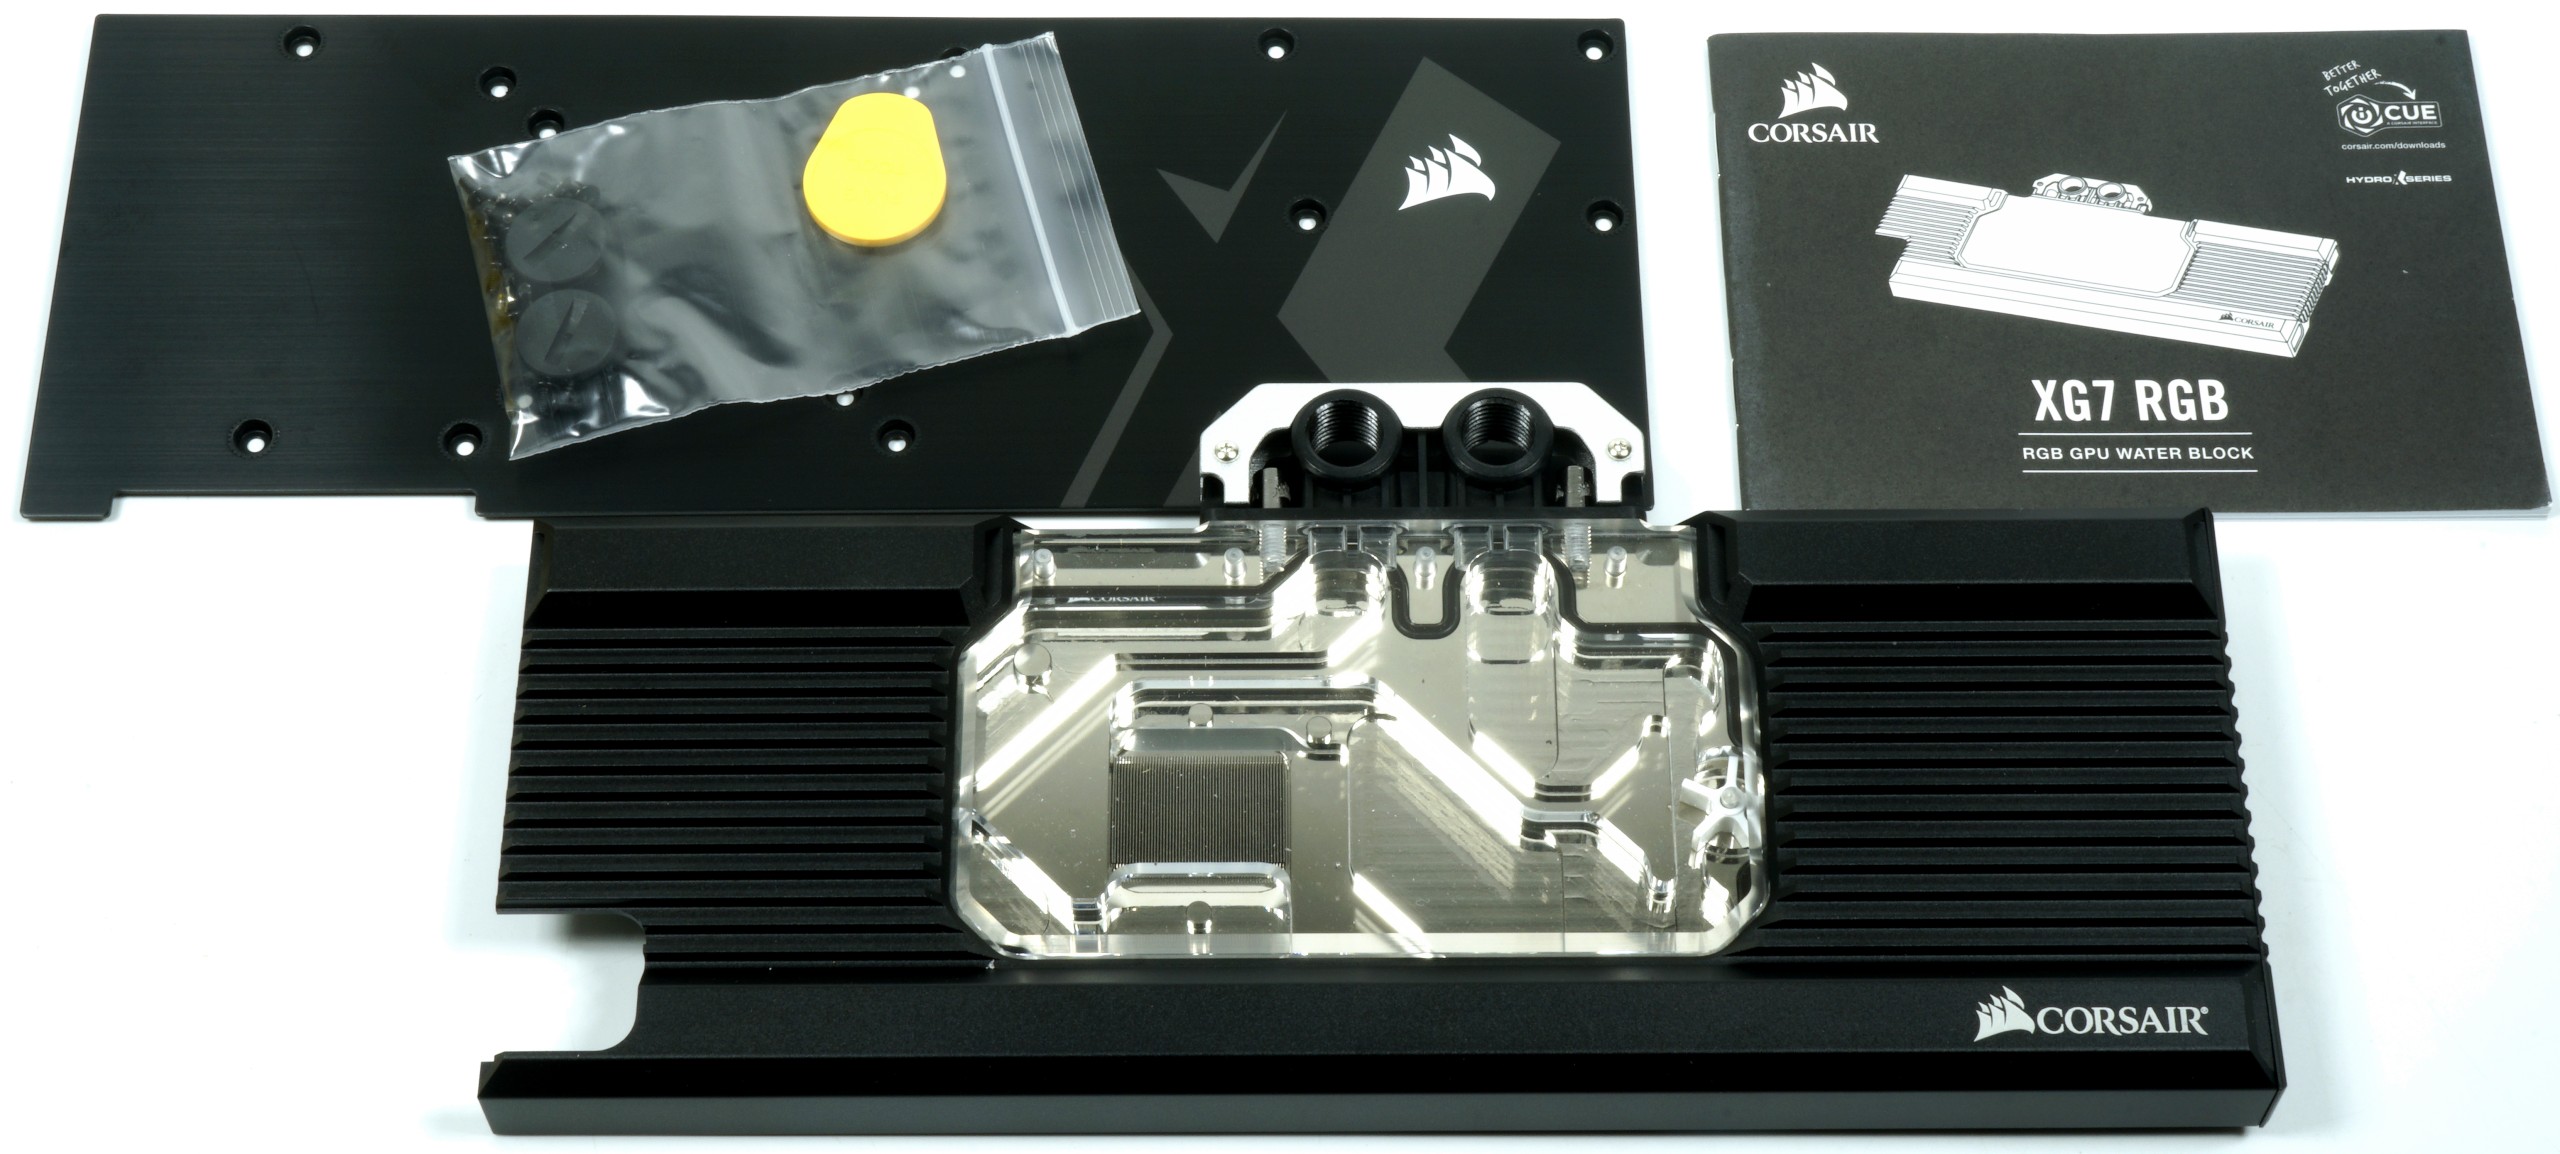
At least an adapter to the most common 5V ports shouldn't fail. Newer asus and MSI motherboards now have such a port, and a backward-compatible option would be really nice. Perhaps the manufacturer still has an insight? Let's see. Otherwise, the packaging still includes plugs and a quick guide. The workmanship quality is absolutely fine visually and haptically and the edges are all very neatly deburred.
Unfortunately, the terminal was a bit weak. If you put it on it, use very rigid hoses and then also slightly edge them (but only then), then there can be a bending of the terminal foot and thus also slight leaks. With angles, normal hose or hard tubes, however, you can give a calm warning. But it is a possible source of error that the manufacturer was able to reproduce according to my indications and wants to replace with a new injection molding terminal.

The 0.5 mm thermal pads are good and require a very tailor-made production. Any tolerance overrun would be punished immediately during assembly, which is quite a sign of self-confidence. The pad assembly and assembly of the thermal conductive paste is already carried out ex works. This is safer and so nothing can go wrong even when the board is set up later. Of course, I also show the exact sequence and the screwing as part of my YouTube video. So just take a look later, it's worth it, too.
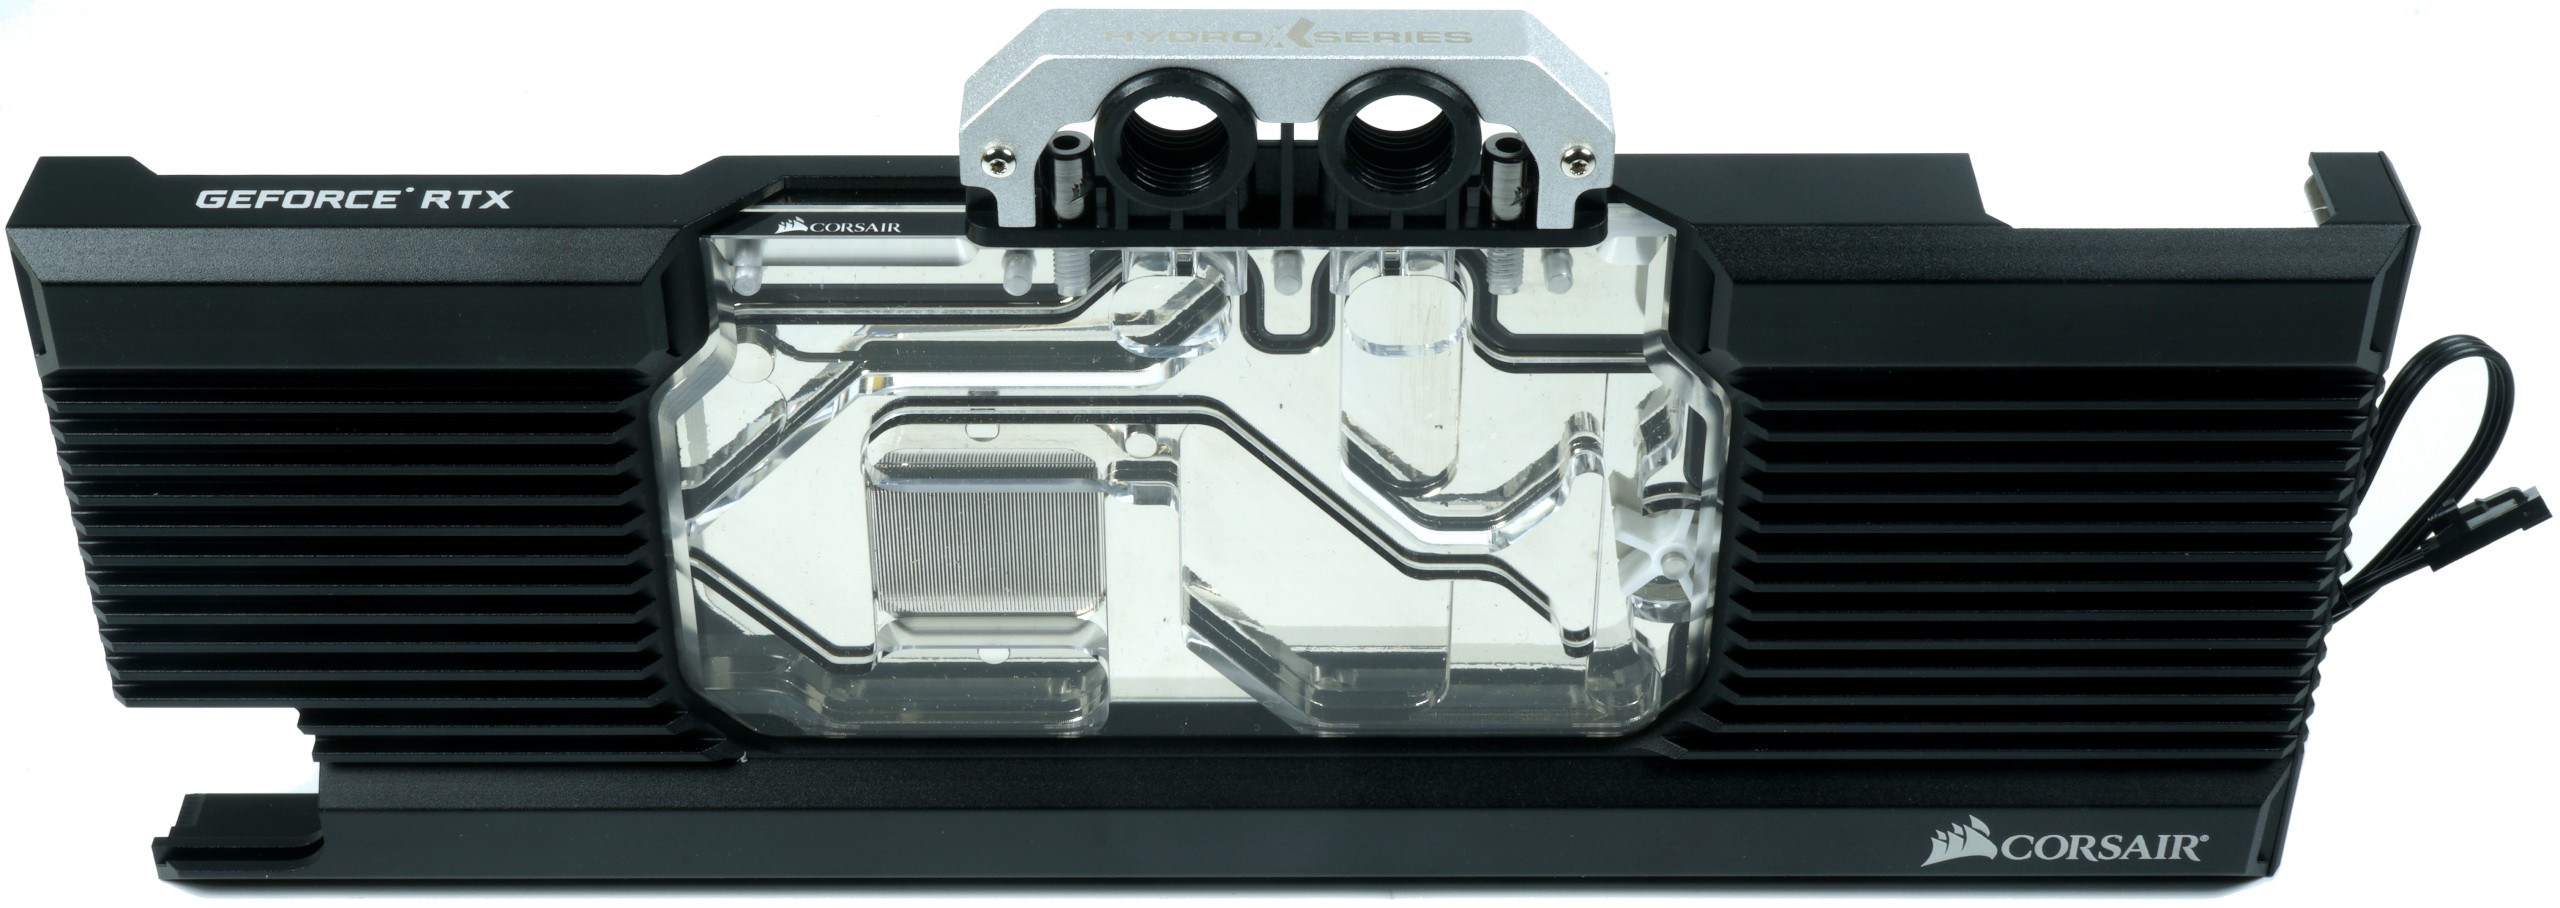
The CNC-milled all-copper cooling block is nickel-plated and has been fitted with a blackened aluminium cover in the front of the Plexi cover. The spacers are fit tight enough and are not as easy to turn out as the EK RTX 2080 Ti from EK Water Blocks. The supplied screws are grippy and relatively hard. With reasonably good skills, you've done everything in less than 20 minutes. The connection to the terminal and the RGB output of the motherboard are not a witch's work either.
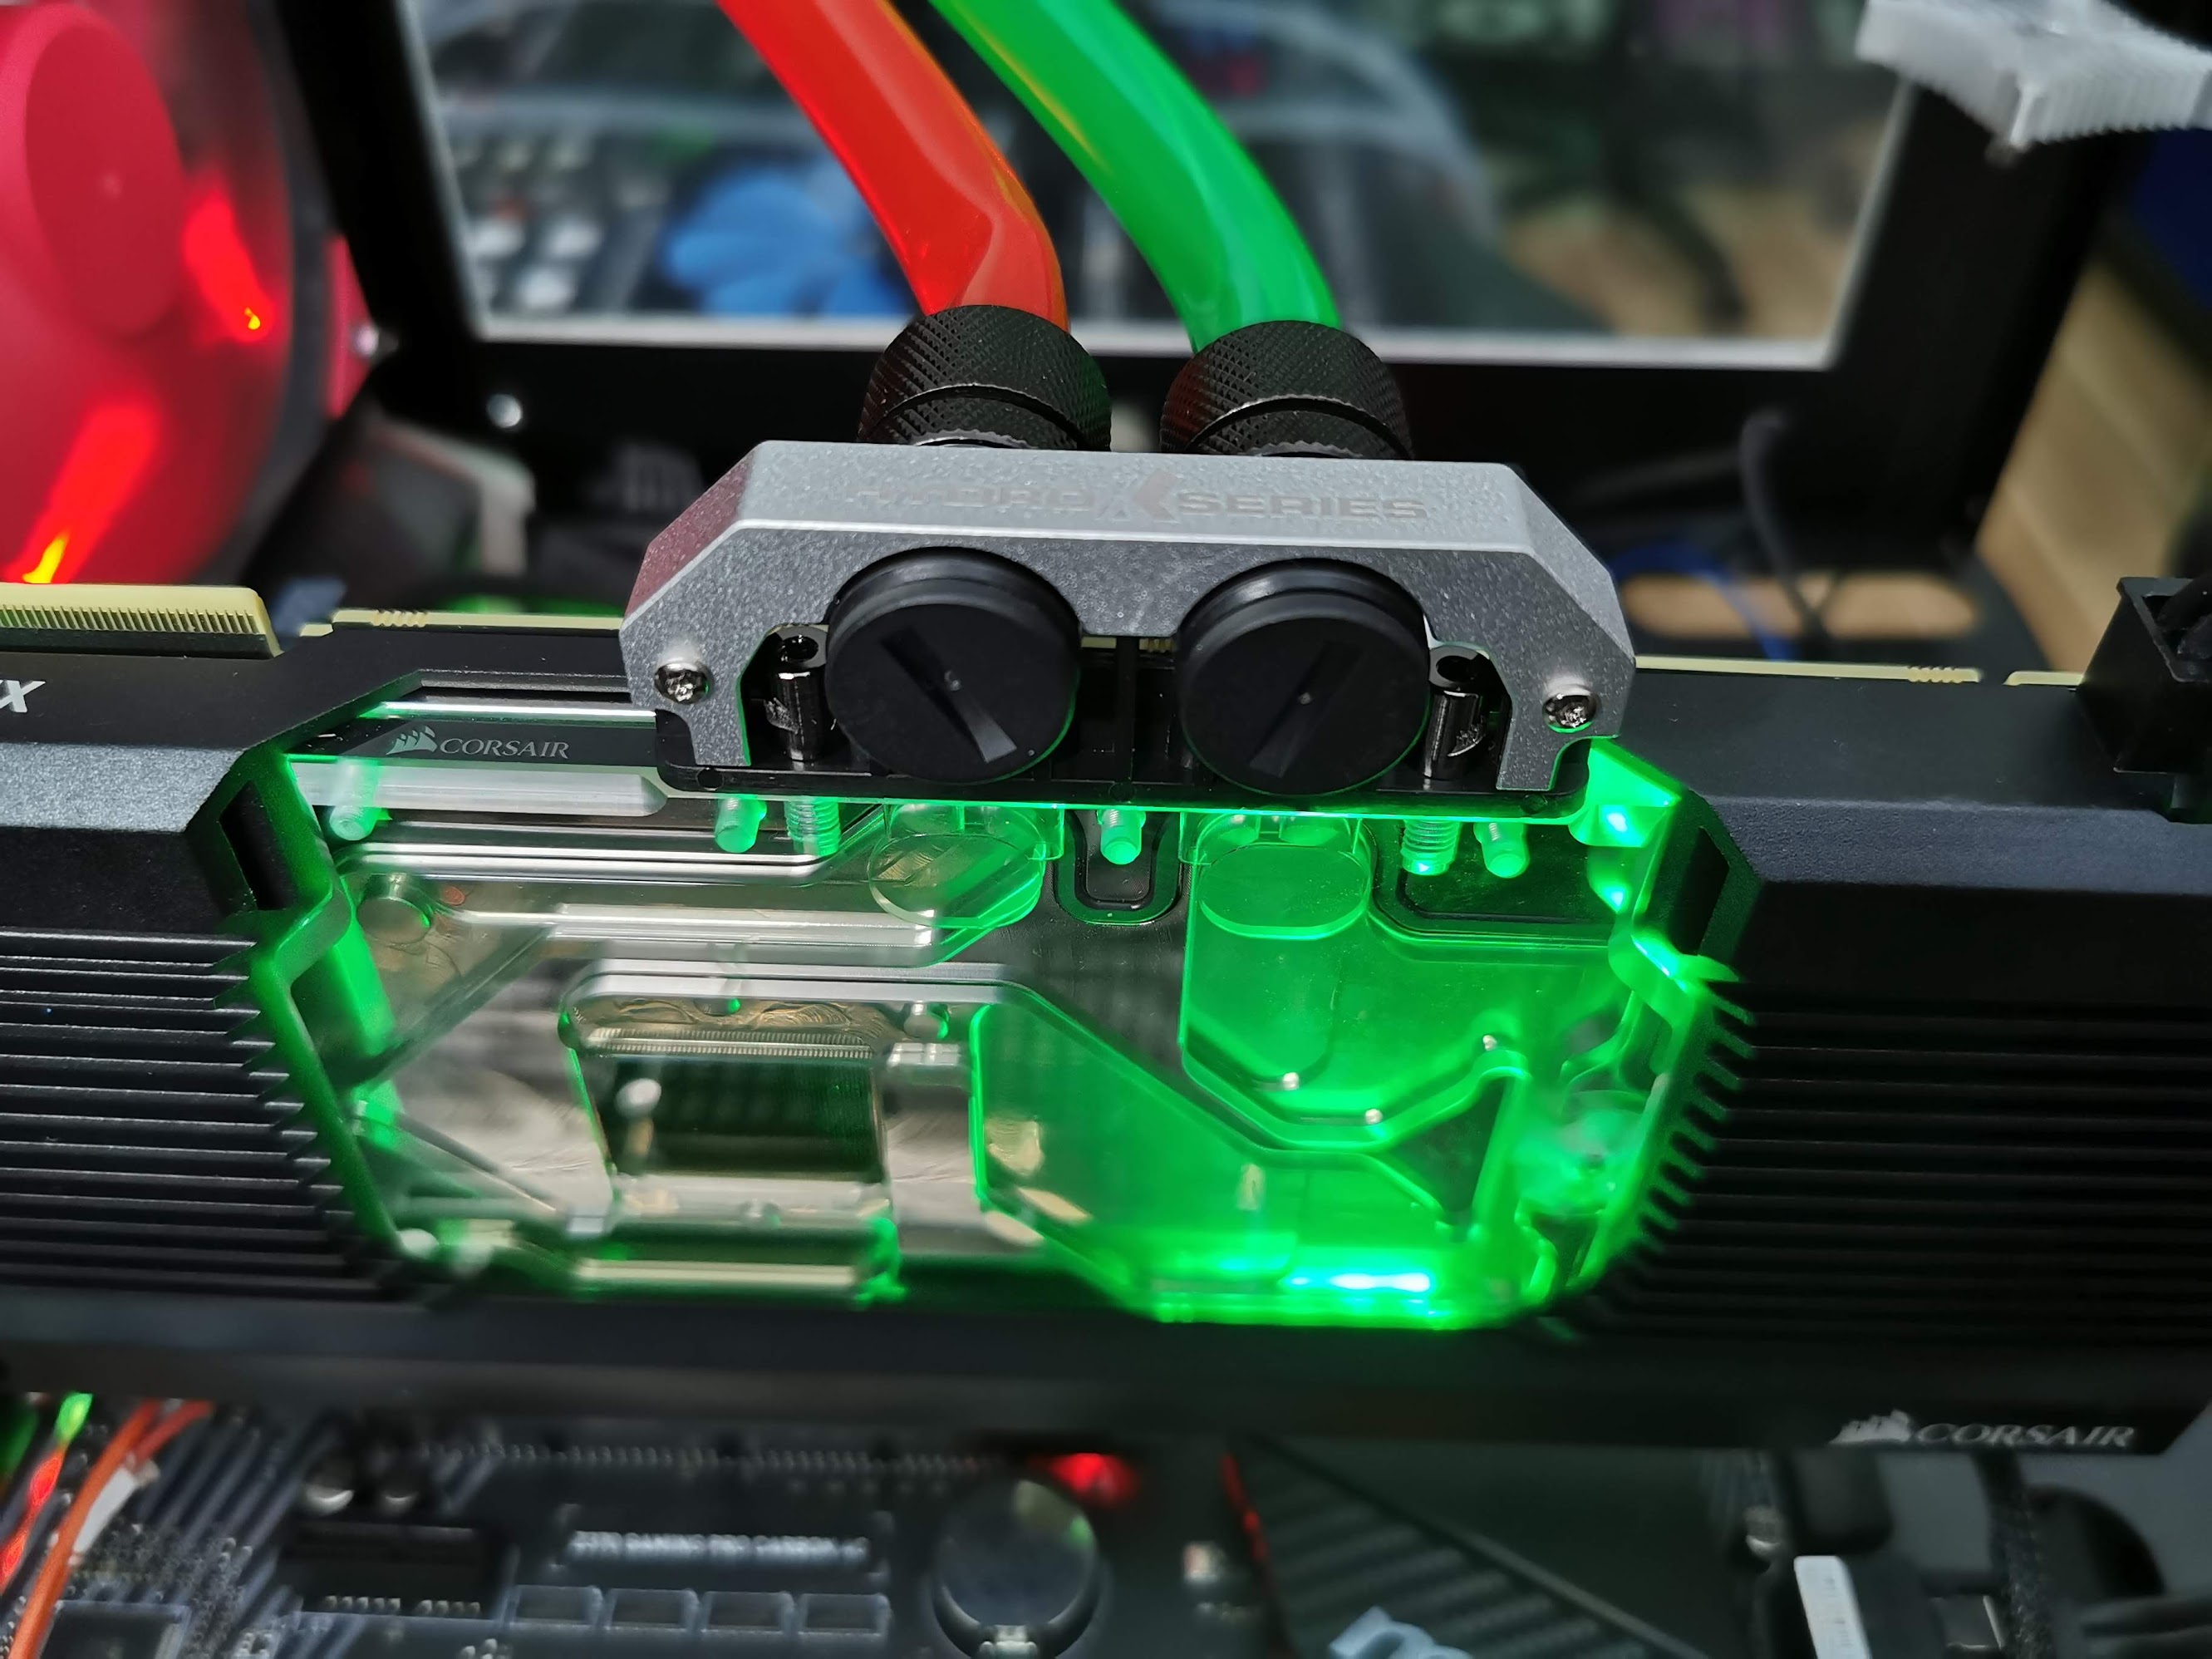
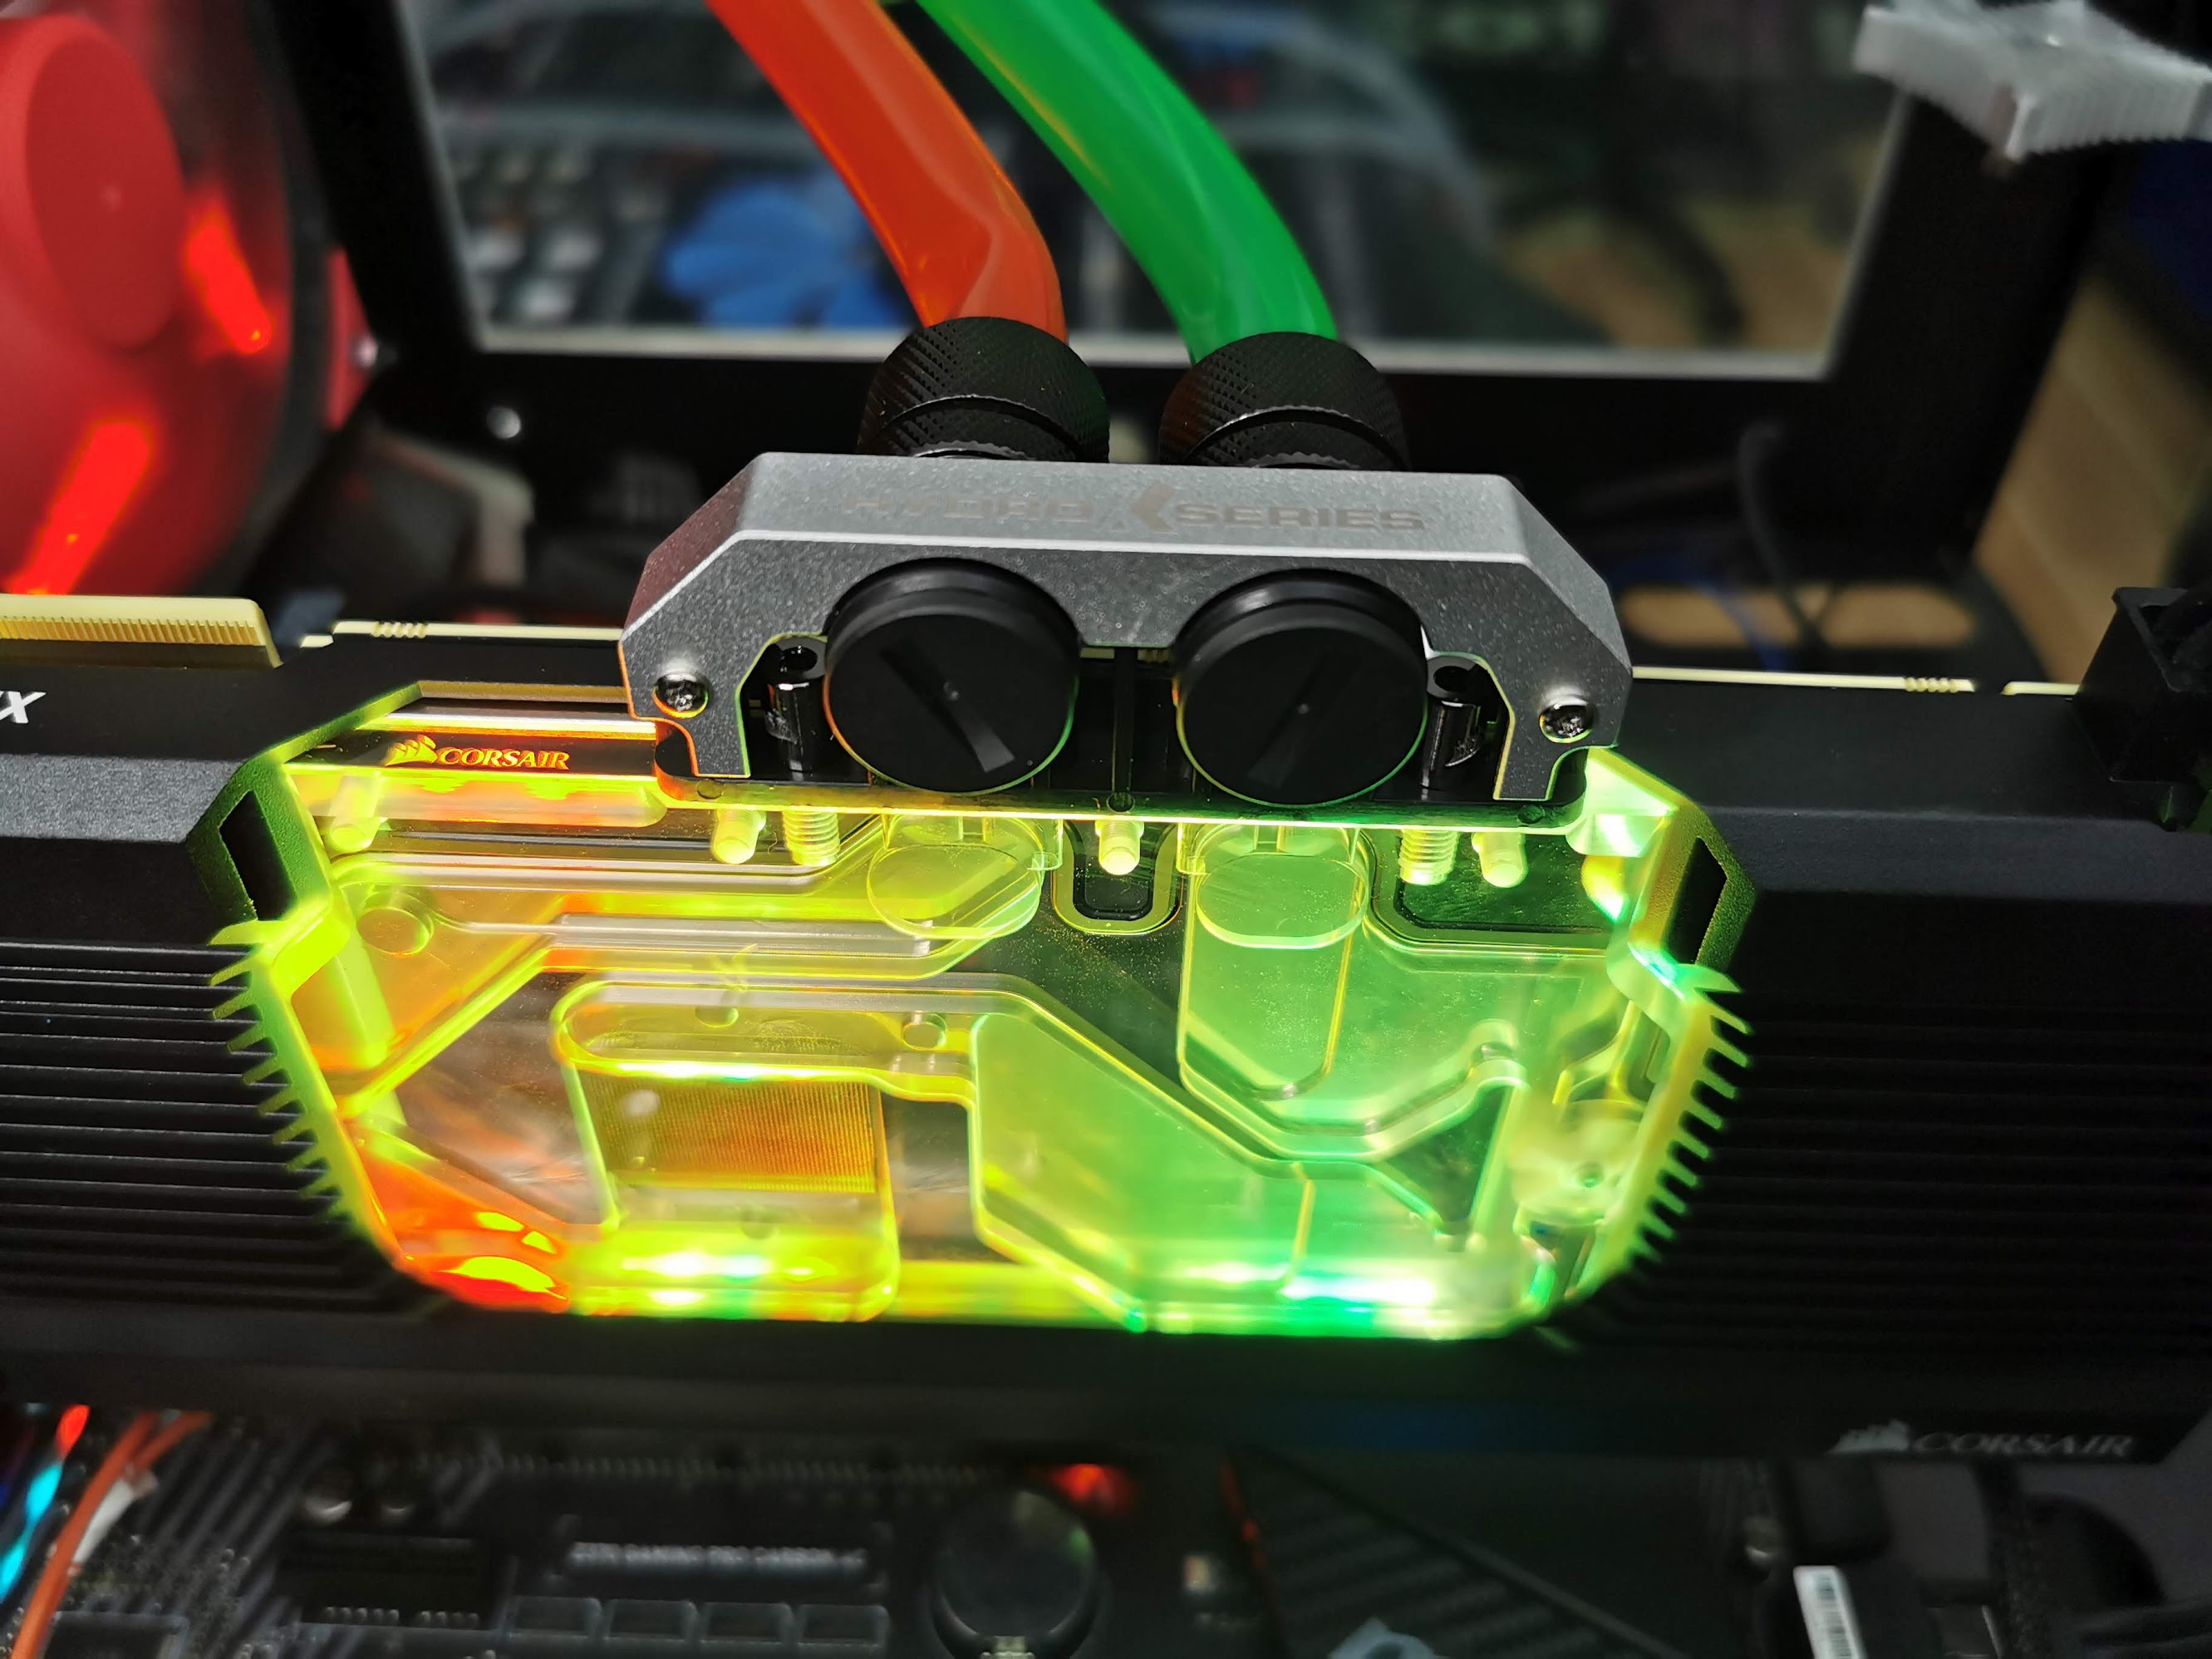


Unfortunately, the backplate does not have a cooling function, but you could insert some 3 mm pads on the areas of the voltage converters (and even only there!) to use this additional cooling surface.
Technical data and manual
WW_HXS_XG7_RGB_WEB
Test system and measurement methods
I have already described the test system and the methodology in the basic article "How we test graphics cards, as of February 2017" (English: "How We Test Graphics Cards") in detail and therefore, for the sake of simplicity, now only refers to these detailed Description. So if you want to read everything again, you are welcome to do so.
If you are interested, the summary in table form quickly provides a brief overview:
| Test systems and measuring rooms | |
|---|---|
| Hardware: |
Intel Core i7-9900K MSI MEG Z390 Ace G.Skill TridentZ DDR4 3600 1x 1 TByte Toshiba OCZ RD400 (M.2, System SSD) 2x 960 GByte Toshiba OCZ TR150 (Storage, Images) Be Quiet Dark Power Pro 11, 850-watt power supply |
| Cooling: |
Alphacool Ice Block XPX 5x Be Quiet! Silent Wings 3 PWM (Closed Case Simulation) Thermal Grizzly Kryonaut (for cooler change) |
| Housing: |
Lian Li PC-T70 with expansion kit and modifications |
| Monitor: | Eizo EV3237-BK |
| Power consumption: |
non-contact DC measurement on the PCIe slot (Riser-Card) non-contact DC measurement on the external PCIe power supply Direct voltage measurement on the respective feeders and on the power supply 2x Rohde & Schwarz HMO 3054, 500 MHz multi-channel oscillograph with memory function 4x Rohde & Schwarz HZO50, current togor adapter (1 mA to 30 A, 100 KHz, DC) 4x Rohde & Schwarz HZ355, touch divider (10:1, 500 MHz) 1x Rohde & Schwarz HMC 8012, digital multimeter with storage function |
| Thermography: |
Optris PI640, infrared camera PI Connect evaluation software with profiles |
| Acoustics: |
NTI Audio M2211 (with calibration file) Steinberg UR12 (with phantom power for the microphones) Creative X7, Smaart v.7 own low-reflection measuring room, 3.5 x 1.8 x 2.2 m (LxTxH) Axial measurements, perpendicular to the center of the sound source(s), measuring distance 50 cm Noise in dBA (Slow) as RTA measurement Frequency spectrum as a graph |
| Operating system | Windows 10 Pro (1809, all updates) |


Kommentieren