Case Reviews

COOLER MASTER QUBE 500 Review – All in one: Benchtable, desktop and mid-tower to build yourself!

With the QUBE 500, COOLER MASTER brings a high-quality modular case with compact dimensions and versatile design to the market. The case comes to the customer as a kit in individual parts and offers many interesting approaches. How the QUBE 500 performs in everyday use, you can read in the test!

I have to admit that the concept of the QUBE 500 made me curious right away. Probably every real hardware nerd has wished for a test bench and the option that you can convert a case not only as such, but also as a lying “desktop” case and as a compact mid-tower, I had never seen before. But whether something like that can work? It’s often the case that things that want to be able to do several things at once somehow end up not being able to do any of them really well. Let’s unpack the kit together and take a look.


Unboxing

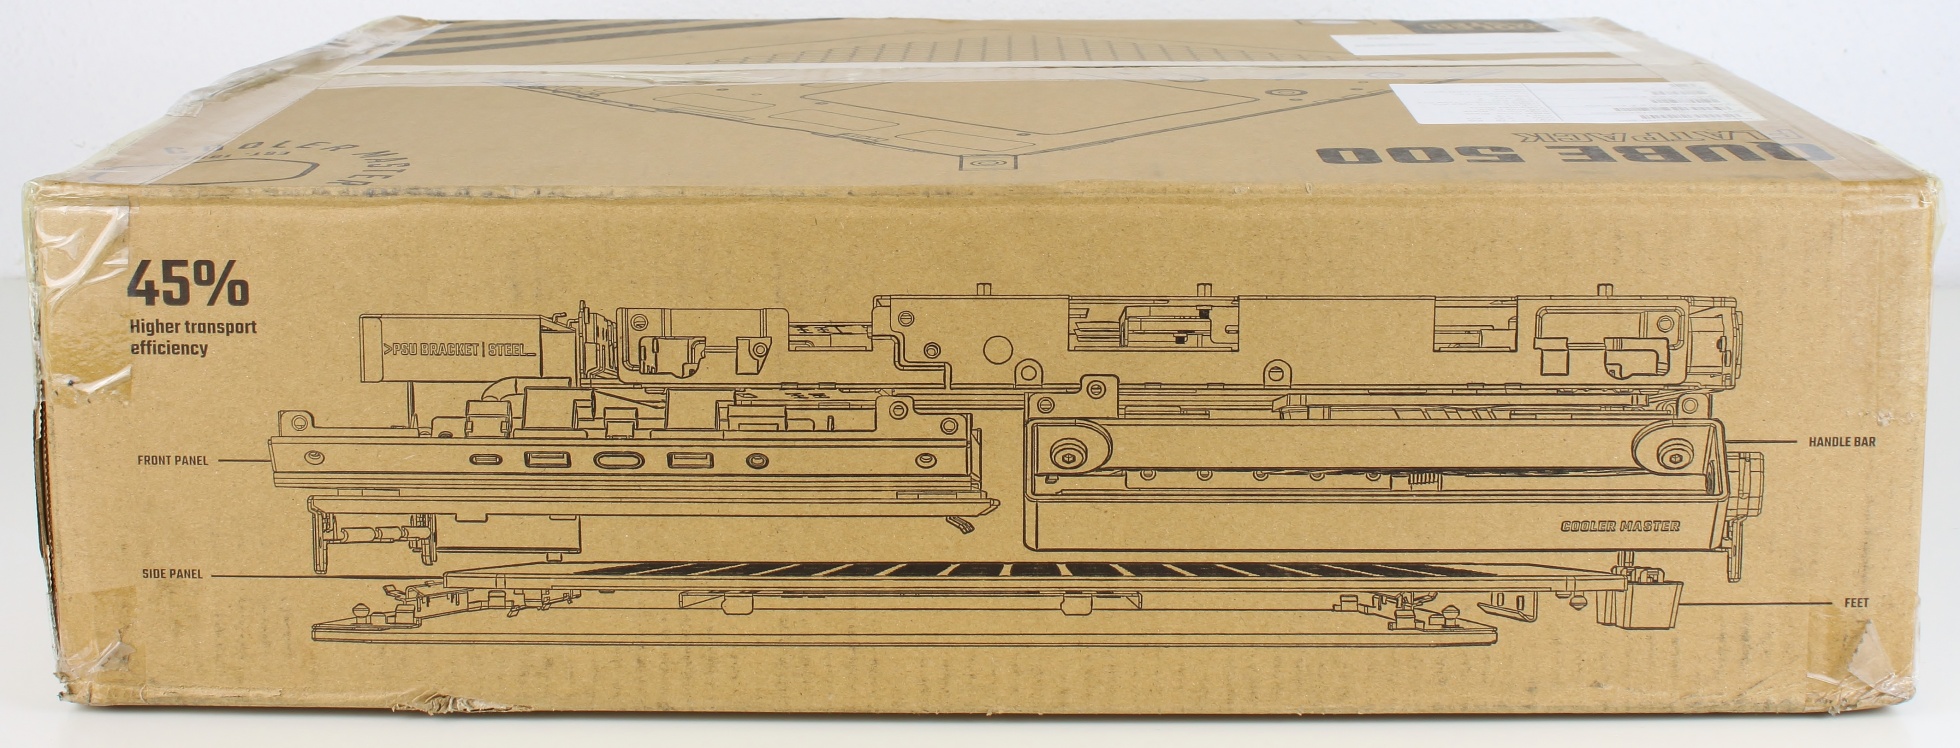
But first, a small note on the topic of the environment – an aspect that has recently become an increasingly frequent part of the discussion of product tests. Apparently, COOLER MASTER wants to get more involved in this topic and has thought about it. The QUBE 500 is manufactured to a large extent from recycled materials and comes in “flatpack” packaging, virtually as a kit, to the customer. The advantage: more efficient transport and 45% less packaging material. In addition, the case’s robust construction should also make it more durable and thus more sustainable than other cases. Despite various attempts, it has not yet been possible to realize a transport protection made of folded cardboard and had to revert to EPE foam (polyethylene) for the QUBE 500. Future iterations and subsequent products in the QUBE series should be further optimized in this regard. In any case, I give it a thumbs up. But now down with the cardboard!

At first glance, the outer box looks quite normal, at least in the picture:

Viewed from the side, however, it looks quite different and suddenly the name “flatpack” also makes sense.

When opening the box, the individual parts smile at us. Definitely something different!

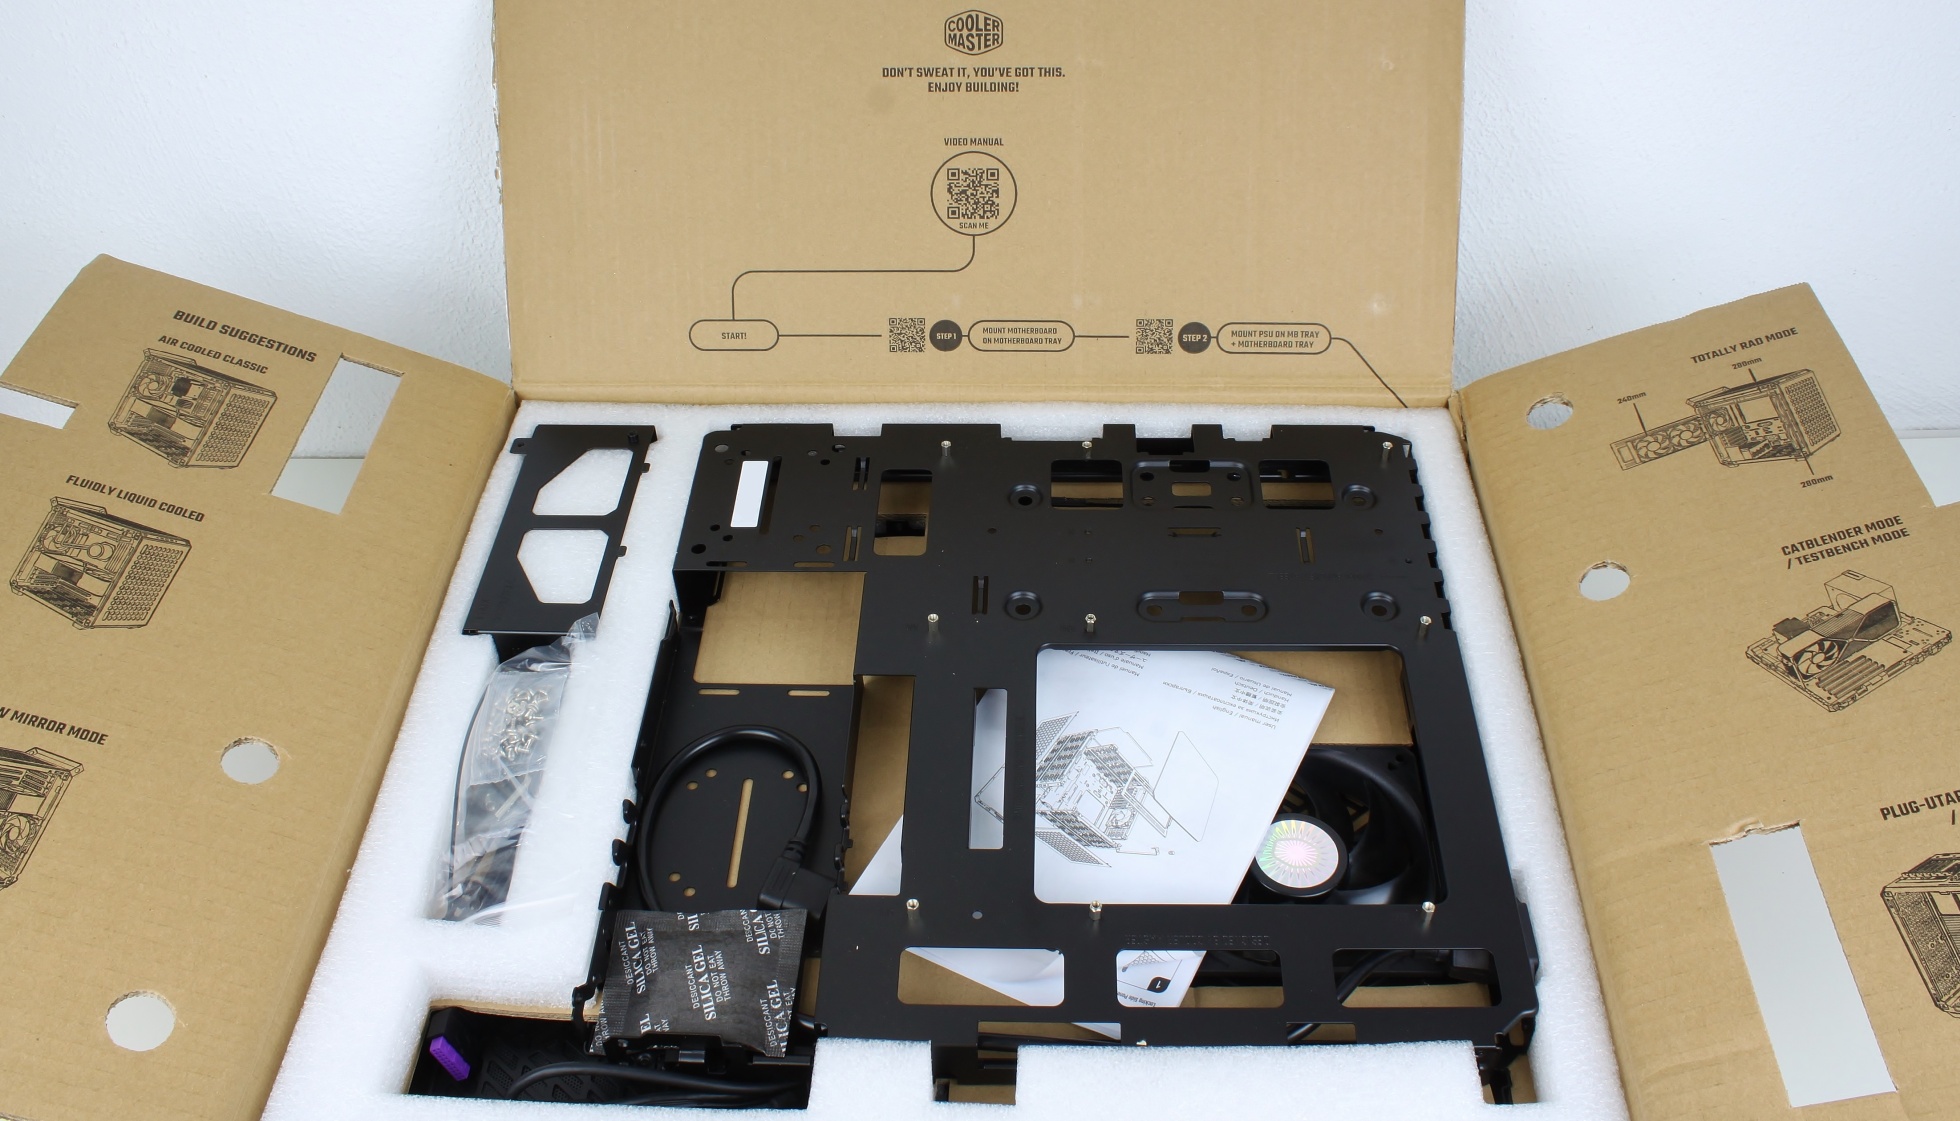
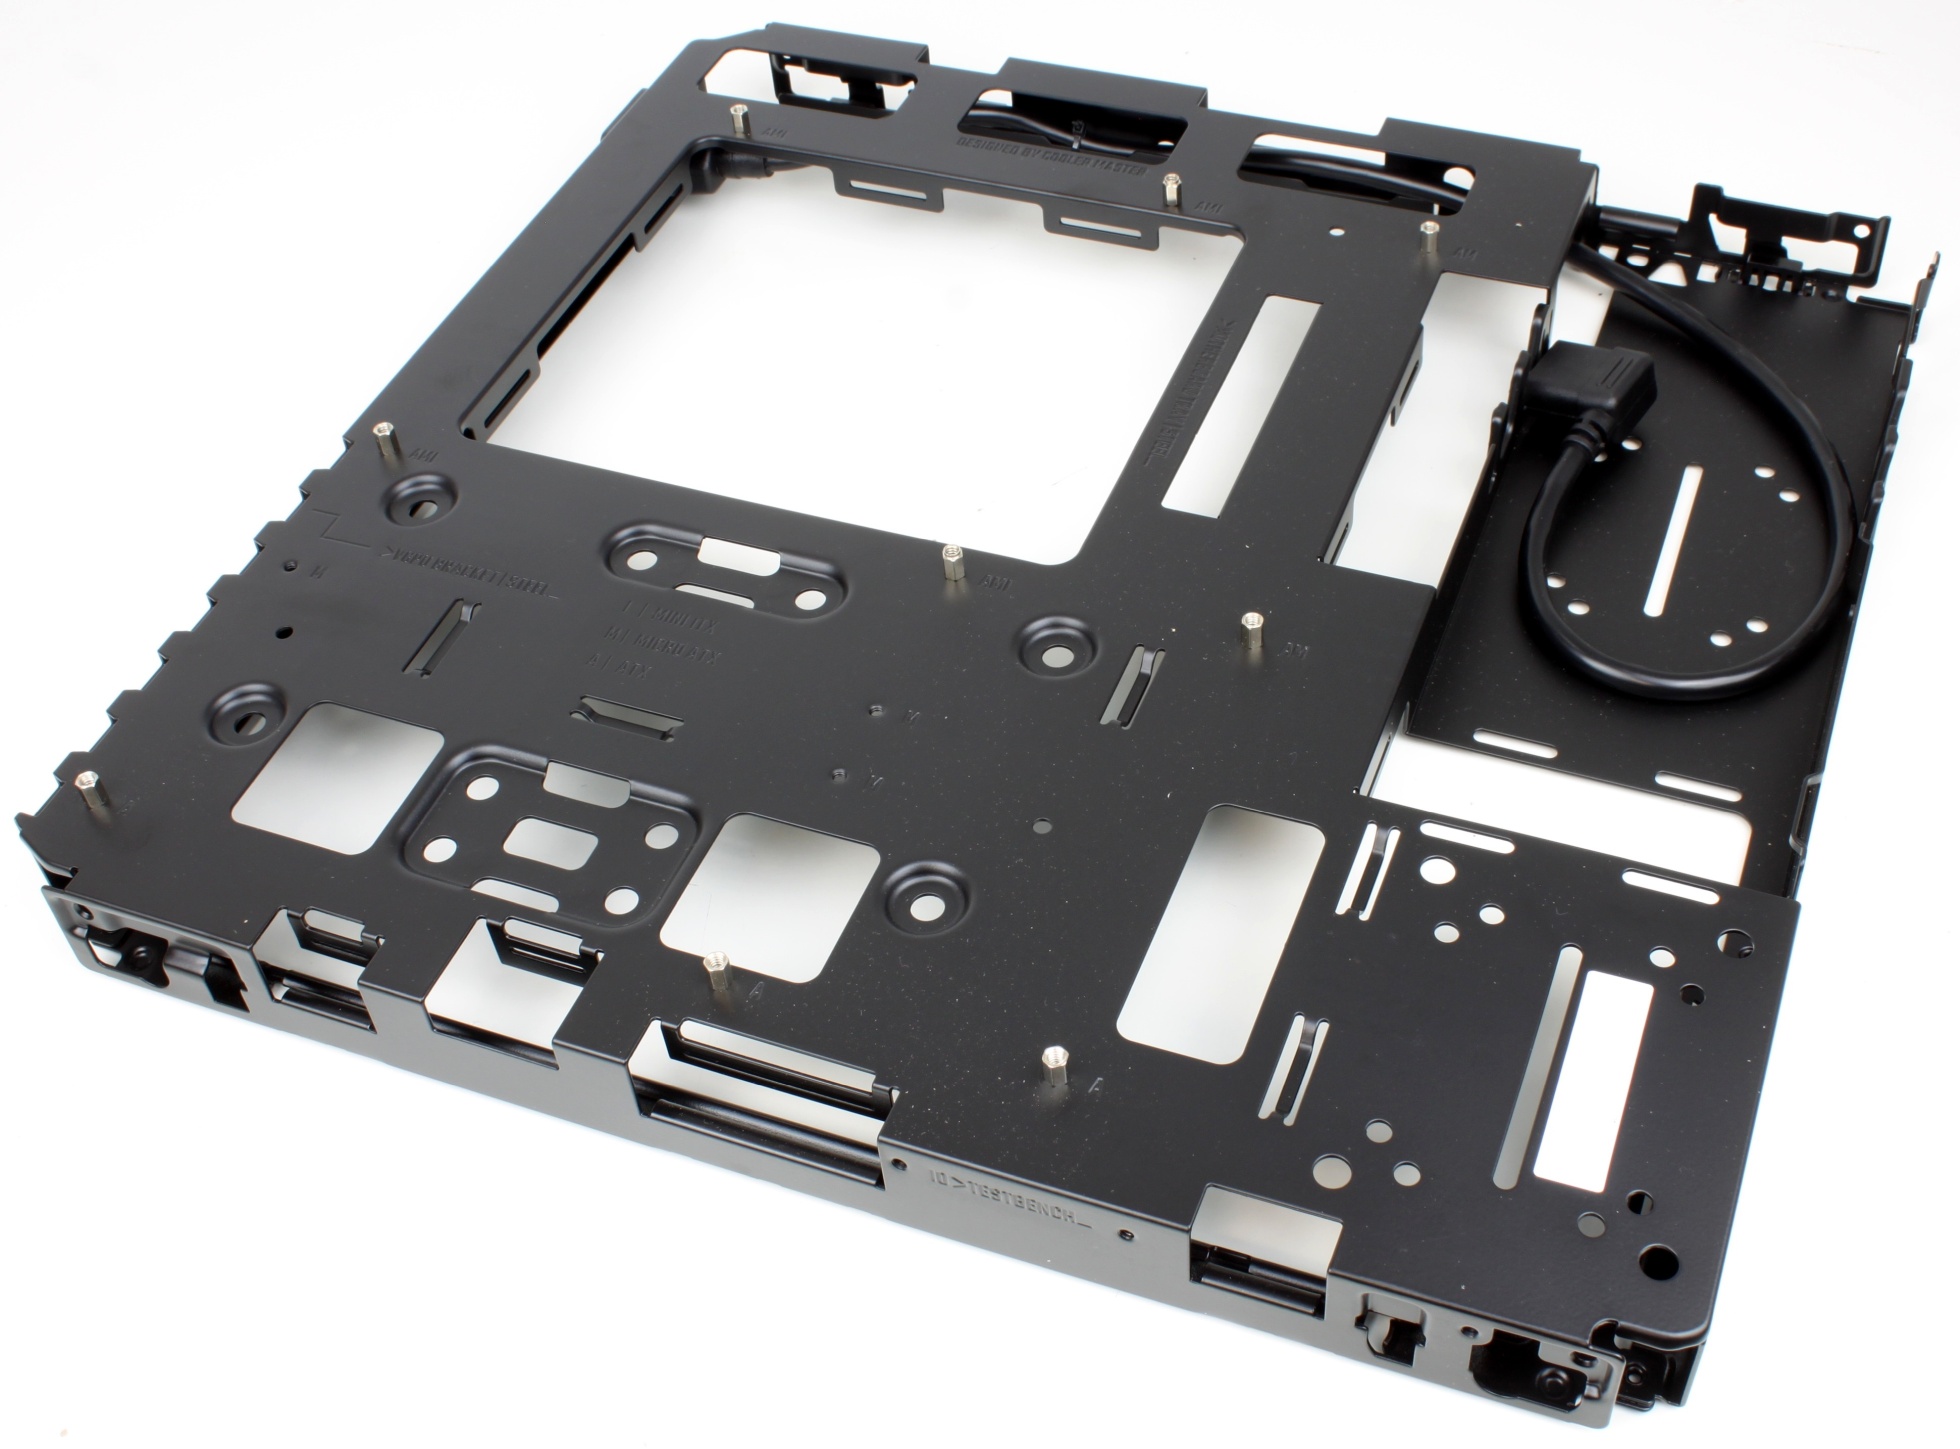
Here we see the finished housing. Joking aside, of course the kit still has to be assembled.

The “base” in detail. Here the mainboard is screwed and also all other add-on and side parts.

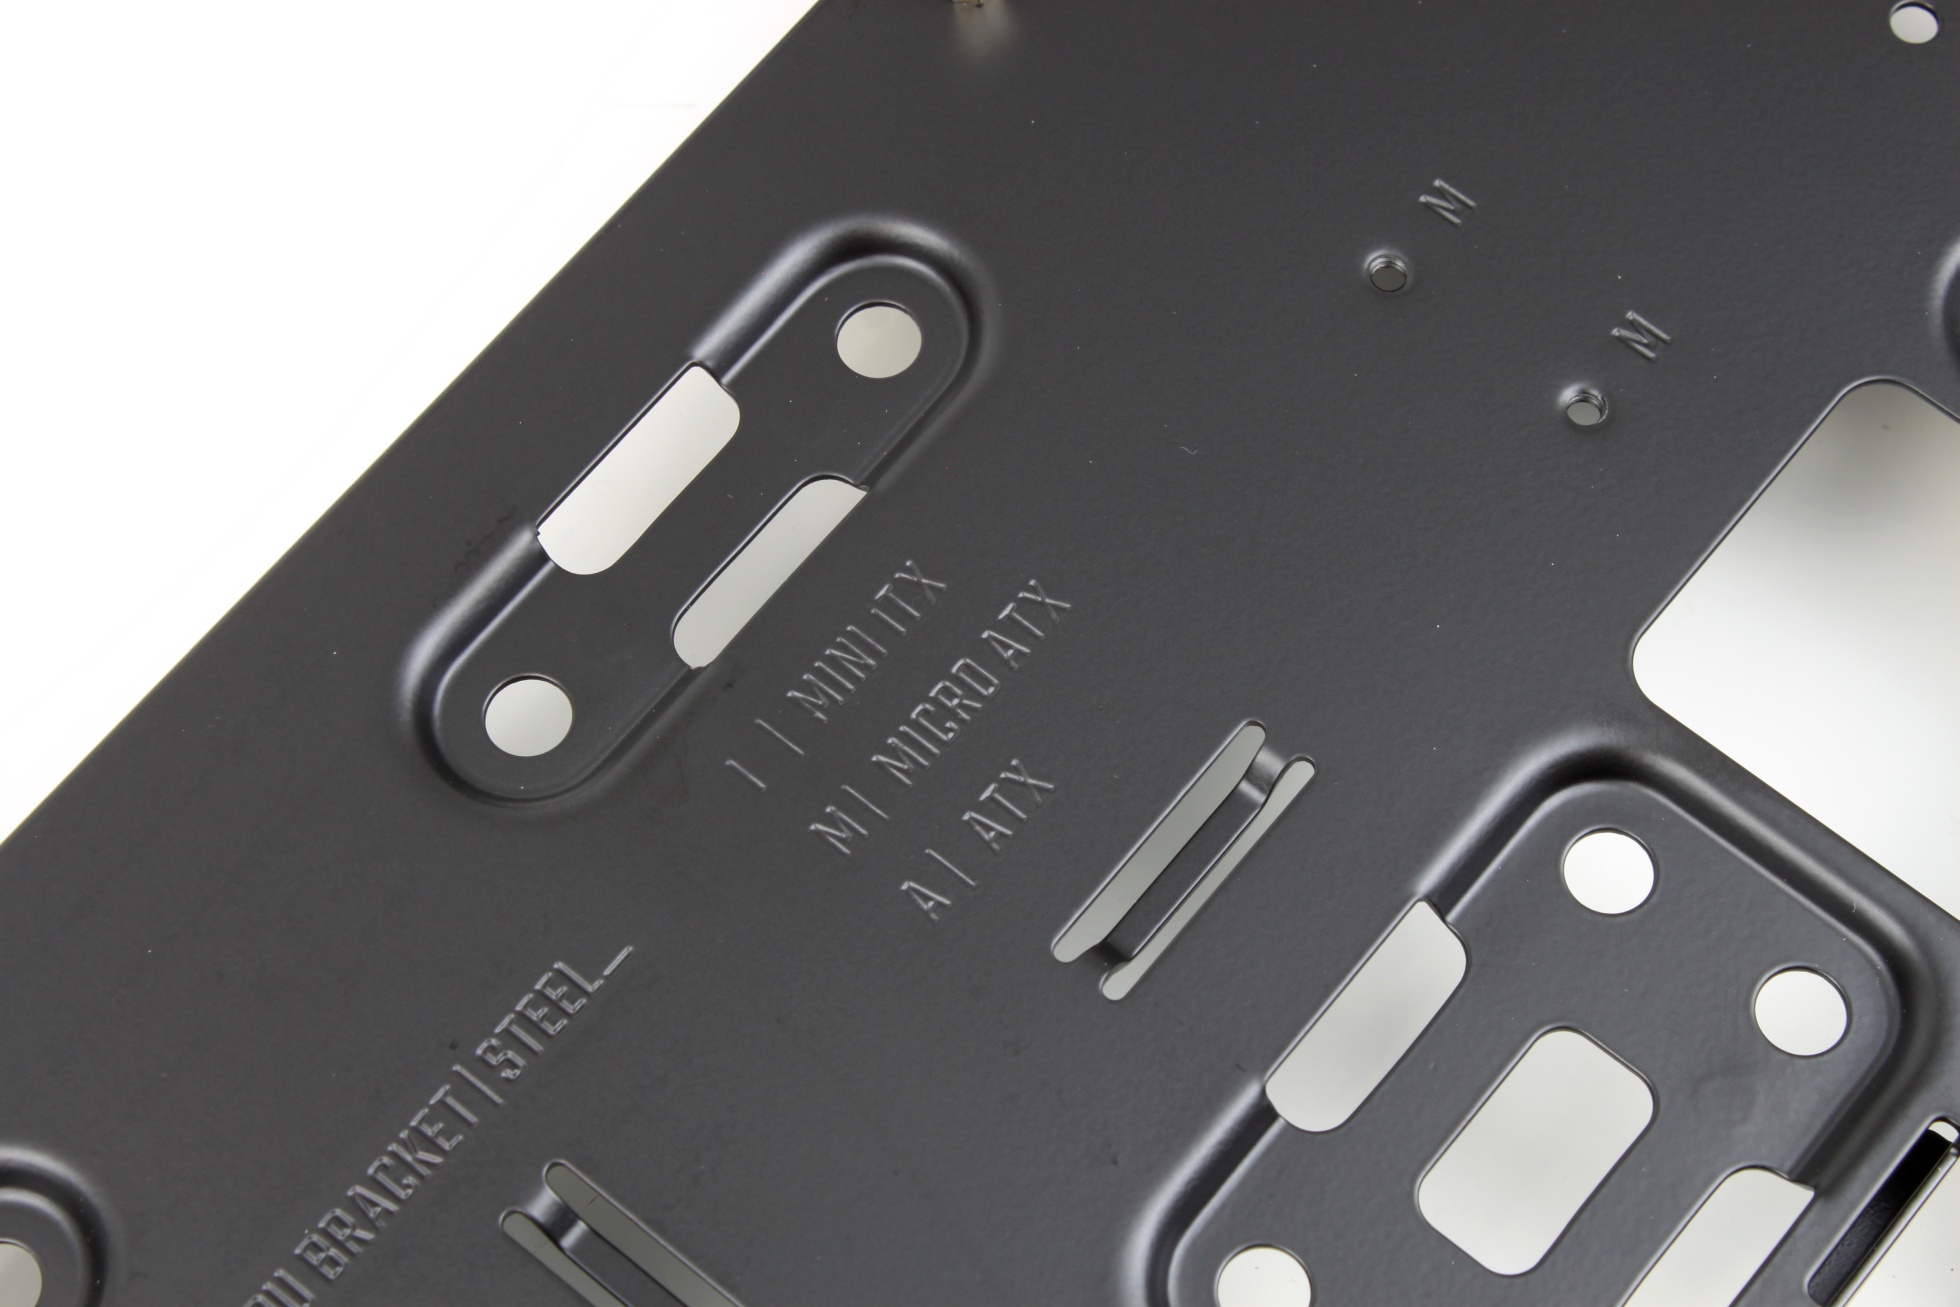
The holes and threads are labeled so that the spacers for the board can be quickly located according to the respective form factor.

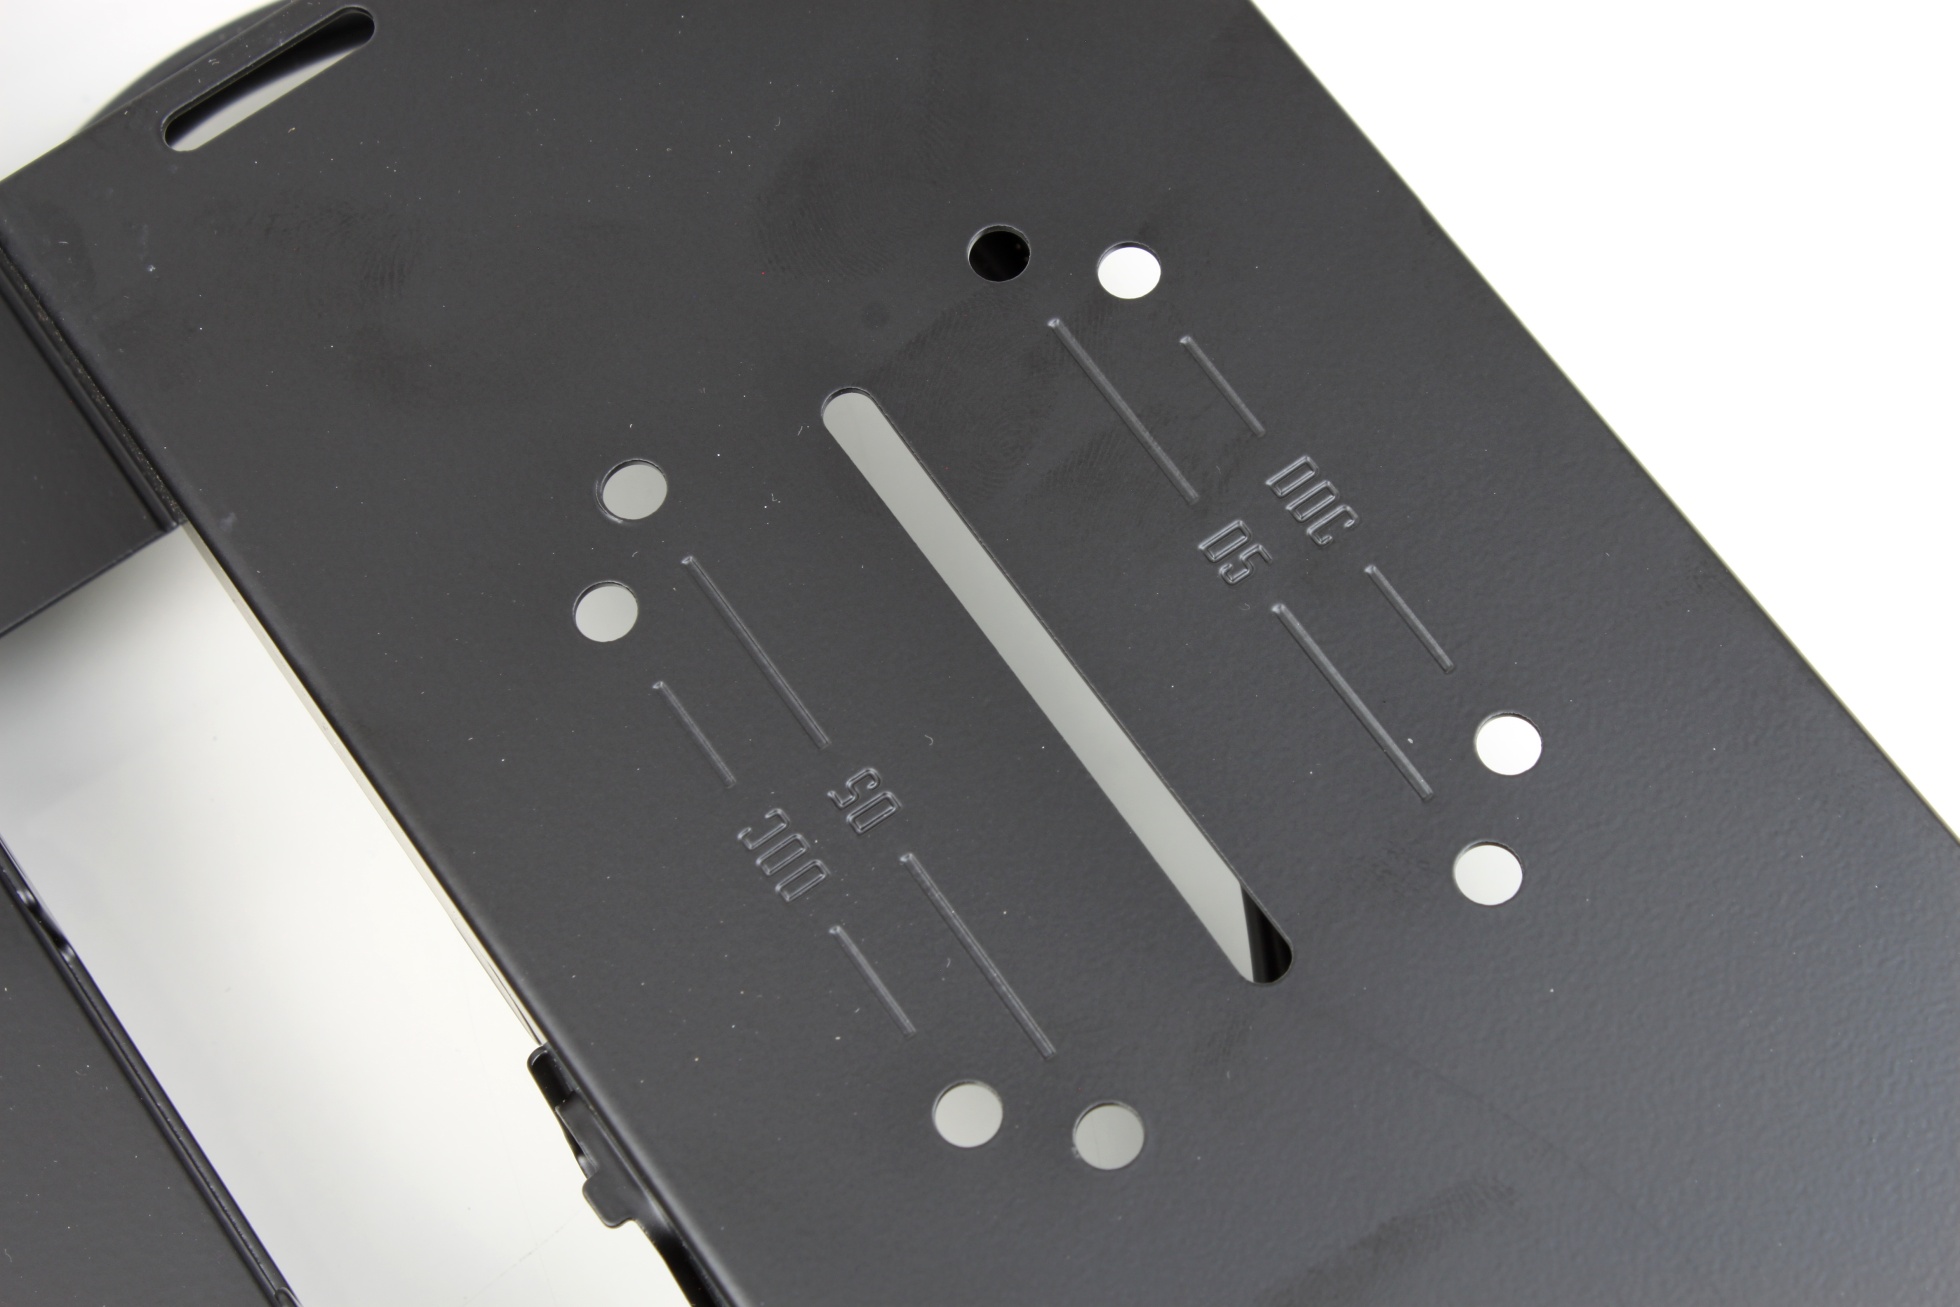
There are even holes for water pumps at two points. The widely used DDC and D5 models are supported.

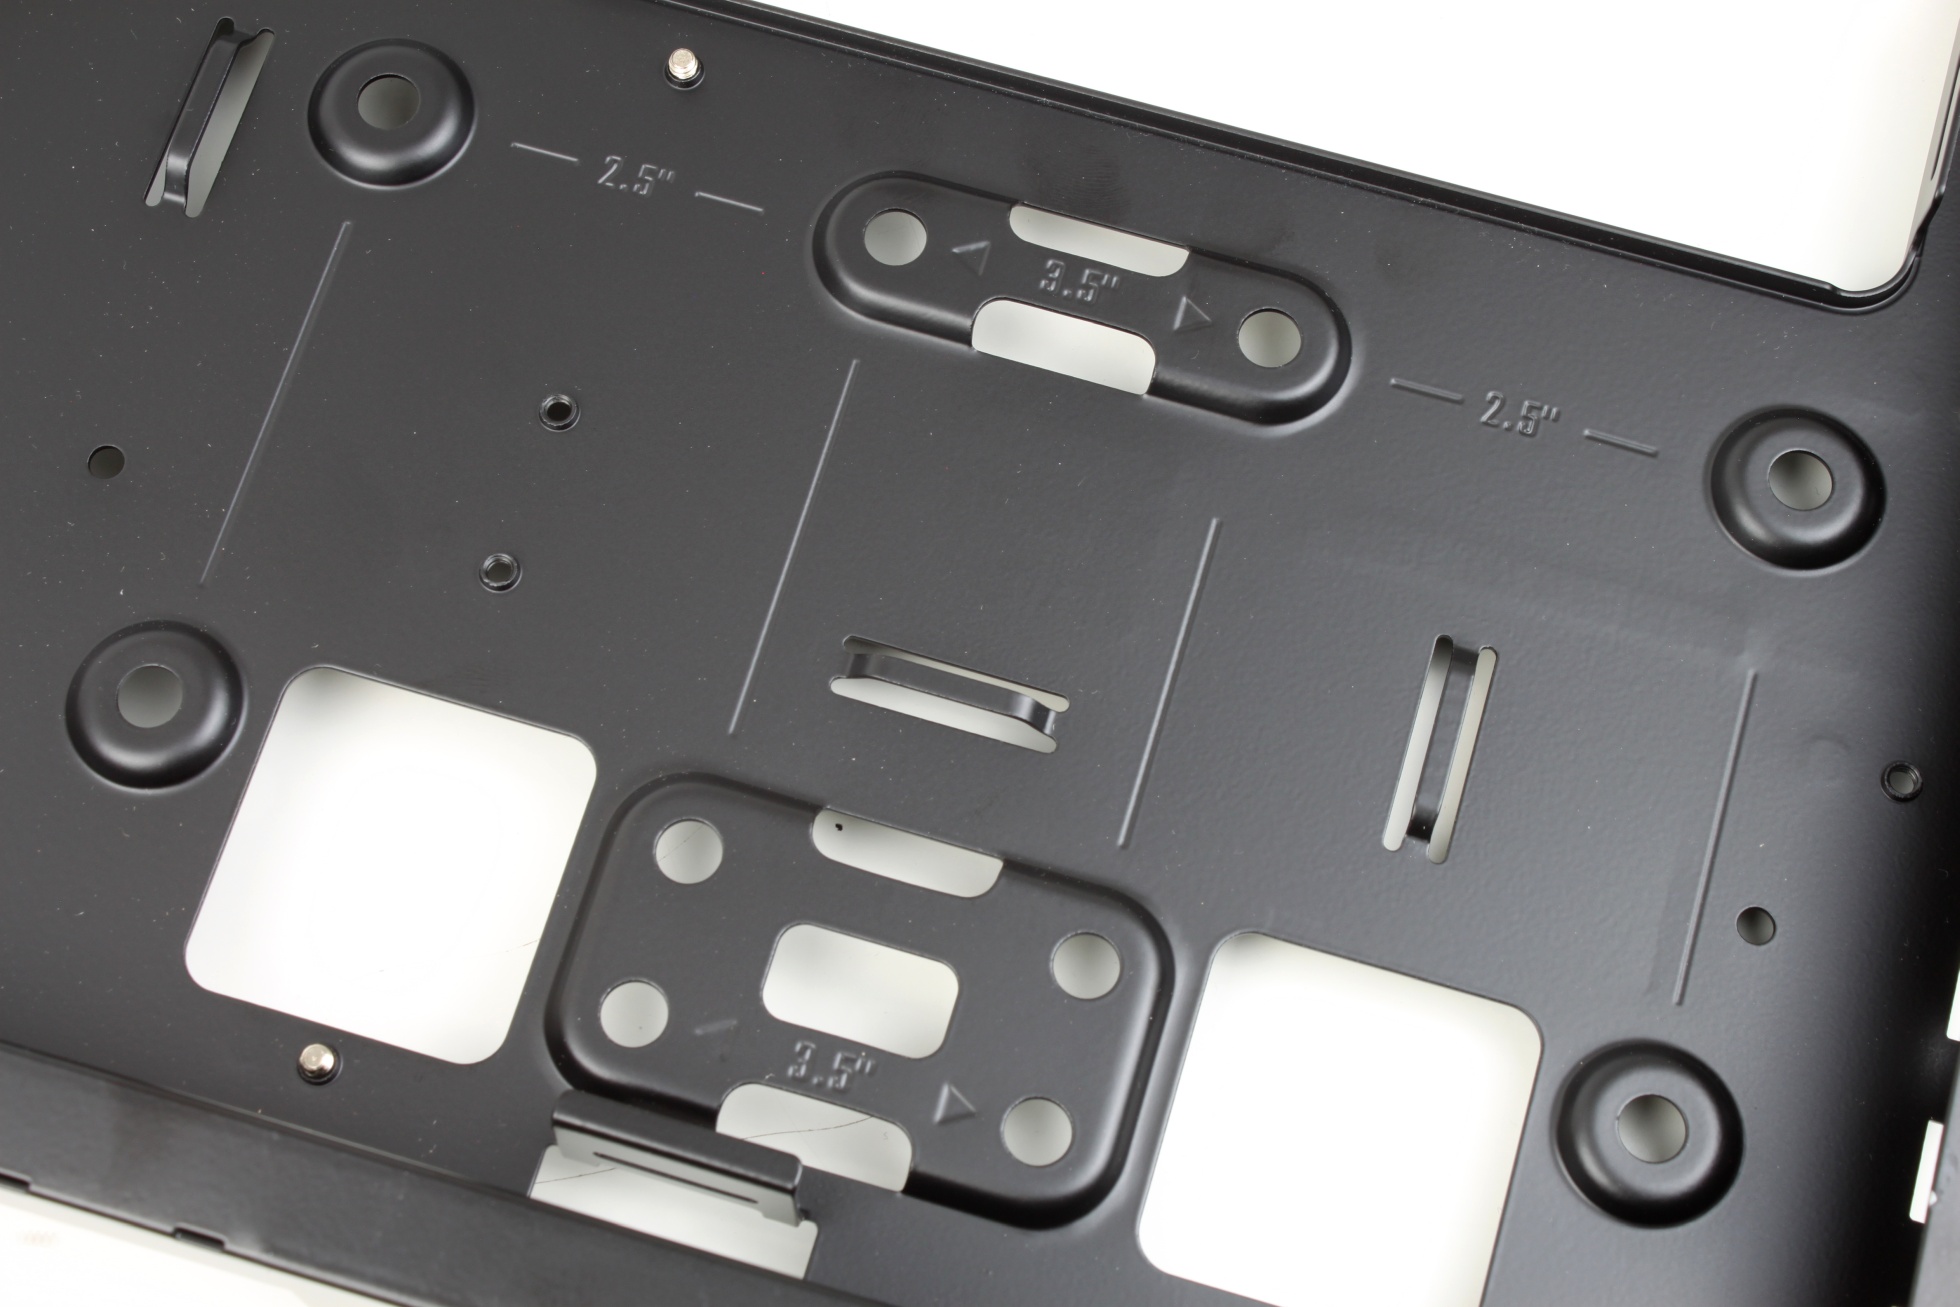
The mounting points for the 2.5″ SSDs and 3.5″ HDDs are also marked accordingly. A lot of rubber buffers are also included for decoupling.

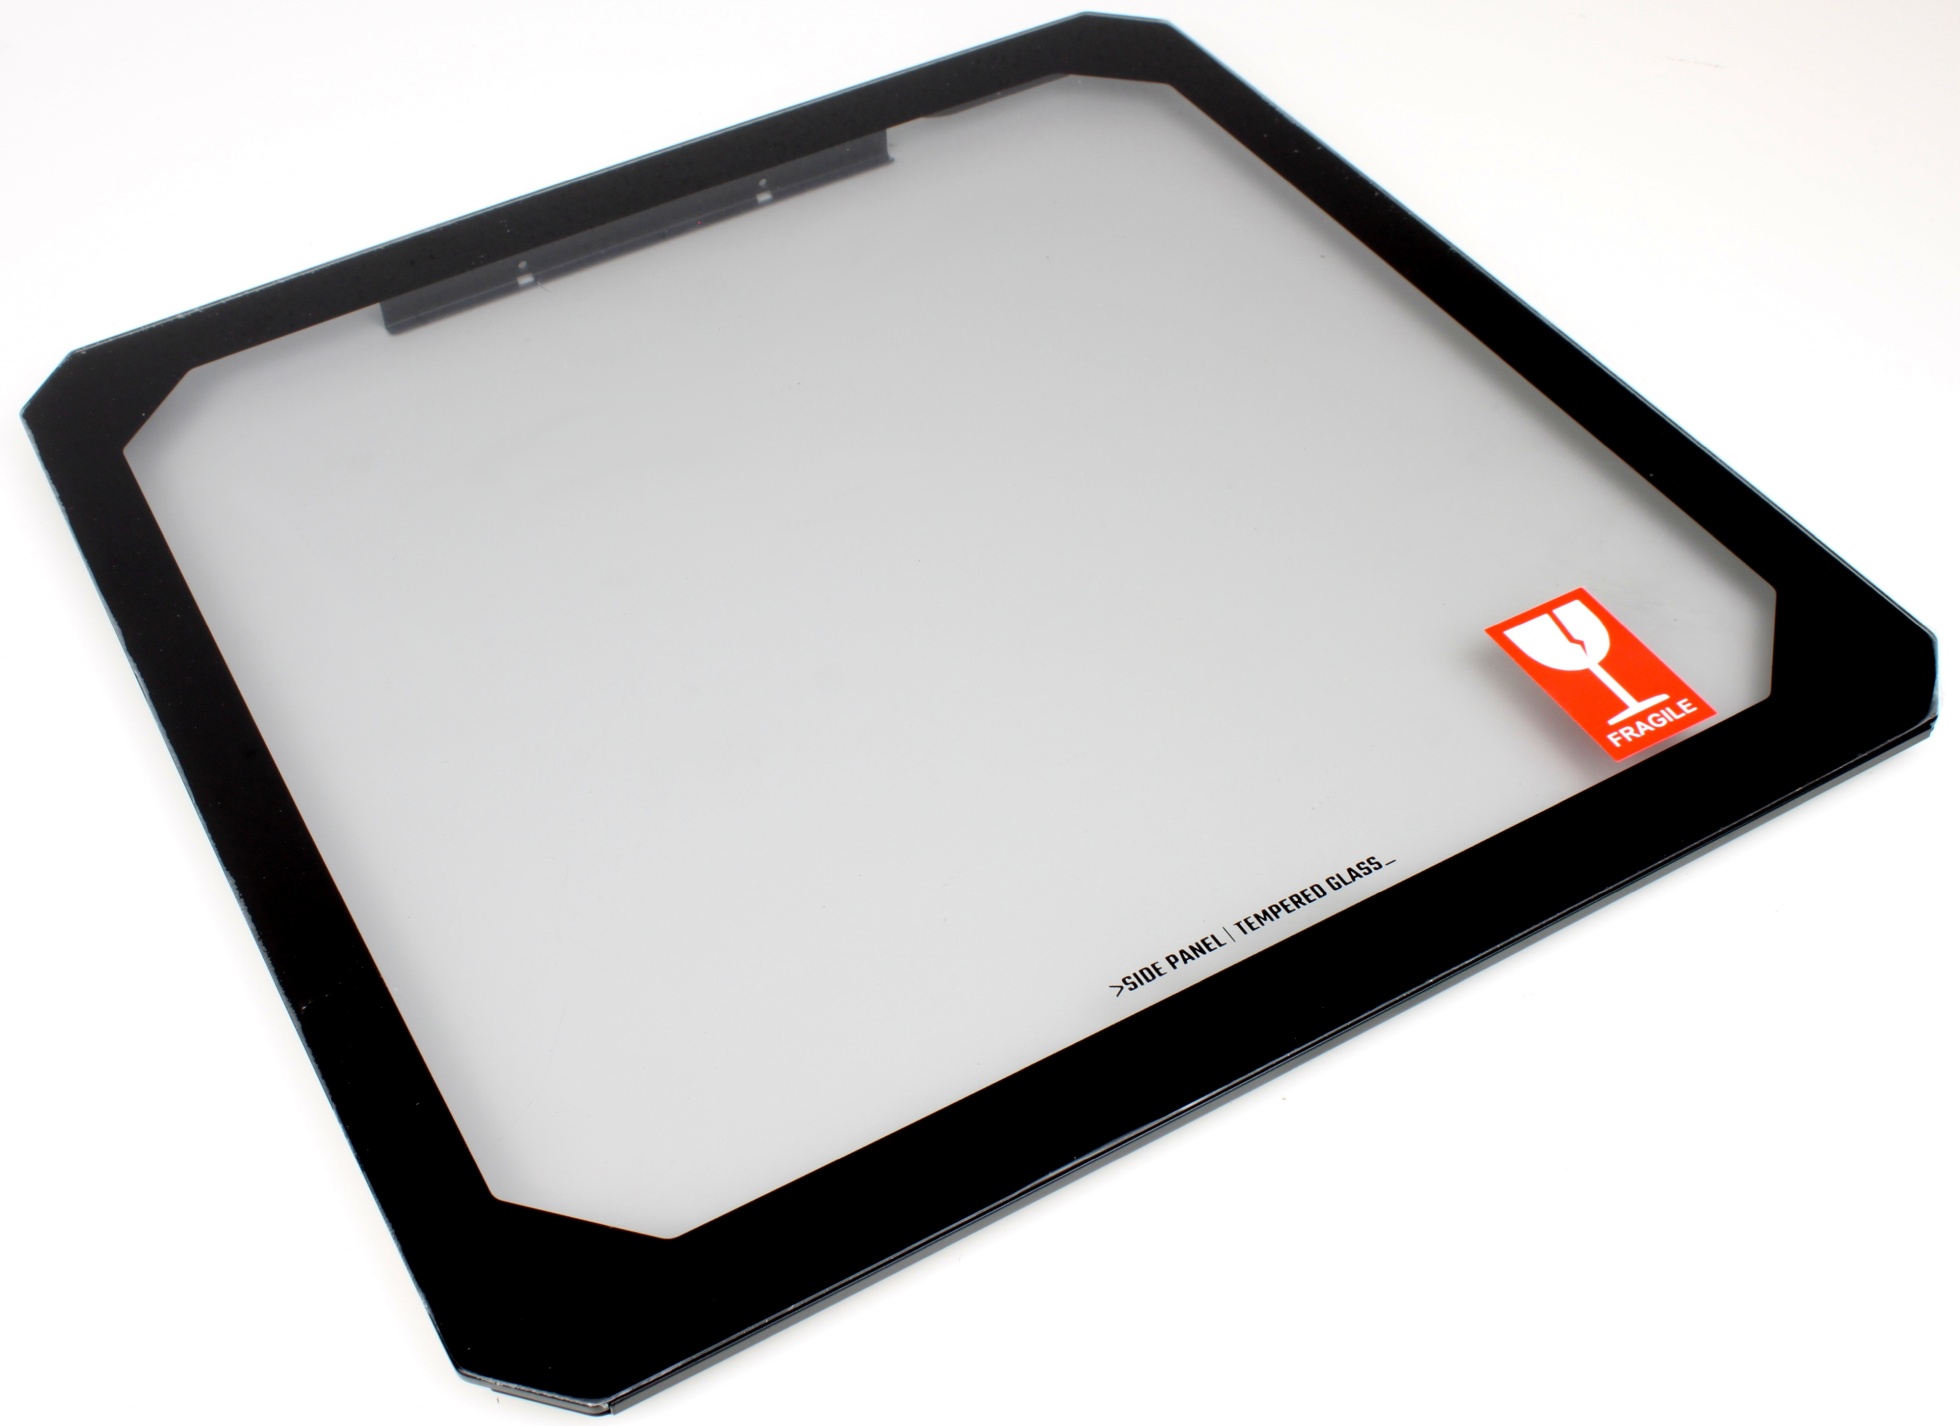
The glass side panel is massive and heavy and can be clicked into the case without tools.

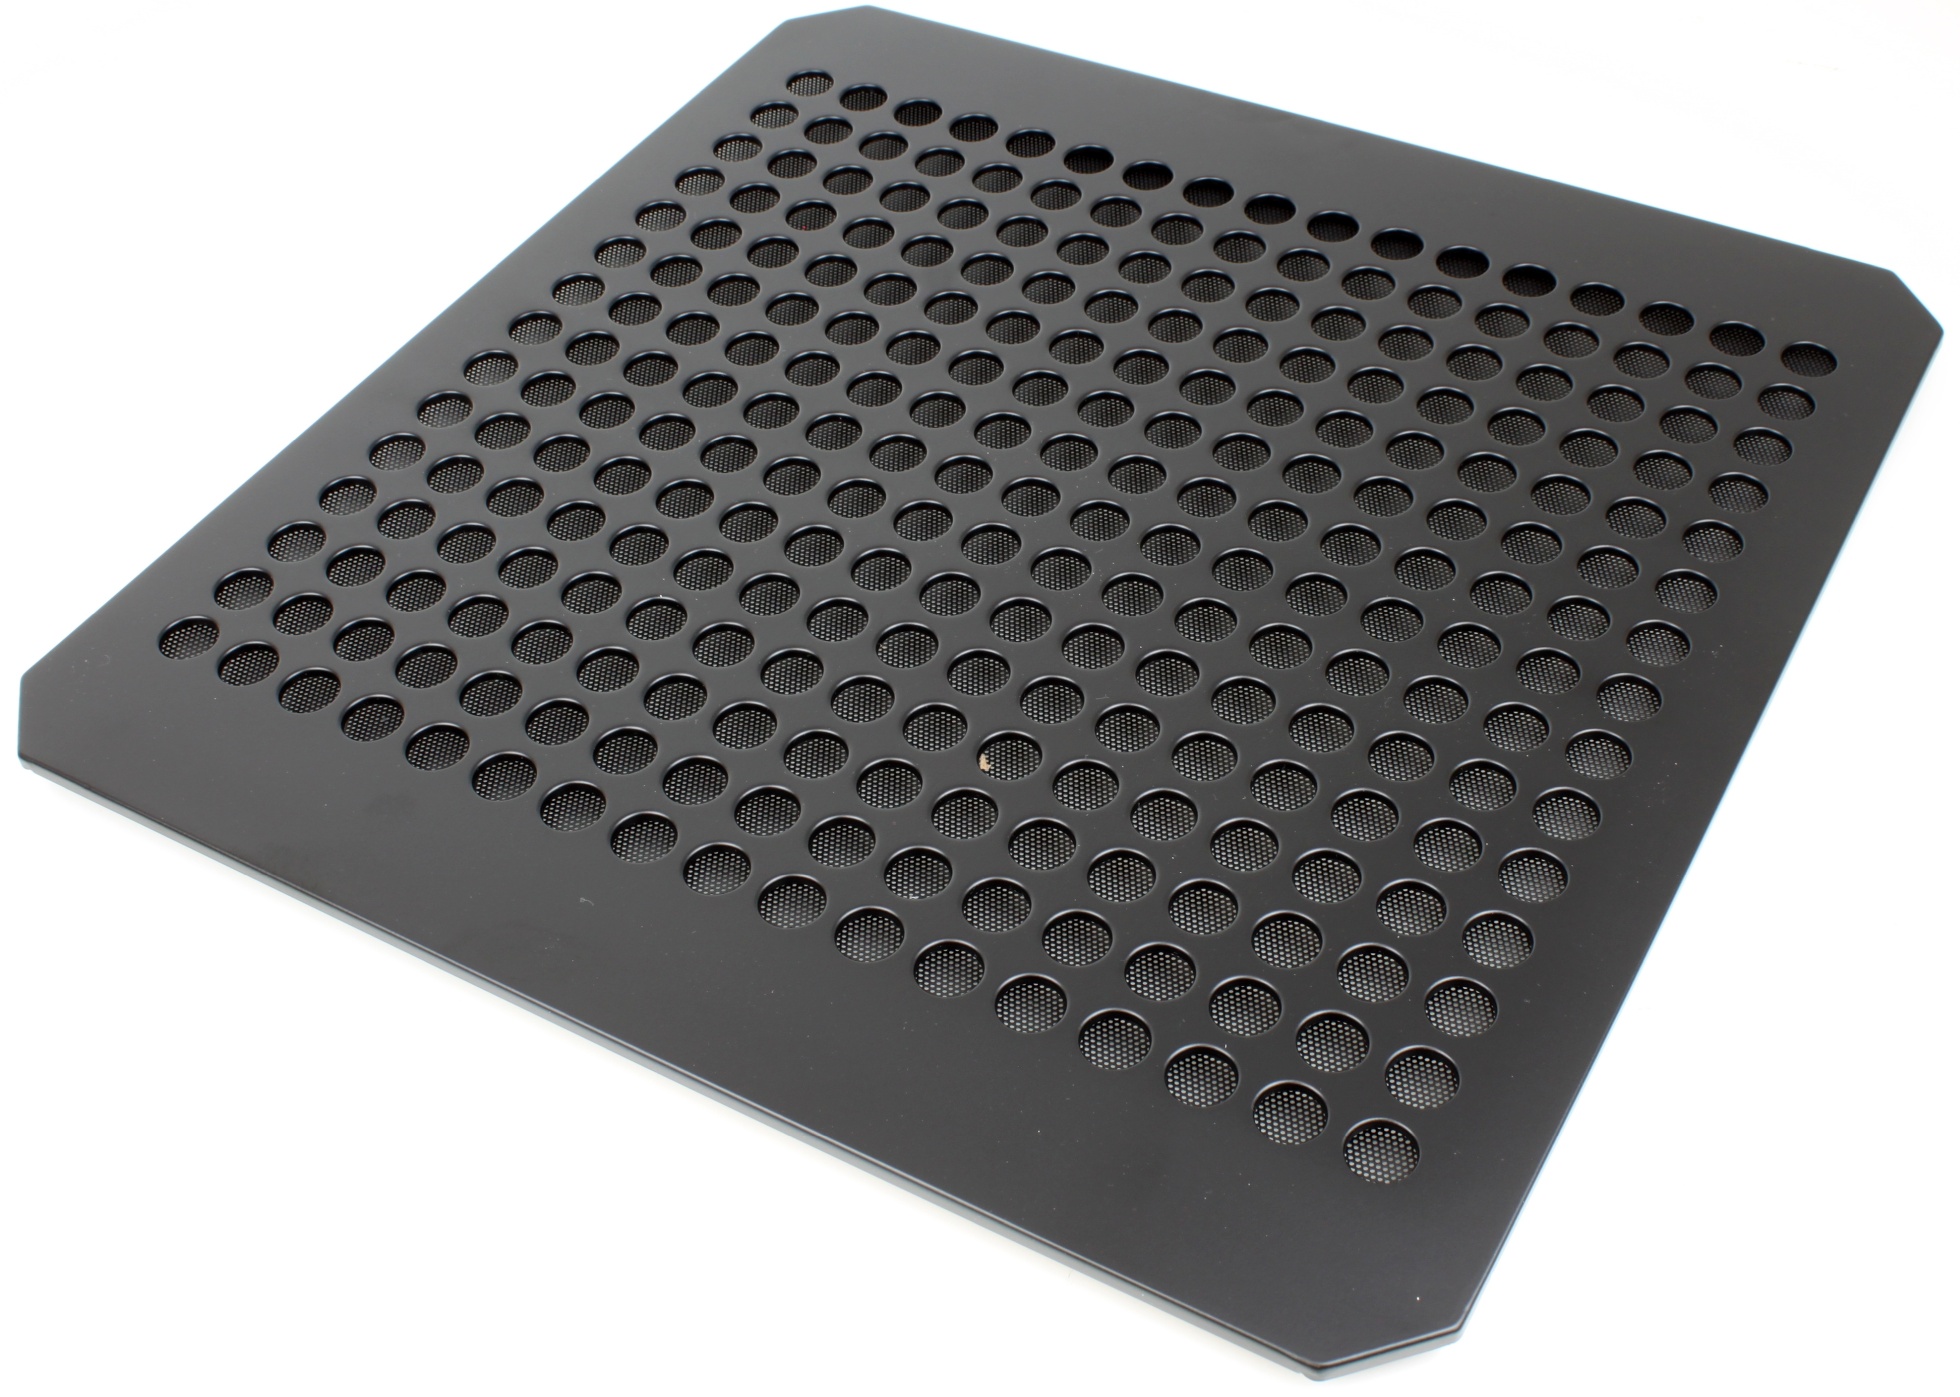
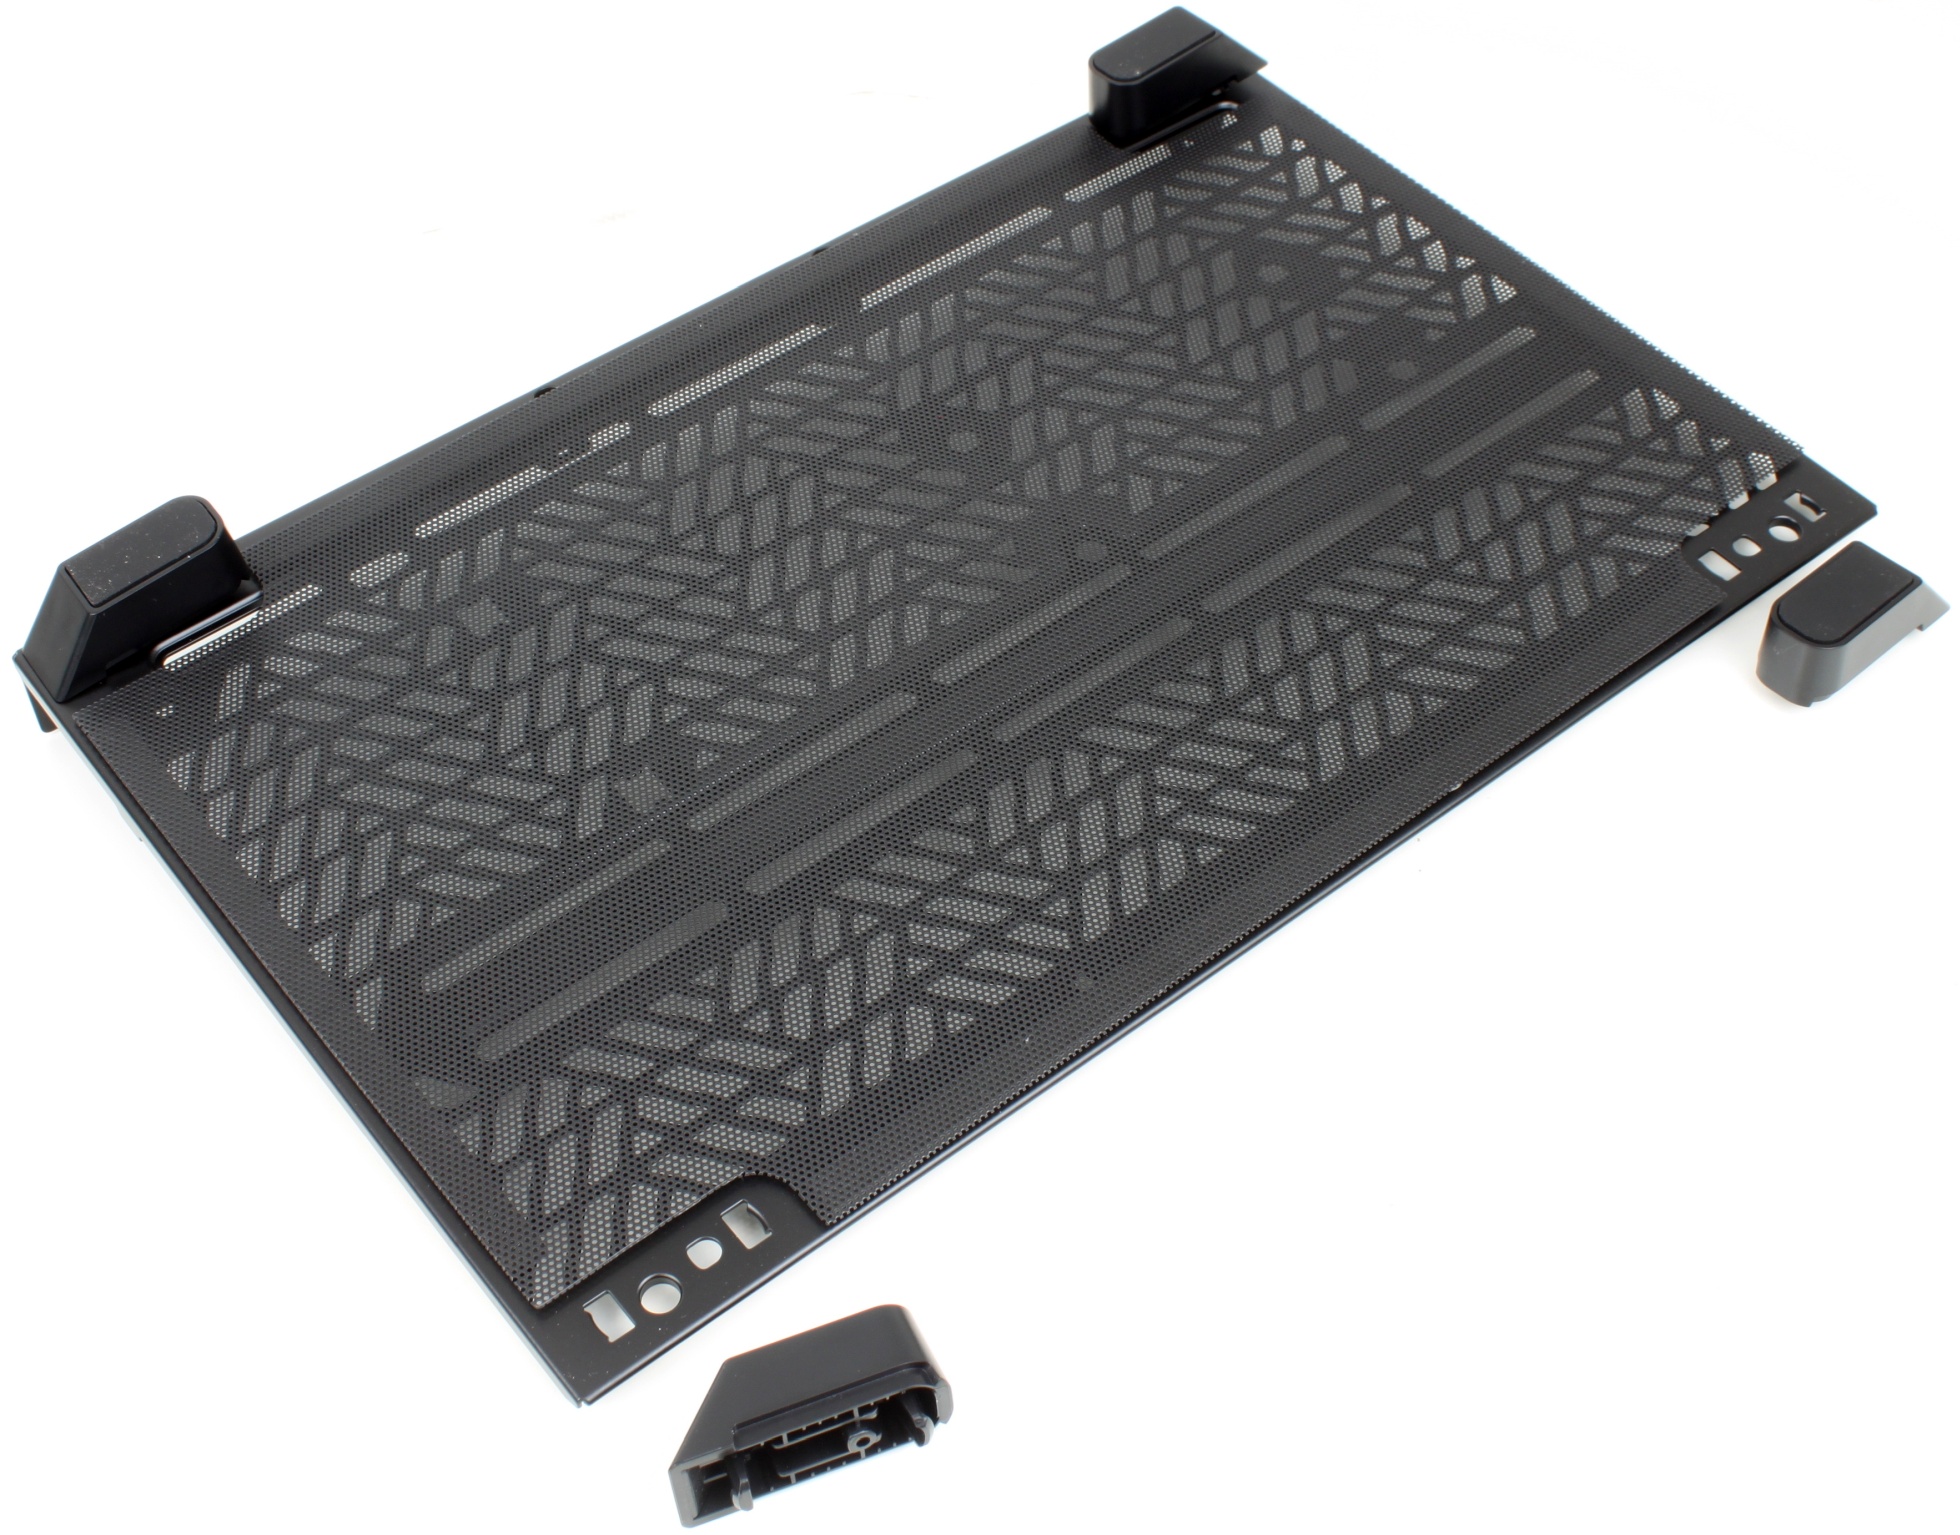
For the other side, there is a completely perforated side panel with a dust filter. Due to the symmetrical design, you can choose which side panel is mounted on which side.

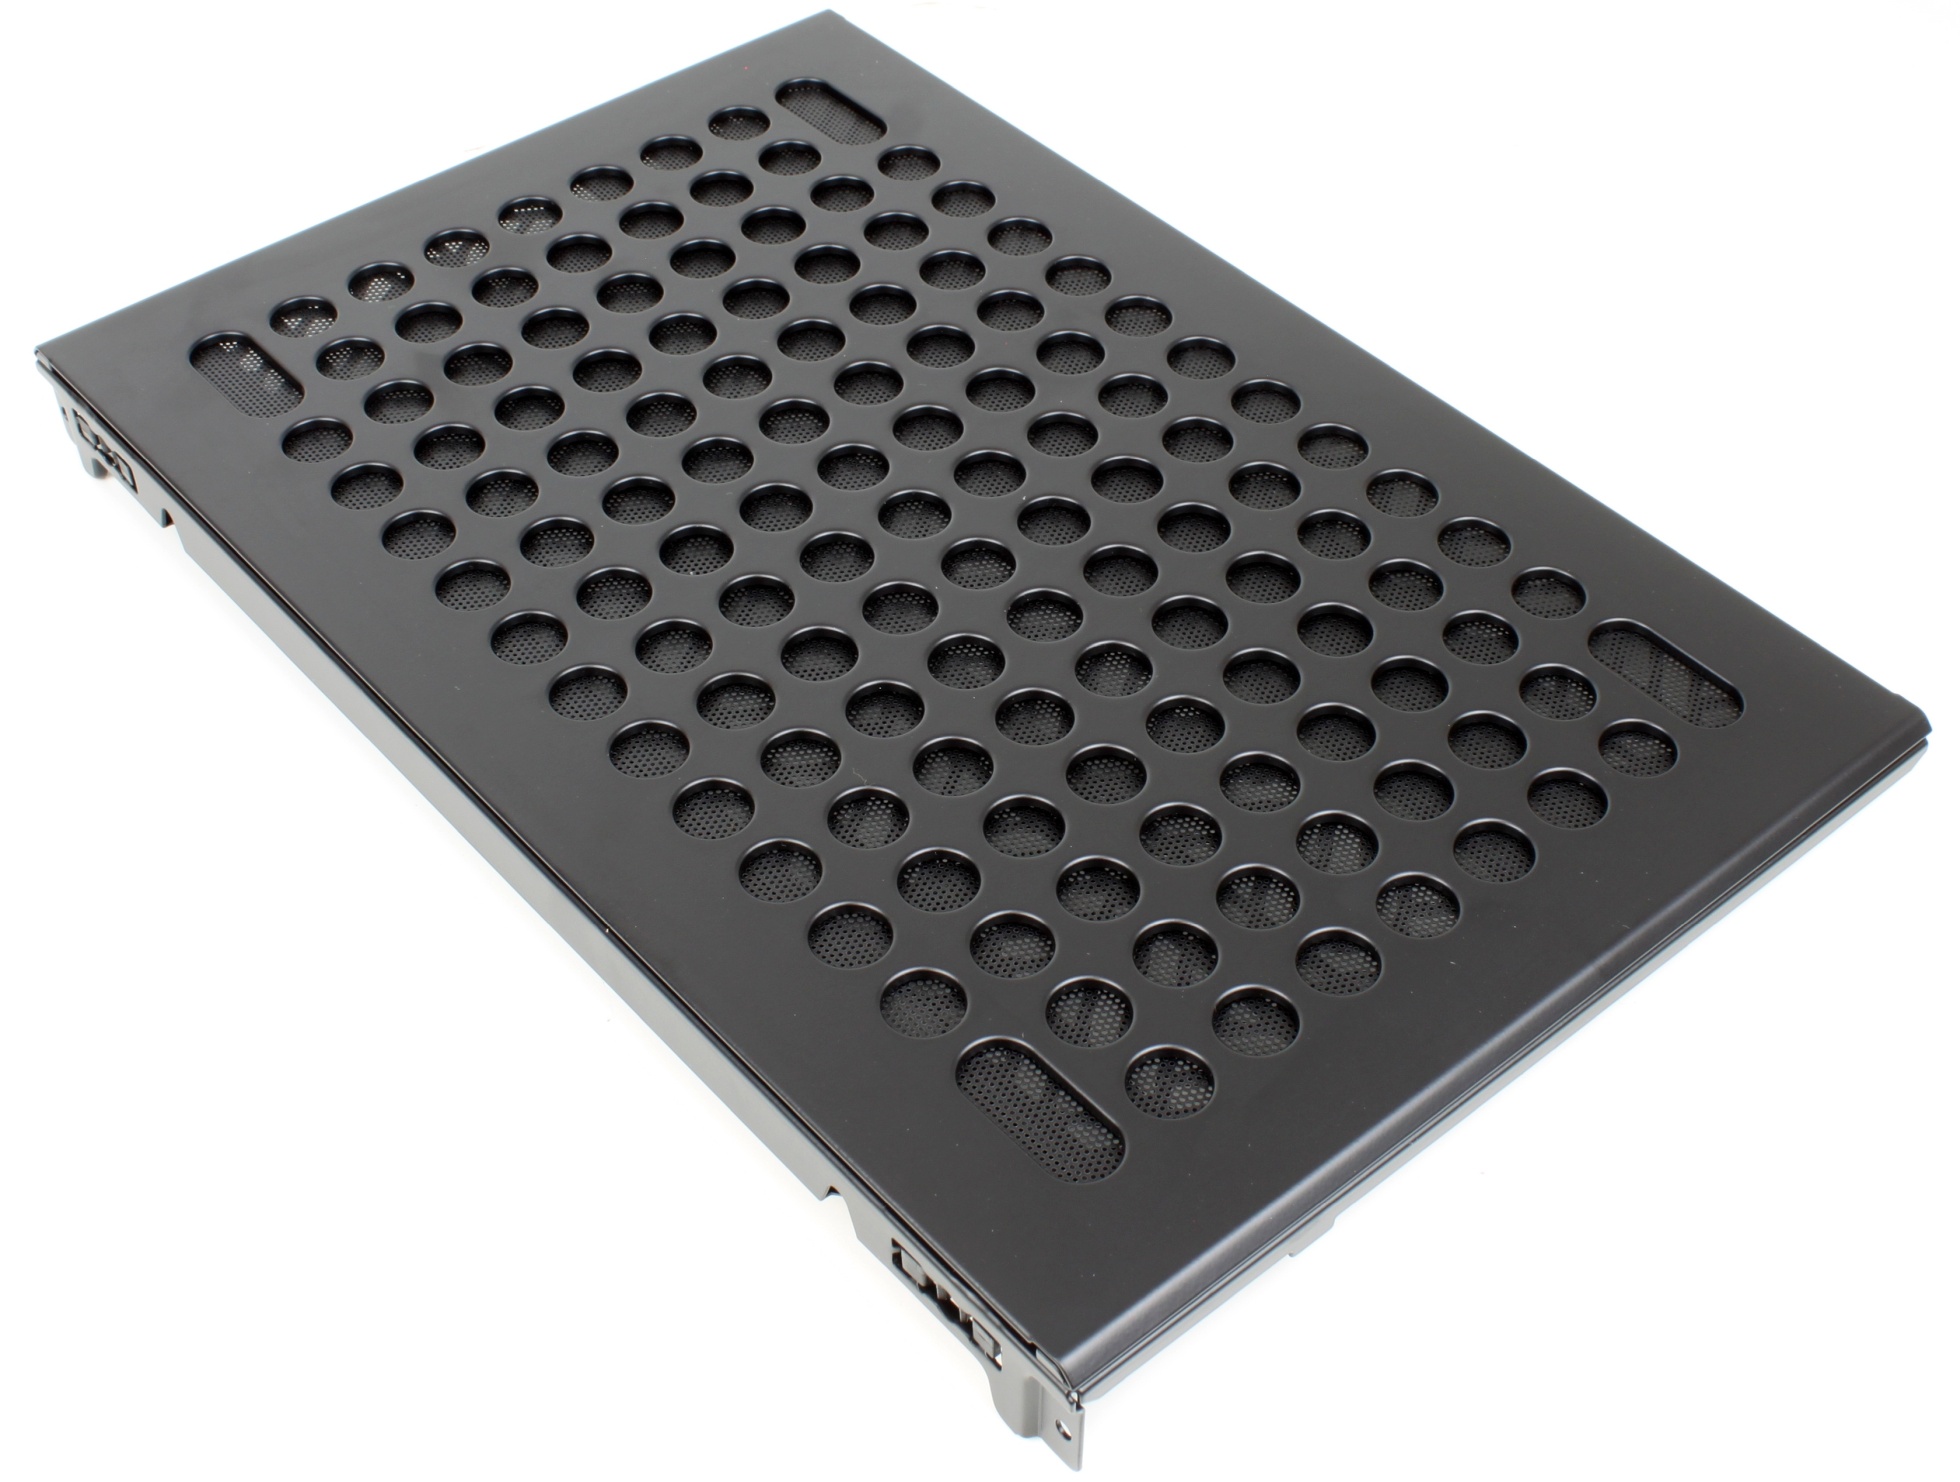
The lid consists of three parts. A perforated cover, a magnetic dust filter and the support structure, which is screwed to the other sides of the case.

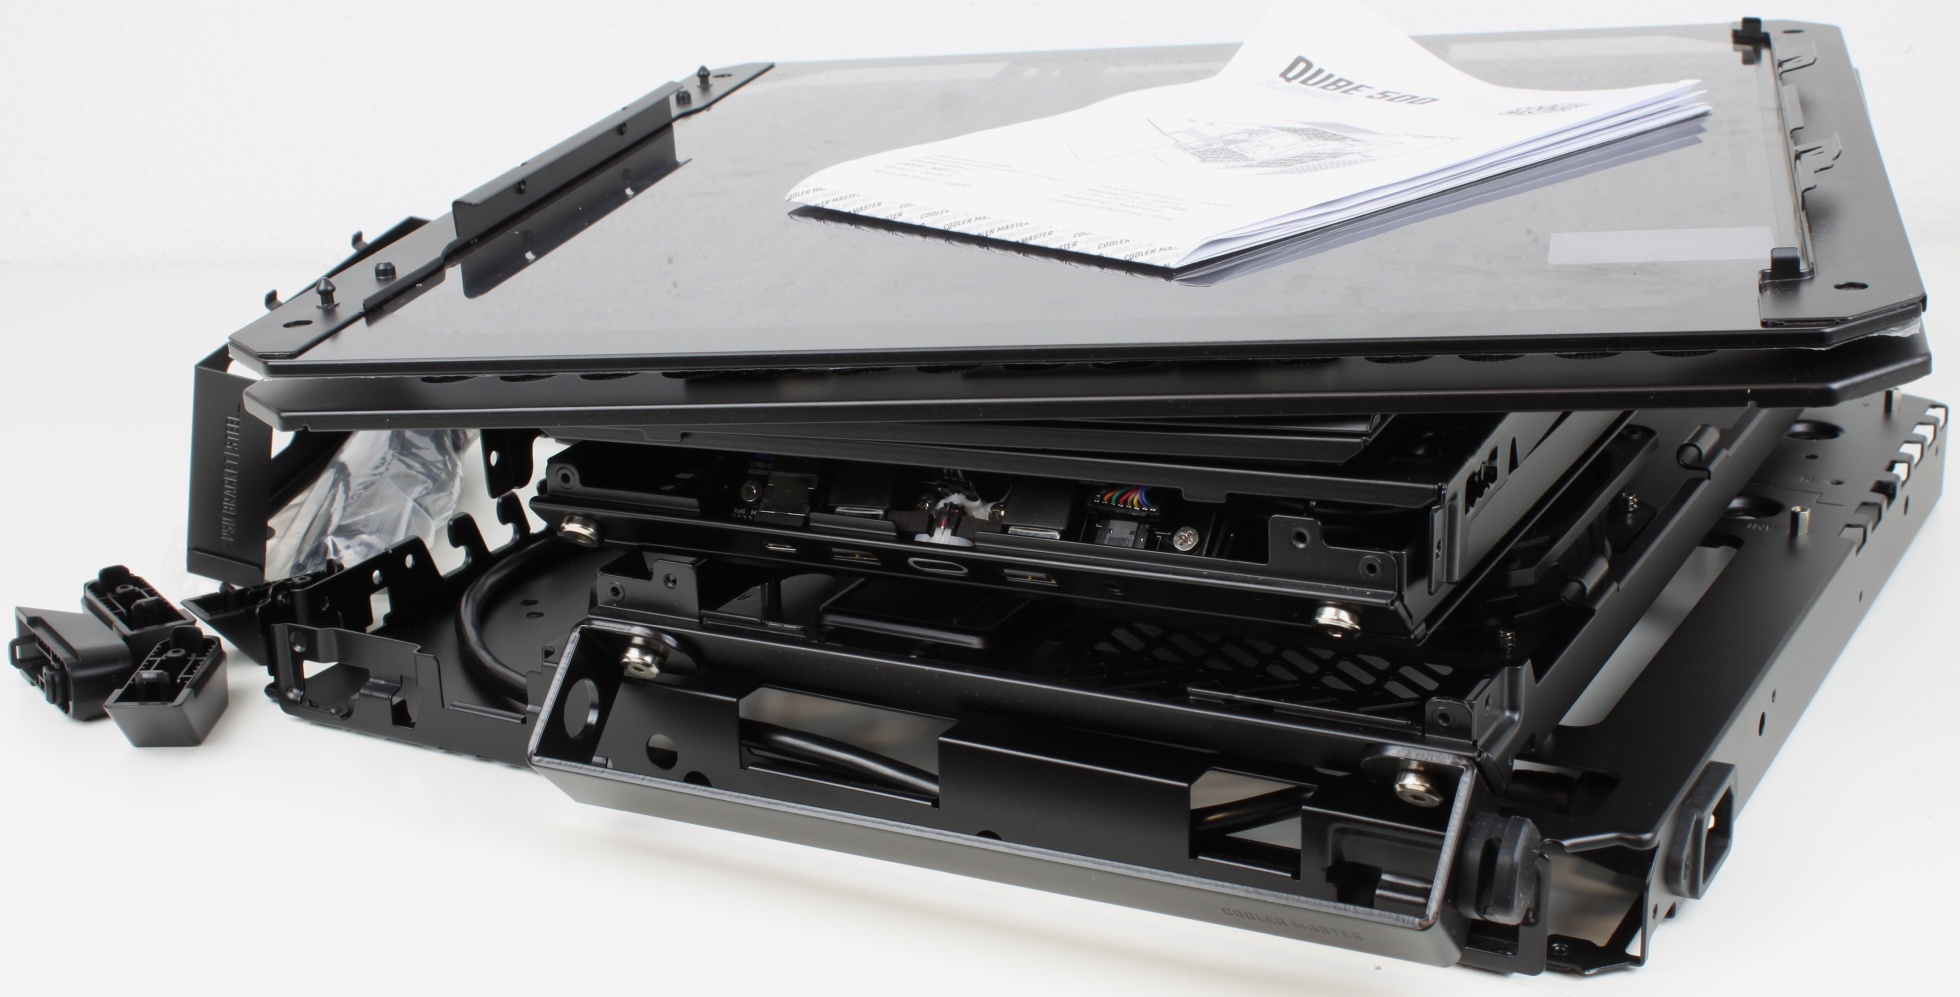
The front of the case is constructed in the same way, and it is joined by the modern front I/O, consisting of a 3.5 mm combo jack, 2x USB 3.0 and a USB-C port. The reset button and the HDD light have been omitted. Cool: The front I/O is connected with a single connector, so you don’t have to search for the PWR_SW, PWR_LED etc. with the flashlight first. Connectors.

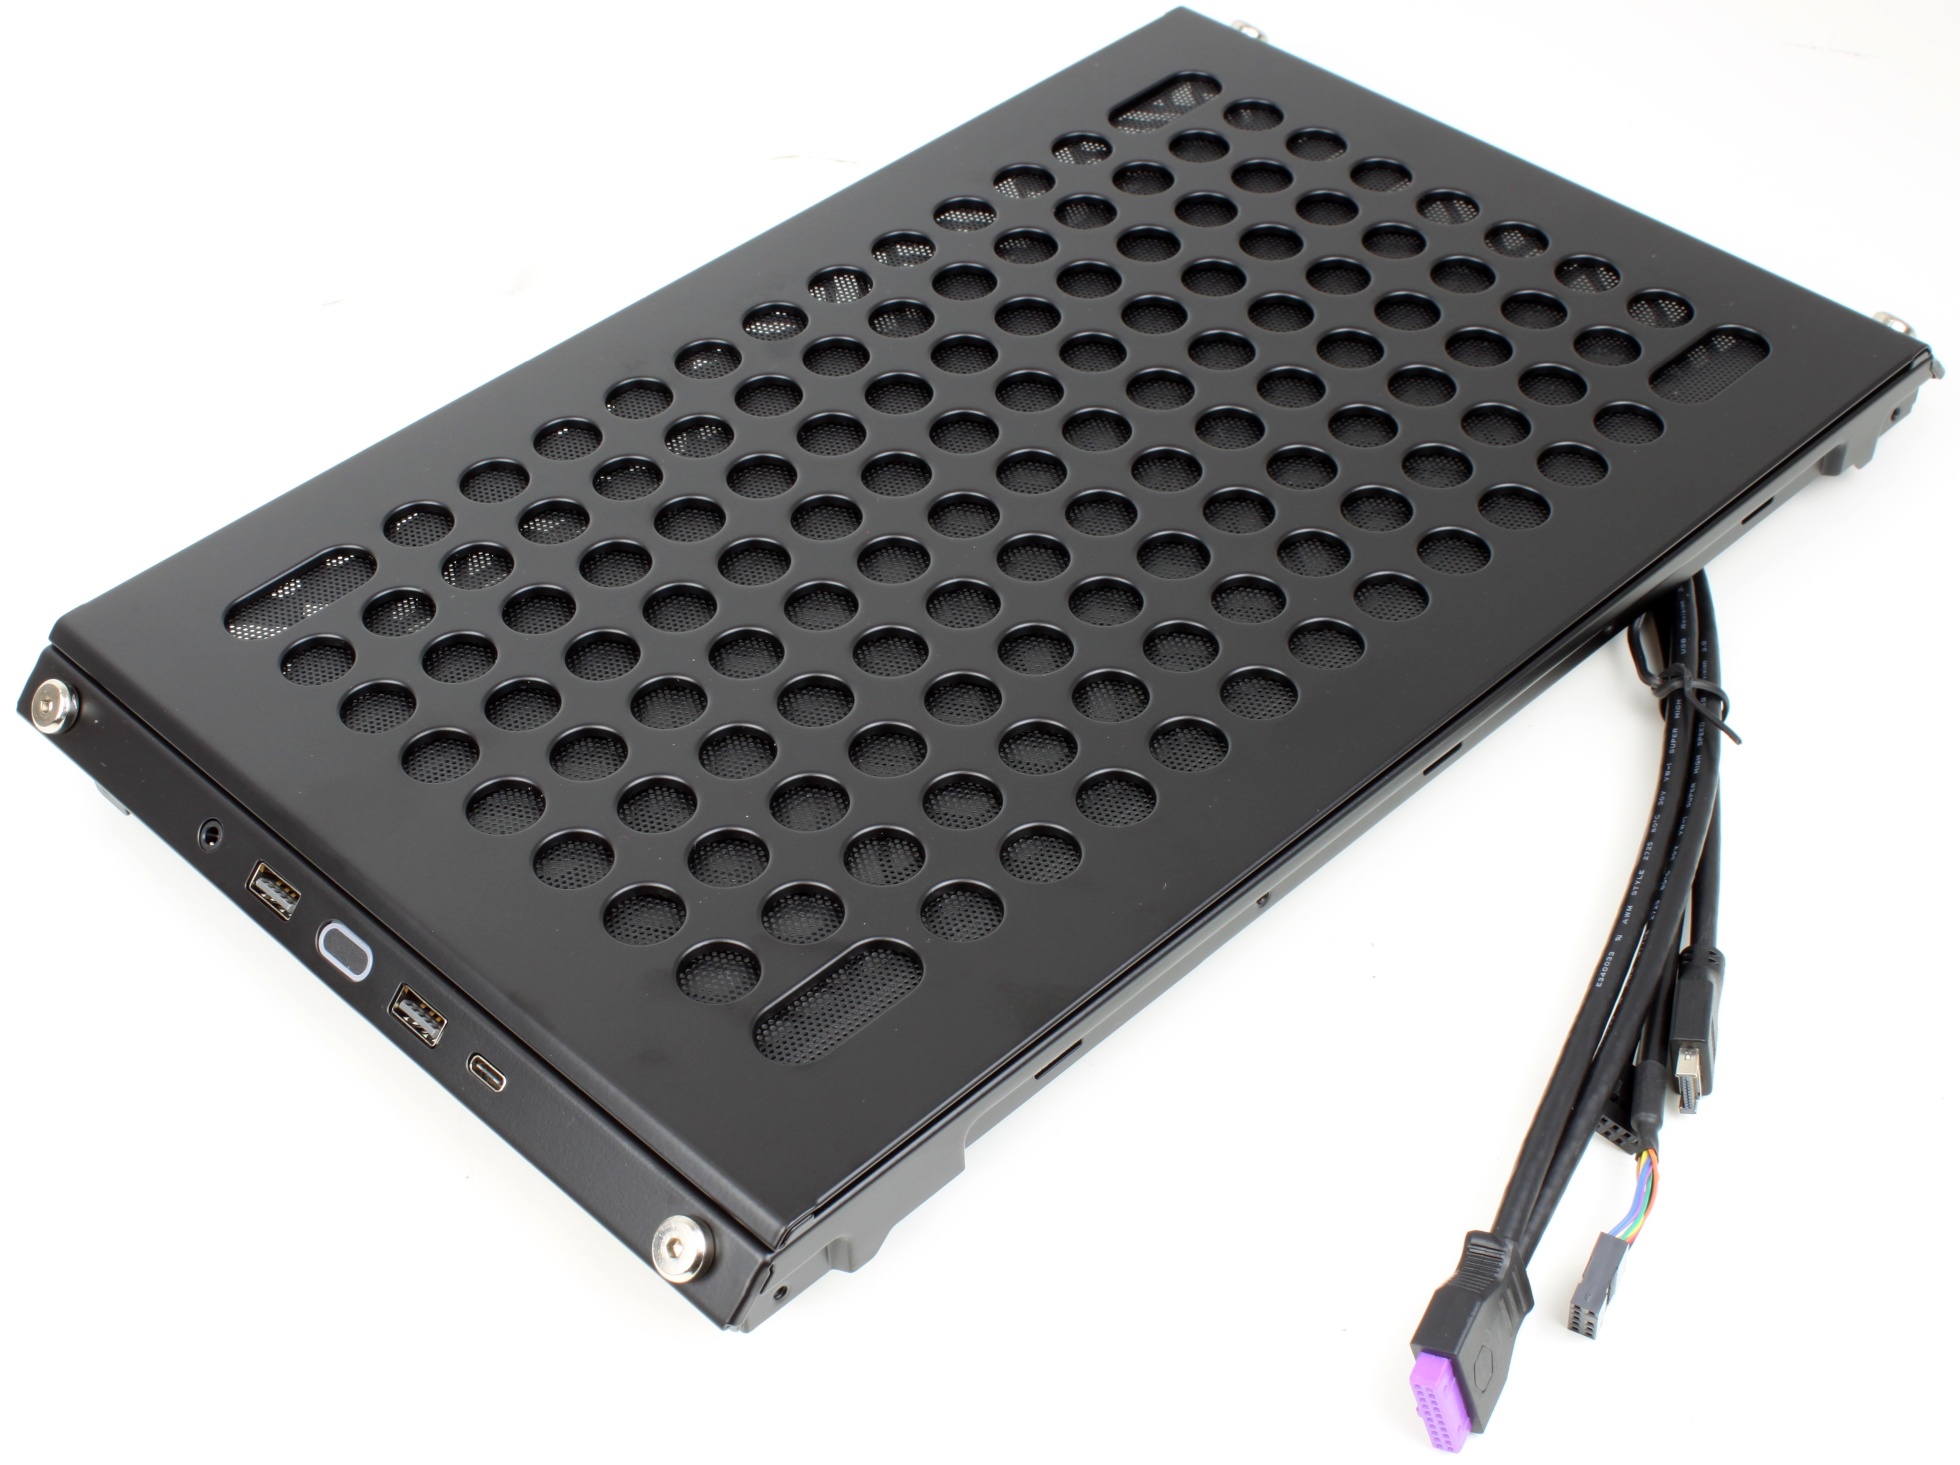
As with the lid, the cover on the front can also be removed without tools.

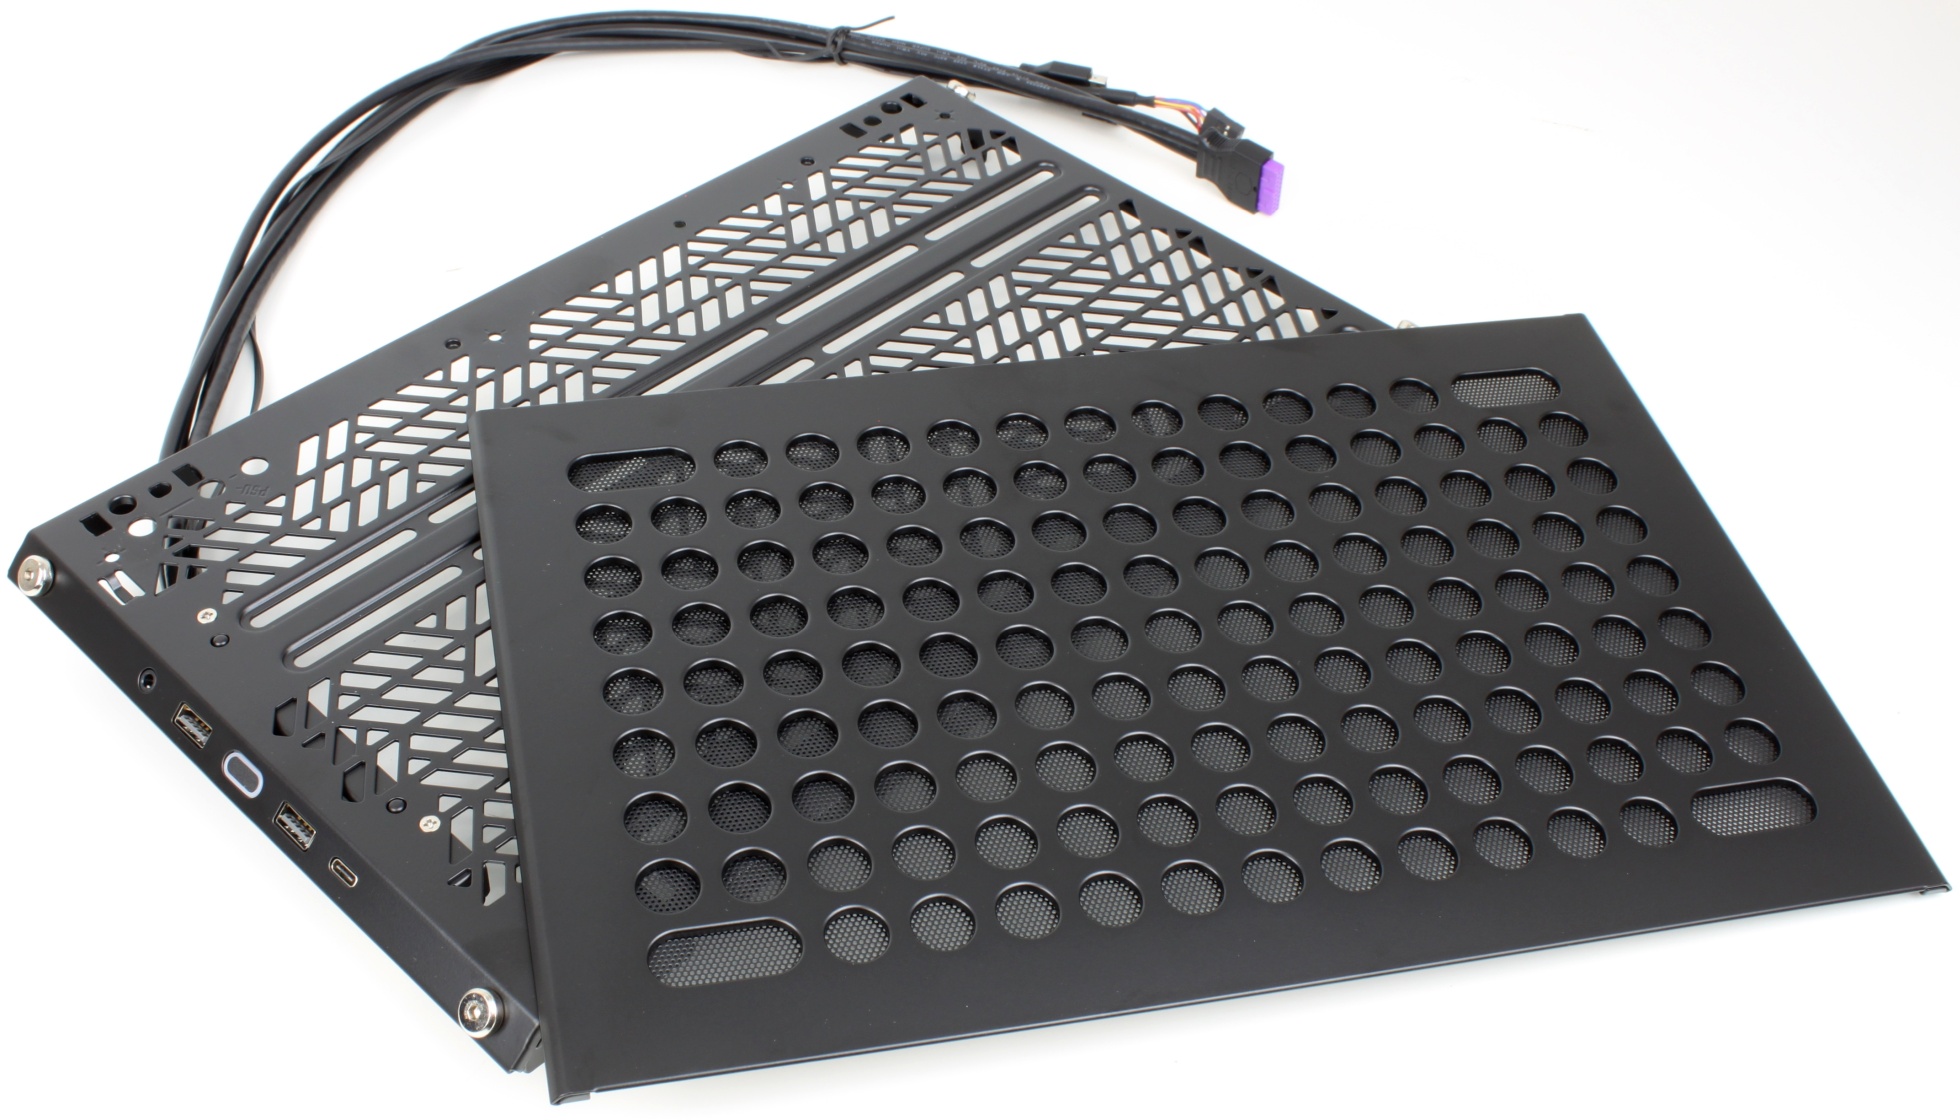
The front I/O in detail. By the way, the large hexagon socket screws on the edges are not only decorative, they also serve as attachment points for the carrying handle, which will be shown in a moment.

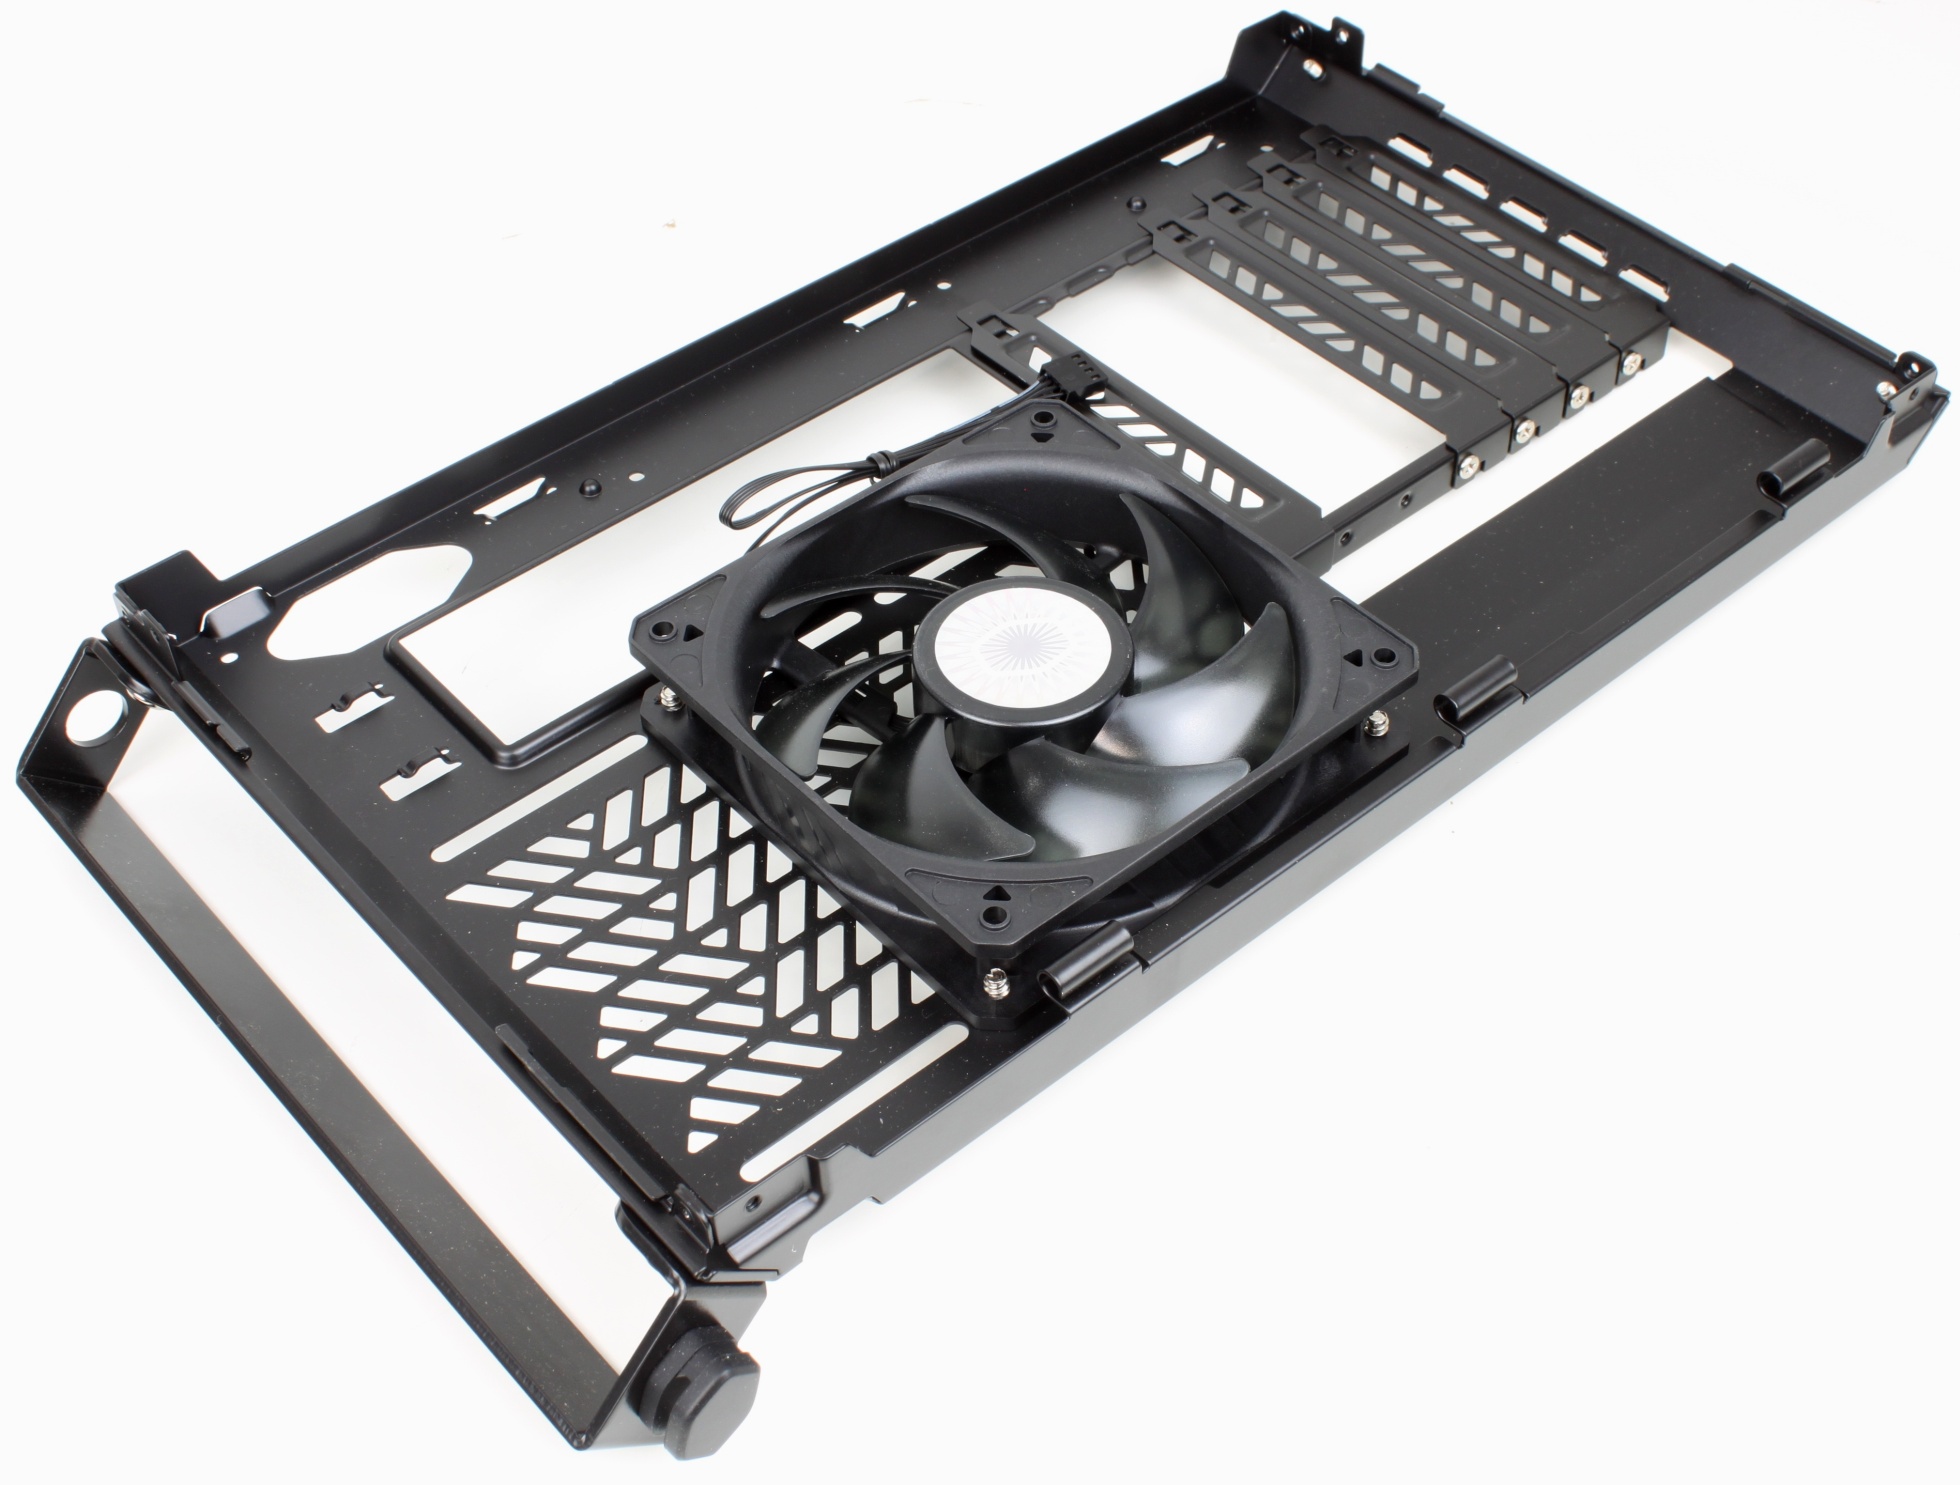
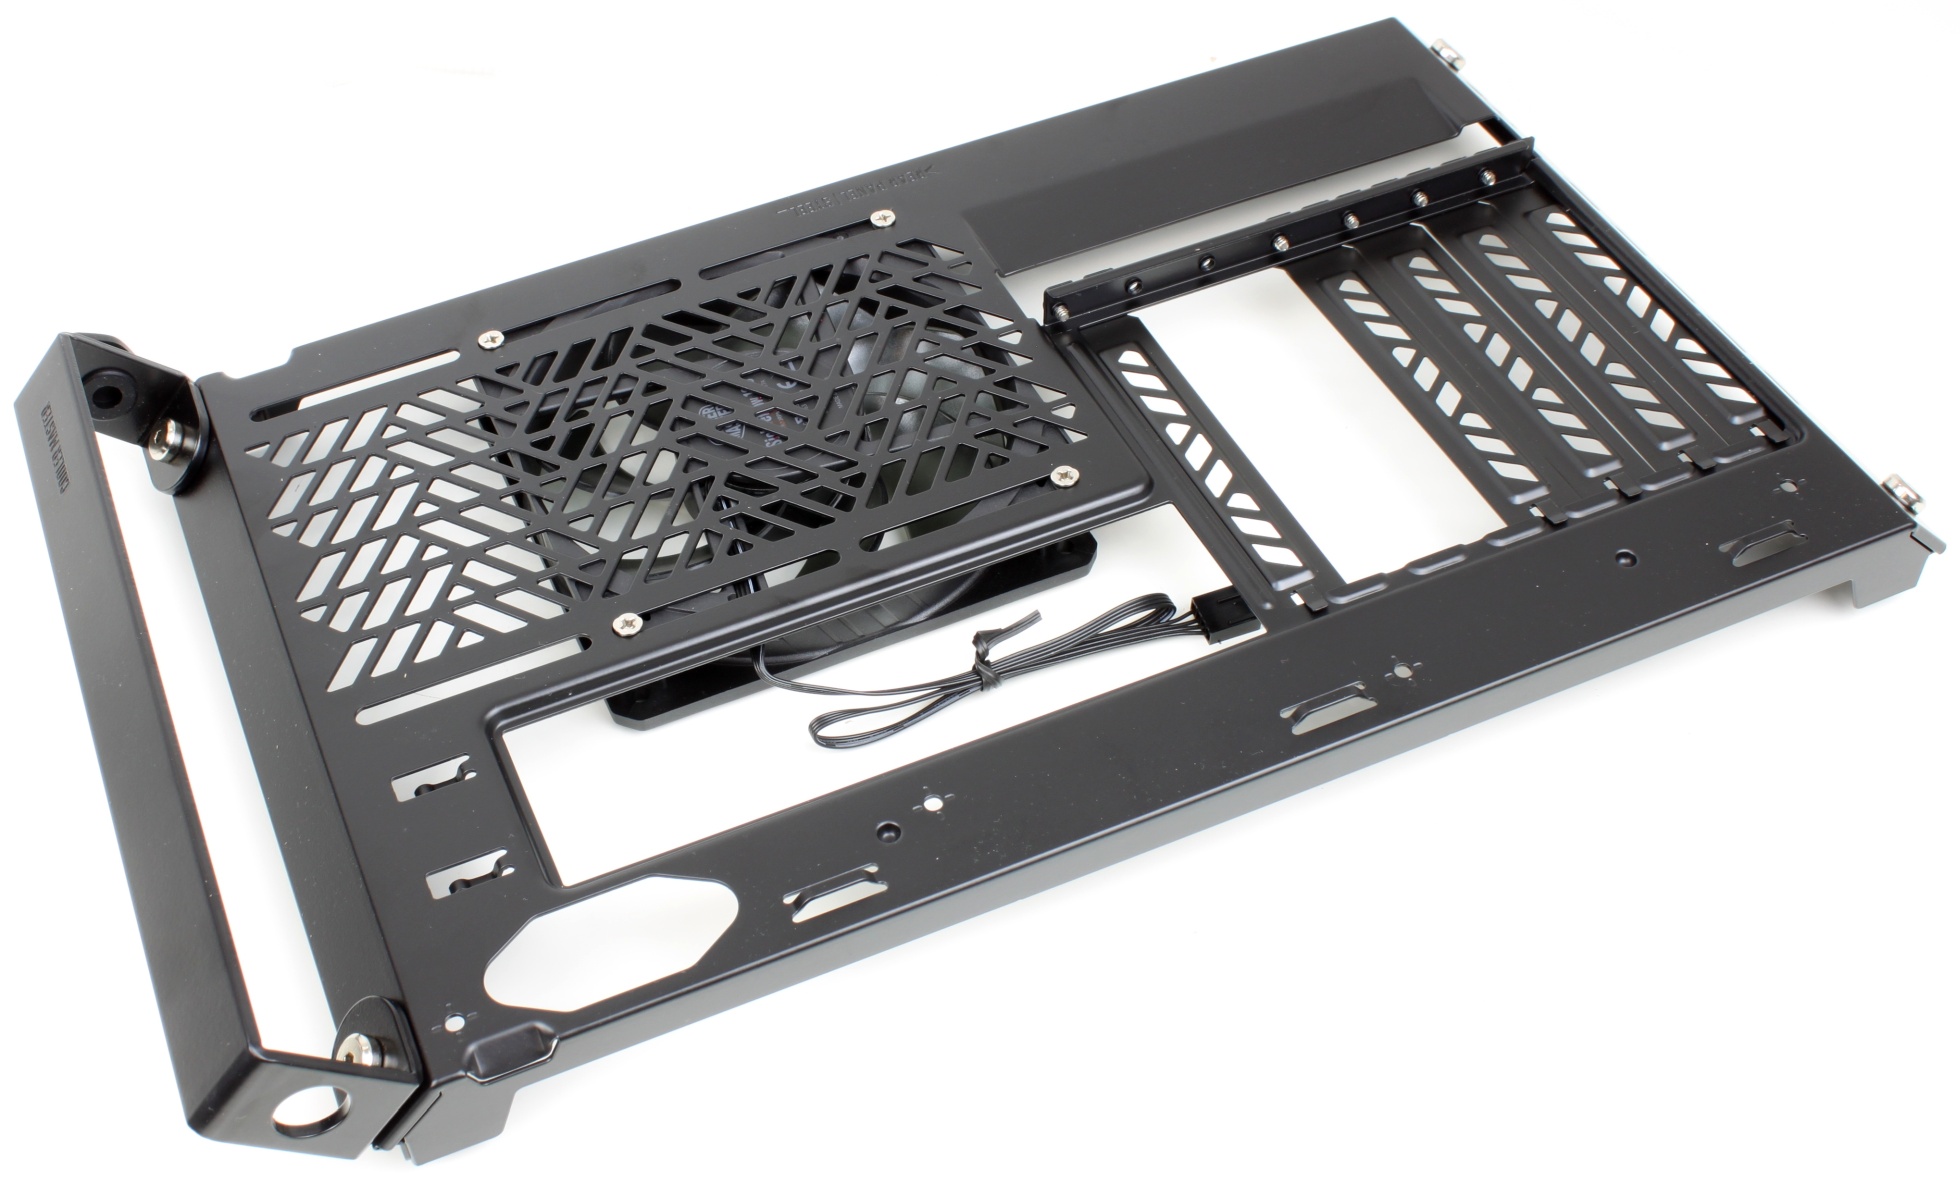
There is no additional cover on the bottom, but the dust filter is still on board. In the “upright” (regular) assembly, the feet are also mounted here.

The rear comes with a pre-installed 120mm.

Besides the fact that you could beat someone to death with all the components, there is even a massive carrying handle here.

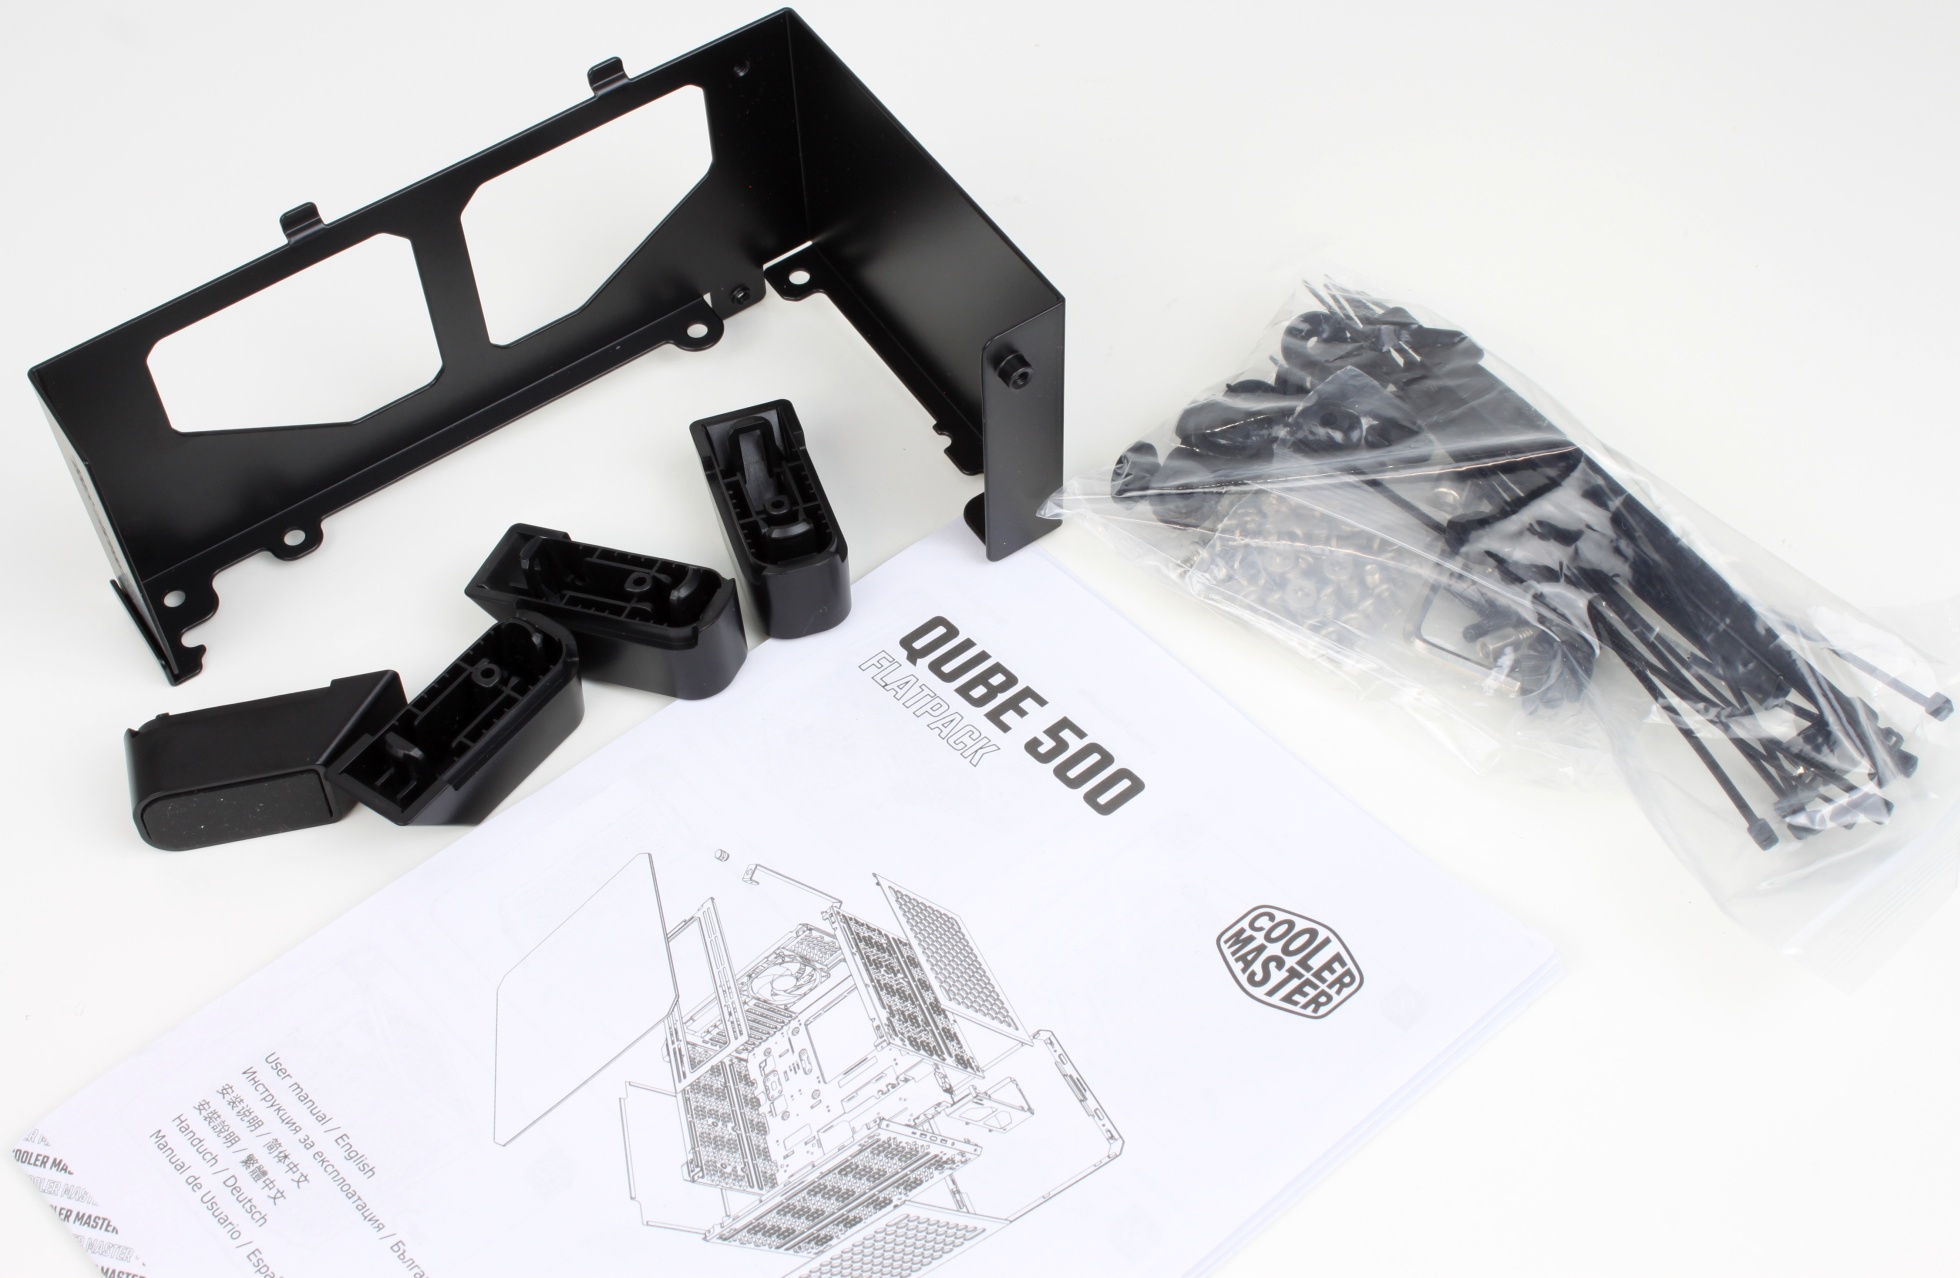
Finally, there is the power supply mount and the usual screw package.


Kommentar

Lade neue Kommentare

RedF

Urgestein

4,665 Kommentare 2,553 Likes

Hat was, wäre vieleicht was für die Kids : )

Antwort Gefällt mir

_
_roman_

Mitglied

78 Kommentare 18 Likes

Ein Lob an den Textersteller.

Auf Seite Eins ist für mich klar, wie was usw.
Die beiden Alternativen - die scheinbar ein ähnliches Cooler Master Produkt auf der homepage hatten vor kurzem, haben elendig versagt.

Die Fotos sind auch um viele besser. Klare Fotos mit dem Blick auf das Wesentliche.

Wie ist die Blechstärke von den einzelnen Teile?

Ich sehe das Baukastenprinzip eher als Vorteil - beim Zusammenbau - und dass man die Möglichkeit hat an die einzelnen Teile ranzukommen.

Warum schafft es kein Hersteller - BeQuiet / Fractal Design / Jonsbo / HP / ASUS / Lenovo bei Gehäuse eine Zugentlastung beim IO-Panel? Ist doch üblich bei Schuko-Stecker bzw. vergiest man dann die Kabel zur Zugentlastung.

Das Teil hat dieselben Probleme wie ich es mit dem Jonsbo D41 erlebt habe, wohin mit dem Netzteil und den Netzteilkabel.
Die fehlende Einrastmöglichkeit des Kaltgerätesteckers im Gehäse beim Netzteil sehe ich genauso wie beim Jonsbo D41 als nachteilig an.

Antwort Gefällt mir

DigitalBlizzard

Urgestein

2,072 Kommentare 969 Likes

Sehr schöner Artikel, gelungen, gottseidank ist Gehäuse Geschmack ja bekanntlich geschmackssache :LOL:

Also die Flexibilität, auch die lustigen Farben inklusive Türkis etc sind lustig, das Konzept ist für den IKEA Fan und Bastler sicher auch eine coole Sache.

Mein erste Assoziation war allerdings Fischertechnik Metall Baukasten

Für User die auch mal gerne an der Hardware basteln und sich einen "Werkstattrechner" hinstellen wollen, sicher megacool, aber so richtig warm werde ich mit dem Produkt leider nicht

View image at the forums

Ich würde mir von CM aber viel eher eine Neuauflage des CM Stacker 830 wünschen, modernisiert, gerne wieder mit Schlitten, vielen Optionen für Lüfter und Radiatoren und 5.25er Slots für z.B. Ausgleichsbehälter und Displays, gerne in der Qualität, dickem Alu, nur halt frischer.

View image at the forums

Der Cosmos ist und bleibt ja auch ne coole Kiste, aber auch schon gefühlt 8 Jahre alt und eben kein Stacker

Also CoolerMaster, wenn ihr das lest, Stacker 830 Refresh 2024, Mesh und Glas Option, silber, schwarz und weiß, Mainboardschlitten, 180 gedrehte Einbauoption für das Mainboard, so dass er variabler wird ( Quasi ATX-BTX )

Was ich nicht verstehe, warum ist im Artikel eine Verlinkung des Namens CooleMaster auf den MF Shop mit DECIMflex Staubfiltern?

Antwort 2 Likes

Klicke zum Ausklappem
onyman

Veteran

237 Kommentare 125 Likes

Mal was anderes. Super! 👍

Es fehlt m.E. eine Infos zu Ersatzteilen. Man kann beim Hersteller doch bestimmt Einzelteile (andere Farben, geschlossener Deckel, Glasdeckel, Blechseitenwand, anderes I/O-Panel ... etc. pp.) erwerben?
Die Seite mit den Zusatzteilen beim Hersteller führt leider wieder auf die Ursprungsseite.

Antwort Gefällt mir

DigitalBlizzard

Urgestein

2,072 Kommentare 969 Likes

Wird noch nicht im Handel sein, aber soweit ich weiß, kannste das Teil auch Bunt machen, weiß Türkis usw.

Antwort Gefällt mir

DigitalBlizzard

Urgestein

2,072 Kommentare 969 Likes

Also so wie es aussieht, sind maximal die Teile im Ersatzteilbereich erhältlich, es gibt nur drei editionen, Black, white und Macaron ( Rosa oder Türkis ) Willst z.B. schwarz mit Türkis kombinieren musst entweder sehen ob Du die Front etc als Spare Part bekommst, oder musst 2 Flatpacks kaufen und untereinander mischen, die einzelnen Komponenten sind wohl nicht zu Einzelkauf im Handel vorgesehen.

Antwort Gefällt mir

ApolloX

Urgestein

1,666 Kommentare 932 Likes

Cool, 1. dass man aus der Benchtable ein Gehäuse bauen kann und 2. dass es eher günstig ist. Aber für ne Wasserkühlung ist es dann schon auch recht klein.

Antwort Gefällt mir

M
Mudsee

Mitglied

34 Kommentare 7 Likes

Ich besitze das Cooler Master HAF XB Evo und ich mag das Gehäuse. Kompakt gute Durchlüftung, Platz für große Lüfter und hohe CPU Kühler usw. So was die das die Stromkabel der Grafikkarte mit dem Deckel kollidieren gibt es da nicht. Und die Tragegriffe sind auch praktisch. Und ich mag es wenn die Grafikkarte, Der Kühler stehend auf dem Board sind. So was die Schwerkraft und spezielle Stützen sind dann nicht nötig da die Lastenverteilung ganz anders ist. Gerade bei so 1KG+ Kühler.

Auch das ich 2 Optische Laufwerke drin habe und Wechselslot für 3,5 Hdd.

Bin auf das gekommen von einem Stacker 810 und in dem Berreich muss man Coolermaster zugesehen bauen die gute Gehäuse. Robust, Stabil usw

So ist das irgendwie so ein kleiner Nachfolger vom HAF XB

Daher finde ich das Gehäuse Schick und praktisch da es auch bis E-ATX unterstützt.

2 Sachen die mich stören sind Der Fehlende Reset Kopf und das man kein optisches Laufwerk verbauen kann. Ja ich weiß wer verbaut noch so was...Ich weil ich auch gerne meine Musik auf CD kaufe und dann sichere und auch noch paar alte Datenträger und Spiele habe. Bin da altmodisch:)

Klar geht das auch über USB ist aber schon wieder was extra. Wo rumsteht:)
Was ich auch schade finde habe mal geschaut ob es kaufbar ist und von den 90€ sind die Anbeote bit 140€ +-10€ weit entfernt

Antwort 2 Likes

Klicke zum Ausklappem
K
KalleWirsch

Veteran

186 Kommentare 91 Likes

Danke für den Test,

Das sieht irgenwie nach IKEA Prinzip aus und ist ein sehr interessanter Ansatz. Very nice.
Sehr cool ist auch, dass man bei Bedarf die IO-blende nach oben oder die Seite bauen kann.

Damit ist das für mich der ideale Kandidat um das mit allen möglichen Custom-Gehäuse Bastelprojekten zu kombinieren, oder als Einbauwariante in einen cShrank oder ähnliches.

Ich schau immer nach interessanten Gehäusen und habe große Freude dran zu sehen was Leute so bauen.

Ähnlich wie bei @Mudsee kommen meine Gehäuse immer mit der Anforderung optische Laufwerke und einen externen Kartenleser/USB Port einzubauen. Ich hab vor ca. 1 Jahr ein ähnlich großes gekauft (Chieftec Gaming Cube).

Viel Spaß noch mit dem Teil.

Antwort Gefällt mir

R
RandomUsername

Neuling

2 Kommentare 1 Likes

Hallo,
Sehr interessanter Test! Könnt ihr bitte Fotos machen von dem Netzteil im Boden? Ich habe ein Mikro-ATX Board und möchte wissen, wie viel Platz dann übrig bleibt.
Grüße, Random

Antwort Gefällt mir

Alexander Brose

Moderator

819 Kommentare 574 Likes

Hilft dir dieses Bild vielleicht weiter?

Schaffe das zeitlich aktuell nicht, den Karton aus dem Lager zu holen, das Gehäuse wieder zusammenzubauen und ein Netzteil zu montieren.

View image at the forums

Grüße!

Antwort 3 Likes

R
RandomUsername

Neuling

2 Kommentare 1 Likes

Danke, das hilft schon! Ich hatte auch den Plan, ein RMx Shift Netzteil zu verbauen. Sollte theoretisch klappen, oder? Notfalls muss halt der Dremel ran! :D

Antwort 1 Like

Danke für die Spende


Du fandest, der Beitrag war interessant und möchtest uns unterstützen? Klasse!

Hier erfährst Du, wie: Hier spenden.

Hier kannst Du per PayPal spenden.

About the author

Alexander Brose

Werbung

Werbung