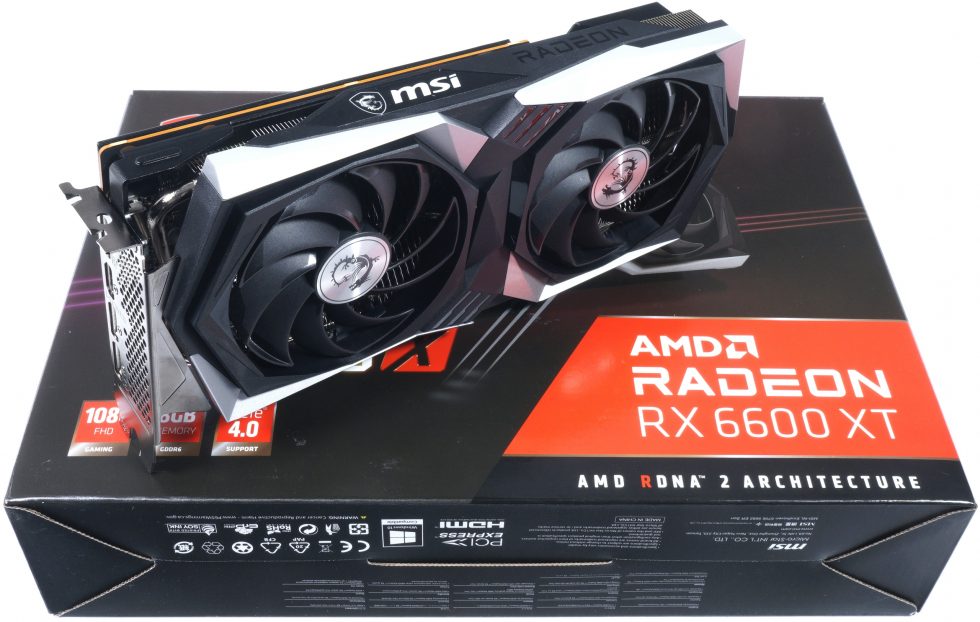
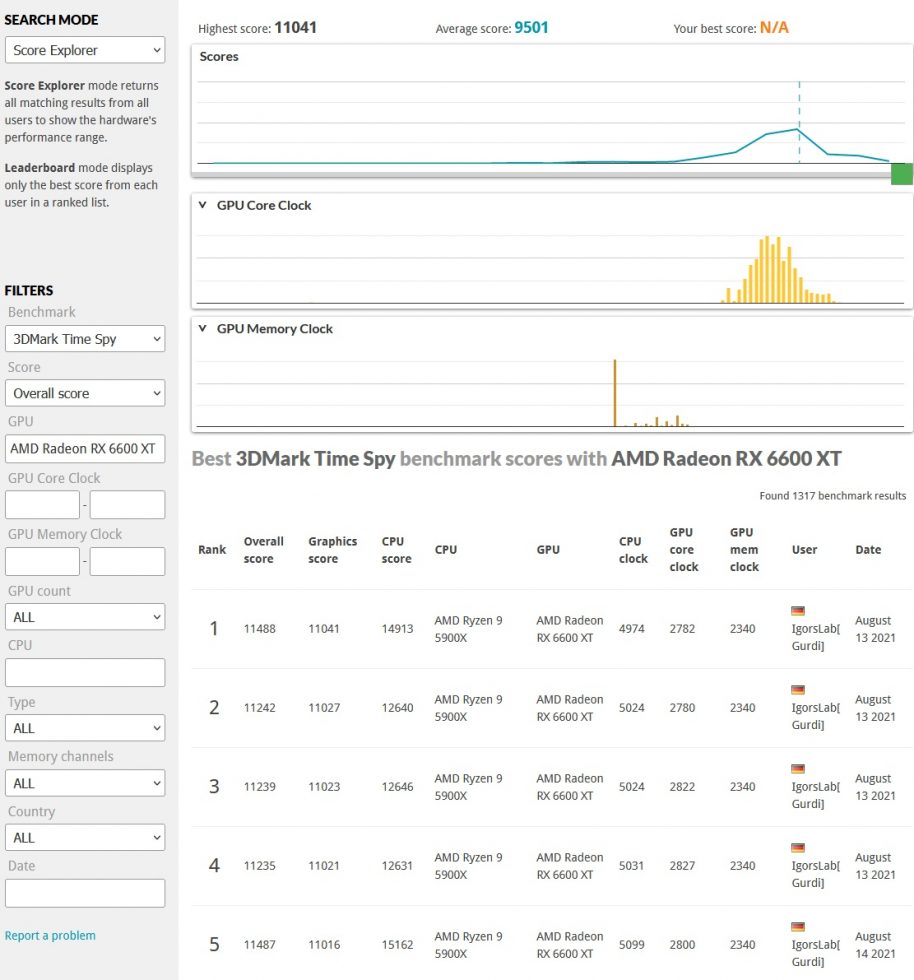
Up to 2.8 GHz is not witchcraft, as today’s practical article shows. First of all, my congratulations go again to Gurdi, whose overclocked RX 6600XT has meanwhile (and for the time being) made its way to all the top 10 places on the TimeSpy leaderboard. His overclocking attempts were really interesting and today we also want to show how he got there. Because it’s easier than many think and fear. Actually anyone can do it and it’s not dangerous.
So that you can also inject the right steroids into the little devil, there are of course also exclusively the right settings for all of them! The leaderboard looks (or looked) exactly like this as of this morning (click on the image to open the sore on the website), so as a little suggestion for where the journey could go:
Overclocking the RX 6600XT – Here’s how!
First, of course (if you haven’t already), download one of the current beta versions of MorePowerTool (MPT) (click here to download) and install. After that we extract the BIOS of our own card with a suitable tool and save it on the harddisk, GPU-Z will do it. Then we open the MPT and first look for our display adapter with the RX 6600XT in the upper combo box. Now we can also load the just saved BIOS into the MPT.
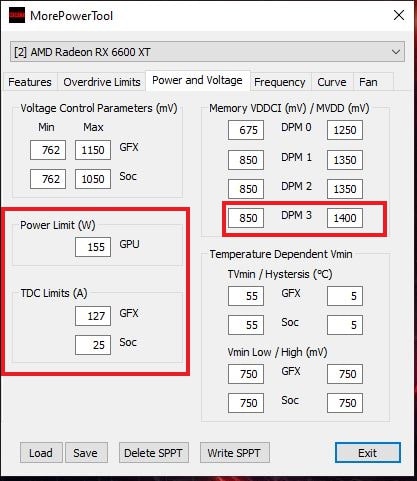
Then we first switch to the “Power and Voltage” tab and set the power limit for the GPU to 155 to 160 watts. That’s a bit more than factory overclocked cards, but it shouldn’t be significantly higher. The maximum currents can be set to values between 127 and 130 A for the GPU (GFX) and 25 for the SoC. Also important is the voltage for the overclocked memory, where we set the DPM 3 to 1400 mV.
The problem with the Wattman is the protection against even too bold changes of the settings from the outside. Here AMD’s driver team fights again and again against the MPT to prevent overly optimistic settings by acknowledging such settings with a fallback to a very low minimum clock. But not everything has been prevented and so the FCLK can be increased significantly in the “Frequency” tab.
Now we can save and store these settings. First with “Save” as MPT file, which contains all changes and serves as archiving for us. Then you don’t need a BIOS the next time, but can experiment directly at the last position. The actual transfer into the system is now done with “Write SPPT”, where all new settings are entered into the SoftPowerPlayTables of the registry. After all this is done, we need to reboot the computer so that everything takes effect.
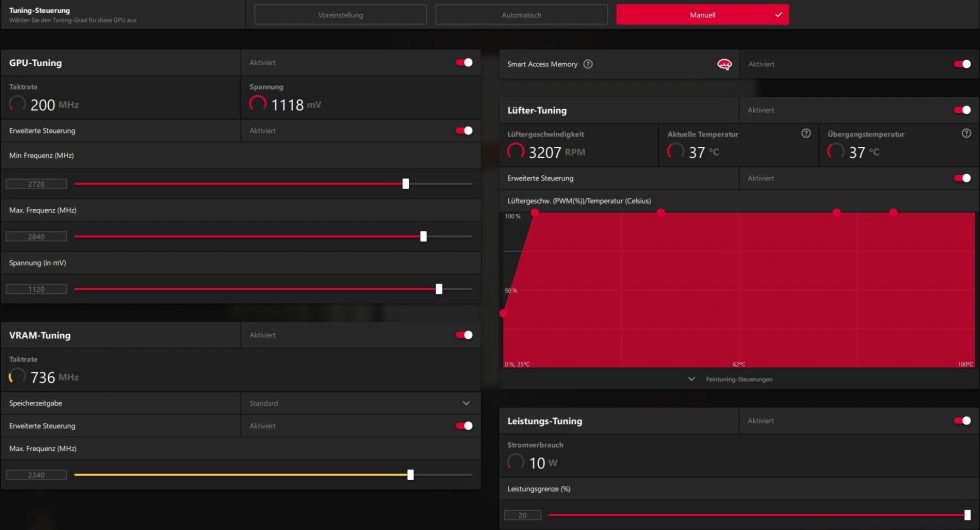
The next step then happens in the AMD driver, more specifically in Wattman. Here the settings are of course variable, I’ll just show you our settings with which we mixed up the best list. Of course, this can be adapted to the conditions of your chip, maybe with a little luck you will get higher. Challenge accepted? Well then, have fun testing!
Nothing can break here for the time being, as long as you adhere to our specifications. However, the next page shows that you gain a lot of performance with a few benchmark results in Full HD and WQHD. After all, TimeSpy has nothing to do with real life, but these gaming benchmarks do. There you will also see which partly astonishing increases could still be possible – and for free on the house!







129 Antworten
Kommentar
Lade neue Kommentare
Urgestein
Urgestein
Urgestein
Urgestein
Urgestein
Urgestein
Urgestein
Urgestein
Mitglied
Urgestein
1
Urgestein
Veteran
Urgestein
1
Neuling
Urgestein
Neuling
Alle Kommentare lesen unter igor´sLAB Community →