


First of all I would like to thank the user LEIV from our community, who quickly put together a tutorial overnight and prepared it for publication. I have moved the content from the forum here to the website, so that it is easier to find. I have taken over the Tutorial 1:1 and you could ask questions or talk shop yourself in the Hydra thread. (Igor)
Tutorial from LEIV
Dear Community, Today comes a milestone for the Ryzen community, at least for Zen3 and successors! And first of all many thanks to 1usmus aka Yuri – who gave me the version one day before release, for this review. Introducing Project Hydra – From the programmer of DramCalculator for Ryzen and CTR, those who know these programs will surely be very excited about Hydra.
What exactly does Hydra do differently than the CTR or “static” overclocking ?
Hydra uses the Curve Optimizer, but unlike the normal Curve Optimizer in the BIOS, Hydra adjusts the CO values for single and multithread loads individually, for each core
Where does that leave us exactly?
We can now, without any great knowledge in overclocking, get the maximum out of each core in the All- and Singlecore. Hydra overclocks each core individually, and also differently depending on the workload, so it offers a more flexible “static” overclocking. For this I wrote a little guide together and offer afterwards also some comparisons with my Ryzen 5 5600x – probably the worst Bronze Sample EUW – what can you get out of it?
First the BIOS settings (BIOS should be up to date):
- Ram overclocking is no problem as long as it runs stable
- CPU Core Voltage – AUTO
- LoadLine Callibration – AUTO (The manual says LLC3 for Asus boards – but most boards will give better results with LLC set to Auto)
- CPU Multiplier – AUTO
- (The manual says disable, but this is the latest trend, has given many another performance boost)
- PBO – Advanced
- PBO Limits – AUTO
- Precidion Boost Overdrive Scalar – AUTO
- Curve Optimizer – Set to 0 (Partly the values are used even with deactivated PBO – BIOS Bug … well )
- Boost Clock Override – 0
Program installation and start under Windows
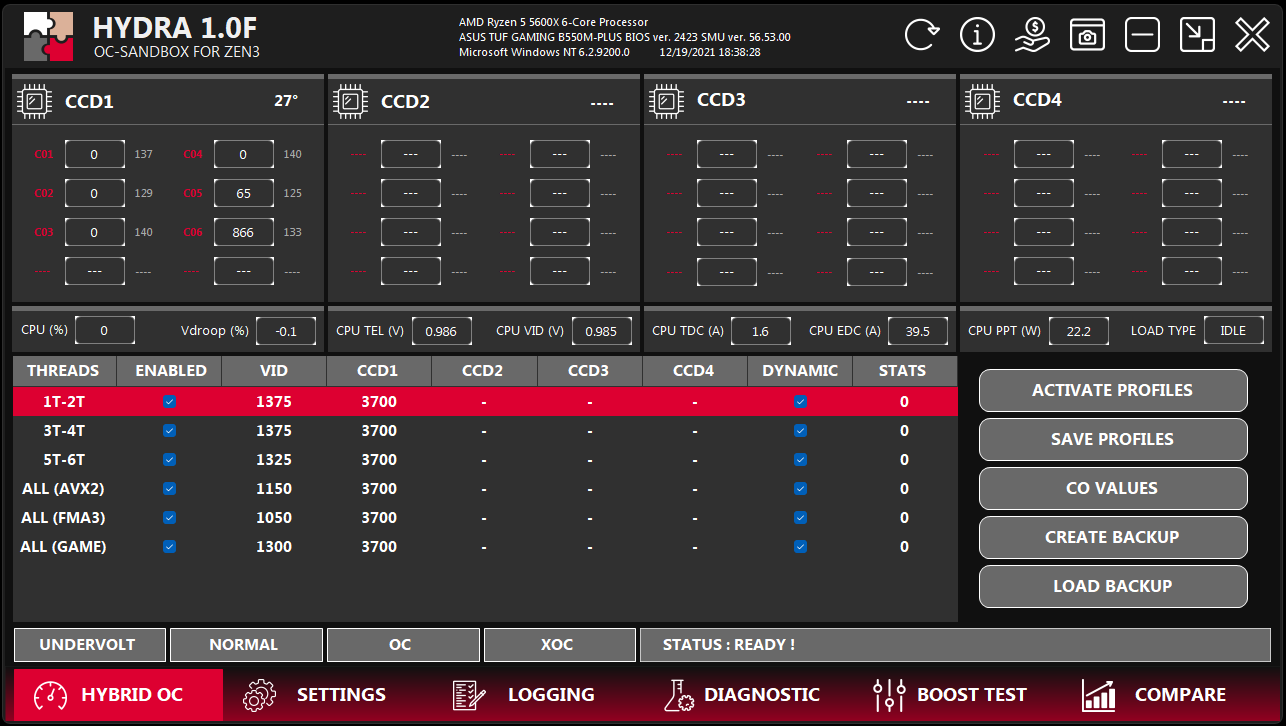
Quit ALL programs that read CPU data in any way, so do not run any Hwinfo/CPUz or mainboard/pump software, this will cause errors in Hydra! Download project Hydra here on igorslab.de, install it and start it as administrator – always watch out for virus scanners, because they don’t always work well with Hydra. Hydra now recognizes the processor, and you can press “Diagnostic” directly without setting anything (you can still take a look at it and fix it if necessary), the rest is automatic!
Hours Later … (1:15 hours)
Hydra is ready, has created profiles that work as is, but the stability test is still recommended and also gives a nice video of 1usmus to further fine tune the CO values in Hydra(Linked also on our Hydra page). However, let’s take a look at the log first, find out the “CURVE OPTIMIZER values for BIOS” and use the “Safe” values if in doubt. However, I had no problems with the “Fast” values either and we enter that nicely into the Curve Optimizer in the BIOS. It is best to do a stability test to be sure (at least if you use the “Fast” values).
As we can see, I have a real “doozy” there, practically nothing goes. There is also a small bug in the program, because with Safe and Fast the “positive” CO values are swapped. But anyway, you can see that.
Back in Windows, we run a new diagnostic on Hydra! (This time only 1 hour)
This time, however, we ignore the “CURVE OPTIMIZER values for BIOS” and can start directly with the profiles that Hydra proposes to us… DONE!
Here are a few quick benchmarks I was able to do – feel free to share your results in the thread as well:

As we can already see in the WONDERFUL table: From stock to PBO ~0-5% more power with almost 29% more consumption! With Hydra (OC profile), however, we are then at 2-4% more power with “only” 14% higher consumption – without fine tuning – there is certainly more inside. With the Hydra profile “normal”, we come in about stock values, but at only about ~69W, so you can also save really good what! In synthetic benchmarks we are already better, but how it looks in games, I can’t say yet. But that will be tested when the opportunity arises.
Create profile
Settings -> Diagnostic Settings -> Everything off, except “Profile Creation” (see screenshot) -> start new Diagnostic, also takes only 1-2 minutes
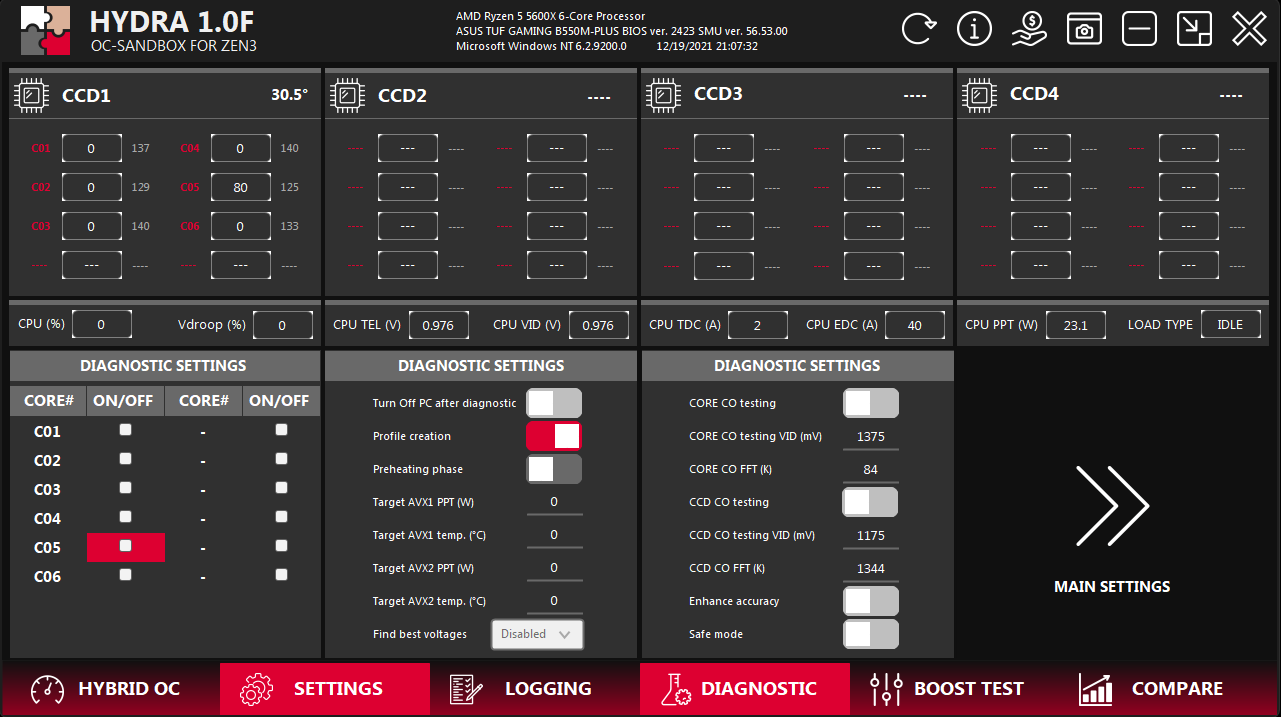
This way you can change the VIDs as you like after the diagnosis in the main screen and then have a new profile created so that the MHz fit to it again. If you have any questions or need help, please post here in the thread, or feel free to contact us in Discord -> https://discord.gg/yZV6MEDEdP
Many thanks especially to Reknez (he owns the Discord ) and the whole Discord community there. And of course to 1usmus. 🙂


611 Antworten
Kommentar
Lade neue Kommentare
Urgestein
Veteran
Veteran
Mitglied
Urgestein
1
Neuling
Urgestein
Veteran
Urgestein
Urgestein
Urgestein
Urgestein
Veteran
1
1
Urgestein
Alle Kommentare lesen unter igor´sLAB Community →