


Converting a GeForce RTX 4090 is easier than you think, but it is not free of small hurdles either. Especially if you want or need to convert the card back to air cooling later (e.g. sale or RMA). So today I’ll show you step by step how I disassembled the card and also cleaned it. And do yourself a favor (because I get mails almost every day, where to get this or that screw): a sealable zip bag for all unscrewed small parts, which you then store in the original packaging, is actually mandatory!
What we really need is a decent set of magnetic mini bits, tape, cotton swabs, isopropyl alcohol, and a small parts storage, as well as the aforementioned baggies for the screws, tension cross, and slot panel, and the other loose parts. And in case anyone is wondering about the “crumbs” on my work mat: they are all thermal paste residue from the last 5 years.
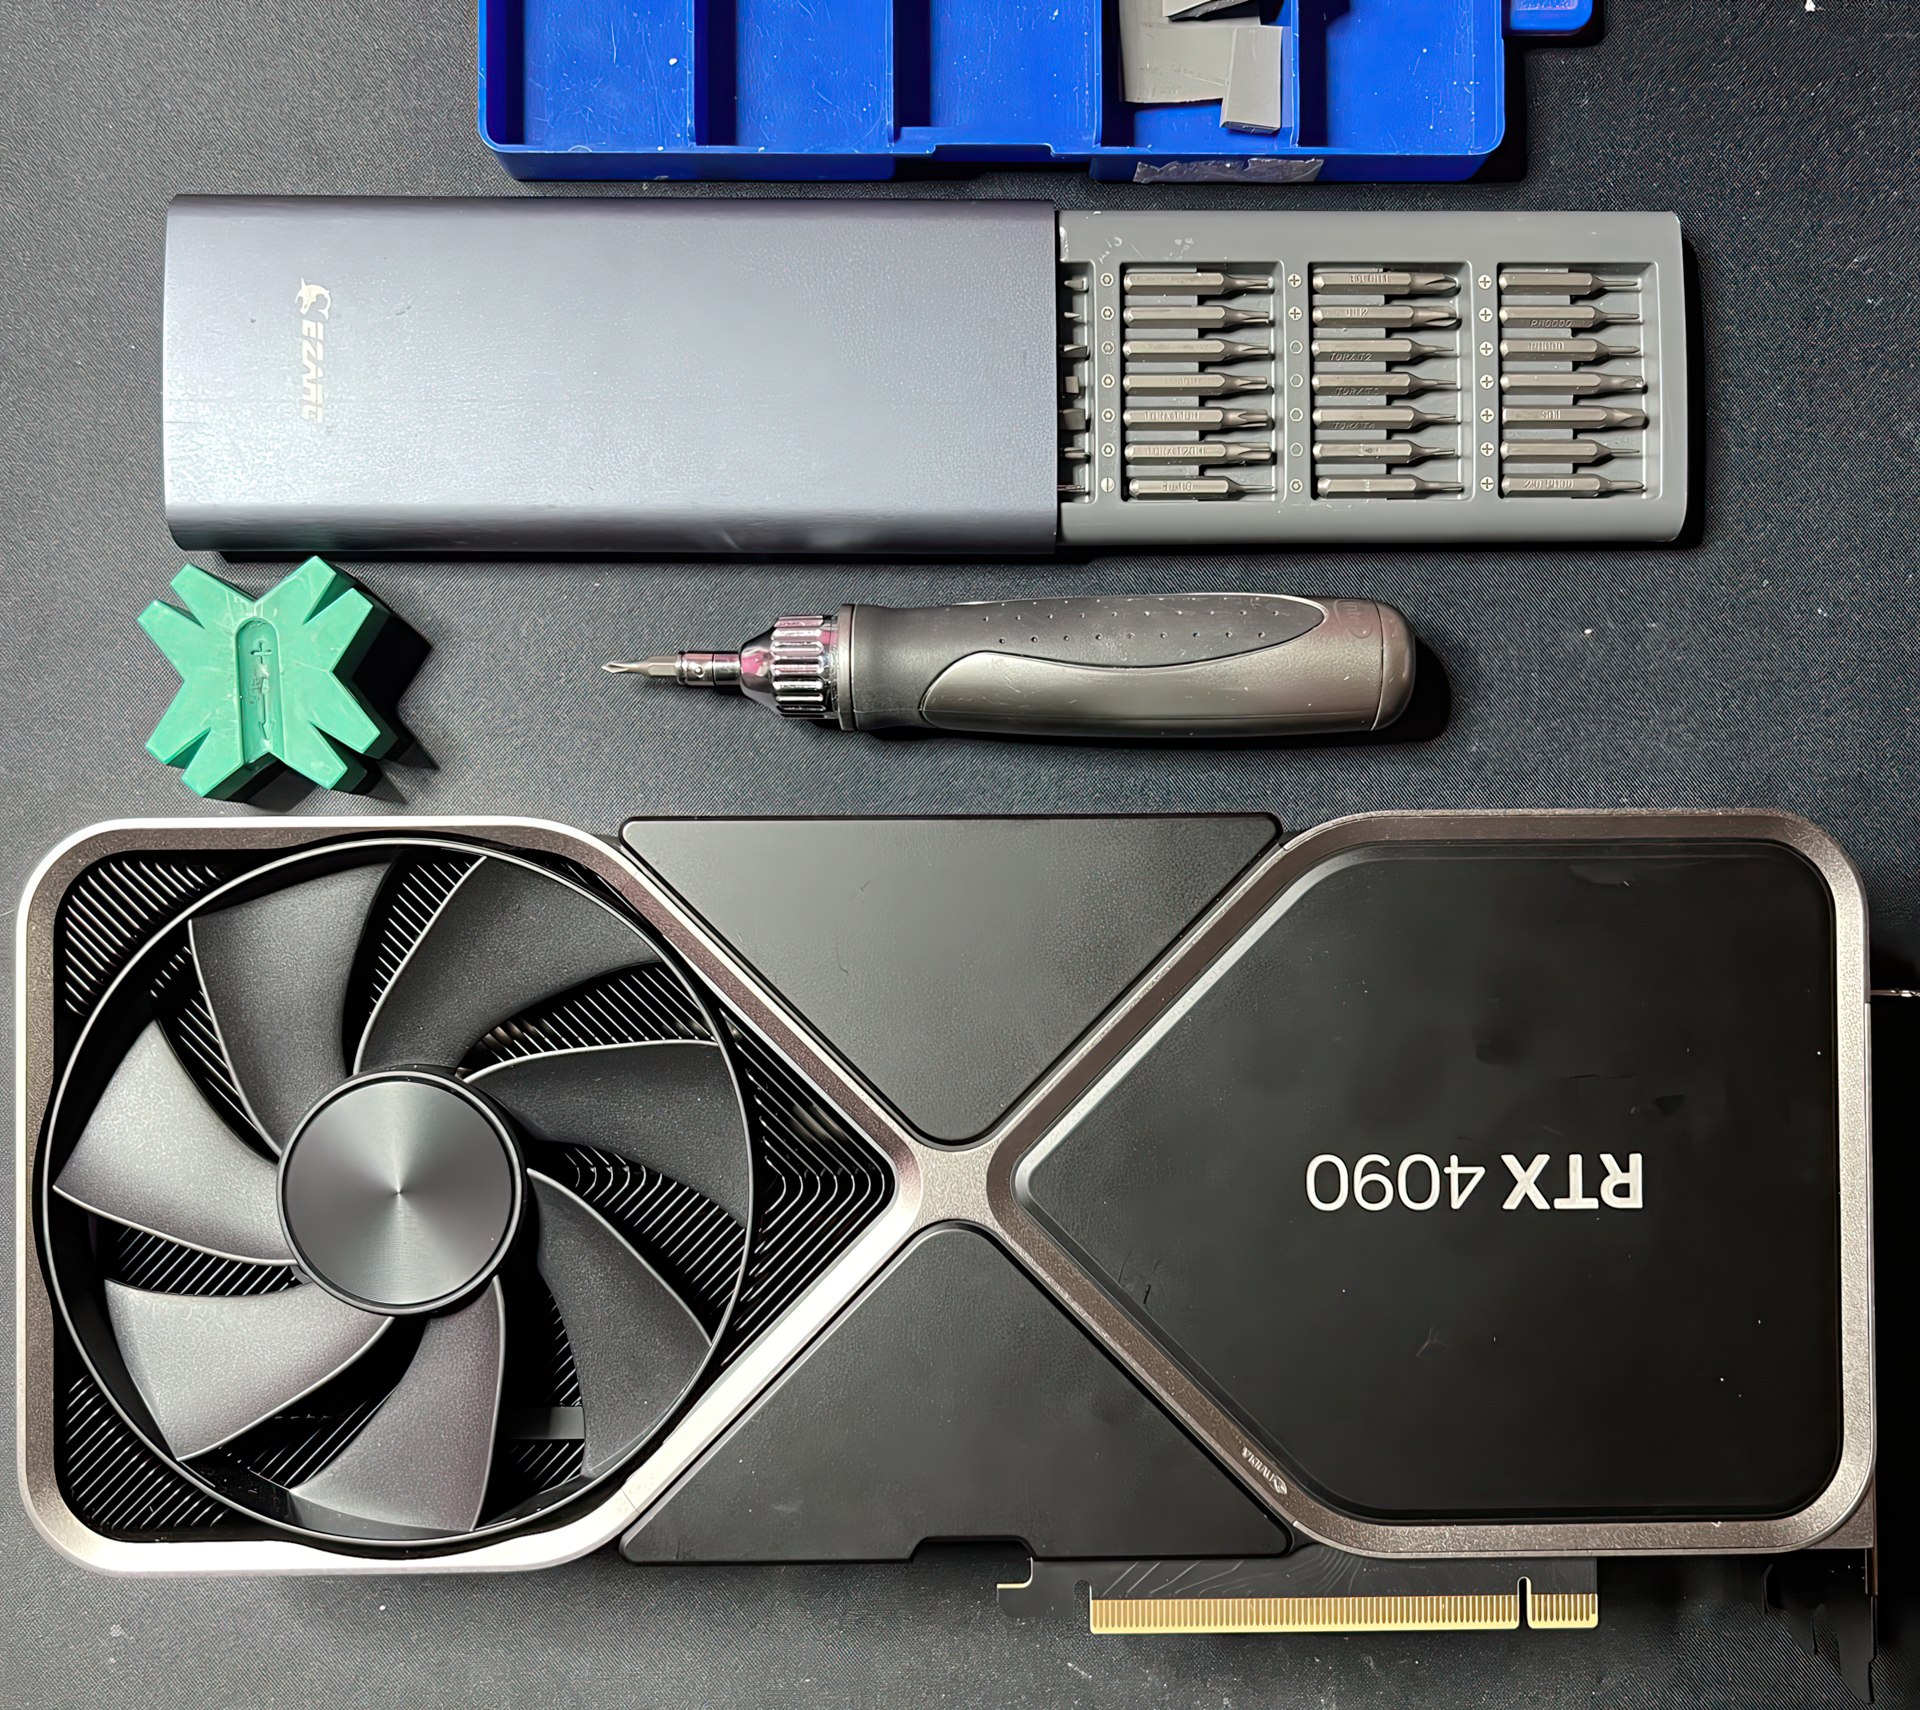

- 1 - Tools, Tools, Tools
- 2 - Tape Out
- 3 - Lift off
- 4 - Back to bag
- 5 - Interim result
- 6 - 4x Torx T5
- 7 - 4x Phillips PH
- 8 - Removing the cover (1)
- 9 - Removing the cover (2)
- 10 - Half open or half closed?
- 11 - Removing the cables (1)
- 12 - Removing the cables (2)
- 13 - Removing the cables (3)
- 14 - Torx T8
- 15 - Slot-Panel 6x Torx T8
- 16 - Slot Panel replacement
- 17 - Free Willy!
- 18 - Saving the pads
- 19 - Cleaning!
- 20 - 3D Scan


59 Antworten
Kommentar
Lade neue Kommentare
Mitglied
Urgestein
Urgestein
Veteran
Urgestein
Veteran
Urgestein
Mitglied
1
1
Veteran
Veteran
Neuling
Mitglied
Veteran
Veteran
Alle Kommentare lesen unter igor´sLAB Community →