


After many attempts with various pads, I have once again taken up the subject of liquid metal pads. Because if you use it right, it’s a really smart thing. But the (supposed) hurdles are so high that at least one generation of PC builders might already have despaired of them. So at least without any real instructions on how to actually “melt” the pad now. Companies like Coollaboratory have failed grandiosely with such products at the customer in the mass, but this is not due to the pad itself, but to the somewhat bitchy burn-in phase and lack of understanding of the problem.
I remember my first Intel Q6600 very clearly and mentally put myself back to 2007. You know, this was the first Quad-Core, which was still glued together at that time, with a brute TDP of 130 watts (B3 Stepping). As a cooler I had the Asus Silent Knight in use and – logically – lots of temperature problems. So what could be more obvious than to purchase the hyped Liquid Metal Pad from Coollaboratory and hope for a remedy? And no, it didn’t work out optimally, as it has for many others, unfortunately.
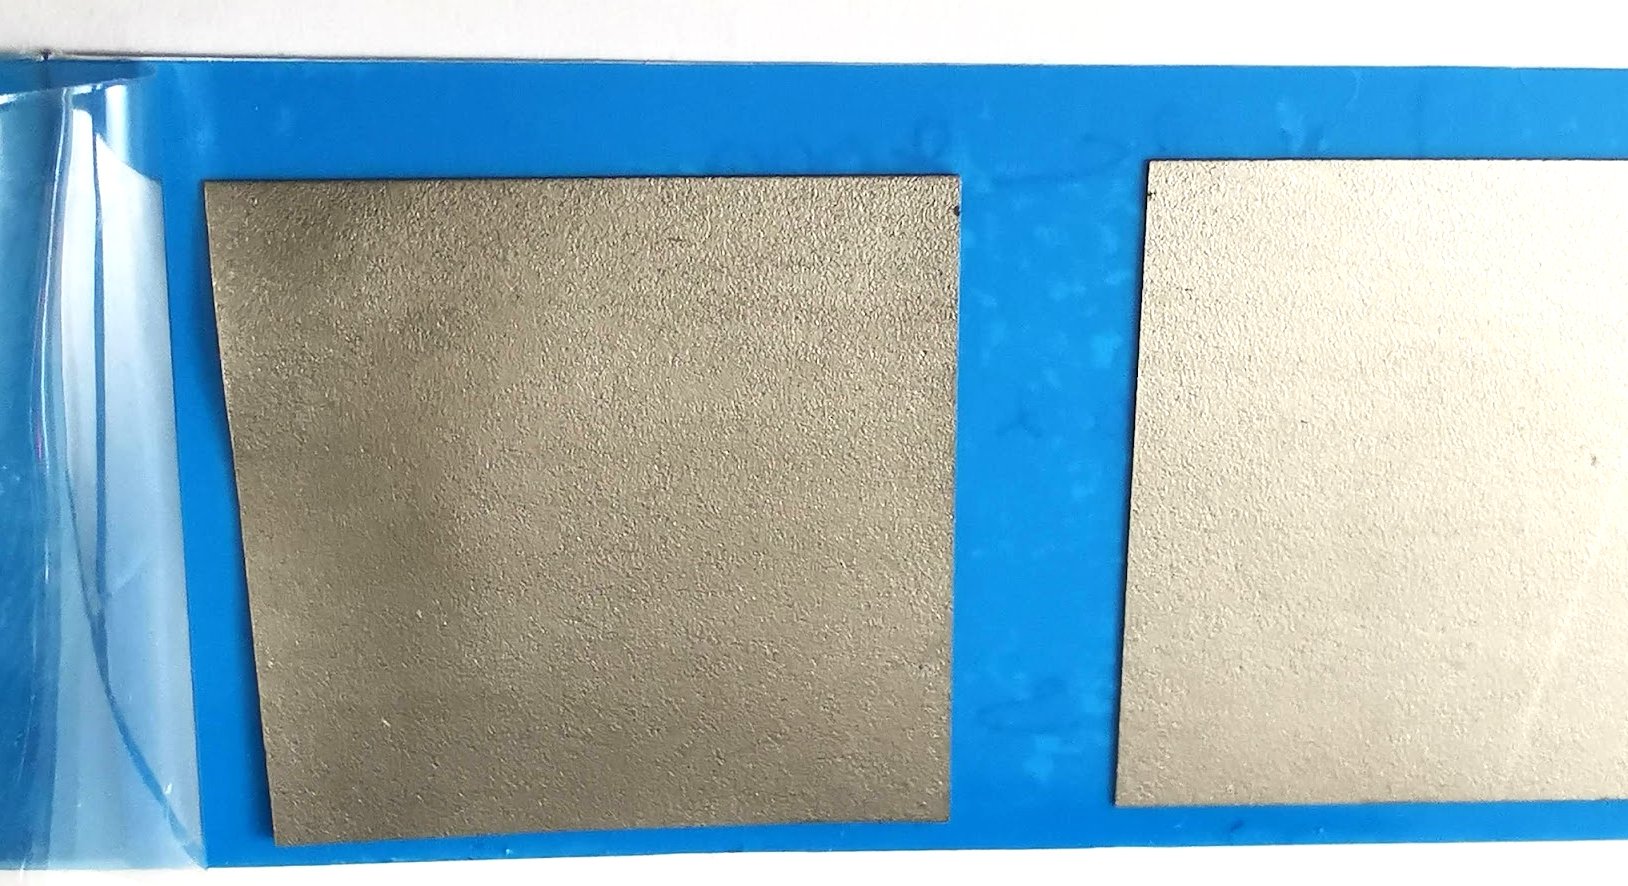
Since I still had various prototypes of pads here, which I test in my own lab for various suppliers and customers, I had the idea to test it again while browsing through all the samples. Sure, it’s a different manufacturer (OEM), but the basic principle is the same. I have here a low-temperature solder rolled flat to 0.1 mm thickness (approx. 60 °C melting point), which is also gallium-free and therefore does not attack base metals such as aluminium. And so I went on a journey with my samples to make the burn-in really foolproof and at the same time document all the nasty pitfalls that exist, unfortunately.
When everything goes wrong
You’d think a little overhang generally wouldn’t bother you. Well. but exactly this “a lot helps a lot” is a fatal fallacy. I also tested the whole thing on purpose, as I was already warned from an initial test with leaking residue on the rim. So let’s put on too big a pad for now. Speaking of putting it on: tweezers or suction cup, just no greasy fingers! If you have accidentally immortalized yourself dactyloscopically: Isopropanol, microfiber cloth and then let it dry.

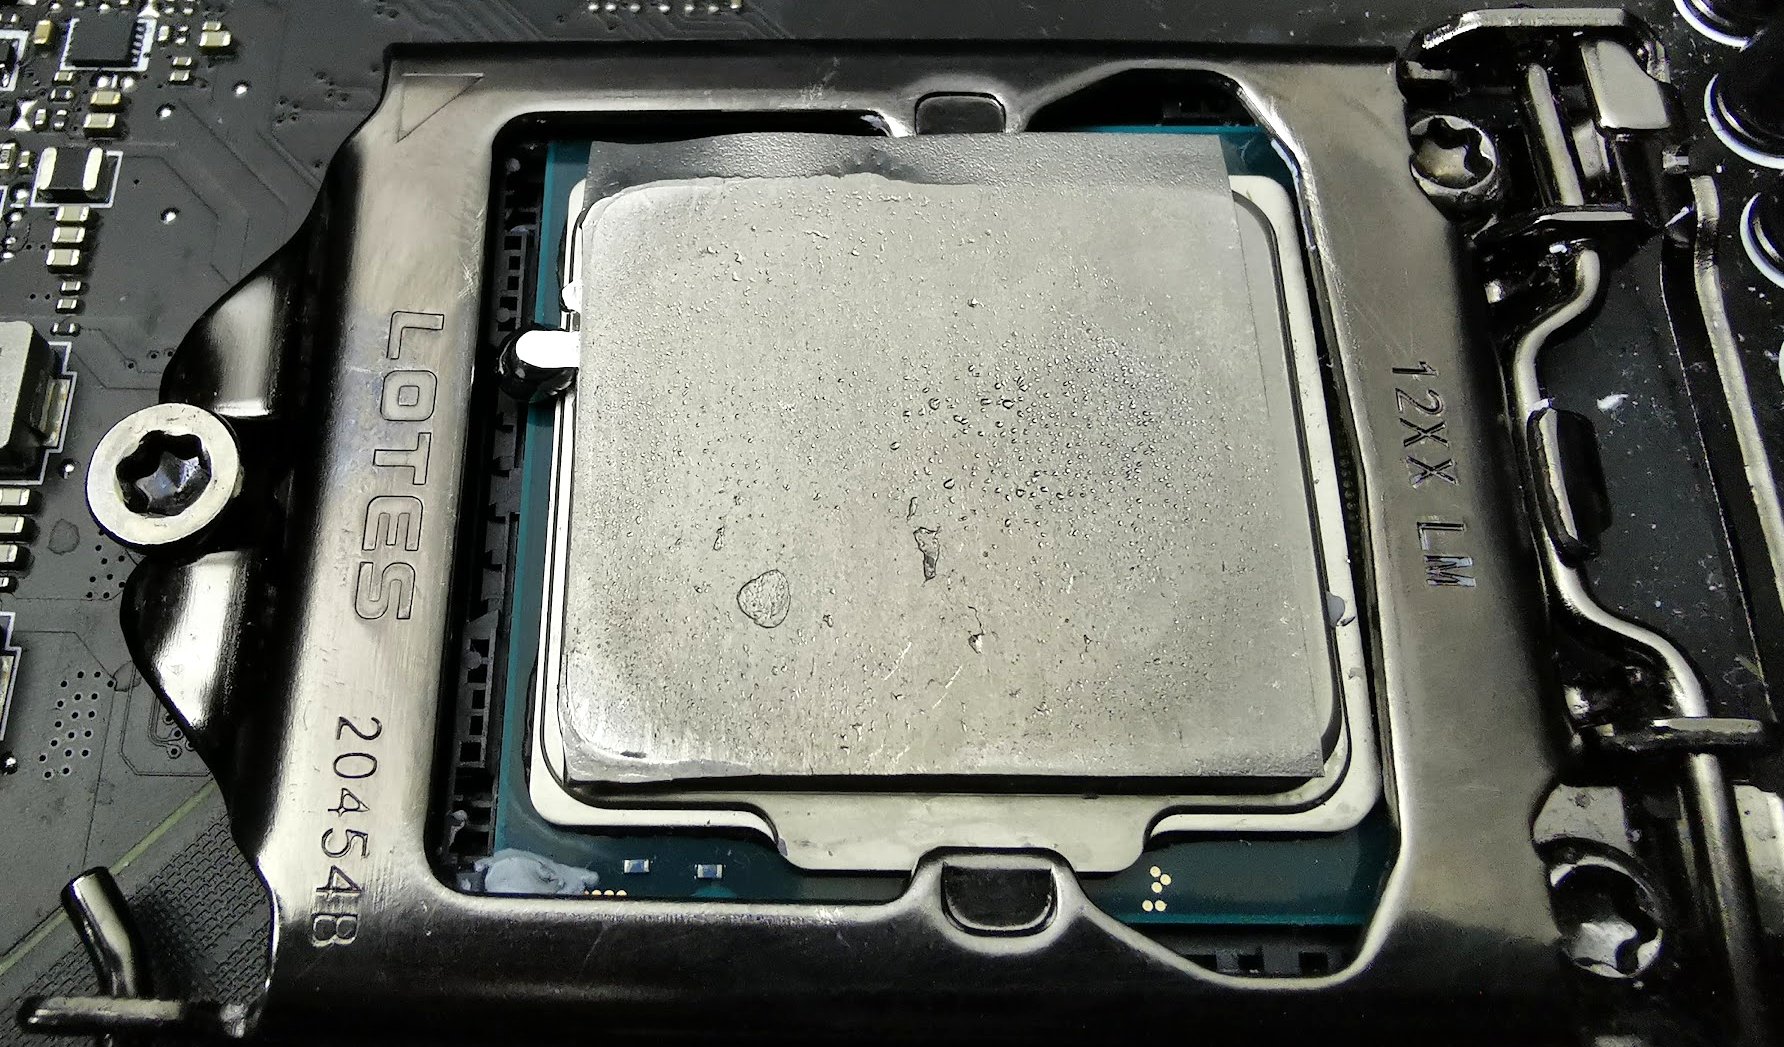
The pad is 0.1mm thick and I purposely grabbed an Intel Core i9-11900K whose IHS I had 3D measured before. There is a bulge in the middle above the elongated die, raised corners, and slightly lower edges on the long sides. If some solder should come out, not at the corners but rather at the long sides. Whoever thinks that such an Intel-IHS is now clearly convex or concave is mistaken, because there are still the upstanding corners, which lie at the level of the die hump in the middle.
This is exactly what we see very clearly after the burn-in and the later removed water block. Why the whole thing still looks like a plate, I’ll explain in a moment. That it was melted, we can see from the worn out solder (left edge, above) and the flattened corners, to which I have already written something. The solder thing is a bit nasty though.
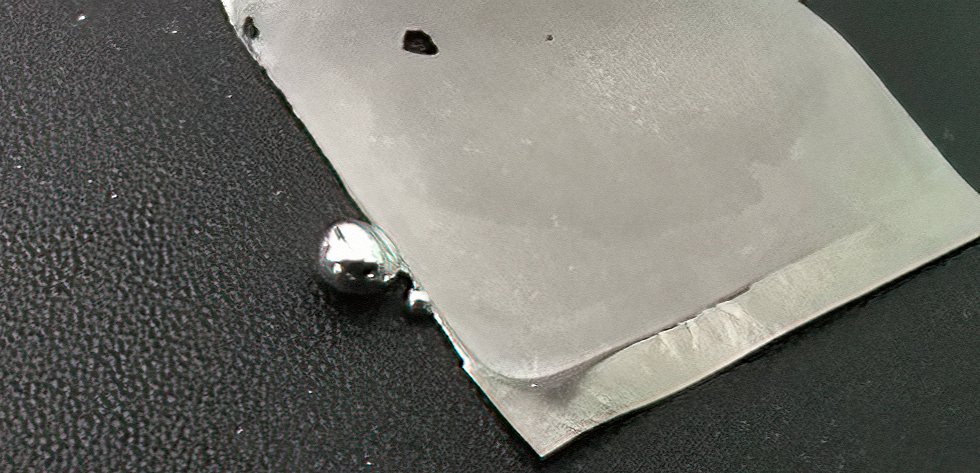
I pulled the solder off once very carefully, with the majority also following willingly. Only a few small spots were still sticking to the CPU, there was nothing at all on the nickel-plated cooler, which could be removed in hot condition after some resistance without any problems, without taking all the solder with it. What we see here now is the drop formed at the lowest point of the IHS, which is the edge. It shouldn’t have been much more than that to get through the base. This is highly dangerous and we will see how to avoid it in a moment. Nail polish is out of the question here.
Even a burn-in that is much too fast doesn’t help, and so it is hardly possible to completely melt the pad in normal operation. Greasy fingers and other impurities cause further stumbling blocks. In the end, a really foolproof course of action must guarantee that you can beat a very good commercial thermal paste in the first place. You can see how this works on the next page.
Summary of possible errors
- Wrong pad size
- Dirty pad or unclean IHS
- Too little or uneven contact pressure
- Burning in too quickly or dropping out too soon


Kommentieren