


Without proper presetting it remains an expensive toy
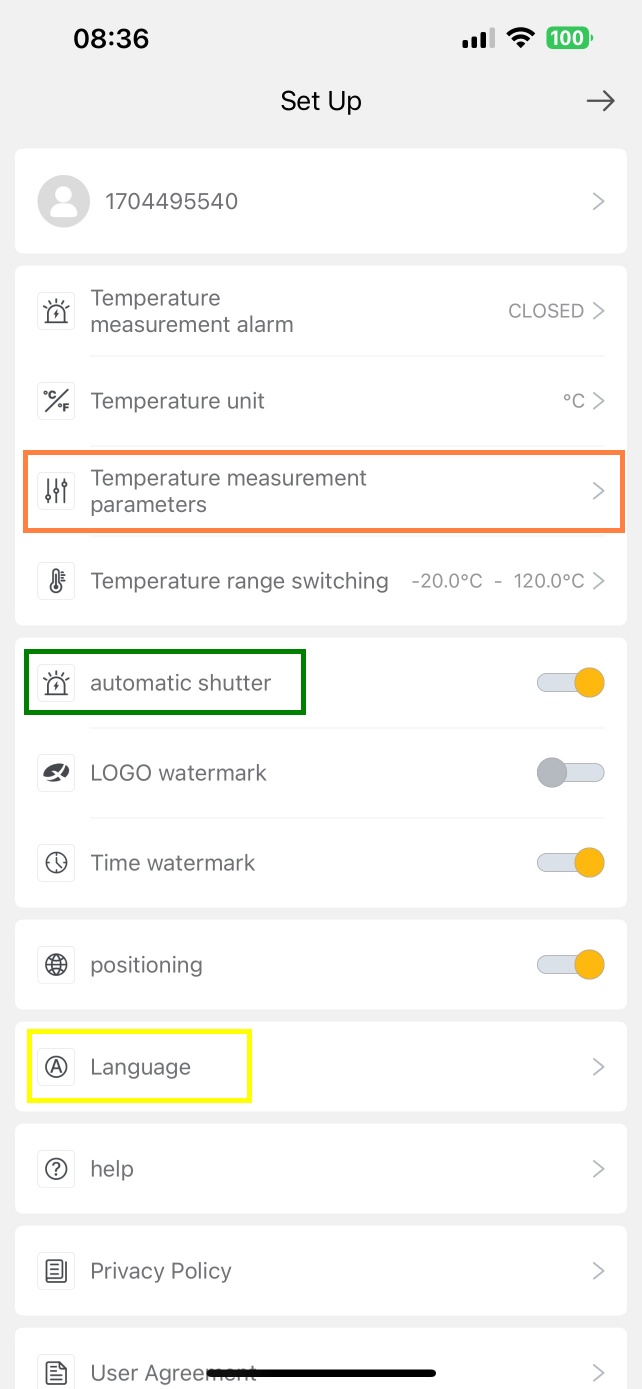
The whole settings are important, otherwise we measure under guarantee only Murks. The XTherm software menu offers more than you might expect. Let’s put it this way: I was positively surprised. Let’s take a look at the first image below. On iOS, the app starts in Chinese. However, this can be fixed by opening the settings menu in the upper left corner and then clicking on the entry with a circled A (yellow marker in the picture). Then you can choose between Russian and English. And if you’re worried about my data, you can google the visible mobile number, which is public.
You should also activate the automatic shutter (green). This is a so-called “shutter check” or “calibration process”. This process corrects and calibrates the camera’s sensor to ensure that it provides accurate temperature readings. During this process, the shutter is briefly closed and the camera performs an internal calibration. You should definitely let the camera do this automatically. The red marked “Temperature Measurement Parameters” takes you to the most important menu of all (middle image). Just click to enlarge!
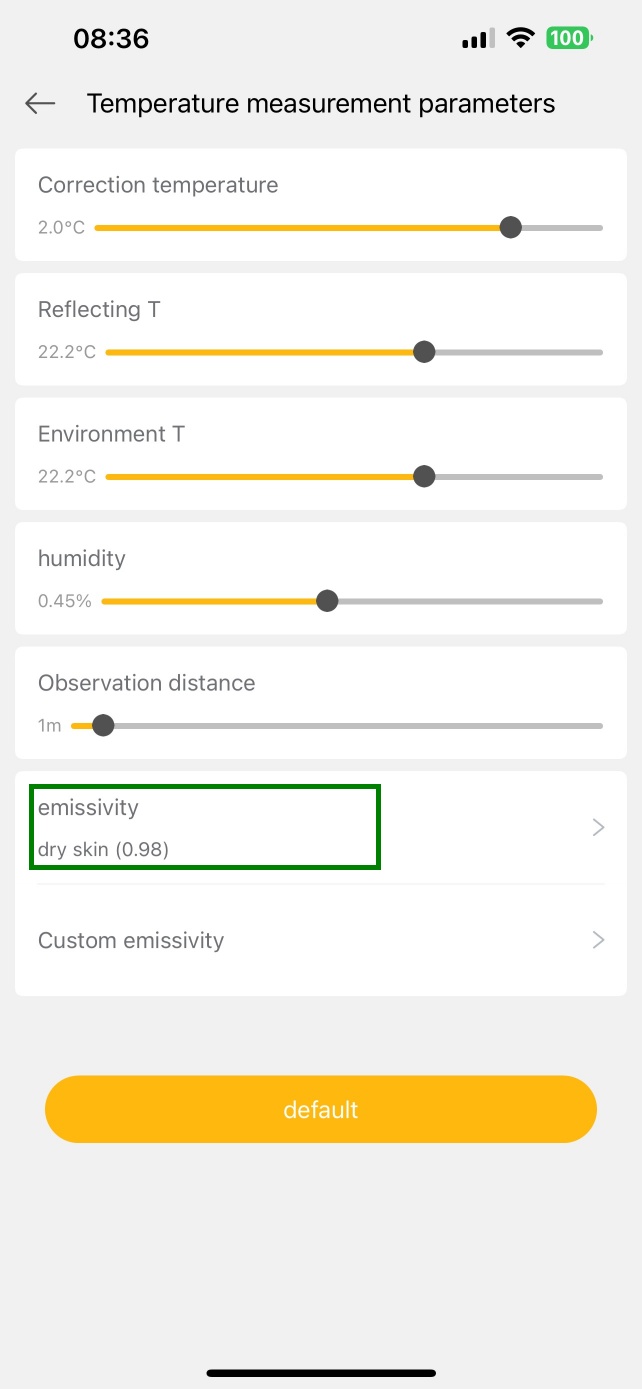
We see lots of factors to set in the image. In general, ambient temperature and reflection temperature (mirroring!) are the same, so I would set that both the same unless you know exactly what might be interfering. Humidity plays a role of course, you should know that approximately or normally leave the default value like that. Because as long as there is no haze in the room, these are minor marginalia. The distance is also important. Infrared cameras can capture either near infrared (NIR) or far infrared (FIR). The T2S Plus makes a compromise here for thermal radiation, but it can be well refined by this factor
Now we come to the most important point, the so-called emissivity. If you cannot define this or leave it at 1.0 (black body), then the entire display values are completely useless. This black body just mentioned is an ideal body which absorbs all radiation falling on it and on which neither reflection nor transmission occur. It radiates the maximum possible energy for all possible radiators at every wavelength, and the radiance is independent of the angle. But nothing in life is truly ideal, unfortunately. And that is where the menu comes into play (red marking in the middle image).
Because hardly a body corresponds to the radiantly beautiful ideal of the black radiator with a so-called emissivity (explanation comes shortly!) of 1.0. If only this emissivity changes, one speaks with the source also of a gray radiator. If temperature and wavelength dependence are added as changing factors, one has a selective radiator. Many bodies emit much less radiation at the same temperature! The emissivity ε indicates the ratio of the real radiation value and that of the blackbody radiator. This value is between zero and one and must be known for the material in question. For explanation, I bring out again the picture of my morning cup of coffee to explain you all this.
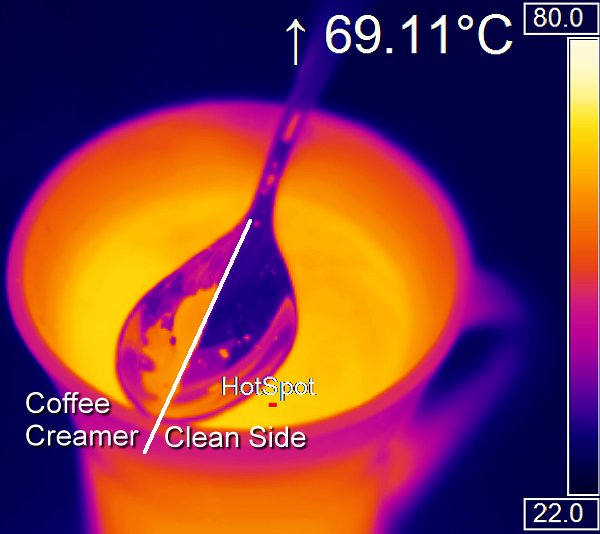
For the test setup, the freshly brewed hot coffee is placed at about 80 °C in a glass already preheated with hot water, together with a hot stainless steel spoon and some coffee cream, in order to keep the respective temperature differences as small as possible and to prevent the coffee from cooling down too quickly. I still wait a few minutes until the coffee, glass and spoon are about the same temperature. Then I take out the spoon, wipe one half lengthwise with the kitchen towel and the above infrared image results.
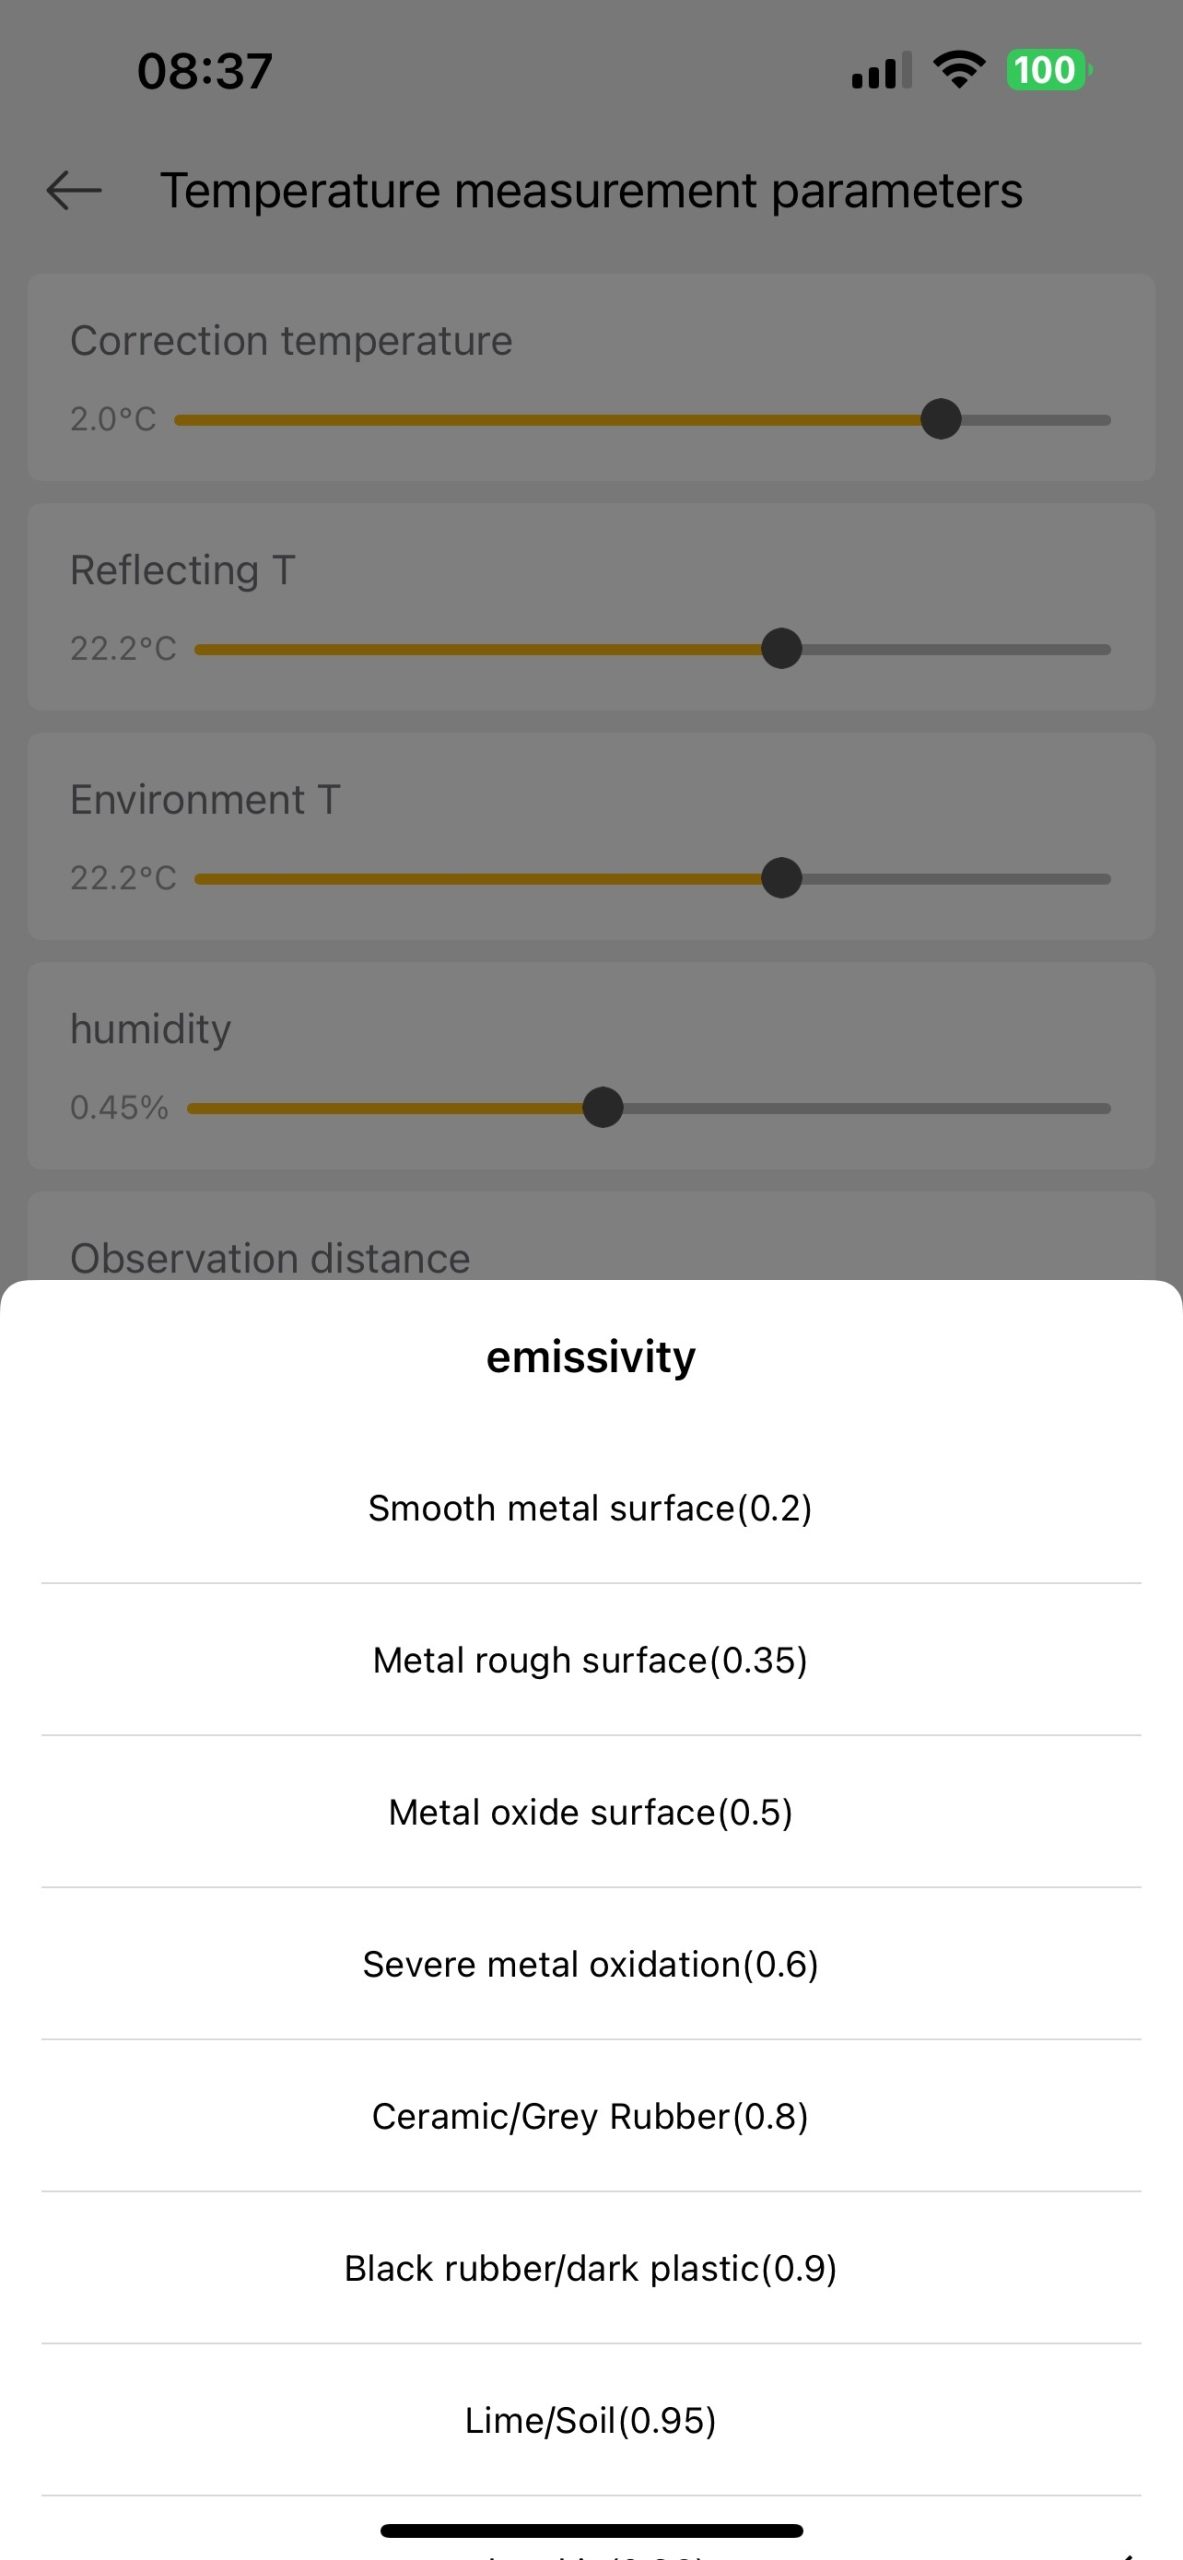
Every surface (different materials and structures) has a certain emissivity that you have to know before you can measure anything accurately at all. Better handhelds can be calibrated manually or you can use a suitable software from the manufacturer. Unfortunately, a value of 1.0 is almost always preset by default, which is never or only rarely encountered in reality. Thus, at least all measurements where the emissivity was set to 1.0 can be confidently booked under expensive entertainment that is of no use to anyone. Because: Without previous input or indication of the respective emissivity of a measuring point, every measurement carried out is completely worthless!
What you can preset is shown in the third picture in the gallery above, where the most important factors are already stored in the software. Or you take the value of your measurement varnish and add it to the gallery manually. Unfortunately, the app can not delete once created values again, so be careful. I have already communicated to the provider that you should definitely change something.


24 Antworten
Kommentar
Lade neue Kommentare
Urgestein
1
Urgestein
1
Mitglied
1
Neuling
Urgestein
Urgestein
1
Neuling
Neuling
Urgestein
1
Neuling
Neuling
Neuling
Neuling
Alle Kommentare lesen unter igor´sLAB Community →