


RGB is everywhere today – fans, components, input devices, even toilet lids (no joke!) are already available with RGB lighting. In some respects, I can even understand the trend: the play of colours is usually pretty to look at and individually adaptable to your own preferences. Unfortunately, however, integration also makes many parts unnecessarily expensive. As part of an upcoming series of articles, I would like to give you a little taste today and I will show you how to build a flashy RGB lighting for your case with minimal financial effort!
By the way, you don’t need any soldering irons or any previous knowledge, just scissors, a few minutes of your time and some climating money. A basic requirement is also a (5050) RGB header on your motherboard, otherwise the whole thing will not work without an extra controller. These are the “old” 12V connectors with the 4 pins, not addressable RGB (aRGB). However, since many upgraders and retrofitters have older motherboards with this connection and many current boards can still do so, the possibility of use is still wide today.
Shopping
Admittedly, the calculated under three euros are the price “per case” and the required parts are unfortunately only available in the 10 pack at Amazon. So you have to invest just under 22 euros first, but then you can easily equip 10 cases with a 50 cm long RGB strip. If you want to tinker even further, you can also buy angular and corner pieces, as well as distributors, for a narrow thaler. The actual base is a 5m long, self-adhesive 5050 RGB LED strip on the roll (important: the strip must be 10mm wide!) for 6 euros including shipping.
In order to supply the strip with electricity, you also need cables and plugs. In order not to have to friemthes the thin strand awkwardly with the soldering iron to the small contacts, there are now even clamping connectors, which are absolutely simple in the handling. The pack of 10 beats with just under 8 euros incl. Shipping to book. Last but not least (optional, but in 9 out of 10 cases necessary) an extension cable is added, because the clamping connectors are unfortunately only equipped with a very short piece of cable, with which you usually cannot reach the RGB header on the motherboard. Here, too, it has to set up the 10-pack for less than 8 euros.
How to assemble the whole thing
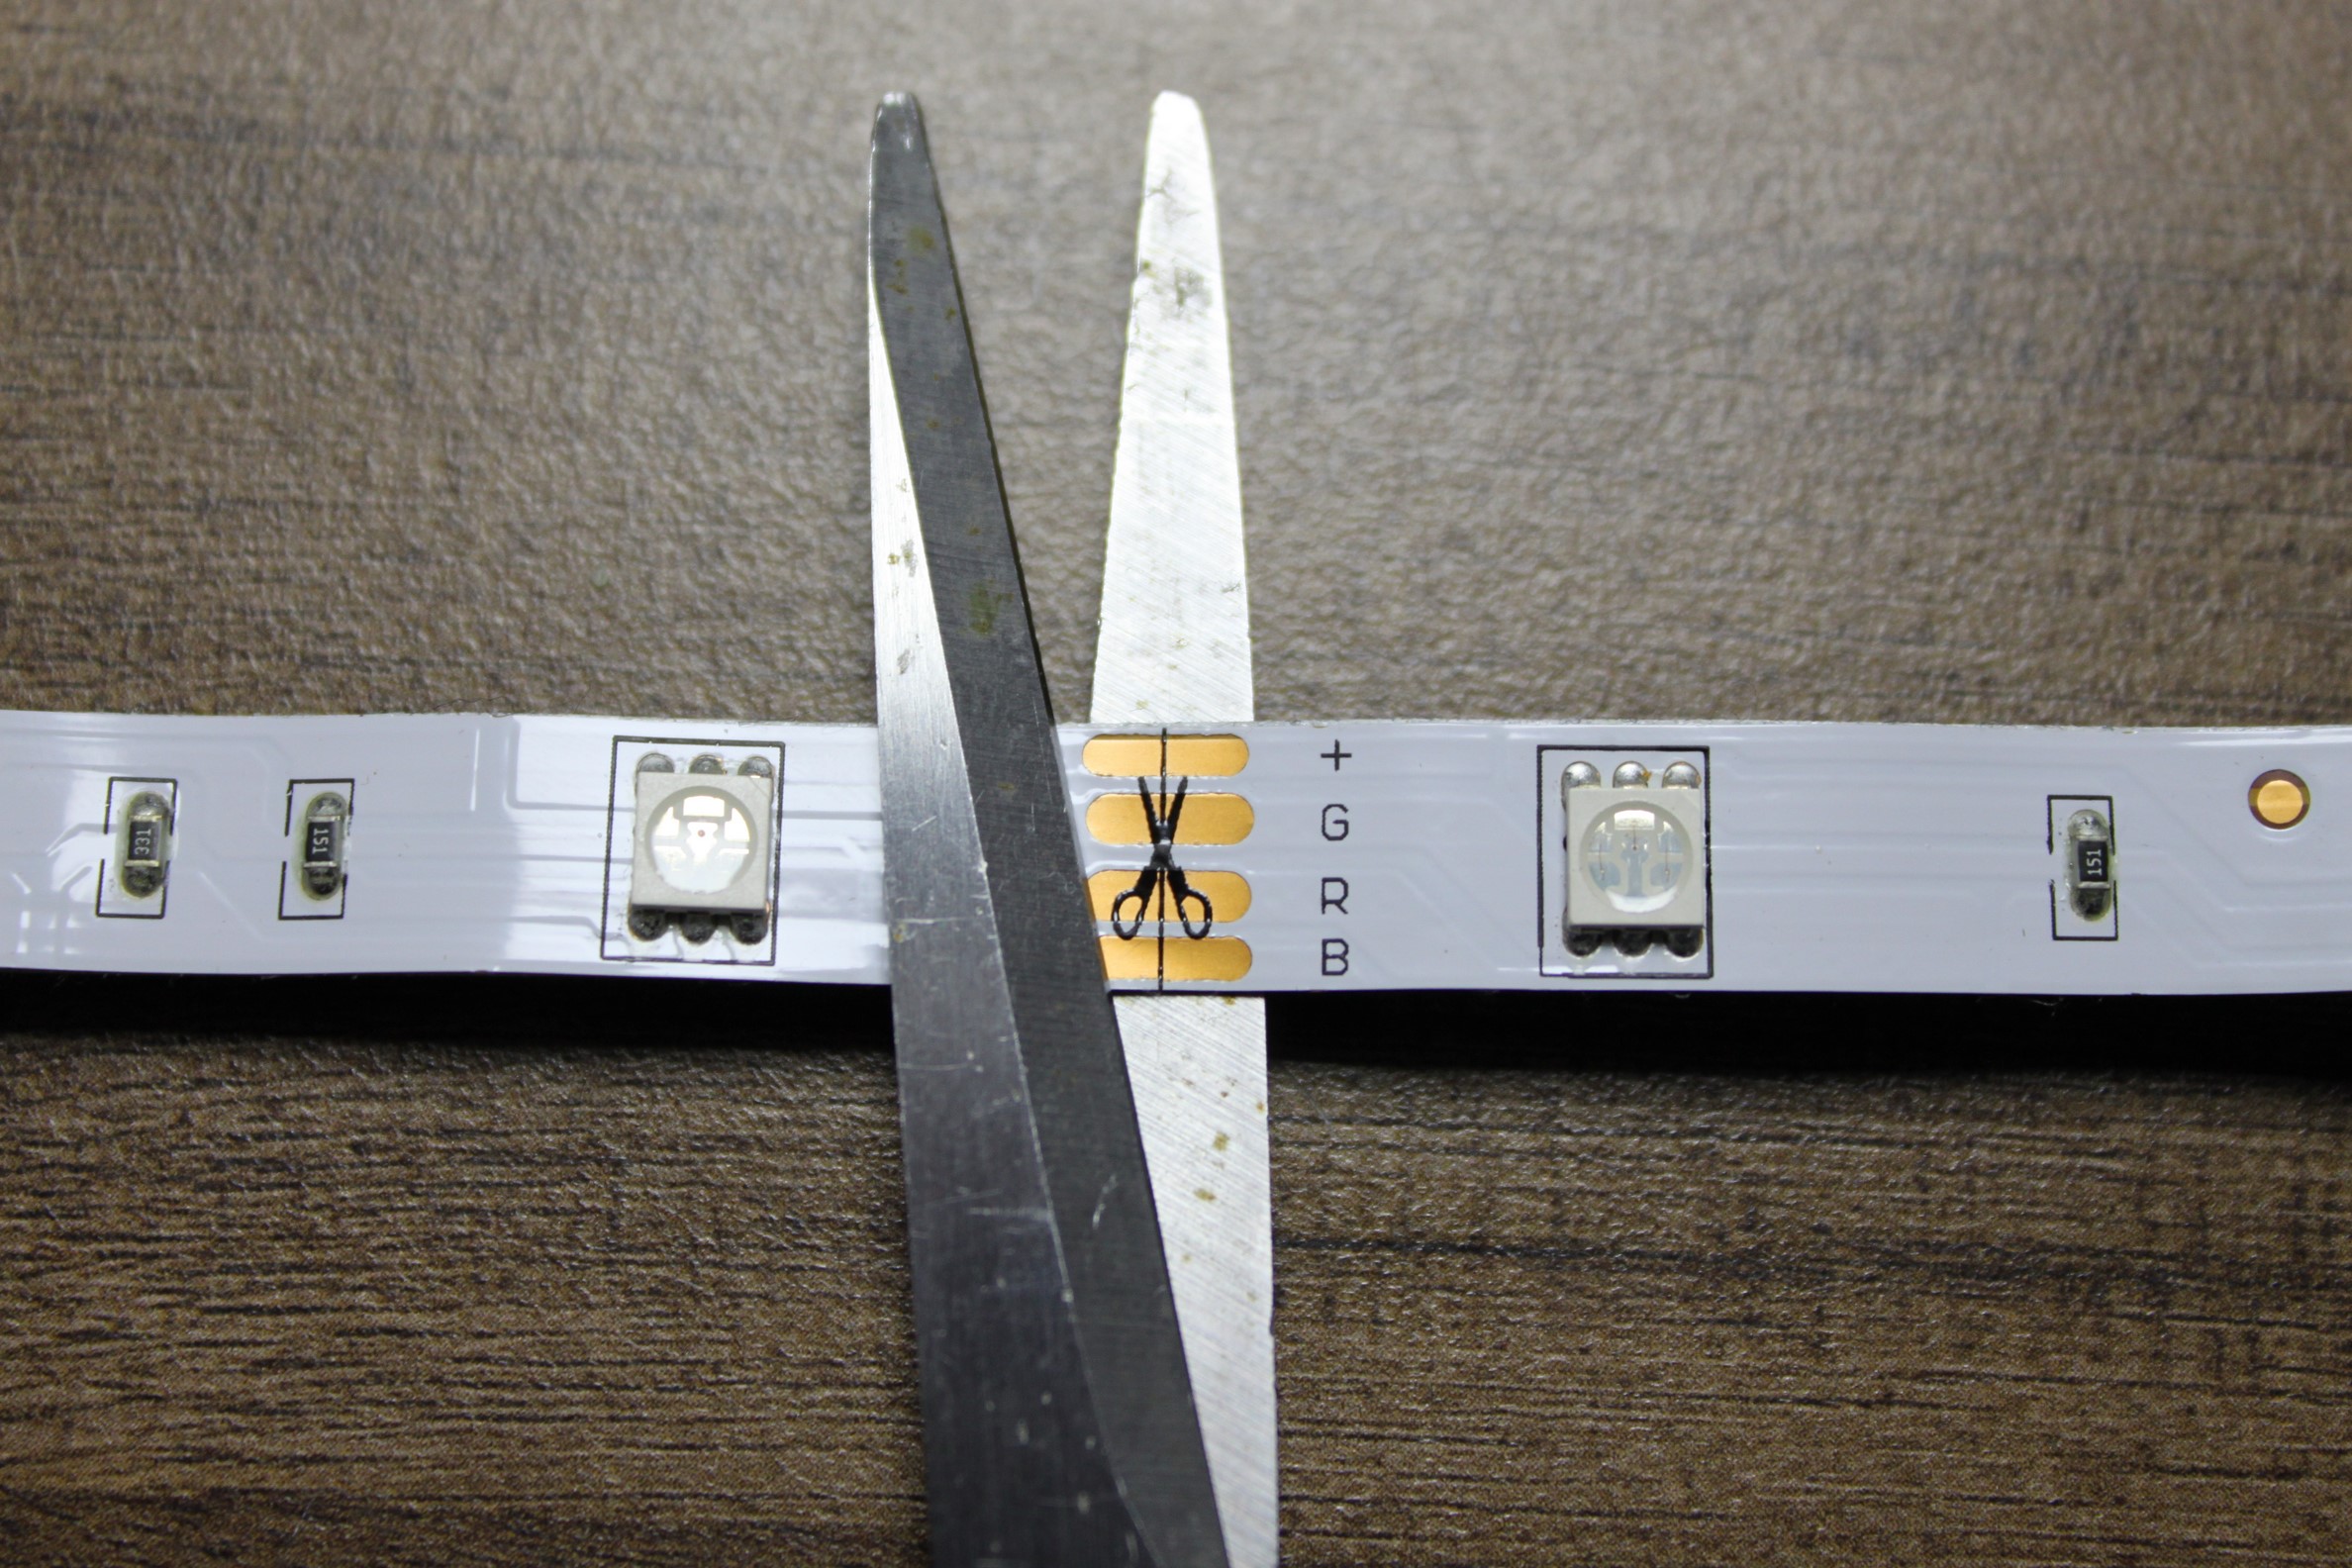
It is a good way to glue the RGB strip from the bottom to the lid of the case. This is the lowest chance of being blinded by the LEDs when looking into the housing. First of all, of course, it is necessary to measure how deep the housing is. As a rule, the depth is between 30 and 50cm and accordingly the strip must be cut cleanly at the intended interface (print every 10cm).
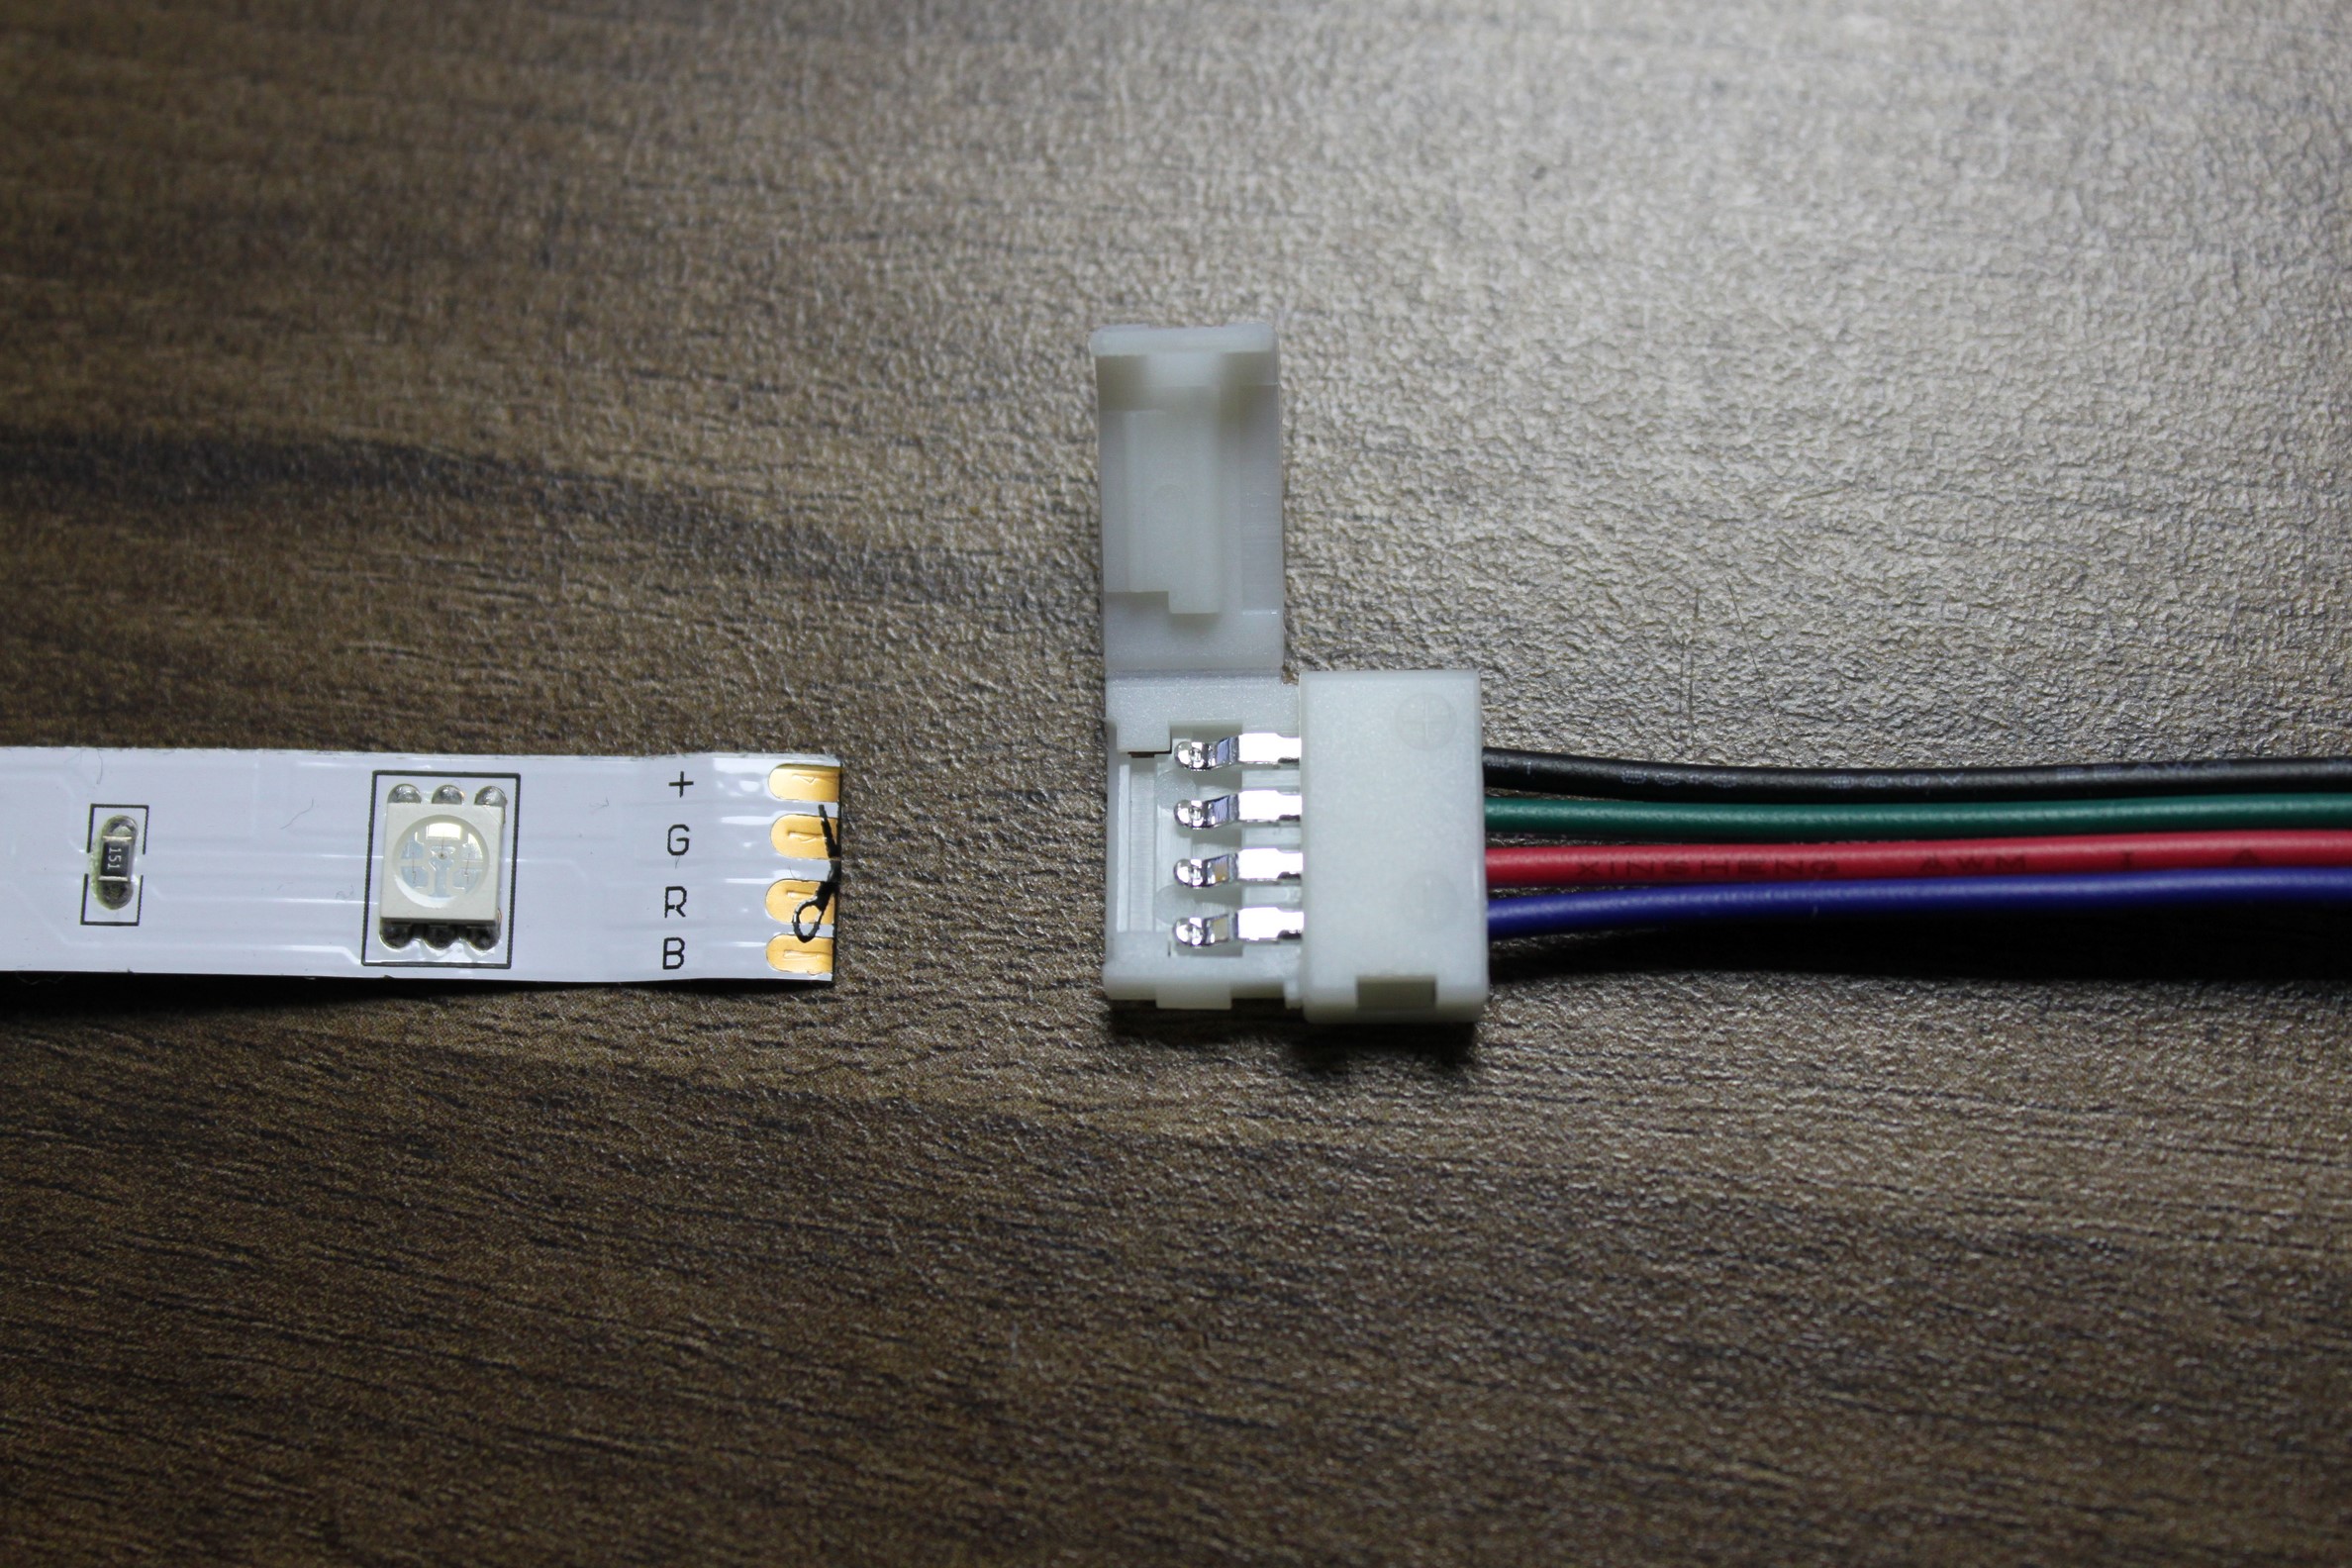
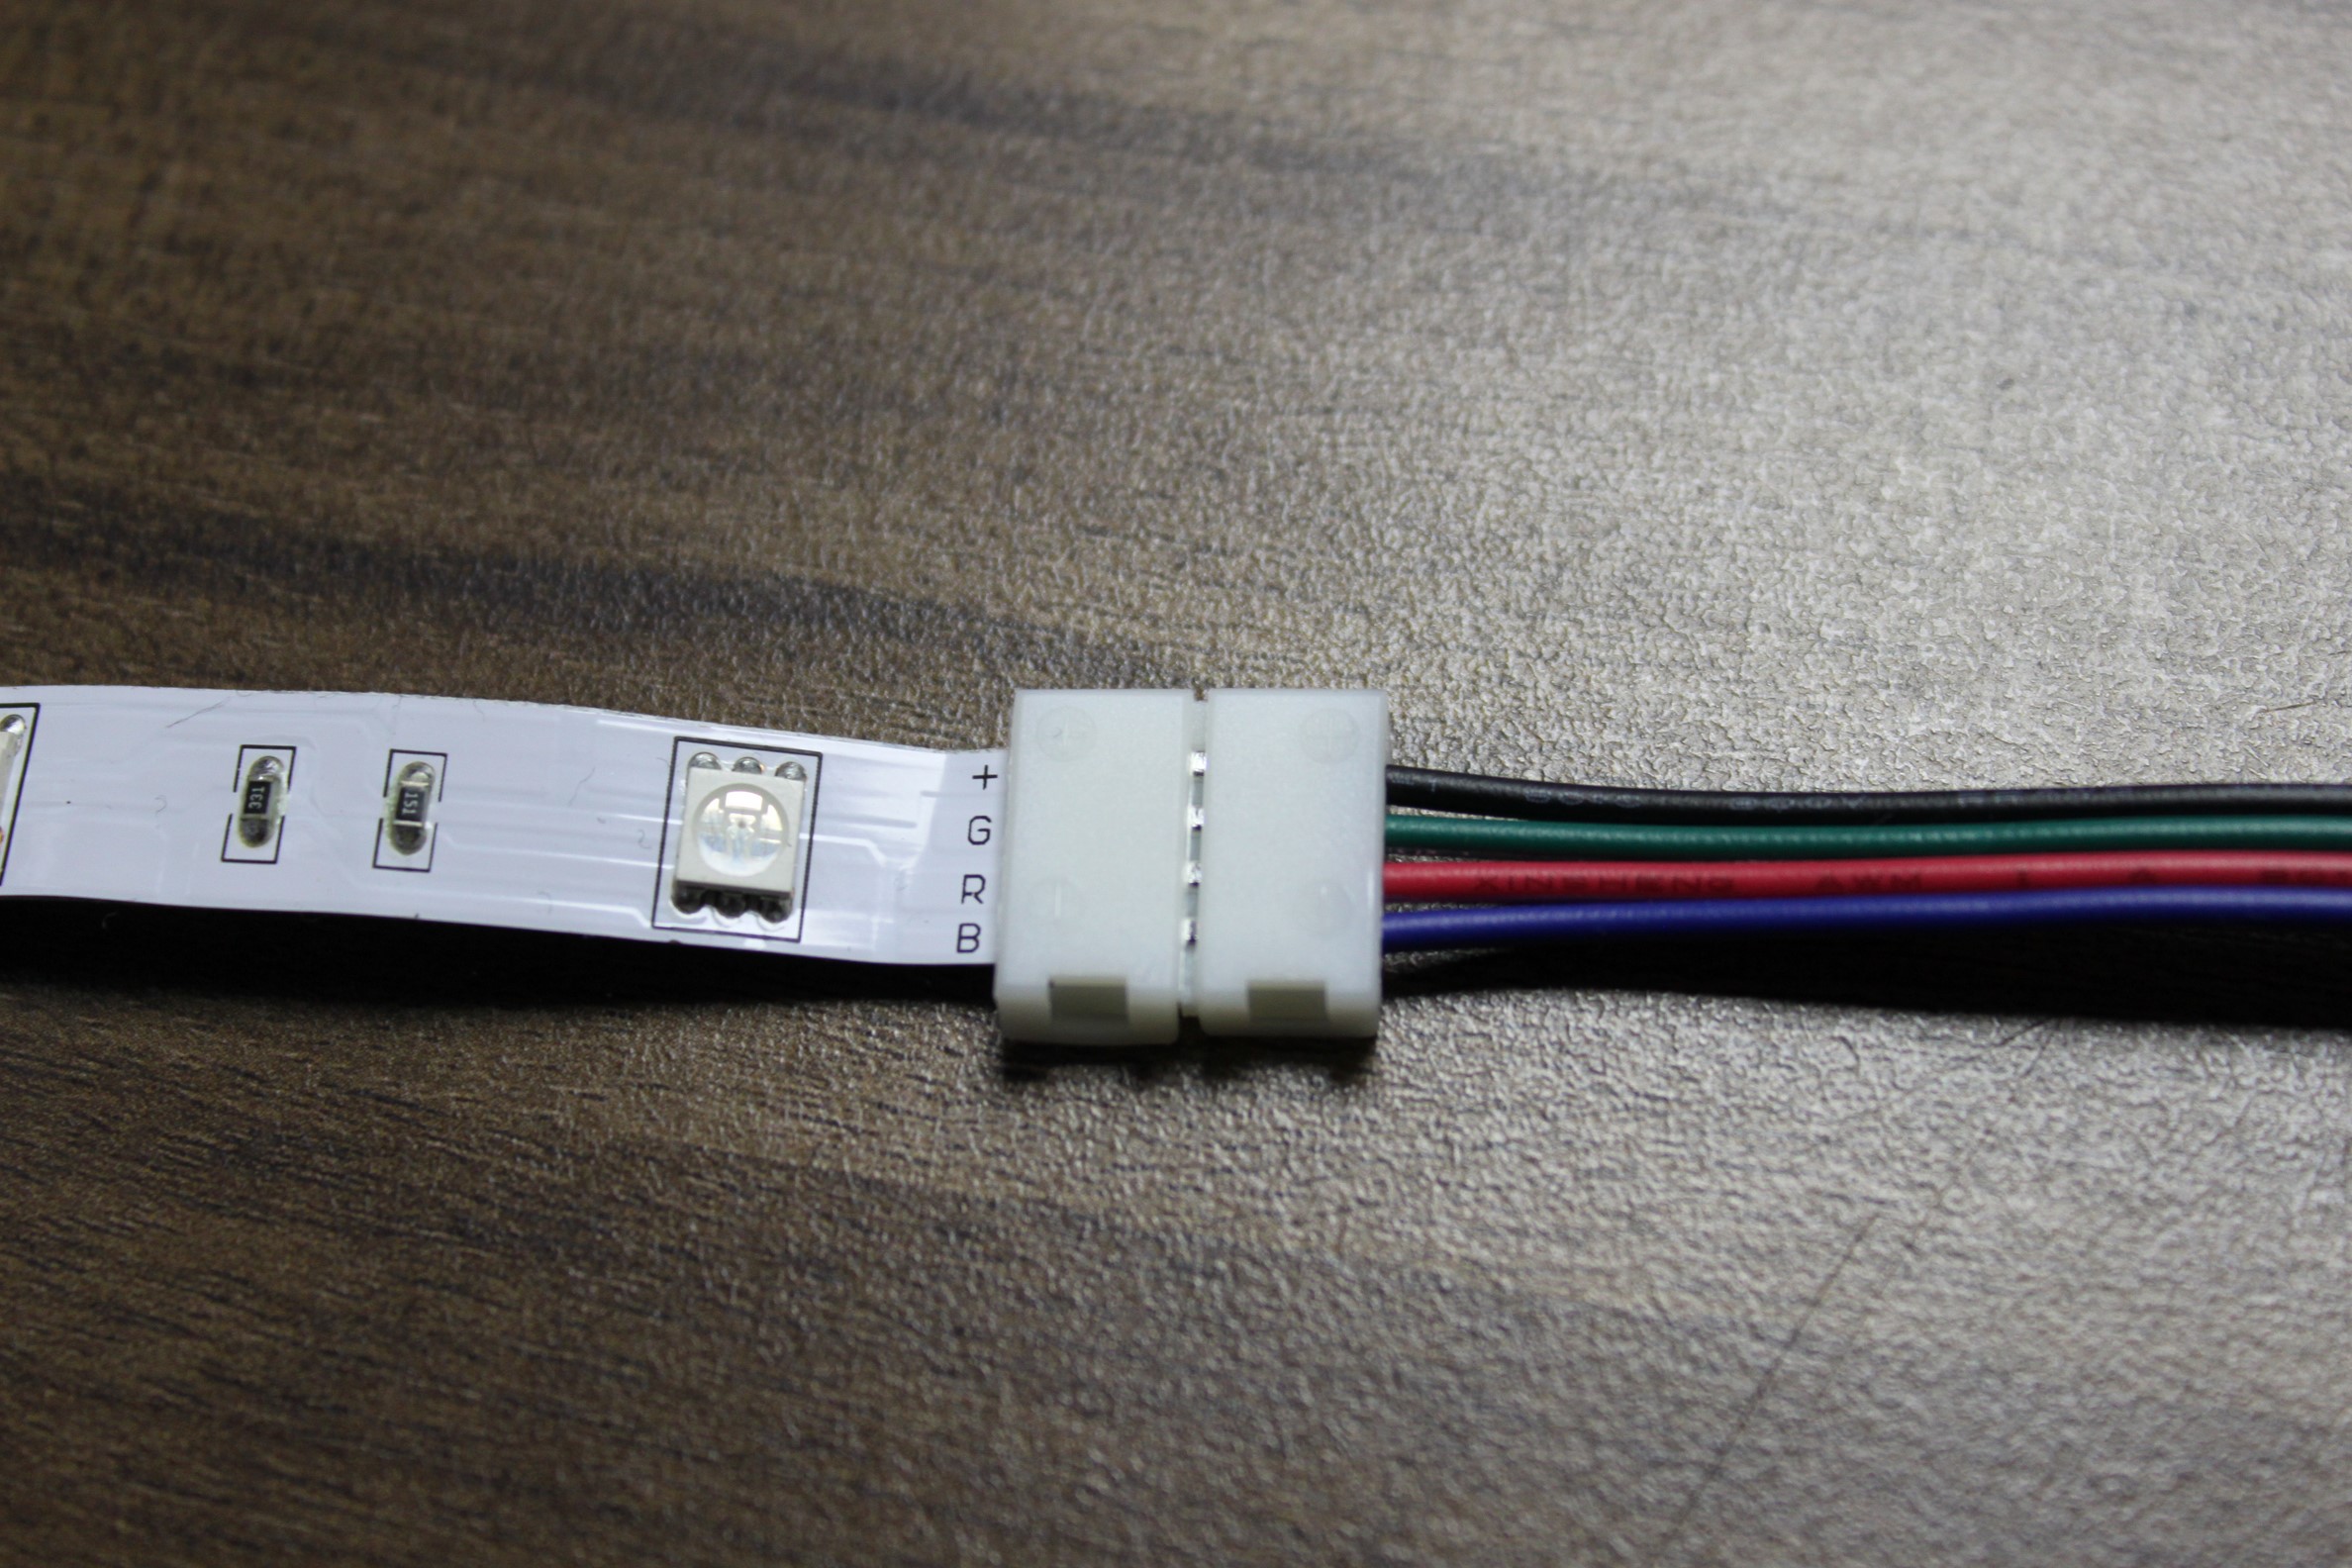
The truncated end is now inserted into the open terminal connector. Pay attention to poleification! Thus + on black and the cable colors to the appropriate initial letters of the corresponding color. If the occupancy is exactly inverted: turn the strip over and put the other end in the clamping connector.

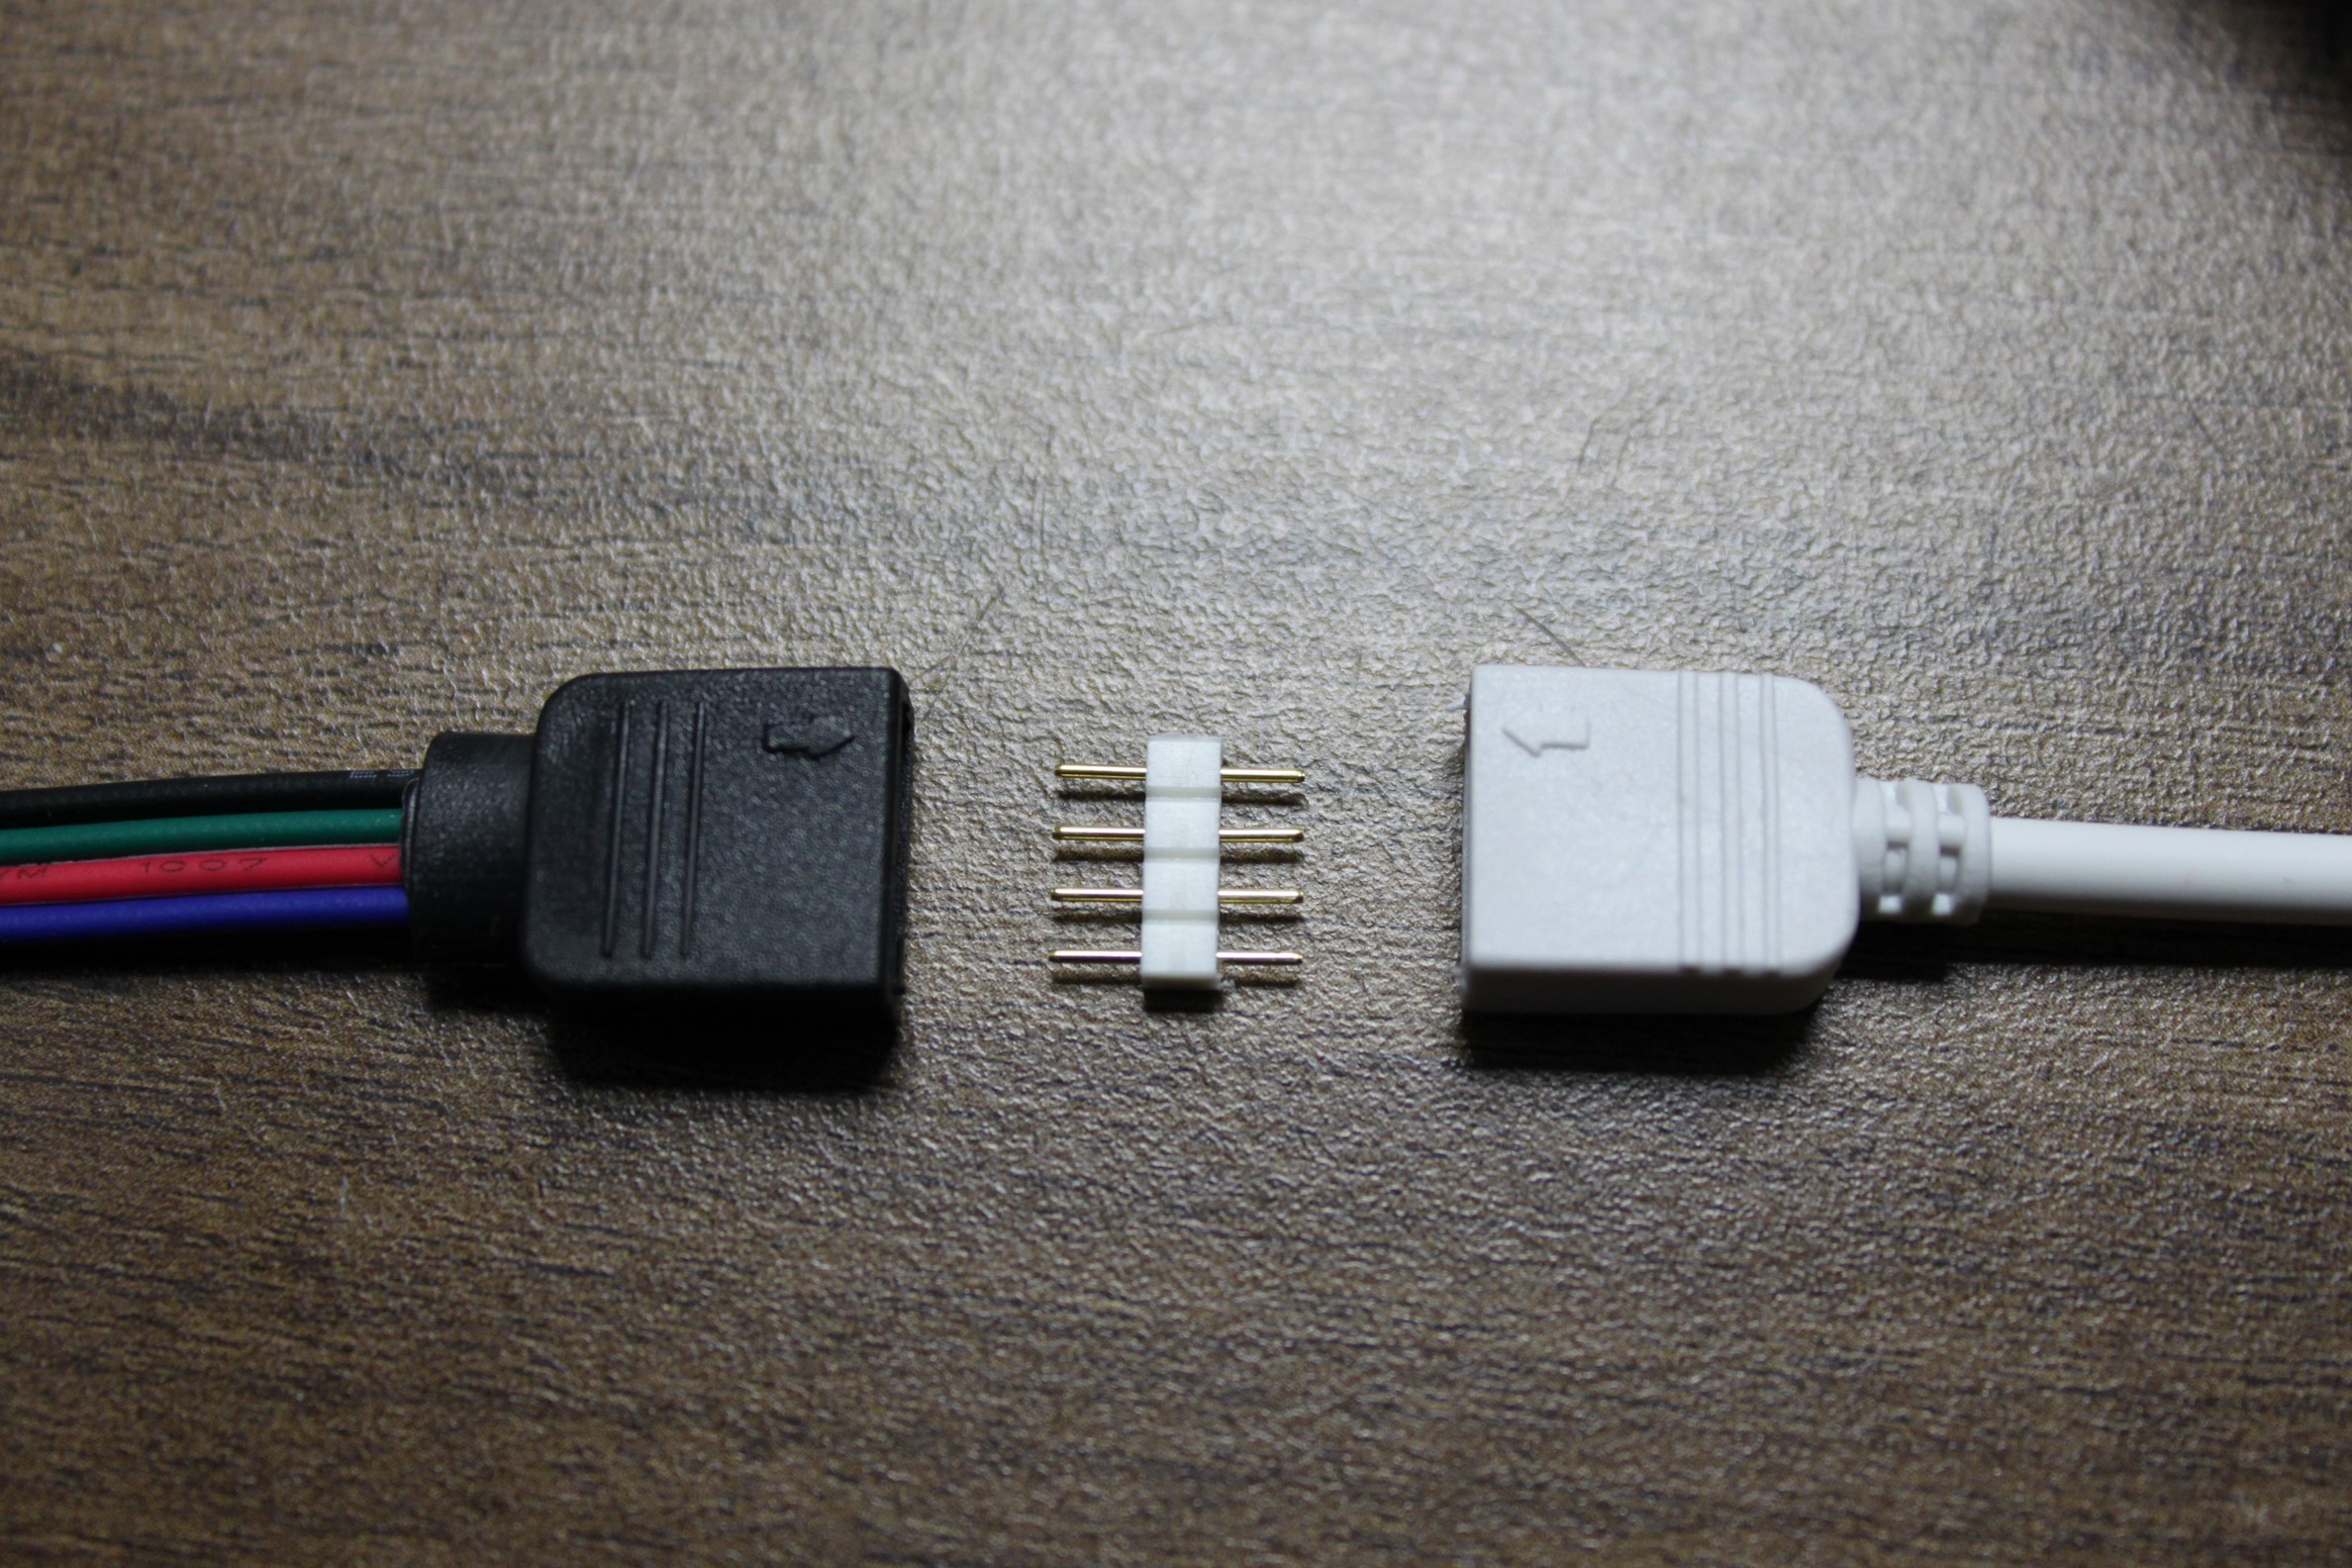
Now, if necessary, you have to. the extension can still be connected. The clamping connectors come with small pin connectors with which the two connectors can be connected. Here, too, the polarity must be observed: the two small arrows must point to each other.

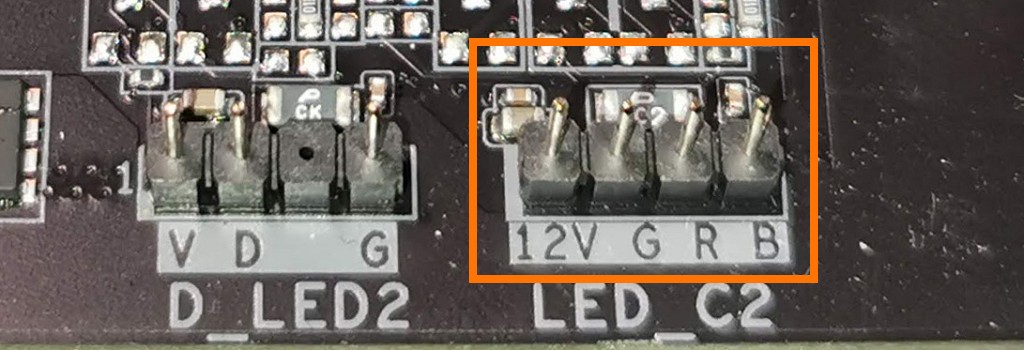
The other end of the extension is now connected to the motherboard. The small arrow of the connector must be on the side of the header, where +12V is located (for some boards the corresponding pin is marked white). The RGB strip used must be connected to the 12V 4-pin header, the also listed 5V 3-pin header is not compatible.
Switch on and be happy!
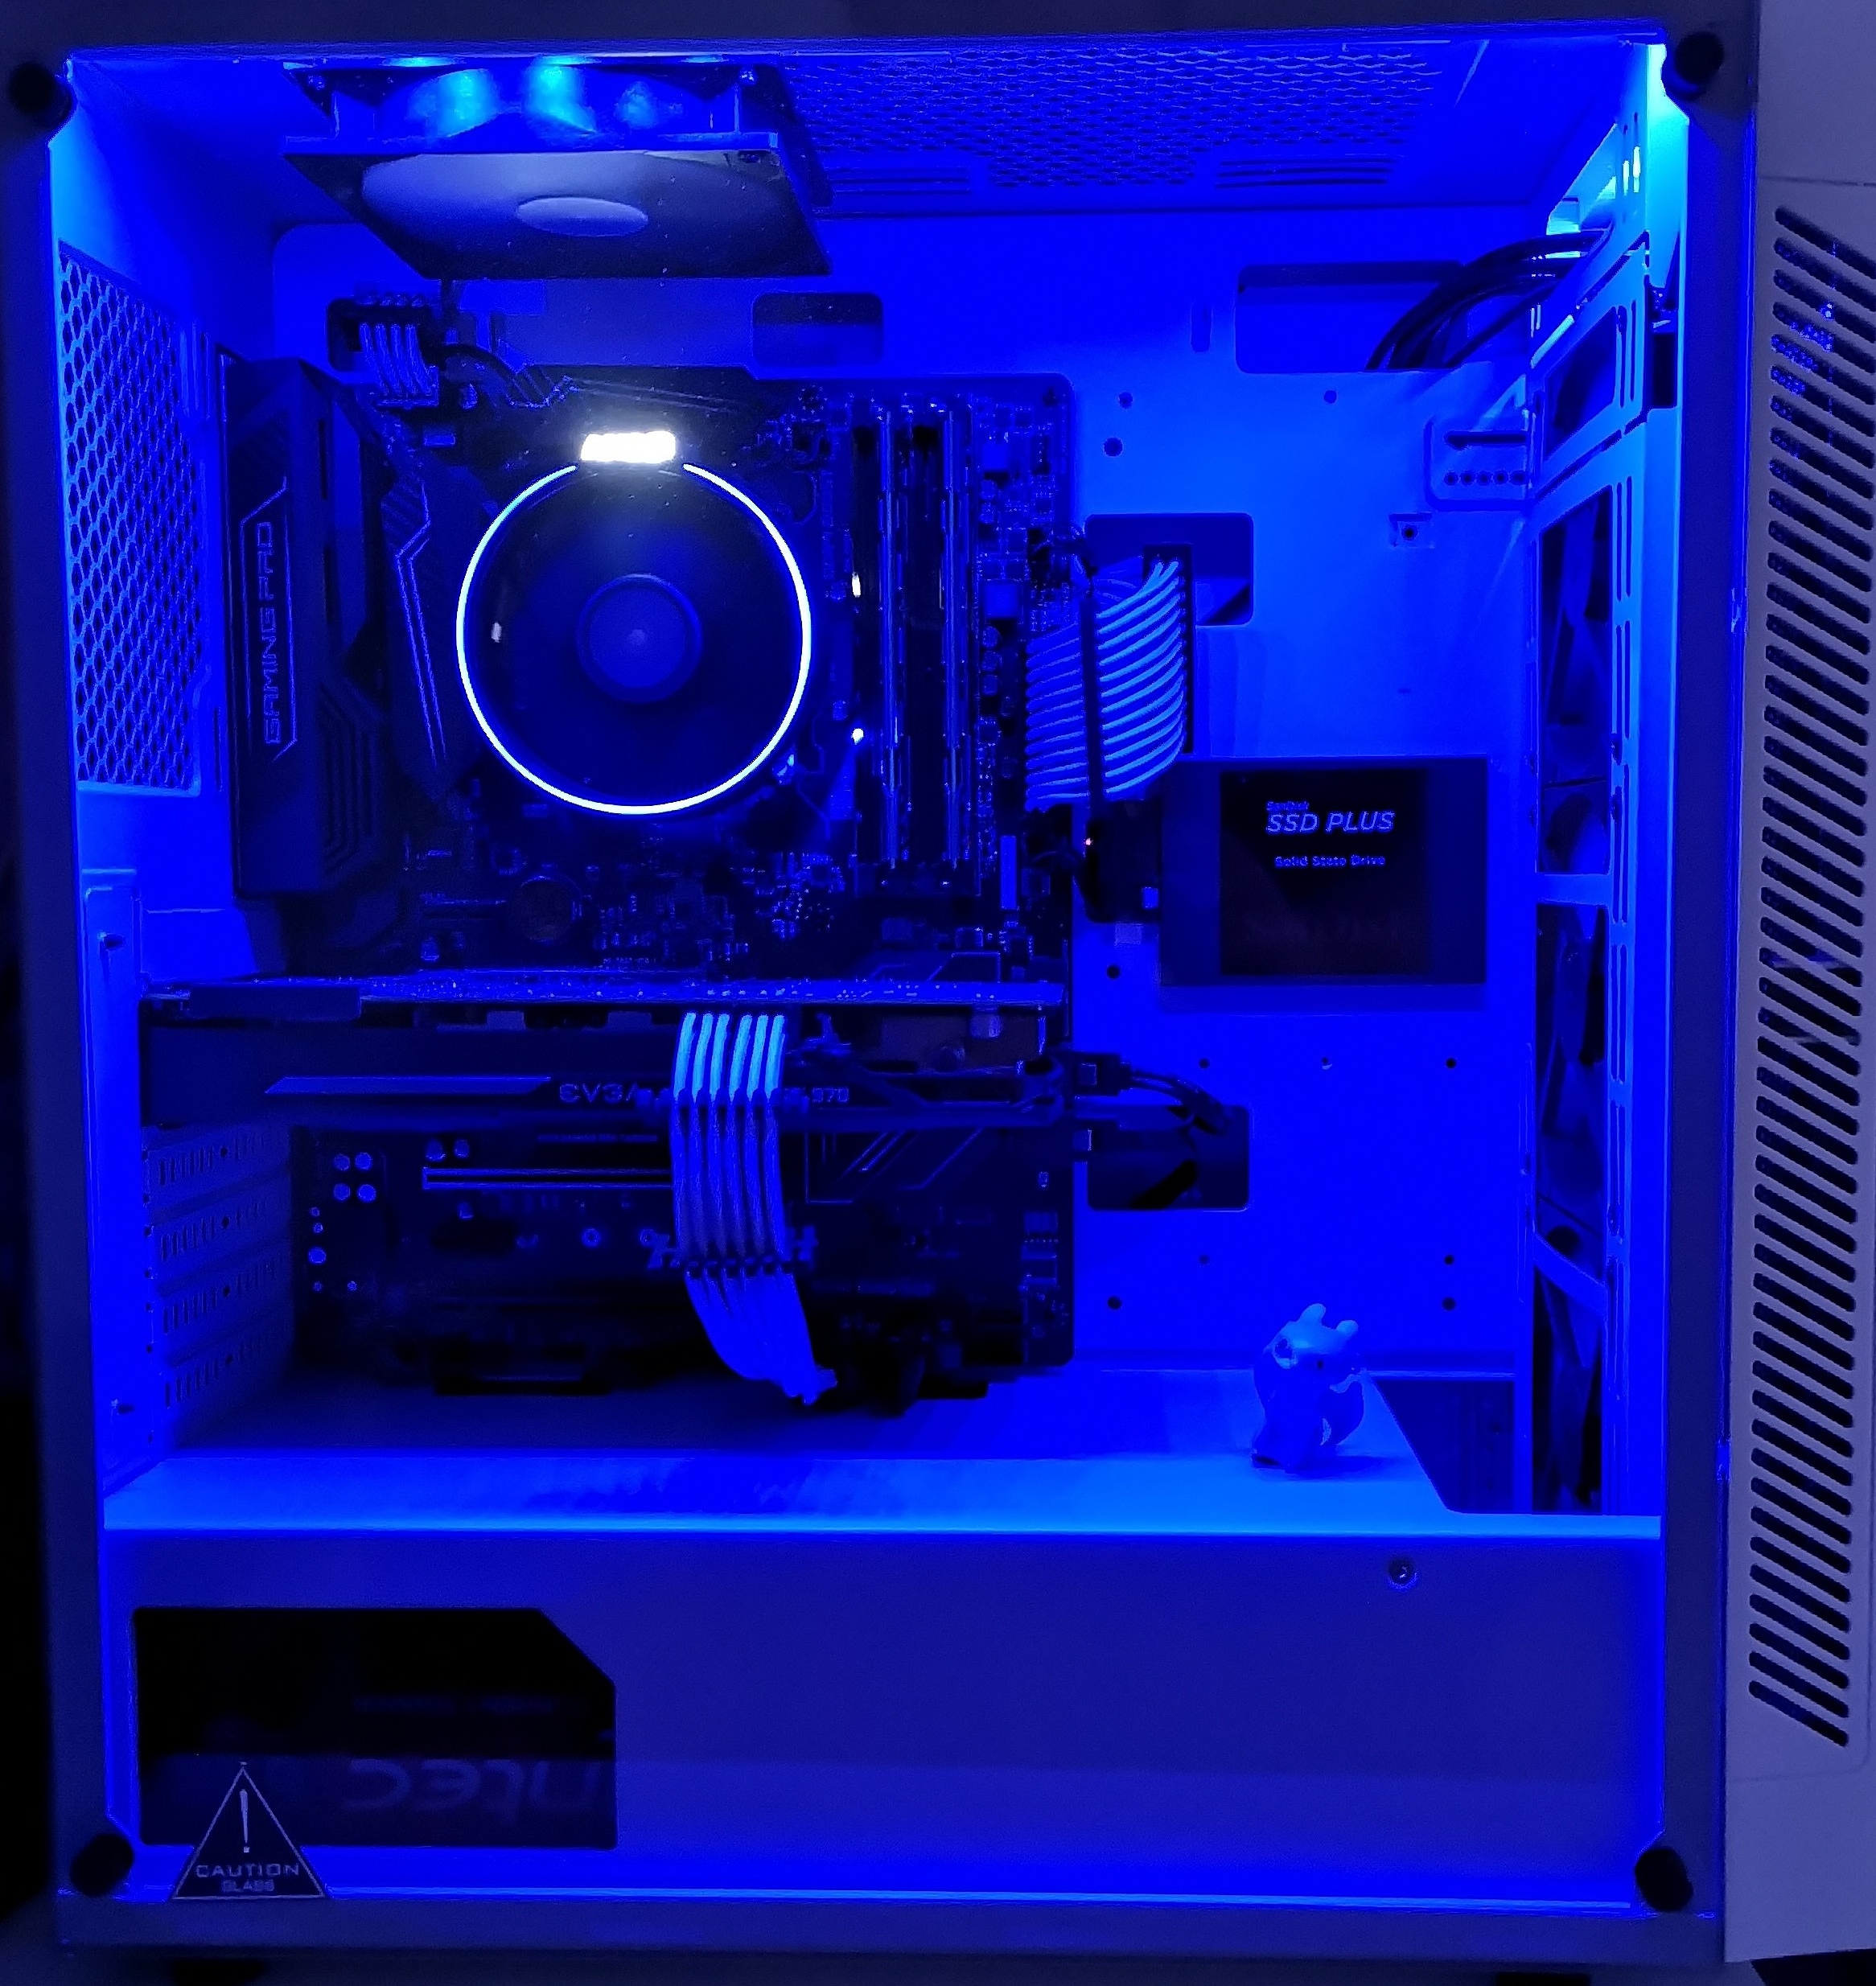
If you have done everything right, the RGB strip should start to light when you turn on the computer. The color and brightness of the lighting can then be controlled by the software provided to the board. And that’s what it should look like:
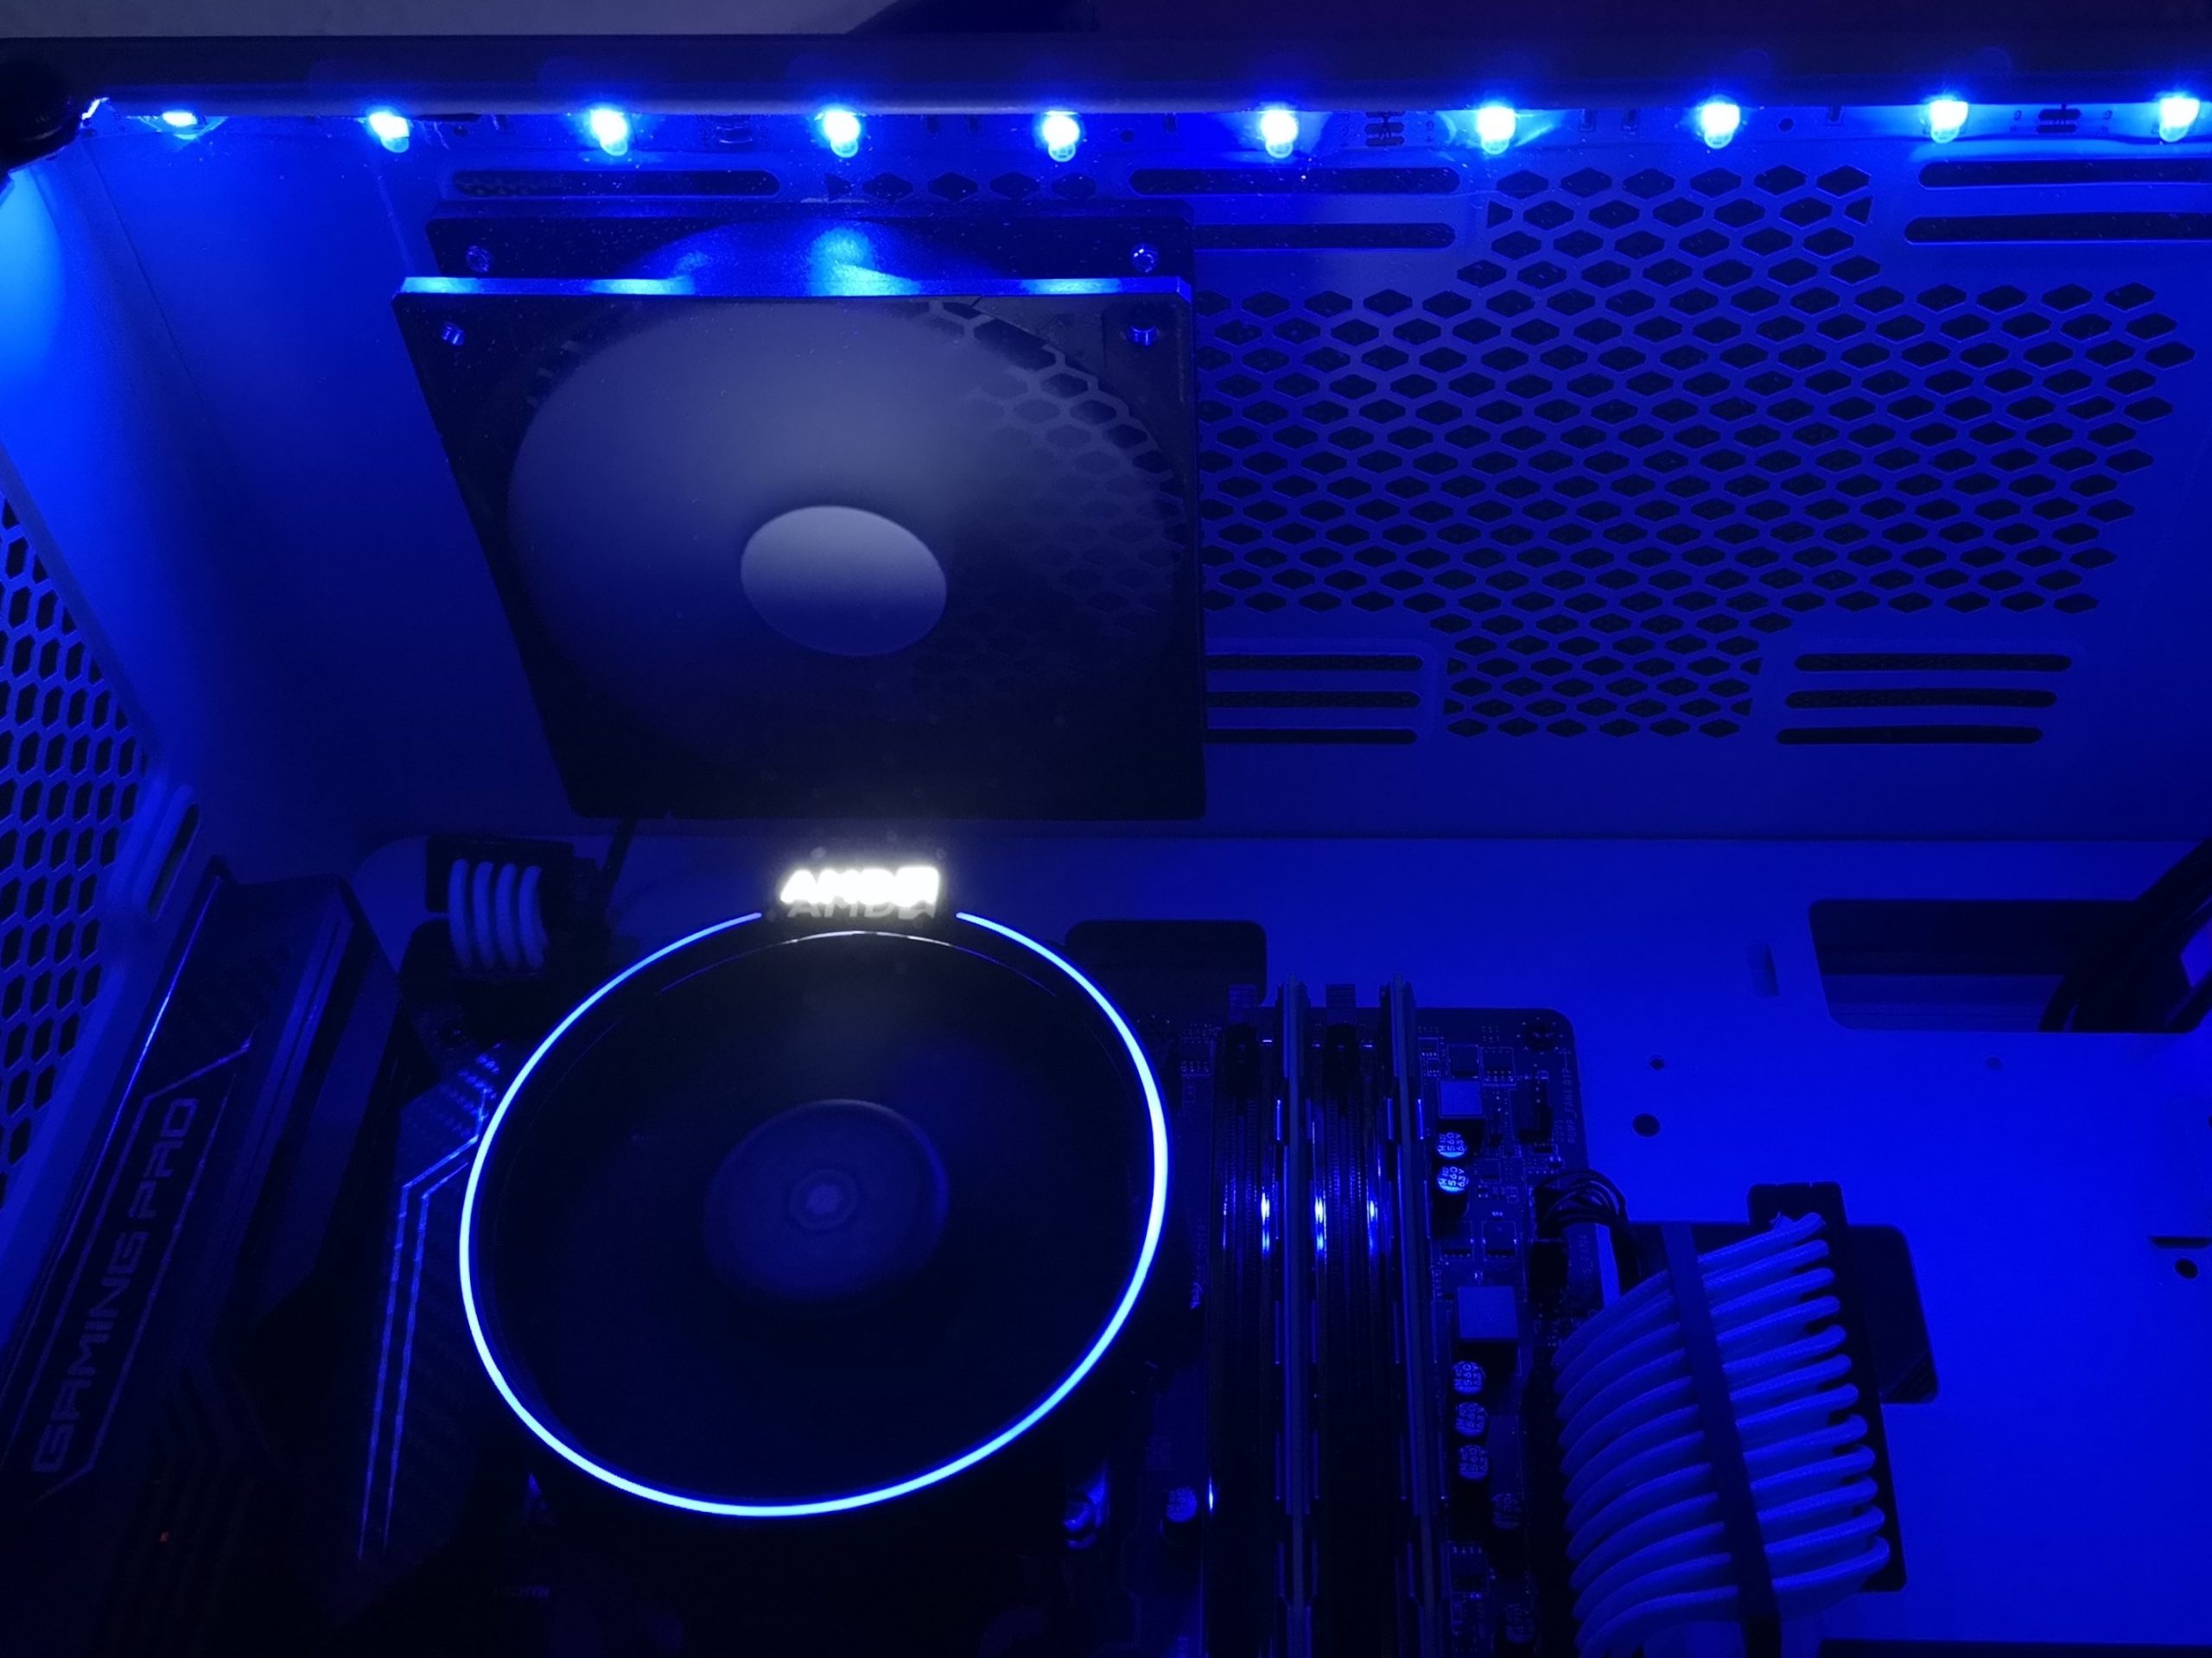
This would make the PC aquarium complete and the conversion is done. If you also want to illuminate your table and speculate on longer cable lengths – unfortunately the load capacity of these connections is not infinite. For more LEDs an RGB amplifier would have to be purchased, then you can even subordinate the entire room to the PC. But this is a completely different project.


Kommentieren