


Even though AMD has solved the determination of Tjunction (“hotspot temperature”) differently with the new Radeon graphics cards (Navi21) and measures and calculates much more widely, it is precisely this temperature that is the linchpin for telemetry. This in turn means that the applied clock rates including voltages, the fan control and finally also the protection mechanisms depend on exactly this value. The “normal” GPU temperature is within the usual range, but in the end it is an indicator for: nothing.
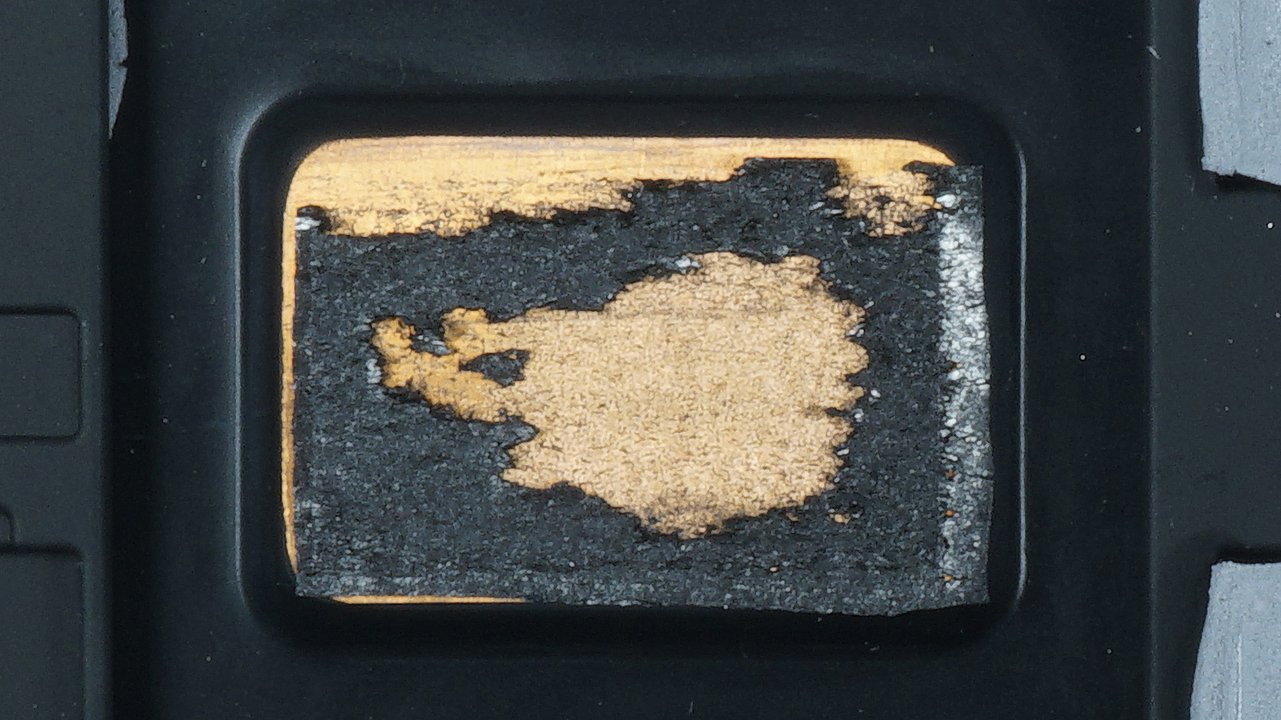
This time the vapor-chamber used in the reference cooler is placed on a machined copper bottom as heat sink. This solution, which is subsequently ground flat, is better than what AMD has used so far, but the gap dimensions of the separately mounted and screwed block seem to be able to vary. This is completely normal, which is why you again, as with the Radeon VII and many workstation cards, rely on the phase change pad with graphite content from Hitachi.
Warning and important preliminary remark
This solution is good. In fact, it is so good that it makes no sense, and in almost all cases it is even a deterioration, if you think you are replacing it with high-quality, conventional heat-conducting paste. I don’t want to go into the risk with liquid metal at this point, but apart from the phase changer I only see this variant as a real and powerful alternative. So if you absolutely believe that you have to remove the cooler (water cooling conversion) and plan a later remounting to air cooling, please read the following text in the article carefully.
Choosing the right thermal paste with brains
What counts here almost alone is the right compromise between the highest possible thermal conductivity and a not too high proportion of silicone oil or ethyl ester as a diluent, so that the paste remains slightly viscous. And this is precisely the problem that is the crux of the matter here. If you take e.g. thin Flutschinaut, the distribution is perfect when screwing, but this paste tends to “run away” if the pressure is not evenly high at all points. As the chip is slightly curved and the heatsink is not really flat, the contact pressure drops slightly towards the edges, so the paste will “wander” and lose performance very quickly, especially at the edges after burn-in. Unfortunately, I had to realize this painfully with the first self-experiment. So that didn’t work for a while.
A slightly more viscous paste works wonders in this case and does exactly the same thing as a thicker phase change pad does: smoothes out gaps without bleeding or disappearing. In the picture below, you can see the usual, somewhat more viscous heat conducting paste of a larger graphic card manufacturer in the small can. Since I screw the cards tested by me all as true to original as possible back together, I have the original paste from almost every major manufacturer in stock. In addition, the individual board partners are primarily concerned with “reliability”, i.e. reliability in the long term and not the last bit of data sheet performance.
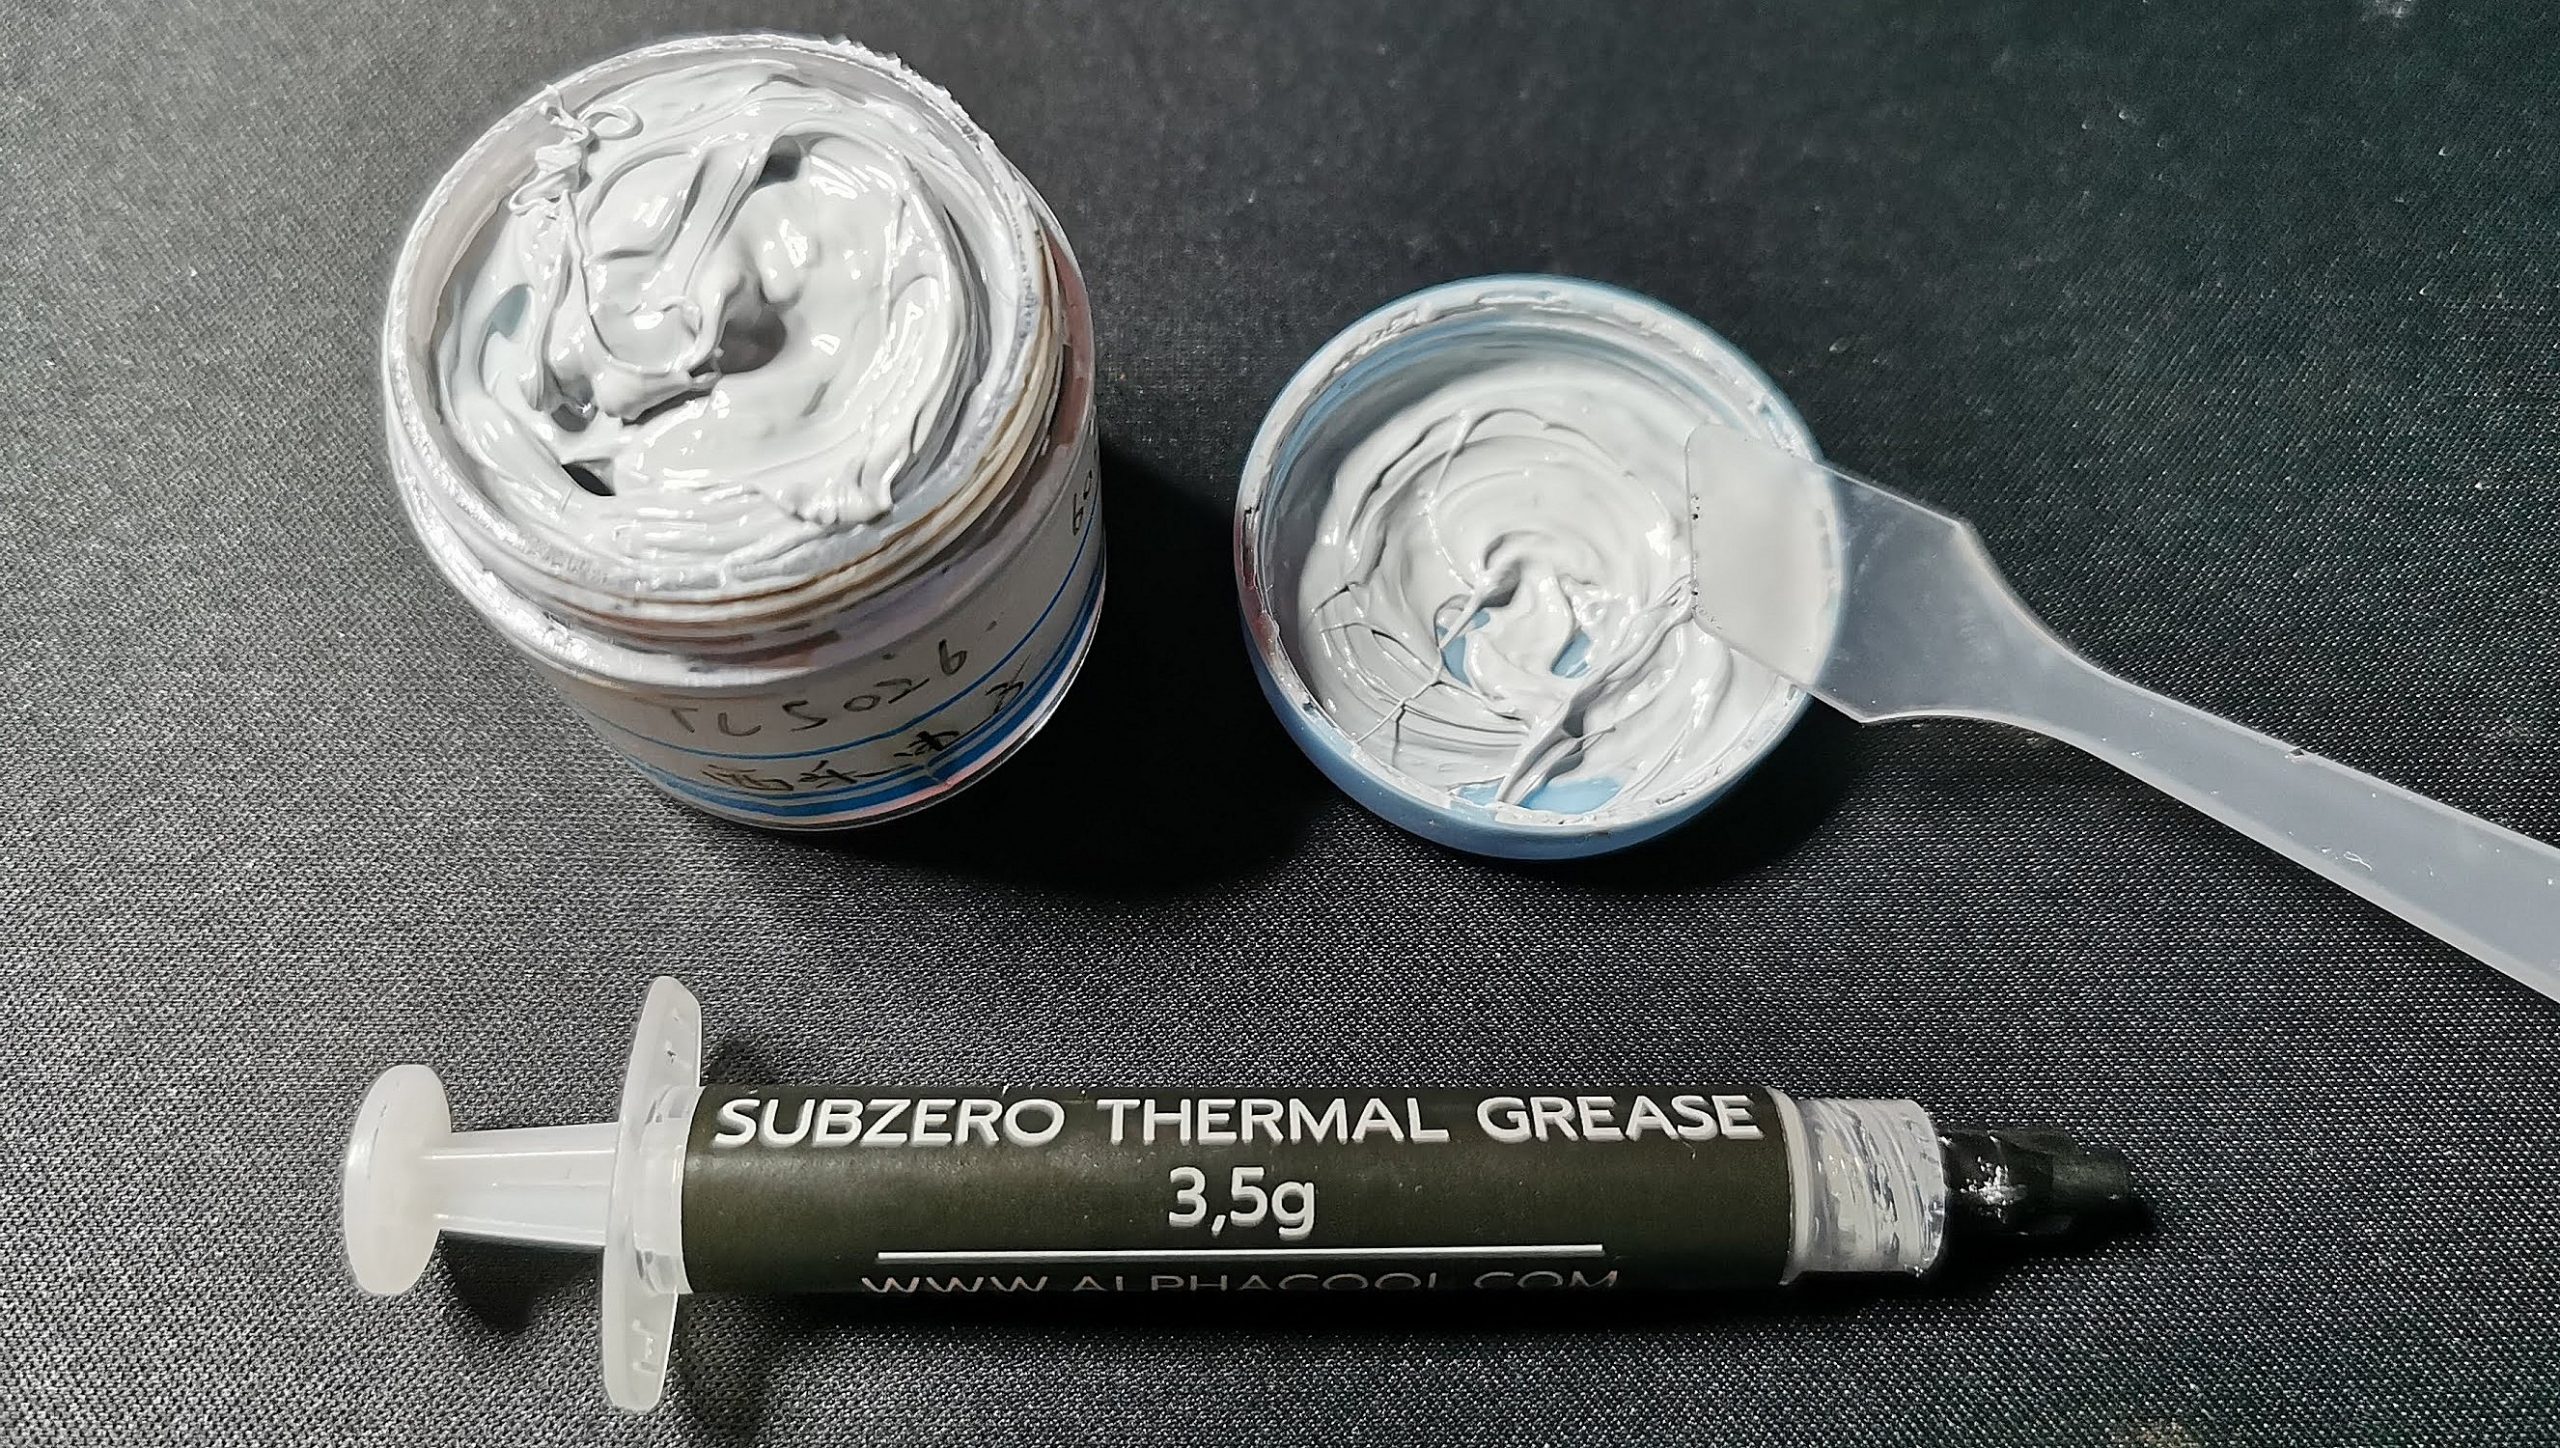
The Subzero from Alphacool comes closest to the whole thing. According to the data sheet, its thermal conductivity is extremely high, but it doesn’t run away as quickly and is therefore viscous enough to cleanly fill larger gaps even at the edges. It could have been even a bit more viscous, but in the end it proved to be at least equal to the pad. But this solution is not much better, and I don’t want to conceal that. One should therefore be glad not to be worse off in the end.
This once again as well-intentioned advice to all the heat-conducting paste fetishists and leisure optimizers, because here everyone will very quickly reach their limits, the paste anyway. So the MX-4 all-purpose weapon fails, the MX-2 anyway. A Gelid GC Extreme would also work quite well, but is already a bit too viscous and should be warmed up and smoothed with a spatula. The sausage method was to fail.
The correct screwing determines the success of the action
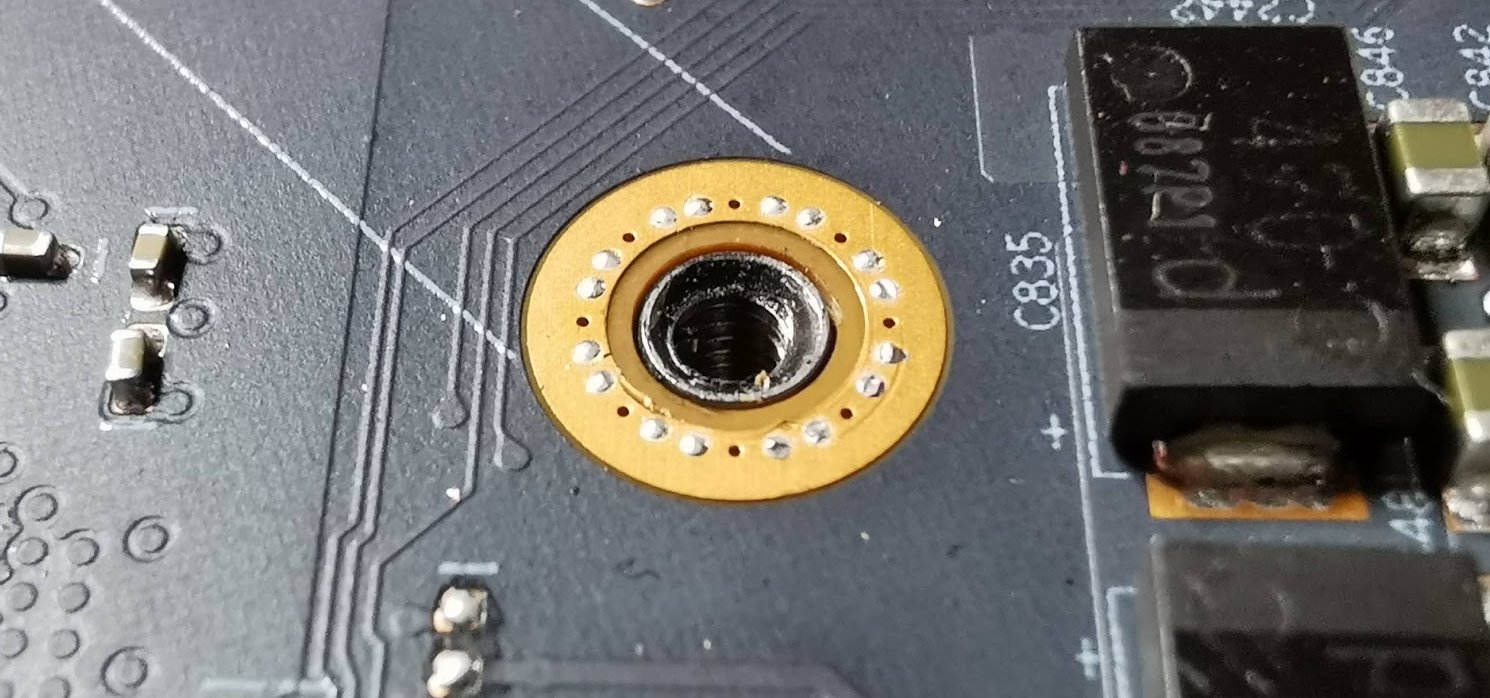
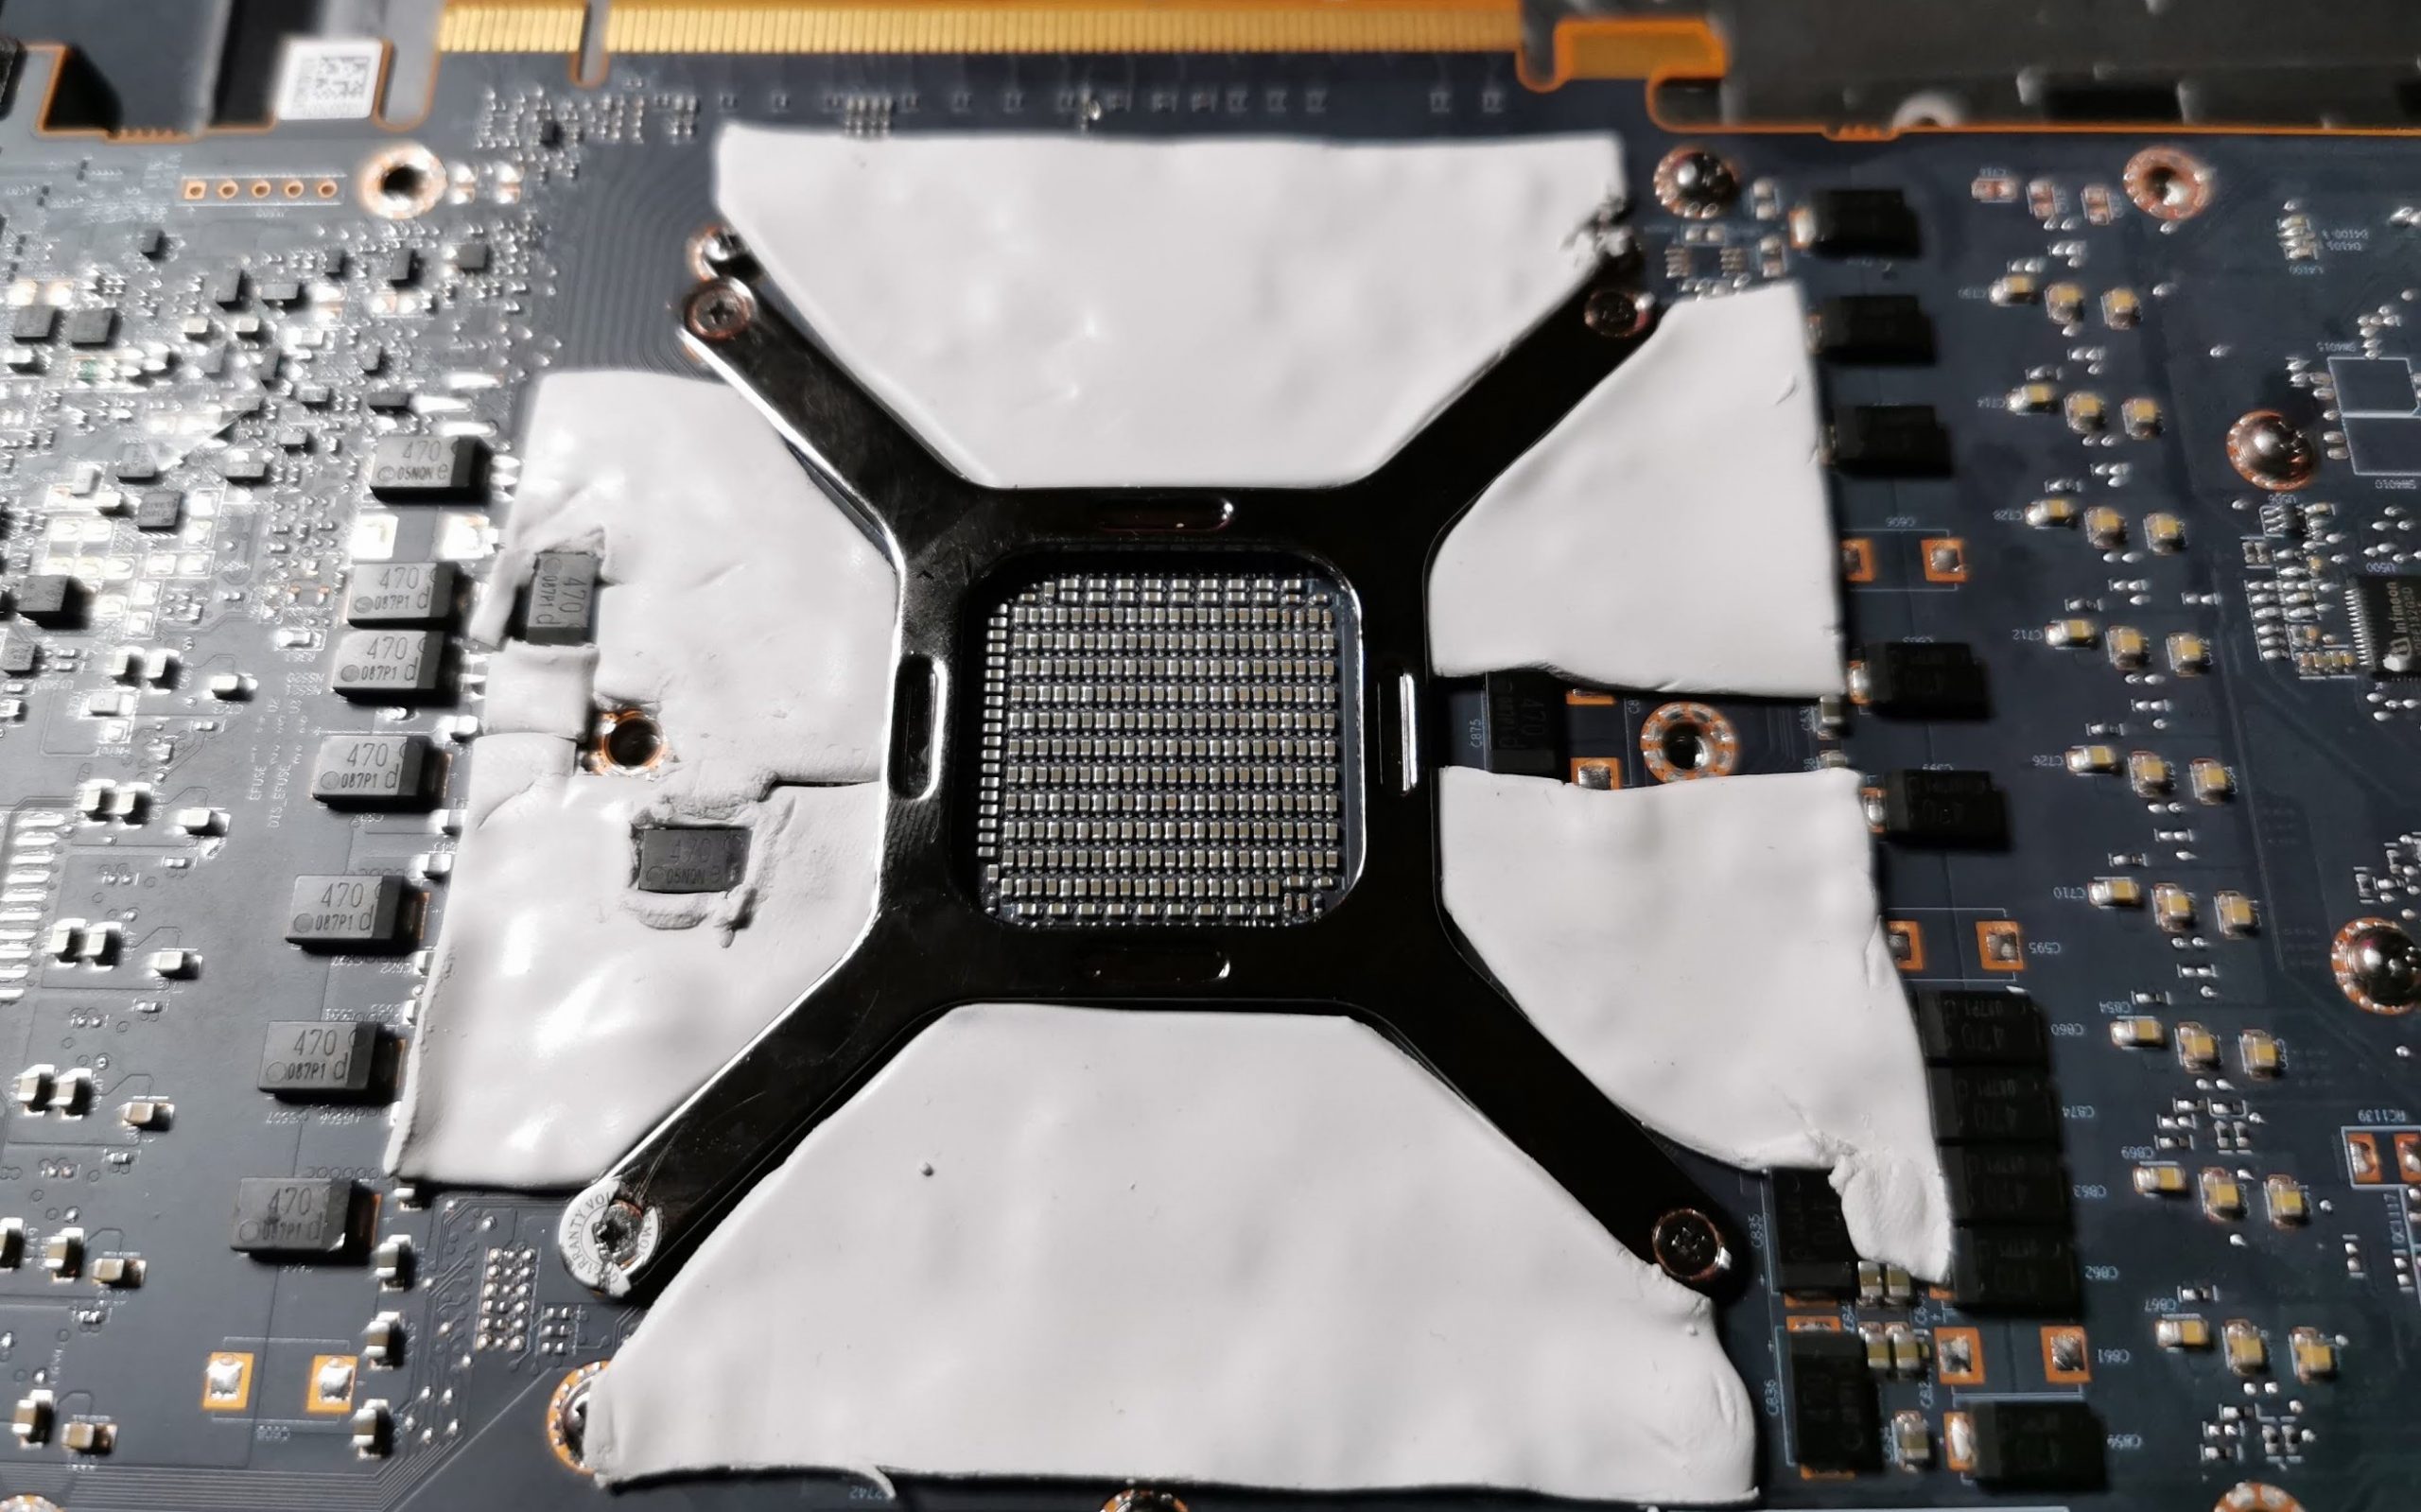
As with the Vega cards, correct mounting is essential. But before I go into the order, here’s a tip including the reason for the problem. The picture below shows the board and in the hole one of the four threaded sleeves of the Vapor-Chamber for the screw connection. Since the chamber and the mounting frame do not form a unit, the chamber hangs slightly lower when the board is in place. This is due to the fact that the board already lies firmly on the frame in the right places and does not give way any further, while other areas, e.g. on the voltage converters and memory modules, need more pressure due to the somewhat thicker heat conducting pads in order to also lie firmly on the frame at the end after screwing.
If one would follow one’s intuition and first want to screw the feather cross for the Vapor-Chamber, then one will not achieve exactly this. Then exactly that happens, as you can see in the following picture: you will not be able to tighten the Vapor-Chamber far enough without damaging the screw heads by too much force. You think it’s solid, only it’s not. The paste had some contact with the chamber, but not over the whole surface!
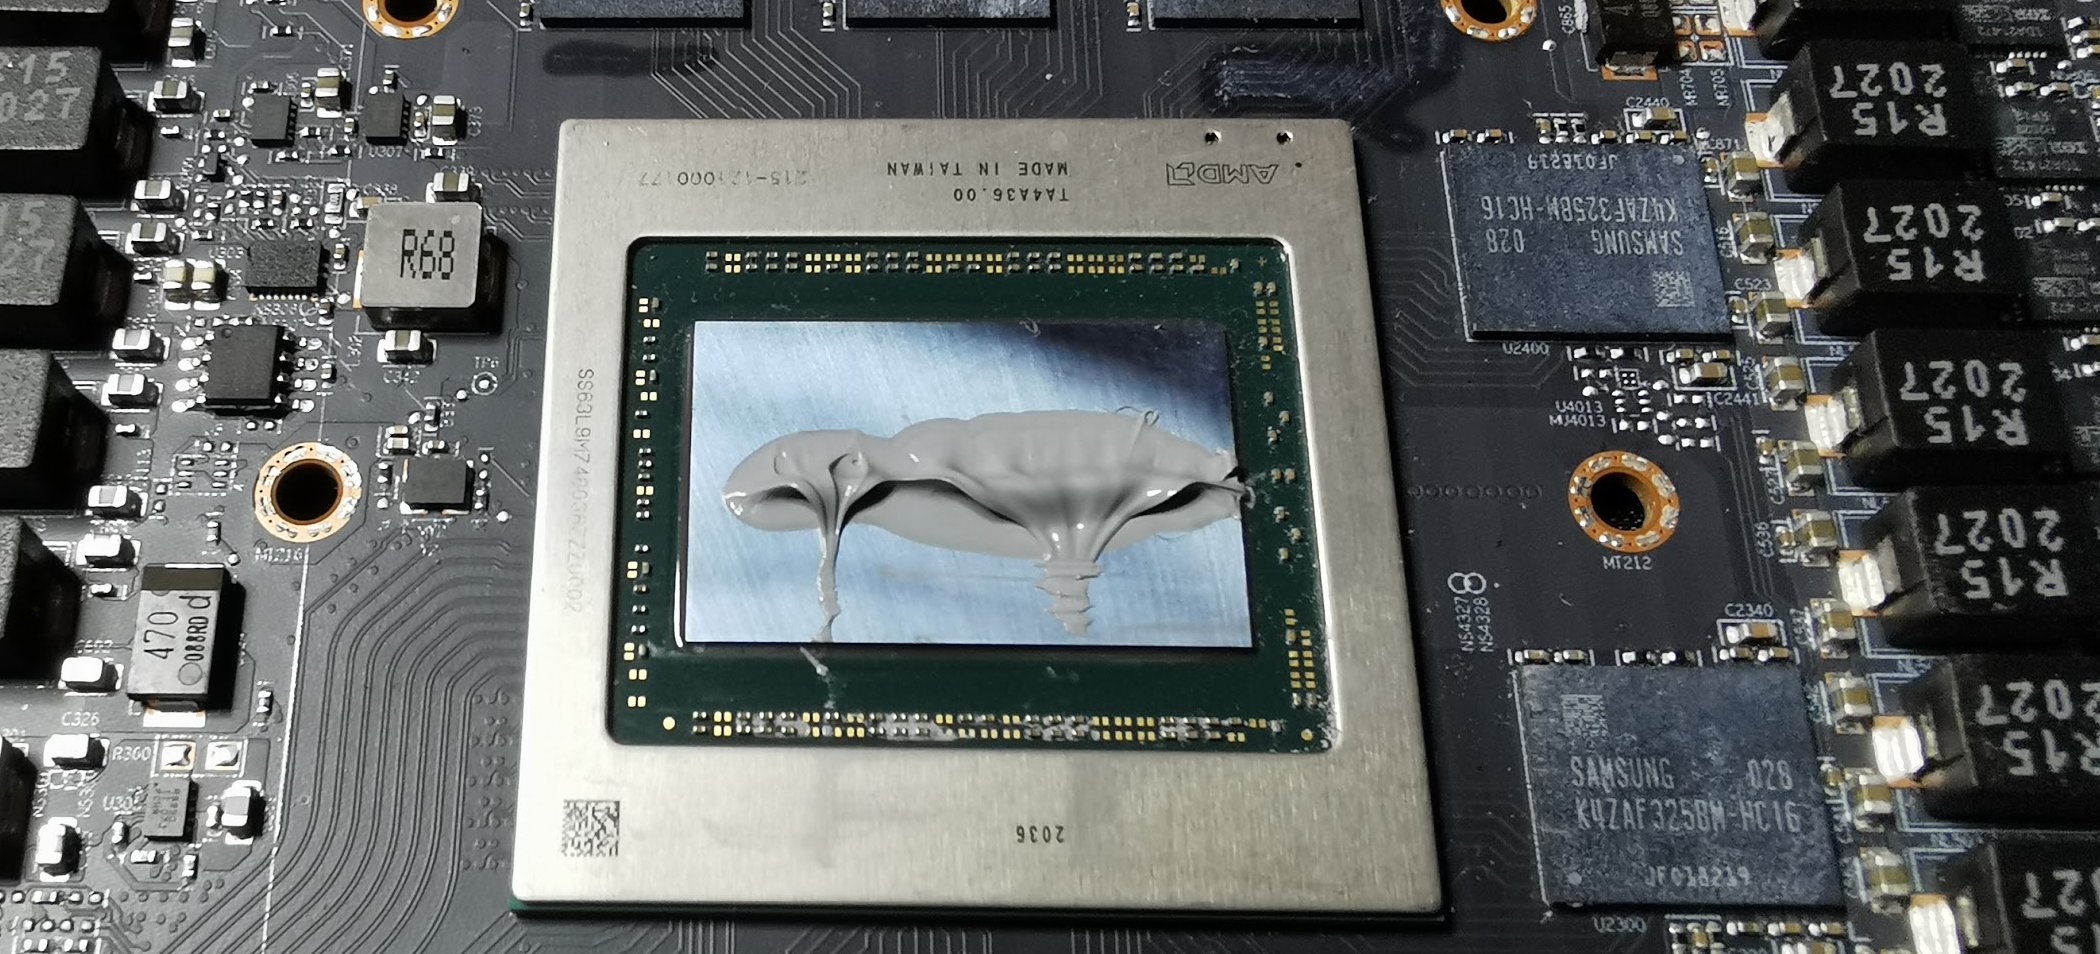
We also see the huge, rather rectangular Navi21 chip of the Radeon. Either spread the paste relatively thickly with a spatula, or use the sausage, as here with the Alphacool Subzero, which is just liquid enough to make it work as hoped. Only you have to screw it definitely a bit different, otherwise it will fail here!
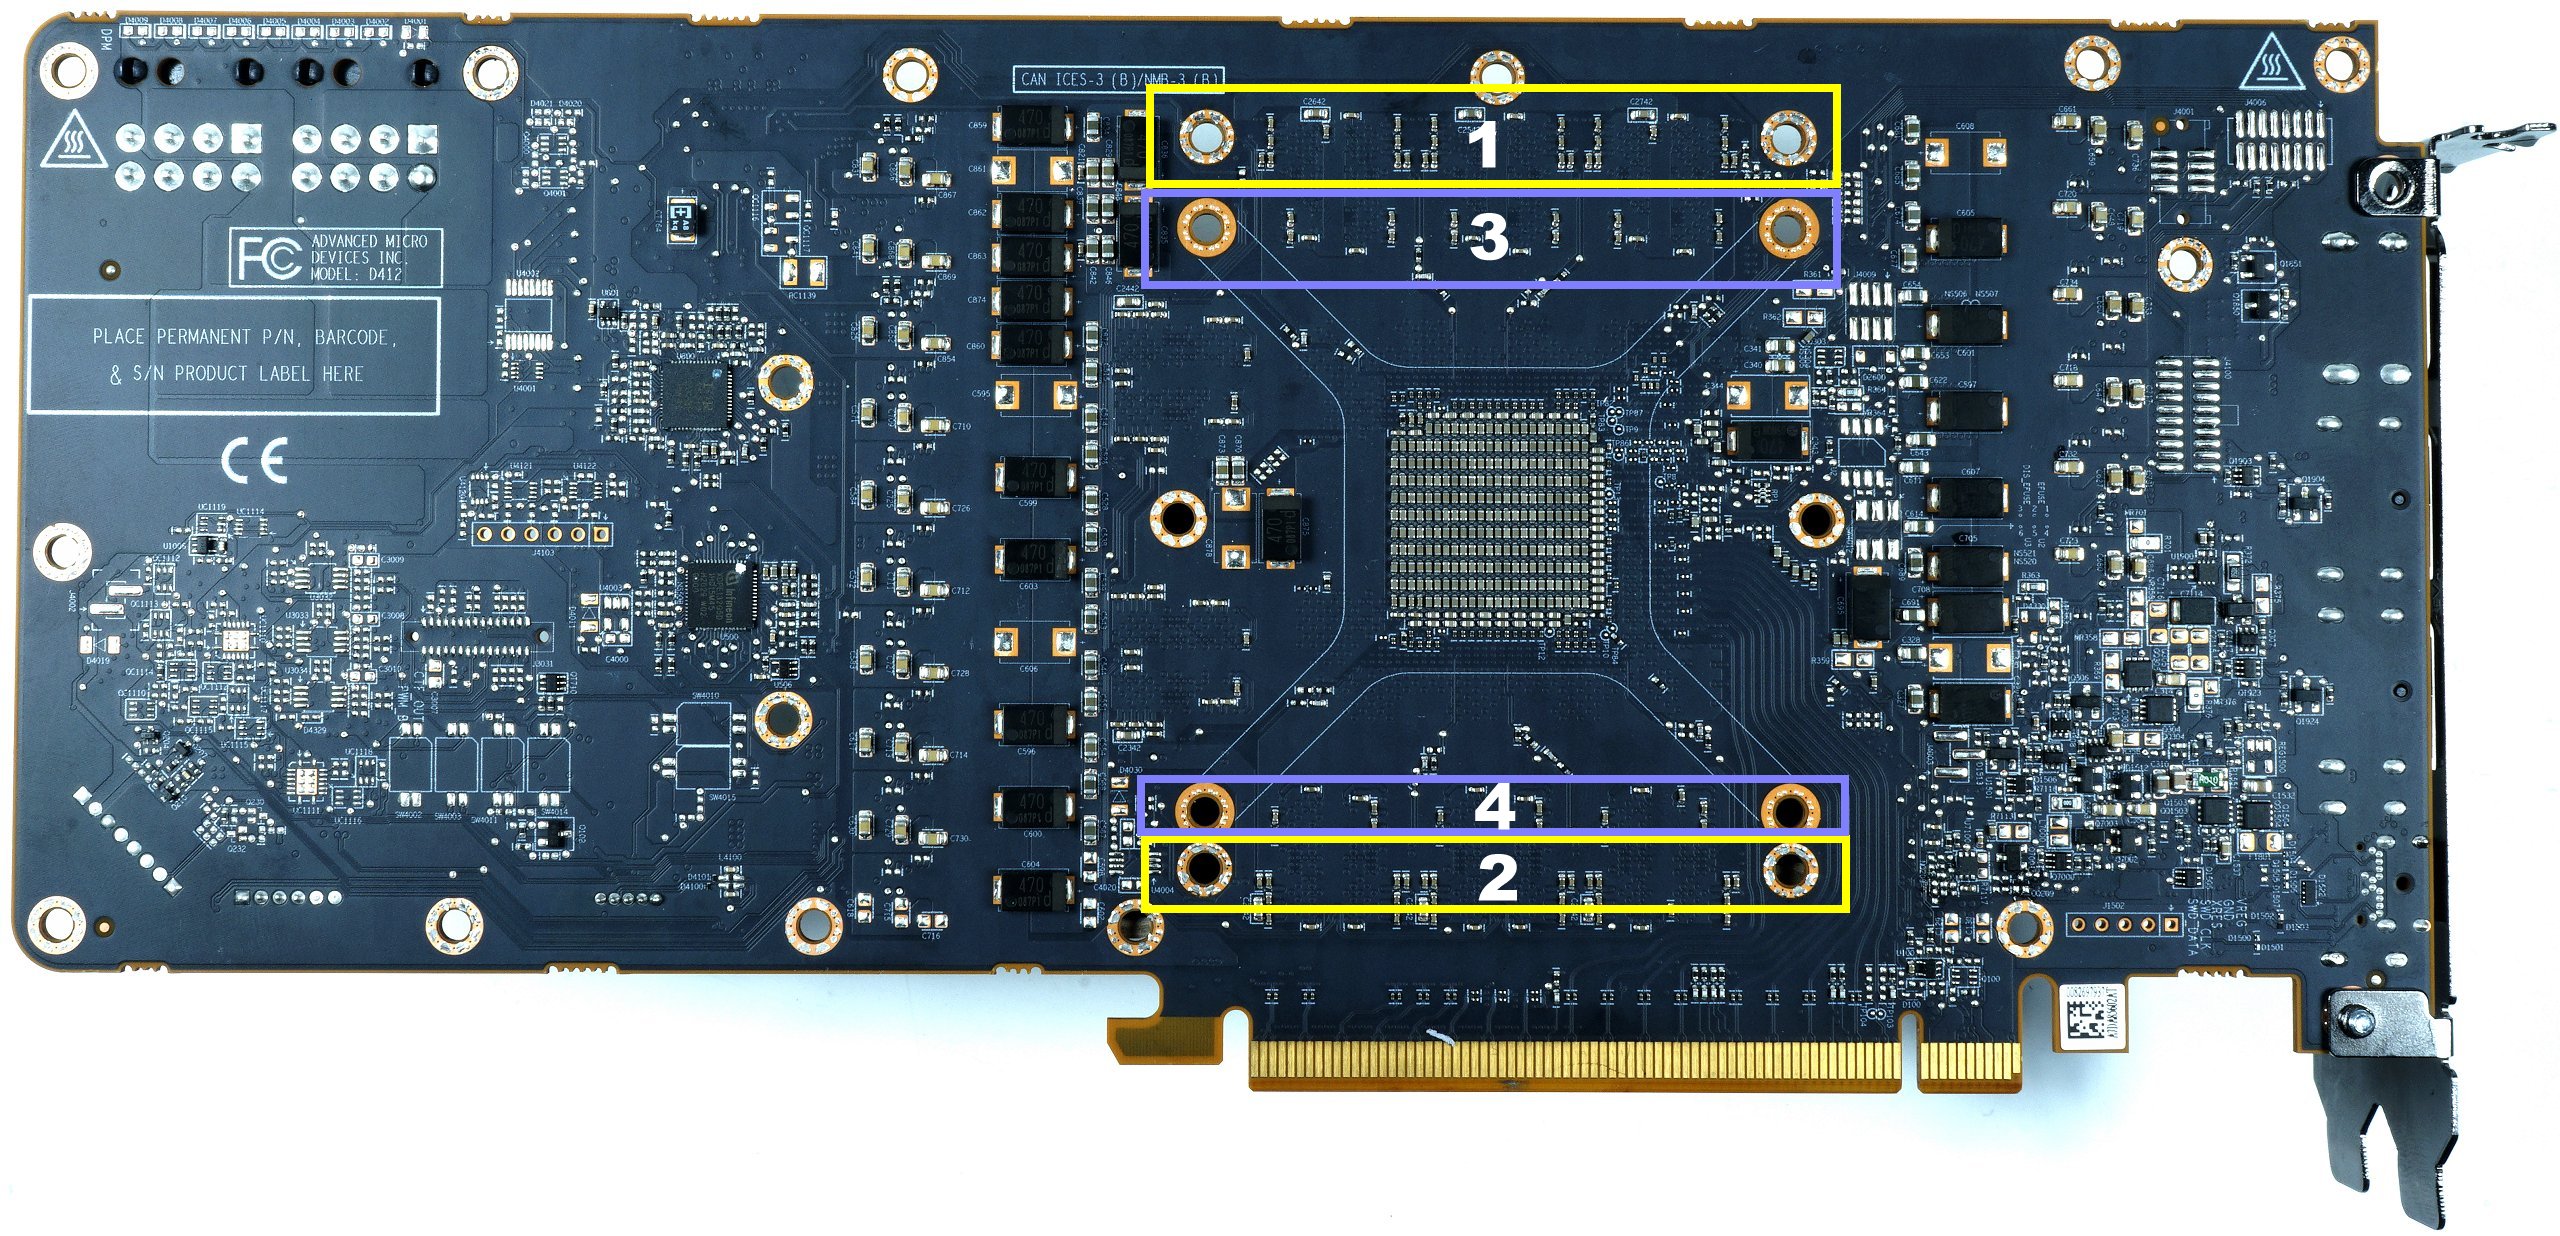
So once again it is all about the right order! The yellow areas 1 and 2 are screwed on alternately and diagonally step by step, not all at once, but alternately and carefully. As soon as you feel a stronger resistance, you have to stop here first. Now screw all further screws of the board mounting plate from the CPU socket to the outside and tighten them all already. Of course, you should only use the screws that will later be covered by the backplate! Only then are the four screws in the yellow areas also finally tightened.
Only now you screw the Vapor-Chamber together, because the board lies flat. It has proven to be effective to tighten the two screws in the blue area 3 alternately until you feel a first, bigger resistance. Then repeat the whole thing again with the blue area 4. Now the four screws, again starting at 3, can be finally tightened. Done.
Pad mod for the memory?
You can certainly do that, but you don’t really have to. We still know from the launch review that this time the heat is not coming from the voltage converters but from the BGA. Therefore I equipped the areas under the modules (but not only these) with 3mm crumb pads in a large area before I screwed the backplate together. This mod is not quite cheap, especially considering the effort and benefits. You will be able to lower the memory temperature by another 2 to 3 degrees, but the board temperature by up to 5 degrees, which is not bad.
You can see very nicely how the fluffy pads are distributed in the width and adapt to the surface of the board by the gap between the edges of the spring cross and the backplate. What’s left just oozes out. This is incredibly practical and avoids too much pressure on sensitive components.
Summary and conclusion
That’s it and yes, the card does it again. Slightly better than before, but if I have to be honest, without any good reason, you can completely avoid this action. AMD has done an almost perfect job here, which you will never be able to do so well with simple means. So if you are planning a Radeon battlefield, you should really have a good reason like a water cooling conversion. Just to generate a miracle by another paste is not possible with this card. You can hardly do better than this, unless you risk it with liquid metal. But do you need the 2 degrees less? I don’t know what for. Cost, risk and benefit?!


Kommentieren