


Would you like a little more or a little less?
The overclocking limit of the Radeon RX 6800 XT isn’t particularly large, so the cheaper RX 6800 already looks much more interesting. But you won’t be able to pull out any trees here either, because AMD is now following the example of NVIDIA and is completely sealed off with the specifications for power (Power Limit) and voltages. These registers cannot be overwritten with AMD’s own engineering software and even the MorePowerTool doesn’t stand a chance (at the moment). With one exception, but I’ll get to that in a minute.

What we want to do today is the direct comparison of the board in factory state against SAM, undervolting together with clock increase and undervolting pure with factory clock. Four different approaches and in addition once again the comparison of the maximum OC against SAM over all 10 tested games in WQHD. That’s all the time there is for it, but that should be enough for a complete picture. I picked out one game as an example for which I also did all single graphics and complete evaluations up to variances and efficiency.
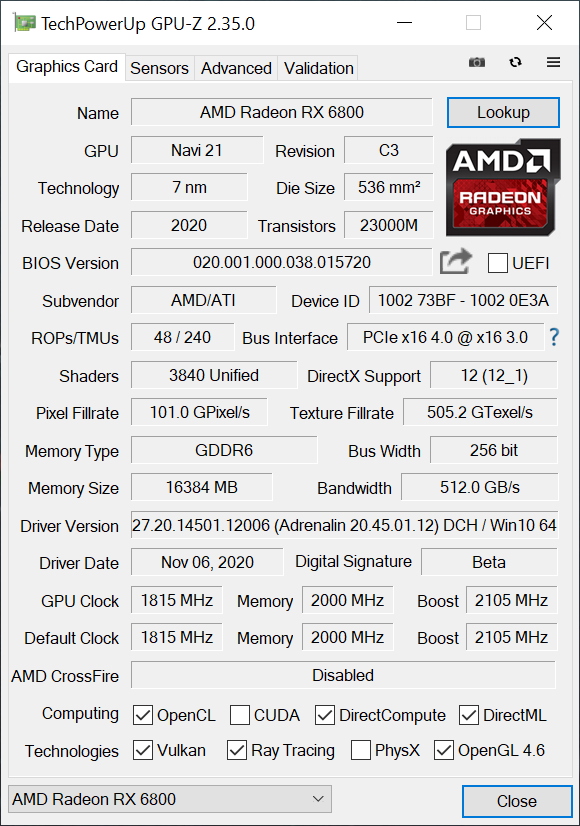
The RX 6800 tested here comes on 62 CU or 3840 shaders and is thus clearly behind the RX 6800 XT than one would have expected at the beginning. While the base clock of the RX 6800 XT is specified with 2015 MHz and the boost clock with 2250 MHz, the RX 6800 has to get by with 1815 or 2105 MHz, but that’s exactly what we can and want to change today. Both cards use 16 GB GDDR6 at 16 Gbps, which is made up of 8 modules of 2 GB each and can also be overclocked.
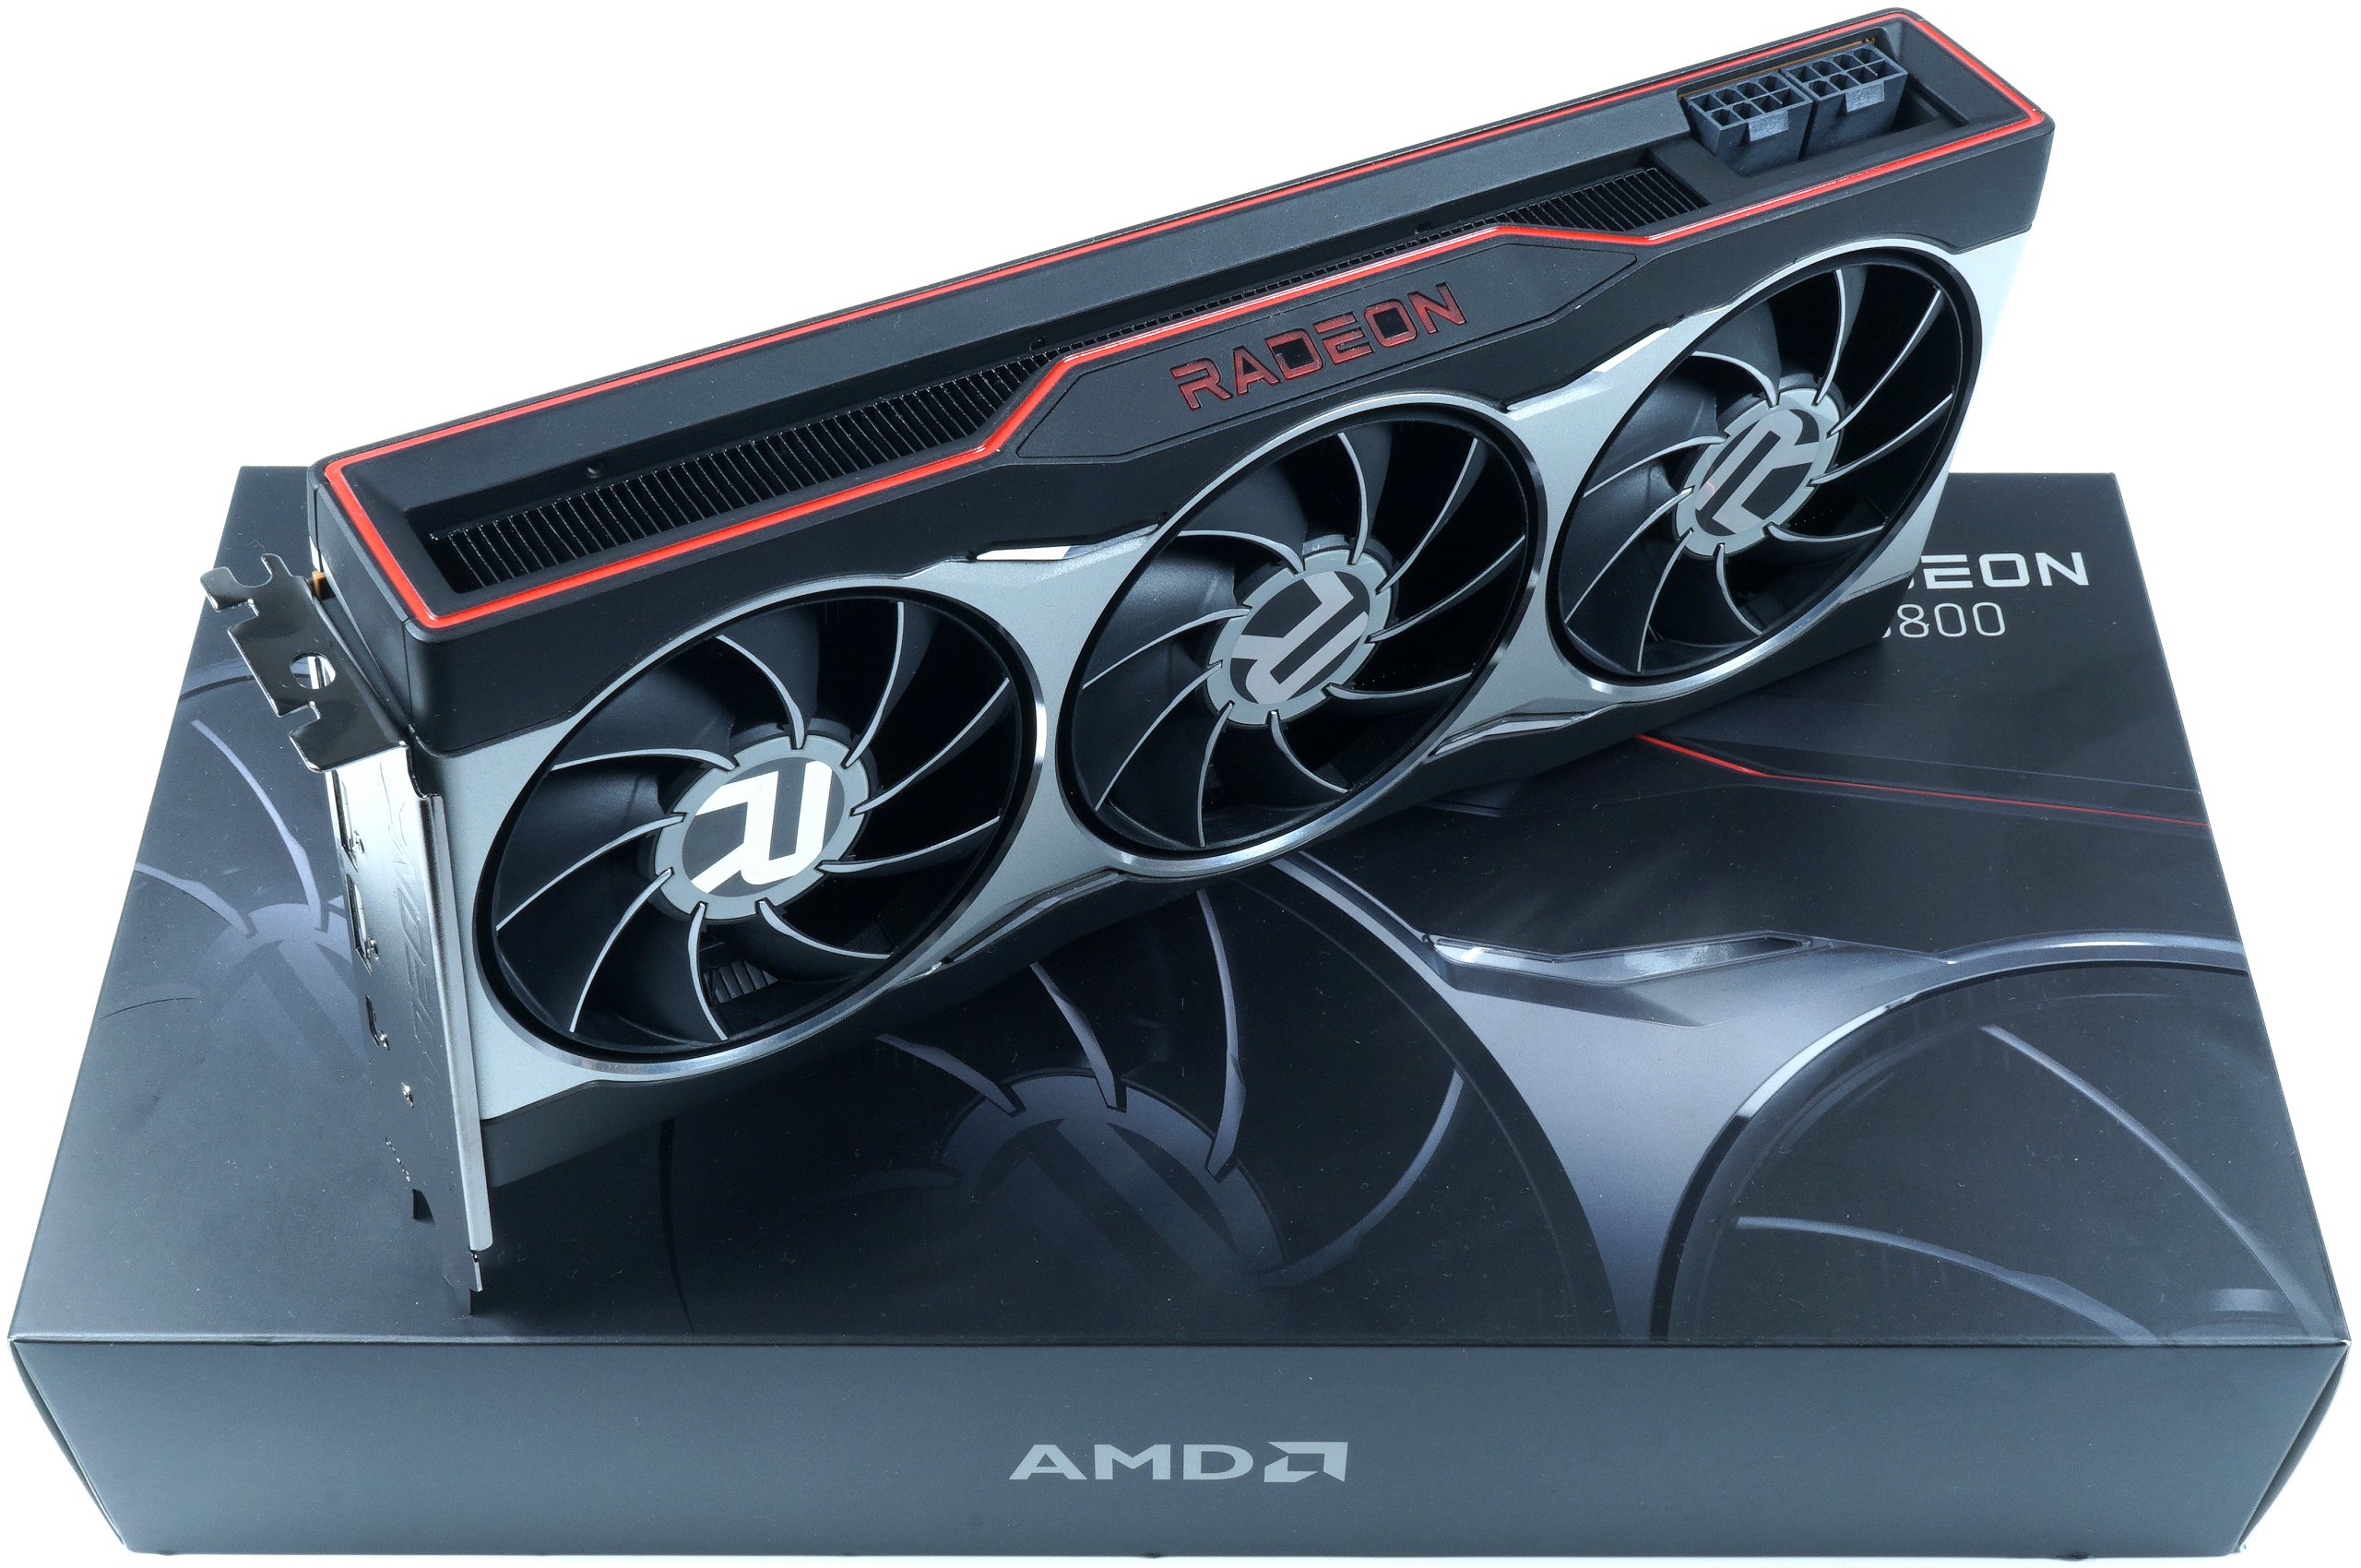
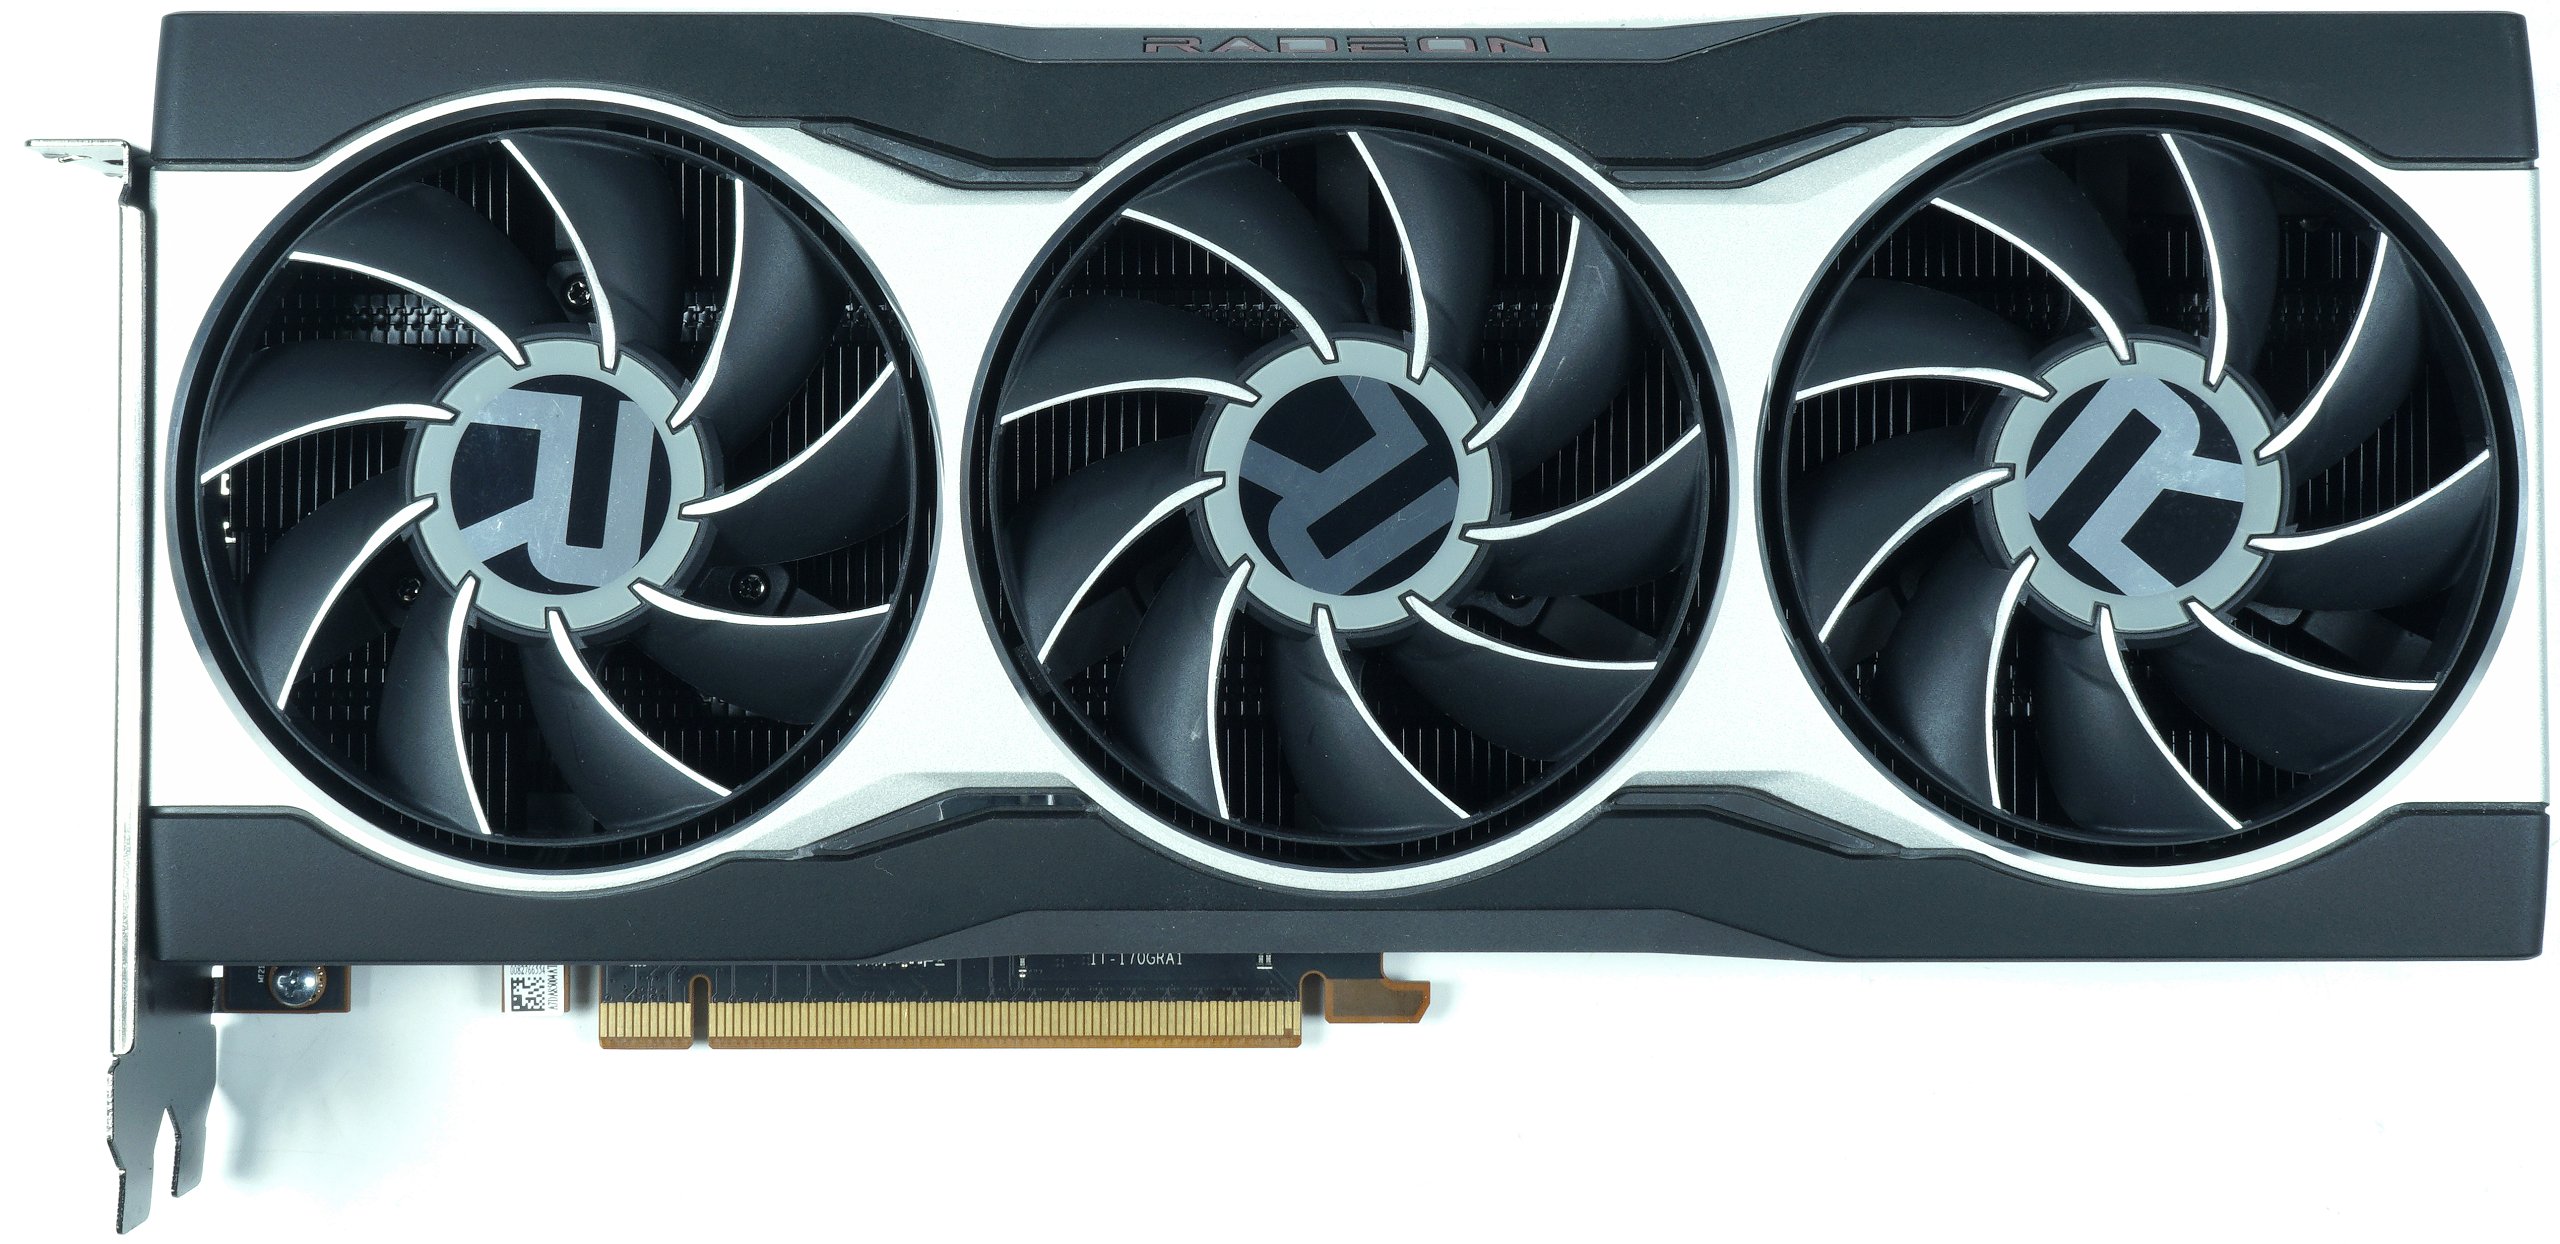
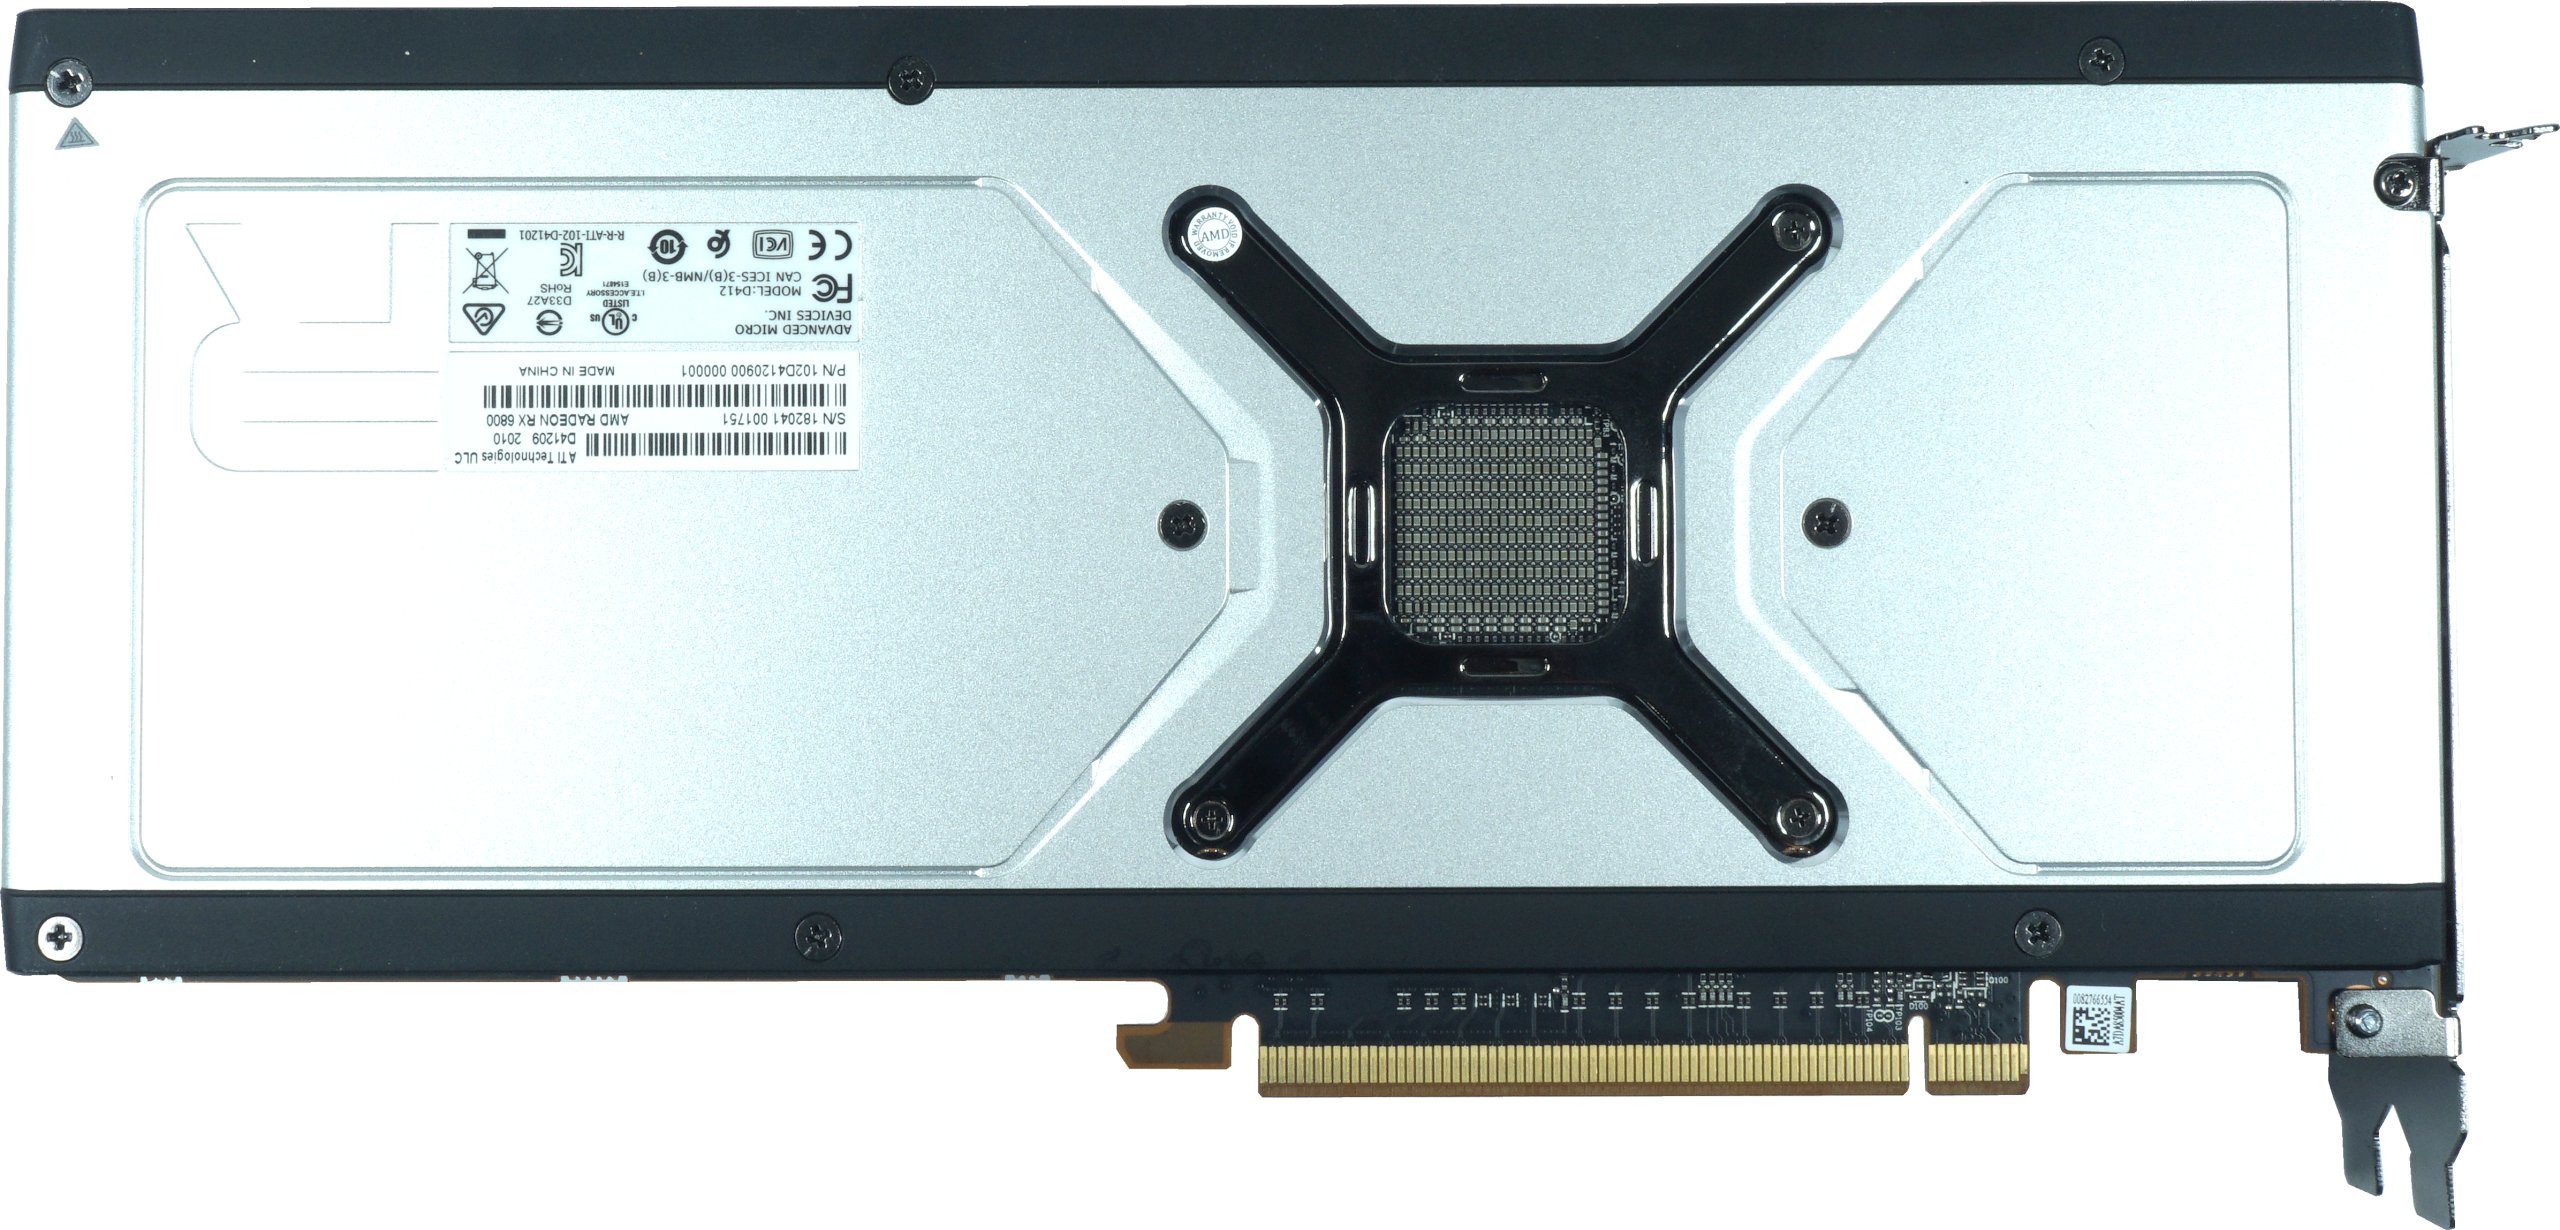


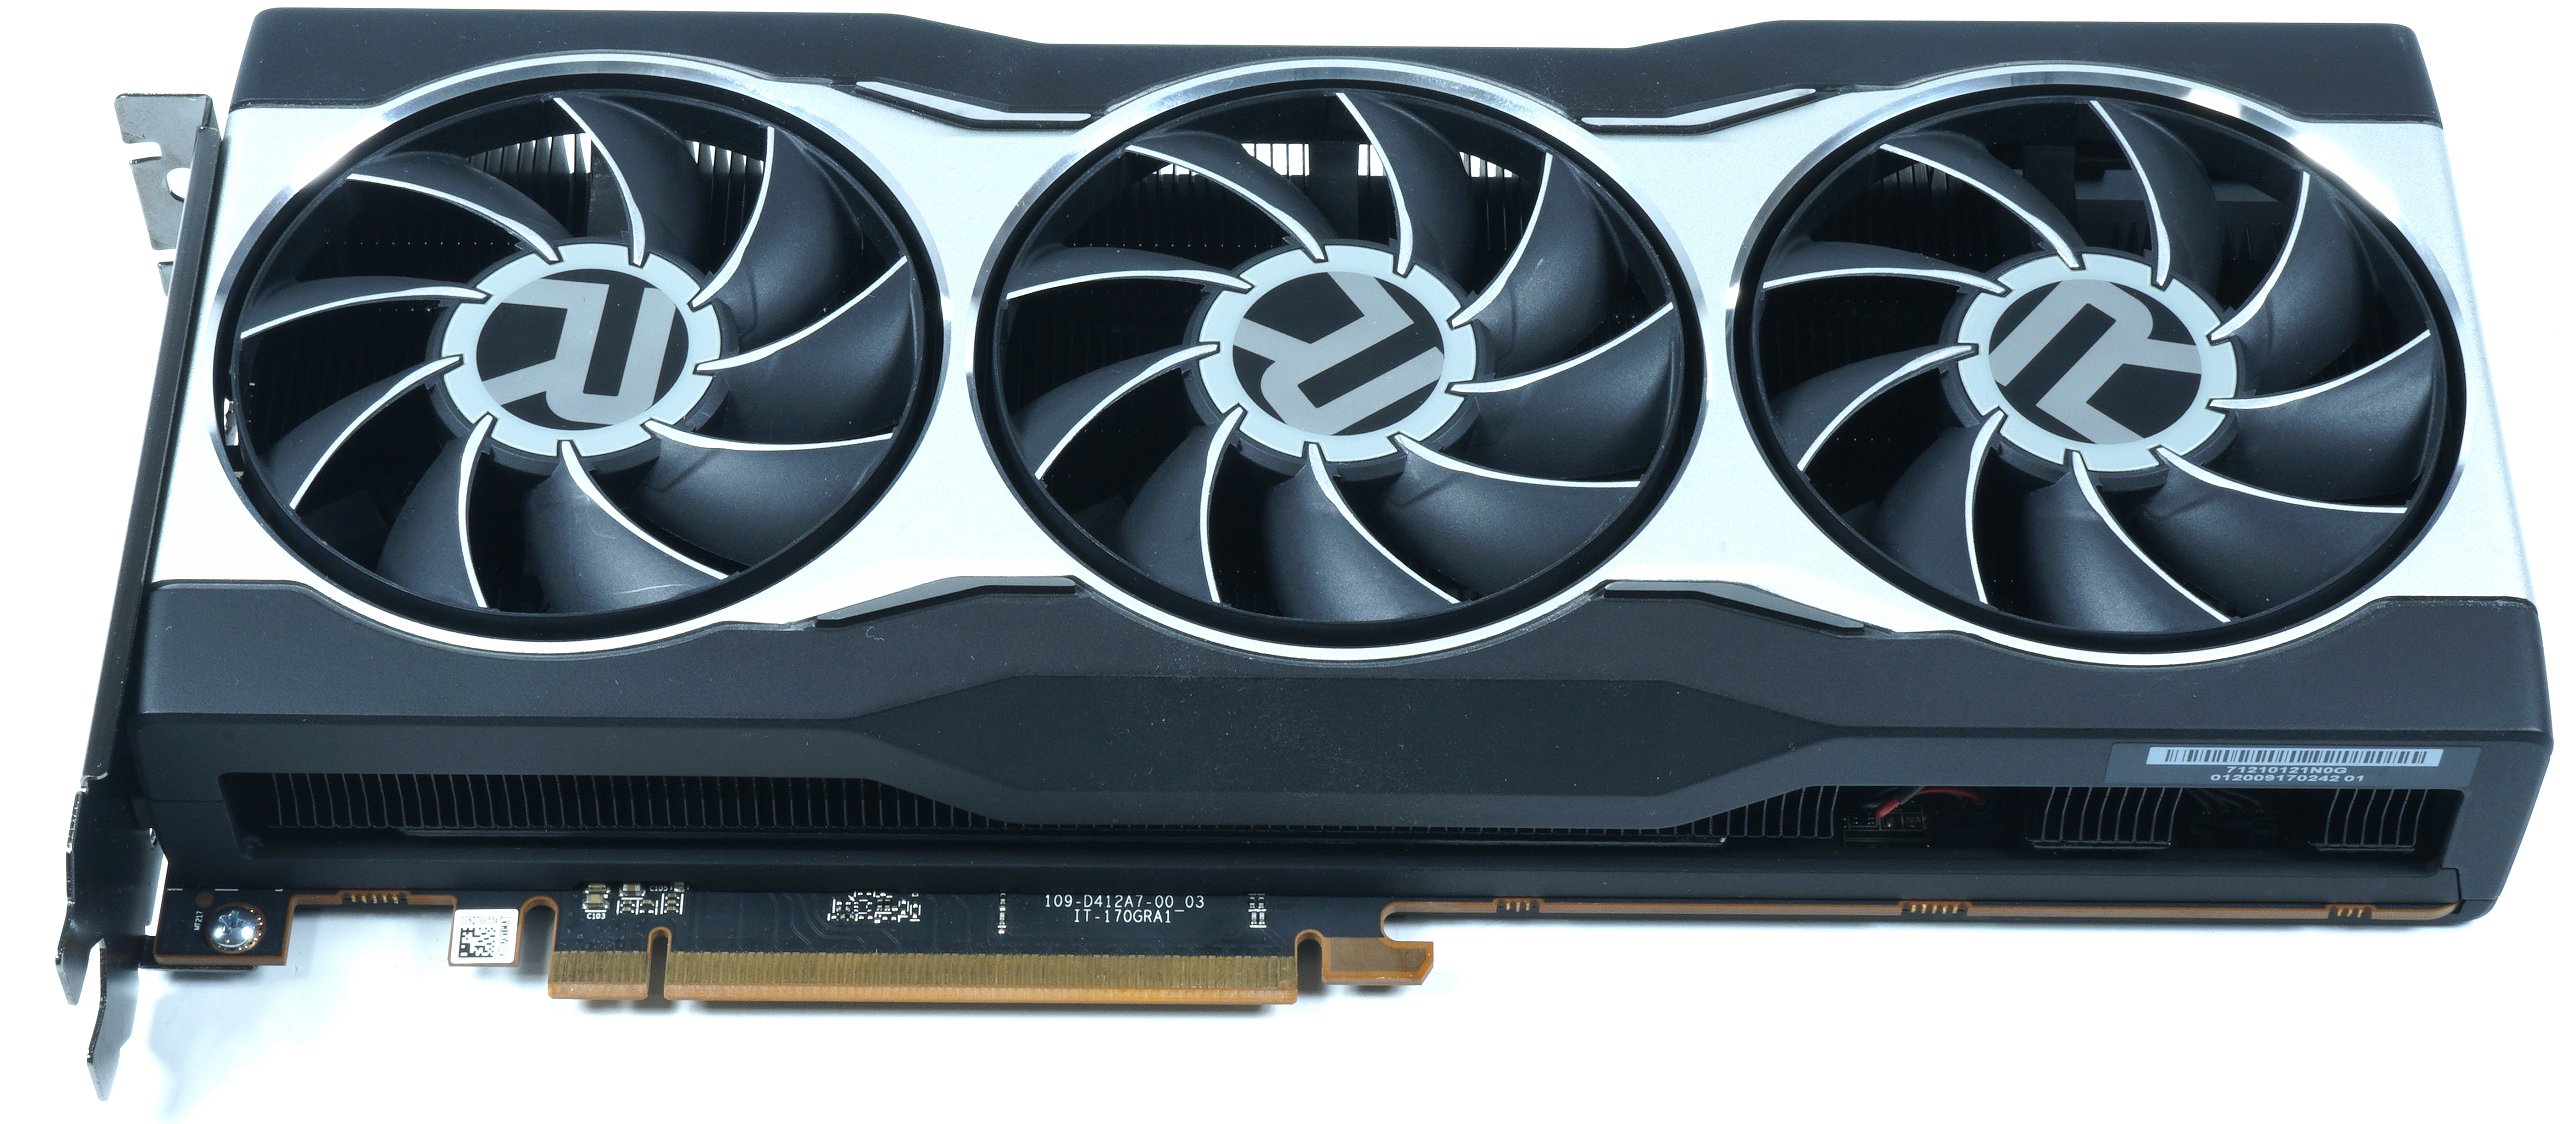

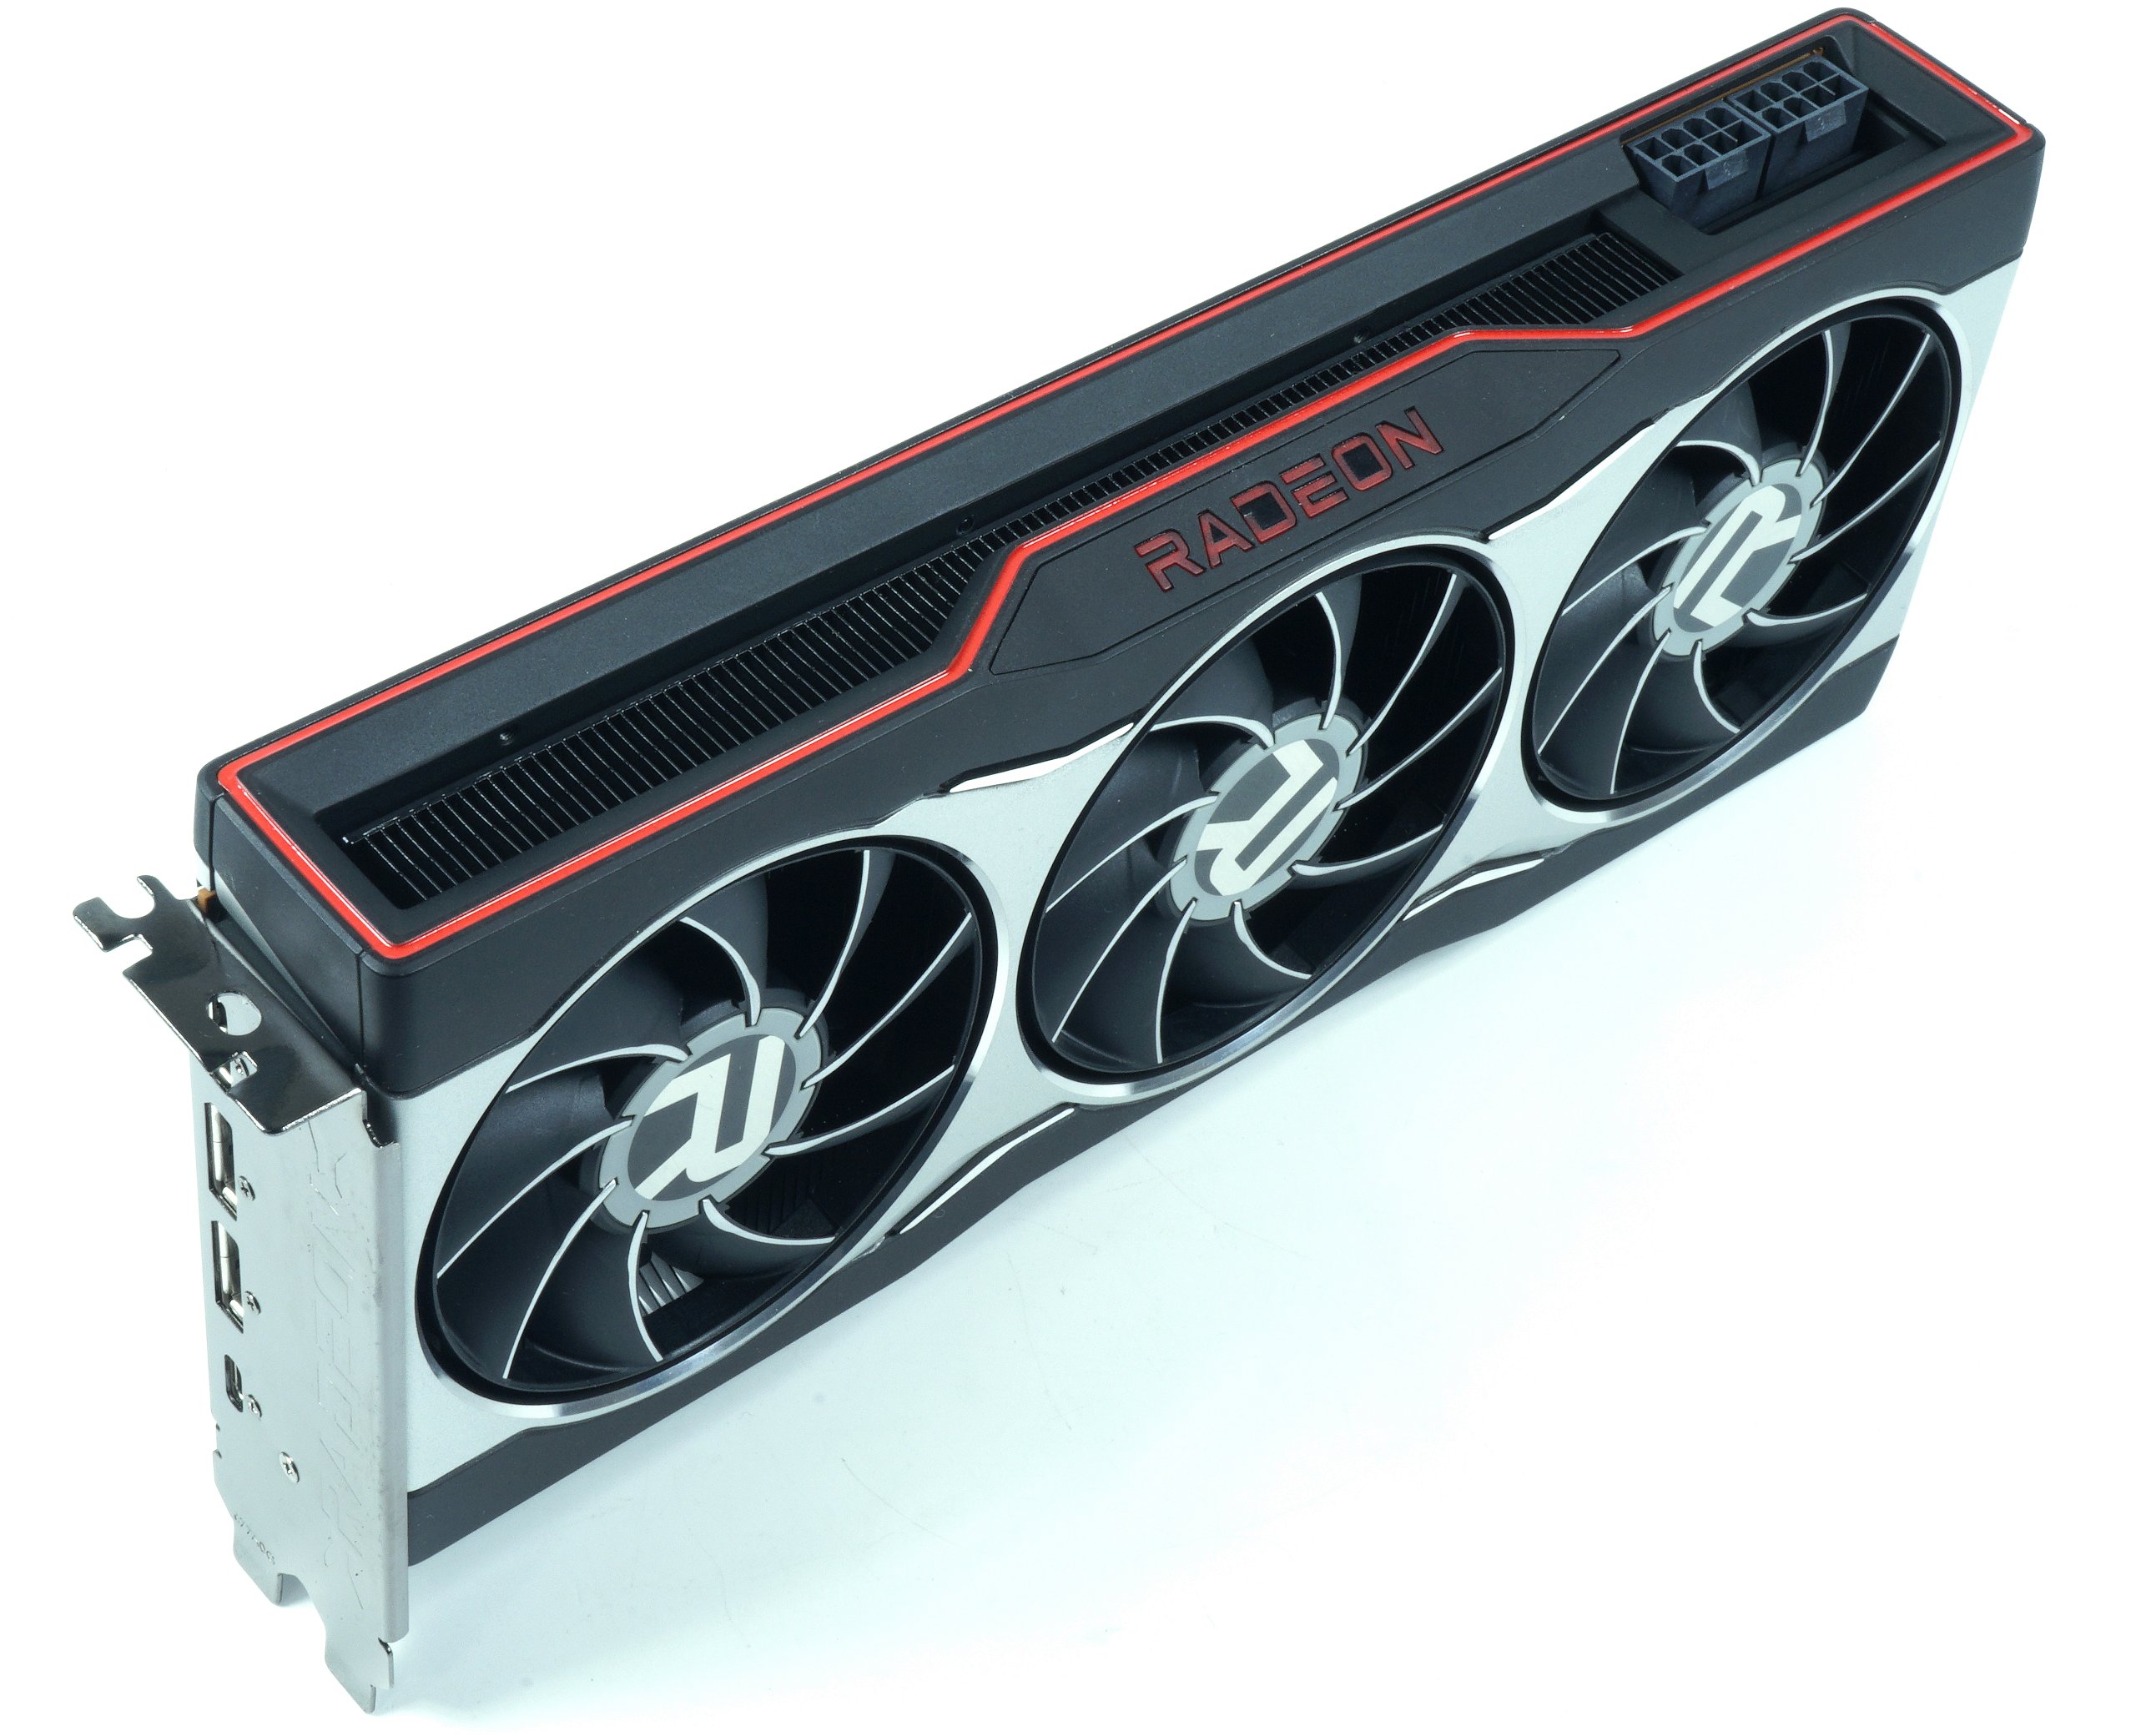
As a reminder: The small RX 6800 weighs 1386 grams, is 26.7 cm long, 12 cm high (11.5 cm installation height from PEG), 3.8 cm thick (2.5-slot design), whereby a backplate and the PCB with a total of four additional millimetres are added. The slot bracket is also closed and carries 1x HDMI 2.1 and two DP connectors. In addition there is a USB Type C socket. The body is also made of light metal, the Radeon lettering is illuminated in red and the whole thing is powered by two 8-pin sockets. Memory mode off.
The RAM goes extra
AMD forgot to block the RAM, here only the slider is limited to 2150 MHz. But this can still be done quite easily with the MorePowerTool (MPT). Simply export the BIOS of the current card with a suitable tool, select the right graphics card in the MPT, then load the BIOS and off you go. The default value for the maximum frequency can be set easily, in the Wattman this default value is then multiplied by 2.
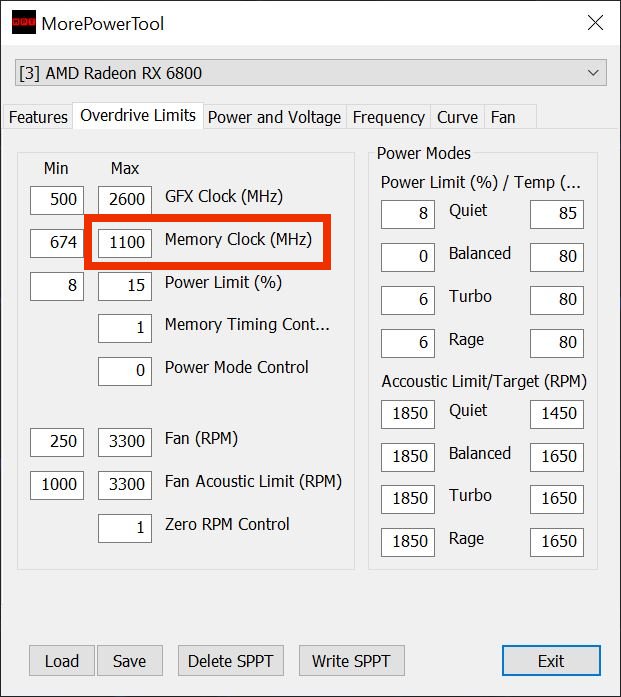
Then simply save with “Write SPPT” and restart. Afterwards, new maximum frequencies are available in the Wattman. A little lifting always works and in the end you can also ease the bottleneck of the narrow memory interface, especially on Ultra-HD.
Overclocking as far as it will go
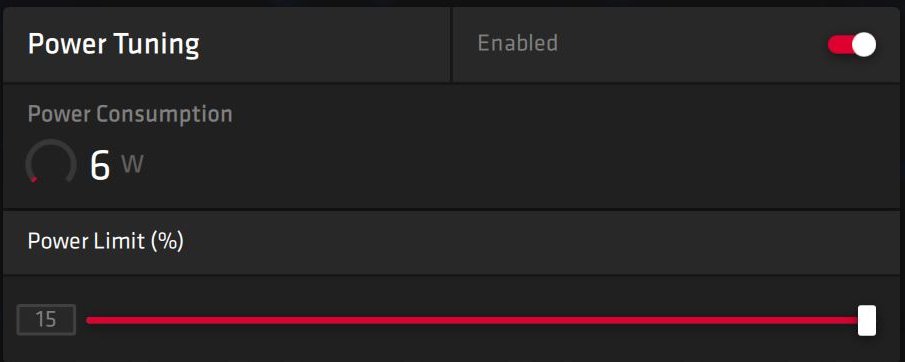
In addition to the work cycle with and without SAM and the undervolting experiments, I naturally tried the maximum OC first. Here you first have to raise the power limit to the maximum possible 15 percent. More is not possible from the outside. Overwriting the registers with higher values causes the card to clock down to 568 MHz. Thanks for that.
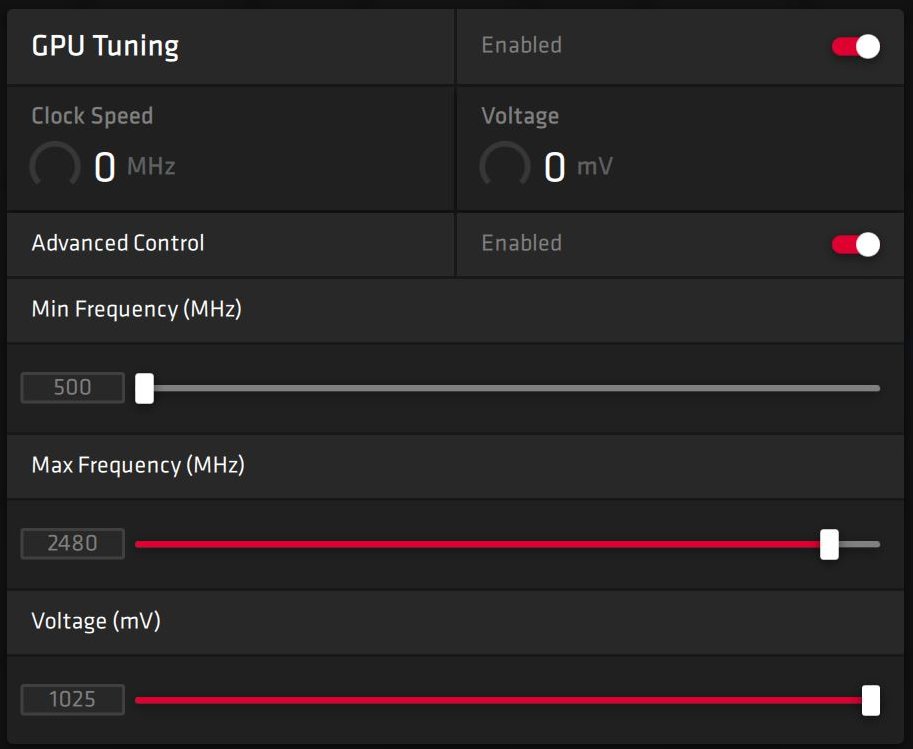
The maximum frequency depends on the chip, unfortunately this is different with every card. My stable default setting was a maximum of 2480 MHz, which was then sufficient for clock rates between about 2420 and 2440. More is only possible with partial loads and lower resolutions. I do not count individual short-term outliers to the 2.5 GHz limit here because it was the exception, but not the rule. You can trick it, but it’s eyewash. Only a tedious approach will help:
Undervolting with and without overclocking
You may now play here. I would first try to find the stable lower limit for the voltage. My card ran stable even at 890 mV, but the variances were quite borderline, 895 mV looked a bit better and the 900 mV should be reached with any card:
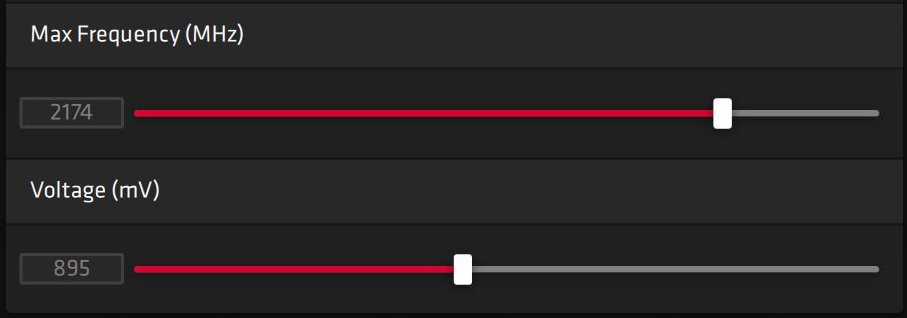
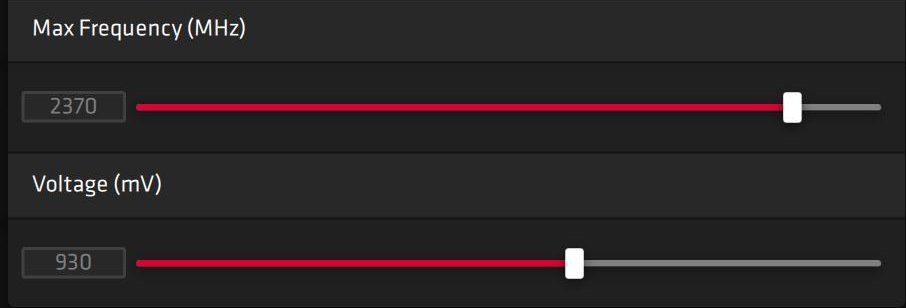
If that’s too wobbly for you, you can switch to 930 mV and then raise the beat slightly. The setting with 930 mV and 2370 MHz was there at the end a good and above all really stable compromise. On the next page we will see where all this fits in with performance and efficiency.
Test system and evaluation software
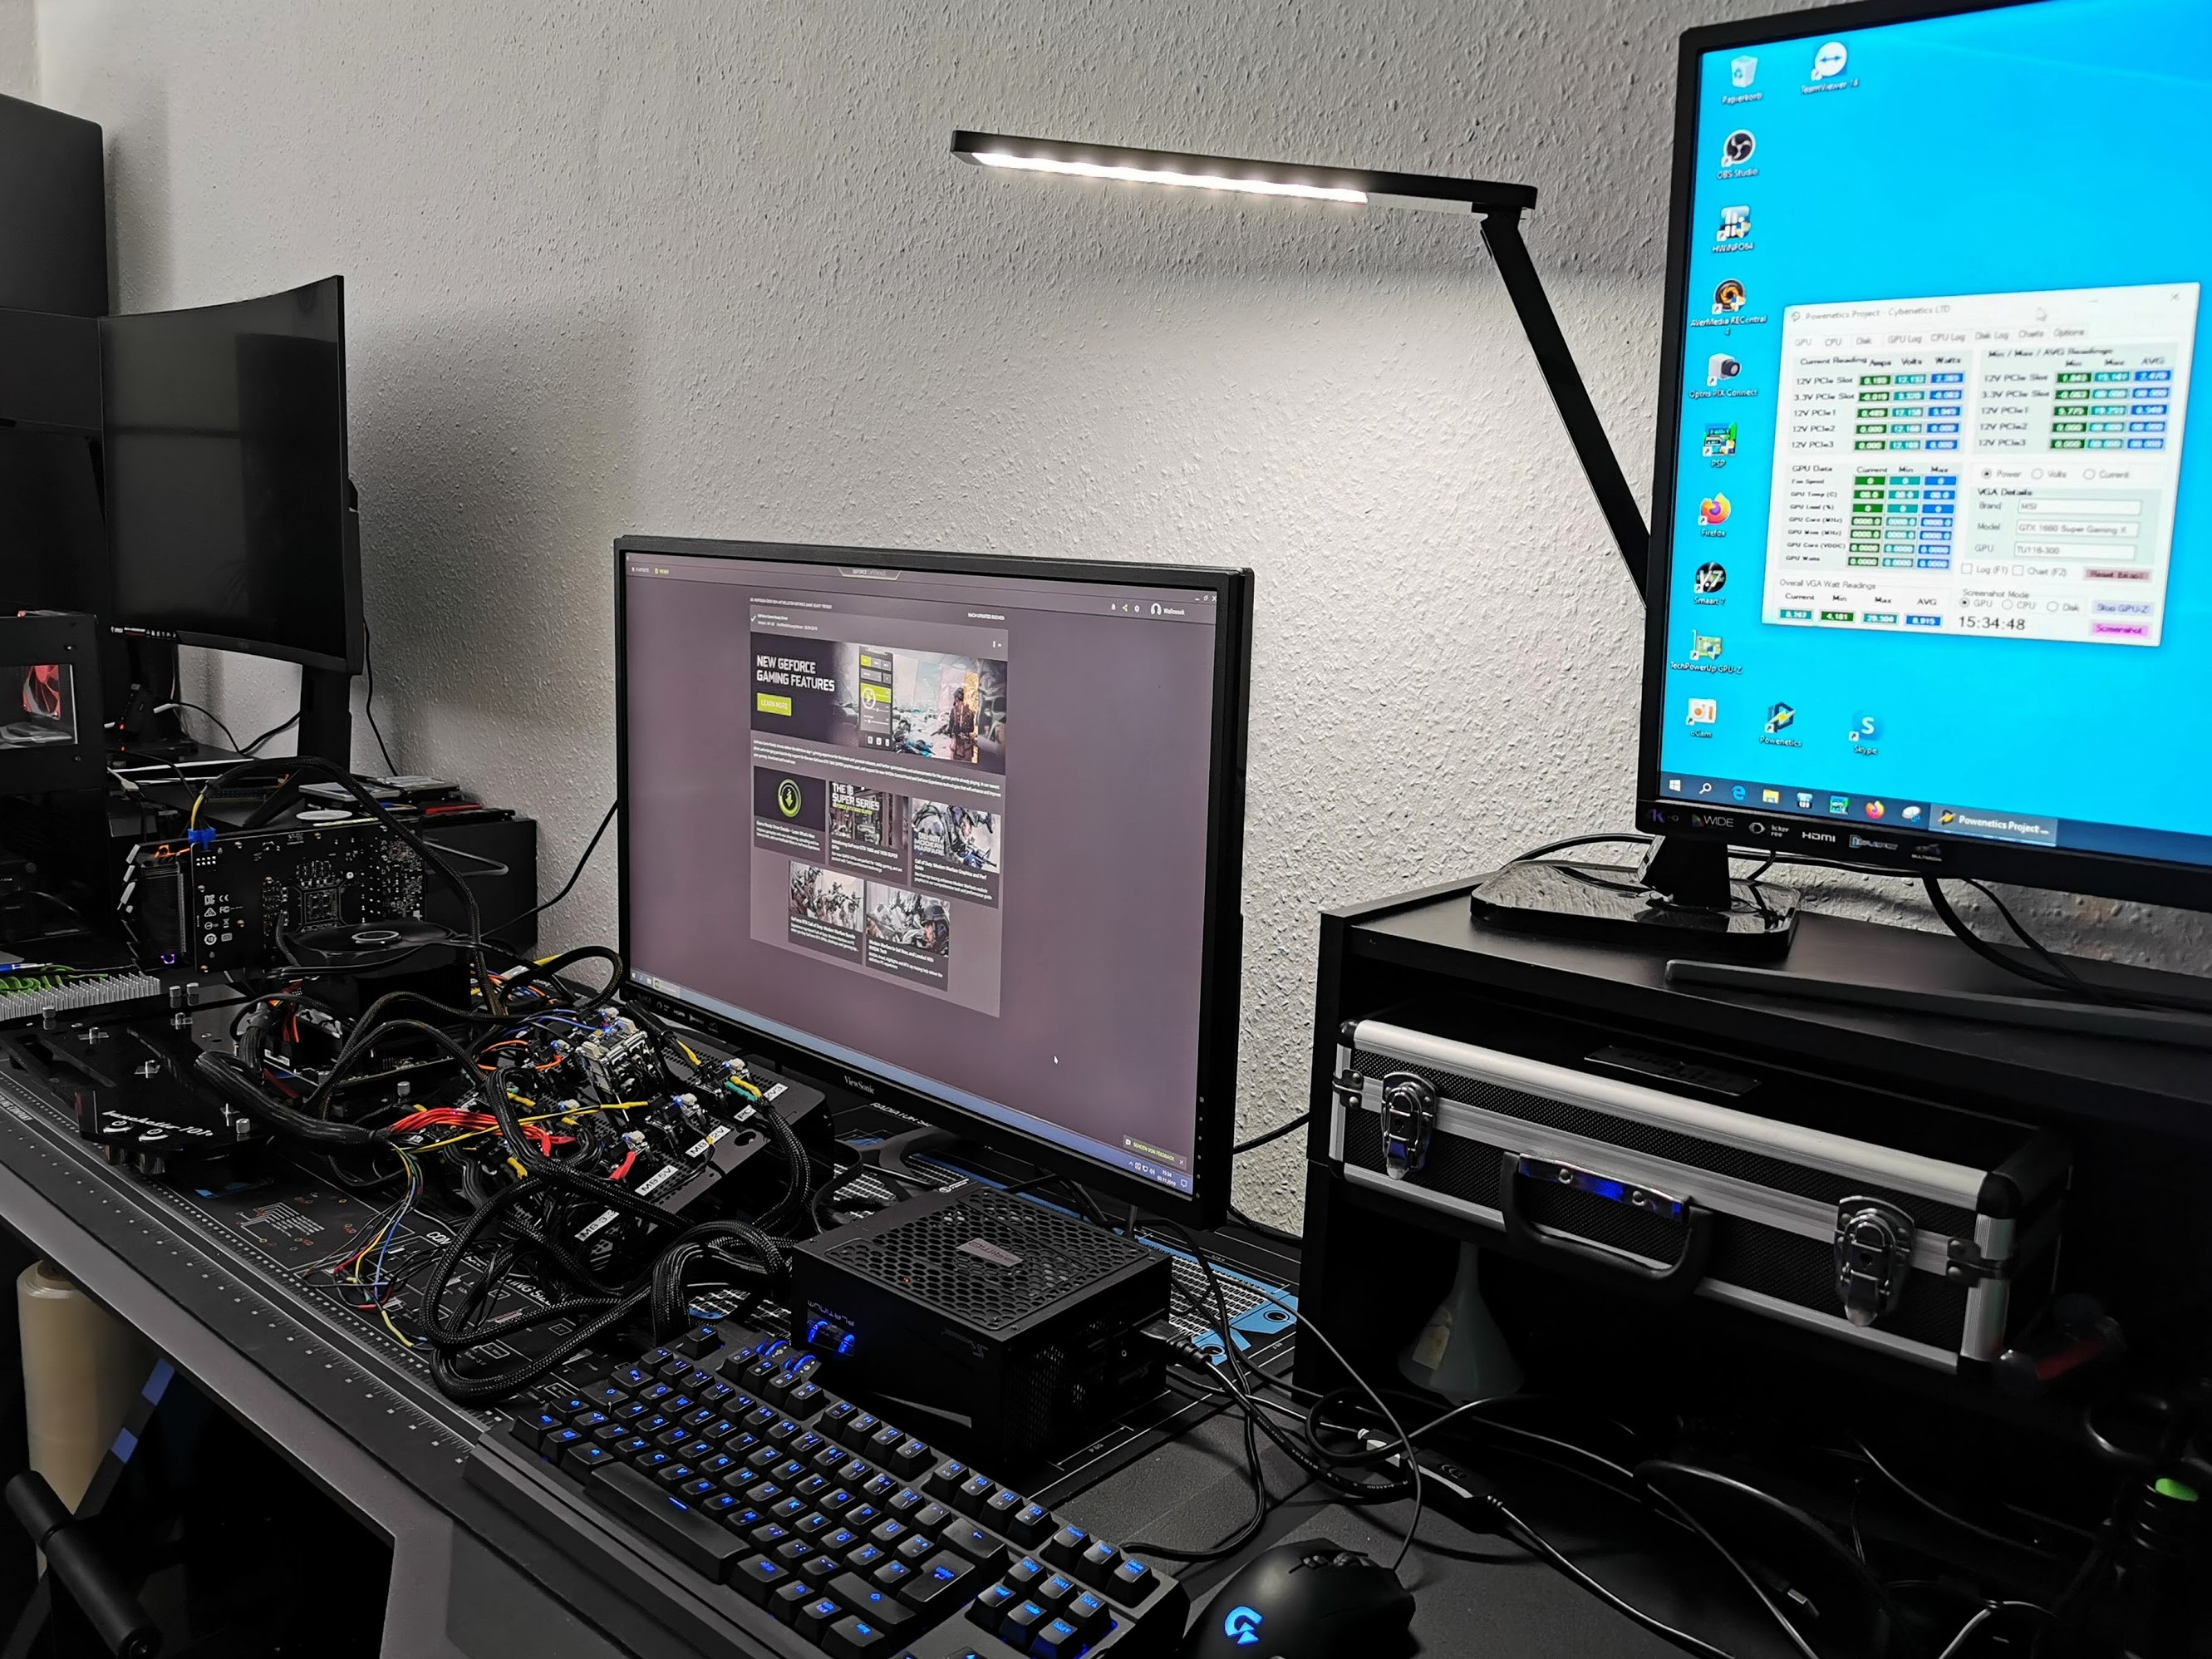
The benchmark system is new and is now completely based on AMD. PCIe 4.0 is of course mandatory. These include the matching X570 motherboard in the form of an MSI MEG X570 Godlike and the Ryzen 9 5950X, which is water-cooled and slightly overclocked. In addition, the matching DDR4 4000 RAM from Corsair in the form of the Vengeance RGB, as well as several fast NVMe SSDs. For direct logging during all games and applications, I use both NVIDIA’s PCAT and my own shunt measurement system, which makes it much more comfortable. The measurement of the detailed power consumption and other somewhat more complicated things is done in a special laboratory on two tracks using high-resolution oscillograph technology…
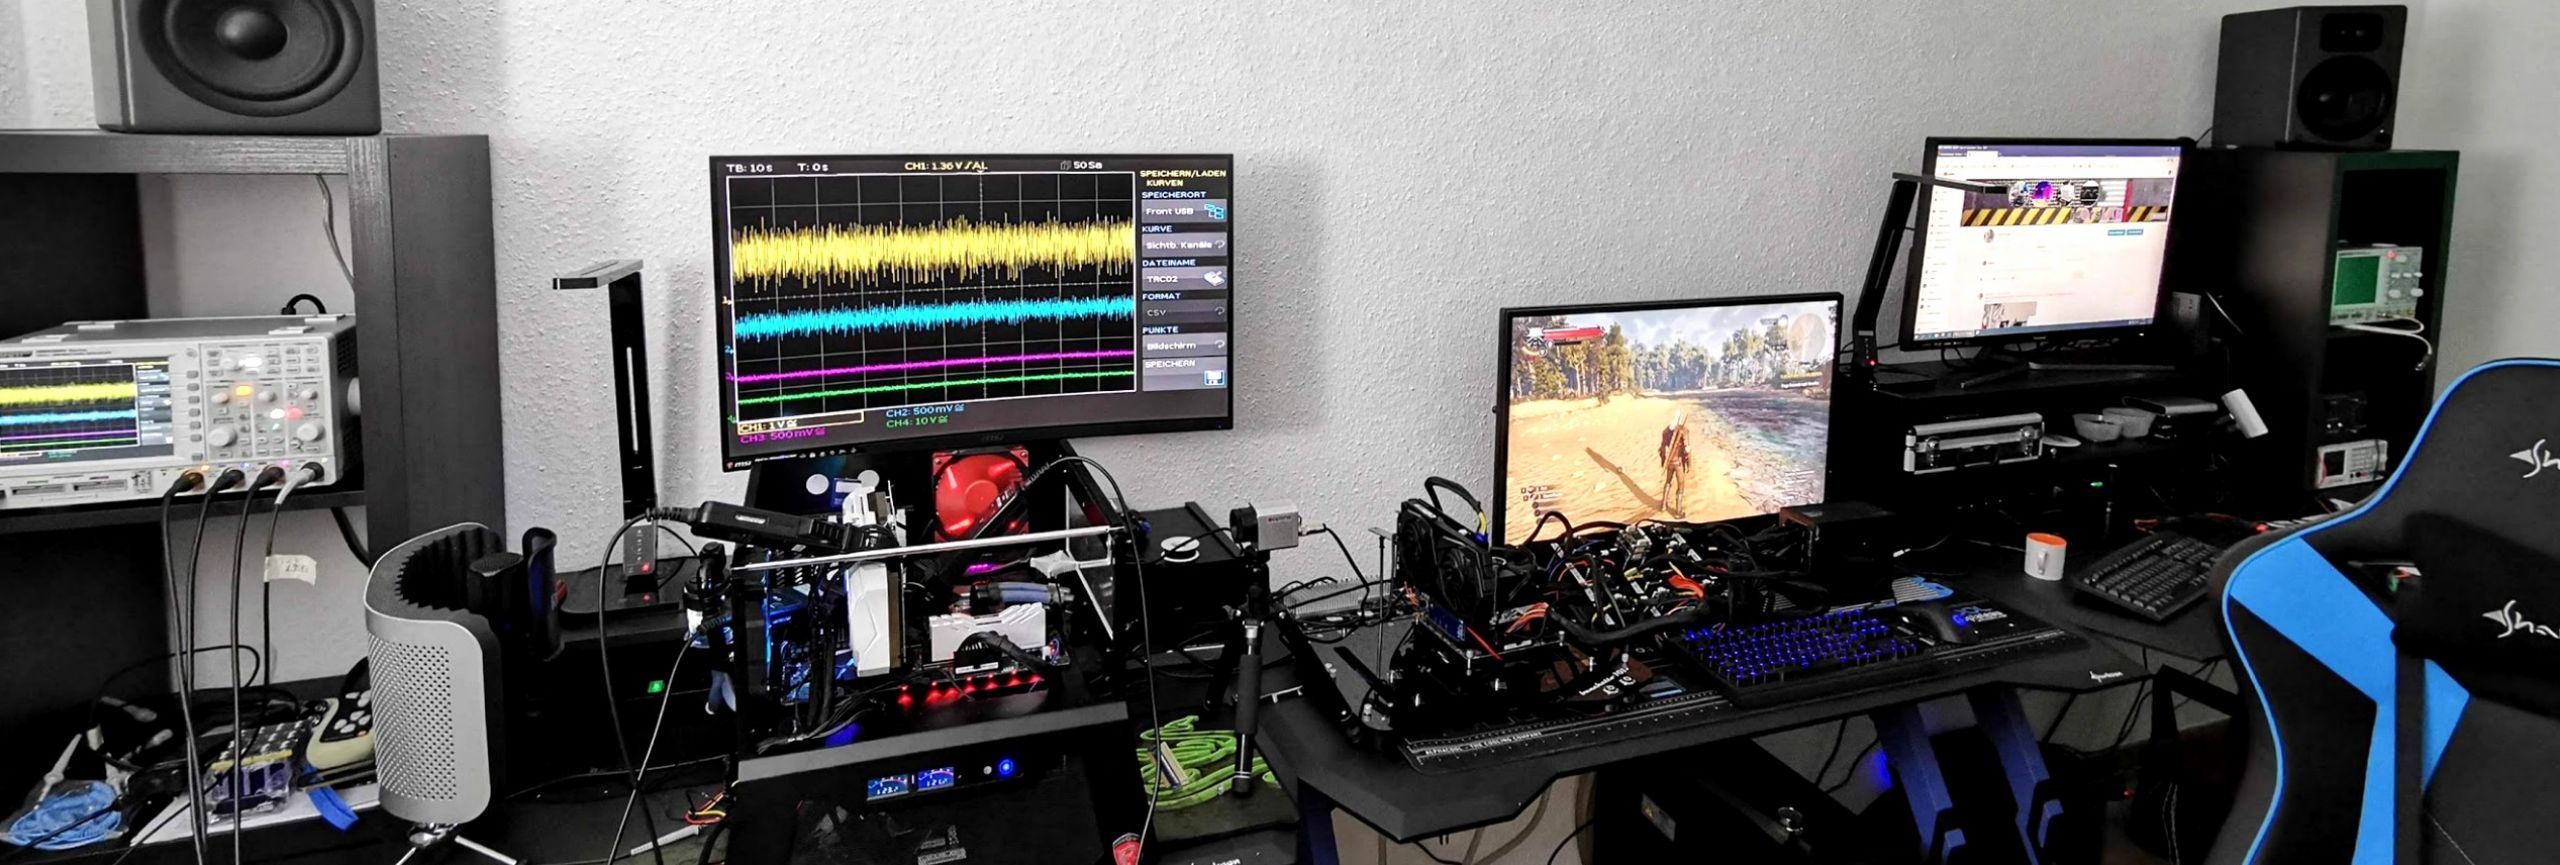
…and the self-created, MCU-based measurement setup for motherboards graphics cards (pictures below), where in the end the thermographic infrared images are also taken with a high-resolution industrial camera in an air-conditioned room. The audio measurements are then taken outside in my chamber (room-in-room).

The used software relies on my own interpreter including evaluation software as well as a very extensive and flexible Excel sheet for the graphical conversion. I have also summarized the individual components of the test system in tabular form:
| Test System and Equipment |
|
|---|---|
| Hardware: |
AMD Ryzen 9 5950X OC MSI MEG X570 Godlike 2x 16 GB Corsair DDR4 4000 Vengeance RGB Pro 1x 2 TByte Aorus (NVMe System SSD, PCIe Gen. 4) 1x 2 TB Corsair MP400 (Data) 1x Seagate FastSSD Portable USB-C Be Quiet! Dark Power Pro 12 1200 Watt |
| Cooling: |
Alphacool Eisblock XPX Pro Alphacool Eiswolf (modified) Thermal Grizzly Kryonaut |
| Case: |
Raijintek Paean |
| Monitor: | BenQ PD3220U |
| Power Consumption: |
Oscilloscope-based system: Non-contact direct current measurement on PCIe slot (riser card) Non-contact direct current measurement at the external PCIe power supply Direct voltage measurement at the respective connectors and at the power supply unit 2x Rohde & Schwarz HMO 3054, 500 MHz multichannel oscilloscope with memory function 4x Rohde & Schwarz HZO50, current clamp adapter (1 mA to 30 A, 100 KHz, DC) 4x Rohde & Schwarz HZ355, probe (10:1, 500 MHz) 1x Rohde & Schwarz HMC 8012, HiRes digital multimeter with memory function MCU-based shunt measuring (own build, Powenetics software) NVIDIA PCAT and FrameView 1.1 |
| Thermal Imager: |
1x Optris PI640 + 2x Xi400 Thermal Imagers Pix Connect Software Type K Class 1 thermal sensors (up to 4 channels) |
| Acoustics: |
NTI Audio M2211 (with calibration file) Steinberg UR12 (with phantom power for the microphones) Creative X7, Smaart v.7 Own anechoic chamber, 3.5 x 1.8 x 2.2 m (LxTxH) Axial measurements, perpendicular to the centre of the sound source(s), measuring distance 50 cm Noise emission in dBA (slow) as RTA measurement Frequency spectrum as graphic |
| OS: | Windows 10 Pro (all updates, current certified or press drivers) |


Kommentieren