


 Once is always the first time. And so, in the end, Alphacool managed to bring a solid fullcover water cooling block to the market. What lasts for a long time will be good? That is exactly what we want to test today. Of course, the Chiller is also at the start, which will provide us with the constant temperatures that we absolutely need for the comparative values in the individual measurement series.
After we had already tested the AMD RX Vega64 with a fullcover cooler from EK Waterblocks, there is now a test with an RX Vega56, which also enjoyed a somewhat greater popularity among the buyers due to its (then) price and of course still Pleased.
In price, Alphacool is on a good average or Just above that, because the complete package for all Vega reference cards (and also the one for the GeForce GTX 1080 Ti FE) costs 119.95 euros incl. in the cheaper Acetal version. Vat. and with Plexi cover (now in test) and RGB bar 149.95 Euro.
Scope of delivery and assembly
In addition to the actual water block, a pre-installed RGB LED bar and the backplate, all the necessary screws, an inner hexagon tool, the important thermal guide pads, thermal conductive paste (OEM version of the Gelid GC Extreme), as well as a well-illustrated manual (whose steps could be made a little more logical).
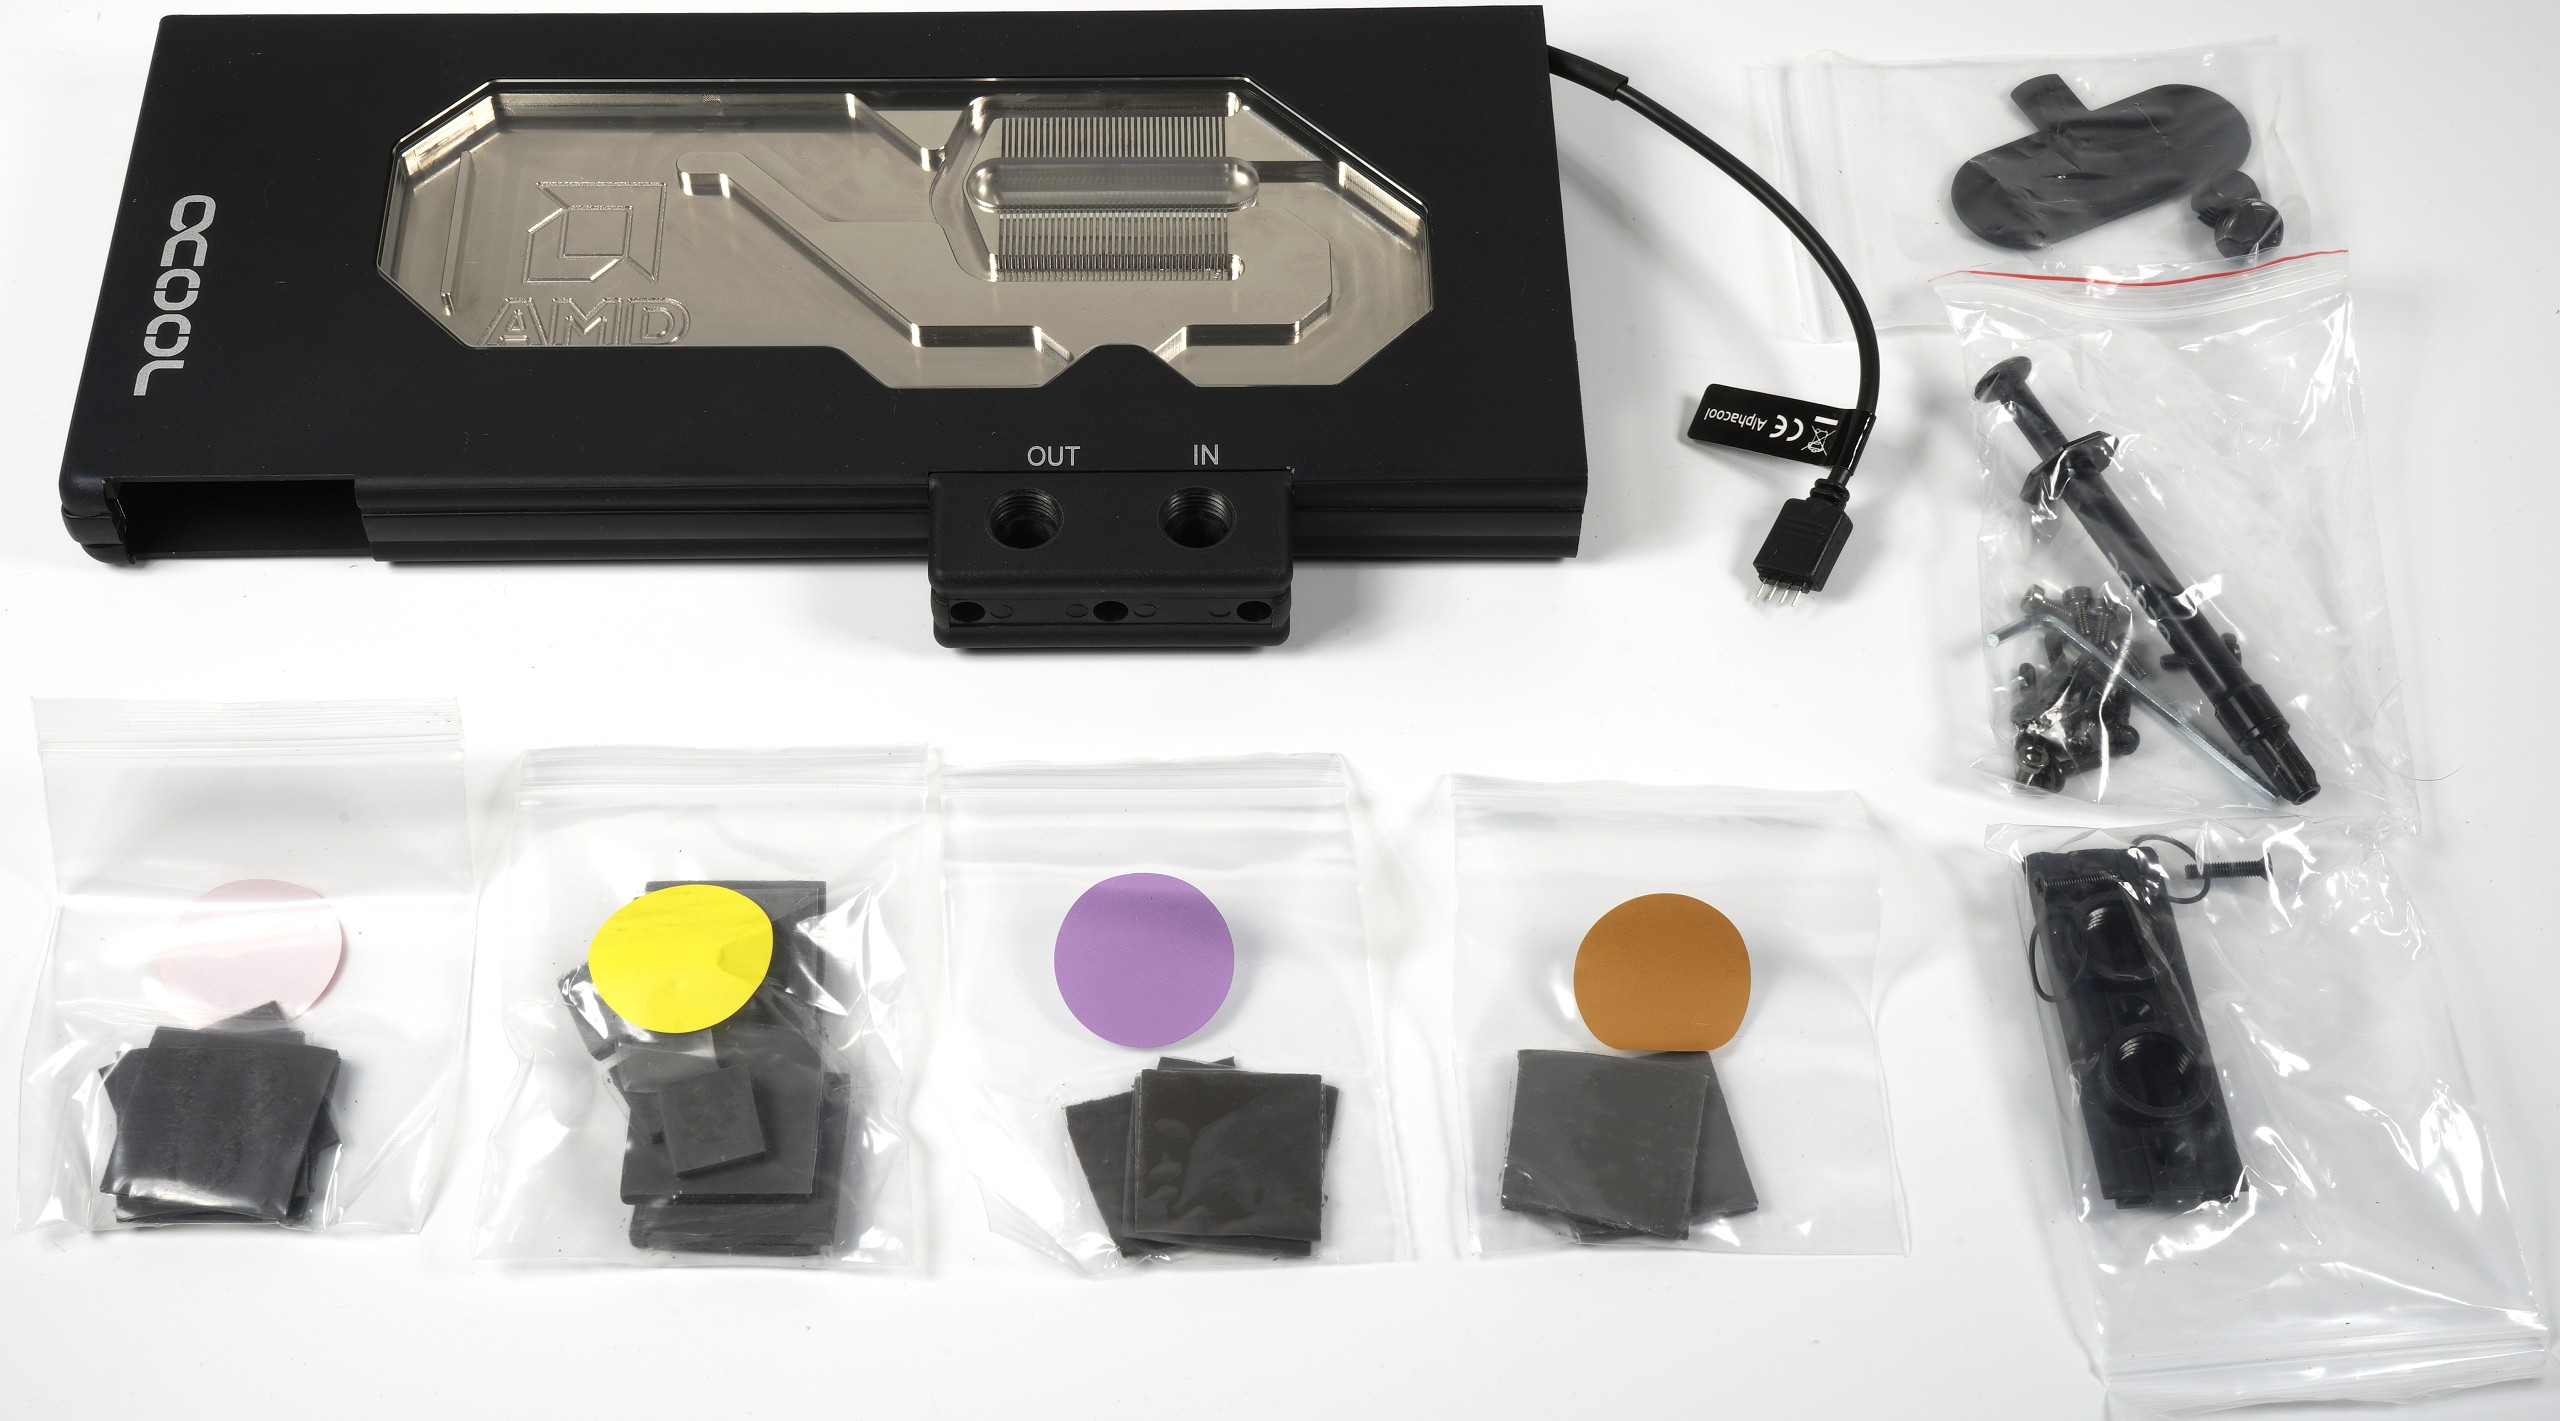
The outer frame as well as the backplate are made of blackened light metal, the copper block of the cooler has been completely nickel-plated and the cover inside is made of the usual acrylic. In addition to the RGB bar inserted at the bottom and interchangeable, at least individual elements of the frame could still be colour-coded by optional applications. Otherwise, it remains the matt black typical of Alphacool, also on the back at the consistently final backplate.
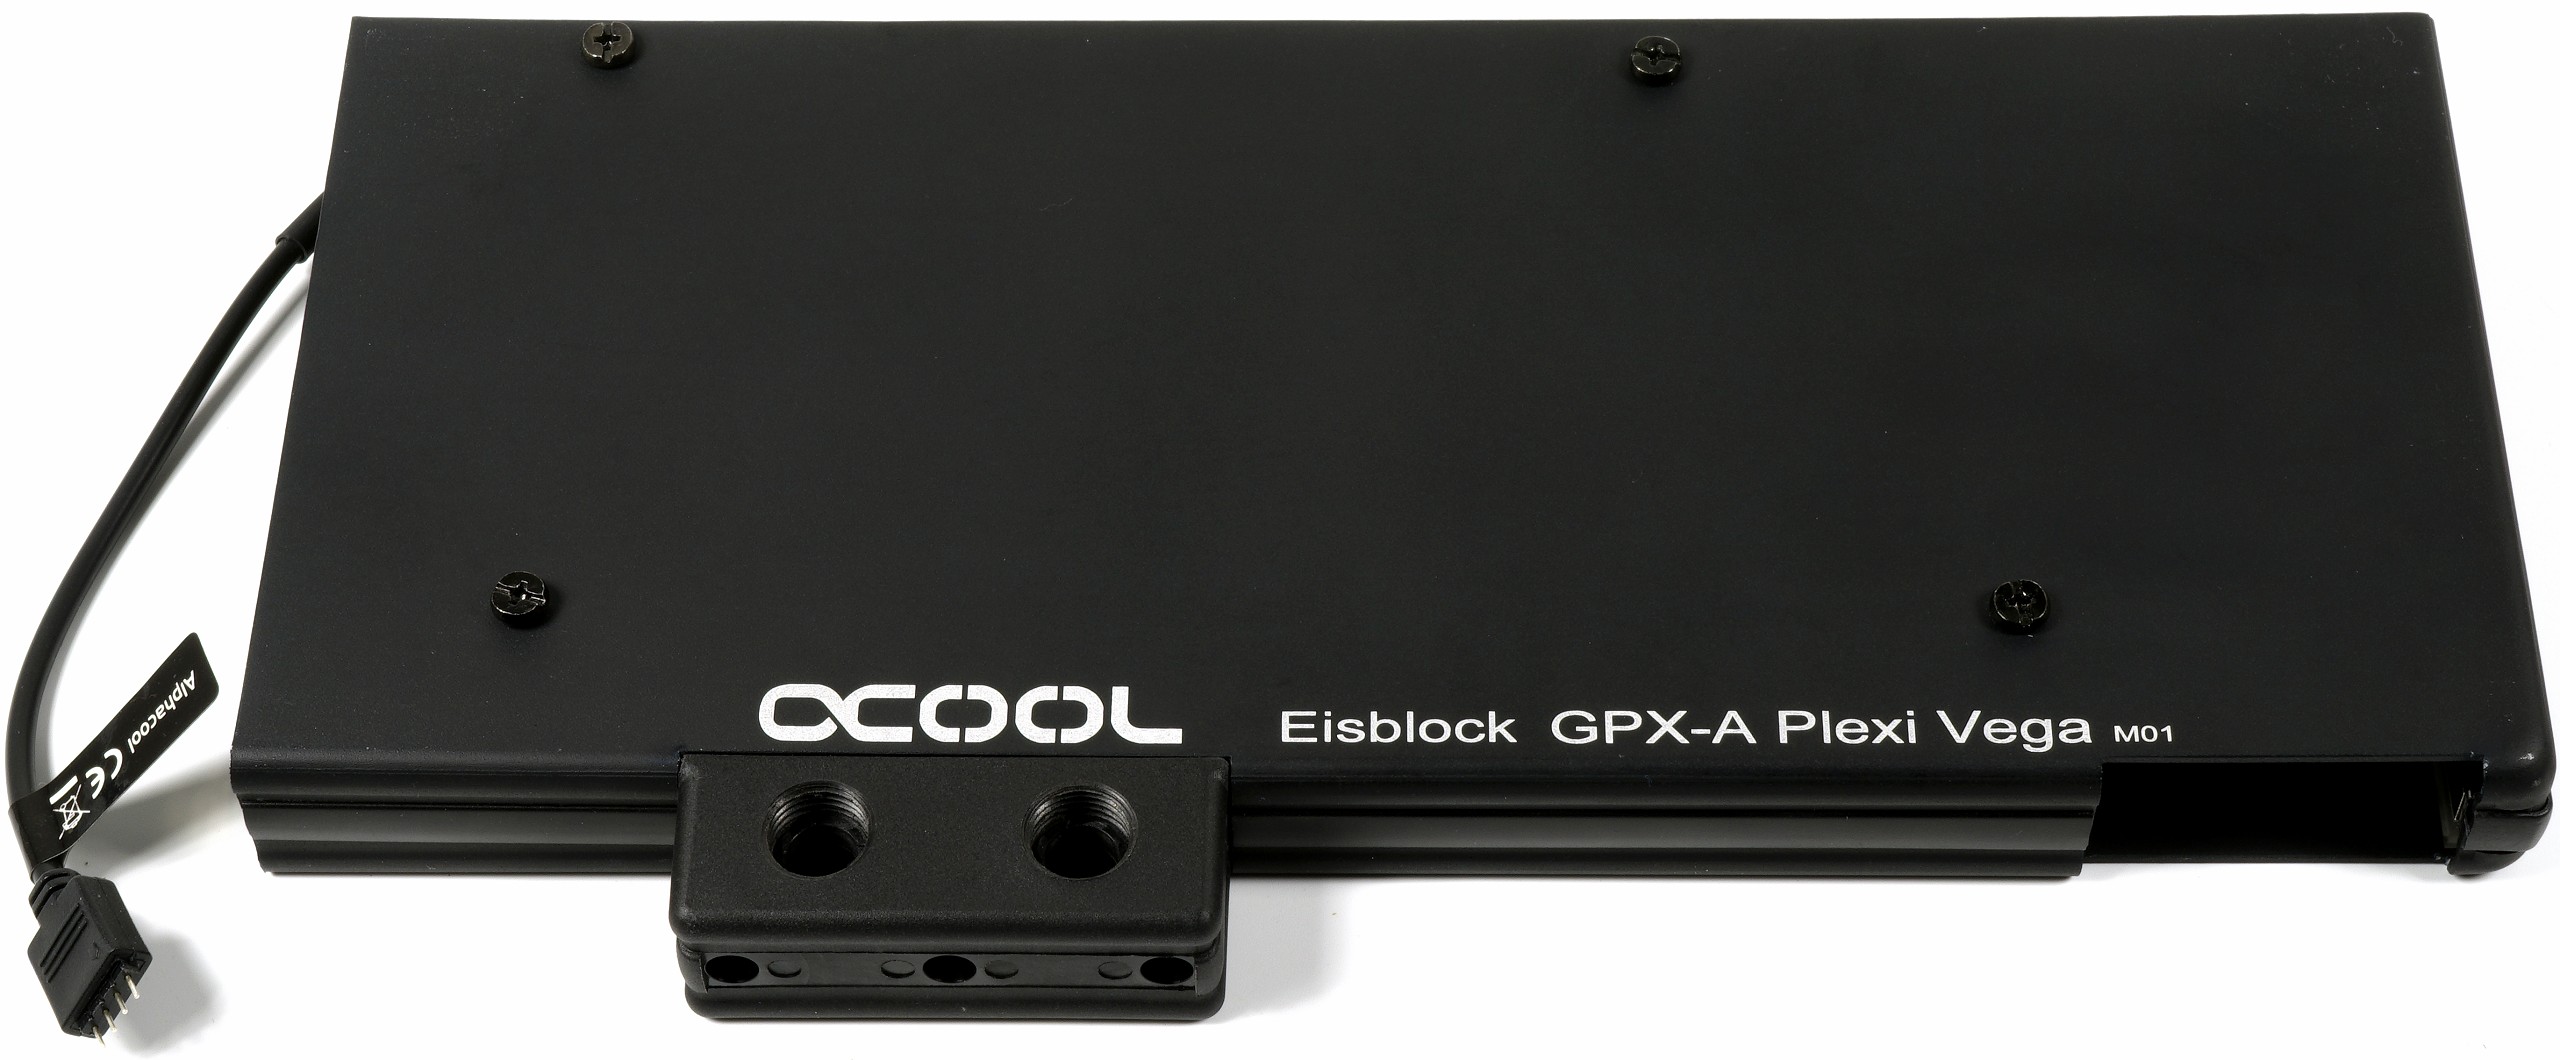
The RGB LED has the usual standardized 4-pin connector and can be easily connected to the motherboard or other RGB control.
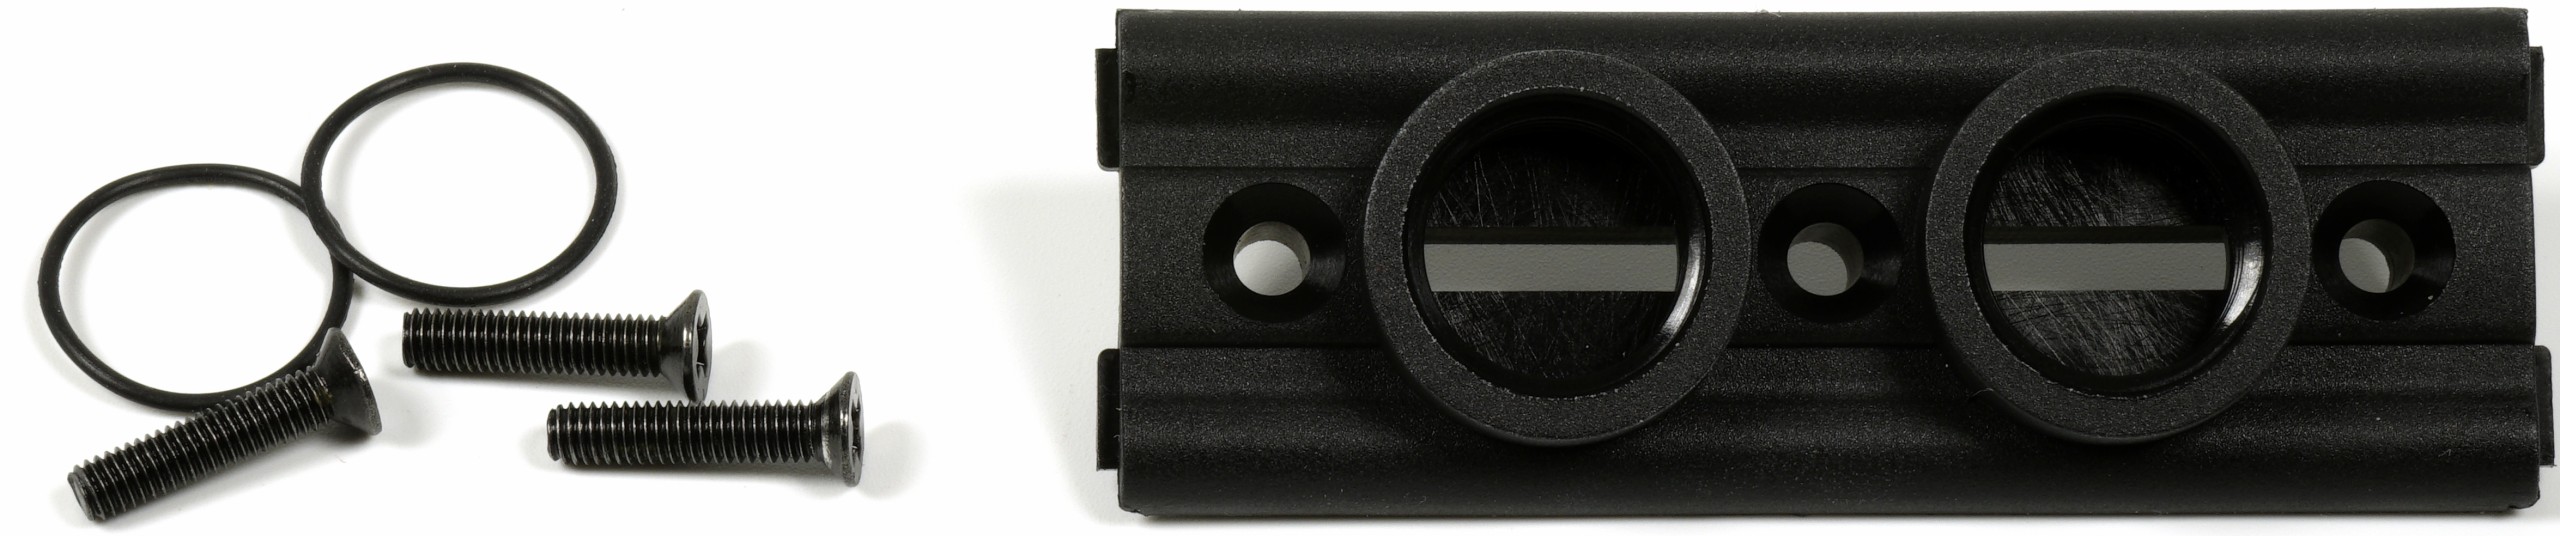
The connections can of course also be exchanged. Simply remove three screws, unplug them and place the new part. Screw and finished. The matching seals and three neutral, black screws are included in the accessories.
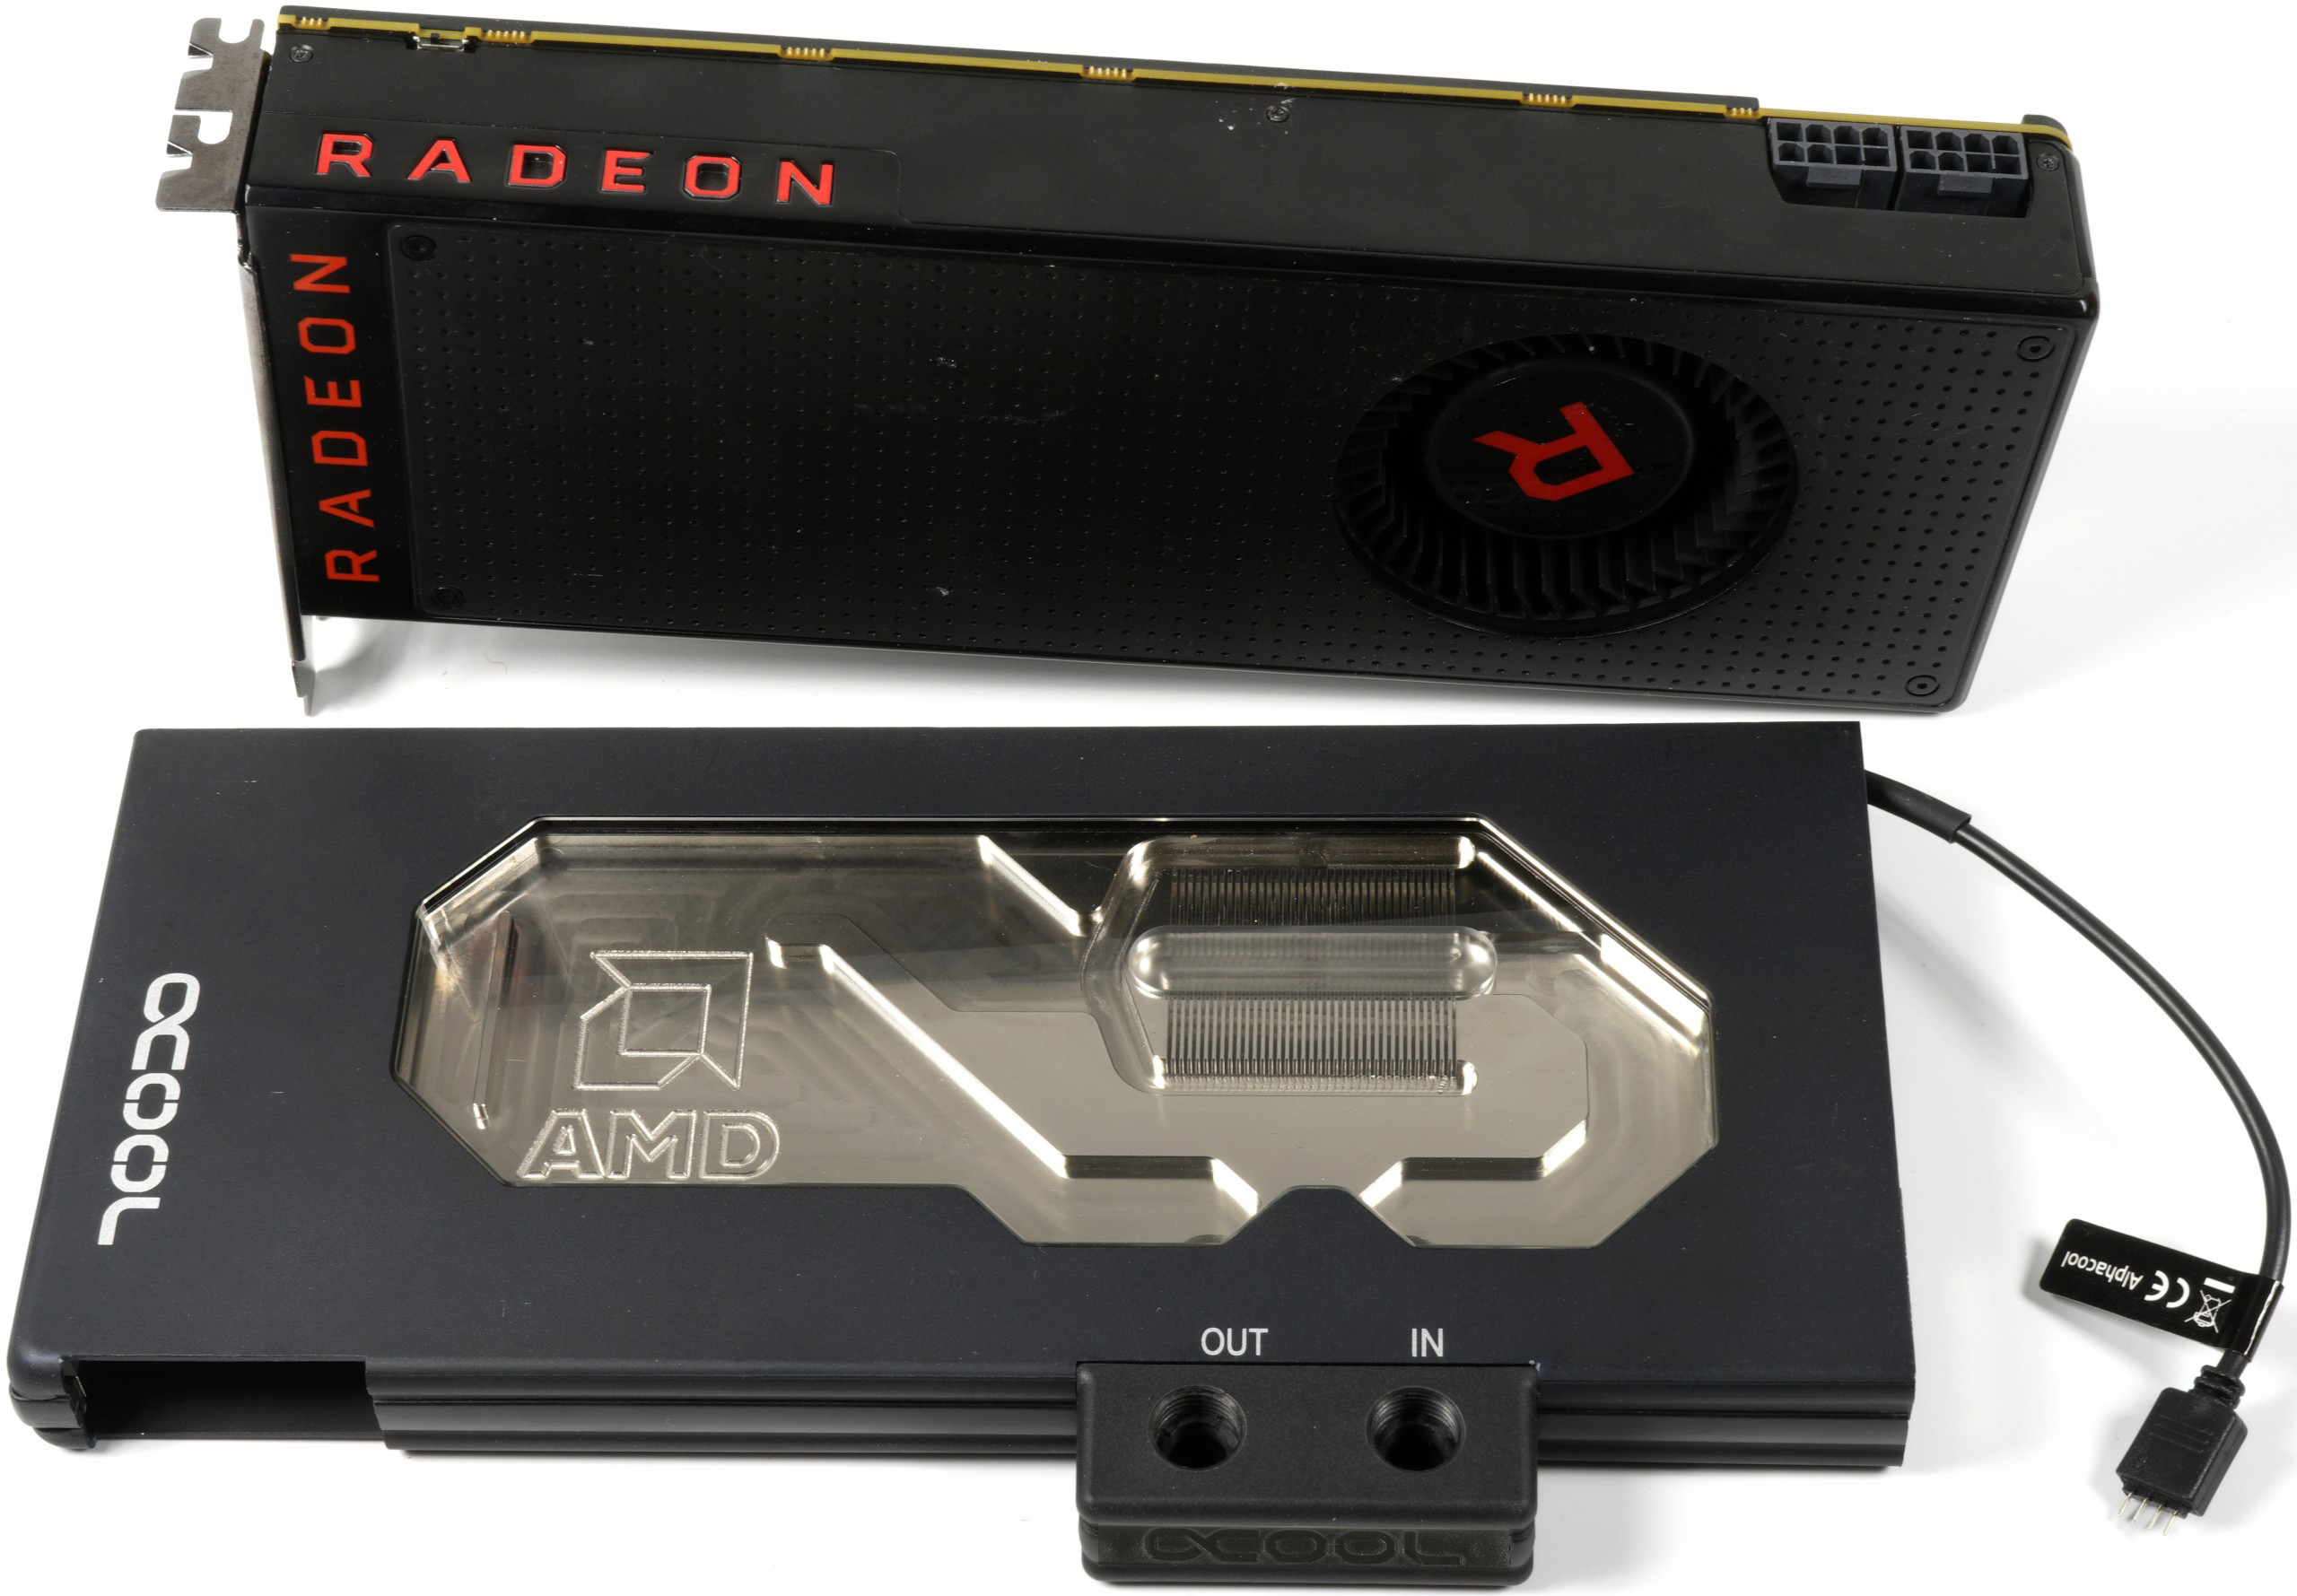
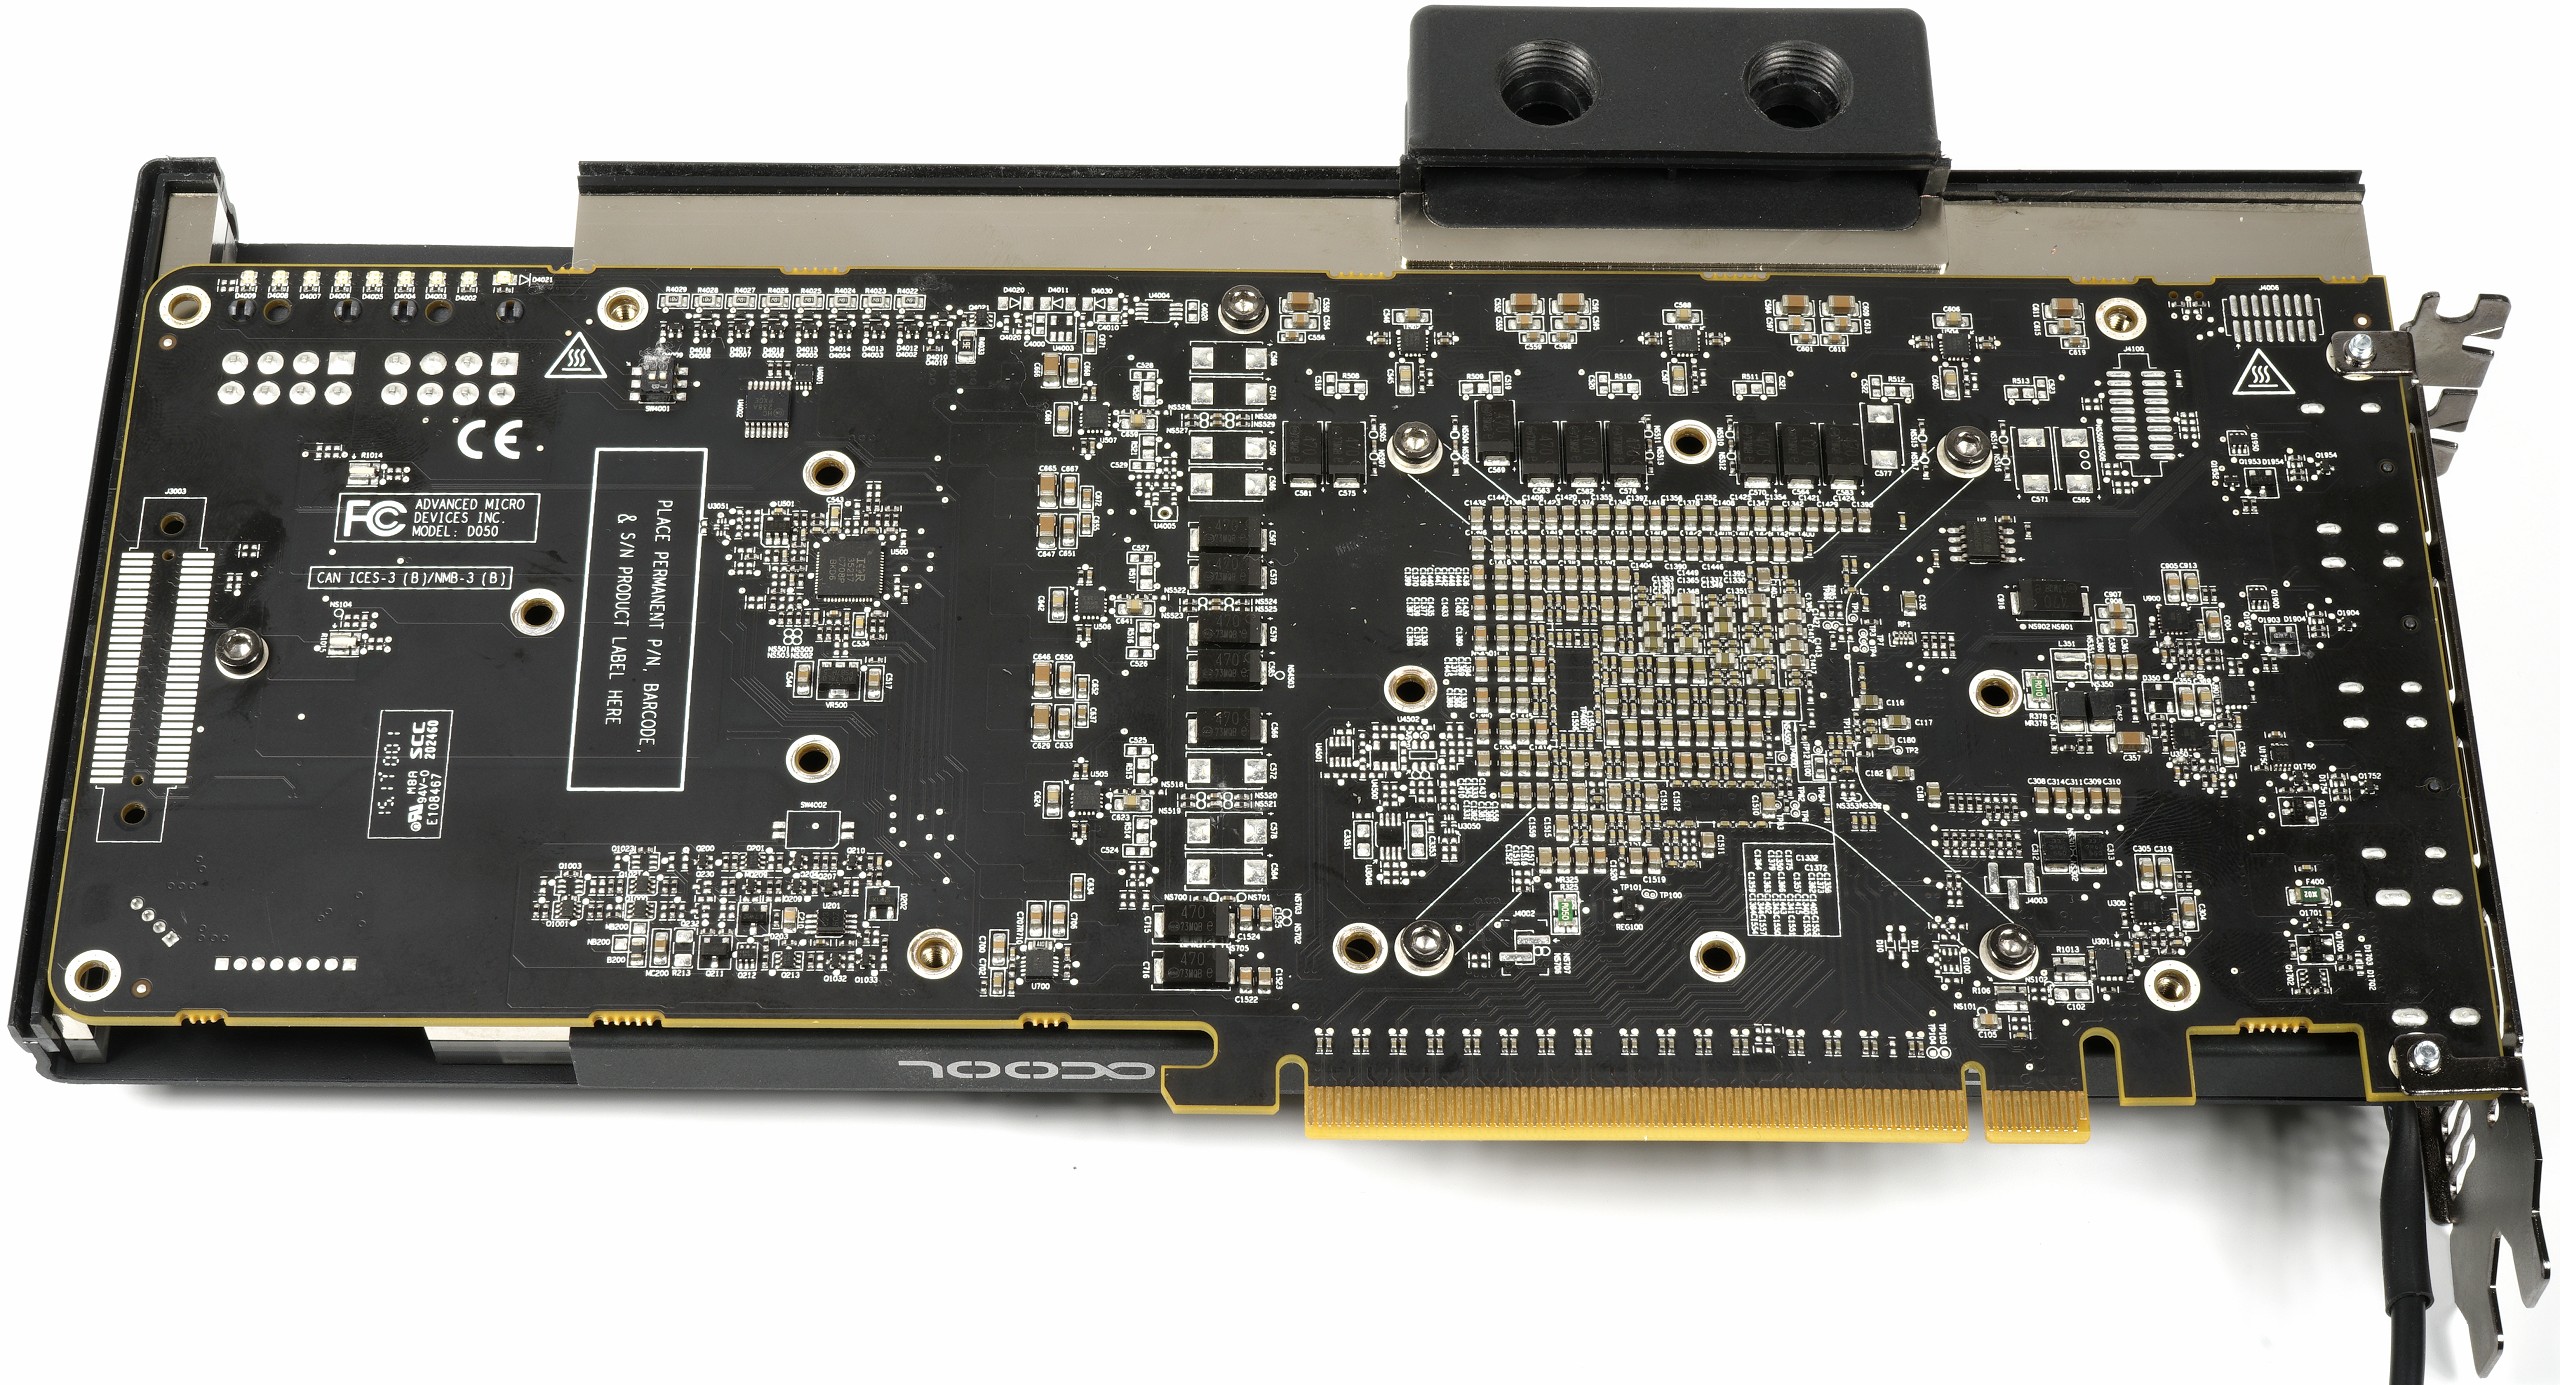
The cooling block has a centrally stored water supply above the GPU, whereby the water then flows through the microchannels outwards, and then is reunited at the outside at the end. Otherwise, Alphacool relies on a very large area directly cooled by the water, which also accommodates the voltage converters and components positioned further away from the GPU.
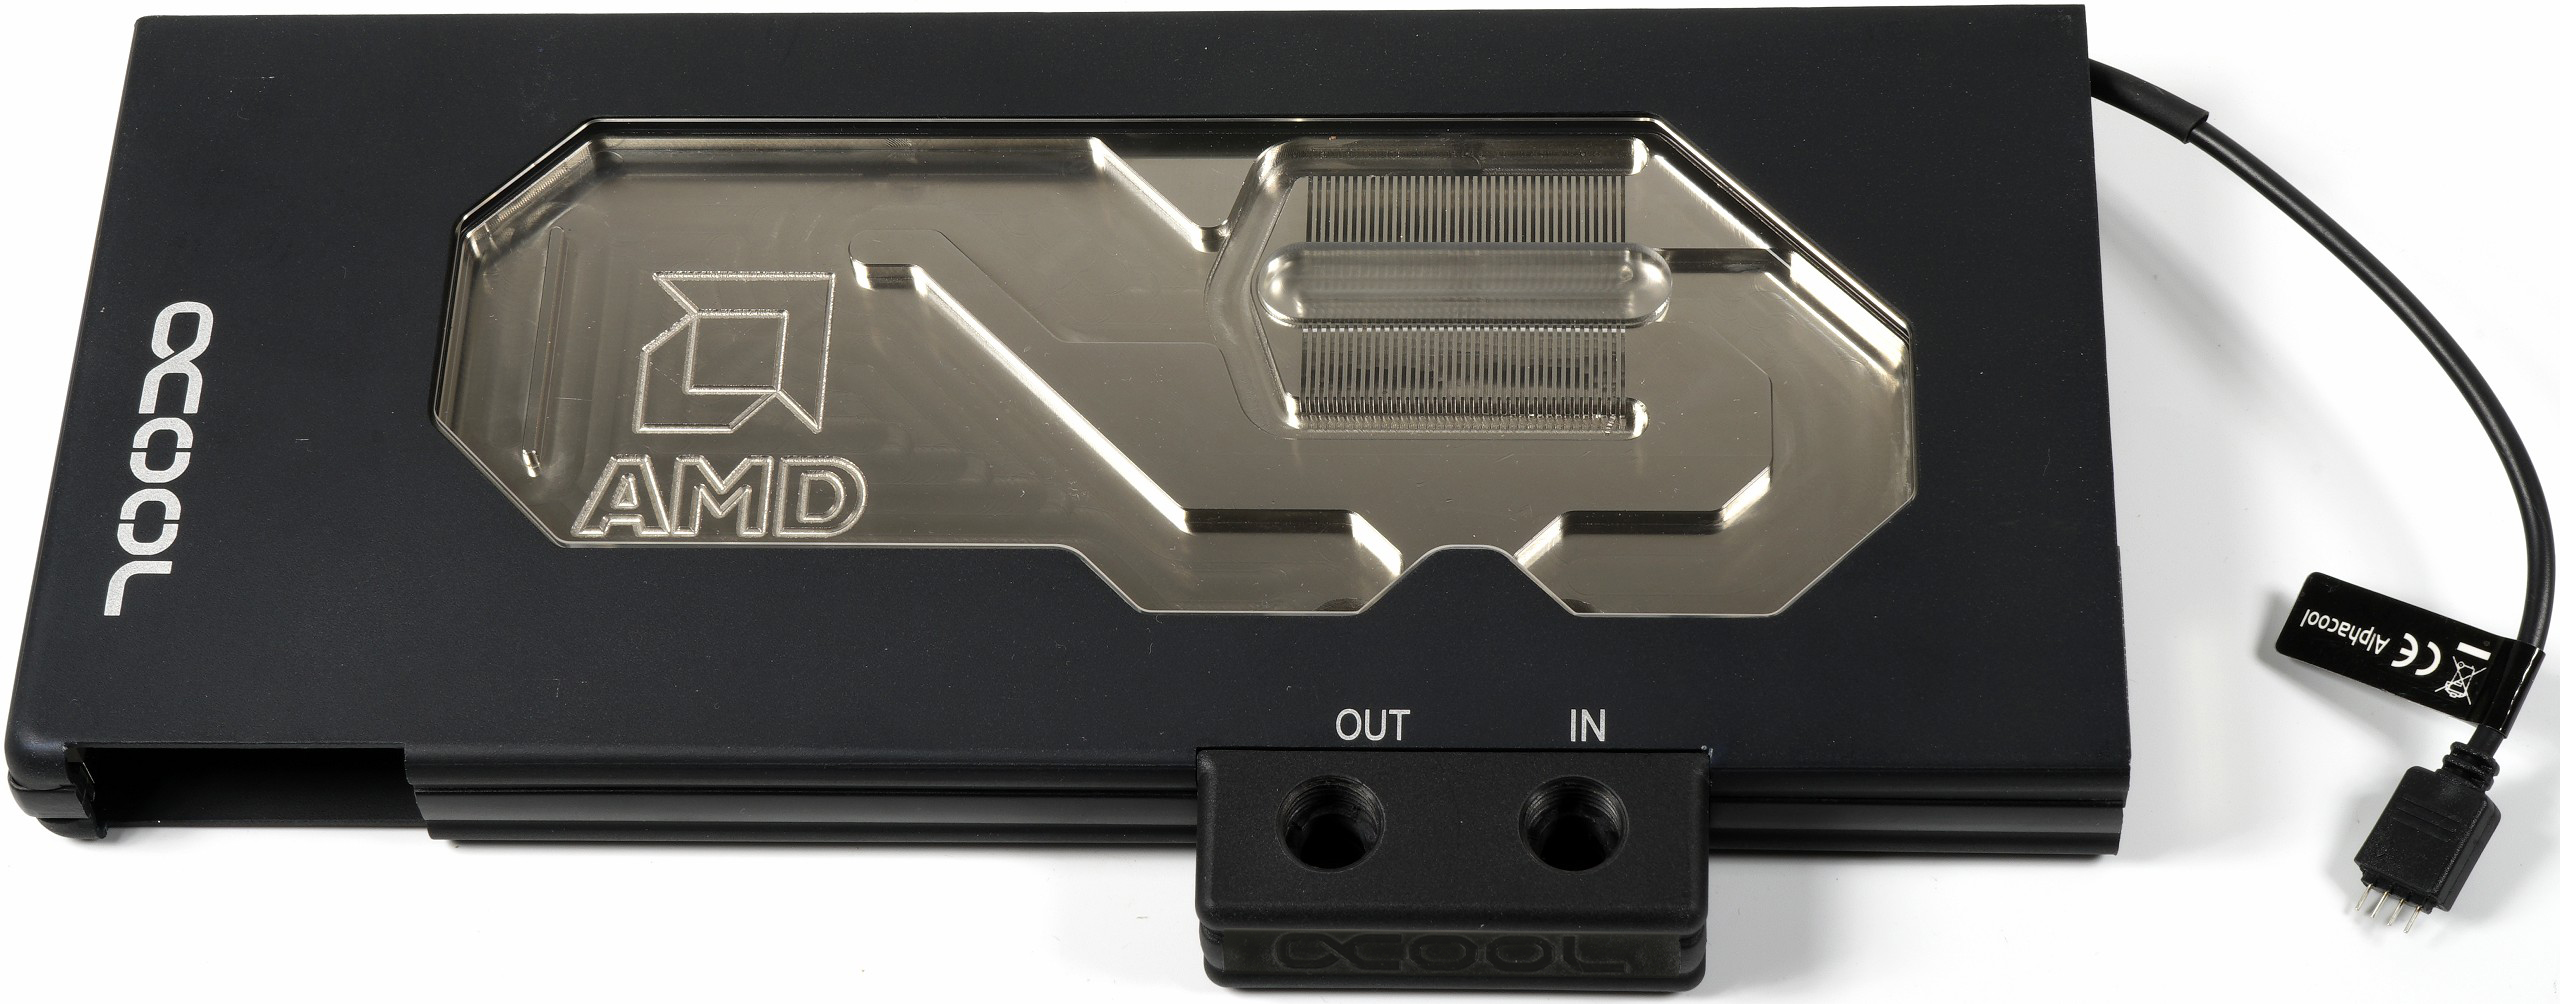
If you look more attentively, you will have already realized that the logos have been twisted by 180°. This has already been corrected for the sales version, because we are still testing a validation sample from the pre-series. Except for the prints, the turned engraved AMD logo and small series-typical flaws, however, our test pattern corresponds completely to the series. Also, in terms of performance.
Let us now turn to the order of the preparatory work. Contrary to the instructions from the manual, we first put on the pads and then applied the thermal paste. In addition, according to the instructions, the pads should be placed on the board. However, this is difficult in that you have to turn the board over later in order to place it on top of the lying cooling block. Especially the larger pads then quickly fall off again.
There are two possible solutions to this. Either you place the larger pads on the cooling block in the designated recesses (our recommendation), or you spray the very dry pads with some silicone spray for better adhesion. With the pads, Alphacool means it far too well, because you definitely don't have to cool the coils in the entrance area. This also applies to the complete voltage transformer range for VPP, VDDCI, as well as the partial voltages for 1.8V or 0.9V. These small pad crumbs are effective and cost unnecessary time when assembling.
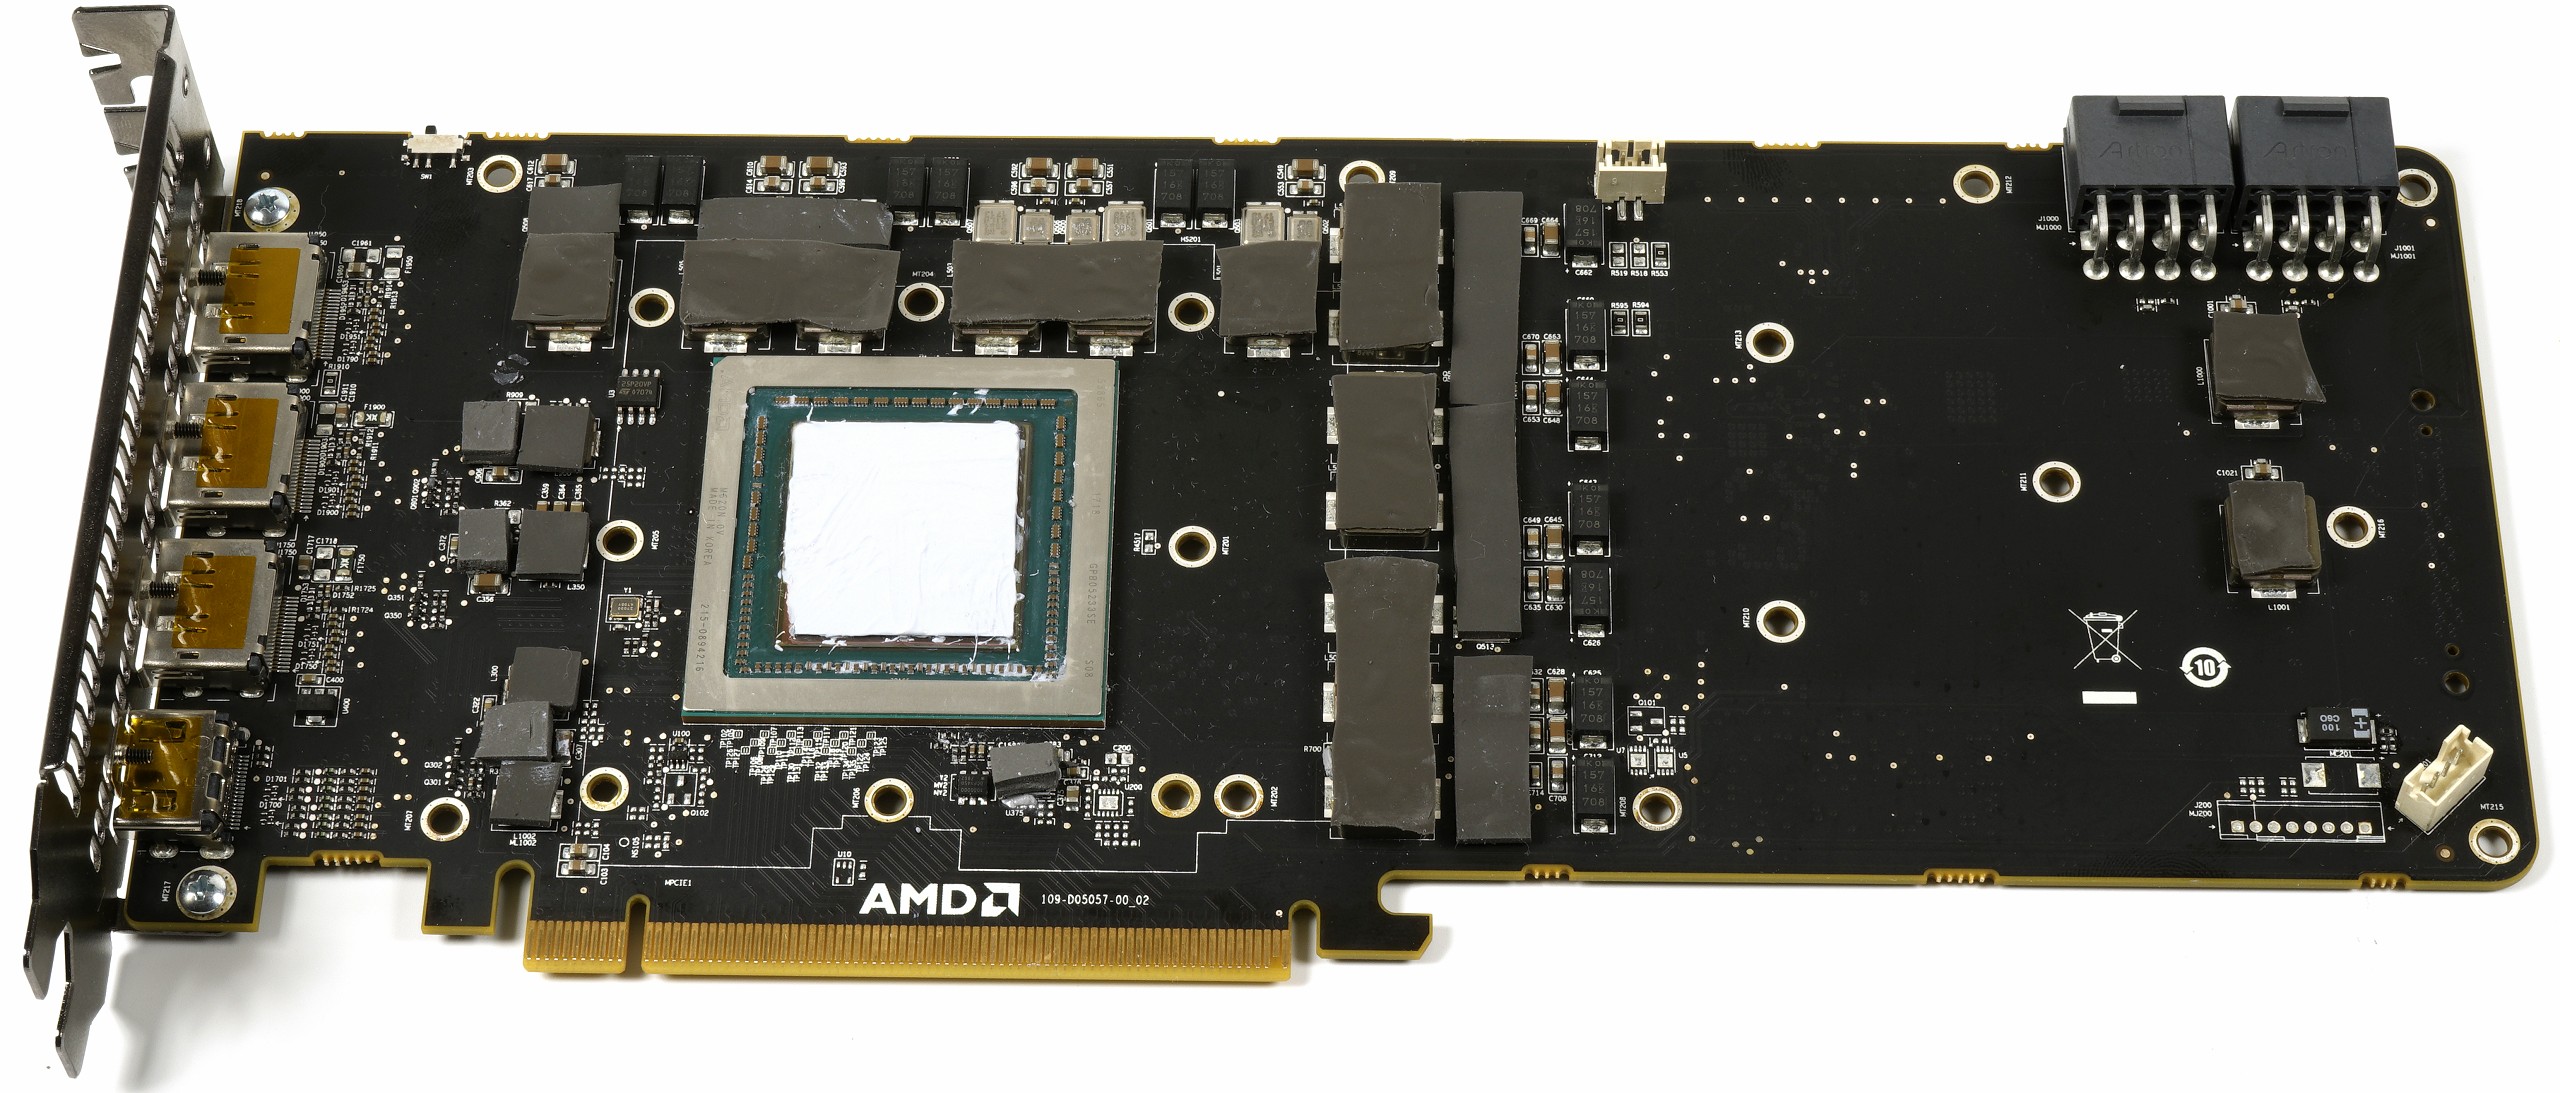
The thermal paste is not easy to handle with the RX Vega56 because of the very sensitive interposer and the unmodified packages also because of the different height of GPU and HBM2 memory. The included GC Extreme is a very good paste, but unfortunately far too viscous. Either, you heat them beforehand in a waterproof bag to approx. 60°C, or you can immediately rely on a more liquid paste.
Large and thin(!) Pass, the direction should always go in the direction of memory, because here you need the most paste because of the deeper top edge. If you are afraid of the interposer, you can also add a very thin paste to the cooler. The industry always puts the pastes on the cooler, because it is thus more feasible in terms of production.
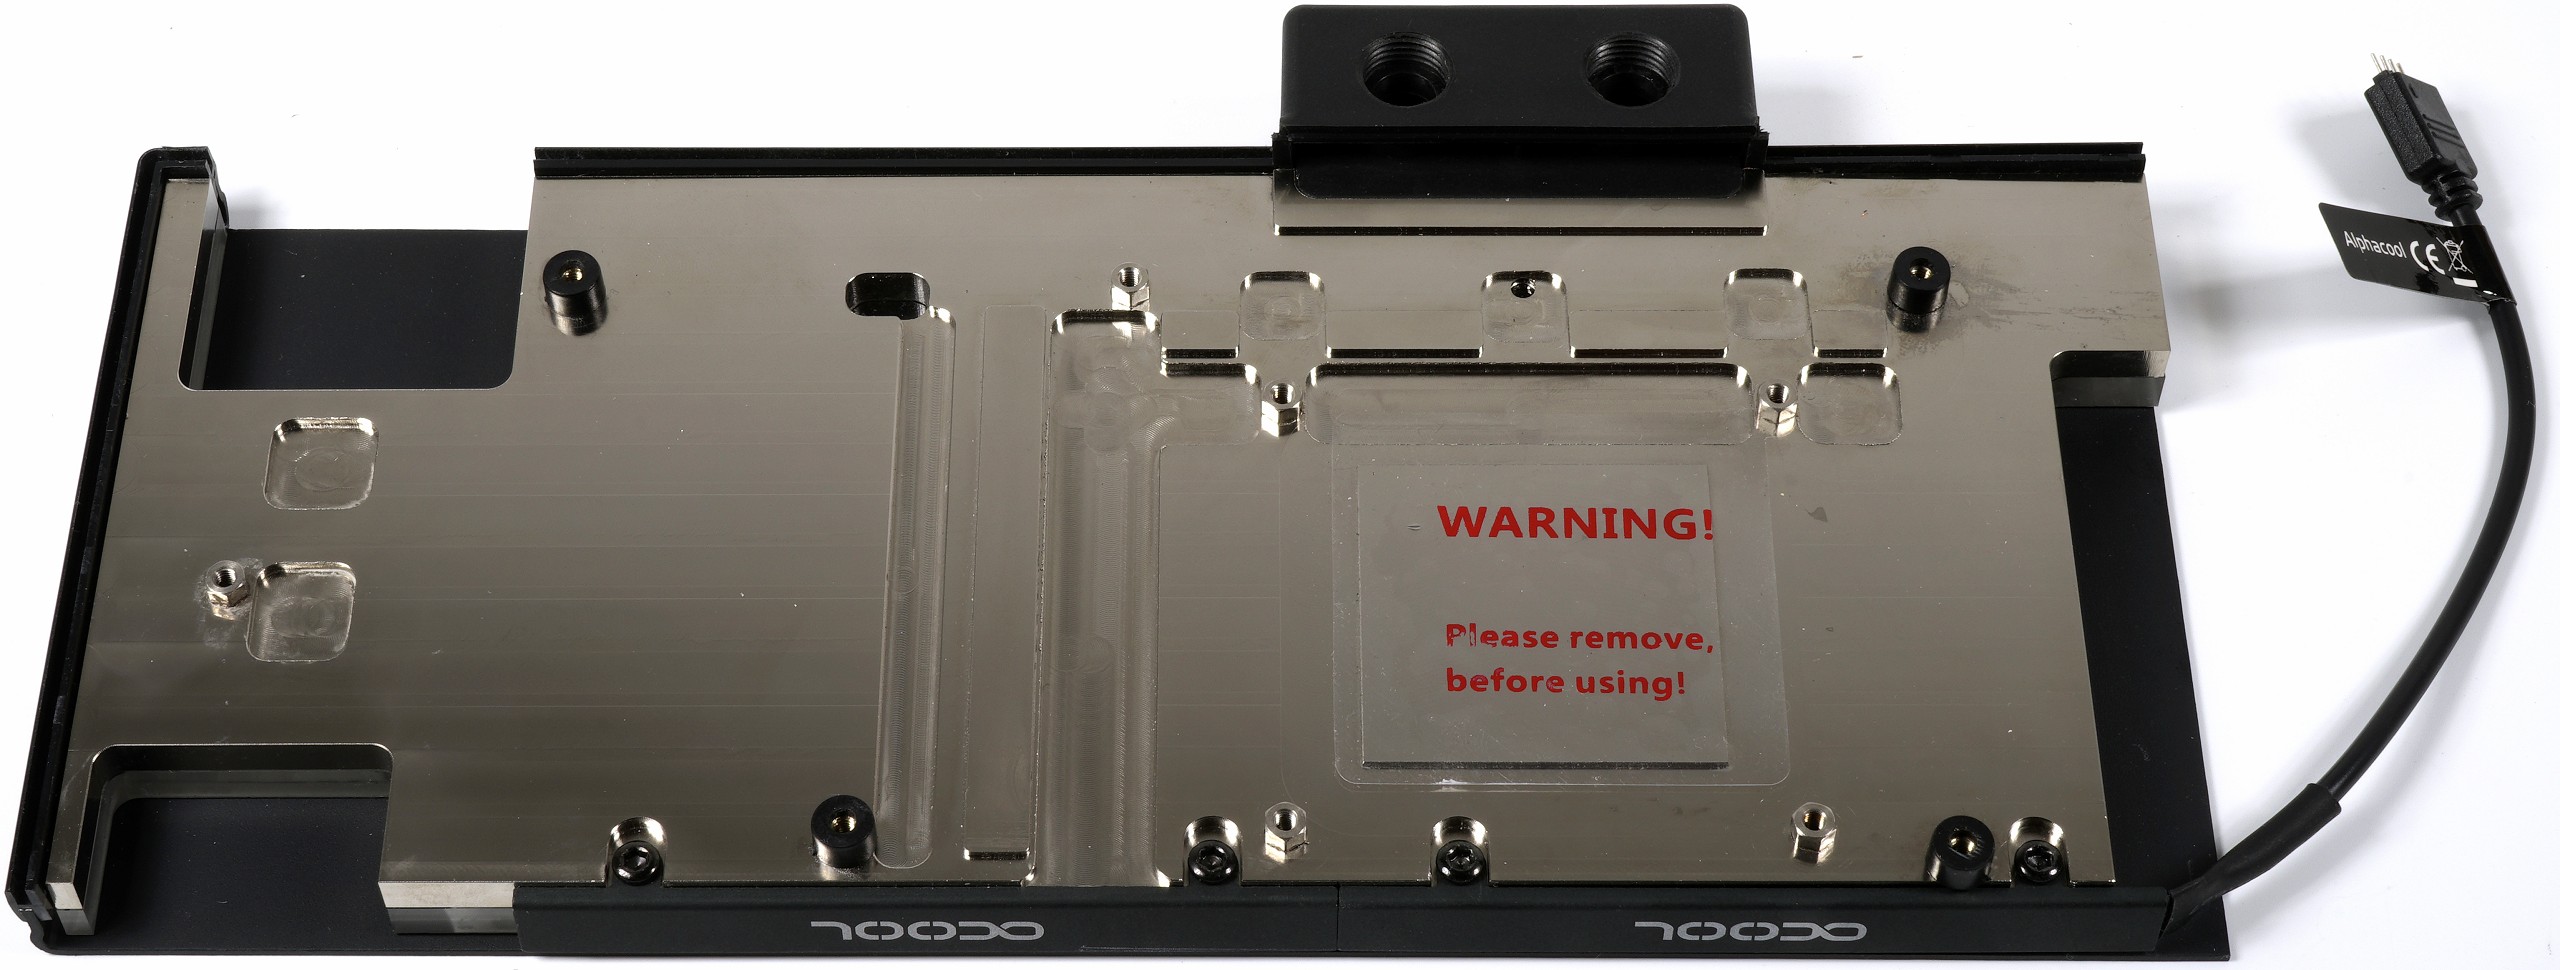
The back clearly shows that the cooler has been pulled much higher than the board would actually require. However, with the RX-Vega individual voltage converters are also very close to the top edge, so that Alphacool has simply created more space for a larger flow for the areas at the inand and outtake. We shall see in a while that this is having an effect. In addition, the more generous water flow also reduces the vertebrae in the cooler.
The back should also be provided with pads in the area of the voltage converters according to instructions in the manual. Then there are the pads for the back behind the coils in the entrance area, as well as for the PWM controller. However, we will see in a while that the cooling over the backplate with a potent fullcover water block is rather pointless.
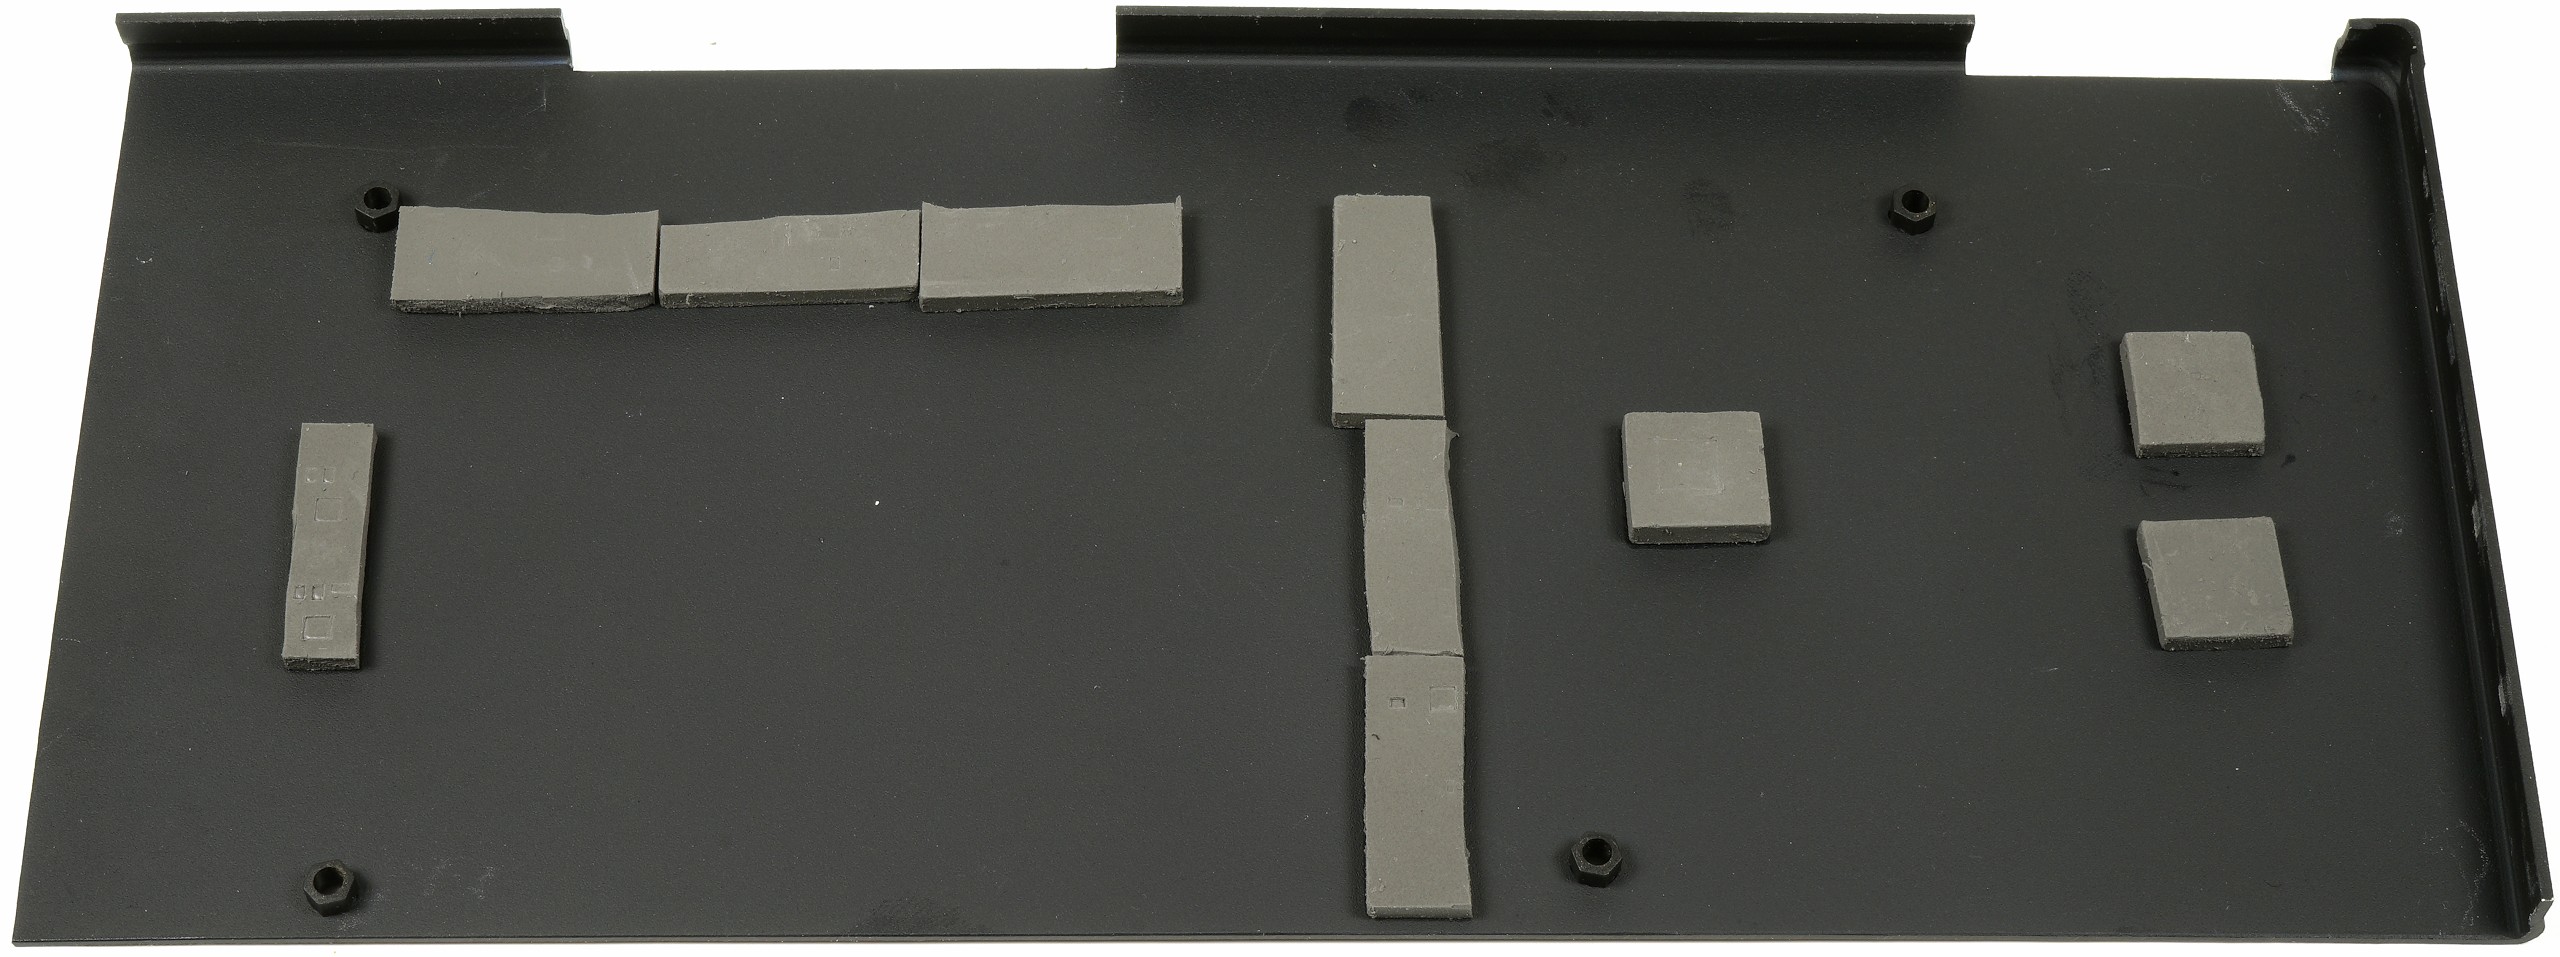
This in turn leads to certain constructions on the market, which even work with elaborate heatpipes, a little ad absurdum and quickly gets into the fairytale area of the optical ballhornungen. The part is and remains pure look and even the work with the pads could almost be given to oneself. And now we measure and prove what we have just said here with facts.


Kommentieren