


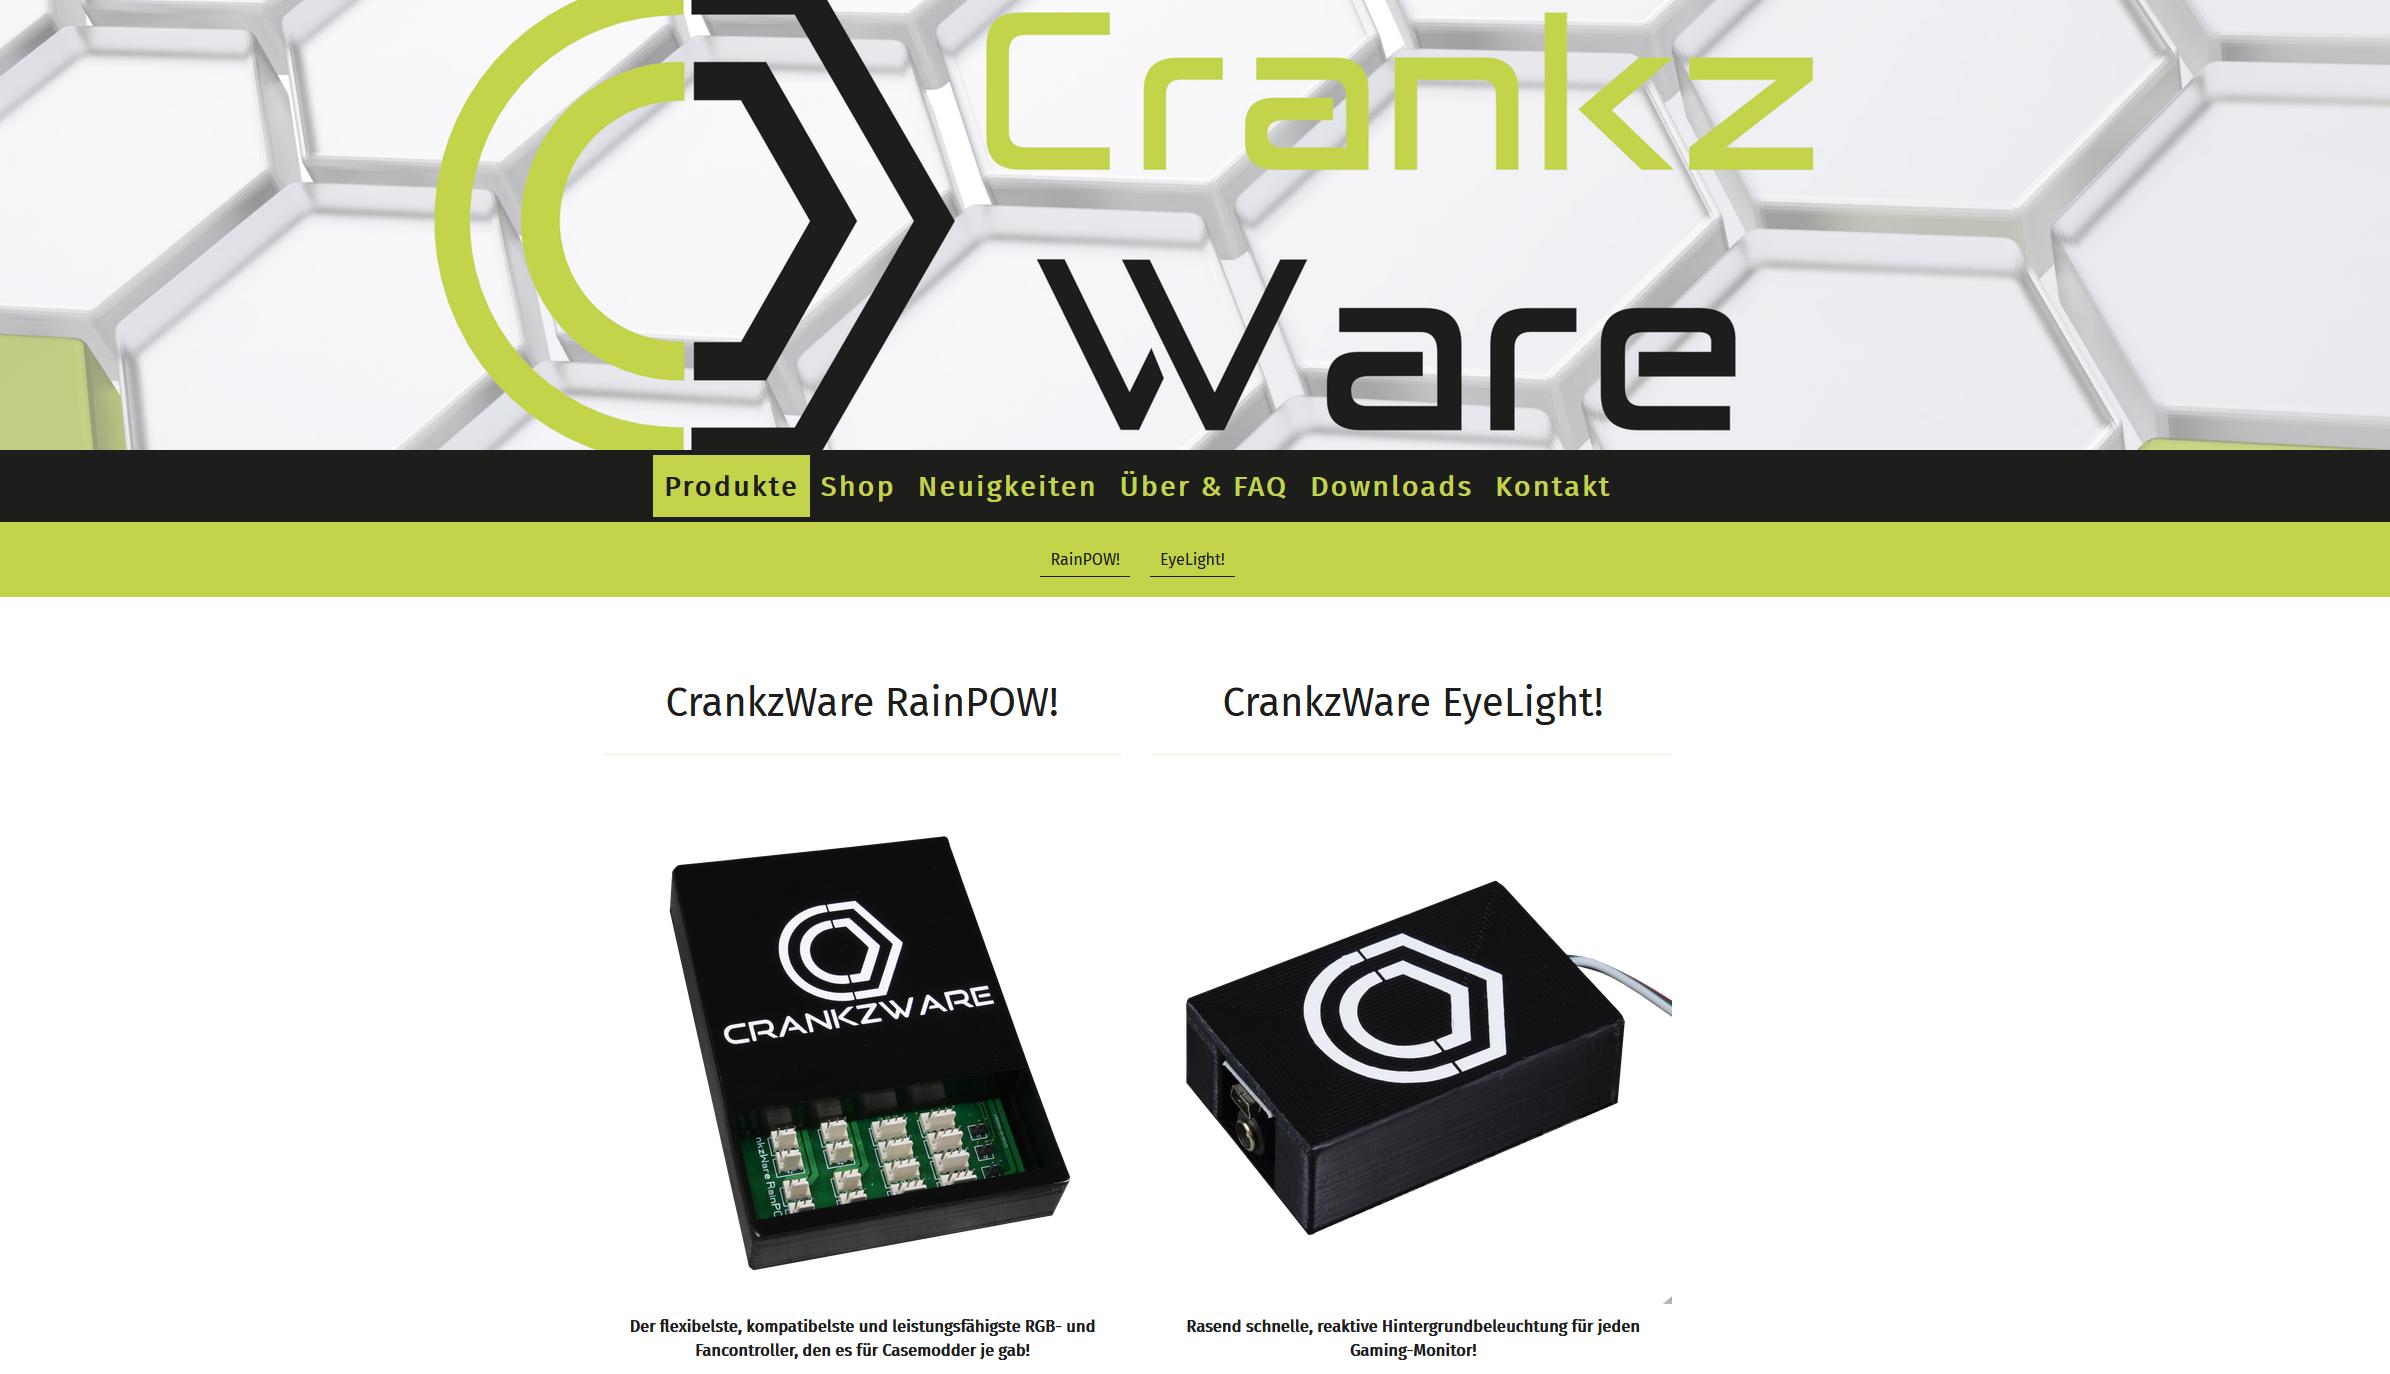
In the following I would like to introduce you to Bernhard Baumgartner, a rather resourceful young man from our community, who is in the process of realizing his dream with his small start-up CrankzWare by simply starting out where others are already failing in themselves. So doing instead of whining, even if a lot of things were difficult at the beginning and still difficult. Since I would rather let him speak himself, I asked him to write down the whole thing myself and provide it with his own pictures.
A few years ago, the trend of RGB illuminated components emerged. It looks good, is flexible and varied, you can make your beloved PC shine in versatile colors and patterns. Of course, the well-known hardware manufacturers did not miss the opportunity to retain customers with their own connections, pin-outs and software. The result was a large, colourful soup kitchen in which no chef let the other look into his pot for a short time. This is where my story begins. In different channels, forums and platforms I read again and again about the same problems: inappropriate plugs, impenetrable pin-outs, lack of synchronization possibilities and last but not least completely overpriced products, only for the reason of certification for an "RGB standard". My curiosity, but also my ambition, were aroused. I still hear the voice in my head saying, "Can't it be so hard to create an open platform for it?" The idea was born and I honestly had no idea how much work and problems would come to me.
To start the journey, I first had to do an inventory in my head and living room. Do I even have what it takes to develop a competitive product myself? Luckily, I live not far from a well-known wholesaler for electrical parts and so the decision was made quite quickly in the first step to make an LED shine. From the prototyping laboratories of my current employer, I knew the rudimentary equipment of a laboratory. So I drove off and came back home with the following shopping basket, which turned the living room more and more into a laboratory:
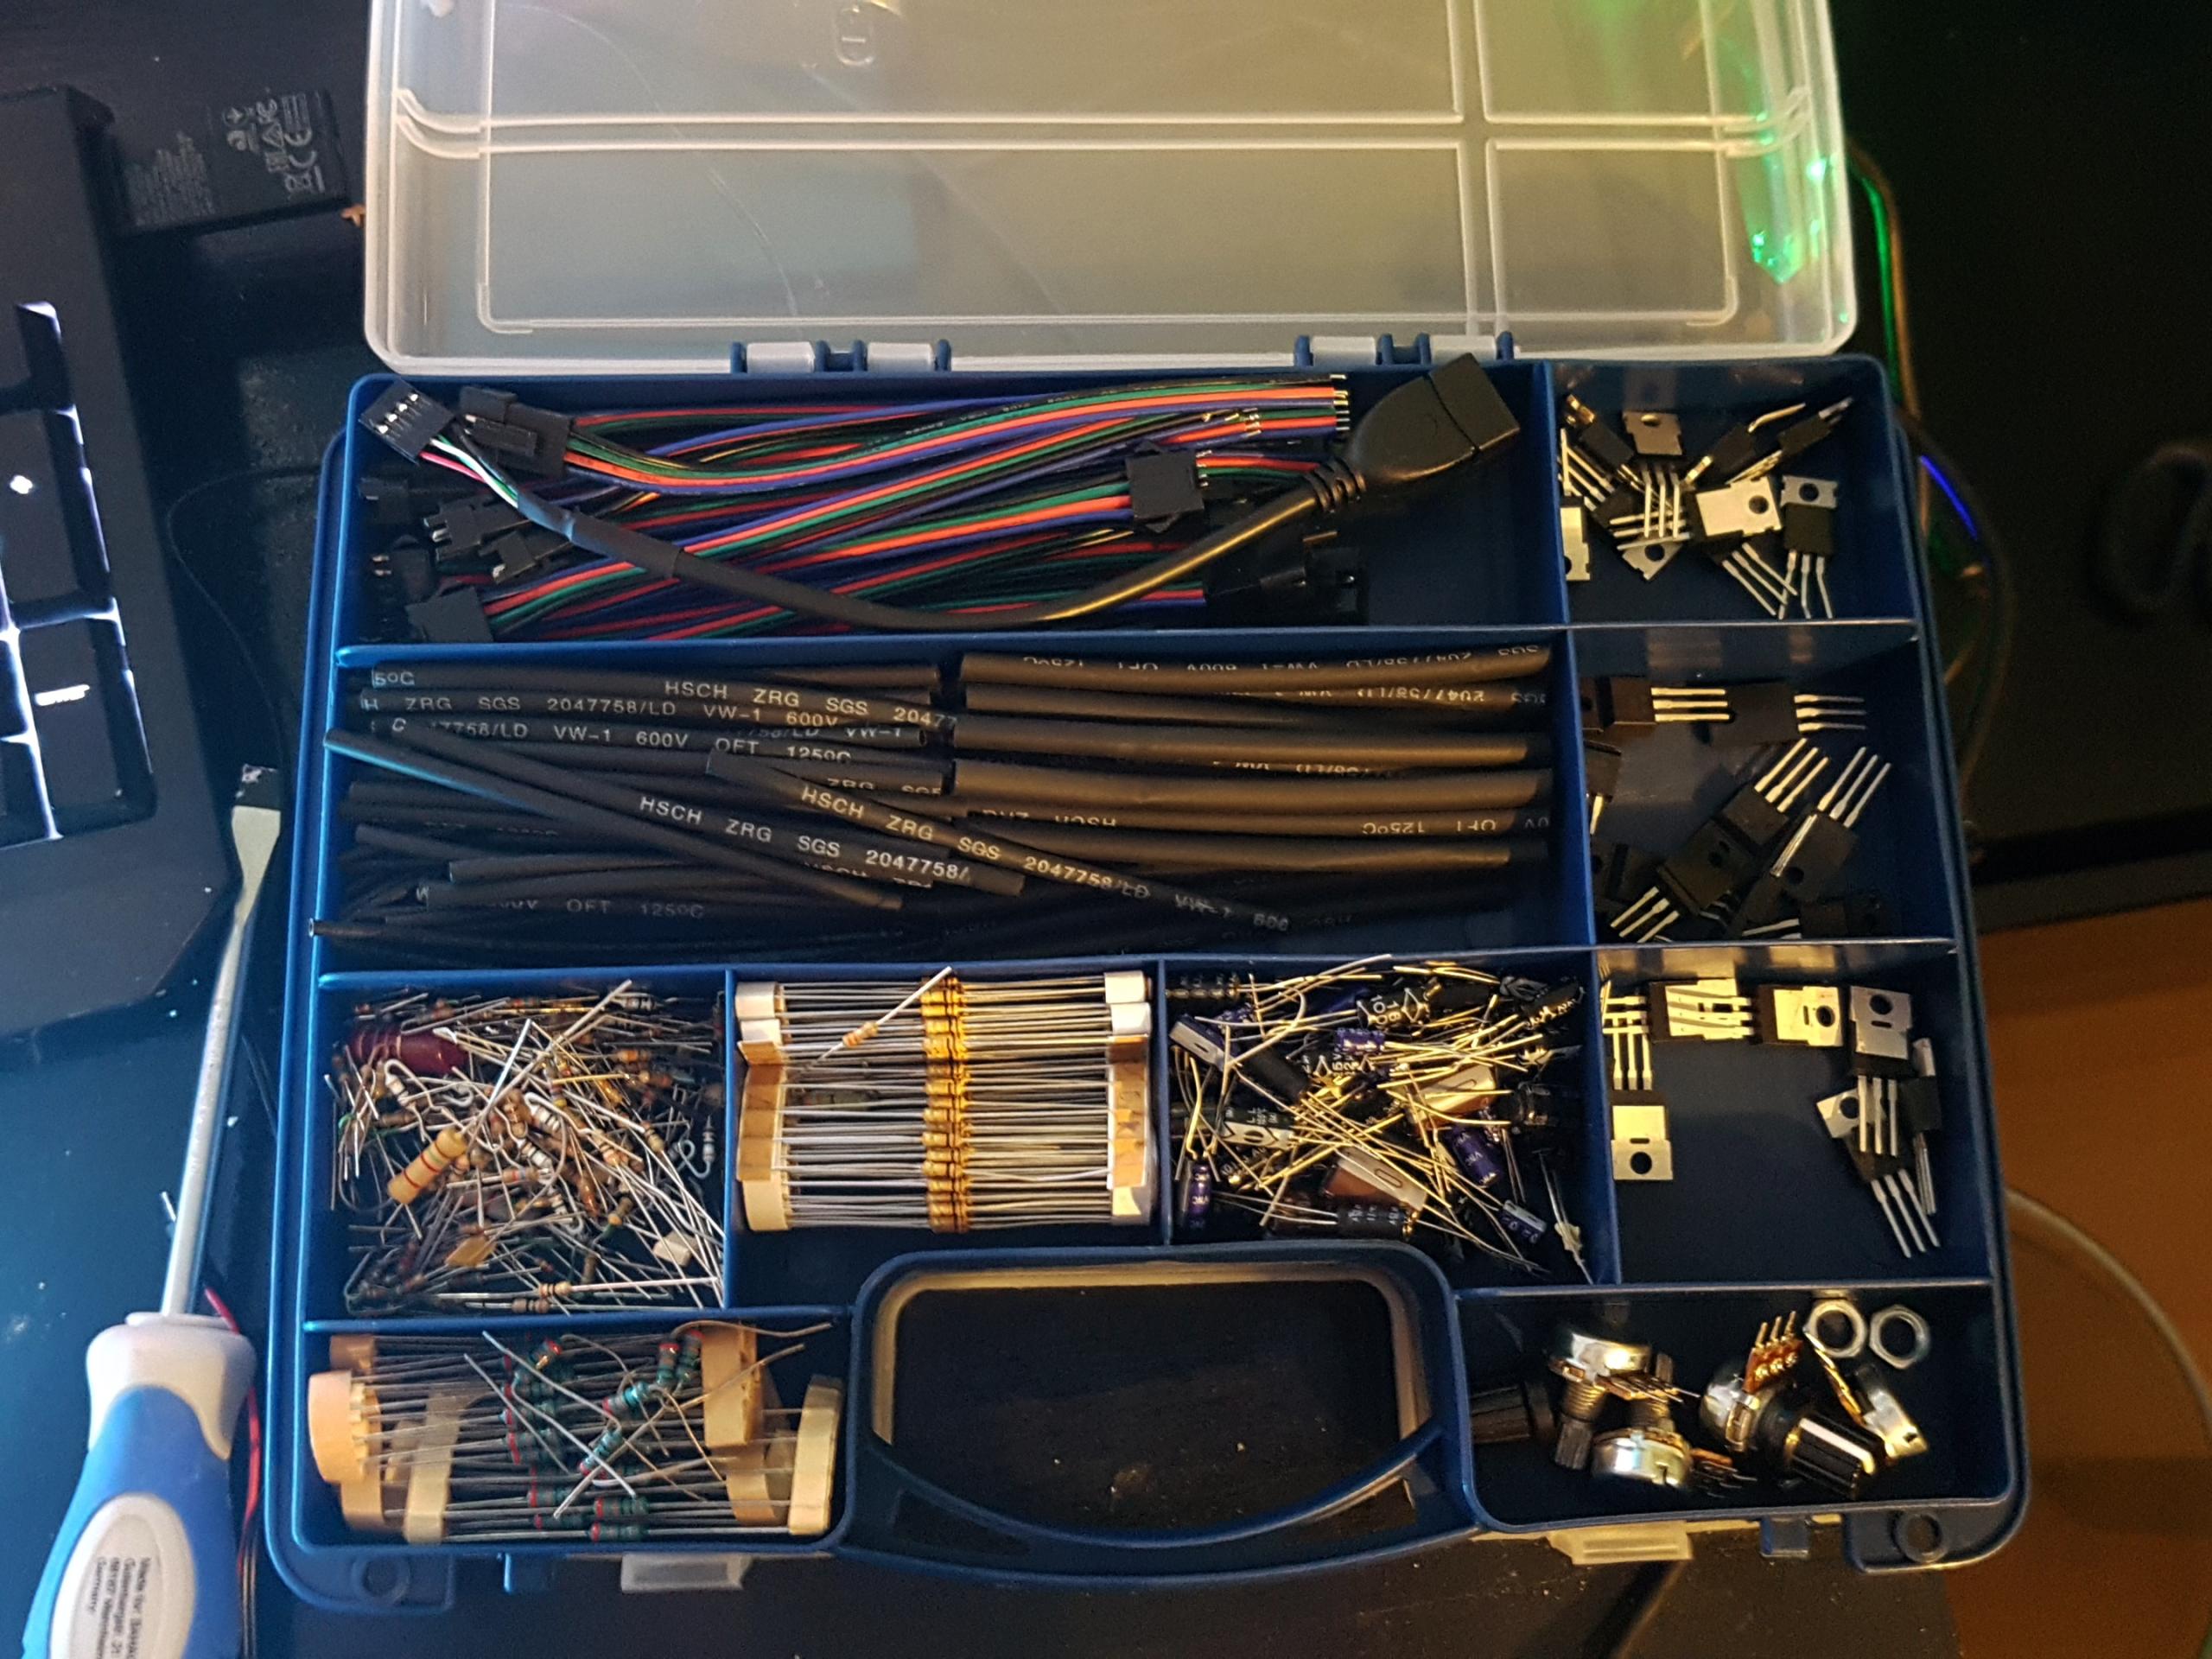
Insulating tape, a breadboard, various resistors, capacitors, jumper cables, LEDs and a microcontroller should be enough for my first walking attempts. Motivating on the way to my own product were the many online references and tutorials that I have gradually implemented. Slowly I became familiar with the matter of programmable microcontrollers and also the peculiarities of LEDs. I felt like the greatest hacker of all time! From then on, I had to work my way from a monochrome LED to RGB. The next stop of my journey was the milestone: color and brightness of commercially available LED stripes, analogous to control with an operating voltage of 12 volts. Of course, the microcontroller itself cannot provide high current on the PWM pins responsible for coloring, so it soon became clear that a separate, low-side MOSFET power amplifier had to be designed. I wanted to control several meters of LEDs as efficiently as possible. After I had found the right semiconductors, which also had sufficient power and high switching speeds, my "control" soon looked like this:
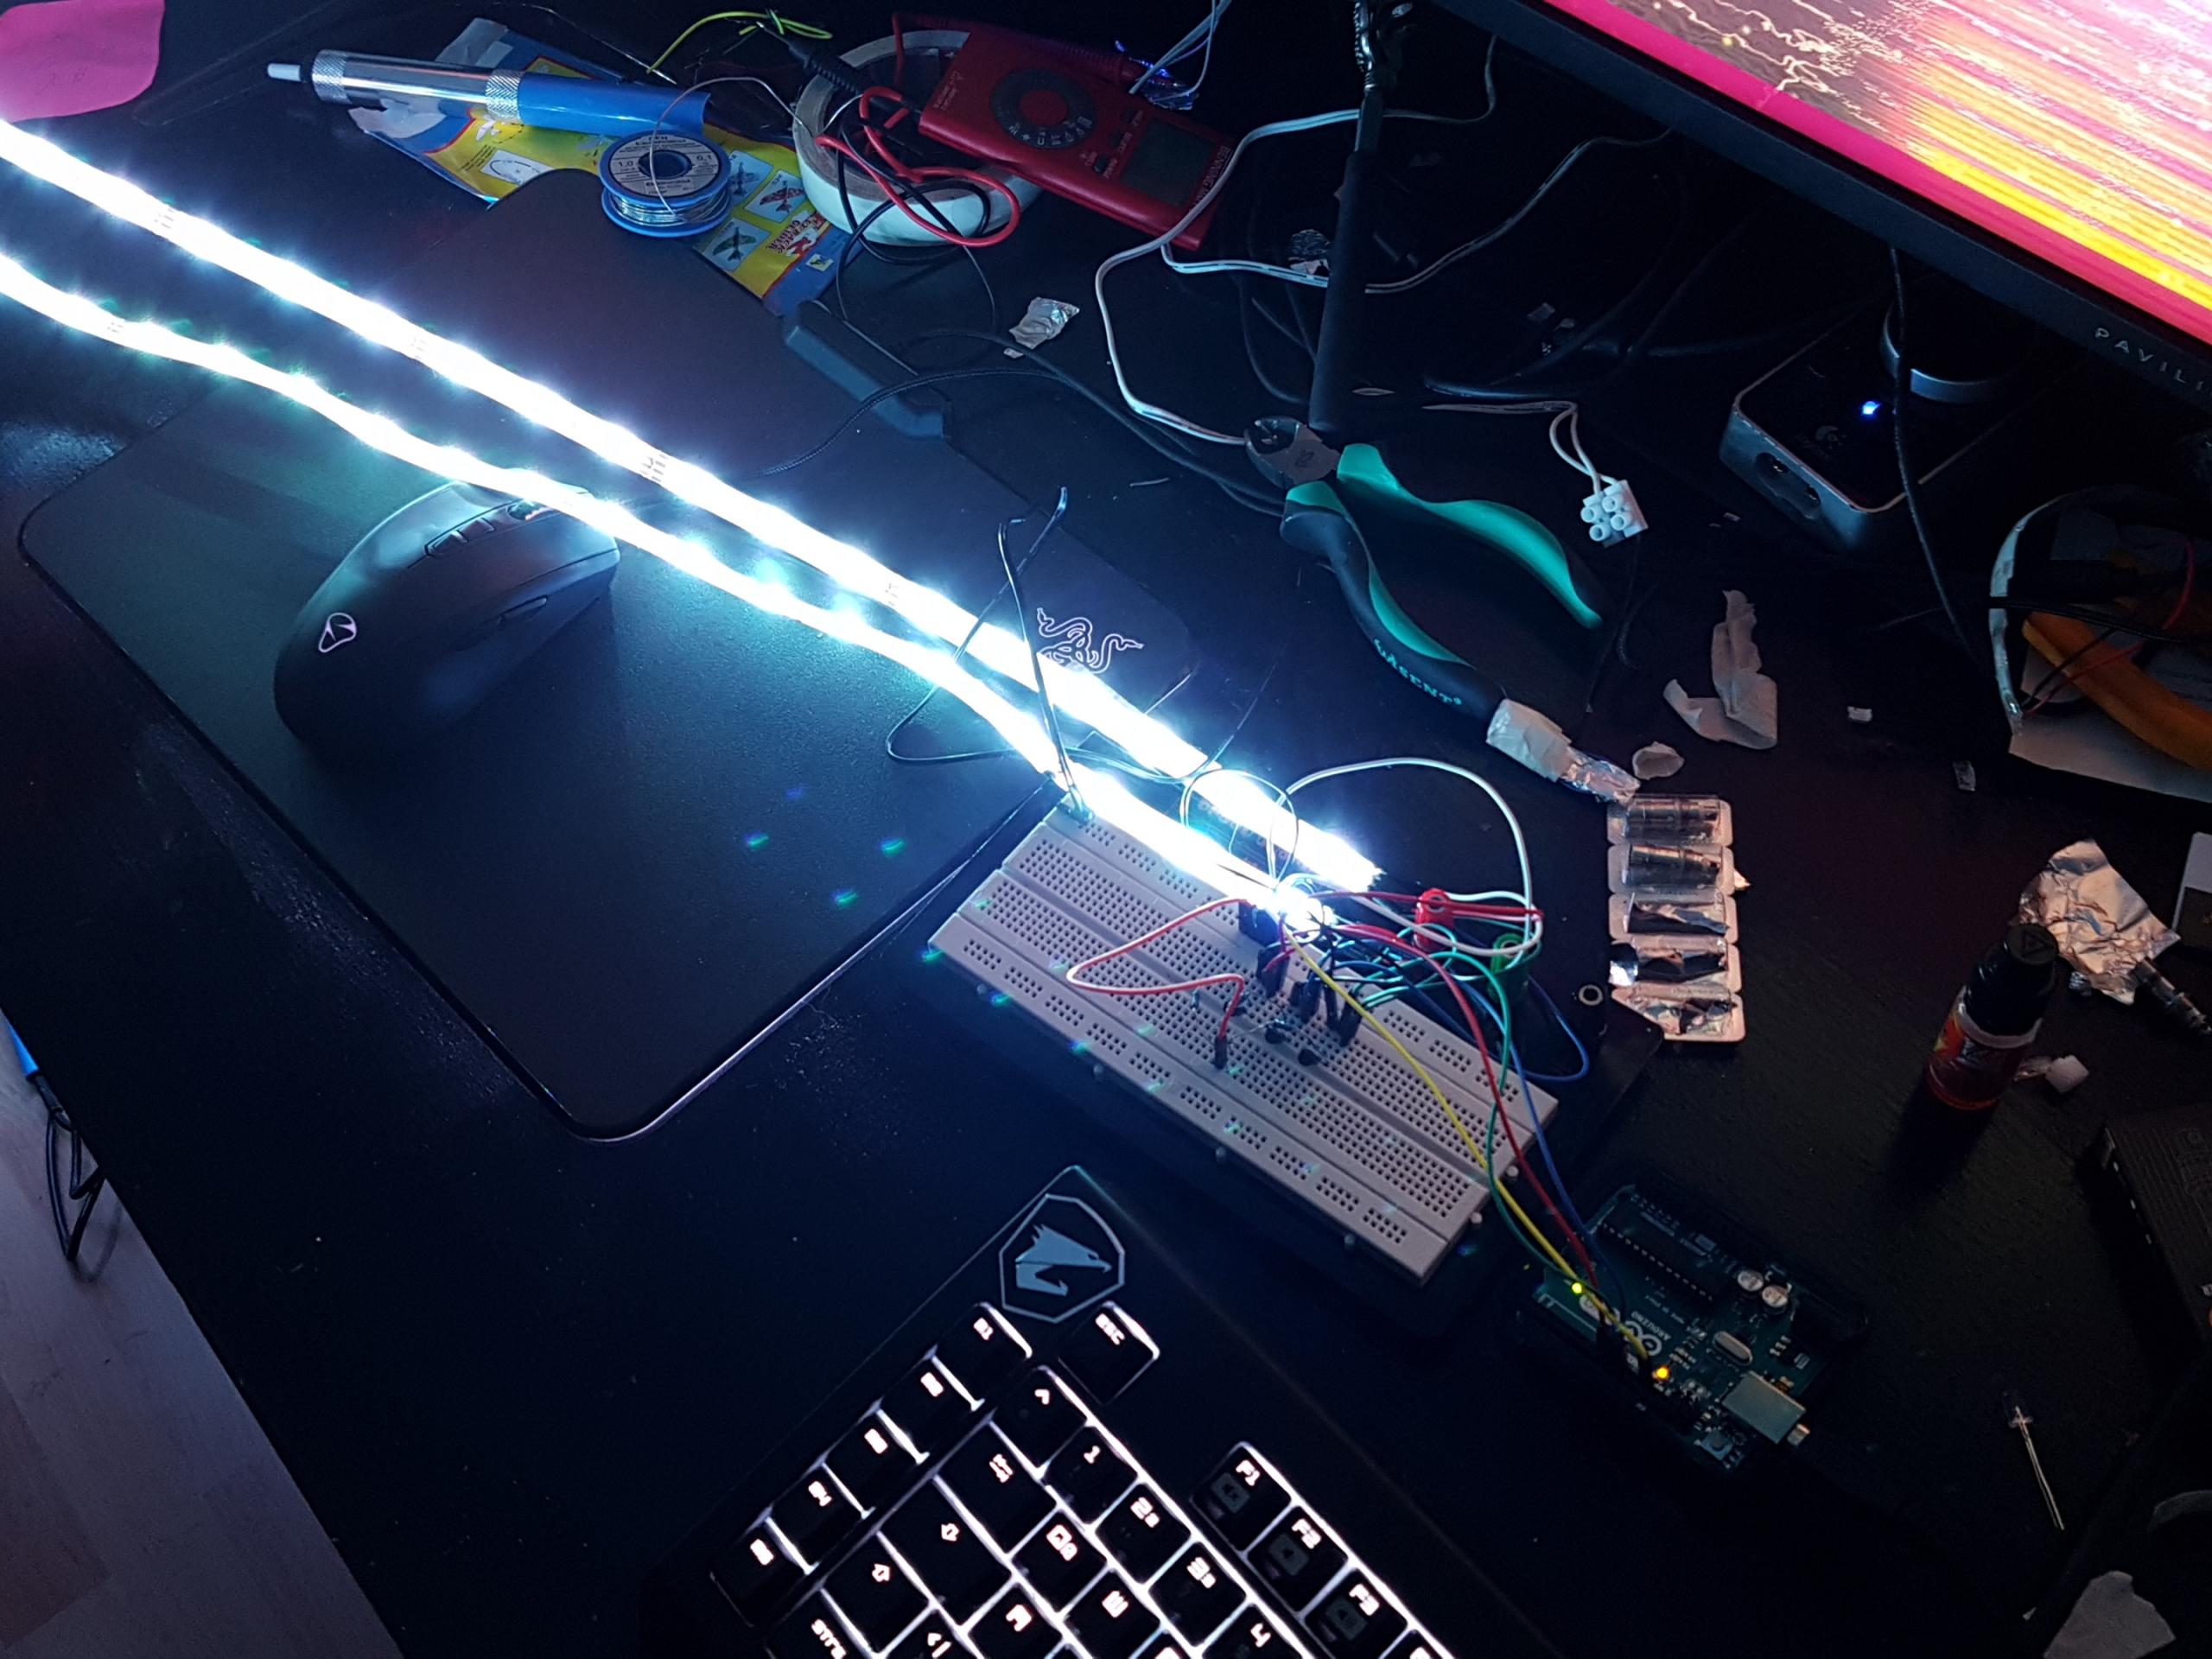
Strong enough to supply two by five meters of LED stripes, however, the control system missed everything else. There was no GUI, no software, no features. Everything was still firmly programmed and to change the operating parameters you had to flash the new code again and again very cumbersome. At the latest here it dawned on me that it cannot go on without a software developer. Of course, I couldn't afford a German freelancer and there were no people with this talent in my circle of friends either. It was all about hardware-related programming in C. In which programming language the GUI is written, I actually didn't care, as long as the handshake, i.e. the communication between GUI and processor works reliably and the software makes a professional impression. I tried to create an international freelancer platform because I knew that you could find good staff there for a good course. I posted my application there with the requirements. Soon I found a very nice, motivated competitor who was just doing his master's degree in IT and had to earn money for his studies. After all, I got a small GUI with modular tools myself, but that was amateurish and looked like this:

You could only adjust the color intensity and also the handshake of "GUI" and hardware worked very tediously over predefined ports. Definitely not a professional gig, but that didn't matter, because I had my programmer by my side. He would help my GUI get on the go! When the control of the analog LEDs was already sufficiently developed to be usable and applicable, the next hurdle had to be cleared on my run: digital, i.e. addressable LEDs. In general, I enjoyed working and testing with this intelligent LED type. It's just fascinating what you can do with these individually controllable LEDs. Elaborate patterns, impressive animations and the most beautiful colors could be easily programmed with just one data line. When the first digital LED stripes arrived in my living lab, weeks of programming of effects were called for until I had a satisfactory range of preconfigured luminous spectacles.
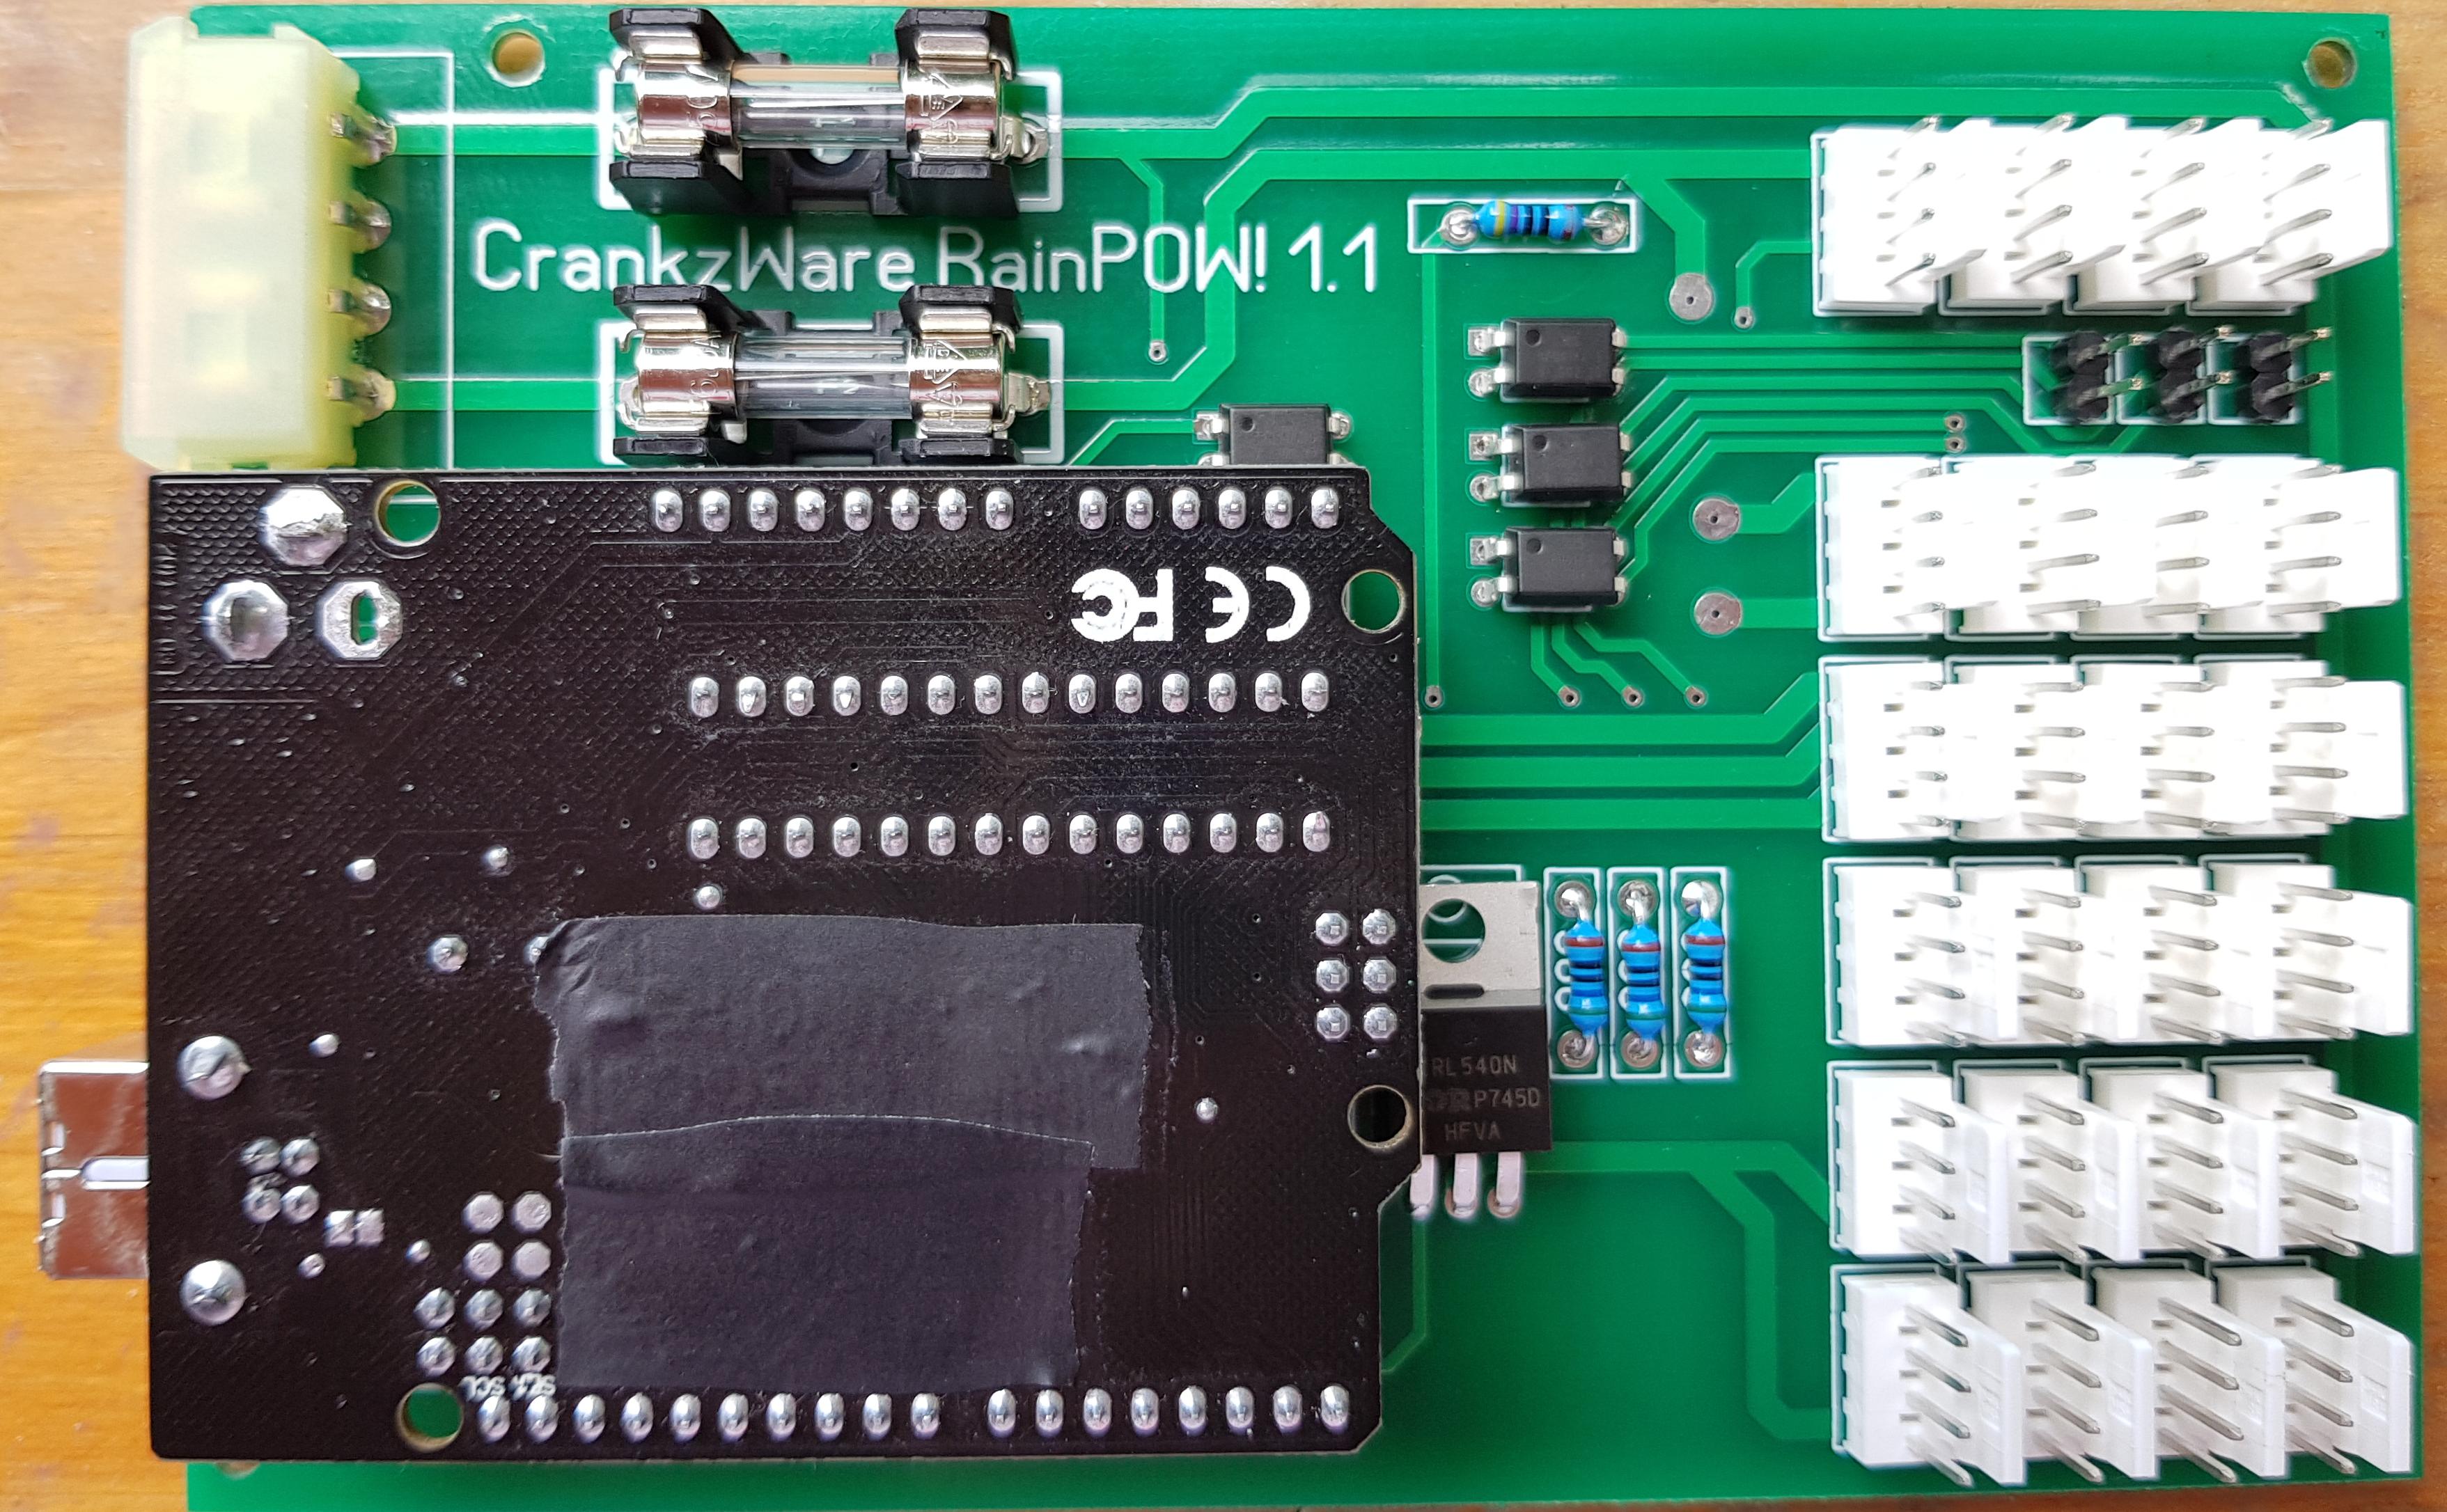
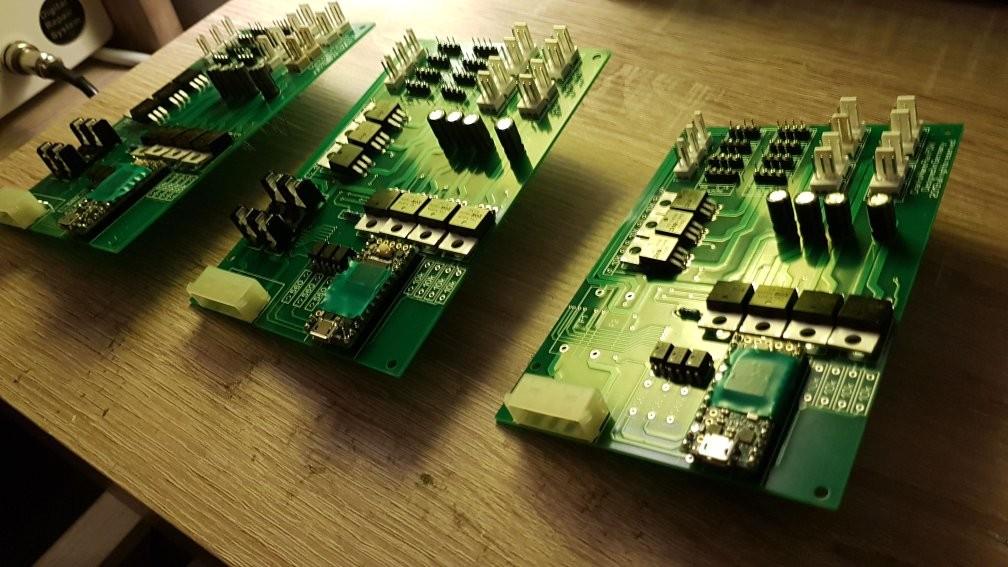
Shortly after the specification of the digital effects, however, we came across a problem that destroyed almost all the development progress made so far: the more digital LEDs addressed, the slower the analog control of the LEDs became. The problem here is multi-threading. If 150 digital LEDs had been addressed via the software, an analog cycle for "breathing" the 12V LEDs no longer took one second, but agonizingly slow one and a half minutes! We could not accept this, because another important component was also missing: the integrated fan and pump controller. After a short conversation with the programmer and the grazing of the market, our choice was an ARM-CORTEX processor, as it dominated multi-threading. Fortunately, the new CPU was very compatible with our old code, only the boot loader had to be rewritten. At the same time I also dealt with the layout of boards, because my RainPOW! should not only get a great brain, but also a beautiful body. Self-explanatory, all electrical components had to sit on an Industrial Grade PCB. The last, directly wired RainPOW! Had the following face:

Slowly, but surely I was also familiar with the layout of boards and the corresponding design rules and quite quickly the first prototype PCBs arrived at me. These look like this:
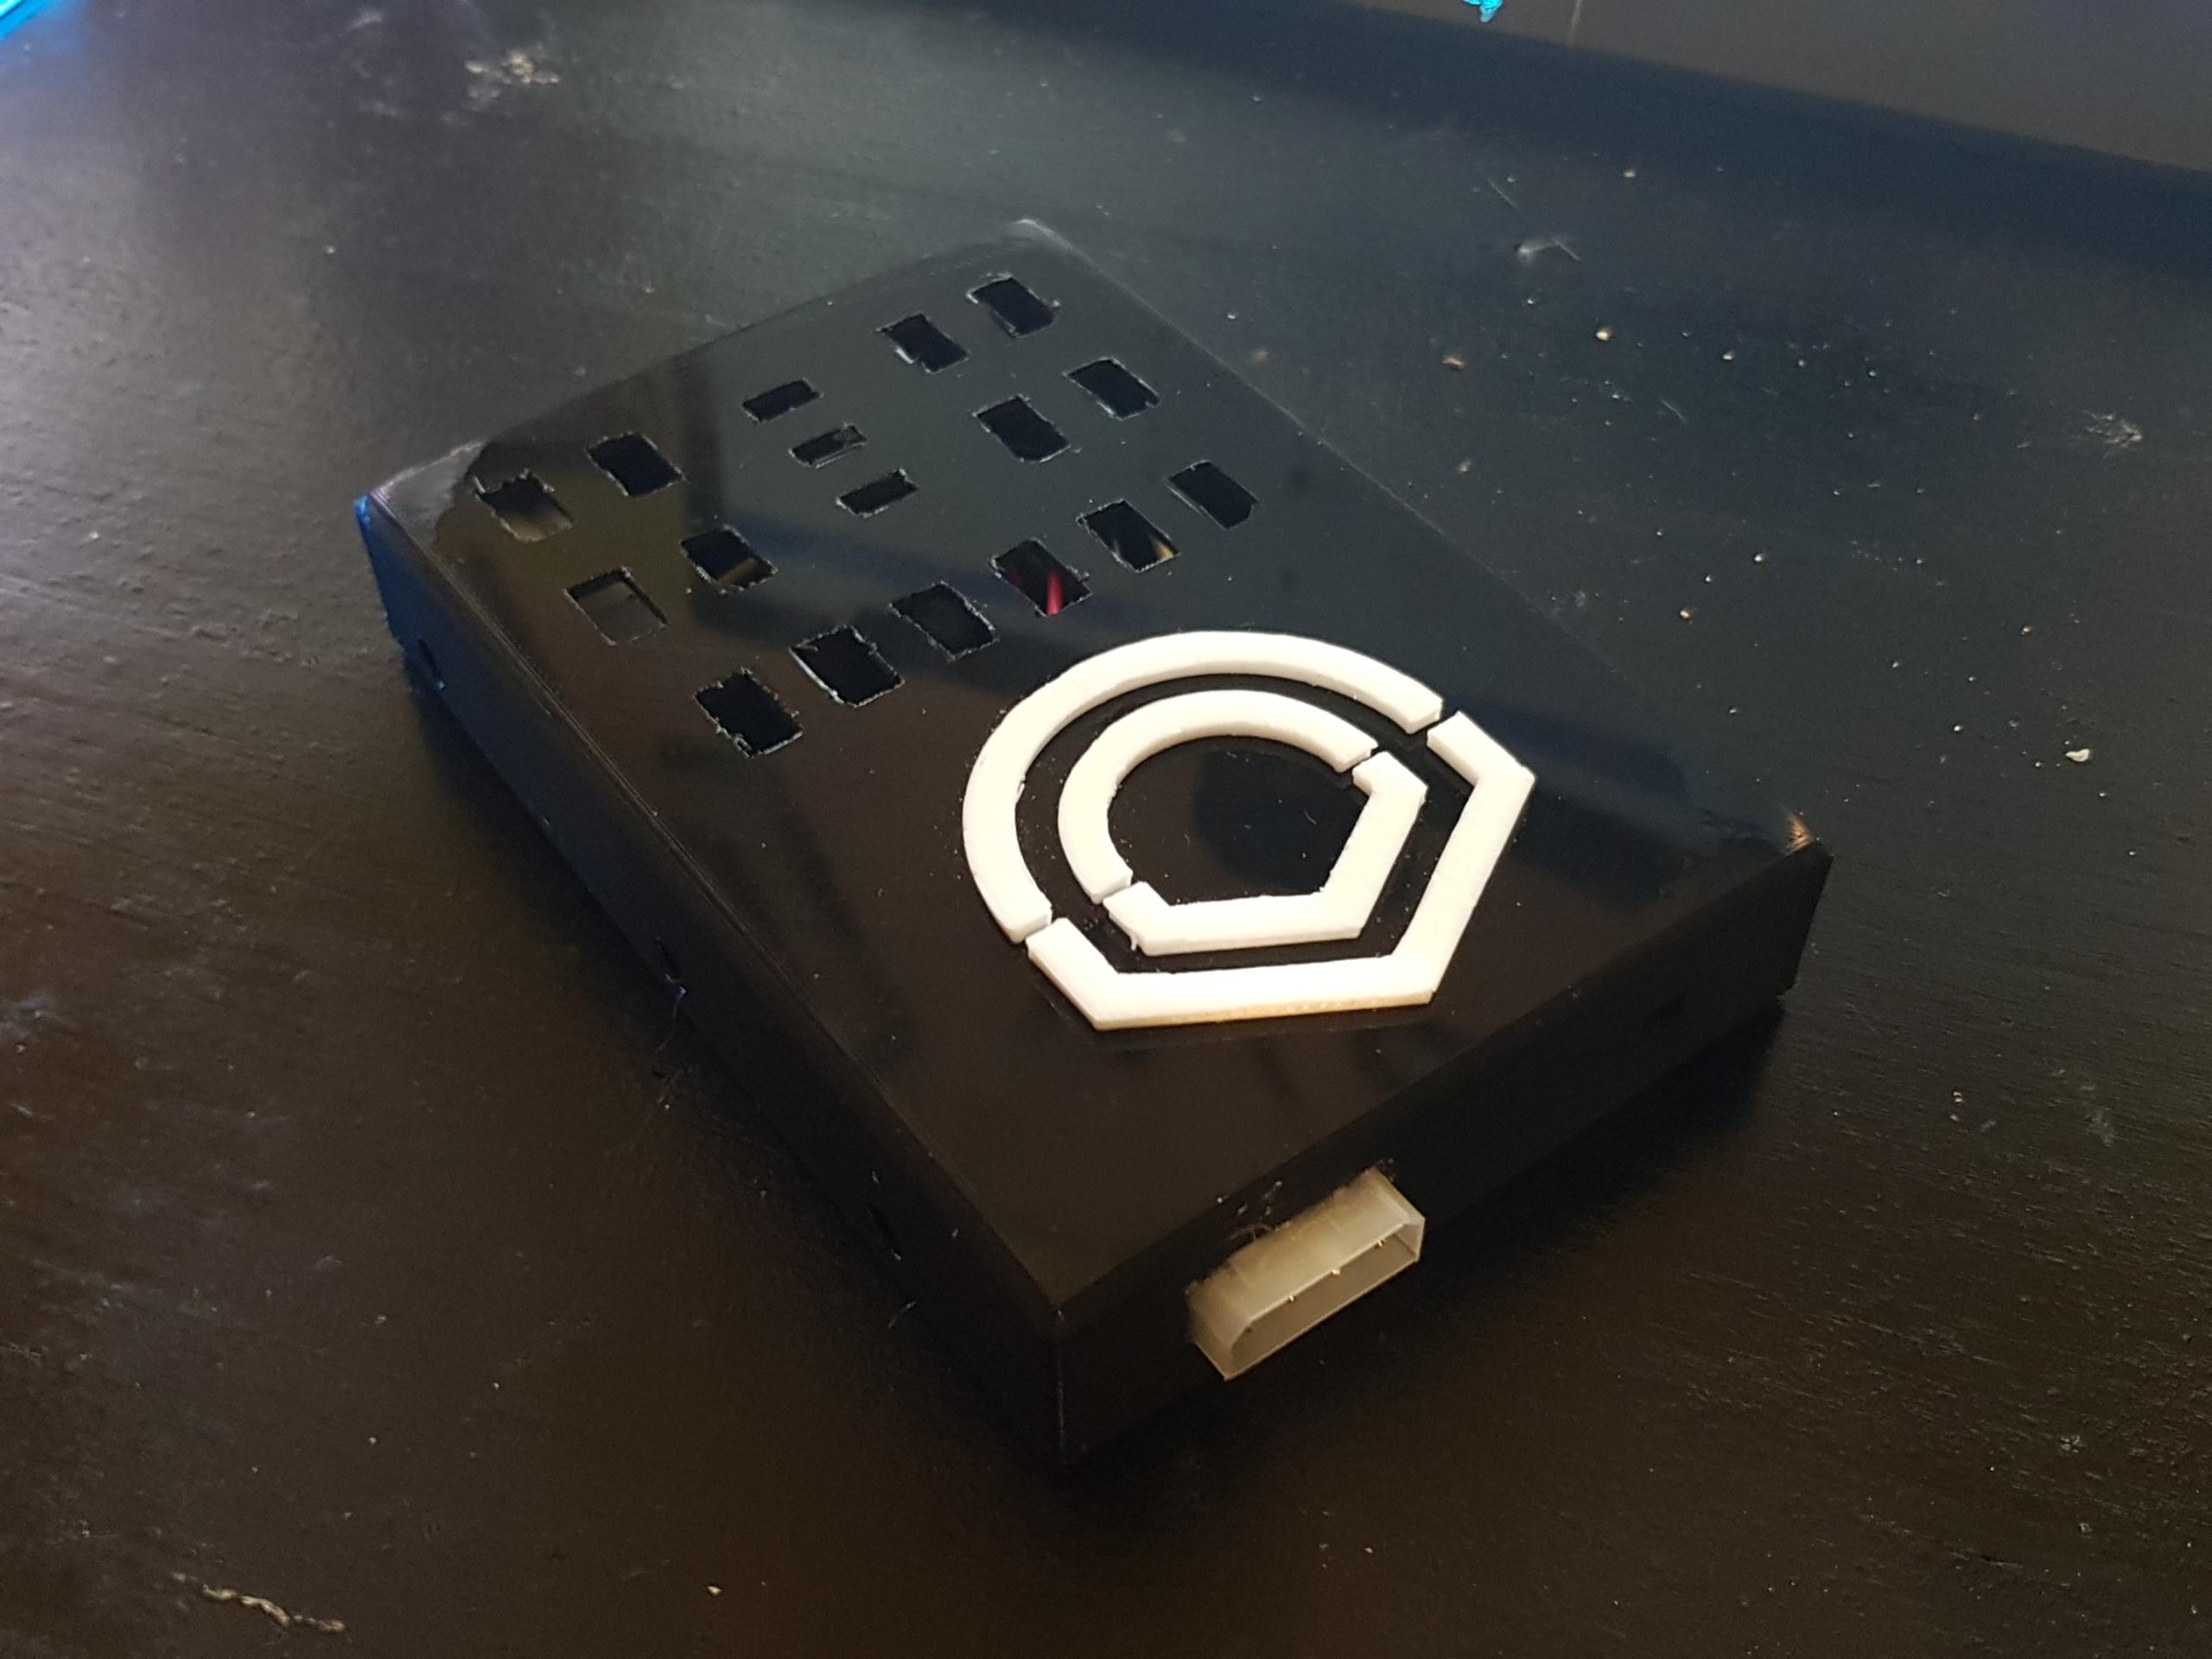
Now at the latest was the right time to think about a case. Tooling injection molding enclosures costs a fortune for an individual like me, so only the 3D printer for housing production remained. Conveniently, I had a work colleague with whom I personally understood very well. So Thomas was in the boat after a short phone call and we designed the first case for the RainPOW! It should not win a design prize, but should be useful:
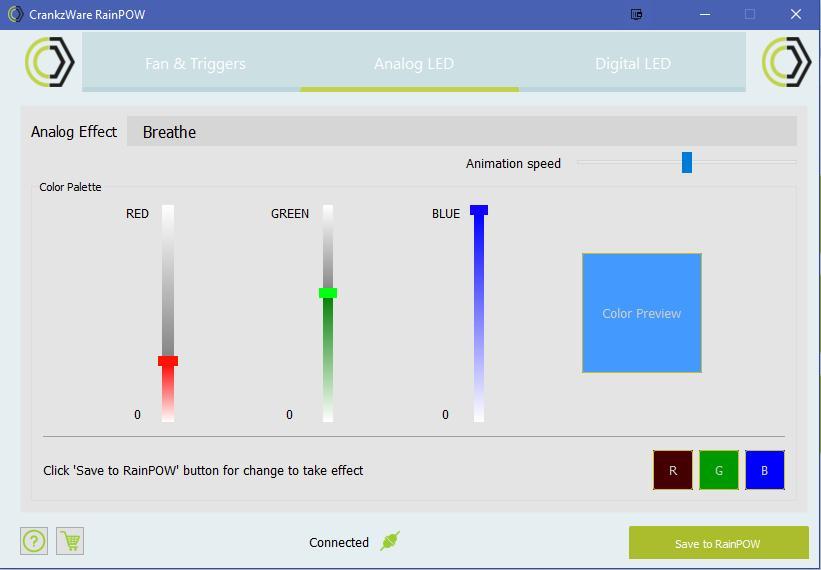
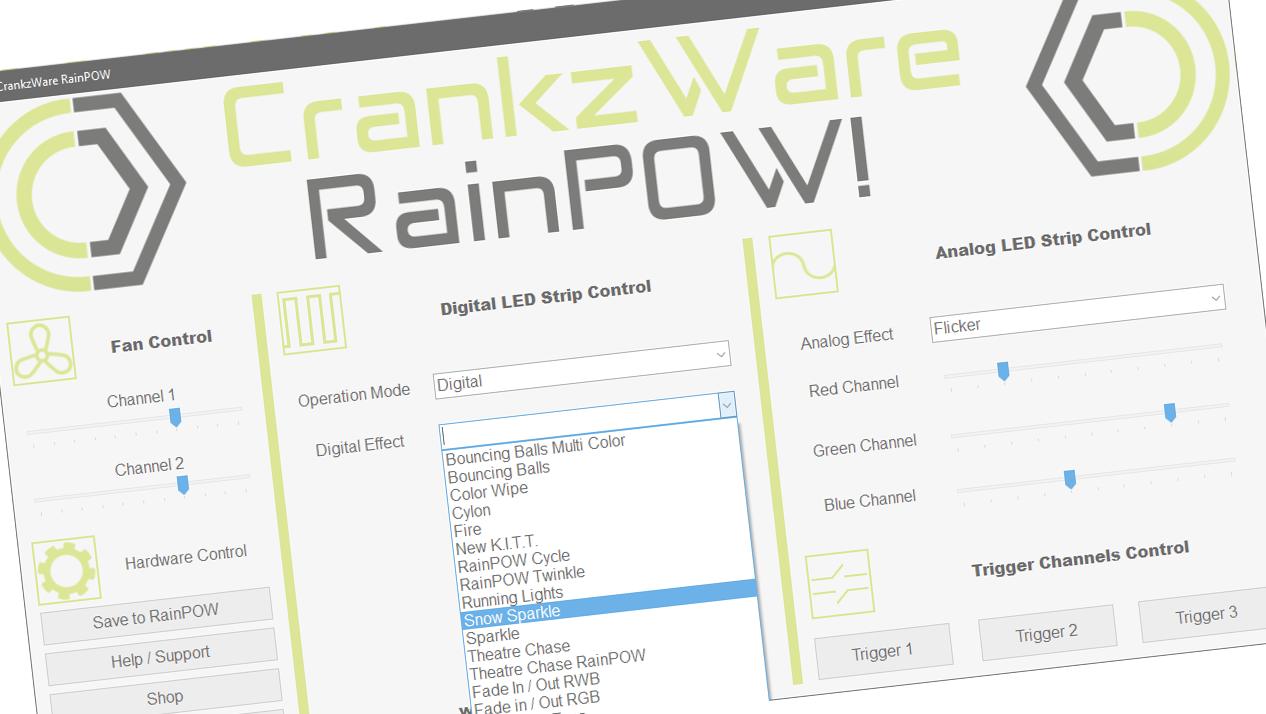
At the same time, of course, our programmer has made enormous progress with the GUI. It looked like a professional app and after several meetings there were an enormous number of new functions, the scope of which is still not completed today.
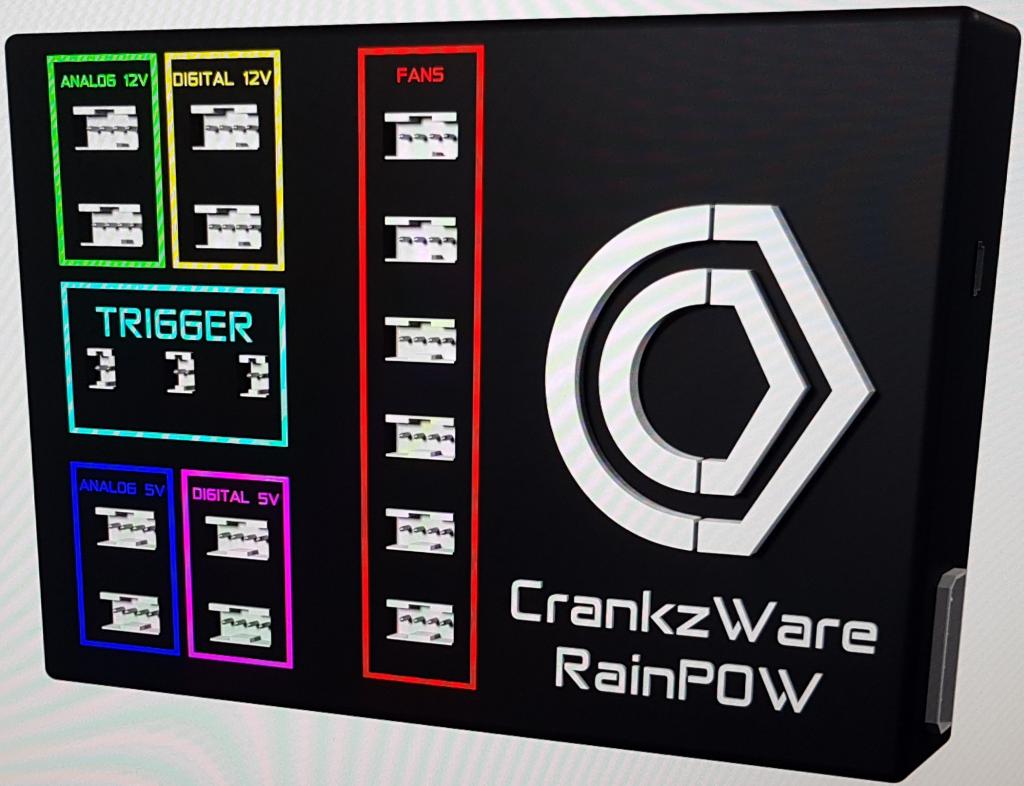
By and large, project and product are now ready for sale to potential customers and beta testers. Electronically, I have specified everything so that the entire RainPOW! 6.8 ampere on the 12-volt and 5-volt rail. Each rail is individually secured and as it is intended to be a product for enthusiasts and case modders, I used easy-to-replace fine fuses.
A feature of the controller came relatively late, but was also not indispensable for me: the trigger channels. Since many manufacturers use their own dedicated controllers with physical buttons, e.g. fan speed and LED color, they had to be remotely controlled via my product. So I included not only an enormous compatibility with other products, but also a certain automation. The trigger channels consist of two pins, which must be placed parallel to the triggering switch (mostly soldered). If you trigger this trigger channel via the software, this switch is electrically operated and a screw-on of the case for button pressing is omitted.
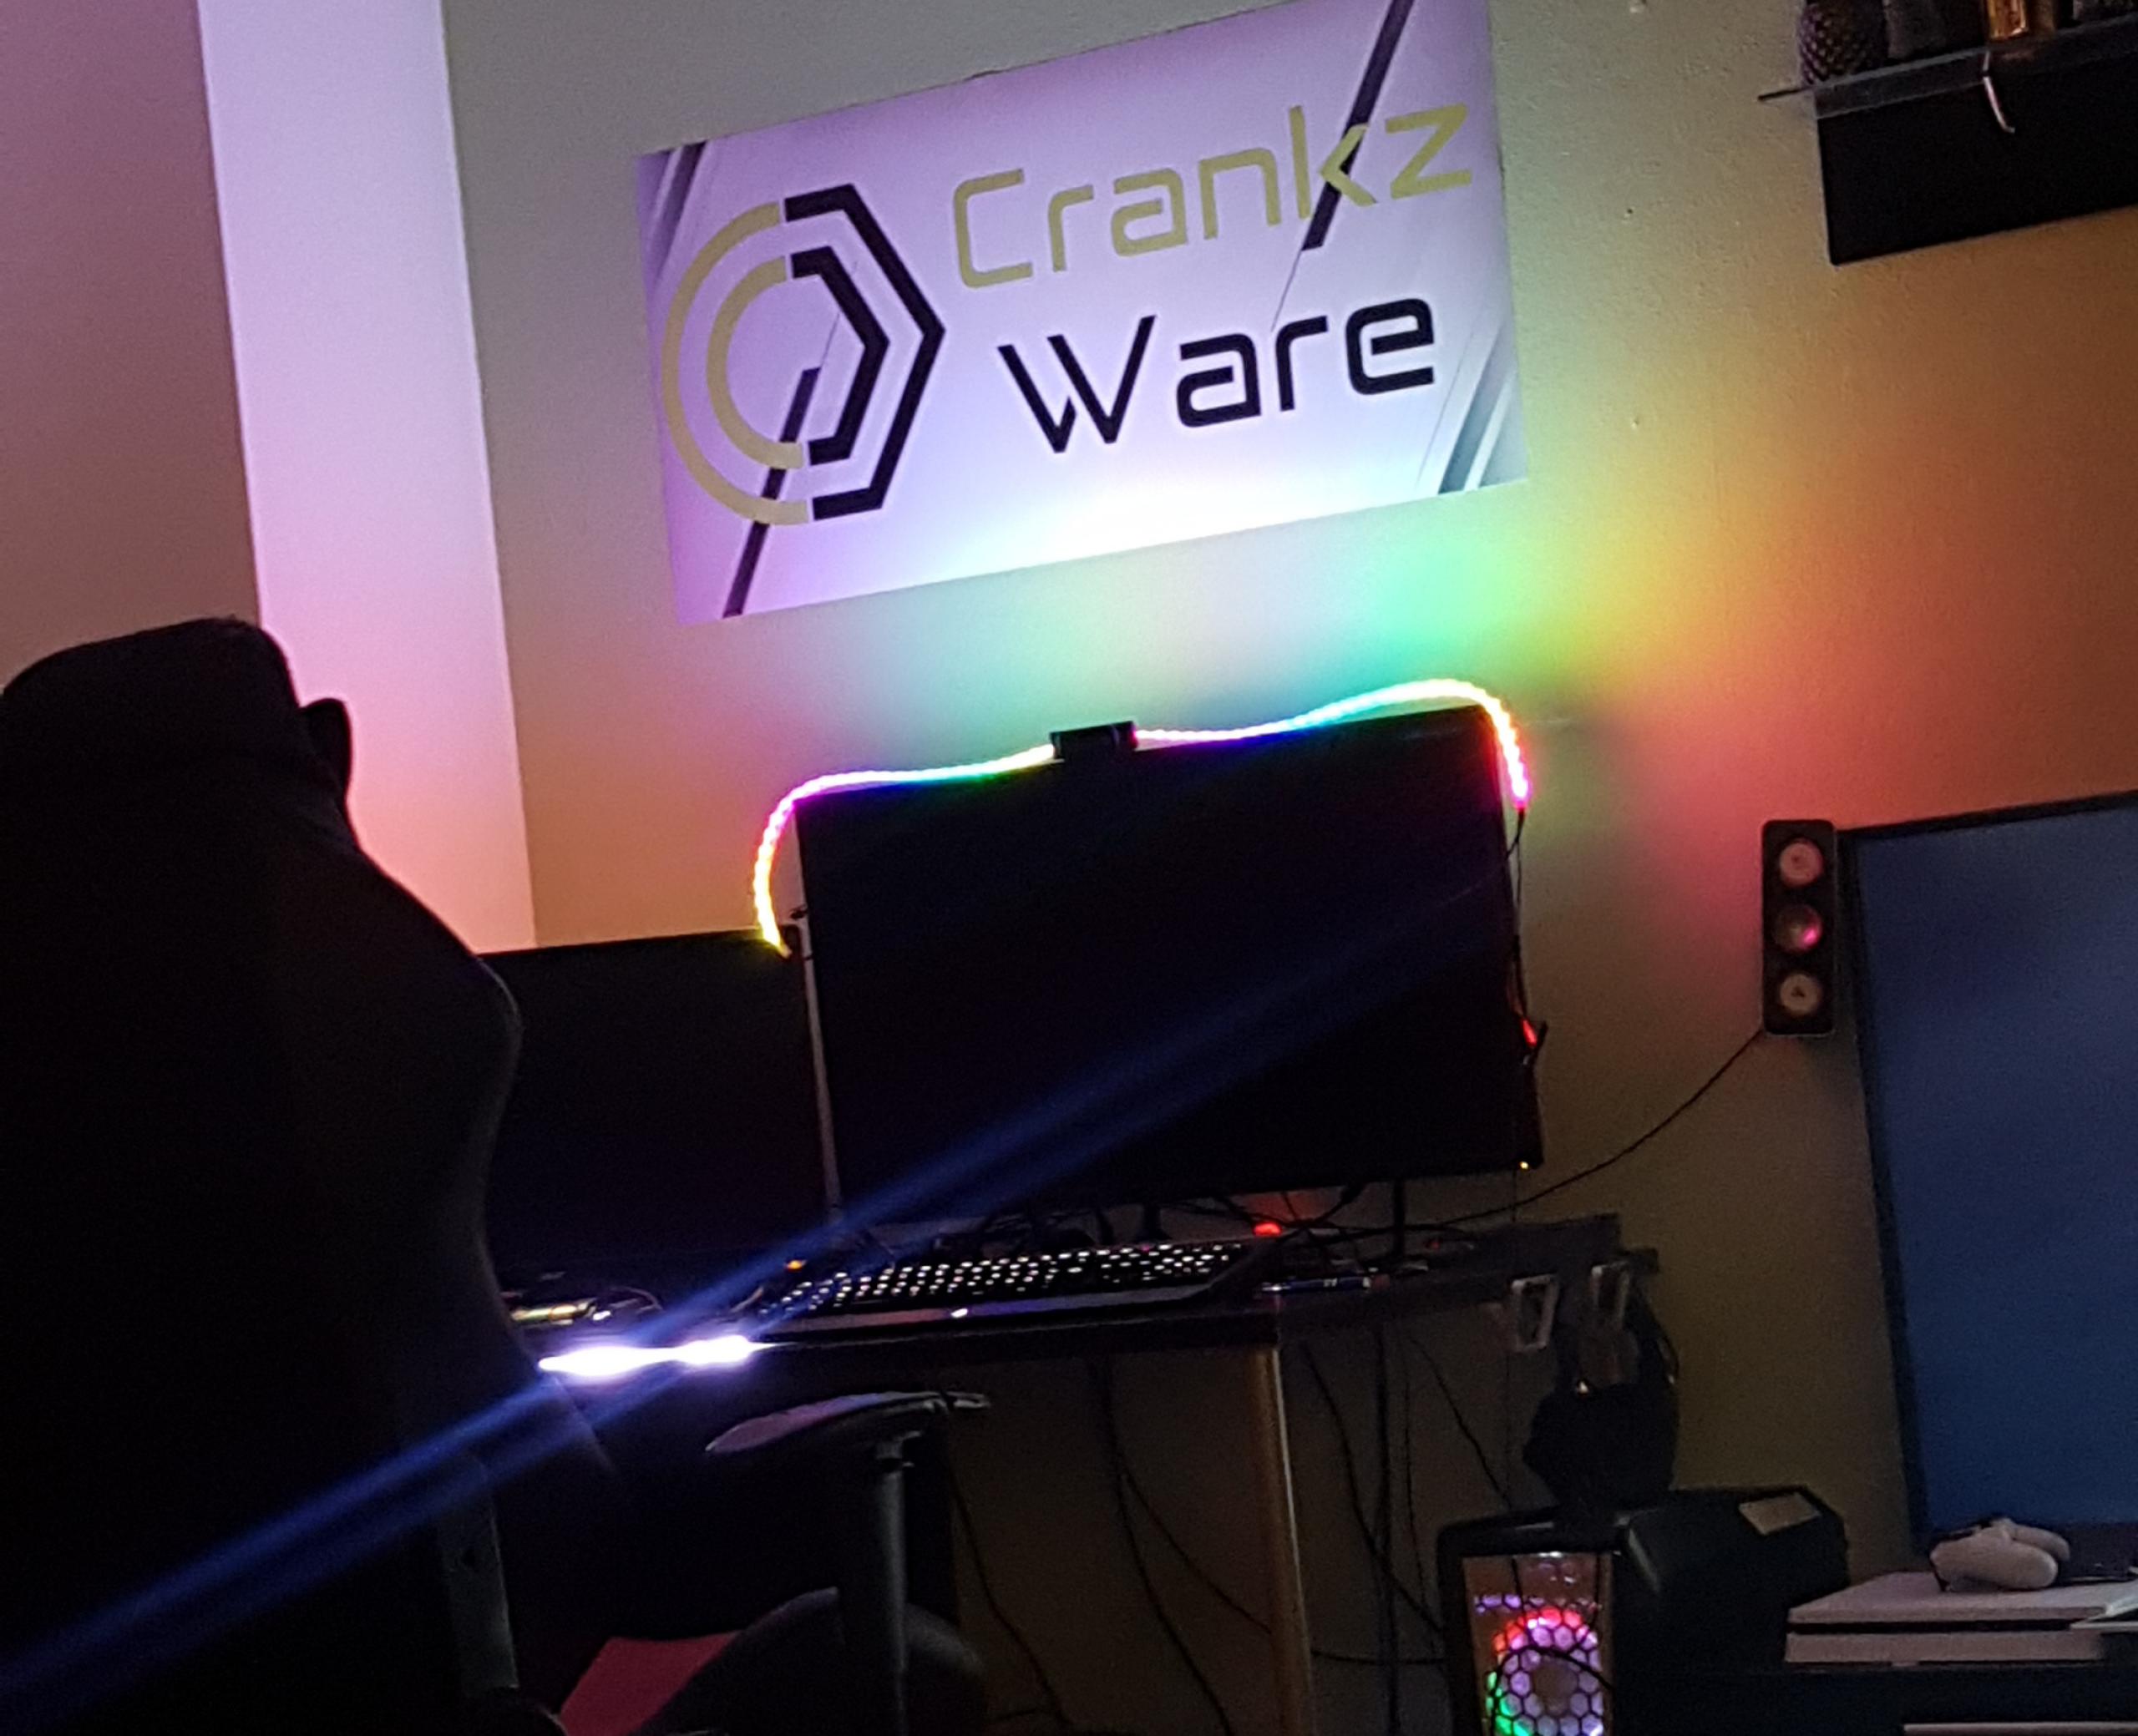
I would never have dreamed that my controller would receive such a positive response, as well as a high level of community acceptance and support. The product is definitely not aimed at the main stream and is more aimed at enthusiasts and case modders with large projects where due to increased power consumption motherboard headers fail. For me personally, it was very motivating even in difficult development times to have people around me who believed in me and my idea. It was only this support that made all this possible and brought me through thirst. The participation of the German case modders, who have told me very often what they would like to have in terms of features and functions, should not be underestimated either. The RainPOW! So it's a kind of community project that has matured over time into a small but fine product. I could have written so much more about the development process, but it would go beyond the scope here.
I would like to thank others for reading my story and hope to give others courage and inspiration for their projects.


Kommentieren