Ich rette mit der Gainward RTX 1660 Super (Susi) mal wieder eine Grafikkarte, die ich vor knapp vier Jahren schon ausführlich getestet hatte und die bisher seitdem auch fast täglich im Einsatz war. Das reicht als Karriereleiter vom Büro bis hin zum Aufnahme-PC (OBS) und dem Gaming Einsatz im PC meines jüngsten Sohnes. Und irgendwann (den ganzen Artikel lesen...)
Du verwendest einen veralteten Browser. Es ist möglich, dass diese oder andere Internetseiten nicht korrekt angezeigt werden.
Du solltest ein Update durchführen oder einen alternativen Browser verwenden.
Du solltest ein Update durchführen oder einen alternativen Browser verwenden.
Thermal Putty statt teurer Wärmeleitpads mit unterschiedlichen Stärken und eine interessante Wärmeleitpaste aus Fernost
- Themenstarter Redaktion
- Beginndatum
RedF
Urgestein
Bei einer sehr dünnen Schicht dürfte das nicht sehr isolieren.Die Frage ist ob ein Trennmittel auch die Wärme Übertragung hemmt und dann hat dir die Aktion nix gebracht.
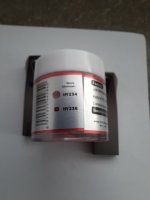
Wie ich schon im Post #318 erwähnt habe, hat meine bei "236" eher einen "Ausschnitt" statt "Klecks" drauf. Siehe:ja, 234, stehen beide auf der Dose und 234 hat den Kleks drauf.

Die 100g Dose war übrigens auch nur zu ~1/3 oder gar zu 25% gefüllt, ist aber schwer genug um an 100g zu glauben:

S.nase
Urgestein
Dieses Stanzloch im Aufkleber würde ich als (HY234 in der Dose) deuten.
Kann man das nicht auch irgendwie an der Dichte unterscheiden, ob es nun HY234, Hy236 oder irgendwas dazwischen ist?
Wenn man die Putty in eine große Einwegspritze füllt, lässt sich das Volumen dich ganz gut messen, und kann es dann auch mit dem Gewicht vergleichen.
Im übrigen könnte auch das Abkühlen der Putty beim Entfernen helfen, damit das Zeug auf der Leiterplatte weniger rumschmiert.
Ich werd mal etwas Silikon- oder Teflon- SprühÖl als Trennmittel auf dem Spachtel versuchen. Ziel ist, eine dünne Holzleiste unten und oben auf die Leiterplattenrückseite zu legen, die nur etwas dicker sind als das höchste Bauelement auf der Leiterplattenseite. Und dann einfach die Putty vollflächig mit einem breiten Spachtel zwischen den Leisten gleichmäßig hoch auf die Leiterplatte zu spachteln.
Snarks Domain
Mitglied
Minimum bondline thickness of Thermal Putty is usually 0.1mmBecause you don't have to bridge a large gap on the GPU, thermal paste on the GPU is more suitable. Because the PuTTY usually has. a minimum thickness of perhaps 0.5mm. When installed, the paste has a maximum layer thickness of 0.1mm. This means that the 0.1mm paste conducts heat 5x better than the 0.5mm PuTTY with the same thermal conductivity due to the layer thickness.
John Wick
Urgestein
Interessant. Mach mal ein Video, bitte.Dieses Stanzloch im Aufkleber würde ich als (HY234 in der Dose) deuten.
Kann man das nicht auch irgendwie an der Dichte unterscheiden, ob es nun HY234, Hy236 oder irgendwas dazwischen ist?
Wenn man die Putty in eine große Einwegspritze füllt, lässt sich das Volumen dich ganz gut messen, und kann es dann auch mit dem Gewicht vergleichen.
Im übrigen könnte auch das Abkühlen der Putty beim Entfernen helfen, damit das Zeug auf der Leiterplatte weniger rumschmiert.
Ich werd mal etwas Silikon- oder Teflon- SprühÖl als Trennmittel auf dem Spachtel versuchen. Ziel ist, eine dünne Holzleiste unten und oben auf die Leiterplattenrückseite zu legen, die nur etwas dicker sind als das höchste Bauelement auf der Leiterplattenseite. Und dann einfach die Putty vollflächig mit einem breiten Spachtel zwischen den Leisten gleichmäßig hoch auf die Leiterplatte zu spachteln.
Snarks Domain
Mitglied
For putty cleanup I scoop up all the putty I cN with paste spreader, then clean rest using Q-Tips (ear cotton swabs), 99% isopropyl alcohol, and a tooth brush, just like you mentioned.I don't think I wrote anything about scratching! Or is it?
I would scrub it with a toothbrush.
Or remove roughly. But the bottom line is that you can remove the putty from the transistors and put new putty on it.
The remaining putty around the transistors certainly doesn't play a role.
I've done it about 30+ times on the same card and no issues yet
")
Snarks Domain
Mitglied
Halnziye HY236 or HY256 (green and also 6w/mk) perform very well and compete in the upper group of putties.I repaired a 2080ti that had a hotspot of 110 degrees.
And in order to get better temperatures, I sacrificed my 3080ti for the test. Putty performs no worse, no better!
Satisfied?
Snarks Domain
Mitglied
The top thermal putties outperform all non-metallic pads (shims).Of course, a high-quality thermal pad performs better than a putty. However, not that much waste heat is generated on the VRAMs, so the slightly poorer thermal conductivity of the putty is sufficient at this point. The real advantage of Putty is its higher elasticity compared to a more or less soft thermal pad. This means that the putty on the VRAMs ensures that the GPU cooler sits better on the GPU straight away, without having to experiment with different pad thicknesses on the VRAMs.
Matching and just slightly better than 3D Graphite pads (coated in phase change).
Snarks Domain
Mitglied
I've been working my way through all the putties, and finding more to test all the time.Maybe there will be someone who will do a comparison test of all the putties available on the market. I only know of one, but I doubt it will ever be published.
Currently, with one exception (HardwareLiebe), you can only get everything from the Far East via eBay, Amazon and Aliexpress.
Feel free to go here for continually updated charts
Test Chart Repository: http://tinyurl.com/4btsmwu6
the chart attached below. The important value to note is the "VRAM T-Delta" the lower the number, the better the putty/pad/shim. It will be some time before I've retested all the pads and shims, but it will happen.
Anhänge

Zuletzt bearbeitet
:
Snarks Domain
Mitglied
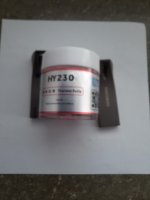
Can you rake a picture of the side of the container? From the top down that almost doesn't seem like legit Halnziye HY234.Hello Igor, thanks for the test. I allowed myself to be tempted and bought the HY 236....
Now to my question, what do I do to the other components if I have put a blob on a VRam?
My cup is only 1/3 full. Did you pack 3 cups together in your picture in the test?
You could have written that there is almost nothing in it.
with you full.................................................. ............. with me
Anhang anzeigen 30056
As far as application goes, ideally replace any existing thermal pad with an equal amount of putty. Either rolled into balls or logs with gloved hands.
50g will do most cards. For a 3090 I recommend buying 100g as you would need to have an additionL 25-30g for the 12 GDDR6X on the backplate.
Snarks Domain
Mitglied
I would interpret this punched hole in the sticker as (HY234 in the can).
Can't you somehow tell the difference based on the density, whether it's HY234, Hy236 or something in between?
If you fill the putty into a large disposable syringe, you can easily measure the volume and then compare it with the weight.
Incidentally, cooling the putty could also help when removing it so that the stuff on the circuit board is less smeared.
I'll try some silicone or Teflon spray oil as a release agent on the spatula. The goal is to place a thin wooden strip at the bottom and top of the back of the circuit board, which is only slightly thicker than the highest component on the circuit board side. And then simply spread the putty evenly over the entire surface of the circuit board between the strips using a wide spatula.
Snarks Domain
Mitglied
The hole is punched on the product version inside the tub. As an example, the HY256 I ordered from Halnziye, after discussing with them via email, had a bole punched on the HY256 dot. And it performed basically the same as HY236, which is supposed to, since they are both 6w/mk.
Additionally, I remember reading a post of a guy using TG-PP10 back in the day on his Redeon VII and claiming to have achieved some sort if world record overclock on air for it. He claimed to have slathered putty on literally the whole card.
now that we have such higher performing putties available, it could work well. Be interesting to try...... kinda tempted to do it now.
John Wick
Urgestein
That's what I'm talking about! With the soft brush, it worksFor putty cleanup I scoop up all the putty I cN with paste spreader, then clean rest using Q-Tips (ear cotton swabs), 99% isopropyl alcohol, and a tooth brush, just like you mentioned.
I've done it about 30+ times on the same card and no issues yet
Snarks Domain
Mitglied
If Toothbrush can clean plaque from teeth, then toothbrush can clean putty from VRAM. Also Toothpicks (sharp wooden tooth gap cleaner), can be used to pry out stubborn putty around edges of VRAM, VRM, etc.That's what I'm talking about! With the soft brush, it works
Snarks Domain
Mitglied
A sign of things to come.
Here is my old chart, from when I didn't track or log ambient intake temperatures. I'm sharing it because it will give you guys a rough idea of how some pads stack up against some of these putties.
For my latest charts I now log Ambient air intake temperatures using an AquaComputer Quaddro and some 10k sensors. I then record a log with HWINFO64 and mine using a memory intensive algorithm for 2 hours (and memory overclock, fixed fan speed, etc.). I ignor the 1st hour of data, and use the entire 2nd hour for the test results. Taking an average of each value for that hour (sample every ~2 seconds). I calculate it all using an excel sheet.
Anhänge

RedF
Urgestein
Great work : )A sign of things to come.
Here is my old chart, from when I didn't track or log ambient intake temperatures. I'm sharing it because it will give you guys a rough idea of how some pads stack up against some of these putties.
For my latest charts I now log Ambient air intake temperatures using an AquaComputer Quaddro and some 10k sensors. I then record a log with HWINFO64 and mine using a memory intensive algorithm for 2 hours (and memory overclock, fixed fan speed, etc.). I ignor the 1st hour of data, and use the entire 2nd hour for the test results. Taking an average of each value for that hour (sample every ~2 seconds). I calculate it all using an excel sheet.
You could also subtract the ambient temperature from the measured values to calculate the delta.
Then you can see at a glance what is going on.
So sieht meine Dose aus ..... bei 234 das Stanzloch und auch bei Amazon stand 234.
Wenn ich jetzt zwischen Platine und Backplate füllen möchte, muss ich da noch was beachten? Es sollte auf Höhe SpaWas und VRam kommen.
Wenn ich jetzt zwischen Platine und Backplate füllen möchte, muss ich da noch was beachten? Es sollte auf Höhe SpaWas und VRam kommen.