Below is an advanced way, please read thoroughly:
1- Reflash the original or backed up vbios with AtiFlashTool 2.93+, copy the link below and paste in the browser to download,
2- Using MorePowerTool from the kindly attached link below,
Apply the setting below,
3- Under Overdrive Limits tab, set:
GFX Maximum Clock 1440 MHz
Memory Maximum Clock 960 MHz
Power Limit Maximum 0%
Power Limit Minimum 0%
Memory Timing Control 1 [For computing (mining), default is 2 for gaming]
4- Under Power and Voltages, set:
Maximum Voltage GFX 1050 mV [must not be lower than this as the MVDD default value in the vbios is at 1350 mV and the VDD must be within 300 mV range with MVDD or components may get degraded and permanent damaged]
Maximum Voltage SoC 1050 mV [must not be lower than this like the Maximum Voltage GFX]
Minimum Voltage GFX 750 mV
Minimum Voltage SoC 750 mV
Power Limit GPU 136 W
TDC Limit GFX 120 A
TDC Limit SoC 12 A
5- Under Frequency tap, set:
GFX Maximum 1440 MHz
Memory DPM 3 - 910 MHz
[Regarding SoC Maximum, must be kept at default 1267 MHz in the vbios, capping it at another value must be done inside the OS using a script in linux or editing the registry using MorePowerTool in Windows and at your own discretion, recommended values for memory types at specific clocks as below,
Memory Clock - - - > SoC Maximum,
910 (1820) MHz - - - > 957 MHz (Samsung & Micron),
950 (1900) MHz - - - > 1093 MHz (Micron, here the default 1267 MHz is preferred),
6- Under Fan tab, set:
Stop Temperature 50° C
Start Temperature 60° C
7- After that click Write SPPT,
8- Keep MorePowerTool running, do not close it and click on Curve tab,
9- Download and Unzip CRU.zip and inside its folder run as Administrator restart64.exe to restart the gpu driver,
10- Download and run as Administrator, Navi Curve Helper and keep it running,
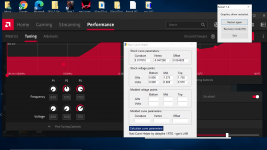
11- Run AMD Raedon software as Administrator, Click on Manual, Enable GPU tuning, Enable Advanced Control and note down the default parameters of frequencies and voltages under the diagram ,
Now you have 3 programs opened,
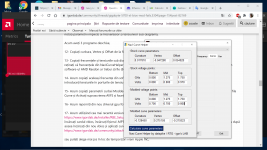
12- Copy the Curvature, Vertex and Offset from the Curve tab in MorePowerTool to the Stock curve parameters in the NaviCurveHelper,
13- Copy the frequencies and voltages under the diagram in the AMD Raedon software to the Stock voltage ports, please note that the frequencies in NaviCurveHelper are in GHz and not MHz, E.g.; 800 MHz = 0.800 GHz and the frequencies in the AMD Raedon software should be (800, 1120, 1440) MHz,
14- Now copy the same frequencies from AMD Raedon software to the Modded curve parameters in the NaviCurveHelper and enter the voltages in the Modded voltage ports, left 0.700, middle 0.700, right 0.800,
15- Now copy the Modded curve parameters, Curvature, Vertex and Offset from the NaviCurveHelper to the MorePowerTool ones under the Curve tab and Enable Override AVFS and Click Write SPPT,
16- Now restart the gpu driver again using restart64.exe and Save the .MPT file,
17- Now using the latest version of RedBiosEditor,
load the card vbios, load the .MPT file and apply Apple Inc. vram timings straps for Micron, and Save the vbios after that load the vbios again and apply the Samsung straps if it is existed and save the vbios again,
or you can choose below instead of Apple Inc. vram timings,
- K4Z80325BC (Samsung)
(1500 or 1550) MHz (Copy) - - - > (Paste) 1800 MHz
1800 MHz - - - > 2000 MHz
2000 MHz - - - > 2250 MHz
- MT61K256M32 (Micron)
(1500 or 1550) MHz - - - > (1750 - 1800) MHz
1750 MHz - - - > (1875 - 2000) MHz
Memory Clock - tREF
1000 MHz - 3900 (Samsung & Micron)
1250 MHz - 4875 (Samsung & Micron)
(1500 or 1550) MHz - 6045 (Samsung & Micron)
1750 MHz - 6825 (Micron only)
1800 MHz - 7020 (Samsung & Micron)
1875 MHz - 7315 (Micron only)
2000 MHz - 7800 (Samsung & Micron)
2250 MHz - 8775 (Samsung only)
18- Now reflash the modded bios,
19- Install HiveOS on an SSD and not USB flash drive and set it up properly, after that apply the below,
In HiveOs, first note down the default gpu parameters then apply below,
- Core parameters,
Core State: 1 (HiveOS),
Mem State: 1 (HiveOS),
Core clock from (1380 to 1430) MHz, VDD at (770 - 790) mV, keep the ratio of Core clock to VDD = below 1.80 (preferred 1.76, default is 1.70) as beyond that negative scaling may start which means lowering performance and occurring instability and increasing temperature.
- Memory parameters,
~Samsung K4Z80325BC-HC14,
Memory clock at 910 MHz more than this is not stable, VDDCI at 850 mV, MVDD at 1350 mV,
~Micron MT61K256M32JE-14,
Memory clock at 910 MHz for power saving and lower temperature like for Samsung memory and 950 MHz for performance, VDDCI at 900 mV (850 mV is the minimum for memory clock 915 MHz and below), MVDD 1350 mV [the minimum is 1350 mV for memory clock 910 MHz and below],
[*Disclaimer regarding the memory temperature to avoid and prevent its degradation and being baked again that might lead to connection loose,
For Samsung memory K4Z80325BC-HC14,
For operating at 24/7, the temperature must not exceed 74° C,
Other than this will fall under the below,
At (80 ± 5)° C, operating for 24/7 requires putting the system on a break of 1 to 2 hour (depending on the ambient temperature) after 48 hour of operation,
At (100 ± 5)° C, operating for 24/7 requires putting the system on a break of 1 to 2 hour (depending on the ambient temperature) after 36 hour of operation,
At (125 ± 5)° C, operating for 24/7 requires putting the system on a break of 1 to 2 hour (depending on the ambient temperature) after 24 hour of operation,
For Micron memory MT61K256M32JE-14, it is the same as for Samsung K4Z80325BC-HC14 even thought Micron Inc. stated it can run from (0 to 95)° C, however this is for normal use and not for 24/7 of operation].
Due to air cooling is being used, the highly recommend setting as below,
[For optimal hashrate, keep the gap between the core clock and memory clock at 480 MHz]
[The recommended and safe ratio between VDDCI and Memory clock is 2.14, for example: 1820 (910*2) MHz ÷ 850 = ~2.14]
[The safe and recommend ratio between the MVDD and Memory clock is 1.39 for memory clock ABOVE 1870 (935*2) MHz],
Core clock, VDD : Memory clock, VDDCI, MVDD
- 1330 MHz, 750 mV : 850 (1700/2) MHz, 800 mV, 1350 mV,
- 1360 MHz, 760 or 770 mV : 880 (1760/2) MHz, 820 mV, 1350 mV,
- 1390 MHz, 780 or 790 mV : 910 (1820/2) MHz, 850 mV, 1350 mV,
- 1430 MHz, 800 or 810 mV : 950 (1900/2) MHz, 890 mV, 1365 mV,
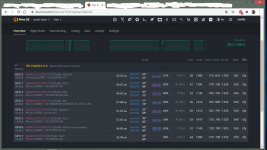
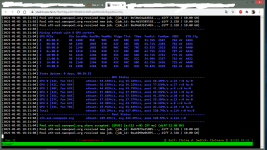
20- Reboot the system and check the results,
Best Regards.


