


Overdrive Limits as Wattman modding. So this is where it gets a little more interesting. In order to show you clearly which values are changed exactly, I have marked them in color on the following pictures of the Wattman. First, however, the relevant tab of the MPT:
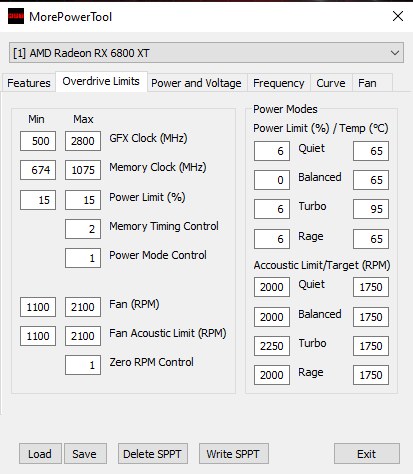
As the name suggests, you primarily change the range of adjustable values here. The values marked in red change the scale, so if you say for example GFX Clock Max should be 3000, then the scale in Wattman will be extended to a maximum of 3000. Currently AMD is doing some kind of validation in the driver that prevents you from editing the power limit, memory and core clock scales beyond the original limits. You can set them and then select them in Wattman, but the card will end up in a fail safe mode. Let’s see if something is possible here again in the future.
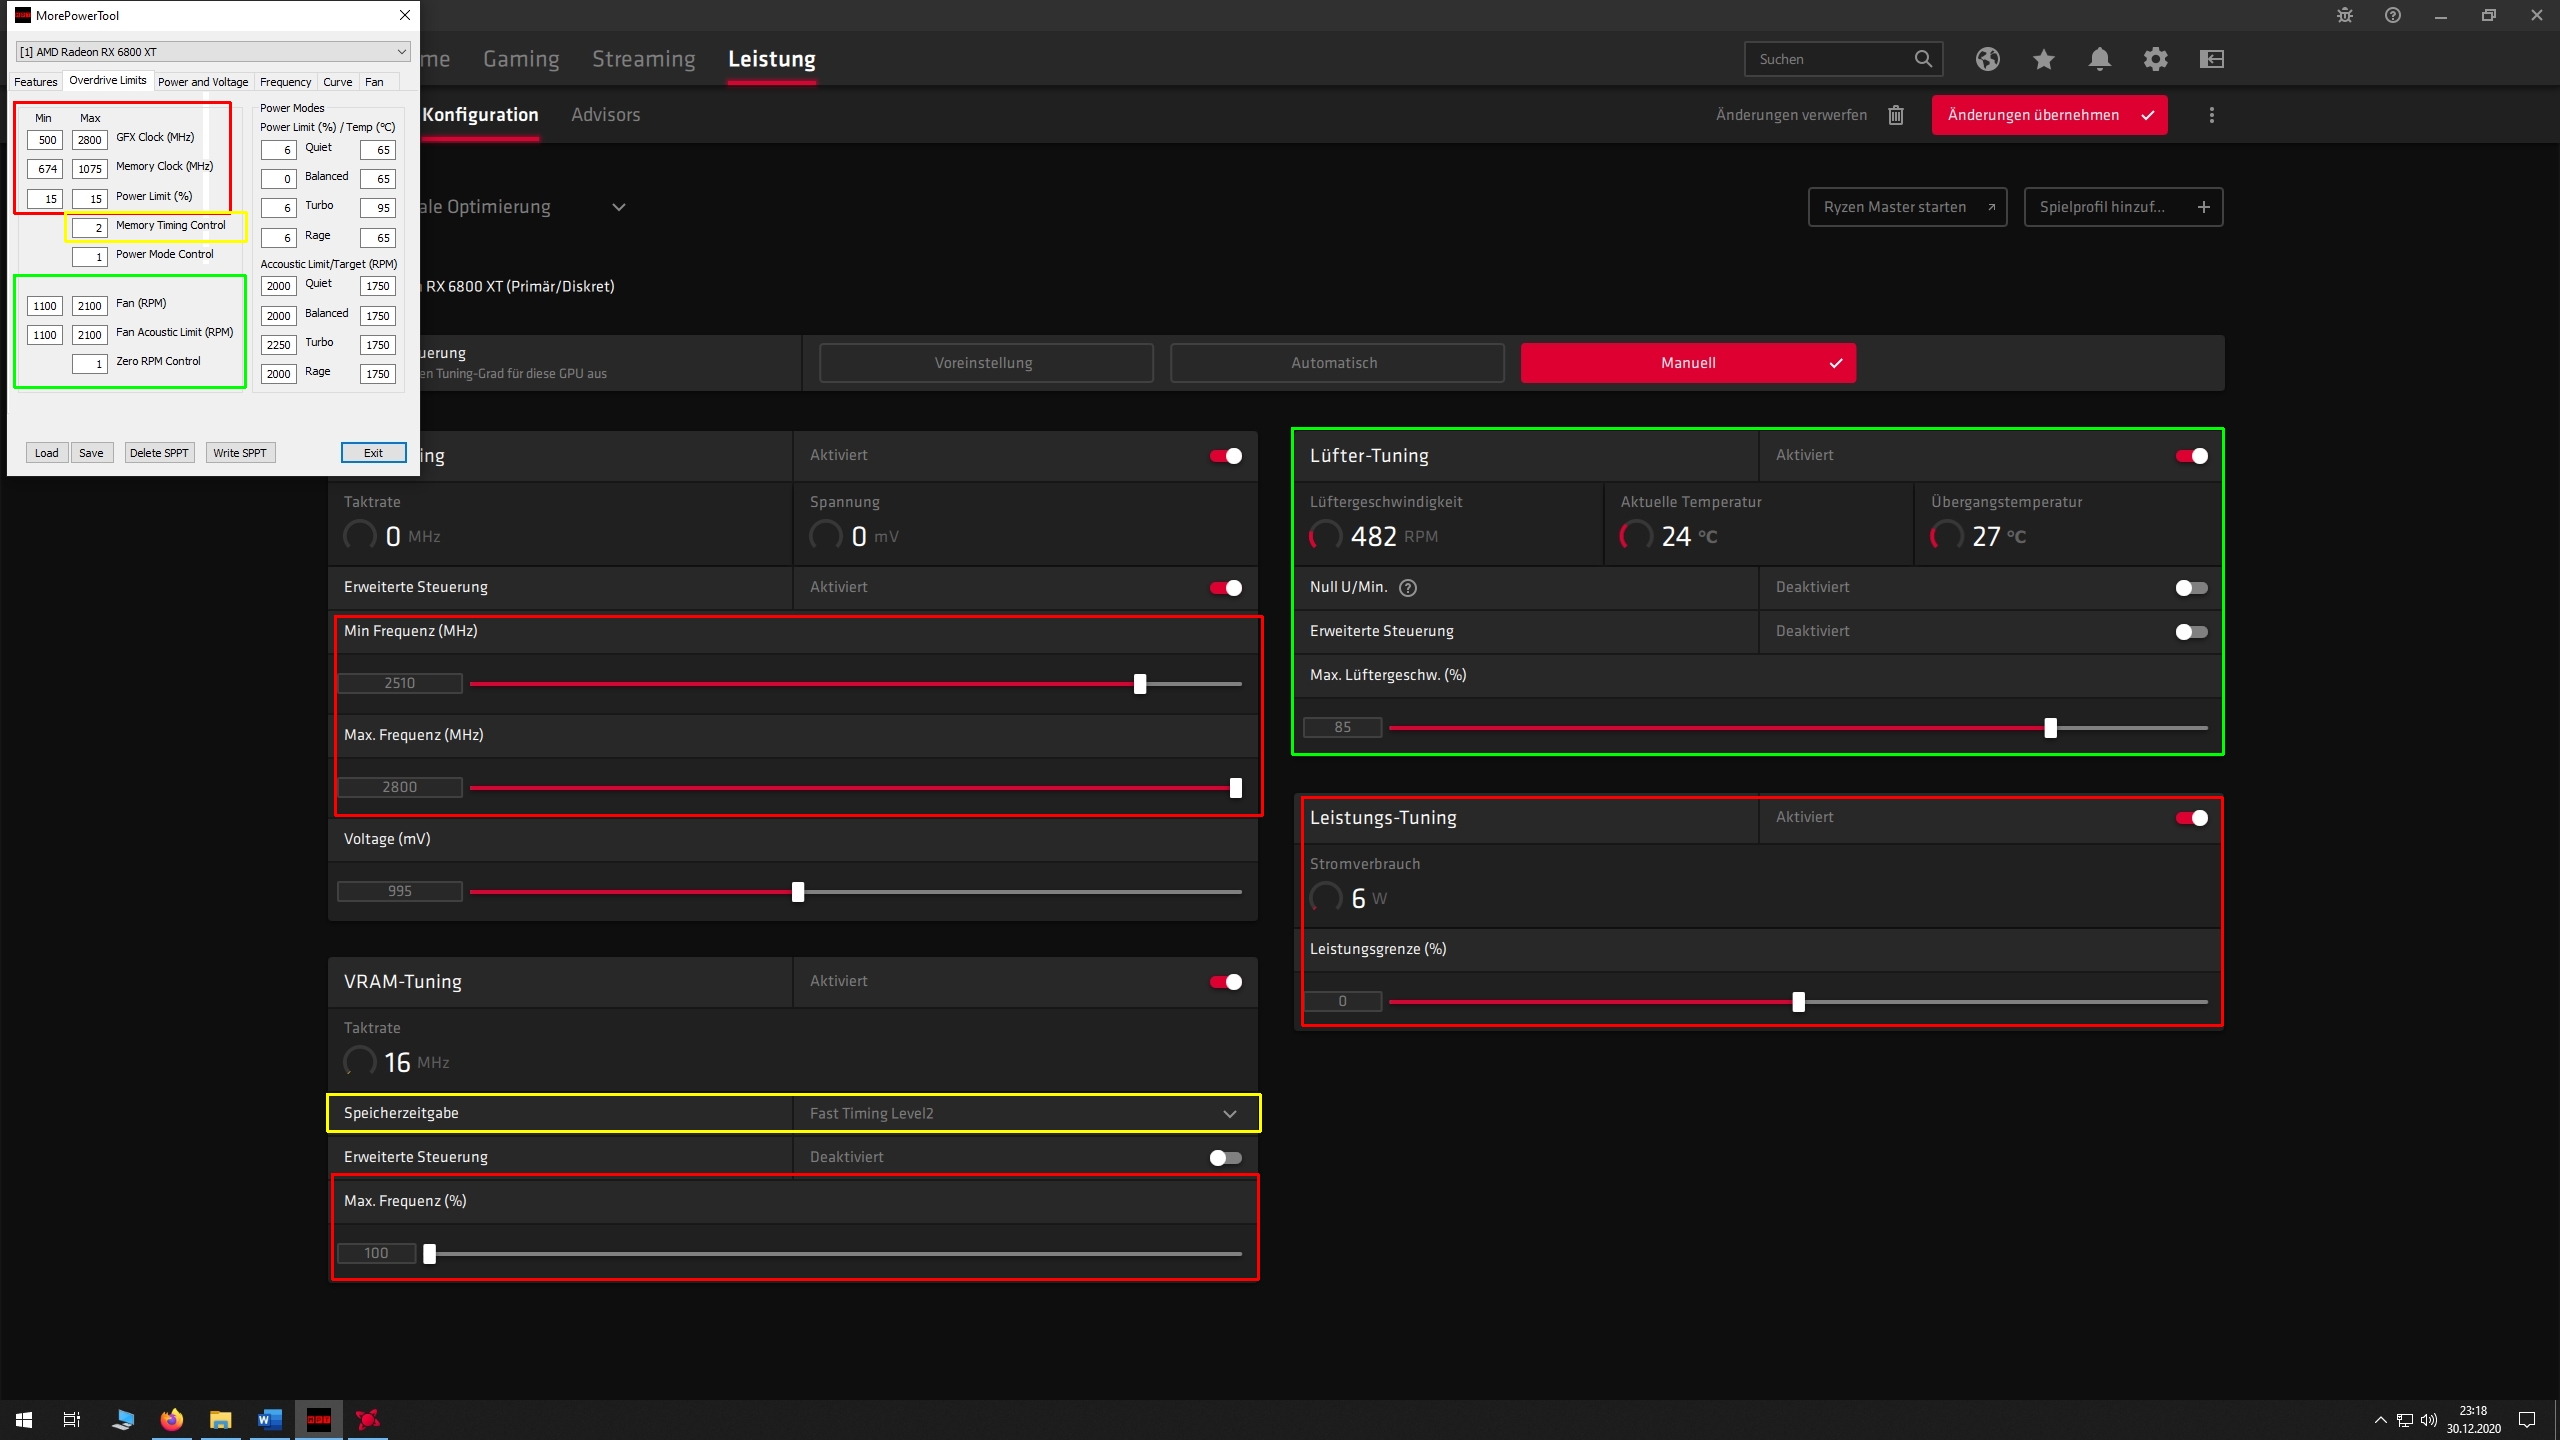
Memory Timing Control:
Here you can set the following:
- 0= The timings can no longer be edited via the Wattman.
- 1=Fast Timings Level 1 is available.
- 2=Fast Timings Level 2 is available.
In general about the timings, the principle is not quite easy to understand.
- Your timings are always the same when you change the memory clock rate in Wattman.
- If you use MPT to change your memory clock on the P-State, then the timings of your VRAM will also change.
- The timing levels reset to one level at a time, meaning Fast Timings Level 1 resets one level, Fast Timings Level 2 resets 2 levels – starting from the base written in the registry!
- Relevant timing levels read from the bios and applied<1800
Level 0 1800-2059
Level 1 2060-212
4 Level 2 2125-22
49 Level 3 Jedes
dieser Level weist schärfere Timings auf, es ist wie beim Arbeitsspeicher. The lower the clock, the sharper the timings can be set. - In the Wattman each to set with 1:2 divisor. Ex. 2060>=1030 in Wattman= Timing Level 2
- Ideal case would be: Base 1000 in Wattman with 2150Mhz clock in Wattman and Fast Timings Level 2. I think almost no card can do this though, if this works for you, feel free to let us know.
- Better and realistic, 1000 in Wattman, Fast Timings Level 1 or 1030 in Wattman with Fast Timings Level 2.
- 1075 in Wattman with Fast Timings Level 2 is counterproductive, why? Because you have already set 2 levels higher in the timings with it and with Fast Timings level 2 ends up back at the starting point.
- I don’t know if the Fast Timings are 1:1 identical with the stored ones in the Bios! So it can be that different combinations are differently fast, my RX 6800 starts also with FTL2, if I set the timings up before – the behavior is not 1:1 identical, as if these are read from the Bios. In general, the differences seem to be quite small, but one would have to test this on a larger parkour.
The general rule here is that lowering the timings by two levels, starting from the base @Stock, has not managed any card so far. I have not yet succeeded in going below level 0.
Power Mode Control:
With this value you change the default settings by AMD in the driver regarding the presets. The infamous “RAGE Mode” is actually a 6 percent air pump and a 6800 for example has no Rage Mode at all because it is disabled in the driver. But you can change that here. You can also activate the previously hidden turbo mode here. This setting is interesting for people who don’t want to modify their card much and want to leave the clock rates at default. With the presets you can modify your power target and the fans on this basis relatively easily with one click. In the yellow marked area you can also adjust these presets according to your wishes. For example, a winter setting and one for summer, Silent or Max Power or who knows.
- 0= Quiet and Standard are available (Quiet & Balanced)
- 1= Quiet, Standard and Loud are available (Quiet, Balanced & Rage)
- 2= Quiet, Standard and Turbo are available (Quiet, Balanced & Turbo)
Example: You set it to 2, thus activating the turbo mode. You set the power limit to 15 % instead of 6 % as stored in the driver. Now turn your fans with maximum power to keep the desired temperature (in my case then 95 degrees at Turbo and 2250 revolutions). Are then only 1600 revolutions necessary for it, it is also no longer used. You can play around freely and make fixed presets, edit the power limit and fan together and of course change the whole thing quickly in the game – if needed. Very convenient. It’s just a shame that you can’t link this to clock rates.

Fan Range:
Marked in green you can change the control areas that are made available to you in Wattman.
- Fan RPM: What the fan can rotate at maximum
- Accoustic Limit: What the fan applies as a maximum to reach the target temperature.
- Zero RPM Control: On/Off for Zero Fan


Kommentieren